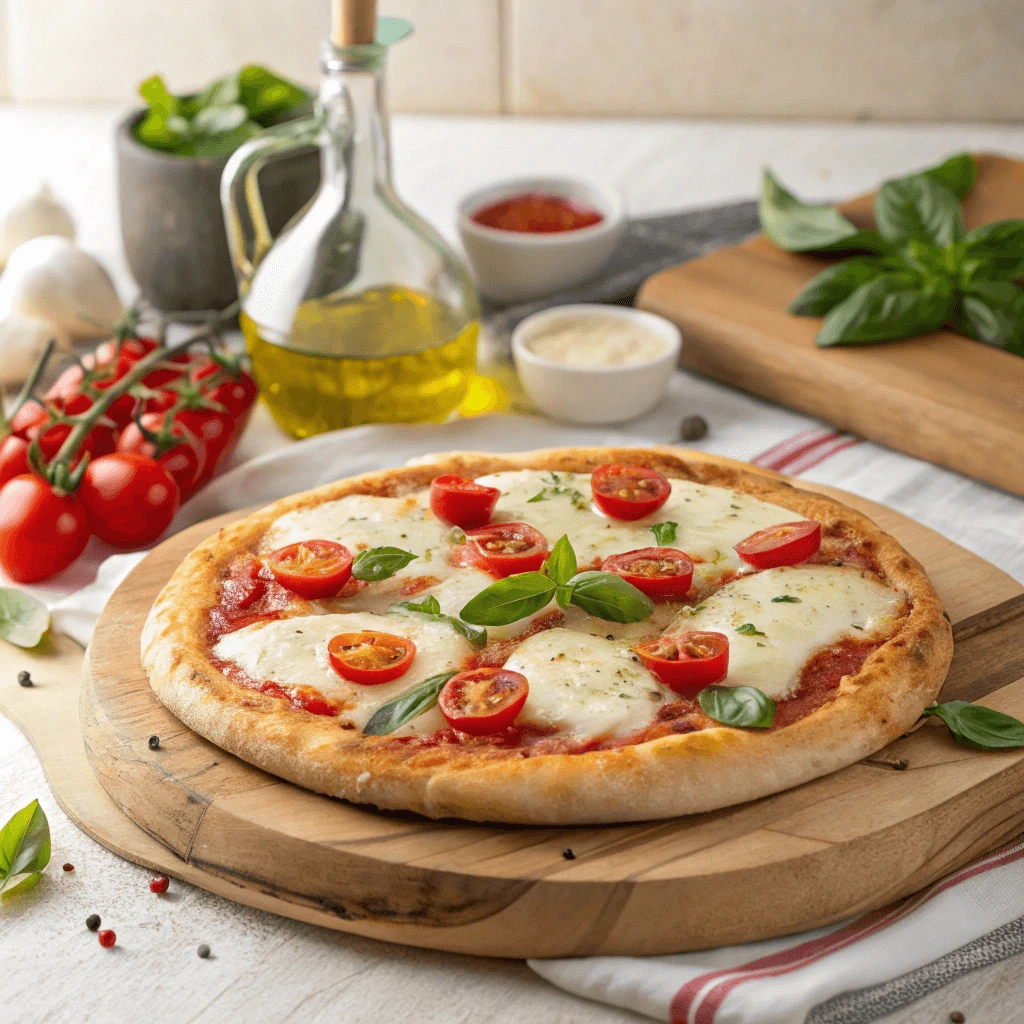
If you love homemade pizza but want something smaller and easier to manage, this 10-inch pizza dough recipe is the perfect solution. It’s ideal for individuals, couples, or small families, offering just the right amount of crust for a personal or shared pie. This recipe keeps things simple—using basic pantry ingredients like all-purpose flour, yeast, and olive oil—but delivers big on flavor and texture. You’ll get a dough that’s soft, elastic, and easy to roll, whether you’re a beginner or a seasoned pizza maker. Plus, the smaller size ensures your pizza bakes evenly in most home ovens, giving you that golden, chewy crust every time.
Why Choose a 10-Inch Pizza Dough Recipe?
Perfect Size for Personal or Small Servings
A 10-inch pizza strikes the ideal balance between portion control and satisfaction. It’s not too big and not too small—just right for one person with a hearty appetite or for two people to share as a light meal. This size works especially well for lunch, dinner, or even as part of a homemade pizza night where everyone gets to build their own pie.
Great for Individual Preferences
With a 10-inch pizza, each person can choose their own sauce, cheese, and toppings without compromise. Whether you prefer classic margherita, veggie-loaded combos, or spicy sausage and onions (no pepperoni if you’re avoiding pork), the smaller base gives you full control. This also makes it a fun and interactive option for families or small gatherings—no more debates over half-and-half toppings!
Easy to Store and Handle
Smaller pizzas are easier to prep, roll out, and slide into the oven, especially if you’re working with a standard home kitchen. You won’t need oversized pizza peels or industrial pans. Leftovers, if any, fit neatly in the fridge or freezer without taking up too much space. Plus, reheating a single slice is quick and convenient the next day.
Ideal for Meal Planning
If you enjoy cooking in batches, preparing several 10-inch dough rounds in advance helps with weekly meal planning. You can freeze them individually and bake as needed, making fresh pizza an easy go-to option during the week. This flexibility makes it perfect for busy households that still want to enjoy delicious, homemade meals.
Ideal for Quick Weeknight Dinners
Busy weeknights often leave little time for elaborate meals. A 10-inch pizza provides a perfect solution when you’re craving something quick, easy, and satisfying. With minimal prep time and fast baking, this pizza is ideal for families or individuals looking for a speedy dinner without sacrificing flavor or quality.
Quick Preparation
One of the best features of a 10-inch pizza is how fast you can get it from the counter to the table. The dough is manageable and doesn’t take long to roll out, making the overall preparation time much shorter than larger pizzas. You can even keep pre-made dough in the fridge or freezer for an even quicker meal on days when time is especially tight.
Simple Customization
The smaller size makes it easy to customize your pizza without needing to prepare large amounts of toppings. Whether you’re in the mood for a classic cheese pizza or something more adventurous like a BBQ chicken or veggie delight, you can pull together a meal quickly. Add your favorite sauce, sprinkle on the cheese, and top with a few ingredients—your pizza is ready to bake in under 10 minutes.
Perfect for Leftovers
If you find yourself with extra slices, don’t worry! A 10-inch pizza makes the perfect portion for leftovers. Whether you store it in the fridge for a simple lunch the next day or wrap it up for a quick snack, the size makes it easy to manage. Plus, reheating pizza from the night before is fast and simple—just pop it in the oven for a few minutes to bring it back to life.
Easier to Roll, Shape, and Bake Evenly
When it comes to making pizza, size matters—not just for portion control but also for the ease of handling. A 10-inch pizza offers a balance between manageability and quality, especially when it comes to rolling, shaping, and baking. Here’s why this size is a favorite for home cooks, especially those who may be new to pizza-making.
Simple to Roll and Shape
Rolling out dough for a 10-inch pizza is straightforward. Unlike larger pizzas that can require a lot of space and muscle, the smaller size means you can handle the dough with greater control. Whether you’re using a rolling pin or stretching it by hand, the dough responds well, allowing you to achieve an even, round shape with minimal effort. This makes it perfect for beginner pizza makers who might find larger dough sheets more challenging to manage.
Less Risk of Overstretching
A 10-inch pizza dough is less prone to overstretching or tearing, especially if you’re working with a softer, more delicate dough. With a manageable surface area, you can stretch the dough evenly, ensuring that it doesn’t become too thin in places or overly thick in others. This creates a more uniform crust, which leads to a more balanced texture when baked.
Even Baking
Another reason why a 10-inch pizza is easier to bake evenly is its size. Smaller pizzas cook faster and at a more consistent rate compared to larger ones. The heat in the oven can easily reach the center, ensuring that both the crust and toppings are baked perfectly. There’s less risk of the crust becoming overdone while the toppings remain undercooked. Additionally, a smaller pizza fits well on various types of bakeware, whether you’re using a pizza stone, baking steel, or even a pizza pan.
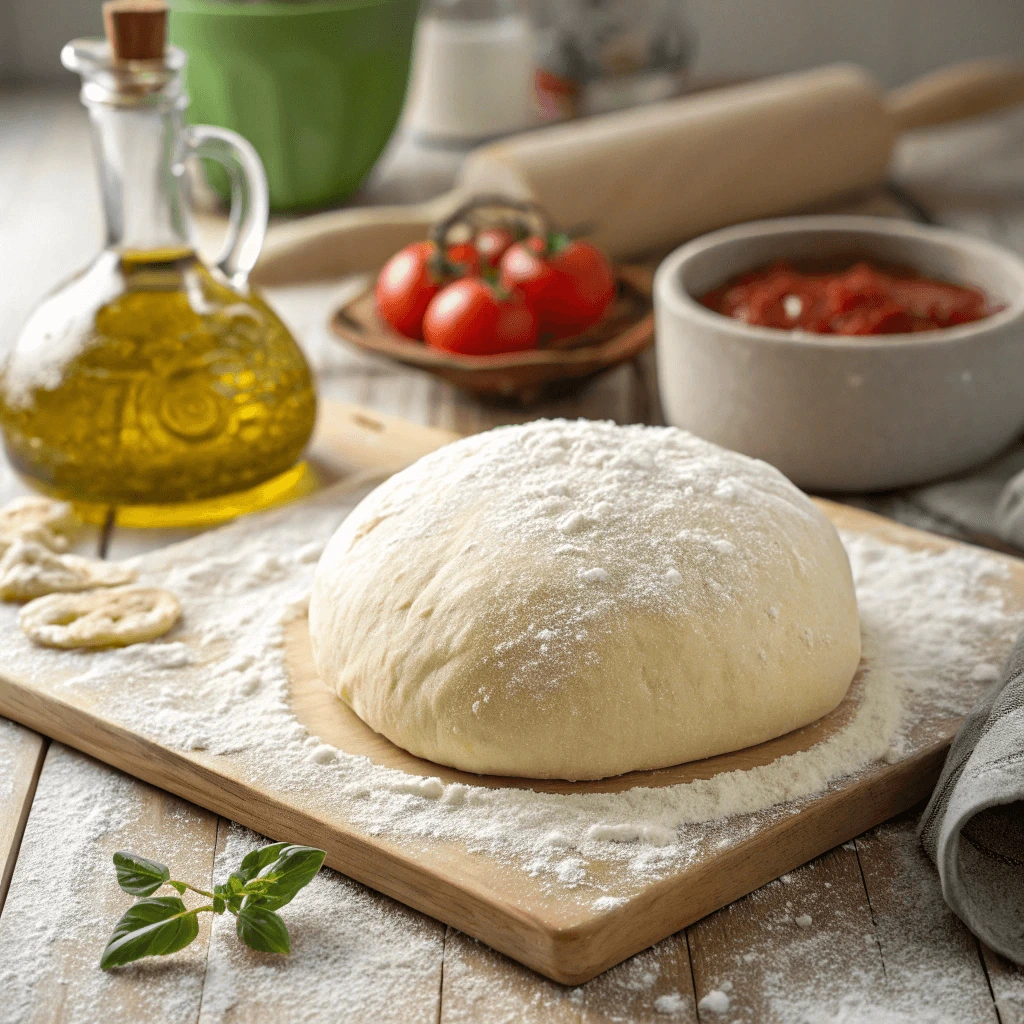
Ingredients You’ll Need for Foolproof Pizza Dough
Choosing the Right Flour and Yeast
The flour and yeast you choose are essential to making the perfect pizza dough. Here’s what you need to know:
Flour Choices
All-purpose flour is a reliable choice for a balanced dough, but bread flour gives a chewier, thicker crust due to its higher protein content. For a lighter, crispier base, Italian “00” flour is ideal, as it’s finely milled and creates a delicate texture.
Yeast Types
Active dry yeast is the most common and needs to be dissolved in warm water, while instant yeast can be mixed directly with dry ingredients. The amount of yeast you use affects both the dough rise and flavor, so finding the right balance is key.
Combining Flour and Yeast
For the best dough, use about 1 teaspoon of active dry yeast per 500g of flour. Experiment with hydration levels—more water creates a softer, airier crust, while less water results in a denser one.
The Role of Water, Oil, and Salt in Dough Texture
Water, oil, and salt are essential ingredients in pizza dough. Each affects the dough’s texture, flavor, and how well it bakes. Here’s how they work:
Water: Hydration and Gluten Formation
Water hydrates the flour and activates gluten, giving the dough its elasticity. The right amount of water helps the dough develop a smooth, stretchy texture, making it easier to shape and work with. Too little water makes the dough dry, while too much can make it sticky and hard to manage.
Oil: Tenderness and Texture
Oil, typically olive oil, softens the dough and makes it more pliable. It helps tenderize the dough by preventing the gluten from becoming too tough. Additionally, oil helps with browning during baking, giving the crust a golden, crisp finish.
Salt: Flavor and Structure
Salt not only enhances flavor but also controls gluten development. It strengthens the dough’s structure, helping it rise evenly. Salt slows down the yeast, allowing for a more controlled fermentation and deeper flavor development.
Optional Add-Ins for Flavor and Browning
You can elevate your pizza dough by adding extra ingredients that enhance both flavor and texture. These optional add-ins are simple yet effective ways to make your pizza dough stand out.
Garlic Powder and Onion Powder
For a savory twist, try adding garlic powder and onion powder. They infuse the dough with aromatic flavors that complement your pizza toppings. A small amount can make a big difference.
Honey or Sugar
A touch of honey or sugar can add a subtle sweetness to the dough. This not only enhances the flavor but also helps with browning, giving your crust a perfect golden finish. It also keeps the dough soft and chewy.
Parmesan or Grated Cheese
Mixing grated Parmesan into your dough adds richness. As it bakes, the cheese melts and contributes to a crispy, golden-brown crust. The cheese also imparts a delicious umami flavor.
Dried Herbs (Basil, Oregano, or Rosemary)
Consider adding dried herbs such as basil, oregano, or rosemary. These herbs enhance the dough with an aromatic, Italian-inspired flavor. They make the crust fragrant and perfect for pairing with a variety of toppings.
Olive Oil and Butter for Richness
Olive oil is already an essential ingredient in pizza dough, but adding a little melted butter can enrich the texture. Butter gives the dough a soft, tender crumb, while olive oil ensures a crispy, flavorful crust.
Step-by-Step Guide to Making Homemade Dough
Mixing and Activating the Ingredients
To create the perfect pizza dough, the first step is to mix and activate the ingredients properly. Here’s how to do it:
Combine Dry Ingredients
Start by mixing your dry ingredients: all-purpose flour, yeast, and salt. This ensures the yeast is evenly distributed throughout the flour.
Activate the Yeast
Heat some water to about 105°F (40°C), add a pinch of sugar, and sprinkle the yeast over it. Let it sit for 5-10 minutes until it becomes frothy, indicating the yeast is activated.
Add Wet Ingredients
Add olive oil and a pinch of salt to the activated yeast mixture. Stir until everything is well combined.
Mix and Knead
Stir the ingredients together until the dough begins to form. Once it does, transfer the dough to a floured surface and knead for about 8-10 minutes, until smooth and elastic.
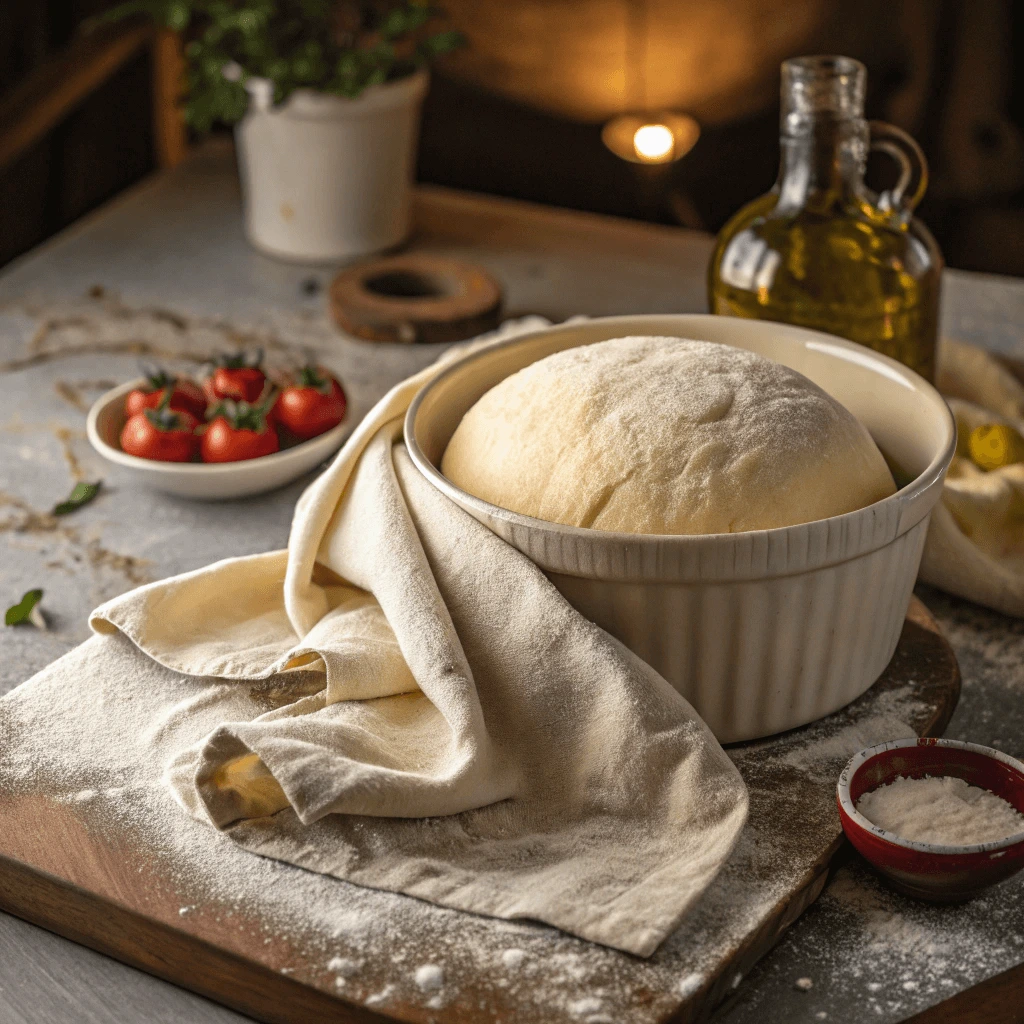
Proofing for the Perfect Rise
Proofing is a critical step in making pizza dough, as it helps the yeast activate and causes the dough to rise. The right proofing process ensures that your dough will have the ideal texture and flavor. Here’s how to proof your dough for the best results:
What is Proofing?
Proofing refers to the process of allowing the dough to rest and rise. During this time, the yeast ferments the sugars in the dough, releasing carbon dioxide, which causes the dough to expand. This makes the dough soft, airy, and full of flavor.
Creating the Perfect Environment for Proofing
The key to successful proofing is providing the dough with a warm, consistent environment. Ideally, the temperature should be between 75°F to 85°F (24°C to 29°C). Too hot, and the yeast can over-ferment; too cold, and the yeast will not activate properly. To create this warm environment, place the dough in a clean bowl and cover it with a damp cloth or plastic wrap.
Proofing Times and Results
Let the dough proof for 1 to 1.5 hours or until it has doubled in size. The exact time can vary depending on the ambient temperature. If you need to speed up the process, you can place the dough in a slightly warmed oven. Just turn the oven on for a few minutes, then turn it off and place the dough inside.
If you have more time, let the dough rise for a longer period—up to 2-3 hours—for even more flavor development. For a slow rise, you can also proof the dough in the refrigerator overnight.
Checking if Your Dough is Ready
To check if the dough is ready for the next step, perform the “poke test.” Gently press your finger into the dough, and if it leaves an indentation that doesn’t immediately spring back, the dough is ready for shaping and baking.
How Much Dough for a 10-Inch Pizza
When making pizza at home, getting the right amount of dough for your pizza size is crucial to achieving the perfect crust. For a 10-inch pizza, you’ll want to ensure that you have enough dough to cover the entire pizza base with a nice, even thickness, but not so much that it becomes too thick or too thin.
Recommended Dough Weight for a 10-Inch Pizza
For a standard 10-inch pizza, you’ll typically need around 6 to 8 ounces of dough. This amount provides enough dough to cover the surface of the pizza and allow for some rise during baking without overwhelming the crust. If you prefer a slightly thicker crust, you can use the higher end of the range (8 ounces), while for a thinner crust, you can use closer to 6 ounces.
Adjusting Dough for Thickness
The amount of dough you use will also depend on your desired crust thickness. If you enjoy a thin, crispy crust, use the lower end of the recommended amount, closer to 6 ounces. For a thicker, chewier crust, 8 ounces of dough will work better. Keep in mind that if you roll the dough too thin, you might risk it being too fragile, while rolling it too thick could result in a doughy, undercooked center.
Considering Dough Expansion
As the dough proofs, it will expand, and this rise contributes to the final texture of the pizza crust. While baking, the dough will puff up and settle into the pan, so it’s important to keep that rise in mind when rolling out your dough. A pizza peel or baking steel can help you manage the dough and prevent it from getting too thick or thin during the baking process.
By using around 6 to 8 ounces of dough and adjusting for your desired thickness, you’ll be able to create the ideal 10-inch pizza every time, achieving the perfect balance of crispness and chewiness.
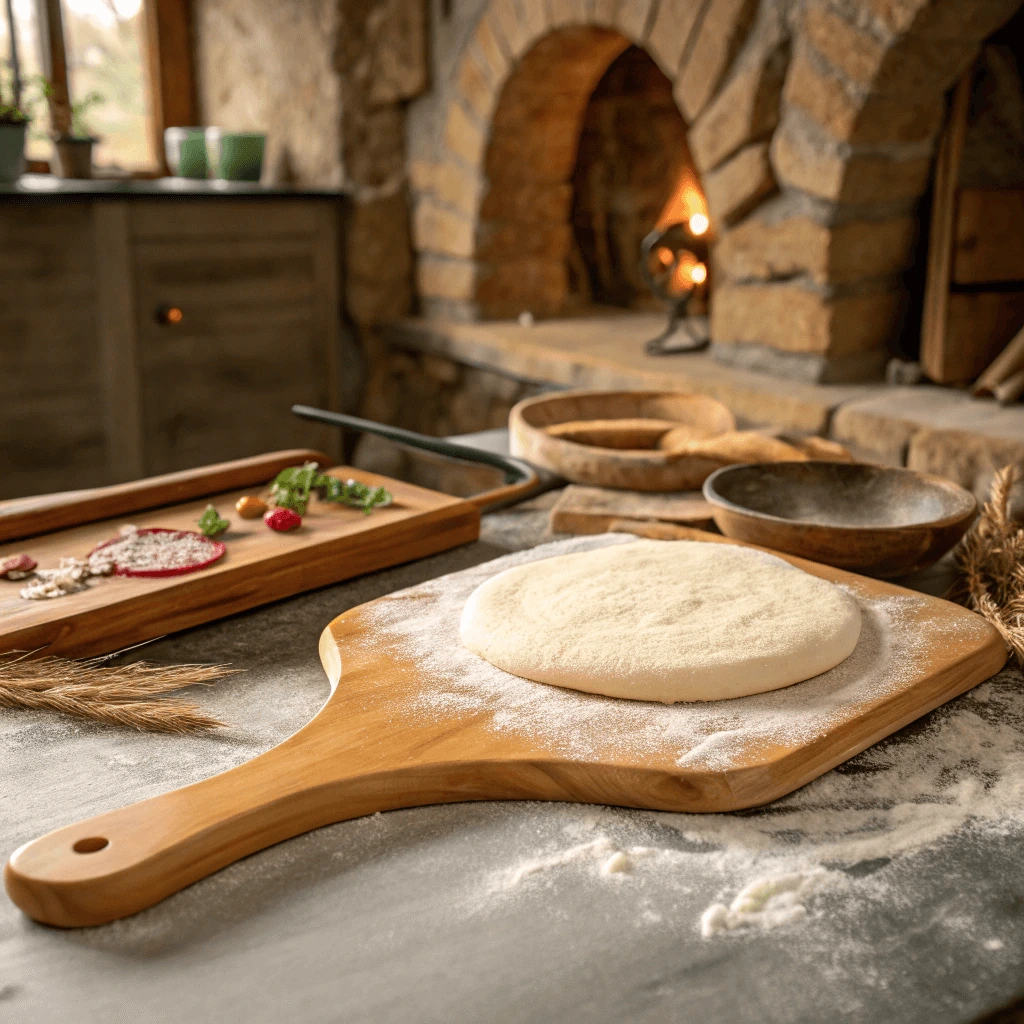
Preparing and Baking the 10-Inch Pizza
Rolling Out the Dough with Even Thickness
Rolling out pizza dough to an even thickness is key to a perfectly baked crust. Here’s how to do it:
Let the Dough Rest
Before rolling, ensure your dough has been proofed and rested. This helps relax the gluten, making it easier to roll without it shrinking back.
Use a Light Flour Dusting
Lightly flour your work surface and rolling pin to prevent sticking. Avoid using too much flour, as it can dry out the dough.
Roll from the Center Out
Start in the center and roll outward to ensure an even thickness. Turn the dough a quarter turn after each roll to keep it round and prevent sticking.
Check for Evenness
Periodically check the dough’s thickness. If you find any areas too thick or thin, gently press the dough back together and continue rolling.
Choose the Right Rolling Pin
A straight rolling pin works best for even pressure, but a tapered French rolling pin can help with control in smaller sections.
Rest if Needed
If the dough shrinks while rolling, let it rest for a few minutes before continuing.
With these tips, you’ll roll out your dough to the perfect thickness for a delicious, evenly baked pizza.
Prepping Your Bakeware for the Best Crust
Getting the best crust on your 10-inch pizza starts with preparing your bakeware. Here’s a guide to ensure your crust turns out perfect every time:
Choosing the Right Bakeware
Different types of bakeware can produce varying crust textures:
- Pizza Stone: Retains and distributes heat evenly, resulting in a crispy crust.
- Pizza Pan: Works well for a slightly softer crust, often with a bit of crispness on the edges.
- Baking Steel: Offers the fastest heat transfer for a crispy, chewy crust.
Preheating the Bakeware
Always preheat your bakeware to ensure an even cook. Preheating pizza stones or steels for 30 minutes at a high temperature ensures the dough starts cooking immediately, giving you the crispy base you desire.
Using Cornmeal or Parchment Paper
Sprinkling cornmeal or using parchment paper prevents sticking and makes transferring your pizza easier. Cornmeal also adds a nice texture to the crust.
Tips for Baking in Home Ovens
Baking a 10-inch pizza at home can be straightforward with the right techniques. Here are some simple yet effective tips to ensure your pizza bakes perfectly.
Preheat Your Oven Properly
Always preheat your oven to its highest setting, usually around 475°F to 500°F. This helps ensure the pizza cooks quickly, giving it a crispy crust. A hot oven also helps melt the cheese evenly.
Use a Pizza Stone or Baking Steel
Using a pizza stone or baking steel can make a huge difference. These tools retain and distribute heat evenly, giving you a crispier crust. Place the stone or steel in the oven while it preheats to ensure it’s hot when you bake your pizza.
Position the Rack Correctly
For a crispy crust, place your oven rack in the lower third of the oven. This lets the heat come from the bottom and cook the crust more effectively, while the toppings cook evenly at the same time.
Keep an Eye on the Pizza
Pizza bakes quickly, so check on it as it nears completion. The cheese should bubble and turn golden, while the crust should have a nice crispy edge. This ensures the pizza is cooked just right without burning.
Let the Pizza Rest
After baking, let your pizza rest for a couple of minutes. This helps the cheese set and makes slicing easier without the toppings sliding off.
Pro Tips to Make Your Dough Foolproof
Common Mistakes to Avoid with Pizza Dough
Making pizza dough can be tricky, but avoiding a few common mistakes can help you achieve a delicious, crispy crust. Here are the most common pitfalls and how to steer clear of them.
1. Not Using Enough Flour
A common mistake is not using enough flour while mixing or rolling the dough. If your dough is sticky, it can be hard to work with. To avoid this, add flour gradually until the dough is smooth and soft, not sticky. Use a light dusting of flour on your rolling surface to make it easier to stretch.
2. Overworking the Dough
Another mistake is over-kneading. While kneading is necessary to activate the gluten, too much can make the dough tough. Knead until it’s elastic, then let it rest. This allows the gluten to relax and makes the dough easier to roll out.
3. Rushing the Rise
Many people rush the proofing process, but dough needs time to rise for the best texture and flavor. Allow at least an hour for your dough to rise. If you’re in a hurry, you can use a warm spot, but always give it enough time to expand.
4. Using Cold Water
Cold water slows down yeast activation. Always use room-temperature water when mixing your dough. This helps the yeast rise more effectively, creating a lighter and fluffier crust.
5. Overloading with Sauce and Toppings
Putting too much sauce or too many toppings can make your pizza soggy. A light layer of sauce and well-chosen toppings ensures a crisp crust. Keep the sauce thin and choose toppings that don’t release too much moisture during baking.
6. Not Preheating the Oven
Skipping the oven preheating can lead to an uneven bake. Always preheat your oven to the desired temperature to ensure that your pizza cooks evenly and the crust turns out crispy.
7. Using the Wrong Flour
Different flours produce different results. Use high-protein bread flour for a chewy, airy dough. All-purpose flour can work, but it might not give you the same results.
By keeping these tips in mind, you’ll be on your way to baking perfect pizza dough every time!
Adjusting for Thin or Thick Crust Preferences
When making homemade pizza, adjusting the dough to create either a thin or thick crust is easy and allows you to enjoy a personalized pizza every time.
Modifying Dough Thickness
To achieve a thin crust, roll the dough out as thin as possible without tearing it. This will create a crispier texture when baked. If you prefer a thicker crust, roll the dough to a slightly smaller size, and don’t stretch it as much. This allows the dough to rise more during baking and gives you a soft, chewy crust.
Adjusting Proofing Time
Proofing time can influence your crust’s thickness. For a thicker crust, allow the dough to rise longer. The extra time gives the dough more air, helping it rise higher when baked. For a thinner crust, reduce the proofing time slightly to keep the dough from expanding too much.
Baking Temperature
Baking at a higher temperature (around 475°F or 245°C) will give you a crisp, thin crust. For a thicker crust, bake at a slightly lower temperature (around 400°F or 200°C) to ensure even cooking, especially in the center of the pizza.
Storing Extra Dough or Making Ahead
Storing extra dough or preparing it ahead of time can make your pizza night even easier. With the right techniques, you can ensure fresh dough is always available when needed.
Refrigerating Dough for Short-Term Use
To store dough for the next day or two, simply place it in an airtight container after shaping it into a ball. Lightly coat the dough with olive oil to prevent it from drying out. Cover the container and refrigerate the dough. It will continue to rise slowly, developing more flavor. When you’re ready to use it, let the dough come to room temperature for about 30 minutes before stretching it into shape.
Freezing Dough for Long-Term Storage
If you need to store dough for a longer period, freezing it is a great option. Shape the dough into a ball, wrap it tightly in plastic wrap, and then in foil to protect it from freezer burn. Place it in a freezer bag or airtight container. Dough can last in the freezer for up to three months. When you’re ready to use it, simply thaw it in the fridge overnight and allow it to come to room temperature before use.
Making Dough in Advance for Future Use
Making pizza dough in advance allows you to have it ready when you’re short on time. You can either refrigerate or freeze it, and the dough’s flavor will actually improve as it sits. For best results, prepare the dough a day or two before baking and allow it to rest in the fridge.
In conclusion, making the perfect 10-inch pizza dough at home is both simple and rewarding. With the right ingredients, techniques, and a little patience, you can achieve a foolproof, delicious dough that forms the foundation for countless pizza creations. Whether you prefer a thin or thick crust, adjusting the recipe to suit your preferences is easy. Storing extra dough for future use makes pizza nights even more convenient. So, roll up your sleeves, gather your ingredients, and enjoy crafting homemade pizza with this perfect dough recipe!