There’s something magical about starting your day with a warm, flaky pastry paired with your favorite morning beverage. Whether you prefer sweet, buttery treats or light, fruit-filled bites, breakfast pastries are the perfect way to make your mornings extra special. From classic croissants to decadent chocolate-filled delights, these pastries are sure to satisfy your cravings and brighten your day.
In this post, we’ll explore 10 irresistible breakfast pastries, from quick,easy recipes for busy mornings to indulgent favorites for weekend brunches. Whether you love baking from scratch or grabbing a treat from your favorite bakery, these pastries will inspire your next morning treat. Get ready to make every breakfast delicious and unforgettable! 😊✨
Classic Breakfast Pastries You’ll Love
🥐 Croissants: Buttery, Flaky, and Perfect with Coffee
Croissants are the epitome of classic breakfast pastries, known for their delicate, flaky layers and rich, buttery flavor. Originating from France, these golden, crescent-shaped delights have become a worldwide favorite, perfect for pairing with a morning coffee or tea. Let’s dive into what makes croissants so special and how you can enjoy them at their best.
🥣 What Makes Croissants Special?
A true croissant has a crisp, golden exterior and soft, airy layers inside. Bakers achieve this texture through a process called lamination, where they fold and roll butter into the dough multiple times. This technique creates thin, flaky layers that melt in your mouth. Freshly baked croissants are light, slightly crispy on the outside, and tender on the inside.
🍯 Popular Croissant Variations
Croissants are versatile pastries, and you can enjoy them plain or filled with delicious ingredients. Here are some popular variations:
- Plain Croissant: Simple, buttery, and perfect with jam or honey.
- Chocolate Croissant (Pain au Chocolat): Filled with rich chocolate, this version is a favorite for sweet lovers.
- Almond Croissant: Topped with sliced almonds and filled with almond paste for a nutty, sweet flavor.
🥐 Tips for Enjoying Croissants
- Best Time to Eat: Fresh croissants are best enjoyed warm from the oven, when their layers are crisp and fragrant.
- Pairings: Pair your croissant with a hot coffee, a frothy latte, or a light, citrusy tea.
- Serving Ideas: Slice a croissant and fill it with ham and cheese for a savory breakfast sandwich.
Croissants are more than just a pastry—they are a symbol of comfort and elegance, perfect for making your breakfast extra special. Whether you enjoy them plain or filled with your favorite ingredients, croissants always bring joy to the morning table.
🇩🇰 Danish Pastries: Sweet, Flaky, and Irresistible
Danish pastries are a delightful blend of rich, buttery dough and sweet fillings, making them a beloved choice for breakfast. Despite their name, these pastries have Austrian roots but gained their fame in Denmark, where bakers refined the recipe into the delicious treat we know today. Let’s explore what makes Danish pastries special and how you can enjoy them.
🍰 What Makes Danish Pastries Unique?
Danish pastries are known for their laminated dough, similar to croissants but slightly sweeter and richer due to the addition of eggs and more butter. The result is a soft, flaky texture with a golden, crisp exterior. Their signature feature is the variety of fillings, which range from fruit preserves to custard and cream cheese.
🥐 Popular Danish Pastry Varieties
Danish pastries come in many shapes and flavors. Here are some classic favorites:
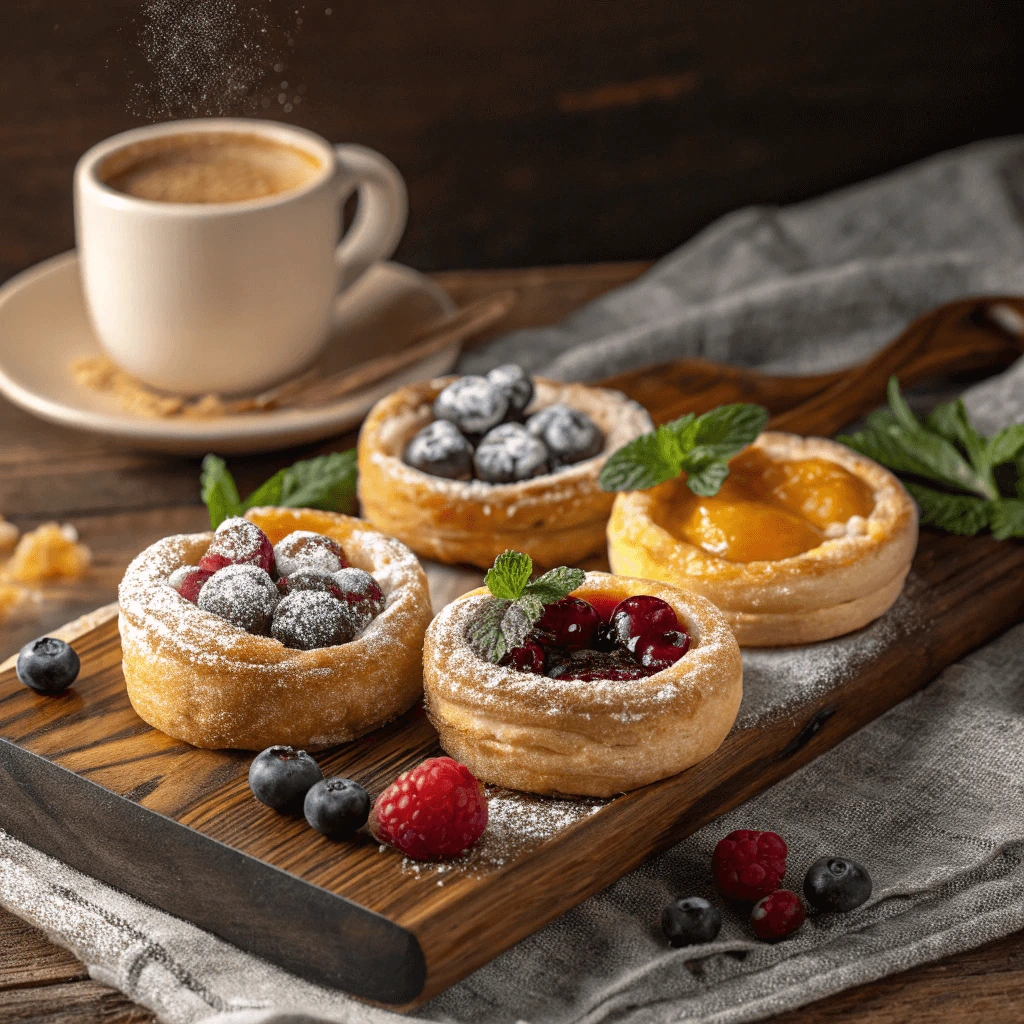
- Cheese Danish: A creamy, tangy cheese filling sits inside a flaky pastry, often topped with a light glaze.
- Fruit Danish: Fresh or preserved fruits, such as cherries, apricots, or blueberries, add sweetness and color.
- Almond Danish: This version includes a sweet almond paste filling, sometimes topped with slivered almonds.
👨🍳 How Danish Pastries Are Made
Making Danish pastries involves several steps, but the result is worth the effort:
- Dough Preparation: The dough is enriched with eggs, milk, and sugar, making it softer and sweeter than croissant dough.
- Lamination: Layers of butter are folded into the dough multiple times to create a flaky texture.
- Shaping and Filling: Bakers shape the dough into twists, braids, or rounds and fill them with custard, fruit, or almond paste.
- Baking: The pastries are baked until golden, then glazed or dusted with powdered sugar.
💡 Tips for Enjoying Danish Pastries:
- Best Pairings: Enjoy your Danish pastry with a hot cup of coffee or a frothy cappuccino.
- Serving Ideas: Warm the pastries slightly before serving to enhance their buttery aroma and soft texture.
- Storage: Store them in an airtight container at room temperature for up to two days or freeze for longer storage.
🍂 Cinnamon Rolls: Warm, Sweet, and Irresistibly Soft
Cinnamon rolls have become a beloved breakfast treat, known for their fluffy texture and rich cinnamon flavor. Their comforting aroma and soft, gooey centers make them a perfect choice for cozy mornings or special gatherings. Let’s explore their charm, variations, and how to make them from scratch.
🧁 Why Cinnamon Rolls Are So Special
These pastries are crafted with a soft, yeast-based dough enriched with butter, milk, and eggs, resulting in a tender, melt-in-your-mouth bite. The sweet swirl of cinnamon, sugar, and butter inside adds a rich flavor, while a creamy glaze or frosting delivers the perfect finishing touch.
🍩 Tasty Cinnamon Roll Variations
- Classic Cinnamon Rolls: Traditional rolls with a cinnamon-sugar filling and a simple glaze.
- Cream Cheese Rolls: Tangy cream cheese frosting balances the sweet, spiced interior.
- Pecan Sticky Buns: Caramelized pecans provide a crunchy, sweet topping.
🍞 Step-by-Step: How Cinnamon Rolls Are Made
- Prepare the Dough: Combine flour, sugar, yeast, milk, and eggs to create an elastic dough. Knead thoroughly to achieve a light, airy texture.
- Fill and Roll: Once the dough has risen, spread the cinnamon-sugar mixture evenly, then roll tightly to form swirls.
- Slice and Proof: Cut the roll into portions and allow them to rise again, ensuring a soft, fluffy texture.
- Bake and Glaze: Bake until golden brown, then drizzle with icing while still warm.
☕ Serving Tips for the Perfect Experience
- Best Served Warm: Enjoy them fresh from the oven for a soft, gooey bite.
- Pair with a Drink: Complement with coffee or chai latte.
- Storing Advice: Keep in an airtight container for up to two days or freeze for longer storage. Reheat before serving for maximum freshness.
Quick and Easy Breakfast Pastries for Busy Mornings
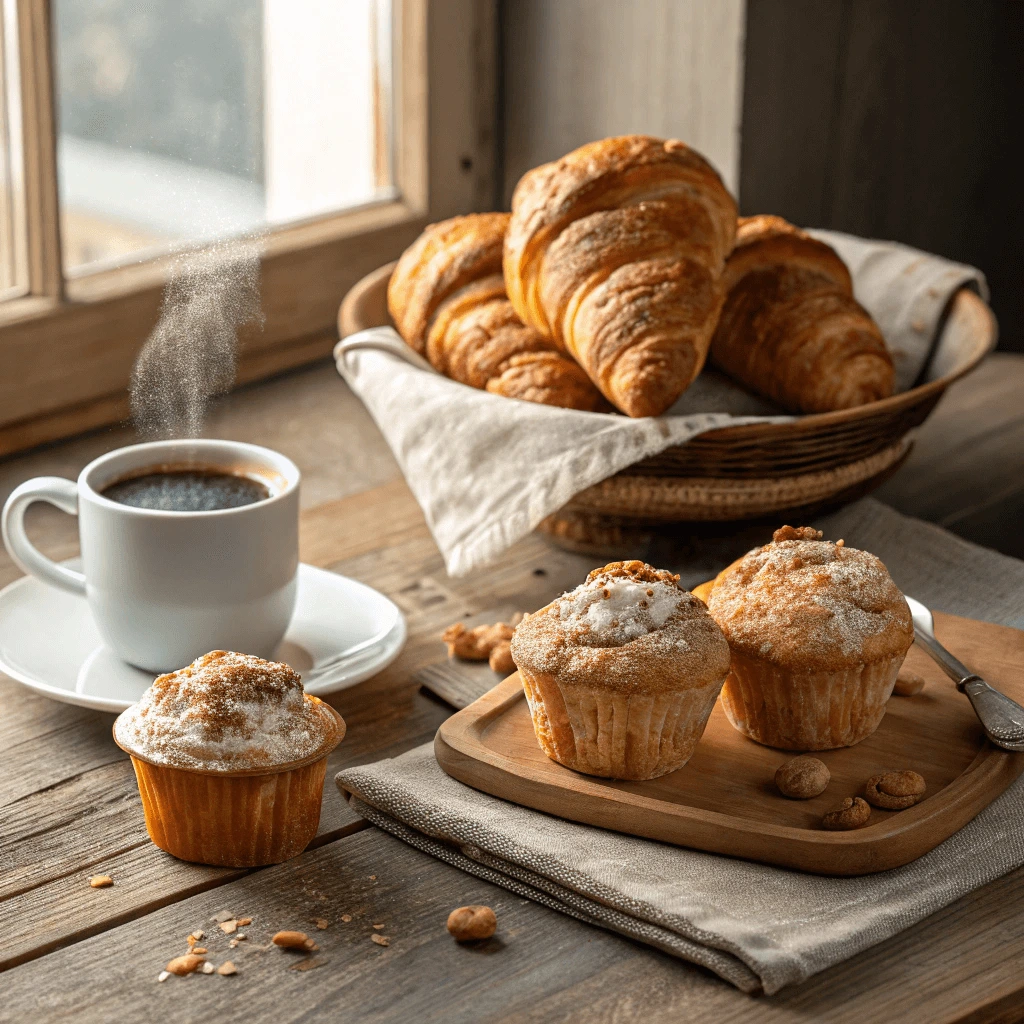
Muffins: Simple to Make, with Endless Flavor Variations
Muffins are a beloved breakfast pastry because of their ease and versatility. Whether you’re baking for a busy weekday or a relaxed weekend morning, muffins can be ready in no time. They offer endless flavor possibilities, making them perfect for any preference—whether you’re craving something sweet, savory, or even a little bit of both.
Quick and Easy Muffin Recipes
The beauty of muffins lies in their simplicity. All you need are basic ingredients like flour, sugar, baking powder, and butter. From there, you can add in your favorite mix-ins, like blueberries, chocolate chips, or even spices like cinnamon. Muffins are great for busy mornings when you need something that’s both fast and filling. You can prepare the batter the night before, store it in the fridge, and just pop the muffins in the oven when you wake up.
Sweet and Savory Muffin Options
While blueberry and chocolate chip muffins are classic favorites, don’t shy away from exploring savory flavors too. Cheddar and chive muffins offer a deliciously cheesy breakfast, and egg muffins can be a hearty, satisfying start to your day. Savory muffins pair wonderfully with a hot cup of coffee or tea and can be packed with vegetables or meats for an extra protein boost.
Healthier Muffin Variations
Muffins don’t have to be loaded with sugar and fat to be tasty. You can easily swap out ingredients to create healthier options without sacrificing flavor. Try whole wheat flour or almond flour for a gluten-free version, and use applesauce or yogurt to replace some of the butter. For a low-sugar version, sweeten your muffins with ripe bananas, honey, or stevia. These modifications not only make the muffins healthier but also add a new layer of flavor.
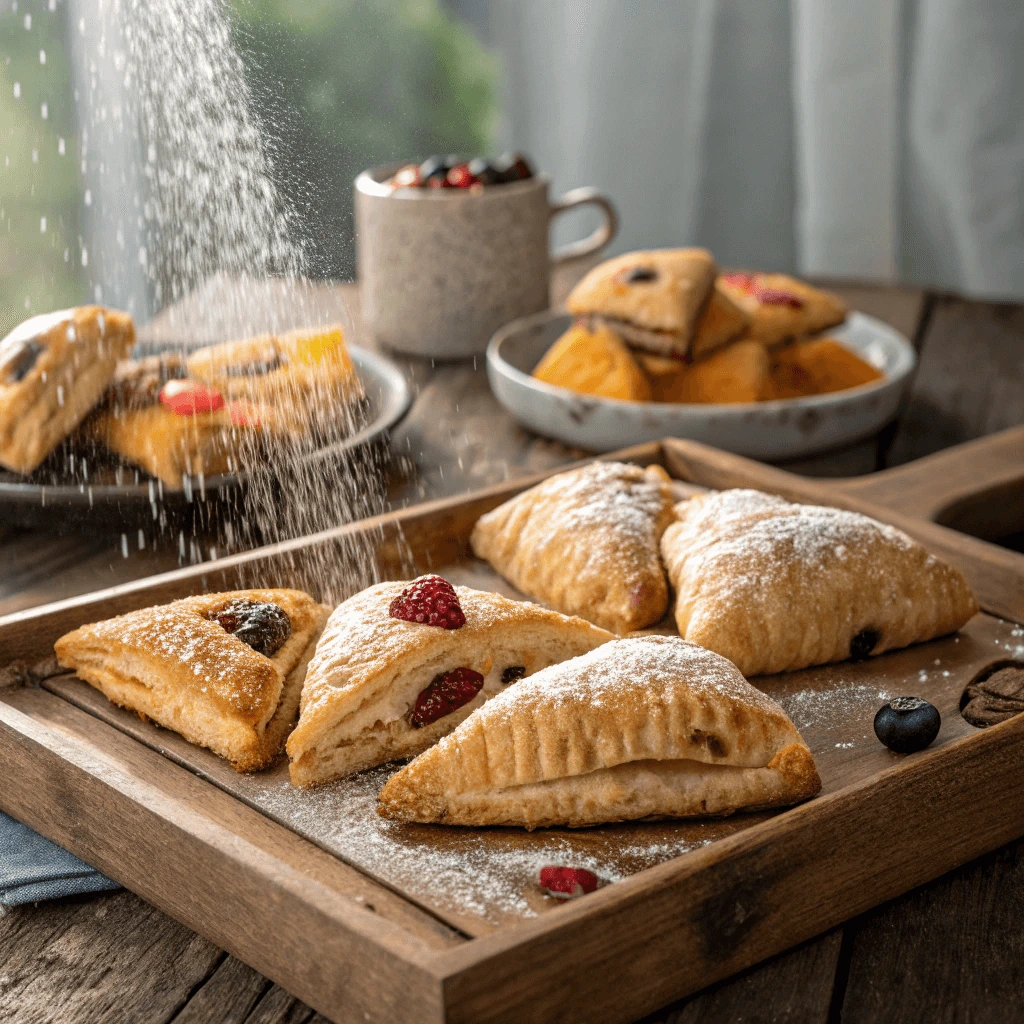
Turnovers: Puff Pastry Pockets with Fruit or Chocolate Filling
Turnovers are an irresistible pastry option that offers both convenience and flavor. With a golden, flaky puff pastry crust and a delicious filling, turnovers make for a satisfying breakfast treat that can be enjoyed with coffee or tea. Their versatility allows you to fill them with a wide variety of ingredients, making them the perfect pastry to suit any craving, from fruity to chocolatey.
Quick and Easy Turnover Preparation
Making turnovers is simpler than you might think, especially when you use store-bought puff pastry. Begin by rolling out the dough and cutting it into squares or circles. From there, you can add your choice of filling—whether it’s fresh fruit like apples, peaches, or berries, or indulgent fillings like Nutella or chocolate chips. Once filled, fold the dough over to create a pocket, seal the edges, and bake until golden and crispy. This simple process yields an impressive, bakery-quality pastry in no time.
Sweet and Savory Turnover Fillings
While fruit turnovers are a classic breakfast option, don’t overlook savory turnovers. You can fill them with a variety of ingredients, from spinach and feta to ham and cheese, creating a savory pastry that’s both filling and flavorful. Sweet fillings like cinnamon apples or mixed berries with cream cheese are delicious choices for those with a sweet tooth, while chocolate-hazelnut turnovers offer a decadent treat for dessert lovers.
Baking and Serving Tips for Perfect Turnovers
To achieve the perfect turnover, make sure the puff pastry is chilled before using. This helps it maintain its flakiness during baking. Brush the tops with an egg wash to give them that golden, shiny finish, and sprinkle a bit of sugar on top for extra sweetness if you’re making fruit or sweet fillings. Serve turnovers warm, straight from the oven, for the ultimate pastry experience.
Scones: Crumbly, Lightly Sweet, and Perfect with Jam
Scones are a classic breakfast pastry that is perfect for those who enjoy a slightly sweet, crumbly treat. With their rich, buttery flavor and soft, tender crumb, scones are best enjoyed fresh out of the oven. They pair beautifully with jam, clotted cream, or even a drizzle of honey. Whether you prefer them plain or filled with fruits, nuts, or chocolate, scones offer versatility for any morning craving.
Classic Scone Ingredients
Making scones from scratch is simple and requires only a handful of ingredients. Flour, butter, sugar, and cream or milk form the base of the dough, while a pinch of salt adds balance to the flavors. The key to a perfect scone is to handle the dough as little as possible—this prevents overworking it, which can result in tough scones. Gently mix the ingredients and fold in your add-ins, such as dried fruits (like currants, cranberries, or raisins) or even chunks of chocolate. The dough should be slightly sticky but firm enough to hold together.
Flavor Variations and Add-ins
While traditional scones are often plain or lightly sweetened, you can get creative with various flavor combinations. Adding citrus zest, like lemon or orange, brightens the scones and adds a refreshing twist. For a more decadent option, try chocolate chip scones or ones filled with fresh berries. If you prefer savory scones, add herbs like rosemary or thyme, along with cheese for a delightful breakfast treat that complements eggs or a fresh salad.
Baking and Serving Tips for Perfect Scones
To achieve a beautifully risen scone, make sure your baking powder is fresh, as it’s the key leavening agent. Preheat your oven to a high temperature (around 400°F) to help the scones rise quickly and form a golden, slightly crisp crust. After shaping the dough, place the scones on a baking sheet lined with parchment paper, ensuring they are spaced apart for even cooking. Once baked, serve them warm, topped with a dollop of cream, jam, or fresh butter for the ultimate experience.
Healthy Breakfast Pastries for a Guilt-Free Treat

Vegan Banana Muffins: Naturally Sweetened and Dairy-Free
Vegan banana muffins are the perfect breakfast pastry for those looking for a healthy and dairy-free option. These muffins are naturally sweetened with ripe bananas, making them both delicious and nutritious. They are a great way to use up overripe bananas while creating a moist, tender muffin. Whether you’re vegan or just looking for a healthier alternative to traditional banana muffins, this recipe is a hit for everyone.
Ingredients for Vegan Banana Muffins
To make these banana muffins, you’ll need a few simple ingredients that replace the traditional dairy and eggs. Overripe bananas are the star ingredient, providing natural sweetness and moisture. For the dry ingredients, use whole wheat flour or oat flour for added fiber, or choose all-purpose flour for a lighter texture. Baking soda acts as the leavening agent, helping the muffins rise. Instead of butter or eggs, use coconut oil or a light oil of your choice to keep them moist, while flaxseed or chia seeds mixed with water make a great egg substitute. To sweeten the muffins further, you can add a small amount of maple syrup or agave syrup, although the bananas usually provide enough natural sweetness.
Flavor Variations and Add-ins
While classic banana muffins are delicious on their own, you can easily customize them to suit your preferences. Add-ins like chocolate chips, chopped walnuts, or even shredded coconut can elevate the flavor and texture of the muffins. If you’re craving a touch of spice, a sprinkle of cinnamon or nutmeg pairs wonderfully with bananas. You can also mix in dried fruit like raisins or cranberries for extra sweetness. The beauty of vegan banana muffins lies in their versatility—feel free to get creative with your mix-ins.
Baking Tips for Moist Vegan Banana Muffins
To ensure your vegan banana muffins turn out moist and fluffy, avoid overmixing the batter. Stir the ingredients just until combined, as overmixing can lead to dense muffins. Preheat your oven to 350°F (175°C) and line your muffin tin with paper liners for easy cleanup. Spoon the batter into the muffin cups, filling each about two-thirds of the way full. Bake the muffins for 18-22 minutes, or until a toothpick inserted into the center comes out clean. Once baked, let the muffins cool in the tin for a few minutes before transferring them to a cooling rack. Serve warm or store them in an airtight container for later.
Whole Wheat Scones: A Fiber-Rich, Hearty Pastry
Whole wheat scones are a healthier alternative to traditional scones, providing a rich, nutty flavor and an extra boost of fiber. Made with whole wheat flour, these scones are perfect for those who want a hearty and wholesome breakfast option. They retain the buttery, crumbly texture of classic scones while offering a more nutritious twist. These scones can be enjoyed on their own or paired with fresh fruit, jam, or clotted cream.
Key Ingredients for Whole Wheat Scones
To make whole wheat scones, you’ll need a combination of whole wheat flour, a leavening agent like baking powder, and a small amount of salt. The whole wheat flour gives these scones a denser texture compared to regular scones made with white flour. Butter, or a plant-based substitute like coconut oil, provides the richness and flakiness that scones are known for. A little sugar enhances the flavor, though you can reduce the amount for a less sweet option. You’ll also need a liquid to bring the dough together, such as milk or a non-dairy milk like almond or oat milk.
For an extra touch of flavor, you can add a teaspoon of vanilla extract or a sprinkle of cinnamon. If you prefer a slightly sweeter scone, consider incorporating honey or maple syrup. The key to making the perfect scone is balancing the dry and wet ingredients carefully to create a dough that is firm but not overly sticky.
How to Make Whole Wheat Scones
The process of making whole wheat scones is similar to that of traditional scones, but with a few tweaks to accommodate the denser whole wheat flour. Begin by whisking together the dry ingredients—whole wheat flour, baking powder, and salt. Next, cut in the cold butter using a pastry cutter or your fingers until the mixture resembles coarse crumbs. This step is crucial for achieving that desirable flaky texture.
Afterward, gradually add the wet ingredients, mixing until the dough just comes together. It’s important not to overwork the dough, as this can result in tough scones. If you’d like to include any add-ins, such as dried fruits (raisins, cranberries) or nuts (walnuts, almonds), fold them into the dough at this stage. Once the dough is formed, gently shape it into a round disk and cut it into wedges. Arrange the scones on a baking sheet lined with parchment paper, brush them with a little milk for a golden finish, and bake in a preheated oven at 400°F (200°C) for 15-20 minutes, or until they are lightly browned on top.
Serving and Storing Whole Wheat Scones
Once baked, allow the whole wheat scones to cool for a few minutes on a wire rack before serving. These scones are delicious on their own, but they pair perfectly with butter, jam, or even a dollop of clotted cream. You can also serve them alongside a fresh cup of coffee or tea for a satisfying breakfast or brunch.
If you have leftover scones, store them in an airtight container at room temperature for up to two days. For longer storage, you can freeze the scones and reheat them when needed. Simply wrap them individually in plastic wrap and store them in a freezer-safe bag. When you’re ready to enjoy them, warm them up in the oven for a few minutes.
Fruit-Filled Hand Pies: Made with Fresh Berries and Minimal Sugar
Fruit-filled hand pies are the perfect portable breakfast pastry. These little pockets of flaky pastry filled with fresh fruit provide a satisfying and delicious treat to start your morning. They’re easy to make and customizable with your favorite fruits, and their handheld design makes them perfect for busy mornings or a quick on-the-go snack. By using minimal sugar and fresh fruit, these hand pies offer a healthier alternative to many traditional breakfast pastries.
Choosing the Best Fruit for Hand Pies
The key to a perfect fruit-filled hand pie lies in selecting the right fruit. While you can use almost any type of fruit, berries like strawberries, blueberries, raspberries, or blackberries work wonderfully for their natural sweetness and juicy texture. Stone fruits like peaches, plums, or cherries are also great choices, offering a slightly tart flavor that balances the sweetness of the pastry.
For the best results, use fresh fruit, though frozen fruit works as well, especially if it’s in season or if fresh fruit is unavailable. If you’re using frozen fruit, make sure to thaw and drain it before adding it to the pie filling to prevent excess moisture from making the dough soggy.
Making the Pastry Dough
The pastry dough for these hand pies is simple and easy to prepare. Start by combining all-purpose flour, sugar, salt, and cold butter in a large bowl. Using a pastry cutter or your fingers, work the butter into the dry ingredients until the mixture resembles coarse crumbs. The key is to keep the butter cold so the dough stays flaky when baked.
Next, add cold water a little at a time, mixing gently until the dough just comes together. Be careful not to overwork the dough, as this can make the hand pies tough. Once the dough is formed, wrap it in plastic wrap and refrigerate it for at least 30 minutes to allow it to firm up and become easier to roll out.
Assembling the Fruit-Filled Hand Pies
After chilling the dough, roll it out on a lightly floured surface to about 1/8 inch thickness. Use a round cutter (a cup or a cookie cutter works well) to cut out circles of dough. Place a spoonful of fruit filling in the center of each dough circle. For the filling, combine your chosen fruit with a bit of sugar, a squeeze of lemon juice, and a touch of cornstarch to help thicken the filling while baking.
Once you’ve added the filling, fold the dough over to form a half-moon shape, then press the edges together using a fork to seal the hand pie. Brush the top with a little milk or egg wash for a golden finish, and make a small slit in the top to allow steam to escape during baking. Arrange the hand pies on a baking sheet lined with parchment paper.
Baking and Serving Fruit-Filled Hand Pies
Preheat your oven to 375°F (190°C) and bake the hand pies for about 20-25 minutes, or until they are golden brown and the filling is bubbling. Be sure to let them cool for a few minutes before serving, as the filling can be very hot.
These fruit-filled hand pies are perfect when served warm and can be enjoyed on their own or with a dollop of whipped cream or a drizzle of icing. They are not only a delicious breakfast pastry but also make a great snack or dessert. You can even pack them in a lunchbox for a tasty treat later in the day.
Storing and Freezing Fruit-Filled Hand Pies
If you have any leftovers, these hand pies store beautifully. Keep them in an airtight container at room temperature for up to two days, or refrigerate them for longer shelf life. For freezing, place the hand pies on a baking sheet and freeze them individually before transferring them to a freezer-safe bag or container. When you’re ready to eat them, simply reheat them in the oven for a few minutes to restore their flaky texture.
Decadent Chocolate and Cream Pastries for Sweet Tooths
Éclairs: Filled with Creamy Custard and Topped with Chocolate Glaze
Éclairs are a classic French pastry known for their light, airy texture and rich, creamy filling. These decadent treats are made with choux pastry dough, which puffs up beautifully when baked, creating a hollow interior perfect for filling with custard, whipped cream, or other delicious fillings. Finished with a smooth layer of chocolate glaze, éclairs make for an indulgent breakfast or dessert pastry that’s sure to impress.
The Perfect Choux Pastry Dough
The foundation of a perfect éclair is the choux pastry dough, which is unique because it’s cooked before it’s baked. Start by combining butter, water, salt, and sugar in a saucepan, then bring it to a boil. Once boiling, add flour all at once and stir vigorously until the mixture forms a dough that pulls away from the sides of the pan. Let it cool for a few minutes before adding eggs, one at a time, until the dough becomes smooth and glossy.
It’s crucial to get the consistency right, as choux pastry should be thick enough to hold its shape but soft enough to pipe easily. The dough is then transferred to a piping bag fitted with a large round tip, ready to be shaped into long, slender éclairs on a baking sheet.
Shaping and Baking the Éclairs
When it comes to shaping éclairs, aim for even, straight lines that will puff up uniformly during baking. Pipe the dough into long strips about 4-5 inches in length, leaving enough space between each éclair to allow for expansion as they bake.
Bake the éclairs at a high temperature (about 400°F or 200°C) for the first 10 minutes to help them rise and create that signature puffed shape. Then, lower the temperature to 350°F (175°C) and bake for an additional 20-25 minutes until they are golden brown and crisp. Resist the urge to open the oven door during the first 15 minutes to avoid deflating the pastries.
Once baked, remove the éclairs from the oven and allow them to cool on a wire rack. If you’re looking to make your éclairs extra light and crispy, you can also poke a small hole in each éclair after baking to let the steam escape, which helps prevent sogginess.
Making the Creamy Custard Filling
The rich filling of an éclair is typically made from pastry cream, which is thickened with egg yolks and cornstarch. Start by heating milk and sugar in a saucepan, then whisking the egg yolks with sugar and cornstarch until smooth. Once the milk is heated, pour it into the egg mixture while whisking constantly to prevent curdling. Return the mixture to the stove and cook over medium heat until it thickens into a creamy custard.
Once thickened, remove the custard from heat and stir in butter and vanilla extract for extra richness and flavor. Allow the custard to cool completely before using it to fill the éclairs. You can also refrigerate the pastry cream for a firmer texture, which will make it easier to pipe into the éclairs.
Filling the Éclairs
Once the éclairs have cooled, it’s time to fill them with the creamy custard. Using a piping bag fitted with a small round tip, carefully insert the tip into one end of each éclair and fill it with the custard. Be gentle but firm to ensure you fill the éclair completely without bursting the dough.
If you prefer, you can slice the éclairs in half horizontally and spoon the custard into the bottom half, then place the top half back on.
Adding the Chocolate Glaze
The finishing touch to an éclair is the glossy chocolate glaze that adds sweetness and a beautiful shine. To make the glaze, melt dark or milk chocolate with a bit of butter and cream in a heatproof bowl, stirring until smooth and shiny. Once the glaze has cooled slightly, dip the top of each filled éclair into the glaze, making sure it’s fully coated.
For extra flair, you can drizzle the glaze in a decorative pattern, or even sprinkle with crushed nuts or sprinkles. Allow the glaze to set before serving.
Serving and Storing Éclairs
Éclairs are best enjoyed fresh, right after they’ve been filled and glazed. However, if you need to store them, keep them in an airtight container in the refrigerator for up to two days. You can also freeze the unfilled éclairs and glaze them when you’re ready to serve them. Simply let them cool, wrap them tightly in plastic wrap, and freeze for up to a month.
Pain au Chocolat: A Rich, Flaky Delight with Melted Chocolate
Pain au chocolat, also known as chocolate croissants, is a beloved French pastry that combines the buttery layers of a croissant with the indulgence of rich, melted chocolate. This sweet pastry is perfect for breakfast or an afternoon treat, and it’s loved by chocolate lovers everywhere. Pain au chocolat can be found in bakeries worldwide, but there’s something especially satisfying about making them at home.
The Basics of Croissant Dough
Pain au chocolat is made using the same dough as croissants—puff pastry dough that undergoes a process known as laminating. This involves folding butter into the dough several times to create thin layers. When baked, these layers puff up, creating the characteristic flaky, airy texture that makes croissants (and pain au chocolat) so irresistible.
To make your own dough, start by combining flour, sugar, salt, yeast, and a bit of milk in a bowl. Then, add cold butter, and use a rolling pin to gently flatten the butter into thin sheets. The key here is to work with cold butter, as it needs to remain in solid chunks while being incorporated into the dough to achieve the flaky layers.
Once the dough has been prepared, you’ll need to roll it out, fold it several times, and refrigerate it between folds to ensure the dough is cold and the layers are formed. This process can take some time, but the result is a perfectly flaky dough that will melt in your mouth.
Shaping Pain au Chocolat
After the dough has rested and chilled, it’s time to shape your pain au chocolat. Roll the dough into a long rectangle, then cut it into smaller rectangles—usually around 4 to 5 inches wide. Place a piece of dark chocolate (or milk chocolate if you prefer) in the center of each rectangle, then fold the dough over the chocolate to create a pocket. The ends of the dough should be pinched together to seal in the chocolate.
To get the perfect shape, be sure the seams are tucked well, so the filling doesn’t spill out during baking. You can even brush the dough with a light egg wash for a golden, shiny finish once it’s baked.
Baking the Pain au Chocolat
Once your pain au chocolat is shaped and sealed, it’s time to bake them. Preheat the oven to a high temperature—around 400°F (200°C). The dough needs a hot oven to puff up properly and form the golden, flaky crust. Place the pastries on a baking sheet lined with parchment paper, leaving some space between each one to allow them to expand.
Bake for 15-20 minutes, or until the pastries are golden brown and the chocolate inside has melted into a gooey, delicious filling. The result should be a flaky, slightly crispy exterior with a warm, rich chocolate center that oozes out when you take a bite.
Enjoying Your Pain au Chocolat
Pain au chocolat is best enjoyed fresh out of the oven when the layers are still crispy, and the chocolate is warm and melty. Serve them for breakfast with a hot cup of coffee, or as a treat with afternoon tea. They are perfect for gatherings or as a simple yet luxurious snack.
If you make a batch and have leftovers, store them in an airtight container at room temperature for up to two days. You can also freeze the unbaked pastries for later use. Simply shape and freeze them before baking, and when you’re ready to enjoy them, bake from frozen—no need to defrost.
Variations on Pain au Chocolat
While the traditional version of pain au chocolat uses dark chocolate bars, feel free to get creative with your fillings. You can experiment with milk chocolate, white chocolate, or even flavored chocolate like hazelnut or orange for a twist on the classic. Some people even add a sprinkle of sea salt on top of the baked pastry for a delightful salty-sweet contrast.
Chocolate Croissants: A Flaky, Chocolatey Indulgence
Chocolate croissants, or “Pain au Chocolat” in French, are a delectable breakfast pastry that combines the flaky goodness of croissant dough with rich, melted chocolate. The delicate layers of buttery dough contrast beautifully with the smooth, gooey chocolate inside, making these pastries a popular choice for breakfast, brunch, or a sweet treat any time of day. Whether you grab one from a local bakery or bake them yourself, chocolate croissants are undeniably irresistible.
The Secret Behind the Flaky Layers
The key to a perfect chocolate croissant lies in its dough. Like all croissants, the dough is made using a process called laminating, where butter is folded into dough multiple times to create thin, flaky layers. When baked, the layers puff up, creating a light, airy texture that is the hallmark of a great croissant.
To begin, combine flour, sugar, salt, yeast, and milk to form a dough. The dough should then rest and rise, allowing the yeast to work its magic and create that light, airy texture. Once rested, roll out the dough and incorporate cold butter by folding it into the dough using a series of precise steps. This is the part that takes patience: you’ll roll, fold, and chill the dough multiple times to create layers that will puff up beautifully in the oven.
Shaping the Chocolate Croissants
Once the dough has been properly laminated and chilled, it’s time to shape your chocolate croissants. Start by rolling out the dough into a large rectangle. Afterward, cut it into smaller rectangles—about 4 to 5 inches wide.
Place a piece of high-quality dark chocolate (or milk chocolate, depending on your preference) at the center of each rectangle. Fold the dough over the chocolate to enclose it, pinching the edges to seal the croissant securely. The goal is to create a pocket of gooey chocolate inside the layers of dough.
Make sure to shape each croissant so that the seam is tucked under. This will help the chocolate stay inside during baking, preventing any mess. To finish off the look and get that golden, glossy finish, you can brush the croissants with an egg wash before baking. The egg wash will give them a beautiful shine and make them even more tempting.
Baking the Croissants
Now comes the exciting part—baking the croissants! Preheat your oven to a high temperature (around 400°F or 200°C). The heat will help the dough puff up and form the iconic golden-brown layers.
Place the croissants on a baking sheet lined with parchment paper, ensuring there’s space between each one for them to expand. Bake for 15-20 minutes, or until they’re golden brown and have that irresistible flaky texture. As they bake, the chocolate inside will melt, creating a rich, gooey filling that will ooze out when you bite into it.
Enjoying Your Chocolate Croissants
Chocolate croissants are best enjoyed fresh out of the oven when they’re warm and the chocolate is still melted. The crispy exterior and gooey chocolate interior make for the perfect balance of textures. Serve them with a cup of coffee or hot chocolate for a decadent breakfast or treat.
If you have leftovers, don’t worry—they’re still delicious the next day. Store them in an airtight container to keep them fresh, or gently reheat them in the oven for a few minutes to restore their crispiness.
Variations on the Classic Chocolate Croissant
While traditional chocolate croissants use dark chocolate, feel free to experiment with different types of chocolate or fillings. For example, you can use milk chocolate or white chocolate for a sweeter flavor. For an extra twist, consider adding a bit of orange zest or a sprinkle of sea salt on top after baking. Some people even add a layer of almond paste inside the croissant for an additional depth of flavor.
Another variation involves filling the croissant with a mixture of chocolate and hazelnuts or even a combination of chocolate and caramel. The possibilities are endless when it comes to customizing this classic pastry.
Best Beverage Pairings for Breakfast Pastries
Coffee: The Perfect Companion for Breakfast Pastries
Coffee is the ultimate breakfast beverage, providing a much-needed energy boost to start your day. Its bold, rich flavor pairs beautifully with the sweet, flaky goodness of breakfast pastries. Whether you enjoy a classic black coffee or a fancy espresso-based drink, coffee enhances the flavor profile of your pastries and adds warmth and comfort to your morning routine.
Why Coffee and Pastries Are a Match Made in Heaven
Coffee and pastries share a deep, cultural connection, especially in European and American breakfast traditions. The robust bitterness of coffee complements the sweetness of pastries, creating a harmonious balance. The combination of a hot cup of coffee and a buttery pastry is an experience cherished by many around the world.
Pastries, with their sweet, delicate textures, offer a rich variety of flavors. When paired with coffee, the contrasting tastes of bitterness and sweetness complement each other perfectly, elevating both the pastry and the coffee itself. The slight bitterness of coffee helps balance the richness of pastries like croissants, muffins, and cinnamon rolls, creating a satisfying breakfast.
The Best Coffee for Breakfast Pastries
Choosing the right coffee for your breakfast pastries can make a significant difference in the overall experience. Here are a few types of coffee that pair particularly well with various pastries:
- Light Roast Coffee: This type of coffee has a bright, crisp flavor and works well with sweeter pastries. It complements the delicate notes in fruit-filled pastries like danishes, turnovers, and scones.
- Medium Roast Coffee: A medium roast offers a balanced flavor profile, which pairs nicely with a wide variety of breakfast pastries, including croissants and cinnamon rolls. Its smooth taste doesn’t overpower the sweetness of the pastry.
- Espresso: If you’re a fan of rich, concentrated flavors, espresso is a great choice. It pairs well with decadent pastries like chocolate croissants and éclairs. The intensity of espresso enhances the chocolatey richness of these pastries, providing a bold contrast.
- Cappuccino or Latte: For a more indulgent pairing, try a cappuccino or latte. The creamy milk froth softens the intensity of the coffee, making it a great match for buttery, flaky pastries like croissants or pain au chocolat.
How to Brew the Perfect Coffee for Your Pastries
To enjoy the best coffee experience with your breakfast pastries, the brewing method matters just as much as the coffee beans themselves. Here are a few tips for brewing the perfect cup:
- Grind Fresh: Always grind your coffee beans just before brewing. Freshly ground coffee ensures the most flavorful cup, with rich aromas that enhance the taste of your pastries.
- Use Filtered Water: Using clean, filtered water helps bring out the best in your coffee. Tap water can have impurities that affect the taste, so it’s worth investing in good water for your brew.
- Mind the Brewing Ratio: To achieve the ideal strength, follow the recommended coffee-to-water ratio for your brewing method. For drip coffee makers, a standard ratio is about 1 to 2 tablespoons of coffee per 6 ounces of water. Adjust the amount to suit your taste preferences.
- Temperature Matters: Brew your coffee at the right temperature, usually between 195°F to 205°F (90°C to 96°C), to ensure the best extraction of flavors.
Coffee Pairings for Specific Pastries
Each type of pastry pairs better with certain types of coffee, creating a perfect harmony of flavors. Here are some recommendations for pairing specific pastries with your morning coffee:
- Croissants: Pair a buttery croissant with a smooth medium roast coffee. The subtle flavor of the croissant complements the balanced taste of a medium roast, making it a timeless combination.
- Cinnamon Rolls: The sweetness and spice of cinnamon rolls go wonderfully with a light roast or a cappuccino. The mild bitterness of the coffee enhances the cinnamon flavor, creating a delightful contrast.
- Pain au Chocolat: Rich, chocolate-filled pastries like pain au chocolat are best enjoyed with espresso. The deep, bold flavor of espresso perfectly complements the sweetness and richness of the chocolate.
- Fruit Danishes: A fruit-filled danish pairs well with a light roast coffee. The fruity filling of the danish enhances the bright and crisp flavor of the coffee, making this pairing a refreshing morning option.
Coffee Culture Around the World
Coffee is more than just a drink; it’s an essential part of many cultures, especially when paired with pastries. In Italy, the classic breakfast involves a quick espresso and a pastry like a cornetto (the Italian version of a croissant). In France, café au lait and croissants are the go-to combination for a leisurely morning. Meanwhile, in the United States, coffee and cinnamon rolls or muffins are often staples in households and cafés alike.
No matter where you are, the ritual of enjoying coffee with breakfast pastries creates a comforting and satisfying start to the day. The global love for this pairing continues to thrive, and each culture has its own unique spin on the tradition.
Tea: A Classic Beverage for Pastry Pairing
Tea is a timeless beverage that has been enjoyed for centuries across the globe. Its soothing properties and variety of flavors make it a perfect pairing for a wide range of breakfast pastries. Whether you prefer a traditional black tea, a fragrant green tea, or an herbal infusion, tea complements pastries in ways that enhance the overall experience of your morning meal.
The Allure of Tea with Breakfast Pastries
Tea’s gentle flavors provide the ideal contrast to the richness and sweetness of many breakfast pastries. Unlike coffee, which can sometimes be intense and bold, tea offers a more subtle taste, allowing the flavors of your pastries to shine. From buttery croissants to fruit-filled danishes, the combination of tea and pastries creates a balanced, enjoyable experience for your taste buds.
Tea also brings a sense of relaxation and calm, making it the perfect choice for those who want a peaceful start to their day. The act of brewing and sipping a warm cup of tea allows you to slow down and savor your pastry, creating a mindful moment before diving into the day ahead.
Best Types of Tea for Breakfast Pastries
Selecting the right type of tea to pair with your breakfast pastries can enhance both the tea and the pastry. Here are some types of tea that work beautifully with different pastries:
- Black Tea: Black tea, with its robust and full-bodied flavor, pairs well with rich and sweet pastries. It complements the flaky texture of croissants, pain au chocolat, and other buttery pastries. The tannins in black tea also help cut through the richness of heavier pastries, making it an excellent choice for pastries like cinnamon rolls or scones.
- Green Tea: Green tea’s light and refreshing taste makes it an ideal pairing for delicate pastries, especially those that are fruit-filled or lighter in flavor. Green tea works well with pastries like fruit danishes, lemon scones, or muffins. Its subtle flavor profile enhances the sweetness of the fruit without overwhelming it.
- Herbal Tea: For a caffeine-free option, herbal teas offer a wide variety of flavors that pair wonderfully with pastries. Chamomile tea, with its calming and floral notes, pairs well with buttery scones or shortbread cookies. Peppermint tea, with its cool and refreshing taste, complements chocolate-filled pastries like pain au chocolat and éclairs.
- Chai Tea: For those who enjoy bold spices, chai tea offers a flavorful and aromatic pairing with pastries. The spiced notes of chai enhance pastries like apple turnovers, spiced muffins, or pumpkin scones, creating a warm and comforting flavor combination.
How to Brew the Perfect Cup of Tea
Brewing the perfect cup of tea is essential to ensuring the best flavor profile for your pastry pairing. Here are some tips to help you brew a delicious cup of tea:
- Use Fresh Water: For the best taste, always use fresh, cold water when brewing your tea. Water that has been sitting in your kettle for too long can affect the flavor of your tea.
- Temperature Matters: Different types of tea require different water temperatures for optimal brewing. Black tea is best brewed with water at a rolling boil (around 212°F or 100°C), while green tea should be brewed at a slightly lower temperature (around 175°F or 80°C) to avoid bitterness.
- Steep for the Right Amount of Time: Over-steeping tea can lead to bitterness, while under-steeping can result in a weak flavor. For black tea, steep for 3-5 minutes, while green tea should steep for 2-3 minutes. Herbal teas may require a longer steeping time of 5-7 minutes.
- Loose Leaf Tea vs. Tea Bags: Loose leaf tea tends to offer better quality and flavor than tea bags, as it contains larger, whole leaves. If you prefer a more robust flavor, try using loose leaf tea, and remember to use a tea infuser or strainer to keep the leaves from floating in your cup.
Tea Pairings for Specific Pastries
Each type of tea has its own unique characteristics, and pairing it with the right pastry can elevate your breakfast experience. Here are some tea-pastry pairings that work particularly well:
- Black Tea and Croissants: The strong flavor of black tea balances the buttery richness of a classic croissant. The warmth and depth of the tea enhance the flaky, melt-in-your-mouth texture of the pastry, creating the perfect breakfast combination.
- Green Tea and Fruit Pastries: Green tea’s subtle, grassy flavor pairs wonderfully with fruit-filled pastries like danishes, tarts, or fruit muffins. The tea’s lightness complements the sweetness of the fruit without overpowering it.
- Herbal Tea and Scones: A warm, comforting scone goes hand-in-hand with herbal teas like chamomile or peppermint. The floral notes of chamomile tea enhance the light, crumbly texture of the scone, while peppermint offers a refreshing contrast to spiced scones.
- Chai Tea and Spiced Pastries: The aromatic spices in chai tea pair beautifully with pastries that have warming flavors, like cinnamon rolls, gingerbread scones, or apple turnovers. The spices in the tea enhance the flavors in the pastry, creating a cozy and satisfying breakfast.
Exploring the Ritual of Tea and Pastries
The tradition of enjoying tea with pastries is deeply rooted in various cultures around the world. In England, the practice of afternoon tea is a cherished ritual that involves sipping tea while indulging in a variety of sweet and savory pastries. In Japan, green tea is often paired with delicate pastries during traditional tea ceremonies, creating a serene and mindful experience.
Whether you’re enjoying a cup of tea in the comfort of your home or experiencing a cultural tea tradition, the pairing of tea and pastries is an experience that goes beyond just the taste. It’s a moment to pause, savor, and enjoy the simple pleasures of life.
Fresh Juice: A Healthy and Refreshing Beverage for Pastry Pairing
Fresh juice is a vibrant and invigorating beverage that adds a burst of flavor and nutrients to your breakfast. Whether it’s a classic glass of orange juice or a creative blend of fruits and vegetables, fresh juice pairs beautifully with a variety of breakfast pastries. The refreshing taste and natural sweetness of fresh juice make it the perfect complement to rich, buttery pastries and can help balance their heavier textures. Here’s a deeper look into the benefits of fresh juice and the best pairings for your morning treats.
Why Fresh Juice is an Ideal Pairing with Pastries
Fresh juice, unlike its packaged counterparts, retains the full flavor and nutritional value of the fruits or vegetables used. Packed with vitamins, antioxidants, and natural sugars, fresh juice refreshes and revitalizes the body. It’s an excellent choice for balancing out the sweetness and richness of many breakfast pastries, offering a light and nutritious contrast to pastries like croissants, muffins, or tarts.
The natural acidity and zest of citrus juices, for example, work well to cut through the richness of buttery croissants and scones, offering a refreshing pause between bites. On the other hand, sweeter juices like apple or pear juice can complement the flavors of spiced or fruit-filled pastries. Fresh juice also provides a vibrant splash of color to your breakfast table, making it an appealing addition to any pastry spread.
Best Types of Fresh Juices for Breakfast Pastries
Different types of fresh juice can enhance the flavors of various breakfast pastries. Here are some popular juices and the best pastries they pair with:
- Orange Juice: A classic favorite, fresh orange juice offers a tangy and slightly sweet flavor that complements many breakfast pastries. It pairs beautifully with pastries like croissants, cinnamon rolls, or almond danishes. The citrusy notes of orange juice help cleanse the palate, making it a great choice for pastries that are rich in butter or sweetness.
- Apple Juice: Fresh apple juice provides a sweet yet mild flavor, making it a versatile pairing with a variety of pastries. It complements pastries like apple turnovers, scones, or muffins. Apple juice brings out the natural sweetness of fruit-filled pastries while balancing their richness.
- Grapefruit Juice: For those who prefer a more tart and tangy option, grapefruit juice offers a bold contrast to sweet pastries. Its sharp, citrus flavor works well with lighter pastries like lemon scones, yogurt muffins, or delicate fruit tarts. The acidity of grapefruit juice cuts through the pastry’s richness and refreshes the palate.
- Carrot and Ginger Juice: For a more adventurous twist, a combination of carrot and ginger juice adds a unique and spicy kick. This juice pairs beautifully with spiced pastries like gingerbread cookies, carrot muffins, or nut-filled pastries. The earthy sweetness of carrots and the warming spice of ginger create an exciting flavor combination.
- Berry Juices: Juices made from fresh berries—such as blueberry, raspberry, or strawberry juice—are naturally sweet and rich in antioxidants. These juices pair excellently with pastries that feature berries, such as berry tarts, Danish pastries, or fruit-filled muffins. The bright and bold flavors of berry juices complement the fruity fillings and elevate the overall flavor profile of the pastries.
How to Make the Best Fresh Juice
Making fresh juice at home is simple and rewarding. With a juicer or blender, you can easily create custom juice blends using a variety of fruits and vegetables. Here are some tips for making the best fresh juice:
- Use Fresh, High-Quality Ingredients: The key to great juice is using fresh, ripe produce. The better the quality of your fruits and vegetables, the better the flavor of your juice will be. Organic produce is often a great choice, as it is free from pesticides and other chemicals.
- Experiment with Combinations: Don’t be afraid to mix different fruits and vegetables to create unique flavors. For example, combine oranges and pineapples for a tropical twist, or blend apples and carrots for a sweet and earthy juice. Adding a hint of ginger or mint can also bring an extra layer of flavor.
- Strain or Blend: Depending on your preference, you can either strain your juice for a smooth, pulp-free beverage or leave it as-is for a thicker, fiber-rich juice. Blending fruits and vegetables retains all of the nutrients and fiber, while straining gives you a smoother texture.
- Serve Immediately: Fresh juice tastes best when it’s freshly made. While you can store juice in the fridge for up to 24 hours, the flavor and nutrient content are at their peak when it’s consumed right away.
How Fresh Juice Enhances the Breakfast Experience
Drinking fresh juice alongside your favorite breakfast pastries adds both health benefits and a burst of natural flavor to your morning. Fresh juice is hydrating and energizing, making it an excellent choice to kickstart your day. The natural sugars in fresh juice provide a quick energy boost without the added preservatives and artificial sweeteners found in store-bought juices. Additionally, fresh juice can contribute to your daily intake of essential vitamins and antioxidants, promoting overall health and well-being.
Moreover, pairing fresh juice with pastries creates a balanced breakfast experience. The sweetness of the juice helps offset the rich, buttery flavor of pastries, creating a harmonious contrast that makes every bite enjoyable. Whether you prefer something tangy, sweet, or a bit spicy, there’s a fresh juice that can elevate your morning meal.
Conclusion:
We’ve explored a delightful variety of breakfast pastries that are sure to elevate any morning. From flaky croissants and scones to sweet muffins, turnovers, and éclairs, there’s something for every taste. Each pastry brings its own unique texture and flavor, making it a perfect addition to your breakfast spread. Don’t forget the fresh juice and coffee to complete the experience!
We encourage you to try making these delicious pastries at home. Not only will you enjoy the satisfaction of creating them from scratch, but you’ll also impress your family and friends with your baking skills. Whether you’re a beginner or a seasoned baker, these recipes are easy to follow and rewarding to make.
We’d love to hear from you! Do you have any favorite pastry recipes or fun variations? Feel free to share your thoughts and creations in the comments below. Happy baking!