Looking for gluten-free cupcake recipes that don’t compromise on flavor? You’re in the right place! These 10 irresistible recipes are perfect for anyone craving a sweet treat. Whether you love classic vanilla, rich chocolate, or something more adventurous, these gluten-free cupcakes deliver on taste and texture. With easy-to-follow instructions, you’ll enjoy making light, fluffy cupcakes that everyone will love. Get ready to bake your new favorite gluten-free cupcakes!
Best Gluten-Free Cupcake Recipes to Try
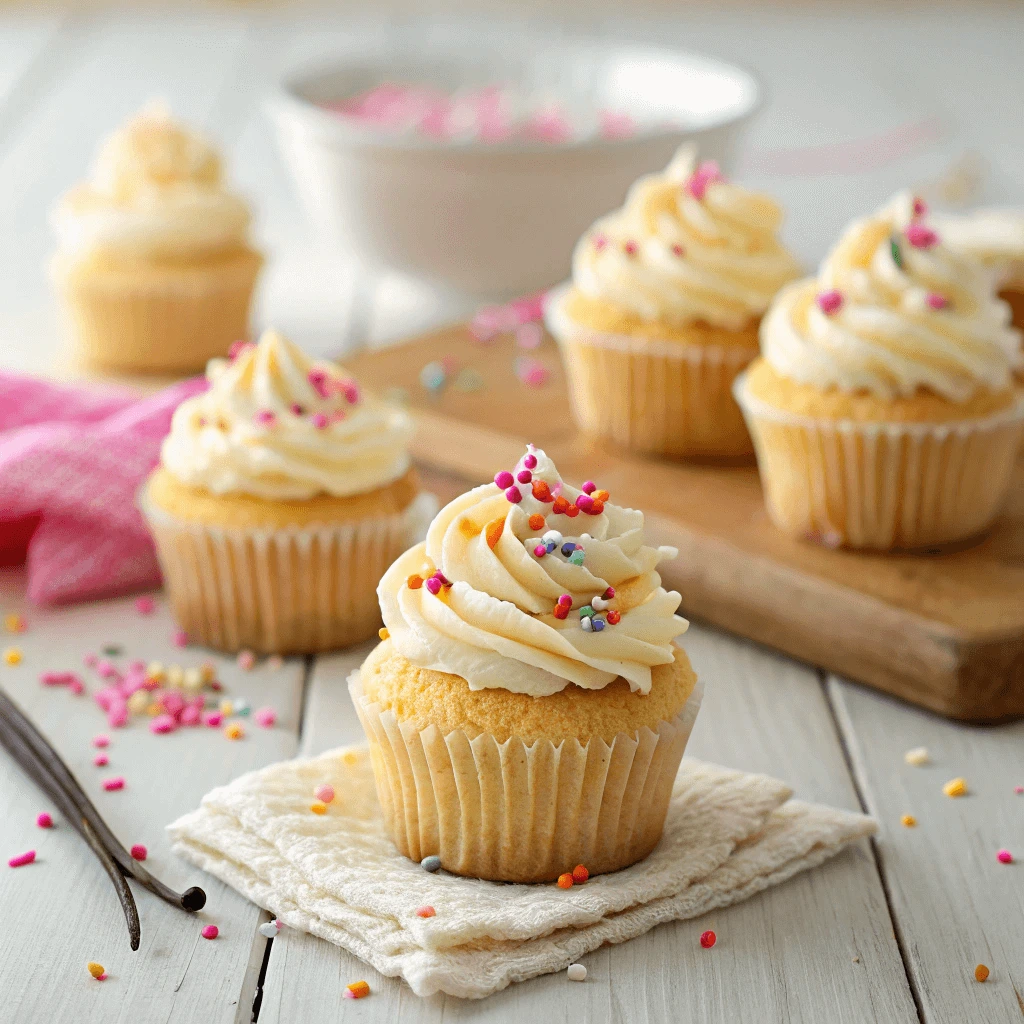
Fluffy Gluten-Free Vanilla Cupcakes
Creating fluffy gluten-free vanilla cupcakes requires the right combination of ingredients and technique. While gluten-free baking can seem challenging, with the correct approach, you can make cupcakes that are light, moist, and full of flavor. Here’s how to achieve that perfect texture.
The Key Ingredients for Fluffiness
To achieve a light and airy cupcake, you must start with the right ingredients. For gluten-free flour, choose a blend that contains a mixture of rice flour, potato starch, and tapioca flour. This combination helps create the structure and texture needed for fluffiness. Add a teaspoon of xanthan gum to act as a binder and provide the necessary elasticity.
You’ll also want to ensure you’re using a good amount of baking powder to help the cupcakes rise. A combination of butter and oil works well for moisture, keeping the cupcakes soft without them becoming too dense.
Mixing Tips for Lightness
The way you mix your batter plays a huge role in the final result. Start by combining your dry ingredients (gluten-free flour, baking powder, and xanthan gum) in a separate bowl. This ensures that everything is evenly distributed before adding to the wet ingredients.
When adding the wet ingredients, use a light hand. Overmixing the batter can cause the cupcakes to become dense. Mix until the ingredients are just combined and no flour streaks are visible.
Baking for the Perfect Rise
Preheat your oven to 350°F (175°C) and line your cupcake pan with paper liners. Fill each liner about two-thirds full to ensure the cupcakes rise properly without overflowing. Bake for 18 to 22 minutes, or until a toothpick inserted into the center comes out clean. This ensures your cupcakes are fully cooked but still moist.
To prevent over-baking, set a timer and start checking around 18 minutes. Every oven is different, so keep an eye on your cupcakes during the last few minutes of baking.
Cooling and Serving
Once your cupcakes are done, let them cool in the pan for about 5 minutes before transferring them to a wire rack. This prevents the cupcakes from becoming too soggy. Allow them to cool completely before frosting to ensure the frosting doesn’t melt.
For the best results, enjoy these vanilla cupcakes the same day they are baked. Their fluffy texture is most prominent when fresh!
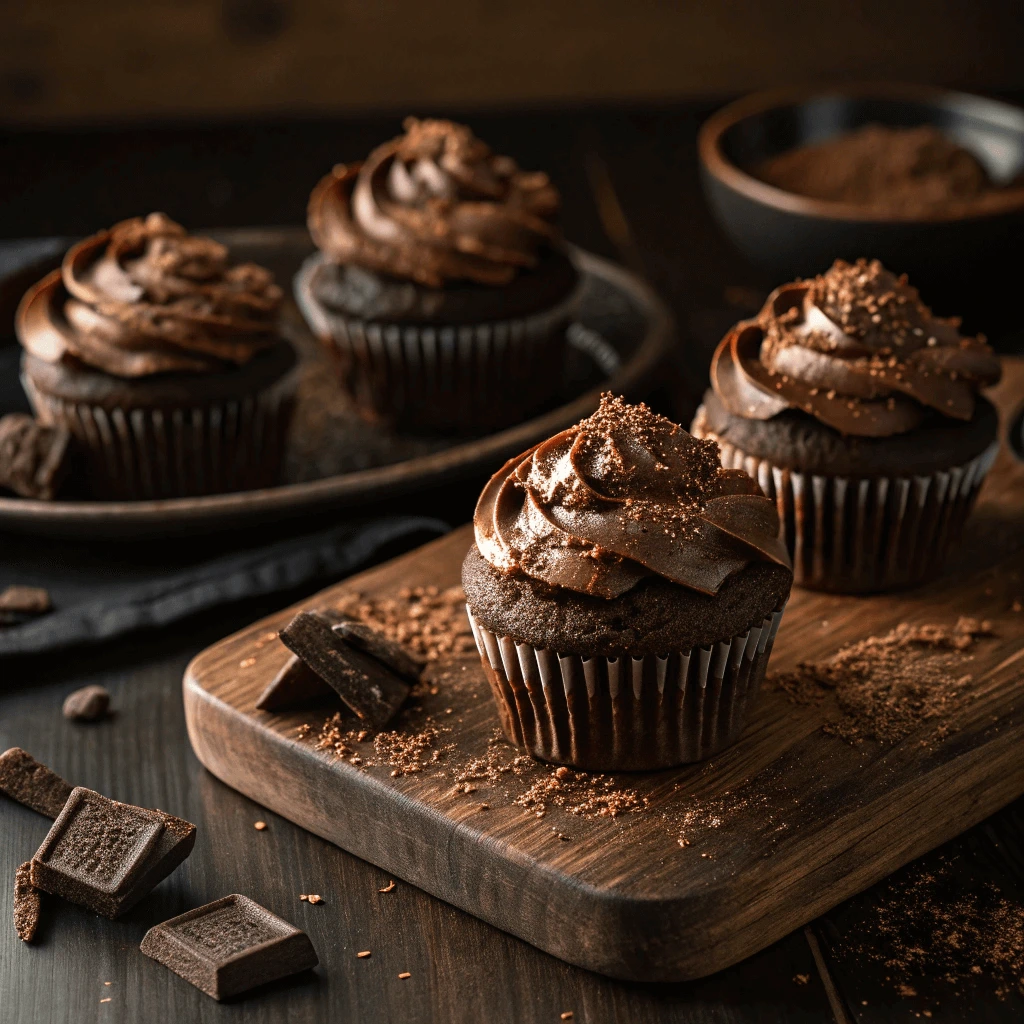
Rich Chocolate Gluten-Free Cupcakes
Rich chocolate gluten-free cupcakes are a decadent treat that can easily become your go-to dessert. These cupcakes are not only gluten-free, but they’re also moist, fudgy, and full of intense chocolate flavor. Follow these steps to create a batch of irresistible chocolate cupcakes that everyone will love.
Choosing the Right Chocolate
The key to creating the rich flavor in your chocolate cupcakes lies in the quality of the chocolate you use. Opt for unsweetened cocoa powder, as it will give your cupcakes a deep, rich flavor without too much sweetness. If you prefer a more intense chocolate experience, consider adding chopped chocolate or chocolate chips to the batter. Dark chocolate with at least 70% cocoa content is an excellent choice, as it melts beautifully and adds a luxurious touch to your cupcakes.
The Best Flour Blend for a Rich Texture
When it comes to gluten-free baking, choosing the right flour blend is essential for achieving a moist and dense cupcake that still rises well. A gluten-free all-purpose flour blend with a combination of rice flour, potato starch, and tapioca flour works well for chocolate cupcakes. This blend helps create a light texture while still providing the density needed for a rich, fudgy finish.
Consider adding almond flour to your gluten-free flour blend to increase moisture and flavor. Almond flour pairs beautifully with chocolate and helps enhance the rich taste. Just be sure to adjust the liquid content slightly, as almond flour can absorb more moisture than other gluten-free flours.
The Secret to Extra Moisture
To make your chocolate cupcakes extra moist, incorporate a combination of wet ingredients that balance flavor and texture. For the liquid base, use eggs, oil, and buttermilk or a non-dairy milk alternative like almond milk. The oil helps keep the cupcakes moist, while the eggs provide structure. Buttermilk or almond milk will add a slight tanginess that enhances the chocolate flavor and creates a tender crumb.
For an even richer taste, you can also add a bit of sour cream or Greek yogurt to the batter. These ingredients not only help with moisture but also contribute to a velvety texture. Be sure not to overmix the batter when adding the wet ingredients to preserve the fluffiness of your cupcakes.
Baking Tips for Rich Chocolate Cupcakes
Preheat your oven to 350°F (175°C) and line your cupcake tin with paper liners. Fill the cupcake liners two-thirds full with the batter to allow space for the cupcakes to rise while baking. Overfilling the cups can lead to overflowing batter and uneven results.
Bake the cupcakes for 18 to 22 minutes. Start checking around 18 minutes by inserting a toothpick into the center of a cupcake. If it comes out clean, the cupcakes are done. Be careful not to overbake, as chocolate cupcakes can dry out quickly. Let the cupcakes cool in the pan for 5 minutes before transferring them to a wire rack to cool completely.
Frosting and Toppings for Chocolate Cupcakes
The perfect chocolate frosting can take your rich chocolate cupcakes to the next level. For a creamy, chocolatey topping, try a rich buttercream made with cocoa powder or melted chocolate. To complement the cupcakes, add toppings like chocolate shavings, sprinkles, or even a drizzle of ganache.
For a lighter frosting option, try whipped cream or a dairy-free alternative like coconut whipped cream. The fluffiness of whipped cream contrasts beautifully with the dense and rich chocolate cupcakes.
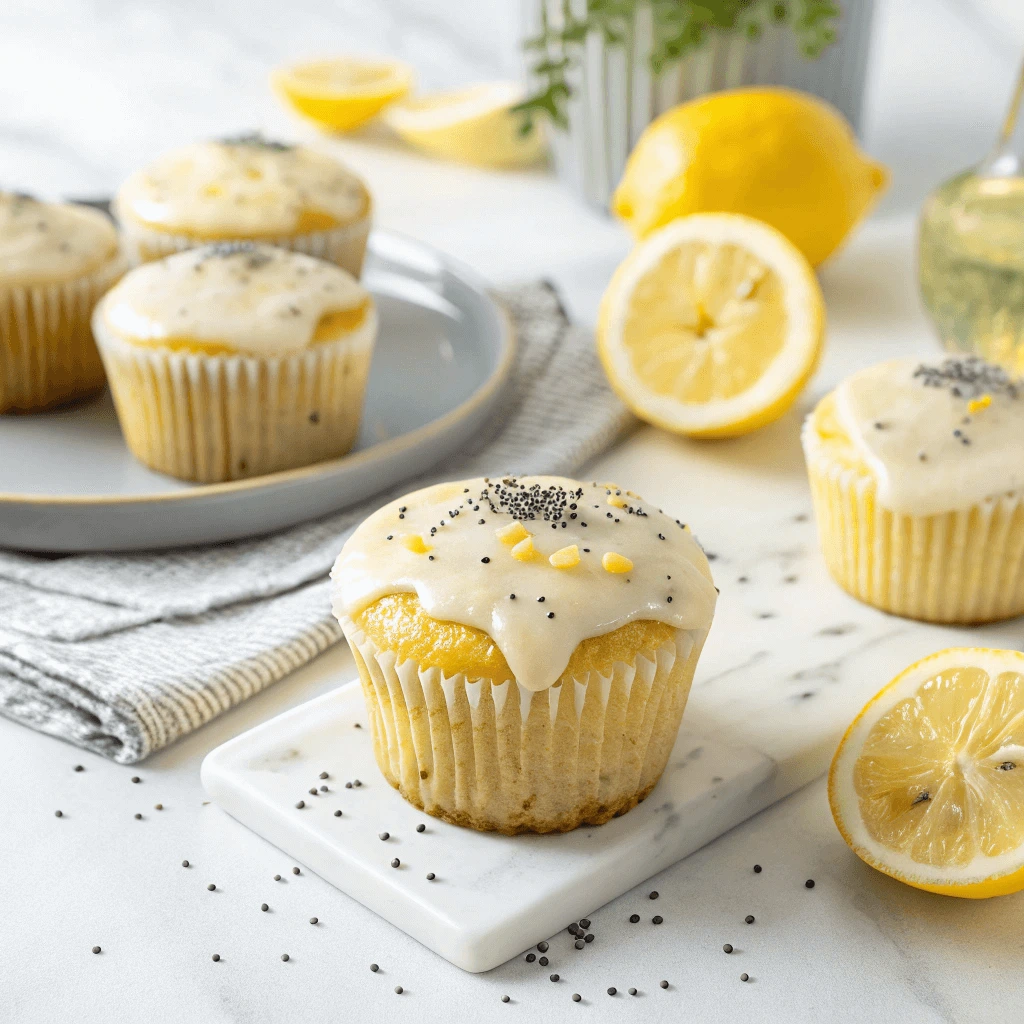
Moist Lemon Poppy Seed Cupcakes
Moist lemon poppy seed cupcakes combine the zing of fresh lemon with the subtle crunch of poppy seeds, creating a light, flavorful treat that will brighten your day. These cupcakes are gluten-free, yet they still boast a soft, fluffy texture. Follow these steps to make lemon poppy seed cupcakes that will quickly become a favorite.
Zesty Lemon for a Fresh Flavor
The key to creating the perfect lemon flavor in your cupcakes is to use fresh lemon juice and zest. Freshly grated lemon zest releases the essential oils that give the cupcakes their aromatic, citrusy fragrance. For the best flavor, always opt for organic lemons since their skins are free from wax coatings.
Use the juice from the lemon to add moisture and a slight tanginess to the batter. Don’t overdo it with the juice, as too much can affect the structure of the cupcake. The combination of zest and juice will give the cupcakes a perfect balance of tartness and sweetness.
The Best Gluten-Free Flour Blend for Lightness
To achieve a soft and fluffy texture in your gluten-free lemon poppy seed cupcakes, use a high-quality gluten-free flour blend. A good option is a blend that includes rice flour, potato starch, and a small amount of tapioca flour. This mix helps the cupcakes rise and gives them a light crumb while still holding the moistness from the added lemon juice.
If you’re aiming for extra tenderness and a slightly richer flavor, consider incorporating a small amount of almond flour into the blend. Almond flour is naturally moist and enhances the texture of the cupcakes, giving them a slightly nutty flavor that complements the citrus notes beautifully.
Incorporating Poppy Seeds for Texture
Poppy seeds are the star of this recipe, providing a delightful crunch in every bite. They also add a subtle earthy flavor that pairs perfectly with the zesty lemon. Be sure to fold the poppy seeds gently into the batter, as overmixing can cause the seeds to clump together and affect the texture.
To avoid any unwanted sogginess, make sure the poppy seeds are evenly distributed throughout the batter. This ensures that each cupcake gets an even amount of seeds, giving them that signature texture and flavor.
Moisture-Boosting Ingredients
Achieving the perfect moist texture is essential for these cupcakes. In addition to the lemon juice, a combination of wet ingredients will help keep your cupcakes soft and tender. A neutral oil like vegetable oil or coconut oil adds richness to the batter without overpowering the lemon flavor. You can also use unsweetened applesauce for added moisture and a slight hint of sweetness.
Eggs are another important ingredient, providing structure while keeping the cupcakes light. If you are vegan or have egg allergies, flax eggs or chia eggs are good substitutes that can replicate the texture of real eggs in gluten-free baking.
Baking Tips for Moist Cupcakes
To ensure your cupcakes bake evenly and stay moist, preheat your oven to 350°F (175°C) and line your cupcake tin with paper liners. Fill the cupcake liners about two-thirds full with batter, as this allows room for the cupcakes to rise without spilling over.
Bake the cupcakes for about 18 to 22 minutes. Start checking at the 18-minute mark by inserting a toothpick into the center of a cupcake. If it comes out clean or with a few moist crumbs, they’re done. Be careful not to overbake, as this can lead to dry cupcakes. Once baked, allow the cupcakes to cool in the pan for 5 minutes before transferring them to a wire rack to cool completely.
Icing and Toppings for Lemon Poppy Seed Cupcakes
To complement the citrus flavor of the cupcakes, a light lemon glaze or cream cheese frosting works wonderfully. For a simple glaze, mix powdered sugar with lemon juice until you achieve a smooth, pourable consistency. Drizzle the glaze over the cooled cupcakes for a sweet and tangy finish.
If you prefer a richer topping, try making a cream cheese frosting with a hint of lemon juice for extra flavor. You can add poppy seeds on top for a decorative touch and an extra crunch. Garnish with lemon zest or thin lemon slices for a fresh, eye-catching finish.
Essential Ingredients for Perfect Gluten-Free Cupcakes
Gluten-Free Flour Blends
When baking gluten-free cupcakes, choosing the right flour blend plays a crucial role in ensuring a light, airy texture and great flavor. Gluten-free flours behave differently from wheat-based flour, and their characteristics vary depending on the blend you choose. Here’s what you need to know to select the best gluten-free flour blend for your cupcakes.
What Are Gluten-Free Flour Blends?
A gluten-free flour blend is typically a combination of several flours and starches designed to mimic the properties of wheat flour. The right blend helps create a texture that mimics the fluffiness of traditional baked goods. It also balances moisture retention and structure, which is essential for gluten-free baking.
Some of the most common ingredients in these blends include rice flour, potato starch, and tapioca flour. These ingredients provide a good base for many gluten-free recipes, especially cupcakes, as they help create a smooth batter and tender crumb.
Types of Gluten-Free Flour Blends
There are two primary types of gluten-free flour blends: store-bought and homemade. Each has its advantages, depending on your preferences and dietary needs.
Store-Bought Blends
Store-bought gluten-free flour blends are convenient and pre-mixed to provide consistent results. They often contain a variety of ingredients such as rice flour, sorghum flour, and cornstarch. Some blends also include xanthan gum or guar gum, which act as binding agents to improve the texture and help hold the batter together.
Popular brands like King Arthur Flour, Bob’s Red Mill, and Cup4Cup offer gluten-free flour blends that are designed for all-purpose use. These blends are versatile and work well in most gluten-free recipes, including cupcakes. They often have a neutral flavor and texture, making them perfect for cupcakes where you don’t want the flour to overpower the taste.
Homemade Blends
If you prefer more control over your ingredients or want to avoid certain additives, you can create your own custom gluten-free flour blend. A basic homemade blend usually consists of a combination of rice flour, a starch (such as potato or tapioca starch), and a binder (like xanthan gum or guar gum).
For example, a simple homemade blend could be made using:
- 40% rice flour
- 30% potato starch
- 30% tapioca flour
This combination offers a good balance of texture and moisture for cupcakes, though you may need to adjust the proportions depending on the specific recipe.
How to Choose the Right Blend for Your Cupcakes
When selecting a gluten-free flour blend for cupcakes, consider both the texture and flavor. You want a blend that creates a soft, fluffy crumb while providing the structure necessary to support frosting and other toppings. Here are a few things to consider:
For a Soft, Fluffy Texture
Look for a blend with a higher ratio of starches (such as potato starch or tapioca starch), as they provide tenderness and moisture to the batter. These blends will help create a light crumb, ideal for cupcakes that should melt in your mouth. Some blends designed for cakes or cupcakes may even include a bit of almond flour or coconut flour to add richness.
For a Richer Flavor
To enhance the flavor of your cupcakes, choose blends that include a variety of whole grain flours, such as sorghum flour, oat flour, or almond flour. These flours add a nutty or slightly sweet flavor, which works well with flavors like chocolate, vanilla, or citrus.
Gluten-Free Baking Additives
Many gluten-free flour blends contain additional ingredients, such as xanthan gum, guar gum, or psyllium husk, to mimic the elasticity of gluten. These ingredients improve the structure of your cupcakes and help bind the ingredients together. If your blend doesn’t contain these additives, you can usually add them separately. Typically, 1/4 to 1/2 teaspoon of xanthan gum per cup of flour is sufficient for most cupcake recipes.
Tips for Working with Gluten-Free Flour Blends
While gluten-free flour blends help create great cupcakes, it’s important to handle them properly to avoid dense or dry results. Here are a few tips:
1. Don’t Overmix the Batter
Gluten-free batters can become tough if overmixed. Mix the wet and dry ingredients until just combined, and then stop. Overmixing can lead to cupcakes that are dense and heavy.
2. Add Moisture
Because gluten-free flours tend to absorb more liquid than wheat flour, you may need to add a bit more moisture to the batter. Use eggs, milk, or even a non-dairy milk alternative to help create a smooth, slightly thick batter. Adding a tablespoon or two of apple cider vinegar can also help activate the baking soda and improve the texture.
3. Let the Batter Rest
Allow the batter to rest for 10-15 minutes before baking. This gives the gluten-free flour time to absorb the liquid, helping improve the texture of the cupcakes and preventing them from being too crumbly.
4. Use a Light Hand When Filling Cupcake Liners
When filling your cupcake liners, aim for about two-thirds full. Gluten-free batters can be a little thicker than traditional batters, so filling the liners too much can cause them to rise unevenly or spill over.
Gluten-Free Flour Blends: The Bottom Line
Choosing the right gluten-free flour blend is essential for making the perfect cupcakes. Whether you opt for a store-bought blend or create your own custom mix, the key is balancing the right ingredients to ensure a tender, fluffy texture. Experiment with different combinations to find the perfect blend that works for your taste and dietary needs. With the right flour blend in hand, your gluten-free cupcakes will turn out soft, delicious, and full of flavor every time!
Binding Agents like Xanthan Gum
When it comes to gluten-free baking, achieving the right texture and structure can be a challenge. Since gluten is the protein that provides elasticity and helps bind ingredients together in traditional baked goods, gluten-free recipes require substitutes. One of the most common ingredients used to replicate this binding function is xanthan gum. Understanding how and why xanthan gum works in gluten-free cupcakes can help you achieve better results every time.
What is Xanthan Gum?
Xanthan gum is a natural thickening and stabilizing agent made by fermenting sugars with the bacterium Xanthomonas campestris. It forms a gel-like consistency when combined with water, which helps mimic the structure that gluten usually provides in baked goods. This makes xanthan gum an essential ingredient for many gluten-free recipes, including cupcakes, cookies, and breads.
Xanthan gum’s primary role in gluten-free baking is to help provide elasticity and structure, creating the texture you expect in traditional cupcakes. Without it, gluten-free baked goods tend to crumble or fall apart more easily because they lack the gluten network that holds everything together.
How Does Xanthan Gum Work in Gluten-Free Cupcakes?
In cupcakes, xanthan gum performs a few key functions:
1. Adds Structure
Xanthan gum binds the ingredients in the batter, providing the structure that gluten would normally give. This helps the cupcakes rise evenly and hold their shape during baking, preventing them from sinking or becoming overly dense.
2. Retains Moisture
Xanthan gum also acts as a moisture-retainer, helping to keep the cupcakes soft and tender. Gluten-free flours, like rice flour and corn flour, tend to absorb moisture more quickly than wheat flour. Xanthan gum helps to balance this by preventing the batter from drying out during the baking process.
3. Improves Texture
By adding elasticity to the batter, xanthan gum helps create a texture that mimics traditional cupcakes. It gives the batter a slightly stretchy quality, which allows the cupcakes to expand as they bake without becoming too tough or crumbly.
How Much Xanthan Gum Should You Use?
When using xanthan gum in gluten-free cupcake recipes, it’s important to use the right amount. Too little xanthan gum can result in cupcakes that are too crumbly or dry. Too much xanthan gum can make the cupcakes chewy or gummy.
As a general rule, for every cup of gluten-free flour blend, you should add between 1/4 to 1/2 teaspoon of xanthan gum. However, the exact amount can vary depending on the flour blend you’re using. If your flour blend already contains xanthan gum or other binders like guar gum, you may not need to add additional xanthan gum. Always check your recipe or the instructions on the flour blend package.
Alternatives to Xanthan Gum
While xanthan gum is widely used, it’s not the only binding agent available for gluten-free baking. If you’re looking for alternatives due to allergies or dietary preferences, here are a few options:
1. Guar Gum
Guar gum is a popular substitute for xanthan gum. It is made from the seeds of the guar plant and works similarly to xanthan gum, helping to bind ingredients and improve the texture of gluten-free cupcakes. Use guar gum in the same proportions as xanthan gum (1/4 to 1/2 teaspoon per cup of flour).
2. Psyllium Husk
Psyllium husk is another excellent alternative. It’s made from the seeds of the plant Plantago ovata and has strong water-absorbing properties. It helps to retain moisture in gluten-free cupcakes and also contributes to the rise and elasticity. Use about 1 tablespoon of psyllium husk per cup of flour for optimal results.
3. Chia Seeds or Flax Seeds
Ground chia seeds or flaxseeds mixed with water can also serve as a binding agent. When combined with liquid, they form a gel-like consistency similar to xanthan gum. These options are particularly great for those who want a natural, plant-based alternative. Mix 1 tablespoon of ground chia or flaxseed with 2-3 tablespoons of water and let it sit for a few minutes to form a gel before adding it to the batter.
Tips for Using Xanthan Gum Effectively
Using xanthan gum successfully in gluten-free baking requires a bit of trial and error. Here are a few tips to ensure the best results:
1. Mix Xanthan Gum with Dry Ingredients
Before adding xanthan gum to the batter, always mix it with the dry ingredients. This helps to distribute it evenly throughout the flour, which prevents clumping and ensures a smooth batter.
2. Use It in Combination with Other Binders
In many recipes, using xanthan gum in combination with other binding agents like guar gum or psyllium husk can produce even better results. These binders complement each other and create a stronger, more stable structure in the cupcakes.
3. Avoid Overuse
As mentioned earlier, too much xanthan gum can lead to a gummy texture, so be mindful of the amount you’re using. If you’re experimenting with a new recipe, start with the lower end of the recommended range and increase if necessary.
Dairy-Free and Egg-Free Alternatives
When baking gluten-free cupcakes, many people also need to consider additional dietary restrictions, such as avoiding dairy and eggs. Whether you’re baking for someone with allergies, following a vegan diet, or simply looking for healthier options, it’s crucial to understand how to effectively replace dairy and eggs without compromising the texture or taste of your cupcakes. In this section, we’ll explore several dairy-free and egg-free alternatives to help you create cupcakes that are suitable for various dietary needs.
Dairy-Free Milk Substitutes
Traditional cupcake recipes often rely on cow’s milk for moisture and flavor. However, dairy-free alternatives can provide the same benefits without the lactose and animal products. Here are some popular options:
1. Almond Milk
Almond milk is one of the most commonly used dairy-free milk substitutes. It has a mild flavor that works well in cupcakes and can be used in place of cow’s milk on a 1:1 ratio. You can also choose unsweetened almond milk to keep the sugar content lower. Almond milk adds moisture without overpowering the taste of the cupcakes.
2. Coconut Milk
Coconut milk is another excellent dairy-free option that imparts a slightly tropical flavor to cupcakes. It’s thicker than almond milk, so it adds extra richness and moisture to the batter. If you’re using canned coconut milk, be sure to shake it well to incorporate the cream, which will provide a smoother texture in the final product.
3. Oat Milk
Oat milk has a creamy consistency and a slightly sweet taste, making it a fantastic dairy-free milk substitute for baking. It’s also a great option for those who are nut-free, as some people have nut allergies. Oat milk creates moist cupcakes and complements both fruity and chocolate-flavored cupcakes beautifully.
Egg Replacements for Vegan Cupcakes
Eggs serve many roles in traditional baking, from providing structure to helping the batter rise. When baking gluten-free cupcakes without eggs, it’s important to select substitutes that mimic these functions. Fortunately, there are several egg alternatives you can use, each with its unique properties.
1. Flaxseed Meal
Flaxseed meal mixed with water is one of the most common egg replacements in vegan baking. When combined, the flaxseed absorbs the water and forms a gel-like consistency similar to the texture of eggs. This works particularly well for cupcakes, providing moisture and binding the ingredients together. To replace one egg, mix 1 tablespoon of ground flaxseed with 3 tablespoons of water and let it sit for a few minutes until it thickens.
2. Chia Seeds
Chia seeds are another fantastic option for egg replacement. Like flaxseeds, chia seeds form a gel when mixed with water, helping to bind cupcake ingredients together. Use the same ratio as flaxseed meal (1 tablespoon of chia seeds and 3 tablespoons of water) to replace one egg. Chia seeds may add a slight crunch to your cupcakes, but they won’t affect the flavor much.
3. Applesauce
Applesauce is a natural egg substitute that works particularly well in recipes requiring moisture. It also adds a slight sweetness to the cupcakes, making it ideal for fruit-flavored cupcakes like apple cinnamon or berry varieties. Use 1/4 cup of unsweetened applesauce to replace one egg in most cupcake recipes.
4. Silken Tofu
Silken tofu is a versatile egg replacer that provides structure and moisture to cupcakes. It’s smooth and creamy, which helps bind the ingredients while ensuring the batter stays fluffy and tender. Blend 1/4 cup of silken tofu to replace one egg in your recipe. This option is particularly useful for rich, dense cupcake recipes like chocolate cupcakes.
Tips for Baking Dairy-Free and Egg-Free Cupcakes
Substituting dairy and eggs in your cupcakes requires a bit of experimentation, but with the right ingredients, you can still achieve a delicious and satisfying result. Here are a few tips to help you bake the perfect dairy-free and egg-free cupcakes:
1. Adjust the Texture and Moisture
Because dairy and eggs play an important role in the texture of cupcakes, you may need to adjust the amount of liquid or dry ingredients. For example, adding a bit more liquid when using egg substitutes like flaxseed or chia can help maintain the moisture and prevent the cupcakes from being too dry.
2. Use the Right Bindings
Eggs provide structure in traditional baking, so be sure to use effective binding agents when going egg-free. Options like flaxseeds, chia seeds, or silken tofu help to hold the batter together and provide that fluffy texture we love in cupcakes.
3. Choose Non-Dairy Butter or Oils
Dairy-free butter substitutes, such as vegan butter or coconut oil, are great options for replacing butter in cupcakes. Make sure to choose a dairy-free product that complements the flavor of your cupcakes. Coconut oil adds a light coconut flavor, while vegan butter mimics the taste of traditional butter, making it a neutral choice for most recipes
How to Achieve the Perfect Texture for Gluten-Free Cupcakes
Use the Right Gluten-Free Flour
Choosing the right gluten-free flour is one of the most important factors when baking gluten-free cupcakes. Unlike wheat flour, which contains gluten that helps provide structure and elasticity, gluten-free flours vary in texture, flavor, and binding properties. Using the right flour or flour blend ensures your cupcakes turn out light, moist, and delicious. In this section, we’ll explore the best gluten-free flours to use and how to combine them for the perfect cupcake.
Types of Gluten-Free Flours to Consider
Not all gluten-free flours are created equal. Some flours are better for certain recipes due to their unique properties. Here’s a breakdown of some of the best gluten-free flours to consider for your cupcake recipes:
1. Almond Flour
Almond flour is made from finely ground almonds and adds a rich, nutty flavor to cupcakes. It also contributes to a tender crumb due to its high-fat content. When using almond flour, it’s essential to note that it doesn’t provide the same structure as wheat flour, so it’s best used in combination with other gluten-free flours. Almond flour works particularly well for gluten-free cakes and cupcakes with a denser texture.
2. Rice Flour
Rice flour is one of the most common and versatile gluten-free flours. It has a neutral flavor and provides a smooth texture to baked goods. Rice flour works well on its own in certain recipes but often benefits from being combined with other flours. It’s an excellent base flour for cupcakes and contributes to a fine, light crumb.
3. Sorghum Flour
Sorghum flour has a mild, slightly sweet flavor that enhances the taste of gluten-free cupcakes. It’s higher in protein and fiber than rice flour and helps to give structure and stability to baked goods. Sorghum flour is particularly useful when you’re making cupcakes with a lighter texture, like vanilla or lemon-flavored ones. When used in a blend, it helps balance the other flours and gives your cupcakes a more authentic texture.
4. Tapioca Flour
Tapioca flour, or tapioca starch, is often used as a thickening agent in gluten-free recipes. It’s smooth and slightly chewy, which gives cupcakes a nice moistness and helps improve the texture. Tapioca flour is usually used in combination with other gluten-free flours to enhance elasticity and prevent crumbliness. It’s especially helpful in gluten-free cupcakes made with almond flour or rice flour.
Gluten-Free Flour Blends
Using a pre-mixed gluten-free flour blend is a great way to take the guesswork out of baking. These blends combine several gluten-free flours to mimic the texture and taste of traditional wheat flour. Many commercially available gluten-free flour blends contain a combination of rice flour, potato starch, and tapioca flour, along with additional ingredients like xanthan gum or guar gum to improve texture and binding.
1. Store-Bought Blends
If you prefer convenience, you can use a store-bought gluten-free flour blend. These blends are specifically formulated for baking and often include a variety of flours to improve texture and structure. Some popular gluten-free flour blends to try are King Arthur Gluten-Free All-Purpose Flour and Bob’s Red Mill Gluten-Free All-Purpose Flour. These blends are designed to be used as a 1:1 replacement for wheat flour in most recipes, including cupcakes.
2. Homemade Flour Blends
If you want more control over the flours you use, consider making your own gluten-free flour blend. A basic blend typically includes a combination of rice flour, potato starch, and tapioca flour. Adding a protein-rich flour like sorghum or chickpea flour can provide extra structure and stability to your cupcakes. Experiment with different proportions to see what works best for your cupcakes. The key is to find the right balance between flours that provides both structure and tenderness.
How to Mix Gluten-Free Flour for Best Results
When baking gluten-free cupcakes, it’s important to mix your flours properly to ensure even distribution. Simply combining all the flours in one bowl and stirring them together won’t always yield the best results. To ensure your gluten-free cupcakes are light and fluffy, consider the following tips:
1. Sift the Flours
Sifting your gluten-free flour helps to aerate the mixture and prevents clumping. This results in a lighter, more even batter that can lead to a fluffier texture in your cupcakes. Sifting also ensures that the various types of flour are evenly incorporated, providing a uniform texture.
2. Add Bindings to Your Flour Mix
Because gluten-free flour lacks the natural binding ability of gluten, you’ll need to use binders like xanthan gum or guar gum. These ingredients help to hold the cupcake batter together and provide structure. You can add about 1/4 teaspoon of xanthan gum per cup of gluten-free flour to prevent the cupcakes from crumbling. Be cautious not to overdo it, as too much gum can make the texture too gummy or rubbery.
3. Don’t Overmix the Batter
Mixing your batter for too long can lead to dense, tough cupcakes. Since gluten is absent in gluten-free flours, you don’t need to mix the batter as long as you would with wheat flour. Stir the ingredients until they’re just combined and smooth. Overmixing can cause the cupcakes to become dense or too crumbly.
Baking Soda and Baking Powder
When it comes to baking gluten-free cupcakes, understanding the difference between baking soda and baking powder is crucial. These leavening agents play a vital role in the texture, rise, and fluffiness of your cupcakes. However, baking soda and baking powder work in different ways and may need to be used differently depending on the recipe. In this section, we’ll break down the functions of these ingredients and how to use them effectively in gluten-free baking.
The Role of Baking Soda
Baking soda, also known as sodium bicarbonate, is a base that requires an acidic ingredient to activate it. Once activated, baking soda releases carbon dioxide, which creates bubbles and causes the batter to rise. For gluten-free cupcakes, baking soda can help achieve a lighter and fluffier texture.
When to Use Baking Soda
Baking soda is typically used when the recipe contains an acidic ingredient, such as lemon juice, vinegar, yogurt, or buttermilk. The acid reacts with the baking soda to release gas, which makes the batter rise. If your recipe calls for an acidic ingredient, baking soda is the perfect leavening agent to use.
How Much Baking Soda to Use
Baking soda is very potent, and you don’t need much. For every cup of flour in your recipe, you’ll usually need about 1/4 to 1/2 teaspoon of baking soda. Adding too much baking soda can cause a bitter taste in your cupcakes, so it’s important to measure it carefully.
The Role of Baking Powder
Baking powder is a combination of baking soda, an acid (usually cream of tartar), and a starch (often cornstarch). Unlike baking soda, baking powder doesn’t require an external acidic ingredient to activate it because it already contains acid. Baking powder is a double-acting agent, meaning it releases gas in two stages: once when mixed with wet ingredients, and again when heated during baking.
When to Use Baking Powder
Baking powder is used in recipes that do not have acidic ingredients. It provides the necessary rise for cupcakes without the need for extra acid. If you’re making gluten-free cupcakes that don’t contain lemon juice, vinegar, or yogurt, baking powder is a great choice.
How Much Baking Powder to Use
When using baking powder in gluten-free cupcake recipes, a general rule of thumb is 1 to 1 1/2 teaspoons per cup of flour. Double-check your recipe’s measurements, as using too much baking powder can make your cupcakes taste overly bitter or metallic. It’s also important to note that older baking powder can lose its potency, so check the expiration date before using it in your recipe.
Baking Soda vs. Baking Powder: What’s the Difference?
While both baking soda and baking powder are used to make your cupcakes rise, they work in distinct ways. Understanding these differences is key to achieving the best results in your gluten-free baking.
- Activation: Baking soda requires an acidic ingredient to activate it, while baking powder contains its own acid and activates in two stages: when combined with liquid and when heated in the oven.
- Strength: Baking soda is stronger and more concentrated than baking powder. Because of its potency, you typically use less baking soda in recipes.
- Recipe Usage: If your recipe contains acidic ingredients like lemon juice or buttermilk, baking soda is often the better choice. However, if your recipe lacks acidity, then baking powder is more suitable.
How to Substitute Baking Soda and Baking Powder
In some cases, you may need to substitute one leavening agent for another in your gluten-free cupcake recipe. However, because they serve different functions, this substitution isn’t always straightforward. If you don’t have one on hand, here are a few tips:
- Substitute Baking Soda with Baking Powder: If you run out of baking soda, you can substitute it with baking powder. Use 3 teaspoons of baking powder for every 1 teaspoon of baking soda. Keep in mind that this may alter the flavor and texture slightly, as baking powder contains additional ingredients like cornstarch.
- Substitute Baking Powder with Baking Soda: If your recipe requires baking powder and you only have baking soda, you can try using baking soda with an acidic ingredient (such as vinegar or lemon juice) to make it work. For every teaspoon of baking powder, use 1/4 teaspoon of baking soda and add 1/2 teaspoon of acid to the wet ingredients.
Tips for Using Baking Soda and Baking Powder in Gluten-Free Cupcakes
- Measure Carefully: Because both baking soda and baking powder are powerful leavening agents, it’s important to measure them accurately. Too much can lead to overly airy or bitter cupcakes, while too little can result in dense or flat cupcakes.
- Freshness Matters: Ensure that your baking soda and baking powder are fresh. Both lose their potency over time, which can affect the texture and rise of your cupcakes.
- Combine with the Right Ingredients: If you’re using baking soda, pair it with an acidic ingredient in your batter. For baking powder, make sure your recipe is free from acidic ingredients to allow the powder to work effectively.
Mixing Techniques for Perfect Gluten-Free Cupcakes
When it comes to gluten-free baking, the mixing process is just as important as the ingredients you use. The right mixing technique ensures that your gluten-free cupcakes have the desired texture—light, fluffy, and tender. In this section, we will explore essential mixing techniques to perfect your gluten-free cupcakes and help you avoid common mistakes like overmixing or undermixing.
1. Sift the Dry Ingredients
Sifting is an often-overlooked step, but it plays a significant role in the final texture of your cupcakes. Gluten-free flours can be dense, so sifting helps ensure that the dry ingredients—such as gluten-free flour, baking powder, and any other dry additions—are well combined and aerated. This step helps your batter achieve a lighter, fluffier texture, as sifting also breaks up any lumps in the flour.
Tip: Always sift your dry ingredients before mixing them with wet ingredients to prevent clumping and ensure even distribution.
2. Combine Wet Ingredients Separately
Before adding the wet ingredients to the dry ingredients, it’s important to combine them in a separate bowl. This allows for thorough incorporation of ingredients like eggs, milk, vanilla, and oil. Whisking the wet ingredients together helps break up the eggs and ensures that the oil or butter is evenly distributed throughout the batter. This step prevents uneven pockets of moisture and fat in the batter, leading to more uniform cupcakes.
Tip: Whisk wet ingredients until smooth and fully blended before incorporating them with the dry ingredients.
3. Don’t Overmix the Batter
Overmixing is one of the most common mistakes in cupcake baking, and it’s even more crucial to avoid in gluten-free baking. Gluten-free batters are different from those made with wheat flour, as they don’t benefit from gluten formation. Overmixing can lead to dense, gummy cupcakes instead of light and fluffy ones. Stir the batter just until the wet and dry ingredients are combined, being mindful not to beat it too much.
Tip: Mix until just incorporated. The batter should still look slightly lumpy; this is a good sign.
4. Fold Ingredients Gently
If you need to add ingredients such as chocolate chips, fruit, or nuts, always fold them into the batter gently. The folding technique helps preserve the air you’ve incorporated into the batter, maintaining the light texture of the cupcakes. This technique also ensures that the added ingredients are evenly distributed without overworking the batter. Use a spatula to fold the ingredients in, turning the bowl while gently scooping and folding.
Tip: Use a light hand when folding in add-ins to preserve the airiness of your batter.
5. Use Room Temperature Ingredients
When mixing your cupcake batter, using room temperature ingredients is key to achieving a smooth, cohesive batter. Cold ingredients can cause the batter to seize up, resulting in lumps or uneven mixing. Room temperature eggs, butter, and milk emulsify more easily, helping create a smoother batter that mixes quickly and evenly.
Tip: Allow butter and eggs to sit out for about 15-30 minutes before mixing to bring them to room temperature.
6. Be Mindful of Wet-to-Dry Ingredient Ratios
Gluten-free cupcake recipes may require adjustments in the wet-to-dry ratio, as gluten-free flours behave differently than wheat flour. Generally, gluten-free flour tends to absorb more liquid. Ensure your wet ingredients are enough to create a batter that is moist but not too runny. If the batter appears too thick, a small amount of milk or water can help thin it out to the right consistency.
Tip: Aim for a thick but spoonable batter that will hold its shape when scooped but not be too stiff.
7. Test the Batter Consistency
Once you’ve mixed your batter, it’s a good idea to test its consistency before baking. The batter should be thick enough to hold its shape but still spread easily in the cupcake liners. If the batter is too runny, it might result in flat cupcakes. If it’s too thick, your cupcakes could turn out dense. You can adjust the batter consistency by adding more liquid if necessary or more flour if the batter seems too thin.
Tip: The batter should fall off the spoon in a thick ribbon, not run off too quickly.
Flavor Variations for Gluten-Free Cupcakes
Almond Flour Cupcakes for a Nutty Twist
Almond flour is a fantastic gluten-free alternative that imparts a slightly nutty flavor and moist texture to cupcakes. Using almond flour in your cupcake recipes is a great way to introduce extra flavor while maintaining a light, airy crumb. These cupcakes are perfect for those looking to enjoy a healthier treat without sacrificing taste. Whether you prefer a simple almond flour base or want to pair it with other flavors, almond flour cupcakes are versatile and delicious.
1. Why Choose Almond Flour?
Almond flour, made from finely ground almonds, is a popular choice in gluten-free and low-carb baking. Unlike regular flour, almond flour is naturally grain-free, making it a suitable option for those who have celiac disease or gluten sensitivities. It also adds a slightly sweet and nutty flavor to baked goods, which pairs wonderfully with various flavor combinations.
Besides its flavor, almond flour is rich in nutrients. It’s a great source of healthy fats, protein, and fiber, making it a more wholesome choice than many traditional gluten-free flours. By incorporating almond flour into your cupcakes, you can enjoy both a tasty treat and a nutritious option that’s good for your body.
Tip: Choose blanched almond flour for a finer texture, which works best in cupcakes.
2. Texture and Moisture Benefits of Almond Flour
One of the most notable characteristics of almond flour is its ability to create moist and tender cupcakes. Because almond flour contains more fat than other gluten-free flours, it naturally prevents baked goods from becoming dry or crumbly. When used in cupcakes, it helps create a rich, soft crumb that holds together without becoming too dense.
To achieve the best texture, be sure to measure almond flour properly. It’s best to spoon the flour into your measuring cup and level it off, rather than packing it in. This ensures you don’t end up with too much almond flour, which can make the cupcakes heavier than desired.
Tip: If you want even more moisture, add a little bit of applesauce or yogurt to your almond flour cupcakes for a tender crumb.
3. Flavor Pairings for Almond Flour Cupcakes
Almond flour has a naturally mild, nutty flavor that complements a variety of other ingredients. Whether you prefer citrus, chocolate, or vanilla, almond flour provides a neutral base that enhances the overall taste of your cupcakes.
- Lemon and Almond Flour: The bright, zesty flavor of lemon pairs beautifully with the richness of almond flour. A bit of lemon zest or lemon juice in the batter can create a refreshing citrus kick that balances the nutty flavor.
- Chocolate and Almond Flour: Almond flour works wonderfully in chocolate cupcakes, where its mild sweetness pairs perfectly with the richness of cocoa. You can create a decadent chocolate almond flour cupcake by adding cocoa powder or melted chocolate to the batter.
- Vanilla and Almond Flour: For a more classic flavor, vanilla and almond flour are a match made in heaven. The almond flour adds a slight nutty taste to vanilla cupcakes, giving them a unique twist on a traditional favorite.
Tip: Don’t be afraid to get creative with flavor combinations. Try adding spices like cinnamon, cardamom, or even a dash of almond extract to deepen the nutty profile of your cupcakes.
4. How to Make Almond Flour Cupcakes
Making almond flour cupcakes is simple and straightforward, but there are a few tips to keep in mind for the best results.
- Combine Wet and Dry Ingredients Separately: Just like in other cupcake recipes, it’s essential to mix wet and dry ingredients in separate bowls first. This ensures that all ingredients are well-distributed before combining them, helping the cupcakes rise evenly.
- Use Baking Powder or Baking Soda: Almond flour doesn’t have the same leavening properties as wheat flour, so it’s important to add a leavening agent like baking powder or baking soda. This will help your cupcakes rise and become light and fluffy.
- Don’t Overmix the Batter: Almond flour can be a little more delicate than other flours, so avoid overmixing your batter. Stir just until the ingredients are combined to prevent the cupcakes from becoming dense.
Tip: For extra fluffiness, you can add egg whites and fold them into the batter gently at the end. This helps provide additional lift and airiness.
5. Variations and Toppings for Almond Flour Cupcakes
Once you have the base recipe down, you can get creative with toppings and add-ins. Almond flour cupcakes are delicious on their own, but they also provide a great canvas for various frostings and toppings.
- Frosting: Cream cheese frosting, chocolate ganache, or even a simple dusting of powdered sugar complement almond flour cupcakes perfectly. If you’re looking for something dairy-free, you can make a coconut whipped cream or use a dairy-free buttercream.
- Fruit Add-ins: Chopped fruits like raspberries, blueberries, or strawberries can be added directly into the batter. These fruits add moisture and a burst of natural sweetness to your cupcakes.
- Nuts and Seeds: For an extra crunch, consider adding chopped nuts such as almonds, walnuts, or pistachios on top. You can also sprinkle seeds like chia or sunflower seeds for added texture.
Tip: If you want an extra layer of flavor, drizzle a little honey or maple syrup on top of your almond flour cupcakes for a subtle sweetness.
Coconut Cupcakes with Coconut Milk and Shredded Coconut
Coconut cupcakes offer a tropical treat that brings together the rich, creamy flavor of coconut milk and the delightful texture of shredded coconut. These cupcakes are perfect for those who love coconut and are looking for a gluten-free option that is both delicious and satisfying. The combination of coconut milk and shredded coconut provides a moist, tender crumb with a sweet, nutty flavor that’s sure to please.
1. Why Choose Coconut for Your Cupcakes?
Coconut is a fantastic ingredient for baking, especially in gluten-free recipes. Its natural sweetness and rich flavor enhance the overall taste of your cupcakes, making them feel indulgent without being overwhelmingly sweet. Coconut milk, which is made from pressed coconut meat, adds creaminess and moisture to the batter, preventing your cupcakes from drying out. Shredded coconut, on the other hand, offers texture and a subtle crunch that contrasts nicely with the soft and tender crumb.
Coconut is also packed with healthy fats, fiber, and antioxidants, making it a better alternative to processed sugars or oils in baked goods. Whether you’re looking to create a healthier treat or just love the flavor, coconut brings a tropical flair to your gluten-free cupcakes.
Tip: For an extra coconut flavor, try adding coconut extract to your batter. It will amplify the coconut taste without overpowering the cupcakes.
2. Texture and Moisture Benefits of Coconut Milk and Shredded Coconut
Coconut milk is an excellent source of moisture in gluten-free baking. Unlike cow’s milk, it’s naturally dairy-free, making it perfect for those with lactose intolerance or following a vegan diet. It also lends a velvety texture to cupcakes, keeping them soft and tender. Coconut milk works wonders in gluten-free recipes, as it helps provide structure and richness to the cupcakes without relying on gluten or dairy.
In addition to coconut milk, shredded coconut adds another layer of texture to the cupcakes. The small shreds of coconut integrate beautifully into the batter, creating pockets of coconut flavor and a slightly chewy texture in each bite. The combination of these two coconut products results in a moist, soft, and lightly textured cupcake.
Tip: Use sweetened shredded coconut for a sweeter cupcake or opt for unsweetened shredded coconut for a more subtle coconut flavor.
3. How to Make Coconut Cupcakes with Coconut Milk and Shredded Coconut
Making coconut cupcakes with coconut milk and shredded coconut is a simple process that involves a few key steps to ensure they turn out perfect every time.
- Combine Wet and Dry Ingredients Separately: Start by whisking together your wet ingredients, which include coconut milk, eggs, and vanilla extract. In a separate bowl, combine your dry ingredients, including coconut flour, gluten-free all-purpose flour, baking powder, and salt. Mixing wet and dry ingredients separately ensures that your batter comes together smoothly without clumps.
- Incorporate Shredded Coconut: Once you’ve combined the wet and dry ingredients, gently fold in the shredded coconut. Be careful not to overmix, as this can affect the texture of the cupcakes. Folding the coconut into the batter will allow the coconut to distribute evenly, adding flavor and texture to each bite.
- Use Coconut Oil for Extra Moisture: If you want to enhance the coconut flavor and moisture in your cupcakes, consider substituting regular oil with coconut oil. The coconut oil will add richness to the cupcakes while complementing the coconut milk and shredded coconut.
Tip: If you want to create a decadent cupcake, try adding some white or dark chocolate chips along with the shredded coconut for a delightful contrast in flavors and textures.
4. Baking Tips for Perfect Coconut Cupcakes
Baking coconut cupcakes requires a few specific tips to ensure that they come out perfectly every time.
- Preheat Your Oven: Make sure your oven is preheated to the correct temperature before you put the cupcakes in. This ensures that the cupcakes bake evenly and rise properly.
- Don’t Overmix the Batter: Coconut flour and shredded coconut both have unique textures, so it’s important to mix the batter gently. Overmixing can result in dense or uneven cupcakes.
- Use an Ice Cream Scoop for Uniform Cupcakes: To make sure your cupcakes bake evenly, use an ice cream scoop to portion the batter into cupcake liners. This will help ensure that each cupcake is the same size, which helps with consistent baking.
Tip: Test your cupcakes with a toothpick to make sure they’re done. Insert it into the center, and if it comes out clean, your cupcakes are ready!
5. Frosting and Topping Ideas for Coconut Cupcakes
Coconut cupcakes are delicious on their own, but adding frosting and toppings can take them to the next level. The light, fluffy texture of these cupcakes pairs well with a variety of frosting options.
- Coconut Buttercream Frosting: For a rich and creamy topping, coconut buttercream frosting is a perfect choice. You can make it by whipping together butter, powdered sugar, and coconut milk. Add a little bit of shredded coconut on top for extra flavor and texture.
- Whipped Coconut Cream: If you want a dairy-free frosting option, whipped coconut cream is an excellent alternative. Simply chill a can of coconut milk, scoop out the solidified cream, and whip it until fluffy. You can sweeten it with a bit of powdered sugar or maple syrup for a delicious topping.
- Toasted Shredded Coconut: For an extra touch, consider toasting some shredded coconut and sprinkling it on top of your frosted cupcakes. The toasting process enhances the flavor and adds a lovely golden crunch that complements the soft cupcake.
Tip: For a tropical flair, garnish your cupcakes with a small slice of fresh pineapple or a maraschino cherry for a fun and festive touch.
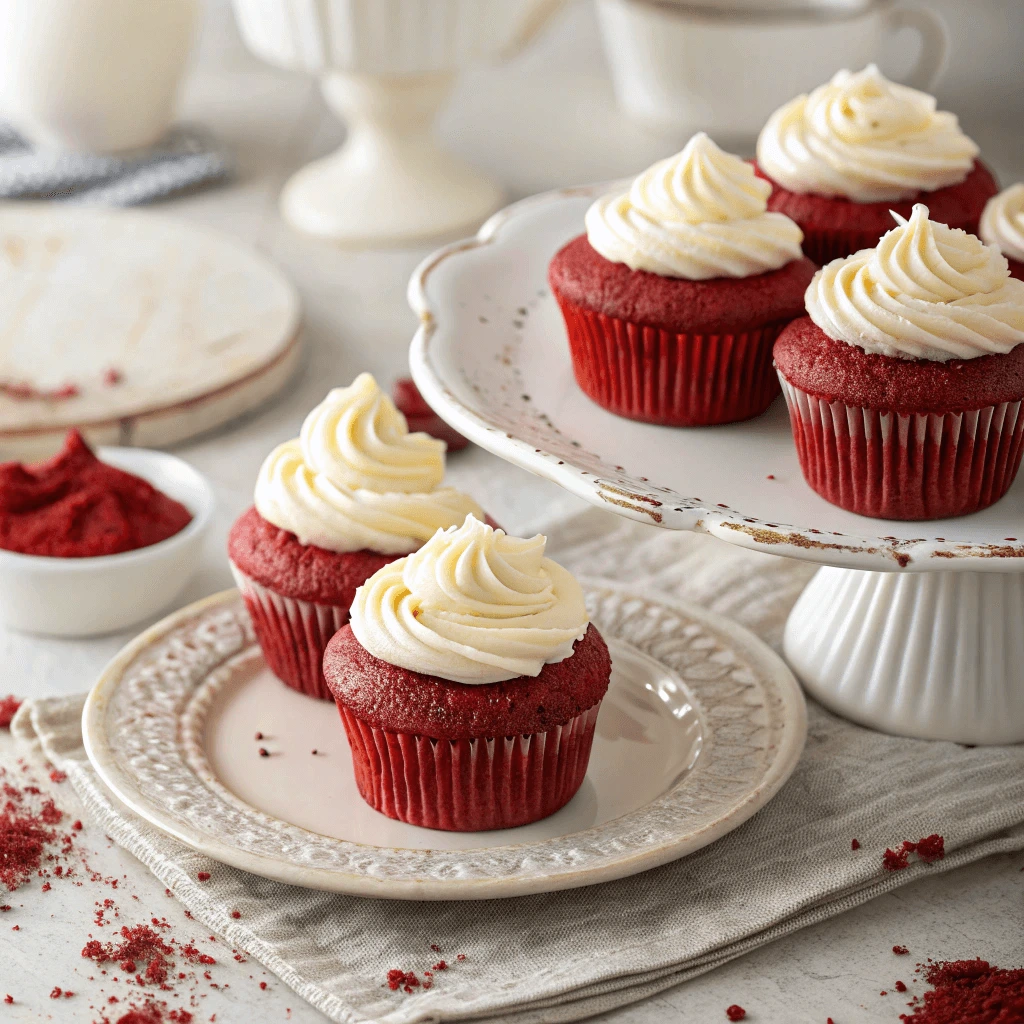
Red Velvet Gluten-Free Cupcakes
Red velvet cupcakes are an indulgent and visually stunning treat, and with a gluten-free twist, they can be enjoyed by those with dietary restrictions. Known for their rich red color, velvety crumb, and deliciously tangy flavor, these cupcakes have become a classic favorite. The combination of cocoa powder and buttermilk gives red velvet cupcakes their unique flavor, while the addition of cream cheese frosting adds a creamy and slightly tangy finish. Gluten-free versions of these cupcakes are just as delicious and tender as their traditional counterparts.
1. What Makes Red Velvet Cupcakes Unique?
Red velvet cupcakes stand out due to their signature red color and distinctive flavor. Unlike regular chocolate cupcakes, they have a subtle cocoa taste that’s balanced with a slight tanginess from buttermilk. This creates a flavor profile that’s neither too sweet nor too bitter. The addition of vinegar and a small amount of cocoa powder gives these cupcakes their signature mild chocolate flavor, while the buttermilk adds tenderness to the crumb.
The deep red color typically comes from food coloring, but for a natural alternative, you can use beet juice, which provides a beautiful color and adds a bit of extra moisture. Red velvet cupcakes are perfect for occasions like birthdays, weddings, and holiday parties, where their vibrant hue and elegant flavor can shine.
Tip: For an even more vibrant color, ensure you use the correct type of food coloring, as some natural colorants may not achieve the same deep red hue as synthetic ones.
2. The Key Ingredients for Red Velvet Gluten-Free Cupcakes
To make red velvet gluten-free cupcakes, you’ll need to use a combination of gluten-free flours and other key ingredients that maintain the integrity and flavor of the classic recipe.
- Gluten-Free Flour Blends: For the best texture and structure, use a gluten-free all-purpose flour blend. These blends typically contain a mix of rice flour, tapioca flour, and potato starch, which mimic the properties of wheat flour and help your cupcakes maintain a soft, moist crumb. Make sure the flour blend you choose includes xanthan gum or guar gum, as these act as binders to help give the cupcakes structure.
- Cocoa Powder: A small amount of unsweetened cocoa powder adds a subtle chocolate flavor to the cupcakes. It’s important to use high-quality cocoa powder for the best taste.
- Buttermilk: Buttermilk is key to the tangy flavor of red velvet cupcakes. It reacts with the baking soda to create a light, fluffy texture. If you need a dairy-free option, you can substitute buttermilk with coconut milk or almond milk combined with a teaspoon of apple cider vinegar or lemon juice.
- Vinegar and Baking Soda: The combination of vinegar and baking soda creates a reaction that helps the cupcakes rise and become light and airy. The vinegar also contributes to the tangy flavor profile.
Tip: If you’re avoiding dairy, opt for a dairy-free buttermilk substitute like coconut milk or almond milk mixed with a tablespoon of vinegar to achieve the same tender texture.
3. How to Make Red Velvet Gluten-Free Cupcakes
Making red velvet gluten-free cupcakes is simple, but there are a few tips to ensure that they turn out perfect every time.
- Prepare the Dry Ingredients: Start by whisking together the gluten-free flour blend, cocoa powder, baking soda, and salt in a bowl. This ensures that the dry ingredients are evenly distributed and helps prevent clumping in your batter.
- Combine the Wet Ingredients: In a separate bowl, whisk together the eggs, sugar, oil (or melted butter), buttermilk (or dairy-free alternative), vinegar, and vanilla extract. Once combined, add the red food coloring (or beet juice) to achieve that signature red hue. The amount of food coloring will depend on the intensity of the color you prefer.
- Mix the Wet and Dry Ingredients: Gradually add the dry ingredients into the wet ingredients, mixing gently until combined. Avoid overmixing the batter, as this can result in dense cupcakes. Stir in the wet ingredients until just combined to ensure the cupcakes are light and fluffy.
- Bake the Cupcakes: Preheat your oven and line a muffin tin with cupcake liners. Spoon the batter into the cupcake liners, filling each about two-thirds full. Bake the cupcakes for 18-20 minutes, or until a toothpick inserted into the center comes out clean. Let them cool completely before frosting.
Tip: Make sure the oven is preheated to the correct temperature before placing the cupcakes inside. This will ensure that the cupcakes bake evenly and rise perfectly.
4. Frosting Options for Red Velvet Cupcakes
Red velvet cupcakes are best known for their pairing with cream cheese frosting, which adds a tangy sweetness that complements the mild chocolate flavor of the cupcakes. However, there are other frosting options you can explore based on dietary preferences.
- Classic Cream Cheese Frosting: To make the classic cream cheese frosting, beat together cream cheese, butter, powdered sugar, and vanilla extract until smooth and creamy. This frosting is rich, creamy, and slightly tangy, making it the perfect companion for red velvet cupcakes.
- Dairy-Free Frosting: If you need a dairy-free option, substitute the cream cheese with dairy-free cream cheese or use coconut cream. You can also use a simple buttercream frosting made with vegan butter and powdered sugar, which still delivers a sweet and creamy topping without any dairy.
- Coconut Frosting: For a tropical twist, coconut frosting can be a unique alternative to the traditional cream cheese frosting. Simply use coconut milk and shredded coconut to create a light and fluffy frosting that pairs beautifully with the coconut undertones in the red velvet cupcakes.
Tip: To decorate the cupcakes, sprinkle some finely shredded coconut or colorful sprinkles on top of the frosting for an extra festive touch.
5. Baking Tips for Perfect Red Velvet Gluten-Free Cupcakes
To ensure that your red velvet cupcakes turn out perfectly, follow these baking tips:
- Don’t Overmix the Batter: Gluten-free cupcakes can become dense if the batter is overmixed. Mix just until the ingredients are combined to preserve the light, airy texture.
- Use Room Temperature Ingredients: Bring your eggs, buttermilk, and other wet ingredients to room temperature before using them. This helps the batter mix more evenly and prevents it from becoming too thick.
- Use High-Quality Red Food Coloring: If you’re using food coloring, opt for a high-quality liquid or gel food coloring. This will ensure that you achieve the vibrant red hue that red velvet cupcakes are known for without affecting the flavor or texture.
Tip: After baking, allow the cupcakes to cool completely before frosting them. This prevents the frosting from melting and ensures that the cupcakes hold their shape.
Decorating Your Gluten-Free Cupcakes Like a Pro
How to Pipe Frosting
Piping frosting is an essential skill for decorating cakes and cupcakes. With the right tools and techniques, you can create beautiful designs that elevate your baked goods.
1. Tools You Need
- Piping Bags: Either reusable silicone bags or disposable plastic bags work well.
- Piping Tips: These include round, star, petal, and leaf tips, each creating different designs like dots, swirls, or flowers.
- Couplers: Allow you to change piping tips without refilling the bag.
- Scissors: For trimming the piping bag to fit your chosen tip.
2. How to Fill a Piping Bag
- Prepare Frosting: Ensure the frosting is smooth and at the right consistency.
- Fill the Bag: Place the bag in a glass to open it wide and use a spatula to fill it two-thirds full.
- Seal and Twist: Twist the top of the bag and squeeze the frosting down toward the tip.
3. Piping Techniques
- Hold the Bag Properly: Hold the top with one hand and support the bottom with the other.
- Apply Even Pressure: Squeeze gently and move the tip steadily across the surface.
- Guide the Tip: Keep the tip just above the surface for clean lines.
4. Popular Piping Designs
- Roses and Swirls: Start at the center and pipe in a circular motion.
- Ruffles: Use a star tip and make quick upward motions.
- Writing and Dots: A round tip works best for these simple designs.
5. Tips for Success
- Practice First: Try on parchment paper before decorating cakes or cupcakes.
- Clean the Tip: Wipe it regularly to prevent clogging.
- Room Temperature Frosting: Keep the frosting at a spreadable consistency.
Creative Toppings for Your Gluten-Free Cupcakes
Toppings can elevate your gluten-free cupcakes, adding flavor, texture, and visual appeal. Here are some fun ideas to try:
1. Fresh Fruit
Top your cupcakes with fresh berries like raspberries or blueberries for a sweet and colorful finish. For extra flavor, coat them in a simple syrup.
2. Nuts and Seeds
Add a crunchy element with nuts like almonds or walnuts. Finely chop them or sprinkle whole ones over your frosting for texture and flavor.
3. Coconut
Shredded or toasted coconut adds a tropical twist. Pair it with fruit or use it alone for a textured topping.
4. Chocolate Shavings
For a rich touch, grate or peel chocolate into curls. It pairs well with most cupcake flavors, adding elegance and depth.
5. Sprinkles or Candy
Fun and colorful sprinkles or small candies can make your cupcakes festive. Choose ones that match your theme for a playful touch.
6. Edible Flowers
Edible flowers, like pansies or marigolds, bring an elegant touch. Perfect for special events, these flowers enhance both the look and flavor.
Gluten-Free Frosting Recipes
Frosting is the finishing touch that can make or break your gluten-free cupcakes. Whether you prefer creamy buttercream, tangy cream cheese frosting, or something more exotic, there are plenty of gluten-free options to try. Here are some simple and delicious frosting recipes to complement your cupcakes.
1. Classic Gluten-Free Buttercream Frosting
Buttercream is a classic choice that works with almost any cupcake flavor. Here’s how to make a smooth, fluffy frosting without any gluten.
Ingredients:
- 1 cup unsalted butter (softened)
- 3-4 cups powdered sugar (gluten-free)
- 1-2 teaspoons vanilla extract
- A pinch of salt
- 2-3 tablespoons milk or dairy-free milk alternative
Instructions:
- Beat the softened butter until light and fluffy.
- Gradually add powdered sugar, one cup at a time, mixing until smooth.
- Add vanilla extract and salt, then mix well.
- Slowly add milk to achieve the desired consistency.
- Beat for an additional 2-3 minutes until light and airy.
2. Gluten-Free Cream Cheese Frosting
Cream cheese frosting adds a tangy, rich flavor that pairs wonderfully with carrot, red velvet, or lemon cupcakes. It’s also super easy to make!
Ingredients:
- 8 oz cream cheese (softened)
- 1/4 cup unsalted butter (softened)
- 3-4 cups powdered sugar (gluten-free)
- 1 teaspoon vanilla extract
Instructions:
- Beat the cream cheese and butter together until smooth and creamy.
- Gradually add the powdered sugar and vanilla extract, mixing until smooth.
- Continue to beat for 2-3 minutes, making sure the frosting is fluffy and spreadable.
3. Chocolate Gluten-Free Frosting
For chocolate lovers, this rich chocolate frosting is a must-try. It’s perfect for chocolate cupcakes or even vanilla cupcakes if you want to add a decadent twist.
Ingredients:
- 1/2 cup unsweetened cocoa powder (gluten-free)
- 1 cup unsalted butter (softened)
- 3-4 cups powdered sugar (gluten-free)
- 1 teaspoon vanilla extract
- 2-3 tablespoons milk or dairy-free milk alternative
Instructions:
- Beat the softened butter until light and fluffy.
- Gradually add cocoa powder, powdered sugar, and vanilla extract, mixing well after each addition.
- Add milk a tablespoon at a time until you reach the desired consistency.
- Beat for an additional 2-3 minutes until fluffy and smooth.
4. Dairy-Free Frosting
For those who are dairy-free, you can easily substitute ingredients in frosting recipes to create a creamy, allergen-friendly alternative. Here’s a simple dairy-free frosting recipe.
Ingredients:
- 1 cup dairy-free butter (like Earth Balance)
- 3-4 cups powdered sugar (gluten-free)
- 1-2 teaspoons vanilla extract
- 2-3 tablespoons coconut milk or almond milk
Instructions:
- Beat the dairy-free butter until creamy and fluffy.
- Gradually add powdered sugar, mixing until smooth.
- Add vanilla extract and the dairy-free milk a little at a time, adjusting to the desired consistency.
- Beat for 3-4 minutes until the frosting is smooth and light.
5. Vegan Gluten-Free Frosting
If you’re following both a gluten-free and vegan diet, this frosting recipe is ideal. It uses coconut milk to create a light, fluffy texture without any animal products.
Ingredients:
- 1/2 cup coconut oil (solidified)
- 3-4 cups powdered sugar (gluten-free)
- 1-2 teaspoons vanilla extract
- 2-3 tablespoons coconut milk (canned, full-fat)
Instructions:
- Beat the solidified coconut oil until smooth and fluffy.
- Gradually add powdered sugar and vanilla extract, mixing well after each addition.
- Slowly add coconut milk until the frosting reaches the desired consistency.
- Beat for 2-3 minutes until airy and smooth.
Conclusion
In this blog post, we explored 10 irresistible gluten-free cupcake recipes that are sure to satisfy every sweet tooth. From fluffy vanilla cupcakes to rich chocolate creations, zesty lemon poppy seed treats, and even indulgent red velvet cupcakes, there’s a recipe for everyone! We also covered fun, creative frosting ideas and unique toppings that will make your cupcakes even more exciting.
Feel free to experiment with these flavors and ingredients, and don’t hesitate to customize the recipes to your liking. Whether you’re a seasoned baker or just starting out, these gluten-free cupcakes will become your go-to treat for any occasion.
We’d love to hear from you! Share your favorite gluten-free cupcake recipe or leave a comment below about your baking experiences. Let’s inspire each other to create even more delicious gluten-free cupcakes!