Making the perfect 14-inch pizza recipe at home is easier than you think. Whether you’re a pizza lover or new to cooking, homemade pizza lets you customize every ingredient to your liking. From the dough to the toppings, you control the freshness and flavor. In this recipe, we’ll walk you through making a delicious 14-inch pizza from scratch. With the right techniques and a balance of sauce, cheese, and toppings, you’ll be enjoying a pizzeria-quality pizza at home. Let’s get started and impress your friends and family with your pizza-making skills!
Choosing the Right Dough for Your 14 Inch Pizza Recipe
Classic Homemade Pizza Dough with Olive Oil
A great 14 inch pizza begins with a dough that has the perfect balance of flavor and texture. Using olive oil in your dough not only adds richness but also helps create a tender crust with a beautiful golden color.
Ingredients to Gather
For this classic dough, you’ll need all-purpose or bread flour, warm water around 110°F, active dry yeast, extra virgin olive oil, sugar, and salt. These simple ingredients come together to form the foundation of your pizza.
Activating the Yeast
Start by mixing the warm water, sugar, and yeast in a bowl. Let it rest for 5 to 10 minutes until the surface becomes foamy. This step ensures that your yeast is active and ready to work its magic.
Mixing and Kneading the Dough
Add the olive oil, flour, and salt to the yeast mixture and stir until the dough begins to form. Turn it onto a floured surface and knead for about 8 to 10 minutes. Kneading develops gluten, which gives the dough structure and chewiness. You’ll notice the dough become smooth and elastic as you work it.
Rising Time
Place the dough in a lightly oiled bowl, cover it with a damp cloth or plastic wrap, and set it in a warm spot. Allow it to rise for about 1 to 1.5 hours, until it doubles in size. This fermentation step creates air bubbles that give your crust a light, airy texture.
The Role of Olive Oil
Olive oil adds more than just flavor—it keeps the dough soft, making it easier to stretch and shape. It also helps create a crisp, golden bottom crust when baked. For the best taste, always choose high-quality extra virgin olive oil.
Whole Wheat Pizza Dough for Extra Fiber
Whole wheat dough offers a nutritious twist to your 14 inch pizza by adding extra fiber and nutrients. It gives the crust a pleasant, nutty flavor and a slightly denser texture that holds up well to toppings.
Ingredients You’ll Need
You’ll need whole wheat flour, warm water, active dry yeast, olive oil, salt, and a bit of honey or sugar. The honey helps activate the yeast and balances the flavor of whole wheat.
Making the Dough
Start by mixing the warm water, honey, and yeast, then let it sit for 5 to 10 minutes until it becomes foamy. This shows the yeast is active. In a large bowl, combine the whole wheat flour and salt. Slowly add the yeast mixture and olive oil, stirring until a dough forms. Knead the dough on a floured surface for 8 to 10 minutes until it feels smooth and elastic.
Rising and Resting
Place the dough in an oiled bowl, cover it, and let it rise in a warm place for about 1 to 1.5 hours until it doubles in size. Whole wheat dough can take a bit longer to rise due to its heavier texture. After rising, gently punch it down and let it rest for 10 minutes before shaping.
Cauliflower Crust for a Low-Carb Option
If you’re looking to enjoy your 14 inch pizza while keeping carbs low, cauliflower crust offers a tasty and healthy alternative. This crust uses finely grated cauliflower instead of traditional flour, making it gluten-free and packed with vitamins and fiber.
Ingredients for Cauliflower Crust
To make cauliflower crust, you’ll need fresh cauliflower, eggs, shredded cheese (like mozzarella or parmesan), and seasoning such as garlic powder, salt, and Italian herbs. These ingredients bind together to form a sturdy, flavorful base.
Preparing the Cauliflower
Start by washing and chopping the cauliflower into florets. Then, pulse them in a food processor until you get a rice-like texture. Next, steam or microwave the cauliflower rice until soft, then squeeze out excess moisture using a clean kitchen towel or cheesecloth. Removing water is key to a crispier crust.
Making and Baking the Dough
Mix the dried cauliflower rice with eggs, cheese, and seasonings to create the dough. Spread it evenly on a parchment-lined baking sheet or pizza stone, shaping it into a 14 inch circle. Bake the crust at a high temperature (around 425°F or 220°C) for about 15-20 minutes until it turns golden and firm.
Why Choose Cauliflower Crust?
Cauliflower crust reduces carbs significantly while adding extra fiber and nutrients like vitamin C and potassium. It suits gluten-free and low-carb diets, making it a popular choice for health-conscious pizza lovers. Plus, it offers a unique, slightly nutty flavor that pairs well with many toppings.
Essential Tools and Oven Prep for the Perfect 14 Inch Pizza Recipe
Pizza Stone vs. Baking Steel: Which Works Best for a 14 Inch Pizza Recipe?
When cooking a 14 inch pizza, choosing between a pizza stone and a baking steel can impact your crust’s texture and cooking time. Both tools help create a crispy base but work in different ways.
How Pizza Stones Work
Pizza stones absorb heat slowly and evenly. They hold heat well and draw moisture from the dough, which helps create a crisp crust. However, stones take longer to heat up and can crack if exposed to sudden temperature changes.
Benefits of Baking Steels
Baking steels conduct heat much faster than stones. They reach higher temperatures quickly, which can cook your pizza faster and produce a crispier crust. Steels are very durable and easy to clean, making them a practical choice for many home cooks.
Which Should You Choose?
If you prefer a traditional baking surface that absorbs moisture, go for a pizza stone. If you want faster cooking with a sturdy, low-maintenance option, choose a baking steel. Both work great for a 14 inch pizza when preheated properly.
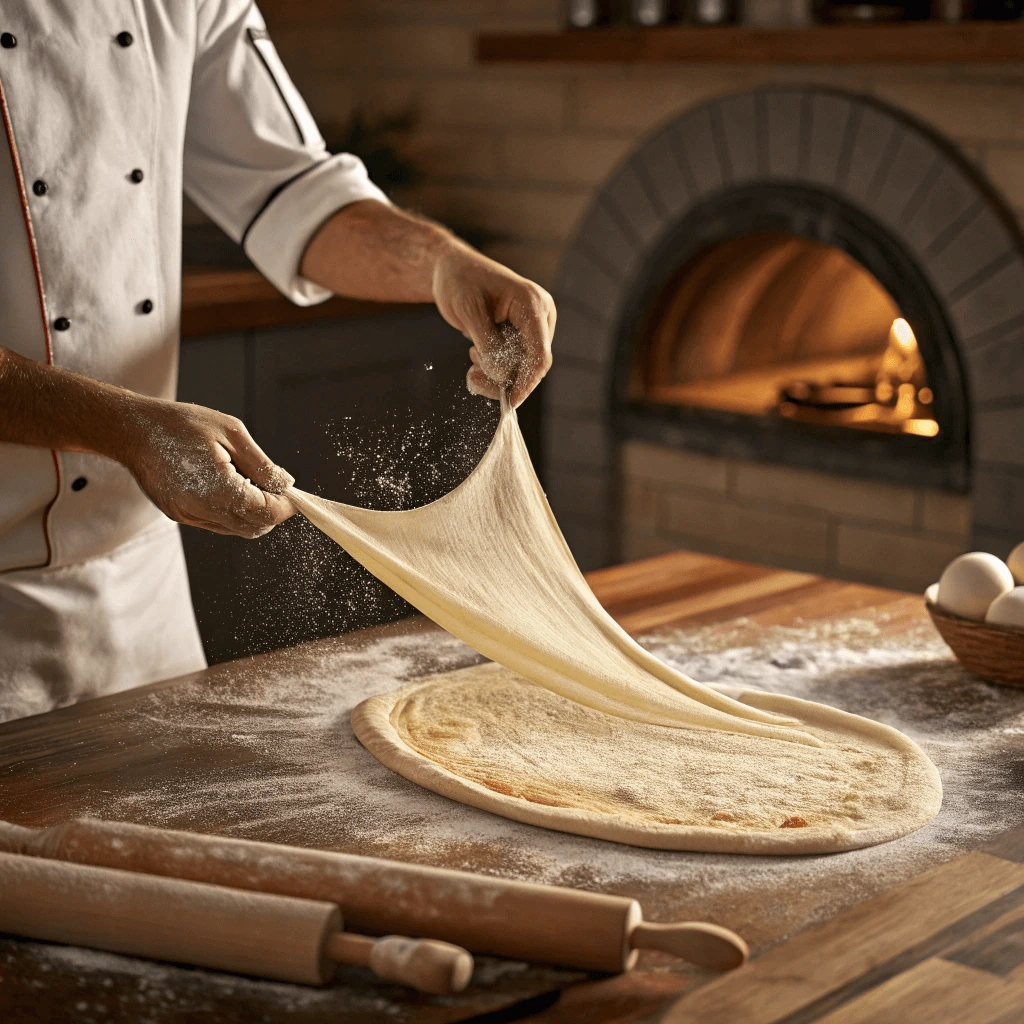
How to Use a Pizza Peel Without Spilling Toppings
Using a pizza peel can feel tricky at first, especially when you’re trying to move a fully topped 14 inch pizza into the oven without losing any toppings. With a few simple tips, you can master the technique and keep your pizza intact.
Prepare the Peel Properly
Before placing your pizza dough on the peel, sprinkle it generously with flour, cornmeal, or semolina. This prevents the dough from sticking and helps the pizza slide off smoothly when you transfer it to the oven. Make sure the flour or cornmeal spreads evenly across the surface.
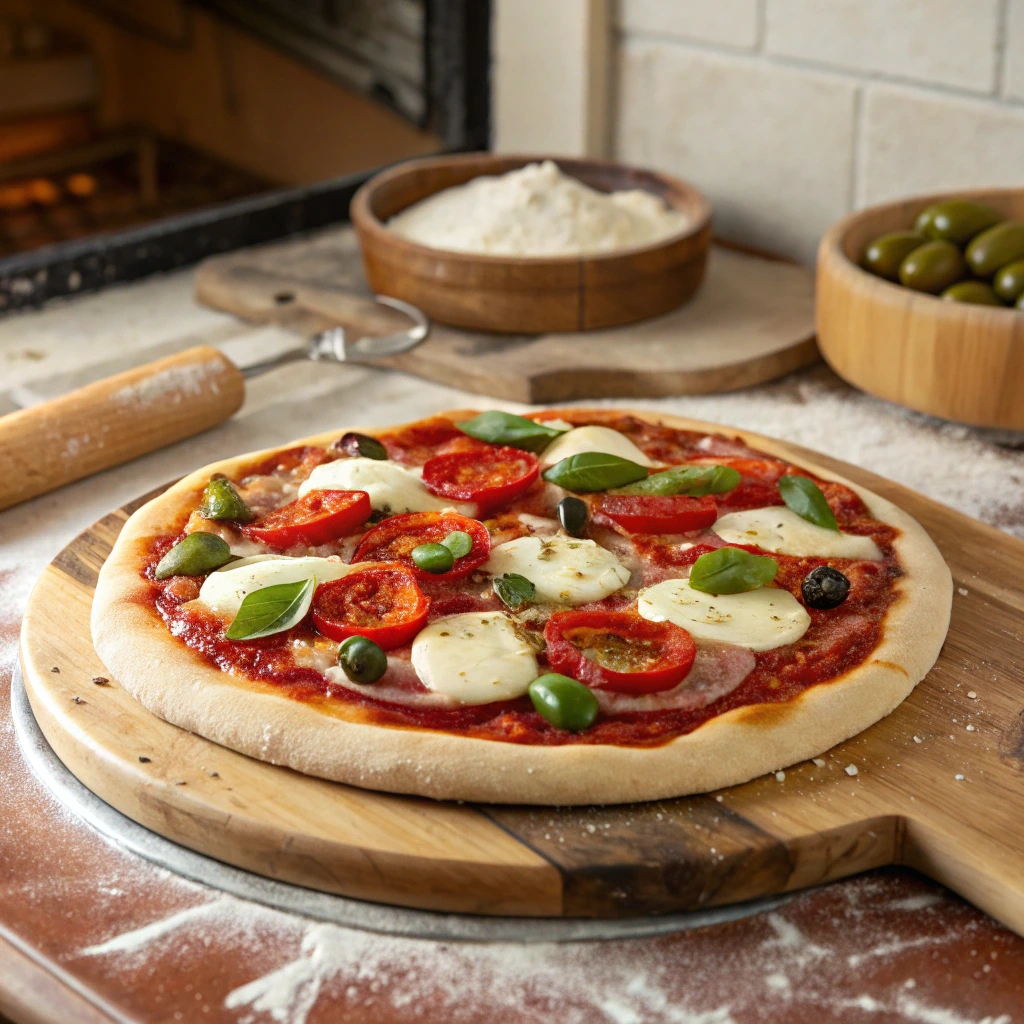
Assemble Your Pizza Quickly
Once your dough is on the peel, add your sauce, cheese, and toppings promptly but carefully. Avoid overloading your pizza with toppings, which can make it heavy and harder to slide. Keep the toppings evenly distributed to maintain balance.
Use a Gentle Rocking Motion
When you’re ready to transfer your pizza, position the peel at the oven entrance with a slight upward tilt. Use a gentle rocking or shaking motion to loosen the pizza from the peel. Push the peel forward quickly and smoothly, allowing the pizza to slide onto the hot stone or steel.
Practice Makes Perfect
The more you use your peel, the better you’ll get at controlling the pizza. Practice with smaller pizzas or use parchment paper under the dough if you’re nervous. Over time, you’ll gain confidence and transfer your 14 inch pizza with ease.
Preheating Your Oven to Bake a Perfect 14 Inch Pizza Recipe
Getting the oven temperature right is essential to achieve a perfectly crispy crust on your 14 inch pizza. Preheating your oven properly ensures even cooking and a crust that’s golden and crunchy.
Set the Right Temperature
Start by setting your oven to the highest temperature it can safely handle, usually between 475°F and 500°F (245°C to 260°C). High heat cooks the pizza quickly, locking in moisture while creating a crisp crust.
Preheat Long Enough
Allow your oven to preheat for at least 30 to 45 minutes before baking. This ensures the oven walls and any baking surface, like a pizza stone or steel, reach the ideal temperature. The longer preheating time helps distribute heat evenly.
Position Your Baking Surface
Place your pizza stone or baking steel on the middle rack before turning on the oven. This placement allows heat to circulate well around the pizza, promoting a balanced cook and crispy bottom crust.
Avoid Opening the Oven Door
Try not to open the oven door during preheating or baking. Opening the door causes heat to escape, lowering the temperature and affecting cooking time. Use the oven light and window to monitor your pizza instead.
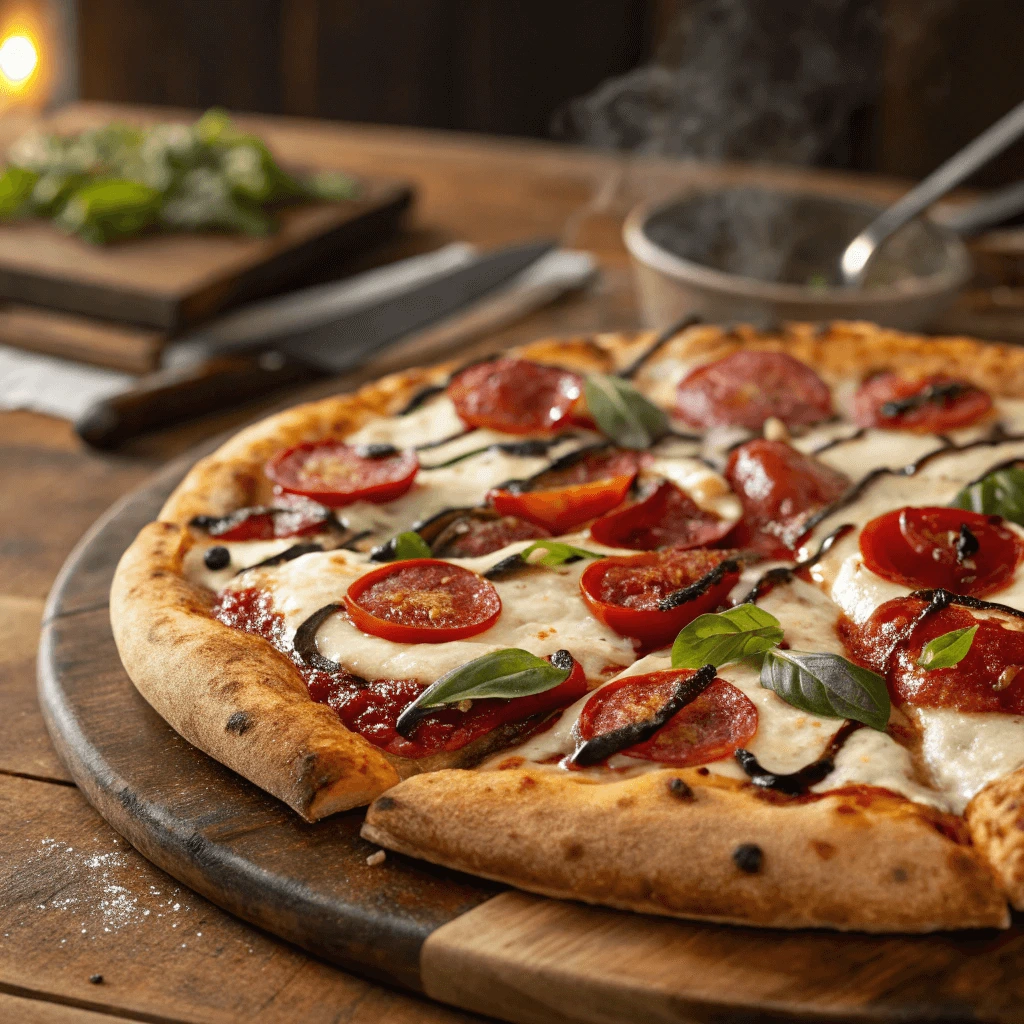
Building the Perfect 14 Inch Pizza Recipe
Choosing the Right Sauce and Cheese Combo
Selecting the perfect sauce and cheese combination plays a huge role in making your 14 inch pizza delicious and balanced. The right flavors enhance the crust and toppings, creating a satisfying pizza every time.
Classic Tomato Sauce for Rich Flavor
Tomato sauce remains a favorite base for many pizza lovers. Choose a sauce made from ripe, fresh tomatoes with a touch of garlic, herbs, and olive oil. Spread it evenly over your dough to add tanginess and moisture without overpowering other ingredients.
Creamy White Sauce for a Twist
If you want to try something different, consider a creamy white sauce like Alfredo or garlic béchamel. These sauces add a smooth texture and rich flavor, pairing especially well with vegetables and lean proteins on your pizza.
Mozzarella: The Classic Cheese Choice
Mozzarella offers the perfect melt and stretch for any pizza. Use fresh or low-moisture mozzarella to get a creamy, gooey texture. Spread it evenly to ensure every bite has cheesy goodness.
Exploring Cheese Alternatives
For a lighter option, try part-skim mozzarella or blend mozzarella with a sharper cheese like Parmesan or Asiago. Vegan cheeses made from nuts or soy also melt well and provide unique flavors for dairy-free pizzas.
Balancing Sauce and Cheese Amounts
Applying the right amount of sauce and cheese helps your pizza cook evenly and prevents sogginess. Spread a thin, even layer of sauce and sprinkle cheese generously but not too thickly. This balance keeps your 14 inch pizza perfectly cooked with a delicious crust.
Fresh Veggies That Add Color and Nutrition
Adding fresh vegetables to your 14 inch pizza not only enhances its visual appeal but also boosts its nutritional value. Fresh, crisp veggies bring texture, flavor, and important vitamins to every slice.
Vibrant Bell Peppers for Sweetness and Crunch
Bell peppers come in red, yellow, and green varieties, each adding a burst of color to your pizza. Their natural sweetness and slight crunch balance savory toppings and cheeses, making every bite exciting. Slice them thinly to cook evenly without losing their texture.
Spinach and Kale for a Nutrient Boost
Leafy greens like spinach and kale offer a great way to sneak in extra nutrients. Add fresh spinach leaves or finely chopped kale just before baking to maintain their vibrant color and mild flavor. These greens pair well with lighter sauces and cheeses, creating a fresh, healthy pizza.
Mushrooms for Earthy Flavor and Umami
Fresh mushrooms add depth with their rich, earthy taste. Sauté them lightly before adding to your pizza to reduce moisture and intensify flavor. Button, cremini, or shiitake mushrooms all work well and complement a variety of other toppings.
Tomatoes and Onions for Classic Taste
Sliced cherry tomatoes or thin rings of red onion add bursts of juicy flavor and aroma. Use fresh tomatoes for a bright tanginess and onions for a mild sweetness that caramelizes slightly during baking. These veggies provide classic pizza flavors with a healthy twist.
Lean Protein Toppings for a Balanced Pizza
Including lean protein toppings on your 14 inch pizza helps create a satisfying and balanced meal. These proteins add flavor, texture, and essential nutrients without excessive fat.
Grilled Chicken: A Versatile Favorite
Grilled chicken works perfectly as a lean protein topping. It offers a mild flavor that pairs well with almost any sauce or veggie combination. Slice or shred cooked chicken breast evenly over your pizza for a delicious protein boost.
Turkey Sausage: A Healthier Alternative
If you enjoy sausage flavors, choose turkey sausage instead of traditional pork varieties. Turkey sausage contains less fat while still providing a savory, spiced taste. Crumble cooked turkey sausage on your pizza to add richness without heaviness.
Shrimp: Light and Flavorful
Shrimp makes a great lean protein topping that cooks quickly and adds a touch of elegance. Use peeled, deveined shrimp seasoned lightly with herbs and garlic. Spread shrimp evenly to ensure every bite has a burst of seafood flavor.
Plant-Based Proteins: Tofu and Tempeh
For vegetarian or vegan options, tofu and tempeh offer excellent lean protein alternatives. Marinate and lightly pan-fry tofu cubes or tempeh strips before adding them to your pizza. These toppings absorb flavors well and provide satisfying texture.
Baking Your Pizza to Perfection
How Long to Bake a 14 Inch Pizza
Baking time plays a crucial role in achieving the perfect crust and thoroughly cooked toppings for your 14 inch pizza. Understanding how long to bake your pizza ensures it comes out just right every time.
Preheat Your Oven Properly
Start by preheating your oven to a high temperature, typically between 450°F and 500°F (232°C to 260°C). A properly heated oven helps the crust crisp up quickly while cooking the toppings evenly. Allow the oven to reach the set temperature before placing your pizza inside.
Typical Baking Time Range
For a 14 inch pizza, bake times usually range from 10 to 15 minutes. The exact time depends on your oven, dough thickness, and topping amounts. Thin-crust pizzas cook faster, often closer to 10 minutes, while thicker or heavily topped pizzas might need the full 15 minutes or a little longer.
Monitor Your Pizza During Baking
Keep an eye on your pizza as it bakes to prevent burning. Check it around the 8-minute mark to assess crust color and cheese melt. Rotate the pizza halfway through baking to ensure even cooking, especially if your oven has hot spots.
Look for Visual Cues of Doneness
The pizza is ready when the crust turns golden brown and crisp, the cheese melts completely with some bubbling, and toppings cook through. If the crust edges start to brown but the center feels undercooked, extend baking by a minute or two.
How to Rotate Your Pizza for Even Cooking
Rotating your pizza during baking ensures even heat distribution and prevents any part of the crust or toppings from burning. This simple step can make a big difference in achieving a perfectly cooked 14 inch pizza.
Why Rotation Matters
Ovens often have hot spots where heat concentrates unevenly. These spots can cause one side of your pizza to cook faster than the other, resulting in uneven crust color or toppings that are burnt on one side and undercooked on the other. Rotating the pizza balances the exposure to heat and promotes uniform cooking.
When to Rotate Your Pizza
For a typical 14 inch pizza baking at high temperatures, plan to rotate it about halfway through the cooking time. If your pizza takes around 12 minutes to bake, rotate it at the 6-minute mark. This timing helps avoid overcooking one side while the other remains underdone.
How to Safely Rotate Your Pizza
Use a pizza peel or an oven mitt to carefully pull the pizza slightly out of the oven. Rotate it 180 degrees or turn it so the side facing the oven’s back moves to the front. Then slide it back onto the pizza stone or baking tray smoothly. Be careful not to disturb the toppings while moving the pizza.
Additional Tips for Even Cooking
If your oven has uneven heat, consider rotating more than once, every 4-5 minutes, for the best results. Avoid opening the oven door too often as it causes heat loss, but timely rotations improve overall baking quality. Using a pizza stone or baking steel can also help distribute heat more evenly.
Using a Cooking Thermometer for Your 14 Inch Pizza Recipe
Checking your pizza’s doneness with a thermometer adds precision and confidence to your cooking process. This tool helps you avoid undercooked dough or overcooked toppings, ensuring your 14 inch pizza comes out perfect every time.
Why Use a Thermometer?
Visual cues like crust color and bubbling cheese are helpful but not always reliable. A thermometer provides an accurate internal temperature reading, letting you know exactly when the pizza reaches a safe and delicious level of doneness.
What Temperature to Look For
The ideal internal temperature for a fully cooked pizza ranges between 200°F and 210°F (93°C to 99°C). This range guarantees the dough is cooked through and the toppings have reached a safe temperature without drying out.
How to Measure Temperature Correctly
Insert an instant-read thermometer probe into the center of the pizza, avoiding cheese or toppings, to get the dough’s internal temperature. Take your reading quickly to minimize heat loss and prevent the pizza from cooling too much.
Benefits of Using a Thermometer
Using a thermometer reduces guesswork and prevents overbaking. It’s especially helpful when you experiment with different dough types or toppings, which might require slight adjustments in baking time.
Healthy Tips and Fun Variations for Your 14 Inch Pizza Recipe
Vegan Cheese and Dairy-Free Topping Ideas
Creating a delicious 14 inch pizza without dairy doesn’t mean sacrificing flavor or texture. By using vegan cheese and dairy-free toppings, you can craft a tasty, satisfying pizza that fits plant-based or lactose-free diets perfectly.
Choosing the Right Vegan Cheese
Vegan cheeses come in many varieties, including those made from nuts like cashews, coconut oil bases, or soy. These cheeses melt well and offer creamy textures similar to traditional cheese. Brands like Daiya, Follow Your Heart, and Violife provide excellent options that melt and brown nicely in the oven.
Homemade Vegan Cheese Alternatives
You can also make your own vegan cheese using cashew cream, nutritional yeast, and lemon juice. This mixture creates a tangy, creamy topping that complements your pizza sauce and veggies beautifully. Experimenting with homemade versions allows you to adjust flavors and control ingredients.
Dairy-Free Toppings to Enhance Flavor
Beyond vegan cheese, use plenty of flavorful dairy-free toppings. Roasted vegetables like bell peppers, mushrooms, zucchini, and caramelized onions add texture and depth. Fresh herbs such as basil or oregano brighten each bite, while plant-based proteins like marinated tofu or tempeh add satisfying substance.
Tips for Baking Vegan Pizzas
Vegan cheese sometimes browns more slowly than dairy cheese. To achieve a golden finish, try broiling the pizza for the last minute or two, watching closely to prevent burning. Using a hot pizza stone can also help crisp the crust and melt vegan cheese evenly.
Adding Herbs and Spices for Big Flavor in Your 14 Inch Pizza Recipe
Herbs and spices transform your 14 inch pizza from ordinary to extraordinary by adding layers of flavor and aroma. Using fresh and dried seasonings thoughtfully can elevate every bite and complement your chosen toppings perfectly.
Fresh Herbs for Brightness
Fresh herbs like basil, oregano, and parsley add vibrant color and a burst of freshness. Sprinkle fresh basil leaves on the pizza right after baking to preserve their aroma and flavor. Fresh oregano pairs beautifully with tomato sauce, enhancing its natural sweetness and tanginess.
Dried Herbs for Deep Flavor
Dried herbs such as thyme, rosemary, and crushed red pepper flakes intensify the flavor profile. These herbs work well when mixed into your pizza sauce or sprinkled on top before baking. Toasting dried herbs lightly in a pan before adding them can release more aromatic oils, enriching the overall taste.
Spices That Add Warmth and Zest
Experiment with spices like garlic powder, smoked paprika, or black pepper to add warmth and depth. Garlic powder blends seamlessly into the sauce, while smoked paprika introduces a subtle smoky flavor without overpowering the pizza. A dash of black pepper can enhance all the other flavors and add a mild kick.
Balancing Flavors
When adding herbs and spices, balance is key. Avoid overpowering the pizza by starting with small amounts and adjusting to taste. Combining complementary herbs and spices creates a harmonious flavor that excites the palate with each slice.
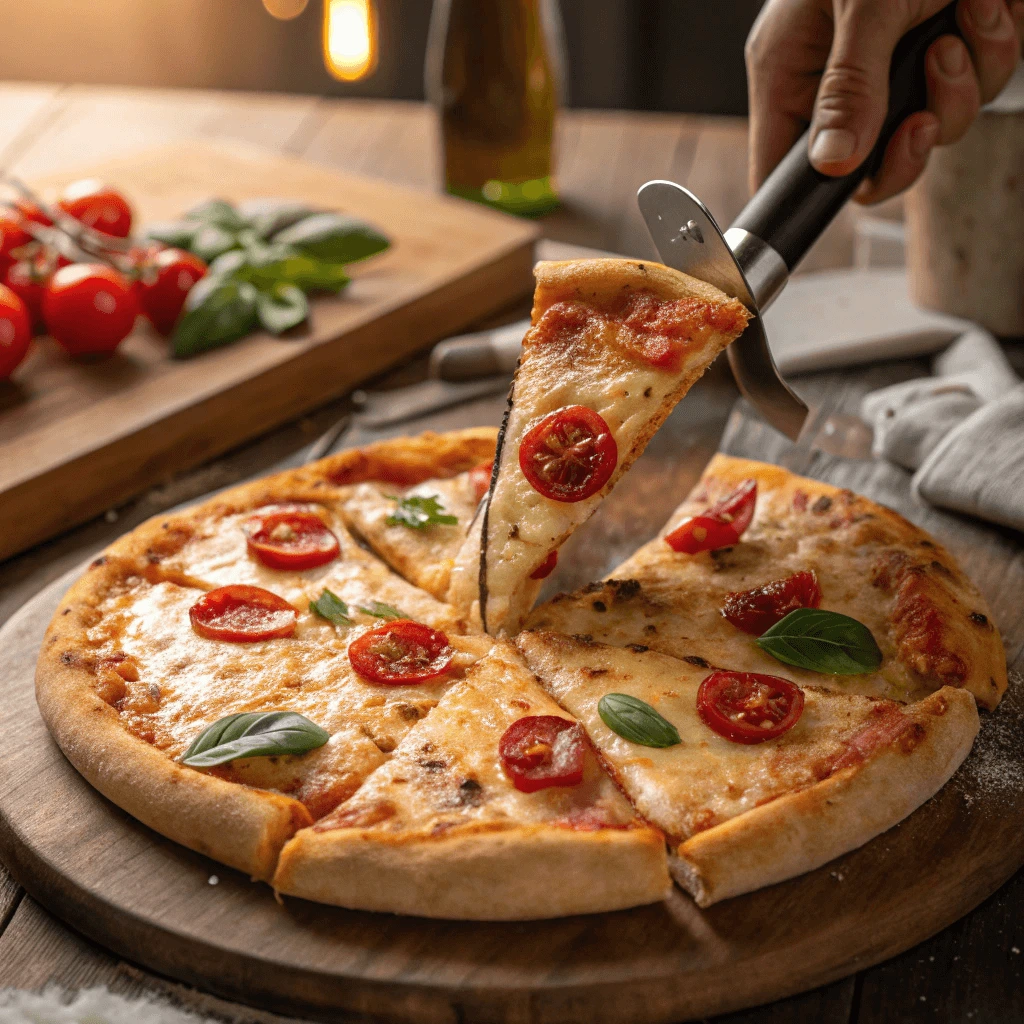
Portion Control and Slicing Tips for Healthy Eating
Learning how to control your portions and slice your 14 inch pizza wisely can help you enjoy your favorite meal while sticking to your health goals. Smart serving practices ensure you satisfy your cravings without overindulging.
Understand Serving Sizes
A 14 inch pizza typically yields 8 large slices. However, cutting it into 10 or 12 smaller slices lets you enjoy the experience while reducing calories per serving. Smaller portions help you feel more satisfied mentally, even if you eat less food physically.
Slice Strategically for Balanced Eating
Use a pizza wheel or a sharp chef’s knife to slice the pizza evenly. If your pizza has heavier toppings, such as cheese or lean meats, aim for thinner slices to manage the richness. For lighter veggie-topped pizzas, slightly larger slices may still fit into a balanced meal plan.
Pair with Healthy Sides
Balance your pizza serving with a light, nutrient-rich side dish. A green salad with a lemon vinaigrette or steamed vegetables can add fiber and volume to your meal without adding too many extra calories. This strategy helps prevent overeating while still making your plate feel full and satisfying.
Listen to Your Hunger Cues
Eat slowly and pay attention to your body’s hunger and fullness signals. It takes time for your brain to register that you’re full, so give yourself that chance before reaching for another slice.
Conclusion
With this 14 Inch Pizza Recipe, making the perfect pizza at home becomes simple, delicious, and rewarding. From choosing the ideal dough to selecting fresh toppings and mastering the bake, every step brings you closer to pizzeria-quality results in your own kitchen. Whether you prefer a traditional crust or a healthy cauliflower base, the options are endless. Don’t forget to preheat your oven and rotate your pizza for that golden, crispy finish. Now that you know how to make a flawless 14 inch pizza, it’s time to gather your ingredients and start baking!