Looking For an Easy Chocolate eggs Recipe are a classic treat that brings joy to both kids and adults, especially during Easter. Whether you’re making them for an Easter basket, a party, or just to satisfy a chocolate craving, homemade chocolate eggs are a fun and delicious way to celebrate. Not only do they taste better than store-bought versions, but they also allow you to customize flavors, fillings, and decorations to your liking.
In this guide, you’ll learn how to make easy homemade chocolate eggs with just a few ingredients and simple steps. From melting and molding to creative fillings and decorating ideas, this recipe is perfect for Easter and beyond. Get ready to create rich, creamy, and beautifully crafted chocolate eggs that make the perfect gift or festive treat!
Why Homemade Chocolate Eggs Are Perfect for Easter and Beyond
The Tradition and Joy of Chocolate Eggs at Easter
Chocolate eggs are a beloved part of Easter celebrations around the world. The tradition of giving eggs at Easter dates back centuries and symbolizes new life and renewal. Over time, chocolate eggs replaced real eggs, becoming a sweet and fun way to celebrate.
The History of Easter Eggs
Eggs have long symbolized fertility and rebirth. Early Christians adopted the egg as a symbol of Jesus’ resurrection. Originally, people exchanged decorated real eggs. When chocolate became widely available, chocolatiers crafted chocolate eggs, adding a delicious twist to the tradition.
Why Chocolate Eggs Delight Everyone
Chocolate eggs combine the joy of surprise with a tasty treat. They are perfect for gifts, decorations, and Easter egg hunts. Kids especially love hunting for chocolate eggs, making Easter a fun family event.
Enjoying Chocolate Eggs Beyond Easter
Chocolate eggs are popular year-round as gifts and snacks. Homemade chocolate eggs allow for creative fillings and decorations, making them a special treat for any occasion.
Benefits of Making Your Own Chocolate Eggs at Home
Making chocolate eggs at home offers many great benefits. It lets you control the ingredients, customize flavors, and enjoy a fun activity with family.
Control Ingredients and Quality
When you make chocolate eggs yourself, you pick the chocolate and other ingredients. This helps you avoid preservatives and choose healthier options like organic or dark chocolate.
Customize Flavors and Fillings
You can create chocolate eggs exactly how you like. Add nuts, dried fruit, or even healthy fillings like nut butter or fruit puree for a tasty twist.
Fun and Creative Activity
Making chocolate eggs is a fun project for everyone, especially kids. It lets you get creative with shapes and decorations while spending quality time together.
Healthy Alternatives: Using Dark Chocolate and Natural Sweeteners
If you want to enjoy chocolate eggs without feeling guilty, choosing healthy ingredients can make a big difference. Using dark chocolate and natural sweeteners creates delicious treats with fewer additives and more nutritional benefits.
Benefits of Dark Chocolate
Dark chocolate contains higher cocoa content and less sugar than milk chocolate. It provides antioxidants that support heart health and improve mood. By choosing dark chocolate with at least 70% cocoa, you get a richer flavor and a healthier treat.
Natural Sweeteners to Use
Instead of refined sugar, natural sweeteners like honey, maple syrup, or coconut sugar work well in chocolate egg recipes. These options add subtle sweetness and contain beneficial nutrients. For example, coconut sugar has a lower glycemic index, which helps stabilize blood sugar levels.
How to Incorporate These Alternatives
You can melt dark chocolate and mix in small amounts of honey or maple syrup to sweeten your chocolate eggs naturally. Another option is to add fruit purees like mashed bananas or dates, which provide moisture and sweetness without processed sugars.
Additional Healthy Tips
Try adding nuts, seeds, or dried fruit to your chocolate eggs for extra fiber and nutrients. Avoid artificial flavors or colorings and opt for natural decorations like crushed nuts or edible flowers.
Ingredients Needed for an Easy Chocolate Eggs Recipe
Choosing the Right Chocolate
Selecting the right chocolate is key to making perfect chocolate eggs. Each type—milk, dark, and white chocolate—offers unique flavors, textures, and health benefits. Understanding these differences helps you pick the best chocolate for your recipe and personal preference.
Milk Chocolate: Sweet and Creamy
Milk chocolate contains cocoa solids, milk powder, sugar, and cocoa butter. It has a smooth, creamy texture and a sweeter flavor compared to dark chocolate. Many people love milk chocolate eggs because they are mild and approachable. However, milk chocolate usually contains more sugar and less cocoa than dark chocolate, so it may be less healthy.
Dark Chocolate: Rich and Intense
Dark chocolate has a higher percentage of cocoa solids and less sugar. It tastes richer and more intense, with slight bitterness that many chocolate lovers enjoy. Dark chocolate also offers health benefits, including antioxidants that support heart health. If you want a healthier option, choose dark chocolate with at least 70% cocoa content.
White Chocolate: Sweet and Buttery
White chocolate contains cocoa butter, sugar, and milk solids but no cocoa solids, giving it a creamy and buttery taste. It is the sweetest and mildest of the three types and works well for those who prefer a lighter chocolate flavor. White chocolate melts easily, which can make it ideal for molding and decorating.
How to Choose for Your Chocolate Eggs
Consider the flavor you want to achieve and who will enjoy the eggs. For rich, less sweet eggs, dark chocolate works best. If you want creamy and sweet eggs that kids will love, milk chocolate is a great choice. White chocolate is perfect for decorative eggs or those who prefer a mild, buttery flavor. You can also mix chocolates to create layered or marbled effects.
Essential Tools
Using the right tools makes creating chocolate eggs much easier and improves the final results. Two essential tools you should have are chocolate molds and a candy thermometer. These help you shape the eggs perfectly and get the chocolate texture just right.
Chocolate Molds: Shaping Your Eggs
Chocolate molds come in various shapes and sizes, but egg-shaped molds are perfect for Easter treats. They allow you to create smooth, uniform chocolate eggs with professional-looking finishes. Choose molds made from food-grade silicone or polycarbonate for easy release and durability. Silicone molds are flexible, which helps pop out the eggs without breaking, while polycarbonate molds give a shiny, polished surface.
How to Use Chocolate Molds
Before pouring melted chocolate into the molds, make sure they are clean and dry. Pour the chocolate slowly and tap the mold gently to remove air bubbles. You can fill the molds fully or only partially if you want hollow eggs. After filling, chill the molds in the refrigerator until the chocolate sets, then carefully remove the eggs.
Candy Thermometer: Perfecting Chocolate Temperature
Controlling the temperature of melted chocolate is crucial for a smooth texture and glossy finish. A candy thermometer helps you monitor the chocolate’s temperature precisely during melting and tempering. Tempering stabilizes the chocolate crystals, preventing it from becoming dull or crumbly after cooling.
Using a Candy Thermometer Effectively
Melt the chocolate slowly, stirring often, and keep an eye on the temperature with your thermometer. For dark chocolate, heat it to about 115°F (46°C) and then cool it to 82°F (28°C) before reheating slightly to 88–90°F (31–32°C) for molding. Milk and white chocolate require lower temperatures. Following these steps ensures your chocolate eggs will have a smooth, crisp snap and shiny appearance.
Healthy Alternatives
When making chocolate eggs, choosing healthier ingredients can enhance the taste and nutritional value without sacrificing flavor. Organic cocoa powder and coconut sugar serve as excellent alternatives to conventional ingredients, offering natural benefits and a cleaner label.
Why Choose Organic Cocoa Powder?
Organic cocoa powder comes from cacao beans grown without synthetic pesticides or fertilizers. This means it contains fewer harmful chemicals and retains more antioxidants and nutrients. Using organic cocoa powder enhances the rich chocolate flavor of your eggs while supporting sustainable farming practices.
Benefits of Coconut Sugar as a Sweetener
Coconut sugar is a natural sweetener made from the sap of coconut palm flowers. It contains minerals like iron, zinc, and potassium and has a lower glycemic index compared to regular sugar. This slower digestion helps prevent blood sugar spikes, making it a better option for those watching their sugar intake.
How to Use Organic Cocoa Powder and Coconut Sugar in Recipes
You can easily incorporate organic cocoa powder into your chocolate egg recipe by mixing it with melted cocoa butter or combining it with melted chocolate to deepen the flavor. Replace refined sugar with coconut sugar by measuring it in equal amounts, but keep in mind it has a slightly caramel-like taste that adds warmth to your chocolate.
Additional Tips for Healthy Chocolate Eggs
To boost nutrition further, consider adding nuts, seeds, or dried fruit to your chocolate eggs. Avoid artificial colors or preservatives and opt for natural flavorings like vanilla extract or cinnamon to enhance taste. These small swaps help you create delicious, wholesome treats perfect for Easter and beyond.
Step-by-Step Guide to Making Easy Chocolate Eggs
Melting and Tempering Chocolate for the Best Results
Melting and tempering chocolate correctly is essential to making smooth, shiny chocolate eggs that have a crisp snap. Mastering these steps ensures your chocolate sets perfectly without streaks or a dull finish.
How to Melt Chocolate Properly
Start by chopping your chocolate into small, even pieces. This helps it melt evenly and prevents burning. Use a heatproof bowl placed over a pot of simmering water—a double boiler method. Stir the chocolate gently and continuously until it melts completely. Alternatively, you can melt chocolate in short bursts in the microwave, stirring between each burst to avoid overheating.
Why Tempering Chocolate Matters
Tempering chocolate stabilizes the cocoa butter crystals, which keeps the chocolate glossy and firm at room temperature. Without tempering, chocolate can look dull, develop white streaks called bloom, or become soft and crumbly.
Tempering Chocolate Step-by-Step
To temper, heat dark chocolate to about 115°F (46°C). Remove it from heat and cool it down to 82°F (28°C) by stirring or adding small amounts of unmelted chocolate. Then gently reheat to 88–90°F (31–32°C) before pouring into molds. For milk and white chocolate, keep the temperatures lower. Using a candy thermometer during this process helps you monitor the temperature precisely.
Tips for Successful Chocolate Tempering
Always avoid water contact with chocolate, as even a drop can seize the chocolate and ruin the texture. Work in a cool, dry environment and stir chocolate slowly and evenly. If you don’t have a thermometer, look for a shiny appearance and firm snap as signs that your chocolate is tempered correctly.
Filling and Shaping Your Chocolate Eggs
Creating beautiful, delicious chocolate eggs involves careful filling and shaping. With the right techniques, you can make eggs that look professional and taste amazing.
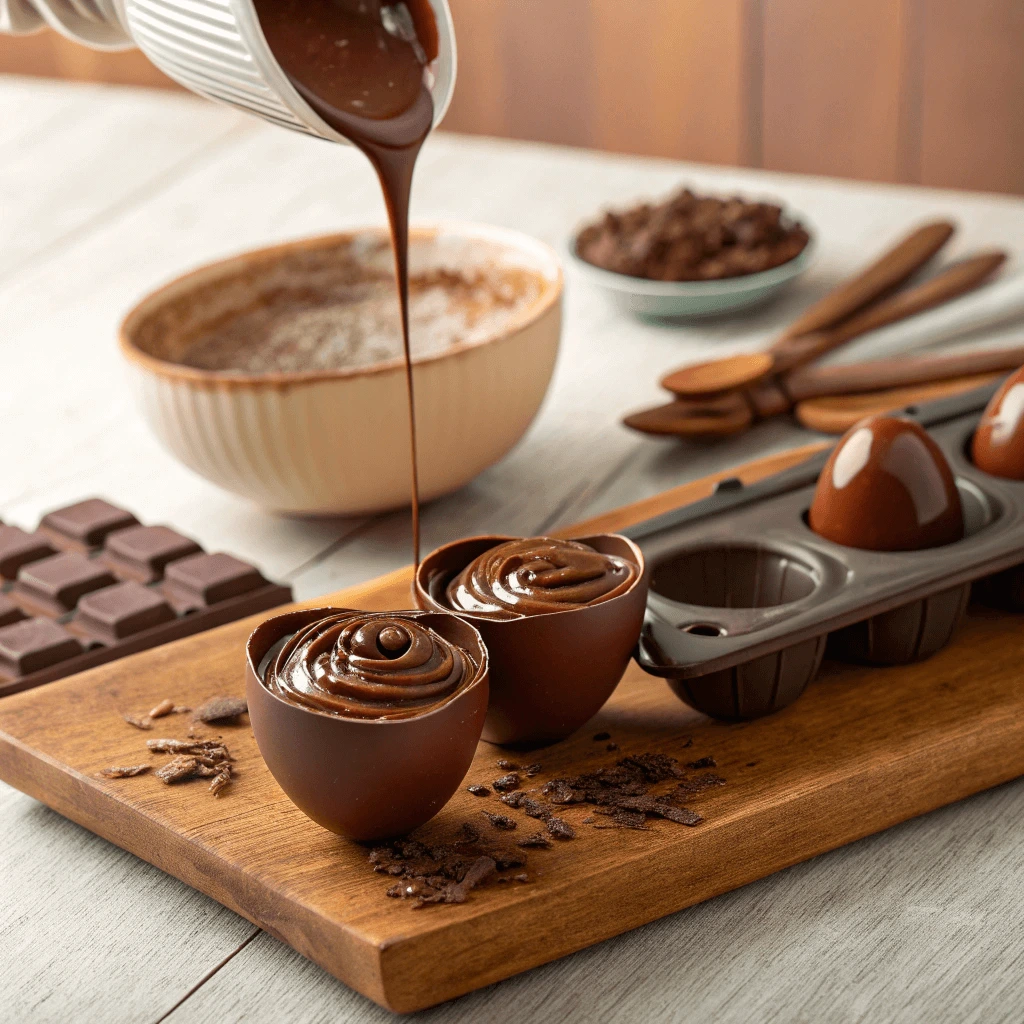
Preparing Your Chocolate Shells
After tempering your chocolate, pour it into egg-shaped molds. Use a spoon or brush to coat the molds evenly. For hollow eggs, pour out any excess chocolate after the first layer sets to create a thin shell. Chill the molds briefly to firm up the shells before adding fillings.
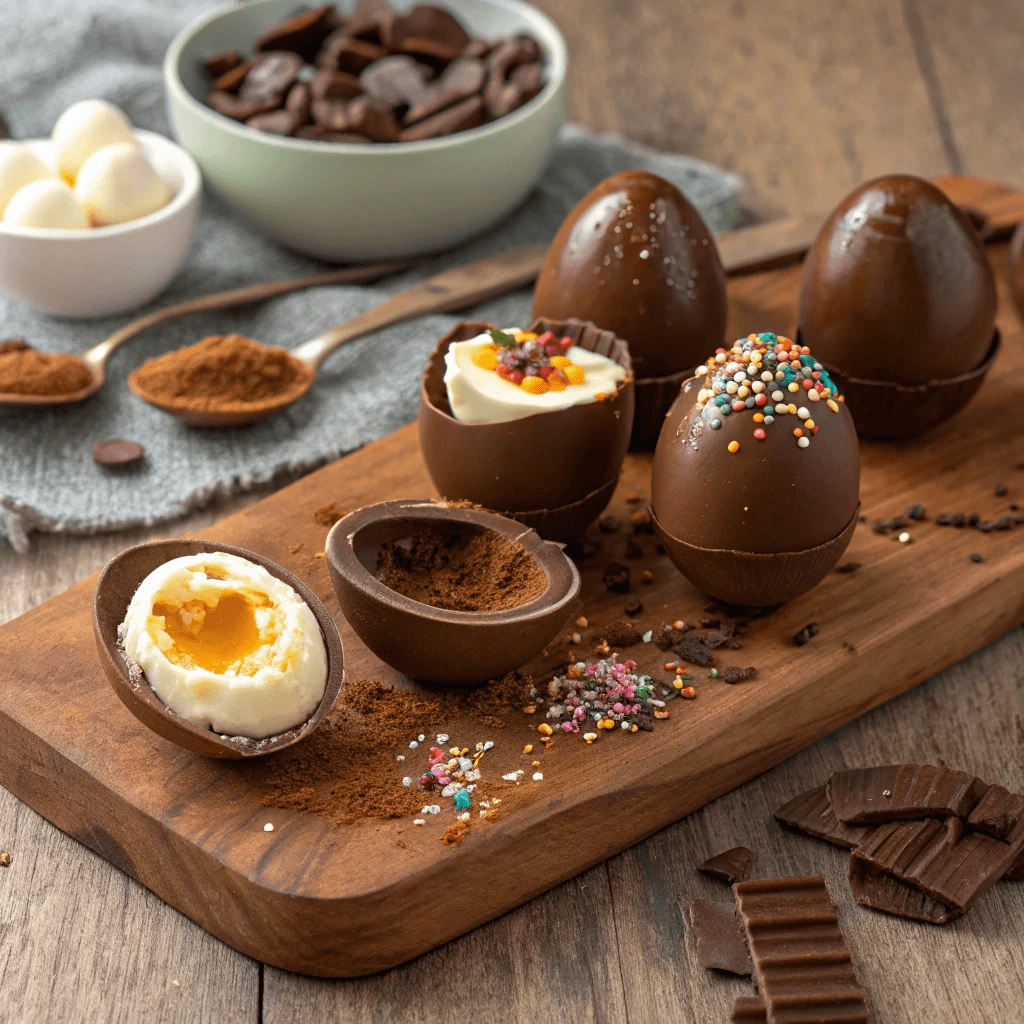
Choosing and Adding Fillings
Select fillings that complement the chocolate, such as caramel, nuts, fruit preserves, or creamy ganache. You can also opt for healthier choices like nut butter or dried fruit mixtures. Fill the shells gently, leaving space at the top to seal the eggs properly.
Sealing and Assembling the Eggs
Once filled, add a final layer of tempered chocolate over the fillings to seal the eggs. Make sure to cover the edges well to avoid gaps. Chill the molds again until the chocolate fully hardens. Carefully remove the eggs from the molds once set.
Tips for Perfect Shaping and Presentation
Work with clean, dry molds to prevent sticking or imperfections. Handle the eggs gently when unmolding to avoid cracks. For a polished finish, you can smooth rough edges with a warm knife or gently warm your hands and roll the eggs lightly.
Healthy Alternatives
Using healthy fillings inside your chocolate eggs not only adds flavor but also boosts their nutritional value. Nut butters and fruit purees offer delicious, wholesome options that complement chocolate perfectly.
Benefits of Nut Butters as Fillings
Nut butters like almond, peanut, or cashew provide healthy fats, protein, and fiber. These fillings add a creamy texture and rich taste to your chocolate eggs. They also offer sustained energy and help keep you full longer. Using natural, unsweetened nut butters keeps the sugar content low while enhancing the flavor.
Using Fruit Purees for Natural Sweetness
Fruit purees, such as mashed bananas, strawberries, or mango, add natural sweetness and moisture to chocolate eggs. These purees contain vitamins, antioxidants, and fiber, making your treats more nutritious. They pair well with dark or milk chocolate and provide a fresh, fruity contrast to the richness of the chocolate.
How to Prepare and Incorporate Fillings
Before filling your chocolate eggs, make sure the nut butters are smooth and slightly softened for easy spreading. For fruit purees, cook them down if needed to remove excess water, which helps prevent soggy chocolate shells. Fill the chocolate shells carefully, leaving enough space to seal the eggs with a chocolate layer.
Tips for Storage and Shelf Life
Nut butter fillings stay fresh longer than fruit purees, which should be refrigerated and consumed within a few days. To extend shelf life, consider mixing fruit purees with a bit of natural thickener like chia seeds or coconut flour. Always store filled chocolate eggs in a cool, dry place or the refrigerator to maintain freshness and texture.
Decorating and Personalizing Your Chocolate Easter Eggs
Creative Decoration Ideas
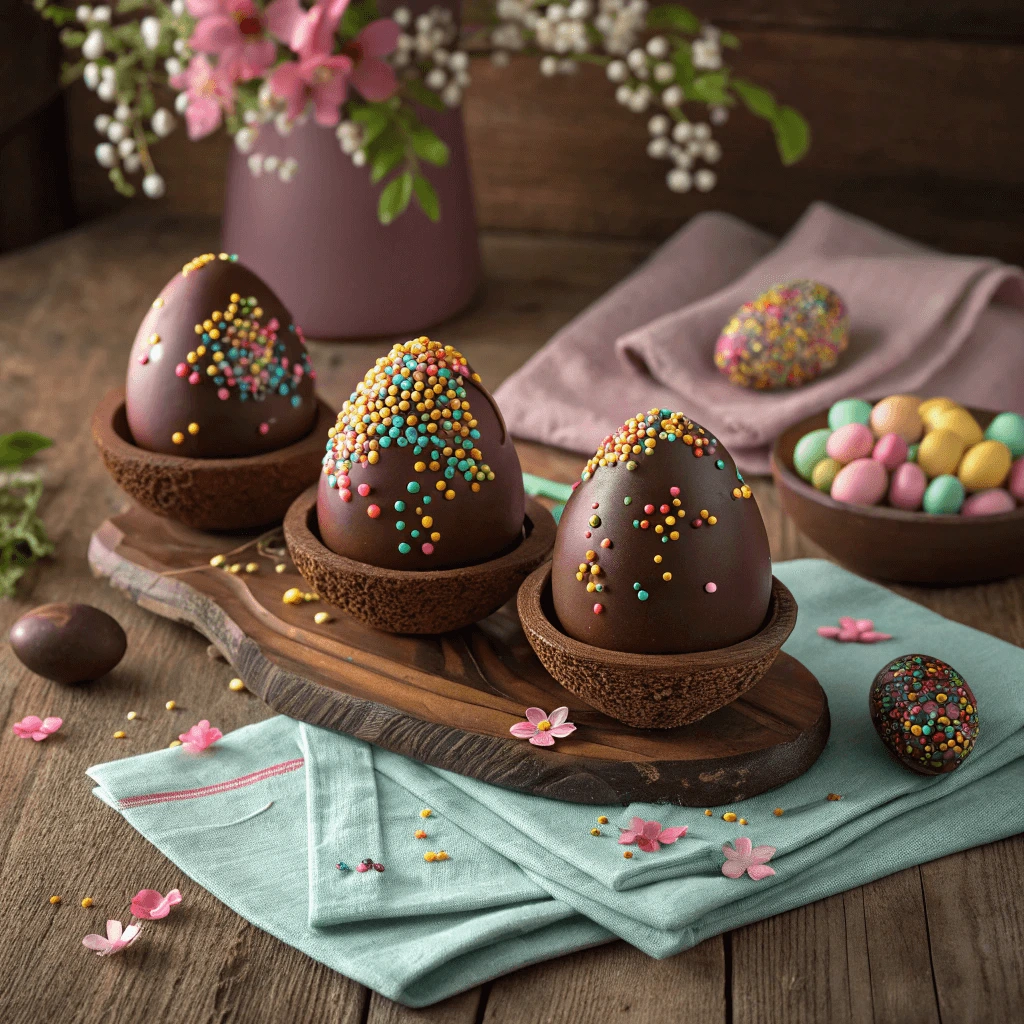
Decorating your chocolate eggs lets you add personality, color, and texture to your creations. Using simple, creative ideas like sprinkles, edible paint, and nuts can make your chocolate eggs look festive and delicious.
Adding Color and Texture with Sprinkles
Sprinkles come in various shapes, sizes, and colors, making them a fun way to decorate chocolate eggs. You can press sprinkles onto the chocolate surface while it’s still soft or add them to melted chocolate before pouring into molds. Choose natural or vegan sprinkles if you want a healthier option.
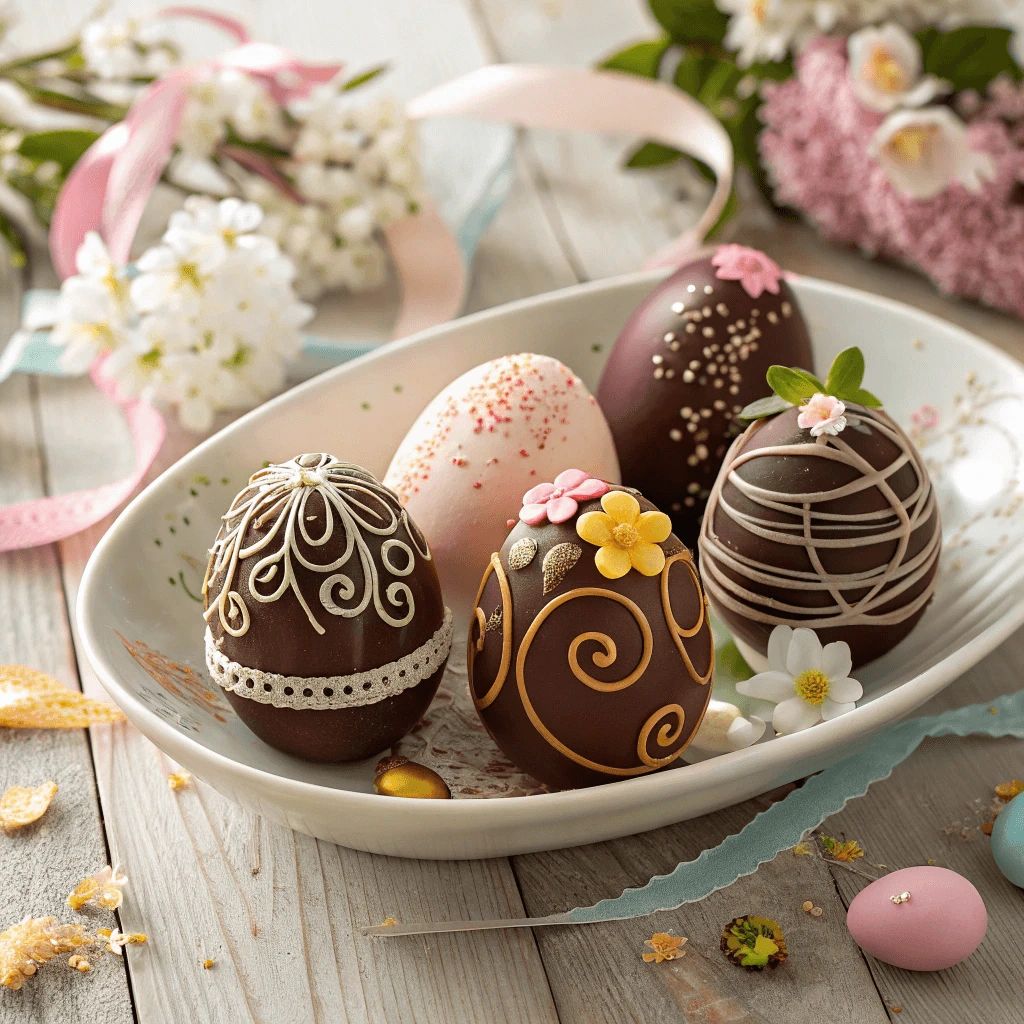
Using Edible Paint for Artistic Flair
Edible paint or colored cocoa butter allows you to create detailed designs and patterns on your chocolate eggs. Use a food-safe brush to paint stripes, dots, or even floral motifs. This technique gives you complete control over the look and lets you customize eggs for different themes or recipients.
Enhancing Flavor and Crunch with Nuts
Nuts like chopped almonds, pistachios, or hazelnuts add crunch and a nutty flavor to your chocolate eggs. Sprinkle them on top of wet chocolate or press them lightly into the surface before the chocolate sets. Toasting nuts beforehand intensifies their flavor and adds extra depth.
Tips for Perfect Decorating
Work on a cool surface and make sure your chocolate is slightly soft but not melted when adding decorations. Let each layer dry fully before adding more details. Store decorated eggs in a cool, dry place to preserve the colors and textures.
Gift Wrapping Tips for Homemade Chocolate Eggs
Presenting your homemade chocolate eggs beautifully adds a special touch that makes your gift memorable. Thoughtful wrapping not only protects the delicate chocolate but also enhances the excitement of receiving it.
Choosing the Right Wrapping Materials
Start by selecting wrapping materials that match the occasion. For Easter, colorful foil wraps, pastel tissue paper, or clear cellophane bags work wonderfully. You can also use reusable fabric wraps like cotton or muslin for an eco-friendly approach. Make sure the materials are food-safe and clean.
How to Wrap Chocolate Eggs Securely
Place each chocolate egg in a small box or on a sturdy card to protect it from breaking. Wrap the egg gently but snugly with tissue paper or bubble wrap for cushioning. If you use cellophane bags, gather the open end and tie it with a ribbon or twine to keep the chocolate fresh and secure.
Adding Personal Touches
Include handwritten tags, small notes, or personalized stickers on the wrapping to make your gift feel unique. You can decorate with fresh flowers, dried herbs, or small ornaments tied onto the ribbons. These details show extra care and make the gift stand out.
Tips for Storing Wrapped Eggs Before Gifting
Store wrapped chocolate eggs in a cool, dry place away from direct sunlight or heat sources. Avoid refrigeration unless necessary, as condensation can affect the chocolate’s texture. Wrapped eggs keep better when kept stable in temperature and humidity.
Healthy Alternatives
Decorating chocolate eggs with natural food coloring and edible flowers provides a beautiful and health-conscious way to enhance your treats. These alternatives avoid artificial dyes and chemicals while adding vibrant colors and delicate flavors.
Why Choose Natural Food Coloring?
Natural food coloring comes from fruits, vegetables, and spices, such as beet juice, turmeric, spinach, and blueberry extract. These colors look vibrant without the potential health risks linked to synthetic dyes. Using natural colors allows you to keep your chocolate eggs wholesome and allergy-friendly.
How to Use Natural Food Coloring in Chocolate
You can mix natural food coloring powders or liquid extracts into melted white chocolate for colorful designs. Make sure to use small amounts to maintain the chocolate’s texture and taste. Painting delicate patterns or swirling colors can create stunning effects without overpowering the flavor.
Benefits of Edible Flowers for Decoration
Edible flowers like pansies, violets, and marigolds add elegance and subtle flavor notes to your chocolate eggs. These flowers often contain antioxidants and vitamins, boosting the nutritional value slightly. They also provide a fresh, natural look that complements organic or homemade treats perfectly.
Tips for Safely Using Edible Flowers
Always source edible flowers from trusted suppliers or grow them yourself without pesticides. Rinse flowers gently and pat dry before placing them on chocolate. Use flowers sparingly, and add them right before gifting or serving to keep them fresh and vibrant.
Tips for Storing and Enjoying Your Chocolate Eggs Year-Round
Proper Storage Methods to Keep Chocolate Fresh
Storing chocolate eggs correctly ensures they maintain their taste, texture, and beautiful appearance. By following a few simple steps, you can prevent your homemade chocolate from developing bloom, absorbing odors, or losing its snap.
Keep Chocolate in a Cool, Dry Place
Chocolate stays freshest in a cool, dry environment where the temperature ranges between 55°F and 68°F (13°C to 20°C). Avoid areas with direct sunlight or high humidity, as both can cause melting or sugar bloom. Pantries or cupboards away from heat sources provide ideal storage conditions.
Use Airtight Containers to Protect Flavor
Store your chocolate eggs in airtight containers to prevent them from absorbing odors from nearby foods. Chocolate acts like a sponge, picking up scents from garlic, onions, or spices if left uncovered. You can use glass jars, food-safe tins, or plastic containers with tight-fitting lids.
When to Refrigerate or Freeze Chocolate
Refrigeration should be a last resort because chocolate can develop condensation when brought back to room temperature, which may affect texture and appearance. If you need to refrigerate, wrap each chocolate egg tightly in parchment paper or plastic wrap, and place them inside a sealed container. For long-term storage, freezing works better. Always thaw frozen chocolate slowly by moving it first to the fridge, then to room temperature before unwrapping.
Additional Tips for Freshness
Keep chocolate eggs away from strong light, moisture, and temperature swings. Label storage containers with dates so you can enjoy them at their best quality. Properly stored homemade chocolate eggs stay fresh for several weeks at room temperature and even longer when refrigerated or frozen correctly.
Creative Uses for Leftover Chocolate Eggs Beyond Easter
Leftover chocolate eggs don’t have to go to waste. With a little imagination, you can transform them into delicious treats that extend the joy of Easter for weeks to come.
Turn Chocolate Eggs into Baking Ingredients
Chop up your leftover chocolate eggs and add the pieces to cookies, muffins, or brownies. The chunks melt slightly while baking, creating gooey pockets of chocolate. You can also melt the eggs down and drizzle the chocolate over cakes, cupcakes, or fresh fruit.
Make Homemade Hot Chocolate or Mocha
Melt leftover chocolate eggs in warm milk to create a rich and creamy hot chocolate. Stir until smooth and top with whipped cream or a sprinkle of cinnamon. For a coffeehouse twist, stir melted chocolate into your morning coffee for an easy mocha that feels like a treat.
Create Chocolate-Covered Snacks
Dip pretzels, nuts, or pieces of dried fruit into melted leftover chocolate for quick, no-bake snacks. Spread the coated items onto a parchment-lined tray and let them set at room temperature or in the fridge. These bite-sized treats make great snacks or small gifts.
Additional Ideas for Leftover Chocolate
Blend melted chocolate into smoothies for added richness. Use it as a base for homemade chocolate bark topped with seeds, coconut flakes, or dried fruit. You can even shape melted chocolate into small molds to create new candies or decorations for other desserts.
Healthy Alternatives: Storing in a Cool, Dry Place and Using Minimal Packaging
When you try an Easy Chocolate Eggs Recipe, it’s important to think not only about how you make your treats but also how you store them afterward. Proper storage keeps your Easy Chocolate Eggs Recipe creations fresh, tasty, and looking their best, while minimal packaging helps reduce waste.
The Importance of Cool, Dry Storage
After following your Easy Chocolate Eggs Recipe, always store your eggs in a cool, dry place. A consistent temperature between 55°F and 68°F (13°C to 20°C) protects the smooth texture and shine of your chocolate. This method ensures that your Easy Chocolate Eggs Recipe doesn’t result in eggs that develop bloom or lose their snap. Heat and humidity can ruin all your effort, so choose a cupboard or pantry away from stoves and sunlight.
Minimal Packaging for Eco-Friendly Results
Part of the charm of an Easy Chocolate Eggs Recipe is that it allows you to keep things simple and eco-conscious. Instead of layers of plastic or foil, use parchment paper or reusable cloth wraps. Place your finished eggs in a tin or glass jar that seals well. Not only does this support sustainability, but it also keeps your Easy Chocolate Eggs Recipe creations safe and fresh.
Simple Tips for Storing Your Easy Chocolate Eggs Recipe
When you complete your Easy Chocolate Eggs Recipe, label your containers with the date so you can enjoy them at their best. Encourage recipients to reuse or recycle any packaging you use for gifts. Minimalist storage aligns with the spirit of a truly thoughtful Easy Chocolate Eggs Recipe, combining delicious flavor with care for the planet.
Conclusion
An Easy Chocolate Eggs Recipe offers the perfect blend of fun, creativity, and delicious results. Whether you’re making these chocolate treats for Easter or simply to enjoy with loved ones any time of year, this recipe provides a simple way to craft something special. With endless options for fillings, decorations, and healthy alternatives, you can personalize each batch to suit your taste. By following an Easy Chocolate Eggs Recipe, you’ll create memorable treats that delight both kids and adults—perfect for Easter and beyond!