Gluten-free bakeries recipes are the Perfect solution for anyone looking to enjoy soft, fluffy, and delicious treats without gluten. Whether you follow a gluten-free diet due to health reasons or simply love the taste of gluten-free baked goods, learning how to master gluten-free bakeries recipes at home is a rewarding experience. With the right ingredients, techniques, and a little patience, you can create bakery-quality gluten-free bakeries treats that rival anything you’d find in a store. In this guide, we’ll explore everything you need to know about baking at home, from flour blends to essential tools, helping you make the most of your gluten-free bakeries adventures.
Understanding the Basics of Gluten-Free Baking
What Makes Gluten-Free Baking Different?
Gluten-free baking stands apart because it avoids gluten, the protein that gives wheat-based dough its stretch and structure. Gluten helps dough trap air bubbles, making baked goods rise and stay soft. Without gluten, bakers need special ingredients and techniques to create similar textures.
Why Gluten Matters
Gluten acts like a strong, stretchy web in dough. It keeps bread chewy and helps cakes hold their shape. When you bake with gluten, it traps gases from yeast or baking powder, making the dough rise.
Challenges Without Gluten
Gluten-free dough often feels crumbly or dense. It doesn’t stretch or trap air well, so baked goods may turn out dry or crumbly. This makes it tricky to get soft, fluffy results without gluten.
How to Bake Gluten-Free Successfully
To replace gluten’s role, bakers use binders like xanthan gum or psyllium husk to add elasticity. Using a mix of gluten-free flours and starches like almond flour and tapioca starch helps balance moisture and texture. Measuring ingredients carefully and mixing gently also improve the outcome.
Common Challenges and How to Overcome Them
Gluten-free baking presents unique challenges that can affect the texture and taste of your treats. Knowing how to handle these issues helps you bake delicious goods every time.
Dry and Crumbly Texture
Without gluten, baked goods often become dry or crumbly. To fix this, add moisture-rich ingredients like eggs or yogurt. Using binders such as xanthan gum also helps hold everything together.
Dense and Heavy Baked Goods
Gluten provides elasticity that makes bread and cakes light. To avoid dense results, mix various gluten-free flours and starches like almond flour and tapioca starch. Also, avoid overmixing your batter.
Uneven Rising
Gluten-free dough can rise unevenly. To improve this, use the right amount of leavening agents like baking powder and let the batter rest before baking. This helps the flours absorb moisture and traps air better.
Avoiding Cross-Contamination
Keep your baking space and tools gluten-free to prevent contamination. Clean surfaces thoroughly and store gluten-free ingredients separately.
Essential Gluten-Free Baking Ingredients
Baking without gluten requires specific ingredients that help replicate the texture and structure gluten provides. Knowing these essentials is key to creating soft, fluffy, and delicious gluten-free treats.
Gluten-Free Flours
Almond flour, coconut flour, and rice flour serve as common gluten-free flour bases. Almond flour adds moisture and a rich flavor, while coconut flour absorbs more liquid and needs careful measuring. Combining different flours balances texture and taste.
Starches and Thickeners
Tapioca starch, potato starch, and cornstarch improve the lightness and chewiness of baked goods. These starches help bind ingredients and retain moisture, preventing dryness in your recipes.
Binding Agents
Binders like xanthan gum, guar gum, and psyllium husk replace gluten’s binding properties. These ingredients hold dough together, giving structure and elasticity to gluten-free baked goods.
Leavening Agents
Baking powder and baking soda remain important in gluten-free baking. They create air bubbles, helping your treats rise and stay fluffy.
Moisture-Rich Ingredients
Gluten-free baked goods often need extra moisture to avoid dryness. Ingredients such as eggs, yogurt, applesauce, and oils add the needed moisture and improve texture.
Best Gluten-Free Flours for Soft and Fluffy Baked Goods
Almond Flour and Coconut Flour
Almond flour and coconut flour rank among the most popular gluten-free flours. Both offer unique textures and flavors that enhance a wide variety of bakery treats.
Almond Flour: Moisture and Rich Flavor
Almond flour comes from finely ground almonds. It adds moisture and a subtle nutty taste to baked goods. Because almond flour contains natural fats, it creates a tender crumb and helps keep baked items soft and moist. You can use almond flour in cakes, muffins, cookies, and even bread.
One thing to keep in mind: almond flour doesn’t absorb much liquid, so recipes often require fewer wet ingredients. When substituting almond flour for regular flour, you might need to adjust the amount of eggs or liquids to achieve the right consistency.
Coconut Flour: Highly Absorbent and Fiber-Rich
Coconut flour comes from dried coconut meat ground into a fine powder. It has a mild coconut flavor and a light texture. However, coconut flour absorbs much more liquid than almond flour, so you need to use less coconut flour and increase the liquid content in your recipes.
Because coconut flour is rich in fiber, it helps improve digestion and adds a slightly dense texture to baked goods. You’ll often find coconut flour combined with other gluten-free flours to balance moisture and texture.
Tips for Using Almond and Coconut Flours
To achieve the best results, experiment with blending almond and coconut flours. This mix often creates a better crumb and structure than using either flour alone. Always measure these flours carefully, as their properties differ greatly from wheat flour.
Tapioca Starch and Other Starches
Tapioca starch and other gluten-free starches play an essential role in gluten-free baking. They improve texture, moisture retention, and elasticity in baked goods.
What is Tapioca Starch?
Tapioca starch, also called tapioca flour, comes from the cassava root. It has a fine, powdery texture and a neutral flavor, making it versatile for many recipes. Tapioca starch adds chewiness and helps create a light, fluffy crumb in breads, cakes, and cookies.
Role of Other Gluten-Free Starches
Other common gluten-free starches include potato starch, cornstarch, and arrowroot powder. Each starch has unique properties that affect moisture and texture:
- Potato starch helps retain moisture and lends a soft, tender crumb.
- Cornstarch thickens batters and adds lightness.
- Arrowroot powder improves the elasticity of dough and helps prevent dryness.
Combining these starches with gluten-free flours often produces better results than using one type alone. They work together to mimic gluten’s ability to trap air and retain moisture.
How to Use Starches Effectively
Use tapioca starch and other starches in appropriate amounts to avoid gummy or overly dense baked goods. Typically, starches make up about 20-30% of the total flour blend in a recipe. Be sure to follow recipe guidelines or test small batches to get the perfect balance.
Using Xanthan Gum and Other Binders
Gluten provides structure and elasticity in traditional baking. In gluten-free baking, binders like xanthan gum take over these important roles to create soft, well-structured baked goods.
What is Xanthan Gum?
Xanthan gum is a natural thickening agent produced through fermentation. It acts as a glue that holds ingredients together, providing elasticity and preventing crumbly textures. Adding xanthan gum improves dough stretch and helps trap air bubbles for better rise and fluffiness.
Other Common Binders
Besides xanthan gum, bakers use guar gum, psyllium husk, and chia seeds as binders:
- Guar gum works similarly to xanthan gum and is ideal for those with allergies or sensitivities.
- Psyllium husk adds fiber and moisture while creating a stretchy dough, great for bread recipes.
- Chia seeds form a gel when soaked in water and help bind ingredients naturally, adding nutrition and moisture.
How to Use Binders Correctly
Using the right amount of binder is crucial. Too little can cause crumbly baked goods, while too much creates a gummy texture. Generally, recipes call for about ¼ to 1 teaspoon of xanthan gum per cup of gluten-free flour. Adjust according to the recipe and type of baked good.
Always mix binders thoroughly with dry ingredients to distribute them evenly. This ensures consistent texture and structure throughout your bakery treats.
Step-by-Step Homemade Gluten-Free Bakery Recipes
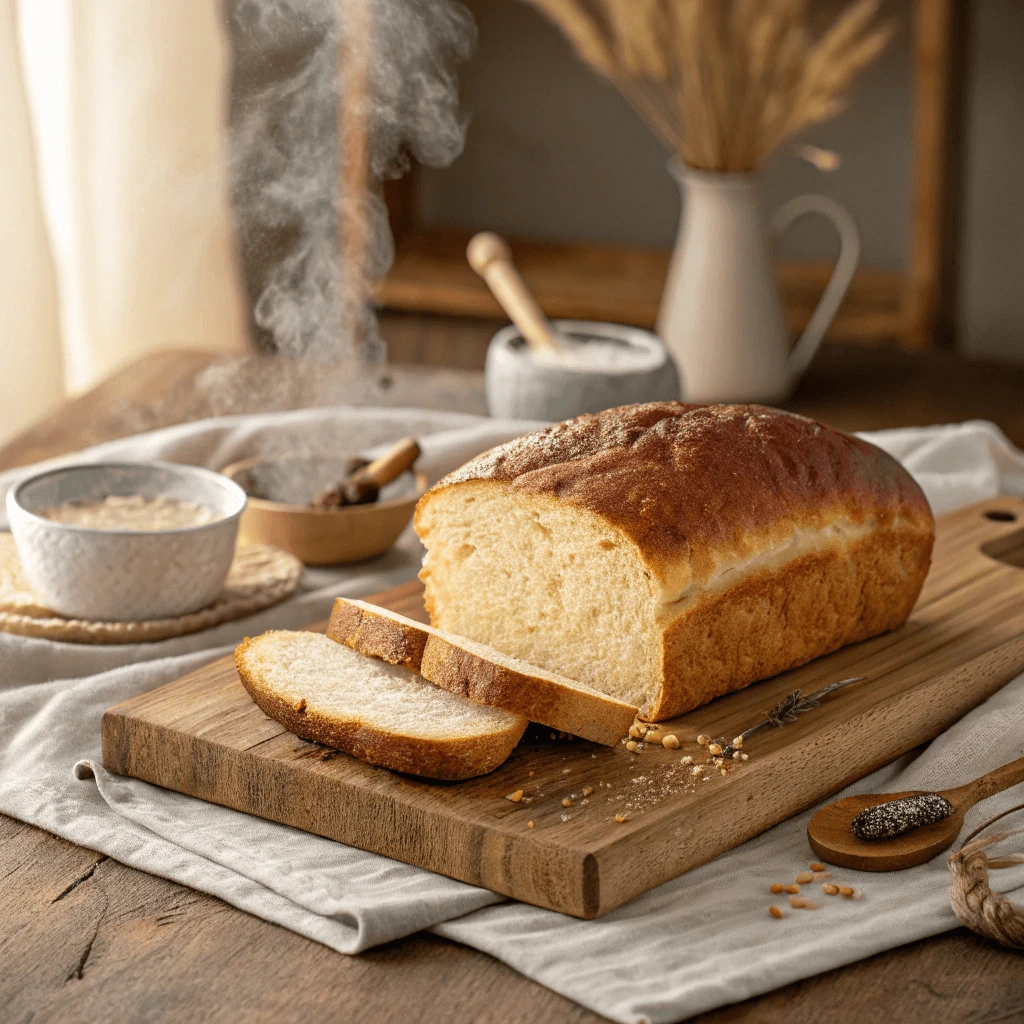
Soft Gluten-Free Bread Recipe
Making soft gluten-free bread at home can be rewarding and delicious. This recipe focuses on creating a light, fluffy texture that mimics traditional bread, using simple gluten-free ingredients.
Key Ingredients for Softness
To achieve softness, this recipe uses a blend of gluten-free flours such as rice flour and tapioca starch, combined with xanthan gum for structure. Adding ingredients like eggs and oil helps retain moisture and improve the crumb.
Step-by-Step Preparation
- Mix dry ingredients: Combine the gluten-free flour blend, xanthan gum, yeast, salt, and sugar in a large bowl.
- Activate yeast: Warm water and a bit of sugar help activate the yeast. Let it sit until it bubbles, signaling it’s ready.
- Combine wet and dry ingredients: Whisk eggs, oil, and the activated yeast mixture, then gradually add to the dry ingredients. Mix until smooth.
- First rise: Cover the dough and let it rise in a warm spot for about an hour. It should double in size.
- Bake: Transfer the dough to a greased loaf pan and bake at 350°F (175°C) for 35-40 minutes, until golden brown.
Tips for Best Results
Avoid overmixing the dough, which can make bread dense. Use a kitchen scale for accurate measurements, and resist opening the oven door during baking to maintain consistent heat.
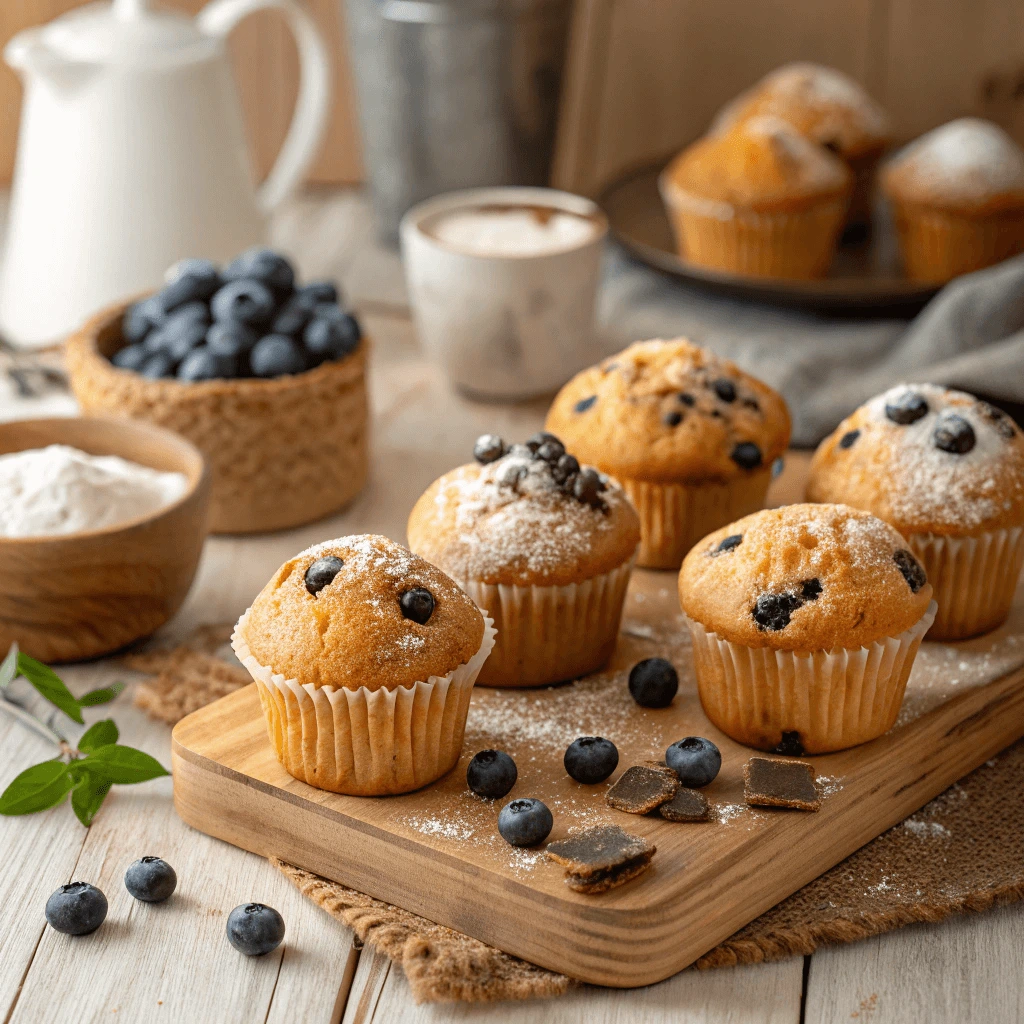
Fluffy Gluten-Free Muffins and Cupcakes
Gluten-free muffins and cupcakes can be just as light and fluffy as their traditional counterparts when you use the right ingredients and techniques.
Choosing the Right Flour Blend
A balanced gluten-free flour blend is key to achieving a tender crumb. Combine rice flour, tapioca starch, and almond flour to provide structure and moisture. These flours work together to mimic the texture of wheat flour.
Incorporating Leavening Agents
Baking powder and baking soda act as leavening agents to help your muffins and cupcakes rise. Using fresh leaveners is crucial; expired ones lose their potency and result in dense treats. Adding a small amount of vinegar or lemon juice can also boost the rising action by activating baking soda.
Mixing Techniques for Fluffy Texture
Avoid overmixing your batter, as it can lead to tough or dense muffins. Gently fold wet and dry ingredients together until just combined. For extra fluffiness, separate egg whites from yolks, whip the whites to soft peaks, and fold them into the batter last.
Baking Tips
Fill muffin tins about two-thirds full to allow room for rising without overflow. Bake at the recommended temperature and avoid opening the oven door early to keep a steady temperature for even rising.
Tender Gluten-Free Pastries and Scones
Creating tender gluten-free pastries and scones requires careful ingredient choices and techniques to replicate the flaky, soft texture of traditional baked goods.
Choosing the Right Flours and Fats
Use a blend of almond flour, rice flour, and tapioca starch for a light base. These flours create a tender crumb while providing structure. Incorporate cold, unsalted butter or coconut oil to add flakiness. Cutting the fat into the dry ingredients in small pieces helps create layers in the dough.
Mixing and Handling the Dough
Avoid overworking the dough, which can make pastries tough. Combine the ingredients just until they come together. Chill the dough for at least 30 minutes before rolling it out. This resting period firms the fat and prevents spreading during baking, preserving the desired texture.
Baking Tips for Tenderness
Bake scones and pastries on a parchment-lined tray to prevent sticking and promote even cooking. Use a light hand when brushing egg wash or milk on top for a golden finish without weighing down the dough. Bake until the edges turn golden brown, and allow them to cool slightly on a wire rack to maintain crispness.
Tools and Techniques for Perfect Gluten-Free Baking
Must-Have Kitchen Tools
Having the right kitchen tools makes gluten-free baking easier and more successful. These tools help ensure accuracy, consistency, and convenience while preparing your favorite treats.
Precision Measuring Tools
Accurate measurements are crucial in gluten-free baking. Invest in a reliable digital kitchen scale to weigh ingredients precisely. Measuring cups and spoons also come in handy, but weighing ingredients delivers the best results, especially for flours and starches.
Mixing Equipment
Use a stand mixer or hand mixer to combine ingredients thoroughly without overmixing. These mixers provide consistent mixing speed and help develop the right dough or batter texture. A food processor also works well for cutting cold butter into flour blends when making pastries.
Baking Pans and Liners
Select high-quality baking pans in various sizes—muffin tins, loaf pans, and baking sheets—to accommodate different recipes. Silicone baking mats or parchment paper prevent sticking and promote even baking. These liners also make cleanup easier.
Other Useful Tools
Keep a set of rubber spatulas for scraping bowls clean and folding batter gently. A fine-mesh sieve helps aerate flour blends and remove lumps. Lastly, a reliable oven thermometer ensures your oven maintains the correct temperature, preventing under- or over-baking.
Measuring Ingredients Accurately
Accurate measurement of ingredients plays a vital role in gluten-free baking. Since gluten-free flours and starches behave differently than wheat flour, precision helps ensure your baked goods turn out perfectly every time.
Why Accuracy Matters in Gluten-Free Baking
Gluten-free recipes require exact ratios of flour blends, liquids, and leavening agents. Even small deviations can lead to dense, dry, or crumbly results. Measuring ingredients precisely balances moisture and structure in your treats.
Weighing vs. Volume Measuring
Weighing ingredients using a digital kitchen scale is the most reliable method. Scales remove inconsistencies caused by how tightly or loosely flours settle in measuring cups. For example, a cup of almond flour packed tightly weighs more than a loosely scooped cup, affecting texture and taste.
If you don’t have a scale, use dry measuring cups for flour and starches, and liquid measuring cups for liquids. Always level off dry ingredients with a straight edge for accuracy.
Tips for Consistent Measuring
Use the spoon-and-level method: spoon flour gently into the measuring cup, then level off excess with a knife. Avoid scooping flour directly with the cup, as this compacts the flour and increases the amount.
Double-check your scale’s accuracy regularly by weighing a known item, such as a packaged ingredient with its weight labeled.
Maintaining a Gluten-Free Baking Environment
Creating and maintaining a dedicated gluten-free baking environment helps prevent cross-contamination and ensures the safety of your baked goods.
Why Avoid Cross-Contamination?
Cross-contamination occurs when gluten-containing ingredients come into contact with gluten-free products or surfaces. Even tiny traces of gluten can cause adverse reactions in people with celiac disease or gluten sensitivity. Maintaining a clean, gluten-free space safeguards your treats.
Designate Gluten-Free Tools and Surfaces
Use separate mixing bowls, baking utensils, and measuring cups exclusively for gluten-free baking. Clearly label these tools to avoid accidental use with gluten-containing ingredients. Assign a specific countertop or workspace for gluten-free prep.
Clean Thoroughly Before and After Baking
Wipe down counters and wash all tools and equipment thoroughly before starting. Clean your oven racks and pans to remove crumbs or residue from previous gluten-containing bakes. Using warm soapy water or a dishwasher works best to eliminate gluten traces.
Store Gluten-Free Ingredients Properly
Keep gluten-free flours, starches, and mixes in airtight containers. Store them separately from regular flours to prevent accidental mixing. Label containers clearly to avoid confusion.
Enhancing Your Gluten-Free Bakery Treats
Using Healthy Sweeteners and Natural Flavor Enhancers
Choosing the right sweeteners and flavor enhancers can elevate your gluten-free bakery treats, making them both delicious and nutritious.
Healthy Sweetener Options
Instead of relying solely on refined sugar, consider natural alternatives like honey, maple syrup, coconut sugar, or agave nectar. These sweeteners contain trace minerals and antioxidants, adding a richer flavor and health benefits. For example, maple syrup lends a subtle caramel note that pairs well with muffins and cookies.
Adjusting Sweetener Quantities
When substituting liquid sweeteners like honey or maple syrup for granulated sugar, reduce the liquid in your recipe slightly to maintain the proper dough or batter consistency. Also, keep in mind that some sweeteners are sweeter than sugar, so adjust quantities accordingly.
Natural Flavor Enhancers
Use vanilla extract, almond extract, cinnamon, nutmeg, and citrus zest to boost your treats’ flavor profiles. These natural ingredients add depth without extra calories or artificial additives. Cinnamon, for instance, enhances sweetness perception, reducing the amount of sugar needed.
Tips for Balancing Flavors
Experiment with combinations of sweeteners and spices to find your perfect balance. Adding a pinch of salt can also enhance sweetness and overall flavor, making your baked goods taste more rounded and satisfying.
Troubleshooting Common Baking Problems
Baking gluten-free treats at home can sometimes present challenges. Identifying common issues and applying practical solutions will help you achieve soft, fluffy, and delicious results.
Problem 1: Dry or Crumbly Texture
Gluten-free baked goods can turn out dry or crumbly due to the lack of gluten’s binding properties. To fix this, increase moisture by adding ingredients like applesauce, yogurt, or an extra egg. Also, ensure you measure flour accurately, as too much flour can dry out your dough.
Problem 2: Dense or Heavy Baked Goods
If your treats feel dense or heavy, check your leavening agents. Baking powder or baking soda must be fresh and used in the right amounts. Overmixing the batter can also lead to density. Mix just until ingredients combine to avoid compacting the dough.
Problem 3: Uneven Rise or Flat Texture
Uneven rising often results from incorrect oven temperature or expired yeast. Use an oven thermometer to verify heat accuracy, and always test yeast before baking. Incorporating binders like xanthan gum or guar gum helps improve structure and rise.
Problem 4: Bitter or Off-Flavors
Sometimes gluten-free flours like almond or coconut flour can impart bitter notes. Balance flavors with sweeteners, spices, or natural flavor enhancers like vanilla extract or citrus zest. Toasting some flours lightly before baking can also reduce bitterness.
Where to Find Quality Ingredients for Gluten-Free Bakeries
When you create homemade Gluten-Free Bakeries treats, choosing the right ingredients makes all the difference. Sourcing high-quality gluten-free flours, starches, and binders helps you achieve consistent, bakery-style results.
Trusted Brands for Gluten-Free Bakeries
Many home bakers rely on well-known brands to recreate the textures and flavors of professional Gluten-Free Bakeries. Brands like Bob’s Red Mill, King Arthur Baking Company, Namaste Foods, and Canyon Bakehouse offer certified gluten-free ingredients perfect for breads, muffins, and cookies. These brands provide the reliability that Gluten-Free Bakeries need, ensuring safety for those with celiac disease or gluten sensitivities.
Best Places to Shop for Gluten-Free Bakeries Ingredients
You can find ingredients for your Gluten-Free Bakeries creations at major supermarkets, health food stores, and online. Stores such as Whole Foods, Sprouts, and Trader Joe’s stock a wide range of gluten-free flours, starches, and baking mixes. For even more variety, try online shops like Vitacost, Thrive Market, or Amazon’s gluten-free section. Many Gluten-Free Bakeries also source specialty items directly from these trusted suppliers.
Tips for Choosing Ingredients
When selecting products for your homemade Gluten-Free Bakeries recipes, look for certified gluten-free labels and clear allergen information. Reviews from bakers can guide you toward the best products that mimic the texture and flavor of traditional baked goods.
Conclusion
Creating your own Homemade Gluten-Free Bakeries Recipe: Soft, Fluffy, Delicious treats is easier than you might think with the right ingredients, tools, and techniques. By using quality gluten-free flours, binders, and natural sweeteners, you can enjoy bakery-style breads, muffins, cookies, and pastries in the comfort of your home. With a little practice, you’ll master the art of gluten-free baking and impress your family with soft, fluffy, and delicious creations. Start experimenting today and bring the magic of gluten-free bakeries into your kitchen!