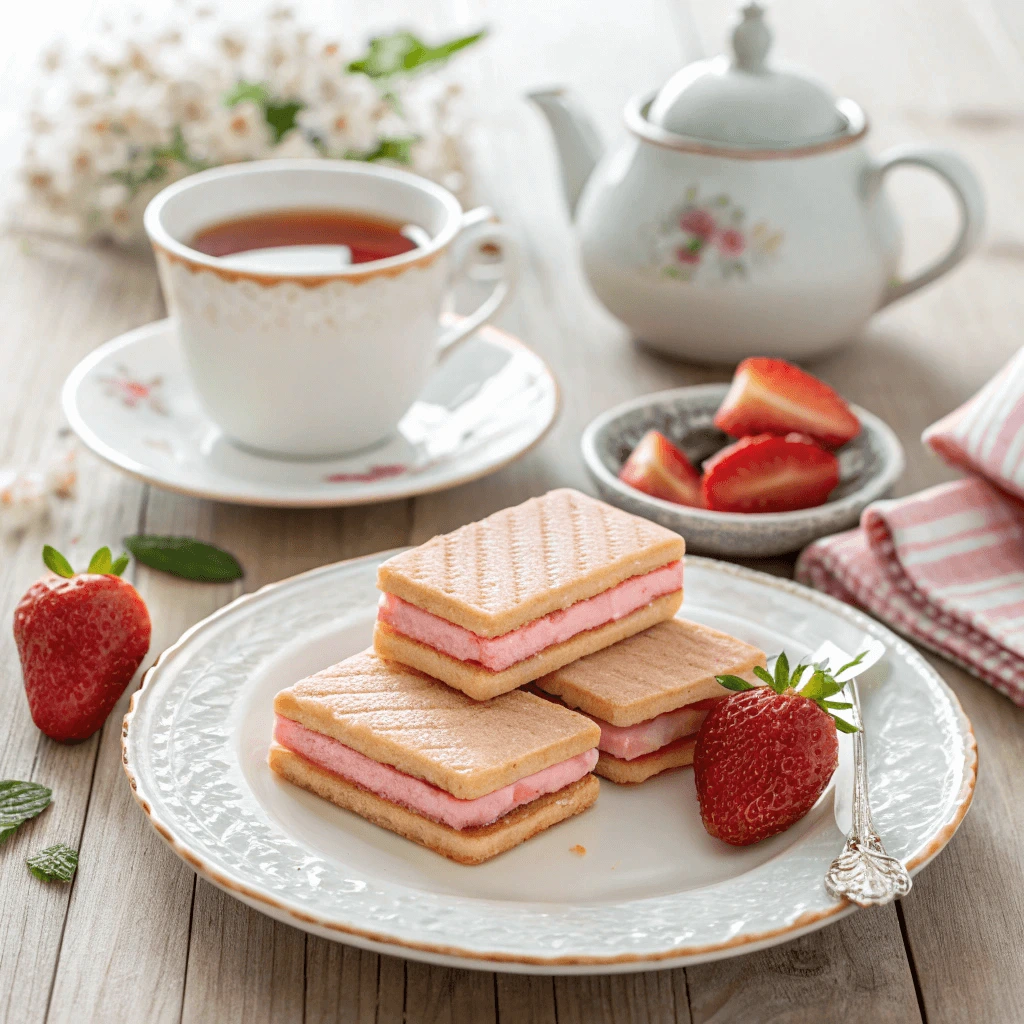
Strawberry wafers are a classic treat loved for their crispy texture and creamy strawberry flavor. Whether enjoyed as a snack, paired with coffee, or used in desserts, these light and airy wafers are a delightful indulgence. While store-bought versions are widely available, nothing beats the freshness and taste of homemade strawberry wafers.
Making your own wafers at home is easier than you might think! With just a few simple ingredients like flour, sugar, butter, and real strawberry puree, you can create a batch of perfectly crispy, sweet wafers that are free from artificial flavors and preservatives. Plus, you can customize the recipe to make it gluten-free, vegan, or even low-sugar.
In this guide, we’ll walk you through step-by-step instructions on how to make delicious homemade strawberry wafers from scratch. Whether you’re a baking beginner or an experienced home cook, this recipe is simple, fun, and sure to impress. Let’s get started! 🍓✨
What Are Strawberry Wafers?
A Brief History of Wafers
Wafers have delighted people for centuries, evolving from simple baked goods into the crisp, layered treats we love today. Historians trace their origins back to medieval Europe, where bakers cooked thin, crisp cakes between heated iron plates. These early wafers contained light sweeteners and aromatic spices like cinnamon and nutmeg. Monks in monasteries often baked them for religious ceremonies, and soon, royalty and the wealthy embraced them as a delicacy.
The Evolution of Wafers Over Time
As baking techniques advanced, wafers became more refined. During the Renaissance period, European bakers experimented with different textures and flavors. They added honey, nuts, and fruit extracts to enhance the taste. By the 19th century, the Industrial Revolution transformed wafer production. Factories began mass-producing these crispy treats, making them accessible to more people than ever before.
In the late 1800s, brands like Nabisco and Keebler introduced packaged wafer cookies, allowing households worldwide to enjoy them conveniently. Over time, bakers developed cream-filled wafers, which combined crisp layers with soft, flavorful fillings. This innovation led to the creation of strawberry, vanilla, and chocolate wafers, which remain popular today.
Strawberry Wafers: A Modern Favorite
Strawberry wafers gained popularity because of their light, fruity flavor and satisfying crunch. Companies responded to growing demand by using real fruit extracts and artificial flavoring to perfect the signature strawberry taste. As more consumers sought healthier alternatives, many brands introduced natural, low-sugar, and gluten-free versions. Today, people enjoy strawberry wafers as a standalone snack, a dessert ingredient, or a complement to coffee and tea.
From their humble beginnings in medieval kitchens to their modern place on grocery store shelves, wafers have remained a beloved treat. Their crispy texture and sweet fillings continue to bring joy to generations of snack lovers.
Ingredients Used in Strawberry Wafers
Homemade strawberry wafers require a handful of simple ingredients that work together to create their light, crispy texture and deliciously sweet flavor. Each ingredient plays a crucial role in ensuring the wafers turn out perfectly. Below, we break down the essential components and their functions.
1. Flour: The Base of the Wafers
Flour serves as the structural foundation of strawberry wafers. Most recipes use all-purpose flour, which provides the right balance of strength and tenderness. Some bakers prefer cake flour for a lighter texture, while those following a gluten-free diet can substitute almond flour or a gluten-free flour blend.
2. Sugar: Sweetness and Texture
Sugar not only adds sweetness but also influences the wafer’s crispiness. Traditional recipes call for granulated sugar, which caramelizes slightly during baking to create a satisfying crunch. Some variations use powdered sugar for a finer texture, while health-conscious bakers may opt for coconut sugar or sugar substitutes like monk fruit or erythritol.
3. Butter or Oil: Enhancing Flavor and Texture
Butter contributes to the wafers’ richness and delicate crispness. Many recipes use unsalted butter, which allows better control over the overall flavor. For a dairy-free option, bakers often replace butter with coconut oil, vegetable oil, or vegan butter. The choice of fat affects the final texture, with butter providing a flakier result and oil creating a lighter crunch.
4. Strawberry Flavoring: Natural vs. Artificial
Strawberry wafers get their signature fruity taste and pink hue from strawberry-based ingredients. The best options for a natural and fresh flavor include:
- Strawberry puree – Made from blended fresh or frozen strawberries, this enhances both taste and color.
- Strawberry extract – A concentrated flavoring that intensifies the strawberry taste.
- Freeze-dried strawberry powder – A great option for natural color and flavor without adding extra liquid.
Some commercial versions use artificial strawberry flavoring and food coloring, but homemade recipes often rely on natural ingredients for a more authentic taste.
5. Baking Powder or Baking Soda: Creating the Perfect Crisp
Leavening agents like baking powder or baking soda help the wafers achieve their characteristic light and airy texture. Without them, the wafers may turn out dense or flat. A small amount is enough to ensure the wafers rise slightly while staying crisp.
6. Milk or Water: Binding the Ingredients
A small amount of milk or water helps bring the batter together. Dairy milk provides richness, while non-dairy alternatives like almond milk, oat milk, or coconut milk work well for vegan versions. Using water instead of milk results in a slightly crispier texture.
7. Vanilla Extract: Enhancing the Overall Flavor
While strawberry is the dominant flavor, a touch of vanilla extract rounds out the sweetness and adds depth to the wafers’ taste. High-quality pure vanilla extract works best, but vanilla bean paste or imitation vanilla can also be used.
Store-Bought vs. Homemade Strawberry Wafers
When it comes to strawberry wafers, you have two main options: buying them from a store or making them at home. Each choice offers its own advantages and drawbacks, depending on factors like taste, ingredients, cost, and convenience. Below, we compare store-bought and homemade strawberry wafers to help you decide which option works best for you.
1. Ingredients: Natural vs. Processed
One of the biggest differences between store-bought and homemade wafers lies in the ingredients.
- Store-Bought Wafers: Most brands use artificial flavors, preservatives, and food coloring to achieve a consistent taste, texture, and shelf life. Many also contain high fructose corn syrup, hydrogenated oils, and artificial additives that may not be ideal for health-conscious consumers.
- Homemade Wafers: When making wafers at home, you have full control over the ingredients. You can choose natural sweeteners, real strawberry puree, and high-quality butter instead of processed alternatives. Additionally, homemade versions allow you to create gluten-free, dairy-free, or low-sugar options based on your dietary needs.
2. Flavor and Freshness
Flavor and freshness make a huge difference in the overall wafer experience.
- Store-Bought Wafers: Manufacturers design store-bought wafers to have a consistent flavor and texture. However, many rely on artificial strawberry flavors rather than real fruit, which can result in a synthetic aftertaste. Additionally, because they are produced in bulk and stored for long periods, they may not taste as fresh as homemade versions.
- Homemade Wafers: Freshly baked wafers deliver a richer, more authentic strawberry flavor. You can enhance the taste by using fresh strawberry puree, freeze-dried strawberry powder, or natural extracts. Since homemade wafers lack preservatives, they taste fresher but may have a shorter shelf life than their store-bought counterparts.
3. Texture and Crispiness
The crispness of a wafer plays a key role in its appeal.
- Store-Bought Wafers: Mass-produced wafers often have a consistent, crunchy texture due to controlled baking processes and the addition of stabilizers. However, some brands may lack the delicate, flaky layers that homemade versions offer.
- Homemade Wafers: When made correctly, homemade strawberry wafers can achieve a light, crispy texture with natural flakiness. The freshness of the ingredients and the ability to adjust baking times allow you to customize the texture to your liking.
4. Cost and Availability
The price and accessibility of strawberry wafers can also influence your decision.
- Store-Bought Wafers: Pre-packaged wafers offer an affordable and convenient option. Many brands sell them at supermarkets, online stores, and convenience shops, making them easy to find. However, premium brands with healthier or organic ingredients can cost significantly more.
- Homemade Wafers: While homemade wafers require time and effort, they can be more cost-effective in the long run. You can buy ingredients in bulk and make larger batches, reducing the overall cost per serving. Plus, you avoid paying for excess packaging and preservatives found in commercial products.
5. Health Considerations
For those concerned about health and nutrition, homemade wafers provide clear advantages.
- Store-Bought Wafers: Many store-bought options contain high sugar levels, unhealthy fats, and chemical preservatives. While some brands offer healthier versions, they can be harder to find and more expensive.
- Homemade Wafers: Making wafers at home allows you to control the sugar content, use healthier fats, and eliminate unnecessary additives. You can even experiment with alternatives like whole wheat flour, coconut sugar, or plant-based ingredients to create a healthier snack.
Final Verdict: Which One Should You Choose?
Both store-bought and homemade strawberry wafers offer their own benefits. If convenience and consistency matter most to you, store-bought wafers provide an easy solution. However, if you prioritize freshness, natural ingredients, and customization, homemade wafers are the better choice.
For those who enjoy baking and want a healthier, more flavorful treat, making strawberry wafers at home is worth the effort. On the other hand, if you need a quick, hassle-free snack, store-bought wafers remain a reliable option. Ultimately, your decision depends on your preferences, dietary needs, and lifestyle.
Ingredients and Equipment Needed
Essential Ingredients for Homemade Strawberry Wafers
Creating delicious homemade strawberry wafers starts with the right ingredients. Each component plays a crucial role in achieving the perfect balance of flavor, texture, and crispiness. Below, we explore the essential ingredients used in making these delightful treats, along with tips for selecting the best options.
1. Flour: The Base for Structure and Crispness
Flour provides the structural foundation for strawberry wafers.
- All-purpose flour is the most common choice because it offers a balance of strength and tenderness, ensuring that the wafers remain light and crisp.
- Cake flour contains less protein than all-purpose flour, leading to a softer, more delicate wafer texture.
- Gluten-free flour blends work well for those with gluten sensitivities, but they may require additional binding agents like xanthan gum to maintain structure.
2. Butter: Enhancing Flavor and Texture
Butter adds richness and flakiness to the wafers, making them more flavorful.
- Unsalted butter is the preferred option since it allows better control over the salt content.
- High-quality European-style butter contains a higher fat content, which creates a more tender and crisp texture.
- Vegan butter alternatives can replace traditional butter for a dairy-free version, but they may slightly alter the texture.
3. Sugar: Providing Sweetness and Crispness
Sugar contributes to the sweetness and caramelization of the wafers.
- Granulated sugar is commonly used because it dissolves easily and helps achieve a crisp texture.
- Powdered sugar can create a finer texture, making the wafers more delicate.
- Coconut sugar or alternative sweeteners work well for those who prefer a lower glycemic option, though they may slightly affect the flavor and color.
4. Eggs: Binding and Lightening the Texture
Eggs play a key role in binding the ingredients together while adding lightness to the wafers.
- Large eggs provide the right balance of moisture and structure.
- Egg yolks add extra richness and contribute to a golden color.
- Egg replacements (such as flax eggs or aquafaba) work for vegan versions, but they may require additional adjustments to maintain crispness.
5. Fresh Strawberries and Flavor Enhancers
The strawberry flavor is what makes these wafers unique. Using high-quality strawberry ingredients ensures the best taste.
- Strawberry puree made from fresh or frozen strawberries provides a natural, fruity flavor.
- Freeze-dried strawberry powder intensifies the strawberry taste without adding excess moisture.
- Strawberry extract enhances the aroma and deepens the berry flavor.
6. Baking Powder: Achieving the Right Texture
Baking powder helps the wafers develop a light, crisp texture.
- A small amount of baking powder ensures that the wafers do not turn out too dense.
- Aluminum-free baking powder is ideal for a cleaner taste.
7. Milk or Dairy Alternatives: Adjusting Consistency
Milk helps adjust the batter’s consistency and contributes to a smoother texture.
- Whole milk provides richness and a balanced texture.
- Almond, oat, or coconut milk work as dairy-free alternatives, though they may slightly change the taste.
Final Thoughts
Each ingredient in homemade strawberry wafers contributes to the flavor, texture, and overall success of the final product. By selecting high-quality, fresh ingredients, you can create wafers that are crisp, flavorful, and free from artificial additives. Adjusting the ingredients allows you to customize the recipe based on your dietary preferences and taste preferences while maintaining the classic appeal of this sweet treat.
Kitchen Tools You’ll Need
Making homemade strawberry wafers requires a few essential kitchen tools. Using the right equipment ensures that your wafers turn out crispy, flavorful, and perfectly shaped. Below, we break down the must-have tools and their functions to help you prepare these delightful treats with ease.
1. Mixing Equipment
A well-mixed batter is key to achieving smooth and evenly baked wafers. Here are the essential tools for mixing:
- Mixing bowls: Use different sizes for combining dry and wet ingredients separately before incorporating them.
- Whisk: Ideal for blending dry ingredients and lightly whisking eggs before adding them to the batter.
- Electric mixer or stand mixer: A hand mixer or stand mixer helps cream butter and sugar efficiently, creating a light and airy texture.
2. Measuring Tools for Accuracy
Precise measurements ensure that the wafers have the right balance of ingredients. Invest in these measuring tools:
- Measuring cups and spoons: Essential for accurately measuring flour, sugar, and liquid ingredients.
- Digital kitchen scale: Ideal for measuring ingredients by weight, ensuring consistency in every batch.
3. Baking Tools for Shaping and Cooking
To achieve the classic thin, crispy texture of strawberry wafers, you need the right baking tools:
- Rolling pin: If you’re rolling out the wafer dough, a rolling pin ensures an even thickness for uniform baking.
- Wafer iron or pizzelle maker: A wafer iron creates the traditional crisp, patterned surface, but you can also use a pizzelle maker for a decorative touch.
- Baking sheet and parchment paper: If baking in an oven, use a baking sheet lined with parchment paper to prevent sticking.
- Offset spatula: Helps spread the batter evenly for thin, delicate wafers.
4. Cutting and Shaping Tools
After baking, precise cutting and shaping make the wafers look professional and appealing. Use these tools for the best results:
- Sharp knife or pastry cutter: Ideal for cutting wafers into uniform rectangular or square shapes.
- Cookie cutter: If you prefer round or decorative shapes, a cookie cutter makes the process easier.
5. Cooling and Storage Tools
Proper cooling prevents soggy wafers, while good storage keeps them fresh longer. Make sure to have:
- Wire cooling rack: Allows wafers to cool evenly without trapping steam underneath, ensuring crispiness.
- Airtight container: Stores wafers properly to maintain their texture and flavor over time.
Final Thoughts
Having the right kitchen tools makes preparing homemade strawberry wafers easier, more efficient, and enjoyable. Investing in quality equipment helps ensure that your wafers turn out crispy, delicious, and picture-perfect every time. Whether you’re a beginner or an experienced baker, using these tools will help you create the best strawberry wafers possible.
Substitutions and Dietary Alternatives
Strawberry wafers are a delightful treat, but not everyone can enjoy them in their traditional form. Whether you have dietary restrictions, allergies, or personal preferences, there are plenty of substitutions available to make these wafers suitable for various needs. Below, we explore different ingredient alternatives while ensuring the same delicious, crispy texture and sweet strawberry flavor.
1. Gluten-Free Alternatives
If you need a gluten-free version of strawberry wafers, swapping out all-purpose flour is essential. Here are some great options:
- Gluten-free all-purpose flour blend: Many store-bought blends contain a mix of rice flour, tapioca starch, and xanthan gum to mimic the texture of wheat flour.
- Almond flour: This works well for a nutty, slightly dense texture but may require additional binding agents like an egg or xanthan gum.
- Coconut flour: Use sparingly, as it absorbs more moisture than regular flour. A general rule is to use ¼ cup of coconut flour for every cup of all-purpose flour and increase the liquid ingredients slightly.
2. Dairy-Free and Vegan Substitutes
To make your strawberry wafers dairy-free or vegan, consider these simple swaps:
- Butter substitute: Replace butter with plant-based alternatives like coconut oil, margarine, or vegan butter. Make sure to use a variety designed for baking to maintain the desired texture.
- Milk replacement: If your recipe calls for milk, use almond, oat, soy, or coconut milk instead. Almond milk provides a neutral flavor, while coconut milk adds slight sweetness.
- Egg alternatives: To bind the ingredients without eggs, use one of these options per egg:
- 1 tablespoon of ground flaxseed mixed with 3 tablespoons of water (flax egg)
- ¼ cup unsweetened applesauce
- ½ mashed banana (adds a slight fruity taste)
3. Sugar-Free and Low-Carb Options
For those looking to reduce sugar intake or follow a low-carb diet, you can replace traditional sugar with these alternatives:
- Stevia or monk fruit sweetener: These natural, zero-calorie sweeteners offer sweetness without spiking blood sugar levels.
- Erythritol or xylitol: These sugar alcohols provide sweetness with fewer calories and minimal impact on blood sugar. Keep in mind that xylitol is toxic to pets, so store wafers safely.
- Coconut sugar: Though not entirely sugar-free, it has a lower glycemic index than white sugar and provides a mild caramel flavor.
4. Nut-Free Alternatives
Many recipes include almond extract or almond flour for extra flavor, but you can make nut-free strawberry wafers by using:
- Vanilla extract or coconut extract instead of almond extract.
- Oat flour or sunflower seed flour in place of almond flour.
- Nut-free dairy alternatives like rice milk or oat milk.
Final Thoughts
Making strawberry wafers suitable for different dietary needs doesn’t mean sacrificing flavor or texture. By selecting the right substitutions, you can still enjoy crispy, sweet, and satisfying wafers while accommodating allergies, preferences, or health-conscious choices. Experiment with these alternatives to find what works best for you and your loved ones!
Step-by-Step Guide to Making Homemade Strawberry Wafers
Preparing the Wafer Dough
The dough is the foundation of your strawberry wafers, and it’s essential to get it just right for the perfect texture and crispness. Preparing the dough involves a few straightforward steps, but attention to detail is crucial for great results. Here’s how you can prepare the wafer dough to ensure your wafers turn out light and delicious.
1. Cream the Butter and Sugar
Start by creaming the butter and sugar together. This step is essential for the dough’s texture, as it helps create a light, airy consistency. Here’s how to do it:
- Use softened butter, as it mixes more easily with the sugar.
- Beat the butter and sugar in a mixing bowl with a hand or stand mixer on medium speed.
- Continue mixing until the mixture becomes light and fluffy, which typically takes about 3-5 minutes. This process incorporates air into the dough, which leads to a crispier texture after baking.
2. Incorporate Wet Ingredients
Once the butter and sugar have been creamed, it’s time to add the wet ingredients. These will bring moisture to the dough and ensure the wafer texture holds together:
- Add eggs: Add one egg at a time, ensuring it’s fully incorporated before adding the next. This ensures a smooth dough.
- Add strawberry extract or puree: To infuse the dough with strawberry flavor, add strawberry extract or puree. If using puree, make sure to drain off excess liquid to prevent the dough from becoming too wet.
- Mix thoroughly: Continue mixing until all the wet ingredients are fully combined with the butter-sugar mixture.
3. Combine the Dry Ingredients
Next, it’s time to add the dry ingredients, which will give the dough structure and stability. Carefully sift the dry ingredients to avoid clumps and ensure a smooth dough:
- Sift the flour: Sift the flour to remove any lumps and make it easier to incorporate into the dough.
- Add baking powder: This will help the wafers rise slightly while baking and give them a light texture.
- Mix in a pinch of salt: Salt enhances the flavor of the dough and balances the sweetness of the strawberry.
- Combine the dry ingredients: Gradually add the sifted dry ingredients into the wet mixture. Mix until everything is incorporated but avoid overmixing to maintain the dough’s lightness.
4. Achieving the Right Dough Consistency
Once the wet and dry ingredients are combined, you should have a dough that is smooth, thick, and slightly sticky. Here’s how to ensure the right texture:
- If the dough feels too sticky, add a little extra flour (1 tablespoon at a time) until it is manageable.
- If the dough is too dry, add a small amount of water or extra strawberry puree to moisten it. Be cautious not to add too much liquid, as it can make the dough too soft.
- Let the dough rest for about 30 minutes in the refrigerator. Chilling the dough helps it firm up, making it easier to roll out and shape into perfect wafers.
5. Rolling and Shaping the Dough
After resting the dough, it’s time to roll it out and shape it into wafers. Rolling out the dough evenly ensures the wafers bake uniformly and have that perfect thin, crispy texture:
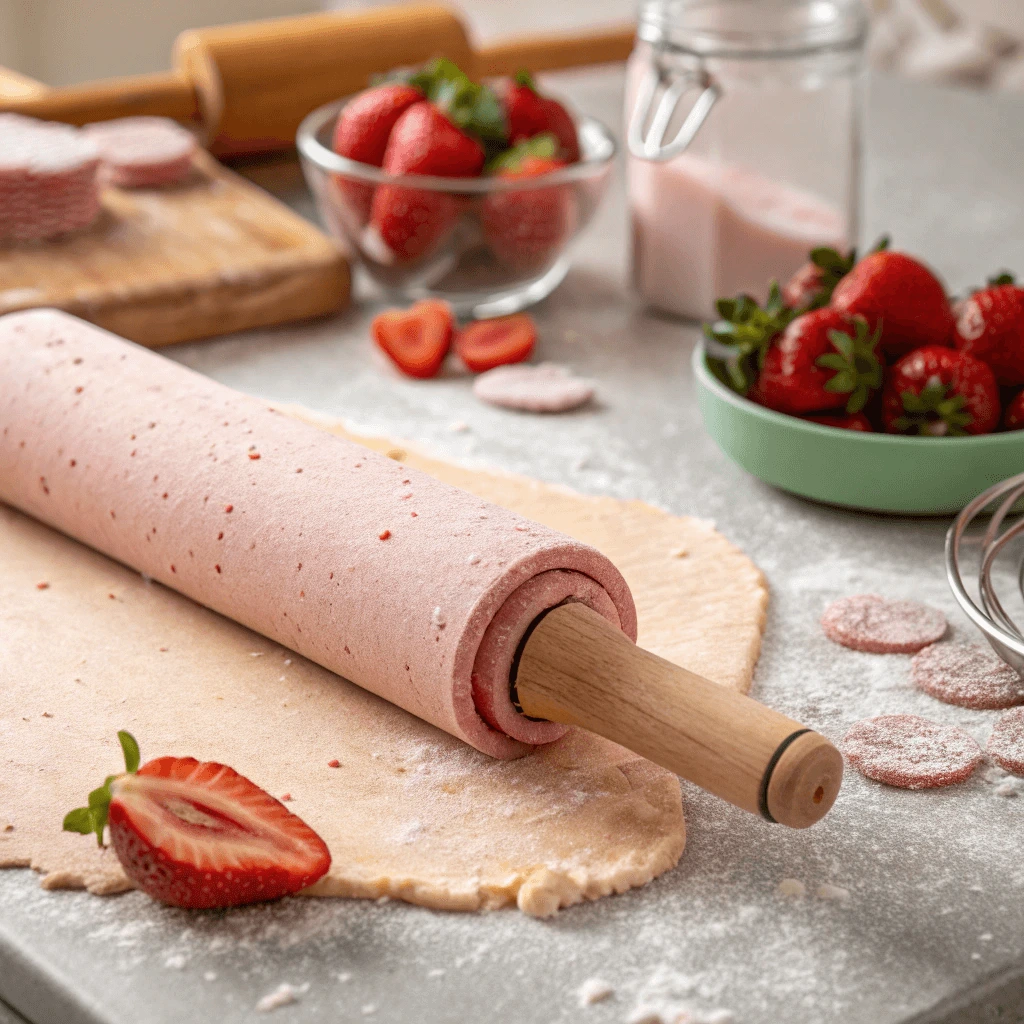
- Roll the dough on a lightly floured surface to a thickness of about 1/8 inch. For perfectly even dough, use a rolling pin with guides or a ruler to measure.
- Cut the dough into rectangles or squares using a sharp knife or cookie cutter. If you’re using a wafer iron or pizzelle maker, be sure to form the dough into small balls or spoonfuls that fit the device.
Final Thoughts
Preparing wafer dough might sound complicated, but it’s relatively simple once you break it down into manageable steps. By taking the time to properly cream the butter and sugar, add your wet and dry ingredients, and achieve the right consistency, you set yourself up for success. Whether you’re using the dough to bake in the oven or with a wafer iron, the right preparation will ensure your strawberry wafers come out crispy, flavorful, and perfectly textured every time.
Baking the Wafers to Perfection
Baking your strawberry wafers is a crucial step in creating the perfect crispy texture and golden-brown color. The process might seem simple, but achieving the ideal balance between a crunchy texture and a light, delicate wafer requires attention to detail. Let’s break down the steps for baking the wafers to perfection.
1. Preheat the Oven
Before placing your wafers in the oven, it’s important to preheat it to the right temperature. Preheating ensures that the wafers bake evenly from the moment they enter the oven.
- Set the oven temperature to 350°F (175°C). This moderate temperature helps the wafers bake slowly, allowing them to crisp up without burning.
- Allow the oven to fully preheat before placing the wafers inside. You can use an oven thermometer if you’re unsure whether your oven reaches the correct temperature.
2. Arrange the Wafers on the Baking Sheet
When it comes to positioning the wafers on the baking sheet, spacing is important. Proper arrangement ensures they bake evenly without sticking together. Here’s how to do it:
- Use parchment paper or a silicone baking mat to line your baking sheet. This will prevent the wafers from sticking and make cleanup easier.
- Place the wafers a few centimeters apart on the baking sheet. This allows the air to circulate around each wafer, helping them bake evenly and develop a crisp texture. If you’re baking multiple batches, make sure to allow enough space for expansion.
3. Monitor Baking Time
The baking time is key to achieving the perfect texture—too long, and your wafers might turn too dark or over-crisp. Too short, and they may remain soft. Here’s how to find the right balance:
- Bake for 10-12 minutes, checking halfway through. The wafers should be golden brown at the edges and slightly firm to the touch.
- Watch for browning: The edges of the wafers will start turning golden-brown first. Once they reach this color, they are likely ready to be removed from the oven. Keep a close eye during the final few minutes of baking to avoid overcooking.
- Test with a spatula: Gently lift one of the wafers from the baking sheet. If it easily comes off and has a crisp texture, it’s done. If it feels soft, give it another minute or two.
4. Cooling the Wafers
After baking, cooling the wafers properly is crucial for maintaining their crispness and texture. Cooling too quickly can cause them to become soft or lose their crunch. Here’s how to cool them down the right way:
- Remove the wafers from the baking sheet and transfer them to a wire rack. This allows air to circulate around them, preventing any steam from making them soggy.
- Let them cool for about 10 minutes at room temperature. As they cool, they will firm up and reach their final crispiness.
5. Storage for Freshness
Once baked and cooled, you’ll want to store your wafers properly to maintain their crunchiness and flavor:
- Place the wafers in an airtight container once completely cooled. This will keep them fresh for several days.
- For longer storage, freeze the wafers. You can freeze them in a single layer on a baking sheet, then transfer to a freezer-safe bag once frozen. To enjoy them later, simply let them thaw at room temperature or warm them up in the oven for a few minutes to restore their crispness.
Final Thoughts
Baking strawberry wafers to perfection is all about timing and technique. By following these simple steps—preheating your oven, spacing the wafers correctly, and monitoring the baking time—you can create crispy, golden-brown wafers that are perfectly baked every time. Whether you’re enjoying them fresh or storing them for later, the key is in the details, ensuring that every bite is crispy, light, and packed with sweet strawberry flavor.
Adding the Strawberry Cream Filling (Optional)
While homemade strawberry wafers are delightful on their own, adding a strawberry cream filling takes them to the next level. The creamy, sweet strawberry filling complements the crispiness of the wafer, offering a decadent contrast in texture and flavor. Whether you’re making them for a special occasion or simply indulging in a treat, this filling can transform your wafers into a mouthwatering dessert. Here’s how to add the strawberry cream filling to your wafers.
1. Preparing the Strawberry Cream Filling
Before you can assemble your strawberry wafers with the filling, you need to prepare the creamy mixture. The key to a great filling is balance—it’s got to be sweet, rich, and just the right consistency to hold between the layers of wafer. Here’s how to prepare it:
- Whip the cream cheese: Start by softening cream cheese at room temperature. Whip it in a bowl using a hand mixer or stand mixer until it becomes smooth and fluffy.
- Add the strawberry flavor: For a fresh, fruity filling, add strawberry puree or strawberry jam. If you use puree, make sure it’s well-drained to avoid excess moisture in the filling.
- Incorporate powdered sugar: Add powdered sugar to the mixture to sweeten the cream. Adjust the amount based on your desired level of sweetness.
- Mix until smooth: Mix all ingredients together until the filling is smooth and creamy. Taste and adjust the sweetness or strawberry flavor as needed. If you prefer a thicker filling, add more powdered sugar or cream cheese. For a lighter filling, reduce the sugar or add a little more cream.
2. Assembling the Wafers with the Filling
Once your strawberry cream filling is prepared, it’s time to assemble the wafers. Careful assembly ensures that the filling doesn’t spill out while you enjoy your treat. Follow these steps to achieve a neat, delicious result:
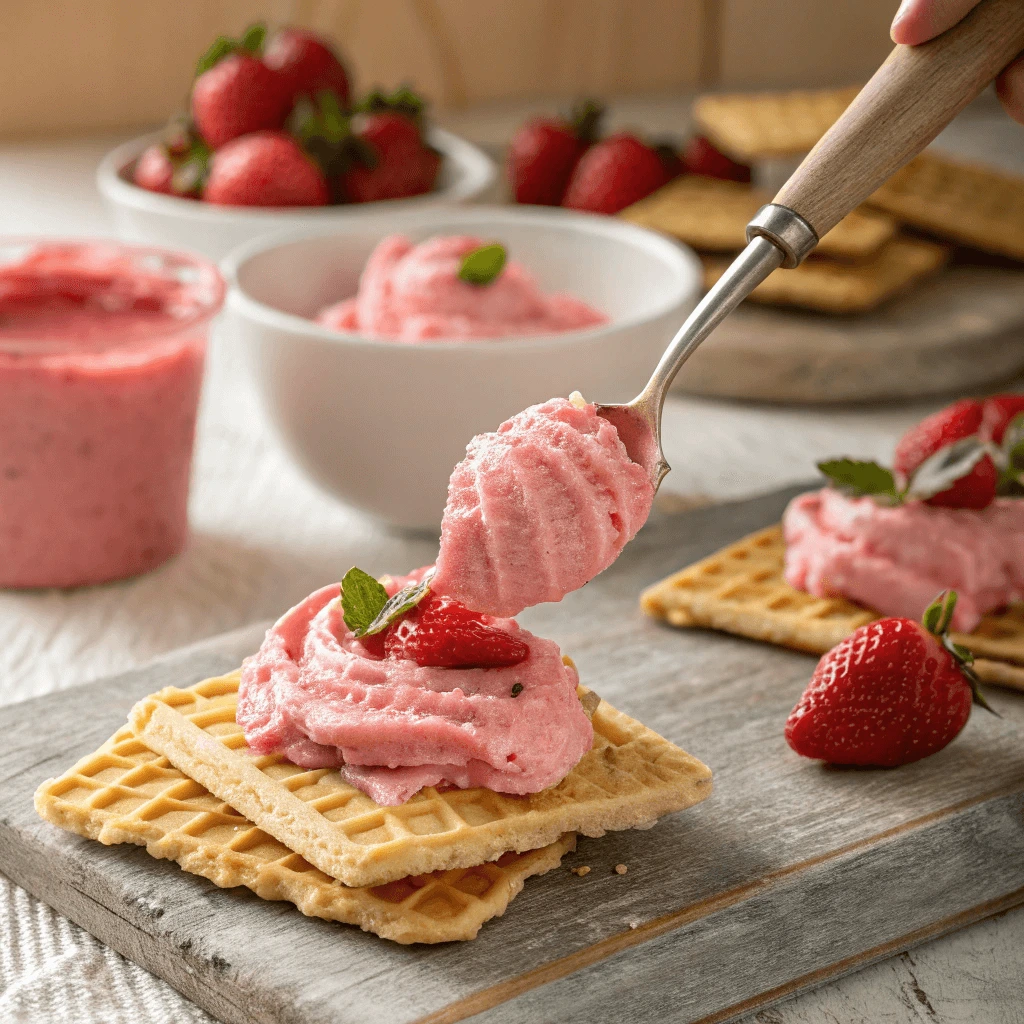
- Spread the filling on one wafer: Take one wafer and spread a generous but even layer of the strawberry cream filling on top.
- Sandwich with another wafer: Place another wafer on top of the filling, pressing down gently to ensure that the filling spreads evenly without overflowing.
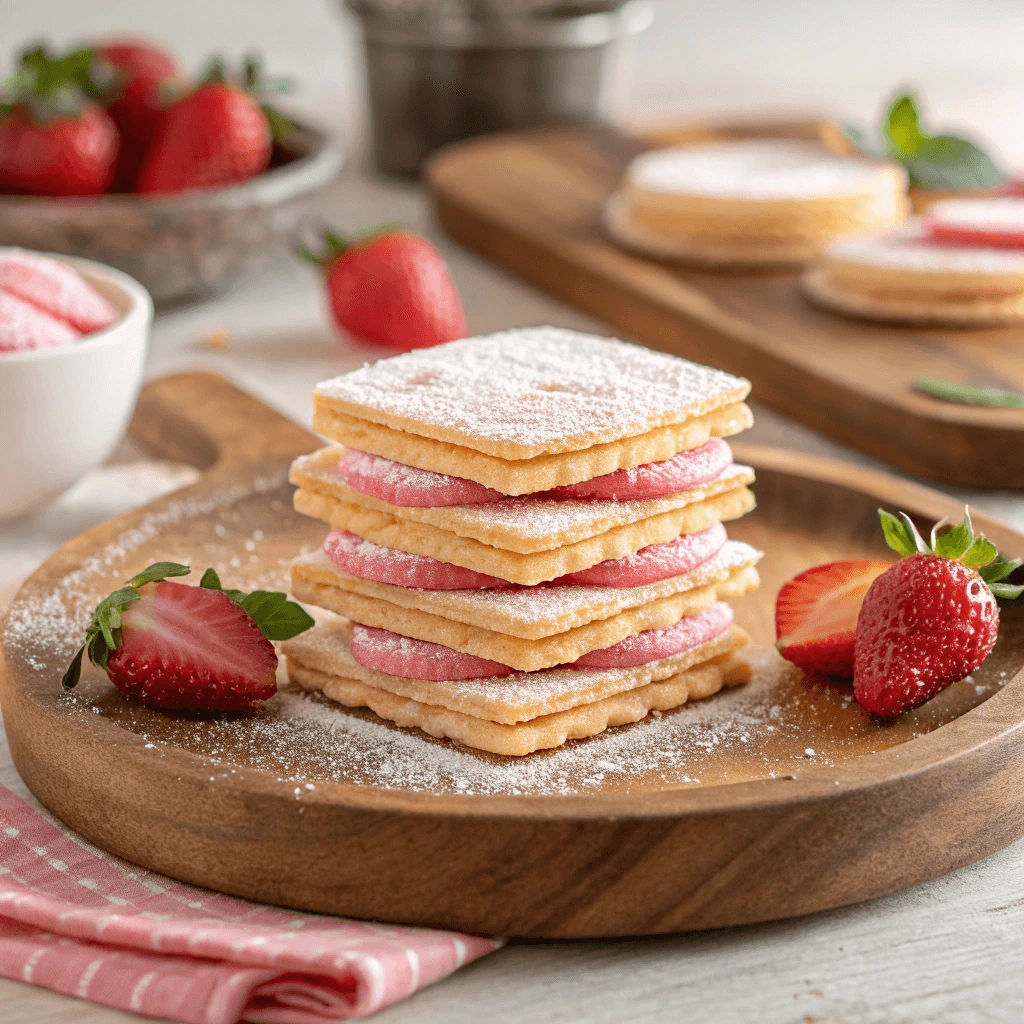
- Repeat for the rest of the wafers: Continue layering wafers with filling until all the wafers are assembled. If you like, you can stack several wafers together for a more substantial dessert.
3. Chilling the Assembled Wafers
After assembling your strawberry wafer sandwiches, it’s important to let them chill for a bit. Chilling helps the filling set and the wafers to firm up, making them easier to handle and eat.
- Chill the wafers in the refrigerator for about 30 minutes to 1 hour. This will allow the filling to firm up, creating a better texture and preventing the filling from oozing out.
- Serve after chilling: Once the wafers have chilled, they’re ready to serve! They’ll have the perfect texture with a firm filling and crispy wafer layers.
4. Optional Garnishes and Variations
For a little extra flair, consider adding some garnishes or experimenting with different variations to enhance the strawberry wafer experience. Here are a few ideas:
- Top with fresh strawberries: Slice a few fresh strawberries and arrange them on top of the wafers for a beautiful, fresh touch.
- Sprinkle with powdered sugar: Lightly dust the tops of the wafers with powdered sugar for a delicate finishing touch.
- Add whipped cream: A dollop of freshly whipped cream adds an extra layer of indulgence and balances the sweetness of the filling.
Final Thoughts
Adding the strawberry cream filling is a delightful option that elevates homemade strawberry wafers into an irresistible dessert. Whether you choose to sandwich the cream filling between the wafers or top them with a light garnish, the addition of strawberry cream brings a smooth, fruity sweetness that pairs perfectly with the crispy texture of the wafers. Chilling the assembled wafers allows the filling to firm up, ensuring every bite is a delicious and balanced treat.
Storing and Serving Suggestions
How to Store Homemade Strawberry Wafers
Storing your homemade strawberry wafers properly is essential to maintaining their freshness and ensuring they stay crispy and delicious. Whether you’ve made a big batch or have leftover wafers, knowing the best ways to store them will allow you to enjoy them at their best for a longer period. Here’s how you can store homemade strawberry wafers and keep them in perfect condition.
1. Storing Unfilled Wafers
If you’ve made the wafers ahead of time without adding the strawberry cream filling, storing them is fairly simple. Since the wafers are dry and crisp, they are more resistant to becoming soggy. Here’s how to store them for maximum freshness:
- Store in an airtight container: Place your unfilled wafers in an airtight container. This will help preserve their crisp texture by keeping out moisture, which can cause them to become soft and lose their crunch.
- Use parchment paper for layering: If you’ve made a large batch of wafers, consider separating them with parchment paper to prevent them from sticking together. This also ensures easy removal without breaking the delicate wafers.
- Keep in a cool, dry place: Store your airtight container in a cool, dry place, away from sunlight. A pantry or cupboard works well, as long as the temperature remains stable. These conditions will keep your wafers fresh for up to two weeks.
2. Storing Filled Strawberry Wafers
Once you’ve added the strawberry cream filling to your wafers, the storage process changes slightly. The moisture from the filling can make the wafers soft if they aren’t stored properly. Here’s how to store them:
- Refrigerate the filled wafers: To maintain the freshness of the strawberry cream filling and keep the wafers from becoming soggy, place the filled wafers in the refrigerator. The cold temperature will prevent the filling from becoming too runny and will help preserve the texture.
- Store in an airtight container or plastic wrap: Similar to unfilled wafers, store the filled wafers in an airtight container. If you don’t have a container large enough, you can individually wrap each wafer in plastic wrap or wax paper to prevent them from sticking together.
- Consume within a few days: While the refrigerated strawberry wafers will stay fresh for about 3 to 5 days, they are best enjoyed within the first 2 days. After this time, the wafer’s crisp texture might diminish, and the filling could begin to soften too much.
3. Freezing Strawberry Wafers
If you want to store your strawberry wafers for a longer period, freezing them is an excellent option. This allows you to enjoy your homemade treat whenever you want without worrying about spoilage. Here’s how to freeze your strawberry wafers:
Freezing Unfilled Wafers
- Allow the wafers to cool completely before freezing to avoid condensation that could make them soggy.
- Place the wafers in a freezer-safe bag or airtight container. If you’re using a container, make sure the wafers are arranged in a single layer, with parchment paper in between each layer.
- Store for up to 3 months: Frozen unfilled wafers can last for up to 3 months. When you’re ready to enjoy them, allow them to thaw at room temperature for about 15 to 20 minutes before serving.
Freezing Filled Wafers
- Freeze individually: If you’ve already added the strawberry cream filling, you’ll want to freeze the wafers individually to prevent them from sticking together. Lay them out on a baking sheet lined with parchment paper and freeze until solid (about 1 to 2 hours).
- Transfer to a container or bag: Once frozen, transfer the wafers to a freezer-safe container or bag. Be sure to remove as much air as possible to prevent freezer burn.
- Consume within 1 to 2 months: Filled strawberry wafers will last for about 1 to 2 months in the freezer. To enjoy them, let them thaw in the refrigerator or at room temperature. However, keep in mind that freezing may slightly alter the texture of the cream filling.
4. Tips for Reheating and Refreshing Leftovers
If you have leftover strawberry wafers that have softened over time, don’t worry! You can refresh them to bring back some of their original crispiness. Here are a couple of tips to do so:
- For unfilled wafers: If the wafers have lost some of their crispness, you can reheat them in the oven. Preheat the oven to 300°F (150°C), and place the wafers on a baking sheet for 5-10 minutes. This will help restore their texture.
- For filled wafers: Reheating filled strawberry wafers is trickier because of the filling. Instead of heating them in the oven, it’s best to leave them out at room temperature for a little while to regain some firmness. However, avoid microwaving filled wafers because the filling may melt and make the wafers soggy.
5. Enjoying Your Homemade Strawberry Wafers
Proper storage ensures that you can enjoy your homemade strawberry wafers for days to come. Whether you’re saving unfilled wafers for later or refrigerating or freezing the filled ones, following these storage methods will help keep them tasting fresh and delicious. By using airtight containers, wrapping them individually, and freezing when necessary, you can enjoy your homemade strawberry wafers any time.
Creative Ways to Serve Strawberry Wafers
Strawberry wafers are not just a delicious snack on their own—they’re also versatile enough to be used in a variety of creative and fun ways. Whether you’re serving them as a dessert at a gathering or incorporating them into other dishes, strawberry wafers can elevate many different recipes. Here are some ideas for how to serve them in unique and exciting ways!
1. Strawberry Wafers with Whipped Cream
One of the simplest and most delightful ways to serve strawberry wafers is by pairing them with whipped cream. This combination enhances the wafers’ crispy texture with the creamy smoothness of the whipped cream.
- Individual servings: Place a single strawberry wafer on a small plate and top it with a dollop of fresh whipped cream. You can even add a few fresh strawberry slices for extra flavor and decoration.
- Layered treat: For a more indulgent treat, create layers by stacking strawberry wafers and whipped cream in a small glass or dessert cup. You can alternate layers of wafer and cream for a fun twist on a traditional parfait.
This pairing is perfect for those who want a light yet indulgent dessert, and it’s easy to prepare for guests during dinner parties or family gatherings.
2. Strawberry Wafers as an Ice Cream Topping
Elevate your ice cream game by using strawberry wafers as a topping! The wafers’ crunch perfectly complements the smoothness of ice cream.
- Crumbled topping: Crush or break the strawberry wafers into smaller pieces and sprinkle them over a bowl of your favorite ice cream. The crispy texture adds a delightful contrast to the creamy ice cream, and the strawberry flavor enhances fruity or berry-flavored ice creams.
- Ice cream sandwich: You can also turn strawberry wafers into a simple yet delicious ice cream sandwich. Just place a scoop of your favorite ice cream between two wafers, and enjoy a fun, portable treat!
This is a fun way to make ice cream more exciting, and it’s an easy treat to serve for birthdays, summer parties, or casual dessert nights.
3. Strawberry Wafer Crust for Cheesecake
Use crushed strawberry wafers as the base for a cheesecake crust to bring a fresh, fruity touch to your dessert.
- Simple crust: Crush the strawberry wafers into fine crumbs and mix them with a bit of melted butter and sugar. Press this mixture into the bottom of a pie or springform pan to create a no-bake cheesecake crust. The wafers will give the crust a delicious, sweet flavor with a slight crunch.
- Creative cheesecake flavors: For a twist, try adding crushed strawberry wafers as an additional layer on top of your cheesecake for extra flavor and texture. It’s a great way to combine the freshness of strawberries with the creamy richness of cheesecake.
This option is perfect for those who enjoy a fruity spin on classic desserts and want to impress their guests with a unique homemade treat.
4. Strawberry Wafers with Fruit Salad
Serve strawberry wafers alongside a fruit salad for a refreshing and balanced treat. The wafers add a delightful crunch, while the fruit provides natural sweetness.
- Individual servings: Make small bowls of fruit salad and serve each with a single strawberry wafer on top. This is a great way to present a light, refreshing snack or dessert at a brunch or summer gathering.
- Crumbled on top: For a fun variation, crumble the strawberry wafers over the fruit salad for added texture. The sweetness of the wafers pairs perfectly with the tanginess of citrus fruits and the juiciness of berries.
This combination is an excellent way to serve strawberry wafers during warmer weather, offering a light, refreshing, and healthy dessert option.
5. Strawberry Wafer Trifle
A trifle is a classic layered dessert, and strawberry wafers make a fantastic addition to the layers. With the crispiness of the wafers and the creaminess of the other ingredients, this dessert is a crowd-pleaser.
- Traditional trifle: Layer whipped cream, fresh strawberries, strawberry wafers, and perhaps a bit of pudding or custard in a large trifle dish or individual cups. The layers come together to create a rich and flavorful dessert.
- Custom variations: Customize your trifle with other ingredients like chocolate chips, nuts, or a drizzle of strawberry syrup to enhance the flavor profile. You can also try adding some sweet liqueur, such as grand marnier or amaretto, for an adult version.
A strawberry wafer trifle is ideal for serving at large gatherings, potlucks, or holiday meals, where you want to impress with a dessert that looks as good as it tastes.
6. Strawberry Wafers in a Chocolate Fondue
For a decadent and interactive dessert, serve strawberry wafers with chocolate fondue. The crispy wafers are perfect for dipping into rich, melted chocolate.
- Perfect dipping size: Break the wafers into smaller pieces so they’re easy to dip into the chocolate without breaking. You can melt a variety of chocolates, such as dark, milk, or white chocolate, depending on your preference.
- Add fruits for variety: To make the experience even more indulgent, include fruits like strawberries, banana slices, and marshmallows alongside the wafers for dipping into the chocolate.
Chocolate fondue is a great way to make dessert feel like an experience, especially at gatherings, date nights, or special celebrations.
7. Strawberry Wafers with Yogurt Parfait
Another creative way to serve strawberry wafers is by incorporating them into a yogurt parfait. This makes for a healthy yet indulgent snack.
- Layering parfaits: Layer Greek yogurt, fresh fruit (such as strawberries, blueberries, or raspberries), and crumbled strawberry wafers in a glass jar or parfait cup. The wafers will add a crunchy contrast to the smoothness of the yogurt.
- Make it a breakfast treat: This strawberry wafer parfait is an excellent choice for breakfast or a mid-day snack. You can even drizzle honey or maple syrup on top for a touch of sweetness.
This option is ideal for people looking for a sweet, healthy alternative that still feels like a treat.
8. Strawberry Wafer Milkshake
Transform your strawberry wafers into a fun milkshake that everyone will love! Blend the wafers with ice cream, milk, and a handful of fresh strawberries for a creamy and flavorful milkshake.
- Flavor variations: You can mix and match flavors by adding chocolate syrup or using vanilla ice cream. The wafers provide a nice texture to the milkshake, offering some crunch alongside the creamy milkshake.
- Toppings: Top the milkshake with whipped cream, extra crumbled wafer pieces, and a drizzle of strawberry syrup or chocolate sauce for added decadence.
Milkshakes are perfect for serving on warm days or as a sweet treat to cap off a meal.
Fun Variations to Try
If you’re looking to take your homemade strawberry wafers to the next level, experimenting with different variations can be a fun way to switch things up and add even more flavor and excitement to your wafer creations. Whether you’re aiming for a fun twist on the classic or want to explore new flavor combinations, here are some creative variations to try.
1. Chocolate-Covered Strawberry Wafers
For those who love the combination of chocolate and strawberries, this variation is a must-try. By dipping your homemade strawberry wafers in melted chocolate, you can create a delicious treat with a rich, indulgent flavor.
- How to make: After baking your strawberry wafers and allowing them to cool, melt your favorite chocolate (dark, milk, or white) and dip the wafers halfway into the chocolate. Allow the excess to drip off before placing the wafers on parchment paper to set.
- Flavor enhancement: To elevate the flavor further, sprinkle a little sea salt on the chocolate-covered wafers for a delightful contrast of sweet and salty. You can also drizzle extra melted chocolate on top for a decorative touch.
Chocolate-covered strawberry wafers make for a decadent dessert or a special treat for parties and gatherings.
2. Strawberry Wafer Sandwiches
If you love the texture and flavor of a wafer, why not take it to the next level by turning them into mini sandwiches? This variation is perfect for anyone who loves a bit of filling with their crispy wafer.
- Filling options: Spread a layer of strawberry jam, whipped cream, or even Nutella between two wafers. For a healthier alternative, try filling them with yogurt or fresh fruit like sliced strawberries.
- Customizable flavors: You can also play around with different fillings to suit your taste. Try peanut butter, almond butter, or even cream cheese for a rich, tangy option.
These wafer sandwiches are perfect for kids and adults alike and can be served as a snack or a fun addition to a picnic.
3. Strawberry Wafer Crumble
If you love the idea of a crumble but want to skip the traditional fruit-based version, try using strawberry wafers as the base for a wafer crumble dessert. This variation is perfect for those who enjoy textures like crunch and creaminess in one bite.
- How to make: Start by crumbling the strawberry wafers into smaller pieces. You can do this with your hands or use a food processor. Then, layer the crumbled wafers over a dish of fresh fruit like strawberries, raspberries, or blueberries. Top with a dollop of whipped cream or vanilla ice cream.
- Flavor variety: This can easily be adapted with different fruits and fillings. Use your favorite fruits for a custom crumble that suits your palate. Add a drizzle of chocolate syrup or caramel sauce for extra indulgence.
This crumble variation can be served as a comforting dessert, perfect for cozy evenings or a sweet ending to a family meal.
4. Strawberry Wafer Parfaits
For a more sophisticated twist, consider making wafer parfaits. This elegant dessert allows you to layer strawberry wafers with other delicious ingredients to create a beautiful presentation.
- How to layer: In a tall glass, alternate layers of strawberry wafers, fresh strawberries, yogurt, and whipped cream. You can even add granola or crushed nuts for extra texture.
- Customization tips: Mix up the flavor profile by using flavored yogurt like vanilla or strawberry. You can also add a drizzle of honey or fruit syrup for added sweetness.
These parfaits are perfect for brunches, holiday gatherings, or even as a refreshing dessert during the summer months.
5. Strawberry Wafer Pops
For a fun twist on serving strawberry wafers, try turning them into wafer pops. These portable and kid-friendly treats are sure to be a hit at parties and events.
- How to make: After baking and cooling your strawberry wafers, insert a wooden stick or plastic stick into each wafer. Dip the wafers in melted chocolate or candy coating and add sprinkles, crushed nuts, or mini chocolate chips to the coating for added texture.
- Serving suggestion: Once the chocolate has set, you can serve these wafer pops in a decorative holder or in individual wrappers for an easy-to-eat treat.
These wafer pops are a fun, creative way to serve strawberry wafers at birthday parties, holidays, or even just as a sweet snack.
6. Strawberry Wafer Trifle
For those looking to impress with a more elaborate dessert, creating a strawberry wafer trifle is a fun and delicious option. This layered dessert showcases the crispness of the strawberry wafers and combines them with rich, creamy layers.
- Layering tips: Start by layering crumbled or whole strawberry wafers in the bottom of a trifle dish or individual glass cups. Then, layer whipped cream, vanilla pudding, or custard on top. Add fresh strawberries or other berries as a final layer.
- Decorate: Garnish the top with extra wafer crumbs, fresh mint, or even a sprinkle of cocoa powder to finish off the presentation.
This variation is a show-stopping dessert for gatherings or a special treat for a family dinner.
7. Strawberry Wafer Ice Cream Sandwiches
Take your love of ice cream and strawberry wafers to the next level by making ice cream sandwiches. This variation is a perfect summertime treat.
- How to make: After baking and cooling your strawberry wafers, spread your favorite ice cream between two wafers to create an ice cream sandwich. You can use classic ice cream flavors like vanilla, chocolate, or strawberry, or go wild with more adventurous options like cookies and cream, salted caramel, or pistachio.
- Customization: Roll the edges of the sandwich in mini chocolate chips, crushed nuts, or sprinkles for extra flair. You can also freeze these sandwiches for a firmer texture.
These ice cream sandwiches are perfect for hot days, birthday parties, or any occasion that calls for a fun and cooling treat.
8. Strawberry Wafer Milkshake
If you’re craving something extra creamy, turn your strawberry wafers into a milkshake. The crispy wafers blend perfectly with the creaminess of ice cream and milk.
- How to make: Blend your strawberry wafers with vanilla ice cream, milk, and fresh strawberries for a delicious milkshake. The wafers will add a nice crunch and texture to the shake.
- Fun twist: You can even add a few extra ingredients like peanut butter, Nutella, or chocolate syrup to give the milkshake more depth. Top with whipped cream and extra wafer crumbles for a beautiful finishing touch.
Strawberry wafer milkshakes are perfect for when you want something indulgent, sweet, and refreshing.
Conclusion
Making homemade strawberry wafers is an easy and fun way to enjoy a delicious treat that can be customized to fit any flavor preference. Not only are these wafers simple to prepare, but they also offer a satisfying crunch with a sweet strawberry twist. By experimenting with different fillings, coatings, and creative variations, you can take your wafers to the next level and impress your friends and family.
Don’t be afraid to get creative! Try experimenting with flavors like chocolate, vanilla, or even citrus to discover new and exciting combinations. Add fun textures with nuts, sprinkles, or fruit, and make each batch uniquely your own.