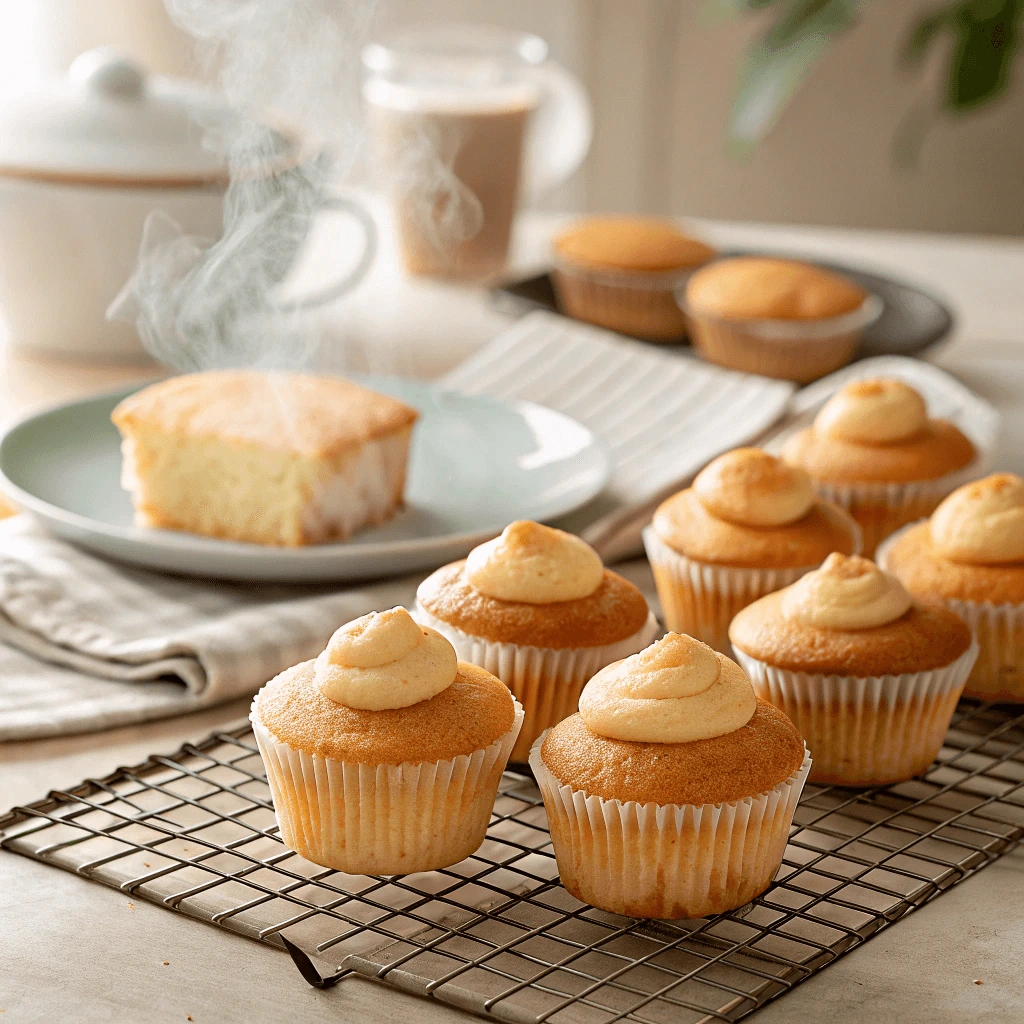
Gluten-free Cupcakes can be just as soft, fluffy, and delicious as regular ones. However, baking without gluten comes with challenges. Many recipes turn out dry or dense. The good news? You can avoid these issues with the right ingredients and techniques.
This guide covers everything you need to know. You’ll learn how to choose the best gluten-free flours, mix ingredients properly, and bake cupcakes to perfection. Whether you have dietary restrictions or just love experimenting, these expert tips will help. Get ready to make moist, flavorful, and foolproof gluten-free cupcakes every time! 🍰✨
Essential Ingredients for Perfect Gluten-Free Cupcakes
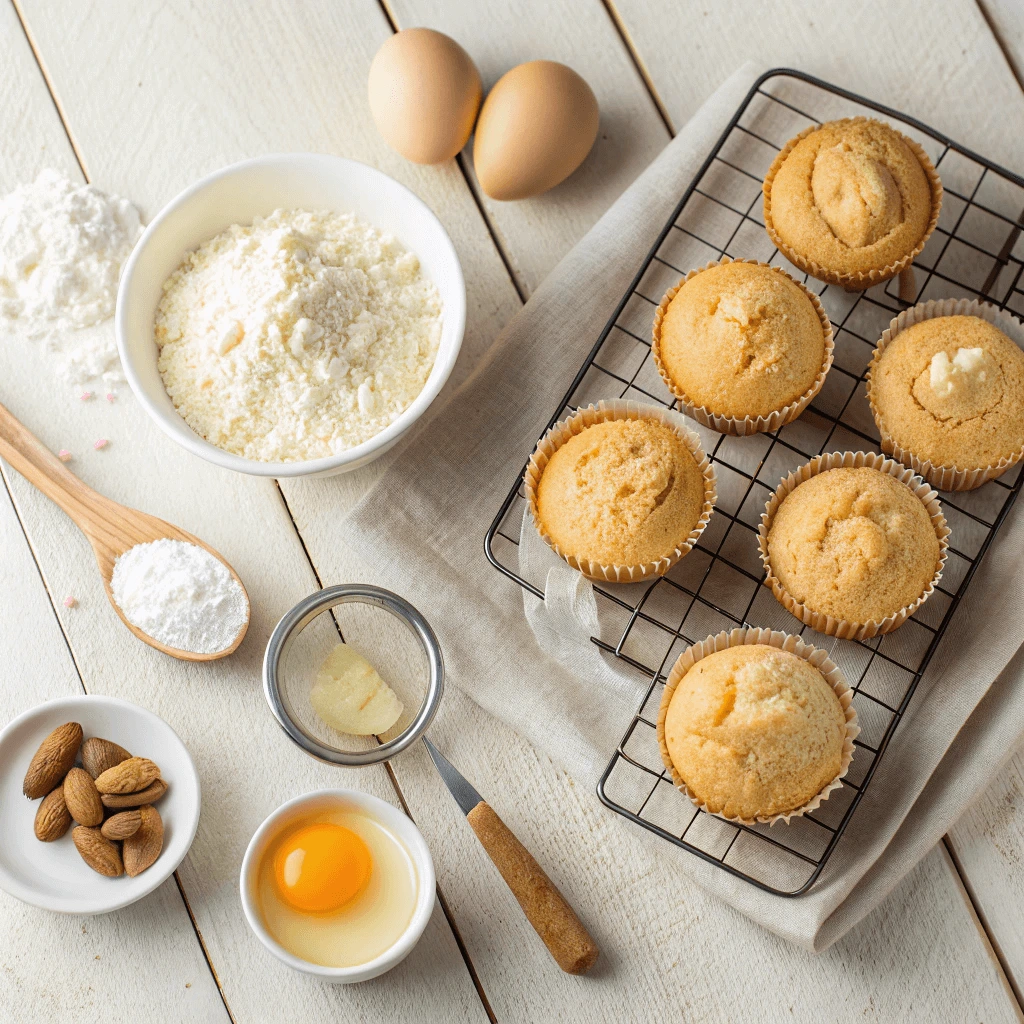
Choosing the Right Gluten-Free Flour
The type of flour you use plays a huge role in the texture and taste of your gluten-free cupcakes. Unlike wheat flour, gluten-free flours lack elasticity and binding properties, which can make baked goods dry or crumbly. To achieve the best results, you need the right flour or a blend of flours that mimic the texture of traditional cupcakes.
Best Gluten-Free Flours for Cupcakes
Some gluten-free flours work better than others when baking cupcakes. Here are a few of the best options:
- Almond Flour – This flour adds moisture and a slightly nutty flavor. It works well when combined with other gluten-free flours.
- Coconut Flour – Highly absorbent, coconut flour requires more liquid in recipes. It creates a light texture when used in small amounts.
- Oat Flour – Made from ground oats, this flour adds a mild sweetness and a soft texture to cupcakes. Ensure it’s certified gluten-free if you have sensitivities.
- Rice Flour – A common base for gluten-free baking, rice flour has a neutral taste but can be slightly gritty. Blending it with starches helps improve the texture.
Why a Gluten-Free Flour Blend Works Best
No single gluten-free flour can fully replace wheat flour. A combination of different flours creates the best structure and texture. Many store-bought gluten-free flour blends include a mix of rice flour, potato starch, and xanthan gum, which helps bind ingredients together. You can also make your own blend by mixing almond flour, tapioca starch, and coconut flour.
How to Choose the Right Blend for Your Recipe
When selecting a gluten-free flour blend, consider the following:
- Pre-Mixed vs. Homemade – Store-bought blends save time and often contain stabilizers like xanthan gum. Homemade blends give you more control over the ingredients.
- Moisture Content – Flours like coconut and almond absorb more liquid, so you may need to adjust wet ingredients.
- Texture Preferences – For a light and fluffy texture, use a mix of rice flour, starches, and a small amount of nut flour.
Choosing the right gluten-free flour makes a big difference in how your cupcakes turn out. Experiment with different blends to find the perfect one for your recipe!
Why Xanthan Gum is Important
Gluten-free baking requires ingredients that can mimic the structure and elasticity of gluten. This is where xanthan gum plays a crucial role. Without it, gluten-free cupcakes may become crumbly, dry, or too dense. Understanding how xanthan gum works and how to use it properly can make a big difference in your baking results.
What is Xanthan Gum?
Xanthan gum is a natural thickener and stabilizer made from fermented sugar. It creates a gel-like consistency when combined with liquid, helping to bind ingredients together. Many gluten-free recipes rely on xanthan gum to add elasticity and prevent baked goods from falling apart.
How Xanthan Gum Improves Gluten-Free Cupcakes
Using xanthan gum in your cupcake batter offers several benefits:
- Adds Structure and Elasticity – It helps mimic the stretchiness of gluten, creating a better texture.
- Prevents Crumbling – Cupcakes hold together instead of breaking apart after baking.
- Retains Moisture – It keeps cupcakes soft and prevents them from drying out.
- Enhances Rise – The binding properties help trap air, making cupcakes fluffier.
How to Use Xanthan Gum in Gluten-Free Baking
To get the best results, follow these guidelines when using xanthan gum:
- Use the Right Amount – For cupcakes, ¼ to ½ teaspoon per cup of flour is usually enough. Too much can make the batter too thick or gummy.
- Mix it Evenly – Stir xanthan gum into the dry ingredients before adding liquid. This prevents clumping and ensures even distribution.
- Adjust for Different Flours – Some flours, like almond or oat flour, may need slightly more xanthan gum to hold the structure.
Xanthan Gum Alternatives
If you don’t have xanthan gum or prefer not to use it, try these substitutes:
- Guar Gum – Works similarly but is plant-based and slightly less effective in baking.
- Psyllium Husk Powder – Absorbs liquid well and adds structure.
- Chia or Flaxseed Gel – When mixed with water, these seeds form a gel that can help bind ingredients.
Xanthan gum is a key ingredient for making gluten-free cupcakes light, moist, and stable. By using it correctly, you can achieve a texture that closely resembles traditional cupcakes!
Best Dairy-Free and Sugar Alternatives
Making gluten-free cupcakes even more inclusive means considering dairy-free and sugar-free alternatives. Whether you have dietary restrictions, food allergies, or prefer healthier ingredients, plenty of substitutes can maintain the taste and texture of traditional cupcakes. Choosing the right replacements ensures your cupcakes stay moist, fluffy, and delicious.
Dairy-Free Alternatives for Gluten-Free Cupcakes
Many gluten-free cupcake recipes call for milk, butter, or yogurt to enhance flavor and texture. If you need dairy-free options, try these alternatives:
- Plant-Based Milks – Almond, coconut, oat, and soy milk work well in place of regular milk. Coconut milk adds richness, while oat milk provides a neutral flavor.
- Dairy-Free Butter – Vegan butter or coconut oil can replace regular butter. Use unsalted versions for better control over flavor.
- Coconut Cream or Cashew Cream – These thick, creamy alternatives work well for frosting and batters that need extra moisture.
- Greek Yogurt Alternatives – If a recipe calls for yogurt, use dairy-free versions made from almond or coconut milk.
Tip: Choose unsweetened dairy-free alternatives to control the sugar content of your recipe.
Best Sugar Substitutes for Healthier Cupcakes
Reducing sugar doesn’t mean sacrificing taste. The right sweeteners keep cupcakes soft and flavorful while making them more diet-friendly. Here are the best alternatives:
- Coconut Sugar – A natural, unrefined sweetener that has a caramel-like flavor and a lower glycemic index than white sugar.
- Maple Syrup or Honey – Both add natural sweetness and moisture. Use ¼ cup less liquid in your recipe when using these liquid sweeteners.
- Stevia or Monk Fruit Sweetener – These calorie-free options work well but can have a slightly different aftertaste. Check the conversion ratio since they are much sweeter than sugar.
- Applesauce or Mashed Bananas – These add natural sweetness while keeping cupcakes moist. Reduce other liquids slightly when using fruit purées.
How to Choose the Right Alternative
When selecting dairy-free and sugar-free substitutes, keep these factors in mind:
- Flavor Compatibility – Some alternatives, like coconut sugar or bananas, slightly alter the taste. Choose the one that complements your cupcake flavor.
- Moisture Balance – Liquid sweeteners and fruit purées add moisture, so adjust dry ingredients accordingly.
- Texture Impact – Certain alternatives, like stevia or monk fruit, lack the bulk of sugar. You may need to add an extra binding ingredient, like xanthan gum or an egg replacer.
Using the right dairy-free and sugar-free substitutes lets you create cupcakes that are just as delicious as traditional ones. Experiment with different options to find the perfect balance of sweetness and texture!
Step-by-Step Guide to Baking Gluten-Free Cupcakes
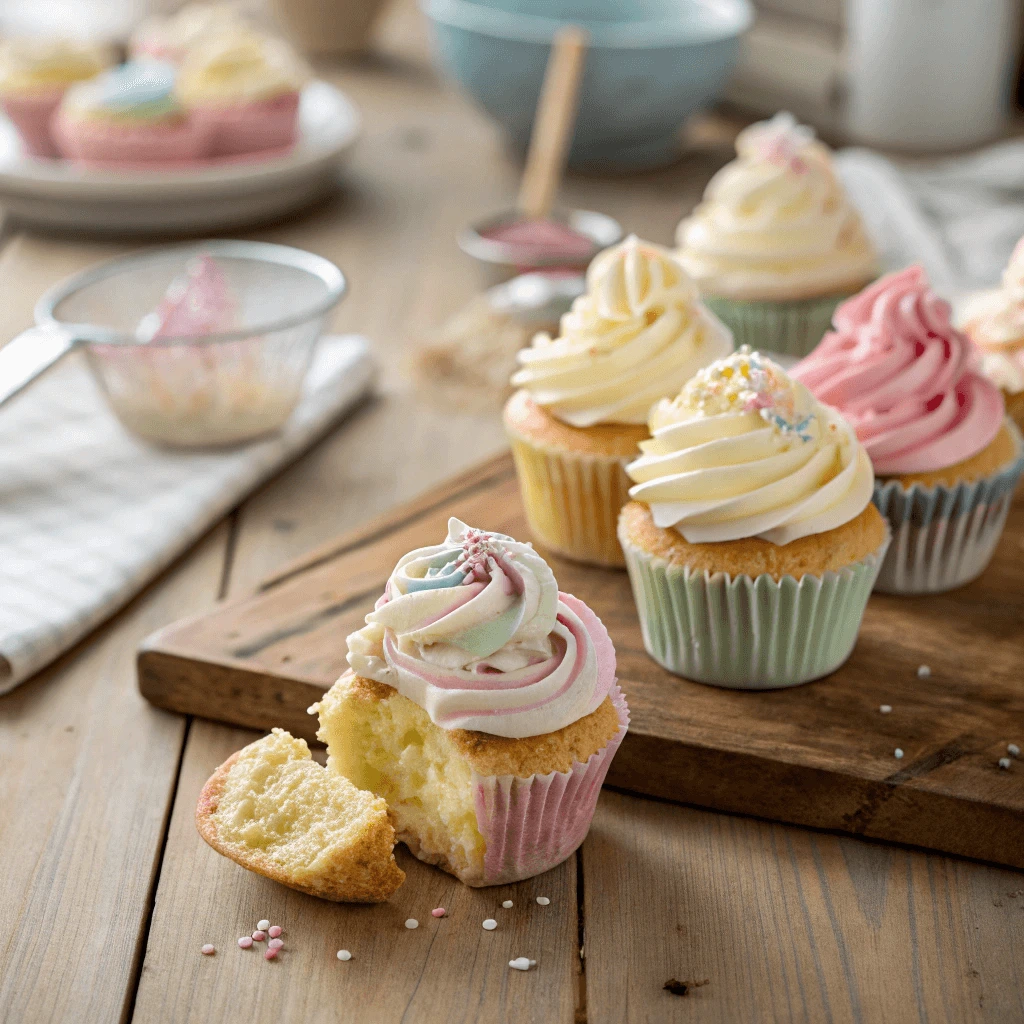
Mixing the Batter for the Perfect Texture
Achieving the perfect texture in gluten-free cupcakes depends on how you mix the batter. Unlike traditional cupcakes, gluten-free batter requires special attention to avoid a dense, dry, or gummy consistency. By following the right techniques and understanding ingredient interactions, you can create cupcakes that are light, fluffy, and moist every time.
1. Start with the Dry and Wet Ingredients Separately
To ensure even mixing, always combine dry ingredients and wet ingredients separately before bringing them together.
- Dry Ingredients – Whisk together gluten-free flour, baking powder, salt, xanthan gum, and any other dry components. This step distributes the ingredients evenly and prevents clumping.
- Wet Ingredients – In another bowl, beat the eggs, sugar (or substitute), vanilla extract, and dairy-free milk. If using melted butter or oil, add it gradually while stirring.
By keeping dry and wet ingredients separate at first, you can avoid overmixing, which is crucial in gluten-free baking.
2. Mix Gently to Avoid Overworking the Batter
Overmixing can cause gluten-free cupcakes to become too dense or gummy. Since gluten-free flours lack the protein structure found in wheat flour, excessive mixing won’t develop elasticity but can instead make the batter heavy.
- Use a spatula or whisk to gently fold the dry and wet ingredients together.
- Stir until just combined—a few small lumps are okay.
- Avoid using a high-speed mixer for too long, as it can break down the structure of the batter.
Tip: If using a stand mixer, mix on low speed for no more than 30–45 seconds after adding dry ingredients.
3. Let the Batter Rest for Better Texture
Allowing the batter to rest for 15–20 minutes before baking improves the final texture. This resting time helps the flour fully absorb the liquid, resulting in a smoother, more cohesive batter.
- Resting the batter also lets xanthan gum or other binders activate, making the cupcakes less crumbly.
- Some gluten-free flours, such as rice flour, benefit from extra hydration time to remove grittiness.
- Do not let the batter sit for too long, or it may thicken too much.
After mixing and resting, your gluten-free cupcake batter will be ready to bake, giving you light and delicious cupcakes every time!
Proper Baking Temperature and Time
Baking gluten-free cupcakes at the right temperature and for the correct amount of time is essential for achieving a light, fluffy texture. Unlike traditional cupcakes, gluten-free batters react differently to heat, making temperature control even more important. By following the right baking methods, you can prevent cupcakes from becoming too dry, dense, or undercooked.
1. Preheat Your Oven for Even Baking
Preheating the oven ensures that cupcakes start baking at a consistent temperature. Gluten-free batters rely on proper heat distribution to rise correctly.
- Set your oven to 325°F to 350°F (163°C to 177°C) for best results.
- Avoid starting with a cold oven, as this can cause uneven baking and a dense texture.
- Use an oven thermometer to check for accuracy, as many ovens may run hotter or cooler than their displayed temperature.
Tip: A lower temperature (around 325°F) is ideal for delicate gluten-free flours, helping them bake evenly without becoming too dry.
2. Use the Right Baking Time for Perfect Cupcakes
Gluten-free cupcakes often take 18–25 minutes to bake, depending on the flour blend and ingredients used. Since they don’t contain gluten to provide structure, they require careful monitoring to prevent overbaking.
- Check for doneness at the 18-minute mark by inserting a toothpick into the center of a cupcake. If it comes out clean or with a few crumbs, they are ready.
- If the tops appear too pale but the centers are fully cooked, lightly broil for 1–2 minutes to create a golden finish.
- Avoid opening the oven door too often, as this can cause the cupcakes to deflate.
Tip: Use light-colored cupcake liners to prevent excessive browning on the sides.
3. Cool Cupcakes Properly to Maintain Moisture
Proper cooling helps retain moisture and prevents cupcakes from becoming dry or crumbly.
- Let cupcakes sit in the pan for 5 minutes before transferring them to a cooling rack.
- Move them to a wire rack to prevent condensation from forming in the liners.
- Avoid frosting cupcakes while they’re still warm, as this can cause the frosting to melt.
Following these temperature and baking time guidelines will help you achieve perfect gluten-free cupcakes with a soft, moist texture every time!
Cooling and Storing Tips
Proper cooling and storage are crucial for maintaining the soft, moist texture of gluten-free cupcakes. Unlike traditional cupcakes, gluten-free versions tend to dry out more quickly due to their unique flour blends. By following the right techniques, you can keep your cupcakes fresh and delicious for longer.
1. Cool Cupcakes Properly to Retain Moisture
Cooling cupcakes the right way prevents them from becoming soggy or overly dry.
- Let the cupcakes sit in the muffin tin for about 5 minutes after removing them from the oven. This allows them to set without becoming too dense.
- Transfer them to a wire cooling rack to let air circulate around them. Keeping them in the tin for too long can trap steam, leading to soggy bottoms.
- Avoid frosting cupcakes while they are still warm, as the heat will cause the frosting to melt and lose its texture.
Tip: If you’re in a rush, you can speed up cooling by placing the cupcakes (on a wire rack) in front of a fan or near an open window.
2. Store at Room Temperature for Short-Term Freshness
If you plan to eat your gluten-free cupcakes within one to two days, storing them at room temperature is the best option.
- Place cupcakes in an airtight container to prevent them from drying out.
- Keep them in a cool, dry place, away from direct sunlight or heat sources.
- If frosted, use a container that is deep enough to avoid smudging the frosting.
Tip: Adding a piece of parchment paper or a slice of apple inside the container can help retain moisture.
3. Refrigerate or Freeze for Long-Term Storage
For longer storage, refrigerate or freeze your cupcakes while maintaining their flavor and texture.
- Refrigeration: Store cupcakes in an airtight container for up to five days. Let them come to room temperature before eating to restore their softness.
- Freezing: Wrap each cupcake individually in plastic wrap, then place them in a freezer-safe bag or container. They can last up to three months in the freezer.
- Thawing: Remove cupcakes from the freezer and let them thaw at room temperature for about an hour before serving.
Tip: If freezing frosted cupcakes, freeze them uncovered for 1-2 hours first, then wrap them carefully to keep the frosting intact.
By following these cooling and storing techniques, you can enjoy moist, delicious gluten-free cupcakes anytime without worrying about dryness or loss of flavor!
Common Mistakes and How to Avoid Them
Why Your Gluten-Free Cupcakes Are Too Dense
If your gluten-free cupcakes are turning out dense instead of light and fluffy, several factors could be at play. Gluten-free baking doesn’t rely on the structure that gluten provides in traditional flour-based cupcakes, so every step in the process becomes crucial for the right texture. Understanding why this happens can help you adjust your technique to ensure your cupcakes come out just the way you want them.
1. Incorrect Flour Blend
The type and blend of gluten-free flour you use can greatly affect the texture of your cupcakes. Not all gluten-free flours behave the same way, and using the wrong one can result in heavy, dense cupcakes.
- Rice flour, a common gluten-free flour, often creates a gritty texture when used alone, leading to denser results.
- Almond flour is heavier and more moist, but can also cause cupcakes to feel dense if not combined properly with other lighter flours.
- Pre-blended gluten-free flour mixes, which typically combine rice flour, potato starch, and tapioca flour, are usually more reliable for light, airy cupcakes. Be sure to use a high-quality blend that includes a mix of starches and protein-rich flours.
Tip: Always check your flour blend’s recommended use for cupcakes. Some gluten-free blends are meant for specific types of baked goods, such as bread or cookies, and may not be ideal for cakes or cupcakes.
2. Overmixing the Batter
Overmixing your batter can lead to dense cupcakes, as it results in too much air being incorporated into the batter, which doesn’t allow it to rise properly during baking. In gluten-free baking, the lack of gluten means the batter needs to be handled gently to prevent it from becoming too heavy.
- When combining the dry and wet ingredients, mix just until combined. Stirring too vigorously can cause the cupcakes to collapse and lose their light texture.
- It’s also important not to overbeat the batter once the flour is added, as this can break down the structure of the batter, leading to a dense, tough texture.
Tip: Use a spatula or spoon instead of an electric mixer when combining the dry and wet ingredients. This will allow you to mix gently, preserving the structure of the batter.
3. Not Using Enough Leavening Agents
Leavening agents, such as baking powder or baking soda, play a key role in creating light and fluffy cupcakes by helping the batter rise. If your cupcakes are dense, it could be because you’re not using enough leavening agent, or the leavening agent is expired and ineffective.
- Baking powder helps create lift in the cupcakes by releasing gas when exposed to heat. Ensure you’re using the correct amount as specified in your recipe.
- Sometimes, baking soda is used when there are acidic ingredients (like vinegar or lemon juice) in the batter. Ensure that it is fresh and active, or it may not provide the desired rise.
Tip: If you’re baking at high altitudes, you may need to adjust the amount of leavening agent used, as the air pressure at higher elevations can affect how the batter rises.
4. The Use of Eggs and Other Binding Agents
In gluten-free baking, eggs and xanthan gum (or other binders) help to provide structure and moisture. Without enough eggs or binding agents, the batter can become too dense, causing the cupcakes to lose their lightness.
- Eggs help provide structure, lift, and moisture. If your recipe calls for a vegan substitute, you may need to adjust the other ingredients to compensate.
- Xanthan gum or guar gum is used to mimic the structure that gluten provides. Not using enough can cause your cupcakes to become dense and crumbly.
Tip: If you’re substituting eggs for an alternative, make sure the replacement has the same binding power. For example, chia seeds or flaxseeds may work as substitutes, but they may require different quantities and adjustments to the recipe.
5. Baking at the Wrong Temperature
If your oven is too cool or too hot, the batter may not rise properly, resulting in dense cupcakes. Baking at the wrong temperature can cause the batter to rise too slowly or too quickly, leading to uneven texture.
- Make sure your oven is fully preheated to the correct temperature before placing your cupcakes inside.
- Invest in an oven thermometer to ensure the temperature is accurate, as many home ovens run hotter or cooler than their dials indicate.
Tip: If your cupcakes are baking unevenly, rotate the pan halfway through baking to ensure they cook uniformly.
6. Too Much Liquid in the Batter
Excess moisture in the batter can prevent it from setting properly during baking, leading to cupcakes that are too wet or dense. Gluten-free batters, in particular, can absorb liquid differently than wheat-based batters.
- Use the exact measurements provided in your recipe for wet ingredients like milk, oil, and eggs. Even small changes can have a large effect on the outcome.
- If the batter seems too runny, add more flour (a little at a time) until it reaches the right consistency.
Tip: Gluten-free flour tends to absorb liquids more slowly, so give the batter some time to rest before adjusting the moisture level.
Fixing Dry and Crumbly Cupcakes
Dry and crumbly cupcakes are a common issue in gluten-free baking. Since gluten plays a major role in holding baked goods together, gluten-free cupcakes often face challenges with moisture retention and texture. If you’ve ended up with a batch of dry and crumbly cupcakes, don’t worry—there are several strategies to restore their softness and fluffiness.
1. Increase the Moisture Content
One of the most common reasons for dry cupcakes is a lack of moisture in the batter. Gluten-free flours absorb moisture differently than traditional wheat flour, so it’s essential to compensate for this.
- Add more wet ingredients: If your cupcakes feel dry, you might need to increase the quantity of wet ingredients such as butter, oil, milk, or even eggs. These ingredients contribute to the richness and moisture of the cupcake, helping to counteract dryness.
- Use yogurt or sour cream: Adding a tablespoon or two of Greek yogurt or sour cream can enhance the texture and keep your cupcakes moist. These ingredients also add a slight tanginess, enhancing the overall flavor.
- Try non-dairy alternatives: If you’re making dairy-free cupcakes, opt for almond milk, coconut milk, or oat milk, as these liquids provide more moisture than regular dairy milk.
Tip: If your batter seems too thick and the cupcakes are coming out dry, adding a small amount of water, or extra milk can help hydrate the batter and provide the moisture needed.
2. Adjust the Flour Ratio
The flour mixture in your gluten-free cupcakes is key to achieving the right texture. An incorrect flour ratio can result in dense or crumbly cupcakes.
- Add more starch: Starches like cornstarch, potato starch, or tapioca flour can help improve the texture of gluten-free cupcakes. They provide lightness and moisture, helping the batter stay soft and fluffy. Too much rice flour, for example, can make cupcakes dry and crumbly.
- Try a different flour blend: Sometimes, the flour blend you’re using may not work well for cupcakes. You might want to experiment with a different blend that offers more moisture retention. Look for a gluten-free all-purpose flour that contains a combination of rice flour, potato starch, and tapioca flour, which helps with moisture.
Tip: Make sure you’re measuring your flour correctly. Scoop and level your flour rather than scooping it directly from the bag to avoid using too much flour, which can result in dry cupcakes.
3. Ensure the Right Baking Time and Temperature
Baking time and temperature are key factors that affect the moisture content in your cupcakes. If your oven is too hot, the cupcakes may cook too quickly, drying out the interior while leaving the outside overdone.
- Use the correct temperature: Gluten-free cupcakes need to bake at a moderate temperature, usually between 325°F to 350°F (163°C to 177°C), to ensure the right balance of moisture retention and structure. Too high a temperature can lead to dry, overcooked cupcakes.
- Check for doneness: Don’t let your cupcakes bake for longer than the recipe suggests. Always perform a toothpick test. Insert a toothpick in the center of the cupcake; if it comes out clean or with a few crumbs, they are done. Overbaking is a primary cause of dry cupcakes.
Tip: If your cupcakes are browning too quickly on top but still raw in the center, reduce the temperature slightly and bake them for a little longer. You can also place a piece of aluminum foil loosely on top of the cupcakes to prevent overbrowning.
4. Add a Simple Syrup or Liquid to Revive Dry Cupcakes
If your cupcakes have already baked and turned out dry, don’t throw them away just yet! You can still save them by adding a simple syrup or liquid to boost moisture.
- Simple syrup: Make a simple syrup by heating equal parts water and sugar until the sugar dissolves. Once it cools, brush the syrup lightly onto the cupcakes to give them an instant moisture boost. This will make your cupcakes softer without altering the flavor too much.
- Milk or cream: Gently brush a little milk or cream onto the top of the cupcakes before serving. This will help soften the dry texture and add extra richness.
Tip: For a more decadent option, you can make a flavored syrup with vanilla, cinnamon, or cocoa for an added taste dimension.
5. Don’t Overmix the Batter
Overmixing the batter can lead to cupcakes that are not only dense but also dry. When you overmix, the ingredients break down too much, preventing proper moisture retention during baking.
- Mix until combined: Gently fold the dry and wet ingredients together until just combined. Avoid beating the batter vigorously, which could overwork the flour and reduce moisture in the final product.
- Rest the batter: Allowing the batter to rest for 10-15 minutes before baking can help hydrate the dry ingredients, especially in gluten-free recipes, where the flour mixture can sometimes absorb moisture too slowly.
Tip: If you notice that the batter is still very thick after mixing, add a bit of extra liquid, such as milk or water, to thin it slightly. This can also help with the overall moisture content.
6. Experiment with Alternative Oils
Some oils help retain moisture better than others. For instance, using oils like coconut oil or vegetable oil can help your cupcakes stay moist. Other oils, such as olive oil, might not have the same moisture-retaining properties.
- Coconut oil: This oil has a slight natural sweetness and adds richness to your cupcakes. It can also help prevent the cupcakes from drying out.
- Vegetable or canola oil: These neutral oils are great for maintaining moisture while not altering the flavor profile of your cupcakes.
Tip: When using coconut oil, make sure it’s in a liquid state before incorporating it into the batter, especially if you’re working in cooler conditions where it can solidify.
Preventing Cupcakes from Sinking in the Middle
One of the most frustrating problems you can face when baking gluten-free cupcakes is the dreaded sinking in the middle. It can ruin their appearance and leave them looking less than perfect. The good news is that you can easily prevent this from happening by addressing a few common causes. Understanding why cupcakes sink, and taking steps to correct these issues, will help you achieve light and perfectly risen treats every time.
1. Avoid Overmixing the Batter
Overmixing the cupcake batter is one of the most common reasons for sinking in the middle. When you mix the batter too much, you break down the structure of the flour, which leads to a denser, heavier batter. This prevents the cupcakes from rising properly and can cause them to collapse as they cool.
- Mix gently and briefly: Stir the ingredients together just until they are combined. Once you no longer see streaks of dry flour or wet ingredients, stop mixing. You don’t need to beat the batter excessively to ensure everything is incorporated.
- Fold carefully: If you’re adding ingredients like chocolate chips or fruits, fold them in gently instead of stirring vigorously. This helps to keep the batter light and airy.
Tip: If you’re mixing by hand, use a light folding motion rather than stirring. This method helps prevent air from being knocked out of the batter.
2. Use the Correct Amount of Leavening Agent
Leavening agents such as baking soda and baking powder play a vital role in helping your cupcakes rise. However, using too much or too little of these ingredients can cause problems, including sinking in the middle. If the leavening agents are too weak, the cupcakes may not rise sufficiently, while too much can cause the cupcakes to rise quickly and then collapse.
- Accurately measure your leavening agents: Follow the recipe’s recommended measurements carefully. If you’re unsure, it’s better to use a little less than to overdo it.
- Choose the right type of leavening: Some gluten-free flour blends require a specific type of baking powder or soda. Make sure you’re using the correct kind, as different types of baking powder have varying levels of strength.
Tip: Check the expiration dates on your baking soda and baking powder to make sure they’re still active. Old leavening agents can prevent your cupcakes from rising properly.
3. Check the Oven Temperature
Baking at the wrong temperature is another culprit behind sinking cupcakes. If your oven is too hot, the cupcakes will rise too quickly and then collapse. Conversely, if the oven is too cool, the cupcakes may not rise enough to hold their shape, leading to a sunken middle.
- Preheat your oven: Always preheat your oven to the right temperature before baking. This ensures that the cupcakes begin cooking immediately once they go in, allowing them to rise properly.
- Use an oven thermometer: Oven temperatures can often be inaccurate. To be sure your oven is at the right temperature, invest in an oven thermometer to monitor the temperature inside. A slightly cooler oven may not provide enough heat for the batter to rise properly, while a hotter oven can cause rapid rising followed by collapse.
Tip: Set your oven to 325°F or 350°F (163°C – 177°C) for most cupcake recipes. Adjust the temperature slightly based on your oven’s actual temperature readings.
4. Don’t Overfill the Cupcake Liners
Overfilling the cupcake liners with batter can cause the cupcakes to rise too quickly and then collapse in the middle as they cool. It’s important to leave enough room for the cupcakes to expand without overflowing.
- Fill liners halfway: For best results, fill each cupcake liner about two-thirds full. This allows enough space for the cupcakes to rise and bake evenly without overflowing and collapsing.
- Even distribution: Use a spoon or ice cream scoop to evenly distribute the batter into the liners. This will ensure that each cupcake rises uniformly, avoiding the issue of some sinking more than others.
Tip: If you’re making mini cupcakes, remember that these bake faster, so keep a closer eye on them to avoid overbaking and sinking.
5. Avoid Opening the Oven Door Too Early
While it’s tempting to check on your cupcakes as they bake, opening the oven door too soon can cause them to sink. The sudden temperature change from opening the door can disrupt the rise and cause the cupcakes to fall in the middle.
- Wait until the cupcakes are set: Only open the oven door after the cupcakes have risen and set, usually about 15-20 minutes into baking. Opening the door too soon can interrupt the rise and lead to collapse.
- Check through the oven window: Most modern ovens have a window, so you can check the progress of your cupcakes without opening the door. This helps maintain the oven’s temperature and prevents sudden fluctuations.
Tip: If you do need to open the door, do so gently and quickly to minimize heat loss.
6. Use Fresh Ingredients
Using expired or old ingredients can lead to various baking problems, including cupcakes that sink in the middle. Leavening agents, flour, and even eggs lose their potency over time, so it’s important to use fresh ingredients for the best results.
- Check your ingredients: Make sure your gluten-free flour hasn’t been sitting around for too long, and that your baking powder and eggs are fresh. Old ingredients can result in weak batter, causing your cupcakes to fall.
- Store ingredients properly: Keep your gluten-free flours and other dry ingredients in airtight containers to preserve their freshness. Store eggs and other perishable ingredients in the refrigerator to ensure their quality.
Tip: If you’re unsure whether an ingredient is still good, conduct a quick test. For example, mix a teaspoon of baking powder with hot water to see if it bubbles. If it doesn’t, it’s time to replace it.
7. Allow the Batter to Rest Before Baking
Resting the batter for 10-15 minutes before baking can allow the gluten-free flour to fully absorb the liquid, which can help improve the structure and prevent sinking in the middle. This resting period ensures the batter holds together better during baking.
- Let the batter sit: After mixing the ingredients, let the batter rest at room temperature before scooping it into the cupcake liners. This helps the flour hydrate fully and ensures an even rise.
- Consistency check: If the batter seems too runny after mixing, a rest period can help it thicken up slightly, reducing the chances of sinking.
Tip: If you’re making a larger batch, rest the batter in batches to prevent it from sitting too long and losing its freshness.
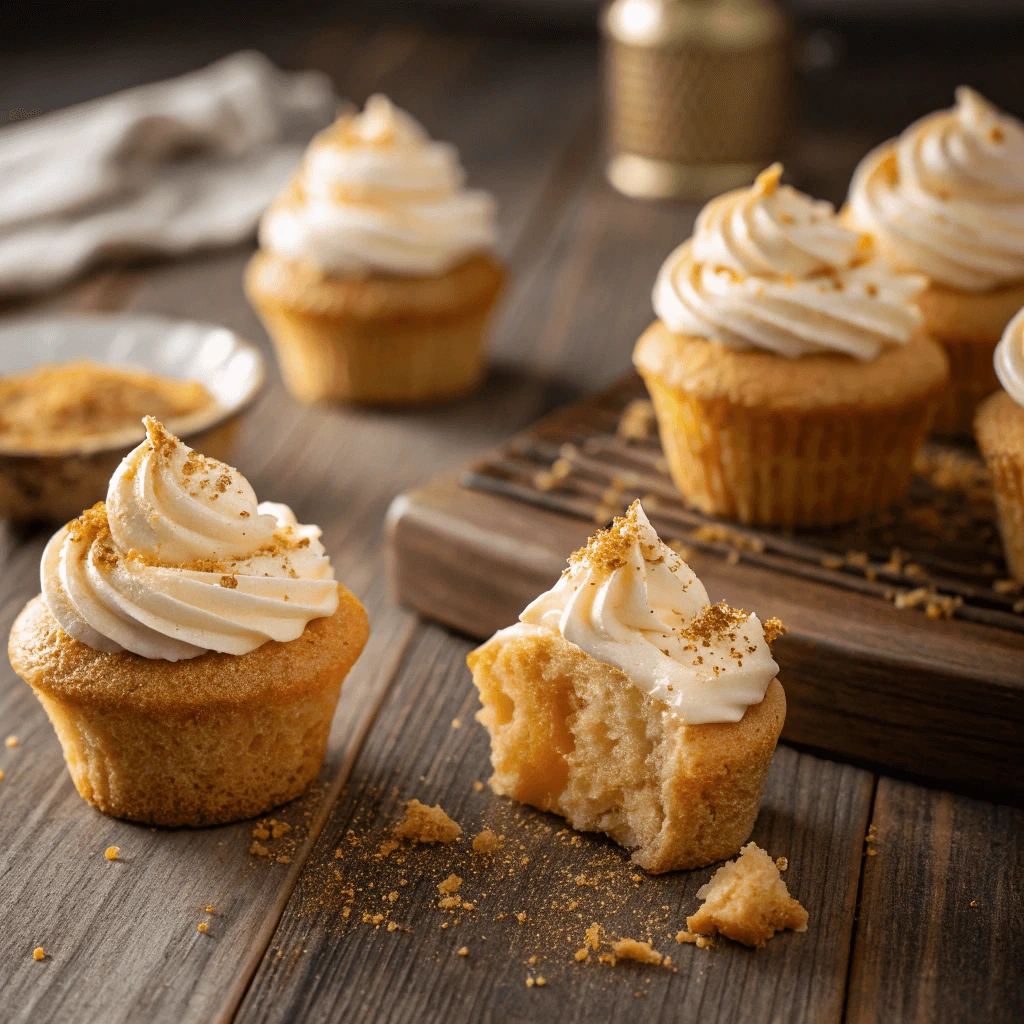
Delicious Variations to Try
Vegan Gluten-Free Cupcakes
Baking vegan gluten-free cupcakes requires more than just substituting traditional ingredients with dairy-free and gluten-free alternatives. You need to ensure that the cupcakes are just as light, fluffy, and delicious as their non-vegan counterparts. This section will provide essential tips and ingredient suggestions to help you make the best vegan gluten-free cupcakes without sacrificing flavor or texture.
1. Substitute Eggs with Vegan Alternatives
Eggs play an essential role in traditional cupcakes, providing moisture, structure, and helping the batter to rise. In vegan baking, you’ll need to replace eggs with plant-based substitutes that offer similar properties.
- Common egg replacements: Flaxseed meal, chia seeds, and applesauce are popular choices. For each egg, use 1 tablespoon of flaxseed or chia meal mixed with 3 tablespoons of water. Let it sit for a few minutes to form a gel-like consistency. Applesauce is another option, replacing one egg with ¼ cup of unsweetened applesauce.
- Aquafaba: The liquid from canned chickpeas, known as aquafaba, is an excellent egg replacer. It can be whipped into stiff peaks and used in place of eggs to create a light and airy texture.
- Silken tofu: Silken tofu is another versatile egg substitute, offering moisture and structure. Blend ¼ cup of silken tofu to replace one egg in your cupcake recipe.
Tip: When choosing an egg substitute, ensure it complements the flavor profile of your cupcakes. For example, applesauce works great for fruit-flavored cupcakes, while flaxseed meal adds a subtle nutty taste to baked goods.
2. Use Non-Dairy Milk for Moisture
In vegan gluten-free cupcakes, replacing cow’s milk with plant-based milk is an easy step, but it’s crucial to select the right type of non-dairy milk to maintain the cupcakes’ moisture and consistency.
- Almond milk: This is one of the most commonly used non-dairy milks. It has a mild flavor and a smooth consistency, making it ideal for most cupcake recipes.
- Oat milk: Oat milk is naturally thicker and sweeter than almond milk, making it an excellent choice for rich, flavorful cupcakes. It also contributes a soft texture to baked goods.
- Coconut milk: If you’re looking for a tropical twist, coconut milk is a great option. It’s creamy and adds a hint of coconut flavor that pairs well with chocolate or vanilla cupcakes.
- Soy milk: This is another popular non-dairy option that closely mimics the texture of dairy milk. It’s a versatile choice for many vegan baking recipes.
Tip: Choose unsweetened versions of non-dairy milk to avoid adding unnecessary sugar to your cupcakes.
3. Replace Butter with Vegan Butter or Oil
Butter is a key ingredient in traditional cupcake recipes, contributing to their richness and flavor. For vegan cupcakes, you’ll need to replace butter with a plant-based alternative.
- Vegan butter: This is the closest substitute for dairy butter. It’s made from plant oils like coconut oil, avocado oil, or palm oil, and it provides the same texture and flavor as regular butter.
- Coconut oil: Coconut oil works well as a butter substitute in vegan baking. It’s solid at room temperature, which helps provide the structure and moisture you need for cupcakes.
- Olive oil: Olive oil can also be used as a substitute for butter, especially in savory vegan gluten-free cupcakes. It adds richness without the overpowering flavor of coconut oil.
Tip: If you choose coconut oil, be sure to melt it before adding it to your batter to avoid any clumps that might form in the mixture.
4. Sweeten with Natural, Vegan Sugar Alternatives
Traditional sugar is vegan, but some types are processed with bone char, so if you’re looking for a completely plant-based option, there are a variety of sweeteners that work great in vegan gluten-free cupcakes.
- Maple syrup: This natural sweetener adds a lovely depth of flavor to cupcakes. It also contributes moisture, so you may need to slightly reduce the amount of other liquids in the recipe when using maple syrup.
- Coconut sugar: Derived from the sap of coconut trees, coconut sugar is a perfect substitute for regular sugar. It has a rich, caramel-like flavor that complements many cupcake recipes.
- Agave syrup: Agave syrup is a sweet alternative that is sweeter than sugar, so use it in smaller amounts. It’s liquid, so you may need to adjust the dry-to-wet ratio of your cupcake batter.
- Stevia: Stevia is a natural, no-calorie sweetener, which can be useful if you’re looking to reduce sugar intake. Use it sparingly since it is much sweeter than sugar.
Tip: Always check the sweetness level of your cupcakes before baking. The batter should taste sweet, but not overly sugary.
5. Choose the Right Gluten-Free Flour Blend
When making vegan gluten-free cupcakes, choosing the right flour blend is crucial for achieving the perfect texture and taste. Gluten-free flour blends are formulated to replace wheat flour in a variety of baked goods, but they’re not all created equal.
- Rice flour: This is the most commonly used gluten-free flour. It has a mild flavor, making it a good base for vegan cupcakes.
- Almond flour: Almond flour adds a slightly nutty flavor to cupcakes, along with moisture and a tender crumb. It’s an excellent choice for adding richness to your cupcakes.
- Sorghum flour: Sorghum flour adds a mild, slightly sweet flavor. It’s commonly used in gluten-free baking to improve the texture and structure of the final product.
- Tapioca flour: Tapioca flour is a great binder and thickening agent in vegan gluten-free baking. It helps cupcakes rise and adds a chewy texture.
Tip: For the best results, use a pre-made gluten-free flour blend that includes a combination of these flours. This will help you achieve the right balance of texture and flavor.
6. Add Flavor with Vegan-Friendly Ingredients
Vegan gluten-free cupcakes don’t have to be bland. You can add all kinds of flavors using plant-based ingredients.
- Vanilla extract: A classic addition that enhances the flavor of any cupcake, vanilla extract is naturally vegan and gluten-free.
- Cocoa powder: For chocolate cupcakes, use high-quality unsweetened cocoa powder for rich, deep flavor. You can even add vegan chocolate chips or chunks to intensify the flavor.
- Fresh fruit or fruit puree: Adding fruit can give your cupcakes a burst of natural sweetness. Try adding mashed bananas, applesauce, or berry purees for flavor and moisture.
- Spices: Cinnamon, nutmeg, or cardamom can add warmth and complexity to your vegan cupcakes. Experiment with different spices to create unique flavors.
Tip: If you’re making fruity cupcakes, consider topping them with fresh fruit or a vegan frosting made from coconut cream for a delightful finish.
Chocolate Gluten-Free Cupcakes
Chocolate gluten-free cupcakes are a favorite treat for anyone with dietary restrictions, and they can easily satisfy a craving for something rich and indulgent. By using high-quality gluten-free ingredients and paying attention to key factors like moisture and texture, you can create cupcakes that are not only gluten-free but also irresistibly delicious. This section will guide you through how to bake perfect chocolate gluten-free cupcakes, including essential tips for creating a fluffy, flavorful, and moist cupcake.
1. Selecting the Right Gluten-Free Flour Blend for Chocolate Cupcakes
When making chocolate gluten-free cupcakes, choosing the best flour blend is crucial for achieving a soft, tender crumb. Gluten-free flours differ greatly in texture, so it’s important to find one that offers the perfect balance of lightness and structure.
- Gluten-Free All-Purpose Flour: A gluten-free all-purpose flour blend is a convenient choice for chocolate cupcakes. It usually combines rice flour, potato starch, and tapioca flour, which work together to mimic the texture of wheat flour. For the best results, use a high-quality blend that includes xanthan gum, a common binder in gluten-free baking.
- Almond Flour: Almond flour adds richness and moisture to chocolate cupcakes. It has a slightly nutty flavor that complements chocolate, providing a soft, tender crumb. Combining almond flour with other gluten-free flours will give your cupcakes a better texture and flavor.
- Sorghum and Rice Flour: A combination of sorghum flour and rice flour can offer a lighter texture for chocolate cupcakes while helping to absorb moisture. Sorghum flour also has a mild, slightly sweet flavor that enhances the chocolate taste.
Tip: Always check the ingredient list of pre-made flour blends. Choose those without artificial additives or preservatives to ensure the best flavor and texture for your cupcakes.
2. Use High-Quality Cocoa Powder for a Rich Chocolate Flavor
The key to creating deep, rich chocolate flavor lies in the quality of the cocoa powder you use. Unsweetened cocoa powder provides the best flavor for chocolate cupcakes because it’s less processed and offers a stronger, more complex taste than sweetened cocoa powder.
- Natural Cocoa Powder: Natural cocoa powder, often labeled as “unsweetened,” has a mild, slightly acidic flavor that works beautifully in chocolate cupcakes. Its rich flavor makes the chocolate taste more intense without being overpowering.
- Dutch-Processed Cocoa Powder: Dutch-processed cocoa powder has been treated with an alkali to neutralize its acidity, resulting in a smoother, milder flavor. It’s perfect for those who prefer a less acidic taste. If you want a more traditional chocolate flavor, using a mix of both natural and Dutch-processed cocoa powder can help balance out the taste.
Tip: Always sift your cocoa powder before adding it to the batter. Sifting removes clumps, ensuring that the cocoa powder is evenly distributed throughout the cupcake batter.
3. Enhancing Moisture with Dairy-Free Alternatives
When baking gluten-free chocolate cupcakes, it’s essential to ensure that the cupcakes are moist, as gluten-free batters can often turn out dry. To achieve the perfect moist chocolate cupcakes, substitute dairy ingredients with plant-based alternatives.
- Non-Dairy Milk: Use unsweetened almond milk, oat milk, or coconut milk to replace dairy milk. These milks provide the right level of moisture and allow the chocolate flavor to shine through without overpowering it.
- Vegan Butter or Coconut Oil: Replace butter with vegan butter or coconut oil. These ingredients help retain moisture in the cupcakes, making them soft and tender. Coconut oil is especially great for adding a subtle coconut flavor, which can enhance the chocolate flavor.
- Applesauce or Mashed Banana: These natural ingredients add extra moisture to your cupcakes. Applesauce is a particularly good choice since it complements the sweetness of chocolate, while mashed bananas offer a slight fruity undertone.
Tip: When using coconut oil, be sure to melt it before mixing it into the batter. If the coconut oil is too solid, it may cause the batter to be uneven, leading to clumps.
4. Using the Right Sweeteners for Perfect Balance
The sweetness of chocolate cupcakes is essential for balancing out the rich, bitter cocoa powder. When making chocolate gluten-free cupcakes, consider using a combination of natural sweeteners to achieve the perfect level of sweetness.
- Coconut Sugar: Coconut sugar is a natural sweetener with a mild caramel flavor that complements chocolate perfectly. It’s also a great choice for those looking to avoid refined sugars.
- Maple Syrup or Agave: For a more liquid-based sweetener, use maple syrup or agave nectar. These options add moisture while also sweetening the batter. Be mindful of the fact that using liquid sweeteners may require you to adjust the dry-to-wet ingredient ratio.
- Stevia or Monk Fruit: If you’re looking for a sugar-free option, stevia or monk fruit can replace sugar while still offering sweetness. However, these sweeteners are much sweeter than sugar, so you may need to adjust the quantities to suit your taste.
Tip: Always taste your batter before baking and adjust the sweetness to your liking. Chocolate cupcakes should have a rich, balanced flavor, so make sure they’re sweet enough to complement the cocoa without being overly sugary.
5. Add a Chocolate Frosting or Filling for Extra Decadence
To elevate your chocolate gluten-free cupcakes, consider topping them with a rich, creamy frosting or adding a chocolate filling. This extra touch will make the cupcakes even more indulgent.
- Vegan Chocolate Ganache: For an extra indulgent treat, top your chocolate cupcakes with vegan chocolate ganache. Made from dairy-free chocolate and coconut cream, this ganache will harden as it cools, creating a smooth and glossy finish.
- Vegan Buttercream Frosting: A classic buttercream frosting made with vegan butter and powdered sugar is always a winner. You can add cocoa powder to the frosting to make it chocolate-flavored or add a pinch of sea salt for a sweet-salty flavor profile.
- Chocolate Chips or Chunks: If you want to add texture and bursts of chocolate flavor, fold in vegan chocolate chips or chunks into the batter before baking. This adds delightful gooey pockets of chocolate that melt in your mouth with each bite.
Tip: To prevent the frosting from melting too quickly, allow your cupcakes to cool completely before decorating. This will help the frosting stay in place and maintain its shape.
Nut-Free and Allergy-Friendly Options
Making nut-free and allergy-friendly cupcakes is essential for those who have specific dietary restrictions or food allergies. Whether you’re preparing cupcakes for a school party, a family gathering, or a special occasion, it’s important to ensure that your cupcakes are safe for everyone to enjoy. In this section, we’ll cover the best strategies for creating nut-free, allergy-friendly cupcakes that still taste delicious, including ingredient substitutions and tips for ensuring safety in your kitchen.
1. Choosing Nut-Free Flour Alternatives
The base of your cupcake recipe is the flour, and for nut-free cupcakes, selecting the right flour blend is crucial. While many gluten-free flours contain nut ingredients, there are plenty of safe, nut-free alternatives available. Opting for these flours helps ensure that your cupcakes are safe for individuals with nut allergies.
- Rice Flour: A commonly used gluten-free flour, rice flour is naturally nut-free and provides a light texture for your cupcakes. It works well in combination with other gluten-free flours like potato starch or tapioca flour to create a balanced, fluffy texture.
- Sorghum Flour: This flour is another excellent nut-free option that adds structure to your cupcakes. It has a slightly earthy flavor, which pairs well with chocolate or fruit-based cupcakes.
- Oat Flour: When using oat flour, make sure it’s labeled as gluten-free, as oats can sometimes be contaminated with gluten. Oat flour is soft, mild in flavor, and helps add moisture to your cupcakes, making it a great addition to allergy-friendly recipes.
Tip: If you don’t have a nut allergy but are making cupcakes for a group, use a nut-free flour blend to avoid cross-contamination.
2. Replacing Nut-Based Ingredients
In addition to using nut-free flours, you’ll need to swap out other common nut-based ingredients that could trigger allergies. Here are a few common replacements for ingredients that typically contain nuts:
- Nut Butters: If your recipe calls for peanut butter, almond butter, or cashew butter, simply substitute with sunflower seed butter or soy nut butter. These alternatives are safe for those with nut allergies and have a similar creamy texture.
- Nut Milks: Nut milks, such as almond milk or cashew milk, are often used in baking to provide moisture. You can easily swap these for oat milk, soy milk, or rice milk, all of which are nut-free and provide a comparable texture.
- Coconut Flour: Some people with nut allergies may also have sensitivities to coconut, which is classified as a tree nut. If you need a flour substitute for recipes that call for coconut flour, you can use rice flour or a blend of oat flour and tapioca flour.
Tip: Always read labels carefully when purchasing store-bought nut-free alternatives. Ensure there are no traces of nuts, especially if the products are manufactured in facilities that process nuts.
3. Allergy-Friendly Substitutions for Eggs and Dairy
Making nut-free and allergy-friendly cupcakes often means you’ll need to eliminate both eggs and dairy products, which are common allergens. Fortunately, there are plenty of plant-based alternatives that can help you achieve the same delicious results without compromising flavor or texture.
- Egg Substitutes: To replace eggs in your cupcake batter, use the following alternatives:
- Flaxseed Meal: Mix one tablespoon of ground flaxseed with three tablespoons of water. Let it sit for a few minutes to thicken before adding it to the batter. This mixture mimics the binding and moisture-retaining qualities of eggs.
- Applesauce: Use 1/4 cup of unsweetened applesauce for each egg in the recipe. It adds moisture and works particularly well in spiced or fruit-based cupcakes.
- Aquafaba: The liquid from canned chickpeas (or other legumes) can be whipped and used as an egg substitute. It works especially well in recipes that require egg whites for structure.
- Dairy-Free Substitutes: For a dairy-free option, replace milk and butter with these plant-based alternatives:
- Non-Dairy Milk: Use oat, soy, or coconut milk instead of dairy milk. These plant-based milks provide a similar texture and moisture while being free of nuts and dairy.
- Vegan Butter: Vegan butter made from plant oils (often coconut or olive oil-based) works just like regular butter in recipes. Ensure that the butter is free from nuts or other allergens.
- Coconut Yogurt: If your recipe requires yogurt, you can replace dairy yogurt with coconut yogurt, which provides a creamy consistency and mild flavor.
Tip: Always check for any hidden allergens in processed vegan and dairy-free products, as some may contain traces of soy or gluten.
4. Baking and Decorating Nut-Free Cupcakes Safely
When baking nut-free cupcakes, it’s important to avoid cross-contamination in the kitchen. Here are some tips to keep the cupcakes safe for those with allergies:
- Clean Your Equipment: Make sure that all your kitchen tools, such as mixing bowls, utensils, and measuring cups, are thoroughly cleaned before you begin baking. Even tiny traces of nuts can cause a reaction in sensitive individuals.
- Use Separate Baking Sheets: If you’ve baked with nuts in the past, it’s a good idea to use separate baking sheets or pans for nut-free cupcakes to prevent cross-contact.
- Allergen-Free Decorations: Many cupcake decorations, such as sprinkles or chocolate chips, may contain traces of nuts. Look for certified nut-free sprinkles or make your own decorations using fresh fruit, dairy-free chocolate, or non-nut-based icing.
Tip: Some stores carry dedicated allergen-free products, which are processed in nut-free facilities. Look for products that are specifically labeled “nut-free” to ensure they are safe.
5. Customizing Your Nut-Free Cupcakes with Flavor Variations
Nut-free cupcakes don’t have to be boring. You can add a variety of fun and allergy-friendly ingredients to customize your cupcakes and make them just as exciting as regular cupcakes.
- Fruit Flavors: Try adding fresh or dried fruits to your batter. Blueberries, raspberries, or mashed bananas are excellent choices for adding natural sweetness and flavor.
- Spices and Extracts: Enhance your cupcakes with cinnamon, vanilla extract, or even a pinch of nutmeg for added depth of flavor.
- Chocolate Variations: For chocolate lovers, use dairy-free chocolate chips or cocoa powder to make chocolate cupcakes or even swirls of chocolate ganache for frosting.
Tip: Keep an eye on the texture when adding wet ingredients like fruit. You may need to adjust the dry ingredients to maintain the right batter consistency.
Frosting and Decoration Ideas
Best Gluten-Free and Dairy-Free Frosting Recipes
Creating the perfect frosting for your gluten-free and dairy-free cupcakes is an essential step to ensure a delicious treat that everyone can enjoy. Many store-bought frostings contain hidden gluten or dairy products, so making your own is the safest way to ensure both gluten- and dairy-free cupcakes. In this section, we’ll explore several frosting recipes that are both gluten-free and dairy-free, offering you a variety of flavors and textures to elevate your cupcakes.
1. Classic Dairy-Free Buttercream Frosting
Buttercream frosting is a classic that works wonderfully on gluten-free and dairy-free cupcakes. This rich, smooth frosting is easy to make and can be flavored to suit any cupcake.
Ingredients:
- 1/2 cup dairy-free butter (such as vegan butter)
- 3-4 cups powdered sugar (ensure it’s gluten-free)
- 1 tsp vanilla extract
- 1-2 tbsp non-dairy milk (such as almond, soy, or oat milk)
- A pinch of salt (optional)
Instructions:
- Beat the dairy-free butter using an electric mixer until smooth and creamy.
- Gradually add the powdered sugar, one cup at a time, beating well after each addition.
- Add vanilla extract and a pinch of salt, if desired, and continue mixing until the frosting is smooth.
- Slowly add non-dairy milk, one tablespoon at a time, until you reach your desired consistency.
- Frost your gluten-free cupcakes and enjoy!
Tip: If you want to make this frosting chocolate-flavored, simply add 1/4 cup of cocoa powder to the mix.
2. Vegan Cream Cheese Frosting
If you love the tangy flavor of cream cheese frosting but want to keep it dairy-free, this vegan version is a perfect substitute. It’s smooth, rich, and pairs wonderfully with both chocolate and vanilla cupcakes.
Ingredients:
- 1/2 cup dairy-free cream cheese (like Tofutti or Daiya)
- 1/4 cup dairy-free butter
- 3-4 cups powdered sugar
- 1 tsp vanilla extract
- A pinch of salt
Instructions:
- Beat the dairy-free cream cheese and butter together until light and fluffy.
- Gradually add powdered sugar, one cup at a time, mixing thoroughly to avoid lumps.
- Add vanilla extract and salt, then continue to mix until smooth.
- Frost your cupcakes with this creamy and tangy frosting for a decadent treat.
Tip: For extra flavor, you can add lemon zest or a few tablespoons of fruit puree to customize the taste.
3. Dairy-Free Whipped Coconut Cream Frosting
If you prefer a lighter, fluffier frosting, whipped coconut cream is an excellent choice. This frosting is perfect for anyone who loves the airy texture of whipped cream but wants a dairy-free alternative.
Ingredients:
- 1 can of full-fat coconut milk (refrigerated overnight)
- 1/4 cup powdered sugar
- 1 tsp vanilla extract
Instructions:
- Open the refrigerated coconut milk and scoop out the solidified coconut cream, leaving the liquid behind.
- Beat the coconut cream with a mixer until it thickens and becomes fluffy.
- Gradually add powdered sugar and vanilla extract, and continue to beat until smooth and creamy.
- Frost your cupcakes immediately, as whipped coconut cream can lose its texture if left at room temperature for too long.
Tip: If you prefer a firmer frosting, you can refrigerate the whipped coconut cream for an hour before using it.
4. Dairy-Free Chocolate Ganache Frosting
For chocolate lovers, a rich, glossy ganache makes a perfect dairy-free frosting. This ganache has a deep chocolate flavor and pairs beautifully with both gluten-free vanilla and chocolate cupcakes.
Ingredients:
- 1 cup dairy-free dark chocolate chips (check labels to ensure they are gluten-free)
- 1/2 cup non-dairy milk (such as almond or soy)
- 1 tbsp dairy-free butter (optional, for extra richness)
Instructions:
- Place the dairy-free chocolate chips in a heatproof bowl.
- Heat the non-dairy milk in a saucepan over low heat until it starts to simmer.
- Pour the hot milk over the chocolate chips and let them sit for a minute. Then, stir the mixture until smooth and glossy.
- Add dairy-free butter for extra richness, if desired, and mix until fully combined.
- Allow the ganache to cool and thicken before frosting your cupcakes. You can refrigerate it for a thicker consistency or use it slightly warm for a more drizzled effect.
Tip: To add a unique twist, infuse your ganache with flavors such as coffee, peppermint extract, or orange zest.
5. Dairy-Free Peanut Butter Frosting
Peanut butter frosting is rich, creamy, and pairs wonderfully with chocolate cupcakes. It’s a favorite for many, and you can easily make it dairy-free by using a plant-based peanut butter option.
Ingredients:
- 1/2 cup dairy-free peanut butter (ensure it doesn’t contain added sugar)
- 1/4 cup dairy-free butter
- 2-3 cups powdered sugar
- 1 tsp vanilla extract
- A pinch of salt
Instructions:
- Beat the dairy-free peanut butter and butter together until smooth and creamy.
- Gradually add powdered sugar, mixing thoroughly to achieve a creamy, spreadable consistency.
- Add vanilla extract and salt, and beat until fully combined.
- Frost your cupcakes with this creamy, nutty frosting for a rich flavor.
Tip: For a smoother texture, you can add a small amount of non-dairy milk to adjust the consistency.
6. Fruit-Infused Frosting (Lemon, Strawberry, or Raspberry)
If you want a fruity frosting that’s both refreshing and flavorful, fruit-infused frosting is a great option. By using fruit purees, you can create light, vibrant frostings that pair perfectly with your gluten-free and dairy-free cupcakes.
Ingredients for Strawberry Frosting:
- 1/2 cup dairy-free butter
- 1/4 cup fruit puree (such as strawberry, raspberry, or lemon)
- 3-4 cups powdered sugar
- 1 tsp vanilla extract
Instructions:
- Beat the dairy-free butter and fruit puree until smooth.
- Gradually add powdered sugar, one cup at a time, until the frosting is thick and smooth.
- Add vanilla extract and beat until combined.
- Frost your cupcakes with this fruity and flavorful frosting.
Tip: You can adjust the amount of fruit puree depending on how strong you want the fruit flavor to be. Be mindful of the consistency and add more powdered sugar if needed
How to Pipe Frosting Like a Pro
Piping frosting can elevate your baked goods, but it requires the right tools and techniques. Here’s how you can pipe like a pro with some simple tips and tricks.
1. Choose the Right Piping Tip
Different tips create different designs. Some popular ones are:
- Round Tips: Ideal for writing and details.
- Star Tips: Perfect for textured swirls and rosettes.
- Petal Tips: Great for flowers like roses.
- Leaf Tips: Best for leaf shapes.
2. Prepare Your Piping Bag
- Fit the Piping Tip: Insert your chosen tip and secure it at the bottom.
- Fill the Bag: Fill halfway, ensuring enough space to twist the top.
- Twist and Secure: Twist the top tightly to prevent leaks.
3. Hold the Bag Correctly
- Grip the bag like a pencil, applying steady pressure with one hand while guiding with the other.
- Keep the tip close to the surface for better control.
4. Master Piping Techniques
- Swirls: Start in the center and work outward in a circular motion.
- Rosettes: Create a spiral from the center outward.
- Ruffles: Use a star tip to make continuous ruffled lines.
5. Practice Makes Perfect
The more you practice, the smoother your designs will be. Set aside time to experiment with different techniques and tips.
Fun Toppings for Extra Flavor and Texture
Toppings are not just for decoration; they enhance the flavor and texture of your gluten-free cupcakes. Whether you’re making a sweet treat or adding a savory twist, choosing the right toppings can elevate your cupcakes to a whole new level. Here are some fun and creative ideas for cupcake toppings that will give your cupcakes extra flair.
1. Fresh Fruits for a Juicy Burst
Fresh fruits are a fantastic way to add natural sweetness and a pop of color to your gluten-free cupcakes. They provide a refreshing contrast to the richness of the frosting and create a delightful texture.
- Berries: Fresh raspberries, blueberries, or strawberries add a tangy, sweet kick.
- Citrus: Thin slices of lemon, lime, or orange give a zesty flavor.
- Bananas: Thin banana slices can complement chocolate or peanut butter-flavored cupcakes.
2. Crushed Nuts for a Crunchy Contrast
Nuts are a great choice to add a satisfying crunch. They not only provide texture but also bring in additional flavors that pair wonderfully with many cupcake varieties.
- Almonds: Slice or chop almonds for a light, crunchy topping.
- Walnuts: Chopped walnuts work particularly well with chocolate cupcakes or cinnamon-spiced varieties.
- Pecans: For a rich, buttery flavor, try toasted pecans.
Make sure the nuts are chopped into small pieces to ensure they’re easy to bite into and don’t overpower the cupcake.
3. Coconut Flakes for a Tropical Touch
Coconut flakes, whether toasted or raw, can add both texture and flavor. They give cupcakes a tropical flair and pair perfectly with fruity or chocolate-based cupcakes.
- Shredded Coconut: Lightly toasted shredded coconut can create a slightly caramelized flavor and crunchy texture.
- Coconut Chips: For a heartier, more substantial texture, go for coconut chips.
Coconut’s natural sweetness complements dairy-free or sugar-free cupcakes beautifully, enhancing their flavor profile.
4. Chocolate Shavings or Chunks for Chocolate Lovers
For any chocolate lover, topping cupcakes with chocolate shavings or chunks takes them to the next level. The richness of chocolate can be a delicious contrast to a lighter cupcake flavor.
- Chocolate Shavings: Use a vegetable peeler to create delicate chocolate shavings to sprinkle on top.
- Chocolate Chunks: Larger pieces of dark or milk chocolate add a decadent, gooey element when you bite into the cupcake.
You can also melt the chocolate and drizzle it over the top for a glossy finish.
5. Sprinkles and Edible Glitter for a Fun, Colorful Look
For a festive touch, sprinkles and edible glitter are an easy and fun way to jazz up your cupcakes. These decorative elements work well for birthdays, holidays, or any celebration.
- Sprinkles: Go for classic jimmies, nonpareils, or themed sprinkles to suit the occasion.
- Edible Glitter: Add a little shimmer with edible glitter for that extra wow factor.
They’re simple, visually appealing, and bring a playful feel to your cupcakes.
6. Spiced Sugar for Extra Sweetness
For an aromatic and flavorful topping, consider using spiced sugar. It adds both sweetness and complexity to the cupcake’s flavor profile.
- Cinnamon Sugar: A mixture of ground cinnamon and sugar makes an aromatic topping that pairs well with vanilla or carrot cupcakes.
- Nutmeg Sugar: A dusting of nutmeg-infused sugar can add a warm, comforting flavor, perfect for fall-inspired cupcakes.
Sprinkle lightly on top of your frosted cupcakes for an extra layer of flavor.
7. Whipped Cream or Dairy-Free Alternatives
For a light, fluffy topping, whipped cream or its dairy-free alternatives can enhance the texture of your cupcakes, adding a cloud-like sweetness.
- Whipped Cream: Homemade whipped cream is rich and airy and perfectly complements many cupcake varieties.
- Coconut Cream: If you’re looking for a dairy-free option, coconut cream is a great choice with a slight tropical flavor.
These toppings work especially well with fruit-filled cupcakes or chocolate varieties.
Conclusion
Making the perfect gluten-free cupcakes is all about choosing the right ingredients, paying attention to texture, and following key baking tips. Start by selecting the best gluten-free flour blends, understanding the importance of binding agents like xanthan gum, and using quality dairy and sugar alternatives. Don’t forget to mix your batter carefully, bake at the right temperature, and store your cupcakes properly to maintain freshness.
Experimenting with different flavors, fillings, and toppings is where the fun really begins! Whether you’re adding fresh fruit, a touch of coconut, or a sprinkle of cinnamon sugar, there’s no limit to the creative combinations you can try.
We’d love to hear from you! Share your favorite gluten-free cupcake recipes or tell us about your go-to baking tips in the comments below. Let’s get the conversation going and inspire each other to bake delicious, gluten-free treats every time!