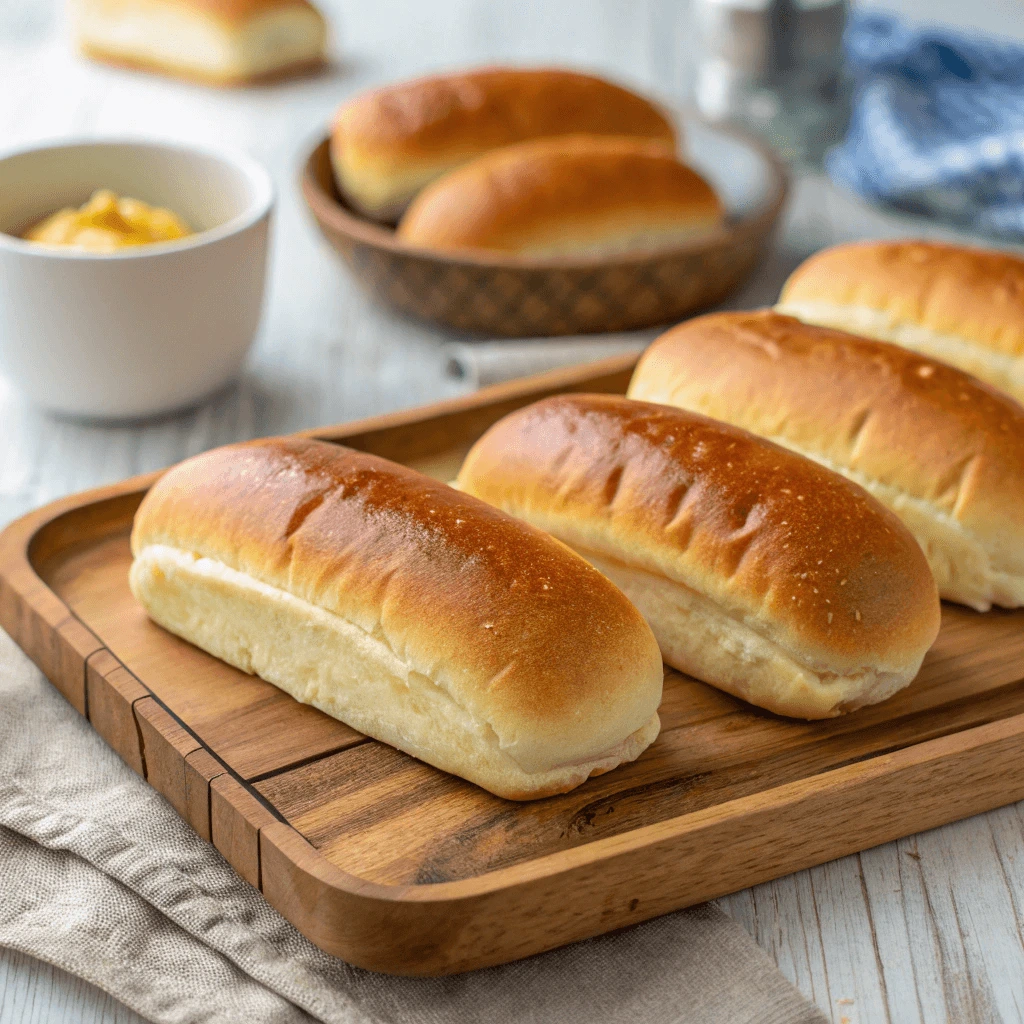
Looking for a quick and easy way to make gluten-free hot dog buns recipe ? This recipe is perfect for you! Whether you’re hosting a BBQ or enjoying a family meal, these buns are soft, fluffy, and gluten-free. Homemade buns taste better and let you control the ingredients, avoiding preservatives and artificial additives. They’re also versatile. Use them for hot dogs, veggie dogs, or as a side dish. This simple, step-by-step guide will help you create the perfect gluten-free buns for any meal. Let’s get baking!
Why Choose Gluten-Free Hot Dog Buns?
Health Benefits of a Gluten-Free Diet
A gluten-free diet offers several health benefits, particularly for those with gluten intolerance or celiac disease. Even those without these conditions can experience improvements in their overall health.
1. Improved Digestive Health
For people with gluten sensitivity, consuming gluten can cause digestive issues like bloating and cramps. By cutting out gluten, many experience relief and better digestion. Removing gluten can also allow the gut to heal, reducing inflammation.
2. Increased Energy
Many gluten-sensitive people feel fatigued after eating gluten. Switching to a gluten-free diet often boosts energy levels and reduces feelings of sluggishness. With less energy spent on digestion, your body can function more efficiently.
3. Better Skin Health
Gluten can trigger skin inflammation, causing conditions like acne and eczema. A gluten-free diet may help reduce these skin problems, leading to clearer and healthier skin.
4. Weight Management
While not all gluten-free foods are lower in calories, the diet often encourages more whole foods. Replacing processed items with fresh fruits, vegetables, and lean proteins can help with weight management and reduce bloating.
5. Reduced Inflammation
A gluten-free diet can reduce inflammation in the body, easing symptoms of conditions like arthritis and joint pain. It also helps manage overall inflammation, contributing to better long-term health.
Perfect for Special Diets
Gluten-free hot dog buns are a great option for various special diets. Whether you follow a gluten-free, vegan, dairy-free, or paleo diet, this recipe can fit your needs.
1. Gluten-Free Diets
For those with celiac disease or gluten intolerance, these buns provide a safe alternative. Made with gluten-free flour, they allow you to enjoy hot dogs without digestive issues or discomfort.
2. Vegan-Friendly
This recipe can easily be adapted for vegans. It uses plant-based ingredients like gluten-free flour, yeast, and dairy-free substitutes, making it perfect for a vegan diet.
3. Dairy-Free Diets
If you’re lactose intolerant or follow a dairy-free diet, you can substitute dairy ingredients with plant-based alternatives. The buns will still be soft and delicious.
4. Paleo Diets
By swapping gluten-free flours with almond or coconut flour, you can create a paleo-friendly version. This ensures the buns fit into your grain-free, whole-food lifestyle.
5. Low-Carb and Keto Diets
For those on low-carb or keto diets, almond flour or coconut flour can be used to reduce carbs while keeping the texture of the buns intact.
Better Taste and Freshness
One of the main reasons to opt for homemade gluten-free hot dog buns is the incredible taste and freshness they offer. Unlike store-bought buns that often contain preservatives and artificial additives, these homemade buns allow you to enjoy a flavorful and satisfying experience. Let’s break down why these buns stand out when it comes to taste and freshness.
1. No Preservatives or Additives
Store-bought gluten-free buns often contain preservatives to extend shelf life. While this may seem convenient, it can affect the taste and texture of the buns. By making your own gluten-free hot dog buns, you control the ingredients. You can use fresh, natural ingredients, resulting in a product that tastes better and is free from unnecessary additives.
- Fresh Ingredients for a Better Taste
Using whole foods like fresh gluten-free flours, yeast, and natural sweeteners ensures that your buns are delicious and free from preservatives, giving them a superior taste.
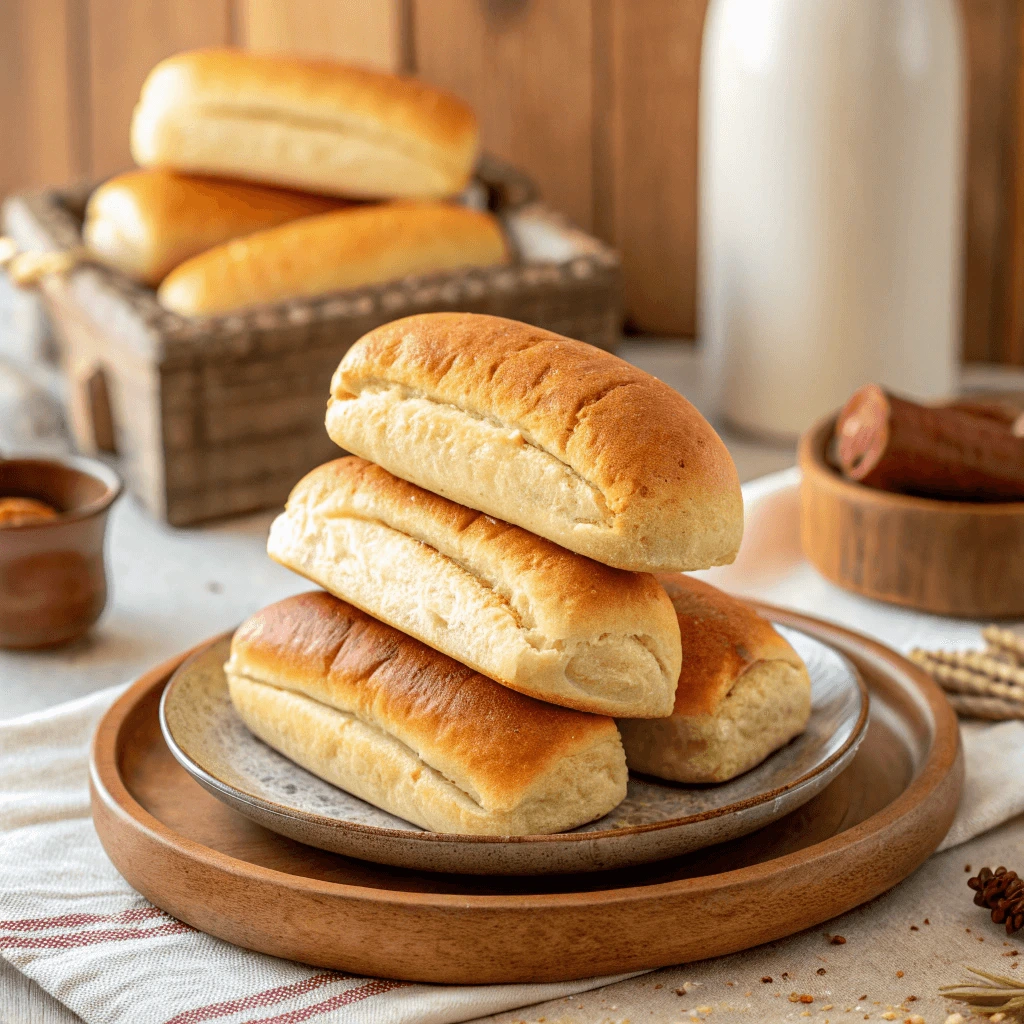
2. Soft and Fluffy Texture
Homemade gluten-free buns are soft, fluffy, and light—something that can be hard to find in store-bought gluten-free options. Many commercial gluten-free buns are dense and dry due to the lack of gluten, which plays a key role in creating a soft texture. By using the right combination of ingredients and techniques, these homemade buns maintain a delicate, airy texture that enhances the eating experience.
- Perfect for Any Filling
The soft texture of these buns makes them perfect for hot dogs, veggie dogs, or any filling. They won’t overpower the flavor of the fillings but complement them beautifully.
3. Warm, Just Out of the Oven
There’s nothing like the smell of freshly baked bread. When you make gluten-free hot dog buns at home, you get to enjoy them straight out of the oven, warm and delicious. This level of freshness is hard to replicate with store-bought buns, which often come from the freezer and lack the same level of moisture and warmth. The warmth of fresh buns enhances the overall eating experience.
- Enhanced Flavor with Freshness
When you bake the buns at home, you capture the flavors at their peak, making each bite more enjoyable.
4. Customizable Flavors
When you make gluten-free buns from scratch, you have the freedom to experiment with flavors. You can add herbs, spices, or even sweeteners to the dough to create a unique twist on a classic recipe. Whether you prefer a hint of garlic, a touch of rosemary, or a dash of cinnamon, homemade buns allow you to tailor the flavor to your preferences.
- Endless Flavor Possibilities
The ability to customize the flavor of your buns means you can make them as savory or sweet as you like, giving you complete control over the final result.
5. No Freezer Burn
One of the biggest drawbacks of store-bought buns is the risk of freezer burn, which happens when they sit too long in the freezer. This leads to a dry, unappetizing texture and flavor. When you make gluten-free hot dog buns at home, you can bake exactly the number you need. You can also freeze the leftovers without worrying about freezer burn, as they’re fresher to begin with.
- Freshness You Can’t Beat
Homemade buns have a freshness that store-bought options simply can’t match, making every bite more enjoyable.
What You Need to Make Gluten-Free Hot Dog Buns
Essential Gluten-Free Flours
Choosing the right gluten-free flour is crucial when making gluten-free hot dog buns. Different gluten-free flours provide distinct textures, flavors, and structures to baked goods. Let’s explore some essential gluten-free flours you can use for baking.
1. Rice Flour
Rice flour is one of the most common and versatile gluten-free flours. It has a mild flavor and fine texture, making it an excellent base for gluten-free baking. It is often used in combination with other flours to provide structure and texture to the dough.
- How It Works
Rice flour helps provide a light, airy texture to baked goods, and it absorbs moisture well. It also blends seamlessly with other gluten-free flours, such as potato or tapioca flour.
2. Almond Flour
Almond flour is made from finely ground almonds, and it adds a rich, slightly nutty flavor to gluten-free recipes. It’s ideal for those following a paleo or low-carb diet, as it is naturally grain-free and low in carbs.
- How It Works
Almond flour adds moisture and tenderness to the dough, giving the buns a soft texture. It’s also packed with protein, making it a great choice for those looking to increase their protein intake.
3. Tapioca Flour
Tapioca flour, also known as tapioca starch, is derived from the root of the cassava plant. It’s a starchy flour that helps provide elasticity and chewiness to baked goods. It’s often used in combination with other flours to balance the texture.
- How It Works
Tapioca flour gives the buns their desired chewy texture. It also helps with browning during baking, giving your buns a beautiful golden crust.
4. Coconut Flour
Coconut flour is made from dried coconut meat and is naturally gluten-free, high in fiber, and low in carbs. It’s incredibly absorbent, so you only need a small amount in gluten-free recipes. It adds a subtle coconut flavor to your buns.
- How It Works
Coconut flour requires more liquid than other gluten-free flours because of its high absorbency. It helps create a dense, moist texture in baked goods, making it perfect for gluten-free buns.
5. Sorghum Flour
Sorghum flour is made from whole grains of the sorghum plant and has a mild, slightly sweet flavor. It’s rich in fiber, protein, and essential nutrients, making it a nutritious choice for gluten-free baking.
- How It Works
Sorghum flour contributes to the structure and density of gluten-free baked goods. It’s often used in combination with other flours to add nutritional value and improve texture.
Other Key Ingredients For Homemade gluten-free hot dog buns
While gluten-free flours provide the base for your hot dog buns, several other ingredients are essential for creating the perfect texture and flavor. These ingredients work together to ensure the buns are soft, delicious, and sturdy enough to hold your favorite fillings.
1. Yeast
Yeast is crucial in giving your buns their rise and airy texture. By fermenting the dough, it allows the dough to expand, mimicking the rise you would typically get from gluten. Without it, your buns might end up dense and flat.
- How It Works
When activated, yeast creates bubbles in the dough, helping it to rise. This process leads to a light, fluffy texture that balances the denser nature of gluten-free flours.
2. Xanthan Gum or Guar Gum
Xanthan gum and guar gum are essential for providing structure and elasticity in gluten-free baking. These ingredients help bind the dough, preventing it from being too crumbly, and replicate the role that gluten would typically play in holding everything together.
- How It Works
These gums thicken the dough and help maintain its elasticity. They also trap moisture, ensuring the buns stay soft and chewy.
3. Eggs
Eggs are essential for adding moisture, structure, and richness to the dough. They play an important role in binding the ingredients together and ensuring the dough rises properly.
- How They Work
The proteins in eggs firm up during baking, providing the structure the buns need. They also contribute to the slightly crispy exterior while keeping the interior moist.
4. Apple Cider Vinegar
Apple cider vinegar adds acidity to the dough, which helps activate the yeast and improve the overall texture of the buns. This acidity also helps the dough rise more effectively, making the final product lighter and fluffier.
- How It Works
When combined with baking soda or yeast, apple cider vinegar creates a reaction that encourages rising. This ingredient also helps tenderize the dough, contributing to a soft texture.
5. Olive Oil or Butter (Dairy-Free Option)
Both olive oil and butter add moisture and richness to the dough. While olive oil works well in dairy-free versions, butter gives the buns a traditional, rich flavor. Either ingredient helps prevent the buns from becoming dry.
- How They Work
These fats keep the buns soft by preventing excessive dryness and contributing to a more delicate crumb. The result is a tender, flavorful bun that enhances the eating experience.
6. Sweetener (Optional)
A small amount of sweetener, like honey, maple syrup, or coconut sugar, can add a touch of sweetness to your buns. While not essential, it can complement the savory flavors of the hot dog and help create a slightly golden crust.
- How It Works
Sweeteners balance out the flavors and contribute to the browning process, giving the buns a beautiful golden exterior. You can choose your sweetener based on your dietary preferences.
Kitchen Tools You’ll Need for Homemade gluten-free hot dog buns
To successfully make gluten-free hot dog buns from scratch, you’ll need a few essential kitchen tools. These tools help streamline the process, ensuring the dough is mixed properly, rises effectively, and bakes into the perfect bun. Here’s a breakdown of the tools that are crucial to have on hand:
1. Mixing Bowl
A large mixing bowl is one of the most important tools for making gluten-free hot dog buns. It gives you enough space to combine your dry and wet ingredients without creating a mess. Choose a bowl that’s deep enough to allow room for stirring and expanding dough, as it can rise significantly.
- Why You Need It
The mixing bowl holds all your ingredients, allowing you to blend them thoroughly. A larger bowl is ideal because it gives enough room for both the dough and any air bubbles to develop as the yeast activates.
2. Stand Mixer or Hand Mixer
While you can mix the dough by hand, a stand mixer or hand mixer can make the process much easier and faster. Stand mixers are particularly useful for kneading gluten-free dough, as they can work the dough more efficiently than by hand.
- Why You Need It
A stand mixer helps mix the dough evenly, ensuring all ingredients are incorporated without overworking the dough. It also saves time and energy, especially if you’re baking multiple batches of buns. - Alternatives
If you don’t have a stand mixer, a hand mixer with dough hooks is a great alternative. However, you may need to do a little more manual mixing to get the right consistency.
3. Measuring Cups and Spoons
Accurate measurements are crucial in gluten-free baking. Gluten-free flours and other ingredients behave differently than their gluten-filled counterparts, so precision is important. Invest in high-quality measuring cups and spoons to ensure you get the right amounts of each ingredient.
- Why You Need Them
Proper measurements help balance the ratios of flour, liquid, and yeast, ensuring that your dough achieves the perfect consistency. Inaccurate measurements can lead to dense or too crumbly buns.
4. Dough Scraper or Spatula
A dough scraper or spatula is a handy tool to help transfer the dough from the mixing bowl to your baking surface. It also helps shape the dough into the proper bun form and assists in handling sticky dough.
- Why You Need It
The scraper lets you easily lift and shape your dough without it sticking to your hands. It’s particularly useful when handling sticky, gluten-free dough, as it allows for smooth, mess-free shaping.
5. Baking Sheet or Pan
Once your dough has been shaped into buns, you’ll need a baking sheet or pan to bake them. A flat baking sheet works well for shaping and spacing out your buns. If you want to create uniform bun shapes, consider using a bun pan with individual slots.
- Why You Need It
A baking sheet ensures that your buns bake evenly and allows air to circulate around them. For more consistent shapes, a bun pan will provide a structured form for the dough to rise and bake into perfect hot dog buns.
6. Pastry Brush
A pastry brush is useful for brushing the top of your buns with a light coat of oil, butter, or egg wash before baking. This creates a golden, slightly glossy finish on your buns.
- Why You Need It
The brush helps evenly coat the top of your buns, which not only gives them a beautiful color but also helps with flavor and moisture retention during the baking process.
7. Cooling Rack
Once your buns are baked, you’ll need a cooling rack to allow them to cool properly. A cooling rack helps prevent condensation from forming at the bottom of your buns, which can make them soggy.
- Why You Need It
The cooling rack promotes airflow around the buns, helping them cool evenly and maintain their structure. This step is important because it ensures that the buns don’t get too soft or wet from the heat that escapes as they cool.
Step-by-Step Guide to Making Gluten-Free Hot Dog Buns
Prepare the Dough
The dough is the foundation of your gluten-free hot dog buns. Preparing the dough correctly ensures your buns have the right texture, flavor, and rise. The process may differ slightly from traditional wheat dough, but with the right techniques, you can make dough that’s both soft and sturdy.
1. Combine the Dry Ingredients
Start by gathering all your dry ingredients, including the gluten-free flour, xanthan gum (or another binder), salt, and any spices you’re using, such as garlic powder or onion powder. Measure them accurately using a set of dry measuring cups. Mixing the dry ingredients together first ensures that everything is evenly distributed, which is crucial for consistent results.
- Why This Step Matters
By thoroughly blending your dry ingredients, you prevent clumps of flour or salt in your dough. This step ensures that the texture is uniform, making the buns light and airy.
2. Activate the Yeast
Next, it’s time to activate the yeast. Warm the water slightly until it’s around 100°F to 110°F (just warm to the touch, not hot). Pour it into a bowl and stir in the sugar or honey to help feed the yeast. Sprinkle the yeast over the top of the water and let it sit for about 5 to 10 minutes until it becomes foamy. This shows that the yeast is active and ready to work.
- Why This Step Matters
Activating the yeast properly is critical for a good rise. If the yeast isn’t active, your buns won’t rise correctly, resulting in dense, heavy buns instead of light and fluffy ones.
3. Mix the Wet Ingredients
While the yeast is activating, whisk together the wet ingredients in a separate bowl. This usually includes eggs, oil (or butter), and apple cider vinegar. The oil or butter adds moisture and flavor, while the eggs help bind the dough. The vinegar helps activate the yeast and contributes to the texture of the final product.
- Why This Step Matters
Mixing the wet ingredients separately ensures even distribution of fats, moisture, and acidity in the dough. It also helps prevent clumping or separation once you add the yeast mixture.
4. Combine the Wet and Dry Ingredients
Once the yeast is foamy, pour it into the bowl of dry ingredients, followed by the wet ingredients. Use a spatula or stand mixer to mix everything together until you have a smooth, sticky dough. If using a stand mixer, use the paddle attachment for best results.
- Why This Step Matters
Combining the wet and dry ingredients gradually helps the dough come together smoothly. The mixture should be sticky, not too thick. If it’s too dry, add a little more water to achieve the right consistency.
5. Knead the Dough
Although gluten-free dough doesn’t require as much kneading as traditional wheat dough, you still need to gently knead it for about 2 to 3 minutes to develop its structure. Use your hands or a dough scraper to fold and press the dough together.
- Why This Step Matters
Kneading helps to activate the ingredients, ensuring they work together to form a cohesive dough. It also helps distribute the yeast and moisture evenly, resulting in buns with a uniform texture.
6. Let the Dough Rise
Once the dough is mixed and kneaded, it’s time to let it rise. Cover the bowl with a damp cloth or plastic wrap and place it in a warm, draft-free area. Let the dough rise for about 45 minutes to 1 hour, or until it has doubled in size.
- Why This Step Matters
Rising gives the dough time to expand as the yeast ferments. This process is essential for the fluffiness of the buns, as the yeast creates air pockets within the dough.
Shaping the Buns
Shaping gluten-free hot dog buns may seem tricky, but with a few simple techniques, you can create perfectly shaped buns every time. The dough for gluten-free buns doesn’t behave like traditional wheat dough, so it’s essential to handle it with care. Here’s how you can shape your gluten-free dough into beautiful buns ready for baking.
1. Prepare Your Workspace
Before you start shaping the dough, make sure your workspace is ready. Dust your counter or work surface lightly with gluten-free flour to prevent the dough from sticking. You can also line a baking sheet with parchment paper or silicone mats to make it easier to transfer your shaped buns to the oven.
- Why This Step Matters
A well-prepared surface ensures smooth shaping. It also prevents the dough from sticking, which can be frustrating and messy, especially since gluten-free dough tends to be more sticky than regular dough.
2. Divide the Dough
Once your dough has risen and is ready for shaping, divide it into equal portions. Depending on the size of your buns, you can divide the dough into 6 to 8 portions for regular-sized hot dog buns. Use a bench scraper or a sharp knife to cut the dough into evenly sized pieces.
- Why This Step Matters
Dividing the dough into equal portions helps ensure that all the buns bake evenly. If some buns are larger than others, they may cook at different rates, leading to uneven texture and color.
3. Shape Each Portion
Take each piece of dough and gently roll it into a long, oval shape. The dough should be shaped to about 6 to 7 inches long, which is the typical size for hot dog buns. Use your hands to carefully stretch and smooth the dough into shape, being mindful not to press it too hard, as gluten-free dough can become dense if overworked.
- Why This Step Matters
Shaping the dough gently helps preserve the lightness and fluffiness of the bun. Overworking the dough can cause it to lose its airy texture, making the buns denser and less enjoyable to eat.
4. Place the Shaped Buns on the Baking Sheet
Once you have shaped each portion into a long oval, arrange the buns on your prepared baking sheet. Make sure to leave some space between each bun, as they will expand slightly during the second rise and baking.
- Why This Step Matters
Spacing the buns properly ensures they don’t stick together while baking. It also allows each bun to expand in its own space, which contributes to a uniform rise and texture.
5. Let the Buns Rise Again
Cover the shaped buns with a clean kitchen towel or plastic wrap, and let them rise for another 20 to 30 minutes. This step is essential because it allows the yeast to continue working, giving your buns a final puff before baking.
- Why This Step Matters
A second rise is critical for light, airy buns. Without this final rise, the buns may end up too dense, which is especially common in gluten-free dough.
6. Optionally Brush with Egg Wash
For a golden, glossy finish on your buns, you can brush the tops with an egg wash. To make the egg wash, simply whisk one egg with a tablespoon of water, and lightly brush it over the tops of the buns before baking. This step is optional but adds a nice touch of color and shine.
- Why This Step Matters
Brushing with egg wash gives the buns a beautiful, bakery-style finish. It adds a slight crispness to the outer crust, which can enhance the overall eating experience.
Baking and Cooling
After you’ve shaped your gluten-free hot dog buns and allowed them to rise, it’s time to bake them. This is the most crucial step in ensuring that your buns are perfectly soft, golden, and slightly crisp on the outside. In this section, we’ll guide you through the baking process and how to cool your buns properly to maintain their texture and flavor.
1. Preheat Your Oven
Before you begin baking, preheat your oven to 375°F (190°C). This is the optimal temperature for baking gluten-free buns, allowing them to cook evenly without burning. Be sure to give the oven a good 10 to 15 minutes to heat up completely before placing your buns inside.
- Why This Step Matters
Preheating the oven ensures that your buns bake evenly. If you place the dough in an oven that isn’t fully heated, the buns may not rise as much and could end up being dense or unevenly cooked.
2. Bake the Buns
Once your buns have risen for the second time, and your oven is preheated, it’s time to bake. Place the buns in the middle of the oven to ensure even heat distribution. Bake for 20 to 25 minutes, or until the buns are golden brown and sound hollow when tapped on the bottom.
- Why This Step Matters
Baking at the right temperature ensures that your buns are cooked through without becoming too dry. The golden-brown color indicates that the buns are properly baked, and the hollow sound when tapped signifies that they have a light, airy texture inside.
3. Keep an Eye on the Buns
During the baking process, it’s important to keep an eye on your buns, especially toward the end of the baking time. Ovens can vary in heat, so your buns might bake faster or slower than expected. If they begin to brown too quickly, you can cover them loosely with aluminum foil to prevent over-browning while the inside finishes baking.
- Why This Step Matters
Monitoring your buns ensures they achieve the perfect golden-brown color without burning. Adjusting the baking time or temperature if needed helps you get the best results from your oven.
4. Let the Buns Cool on a Wire Rack
Once your buns are baked, remove them from the oven and transfer them to a wire rack immediately. Allow the buns to cool for at least 15 to 20 minutes before slicing them open. Cooling on a wire rack helps air circulate around the buns, preventing them from becoming soggy.
- Why This Step Matters
Cooling your buns properly ensures that they maintain a light and airy texture. If you leave them on a baking sheet or closed container, the steam can accumulate and make the bottoms of the buns damp, ruining their crisp texture.
5. Optional: Brush with Butter or Oil for Extra Flavor
For a richer flavor and a glossy finish, you can brush the tops of the buns with melted butter or olive oil as soon as they come out of the oven. This step is optional, but it adds a delicious touch and a slightly crispy texture on top of the buns.
- Why This Step Matters
Adding butter or oil gives the buns a delicious finish, making them taste like they came from a bakery. It also helps lock in moisture, keeping the buns soft on the inside.
6. Slice and Serve
After the buns have cooled, it’s time to slice them. Use a serrated knife to cut through the soft, fluffy buns without compressing them. This step is crucial for keeping the texture intact while making them perfect for filling with your favorite hot dogs, sausages, or other toppings.
- Why This Step Matters
Using a serrated knife ensures that you slice the buns neatly without squashing them. This helps preserve their delicate texture, making them ideal for holding your hot dogs without falling apart.
Tips for Perfect Gluten-Free Hot Dog Buns Every Time
Using the Right Flour Blend
When making gluten-free hot dog buns, choosing the right flour blend is one of the most important decisions you’ll make. The flour you select directly influences the texture, flavor, and structure of your buns. In this section, we’ll explore why the right flour blend is crucial and how to make sure you’re using the best one for your gluten-free buns.
1. Why Gluten-Free Flour Blends Matter
Unlike wheat flour, gluten-free flour lacks the elasticity and structure that gluten provides. To replicate the texture of traditional hot dog buns, gluten-free flour blends combine multiple flours and starches to mimic the properties of wheat flour. Each flour type in a blend contributes different qualities, such as texture, moisture retention, and binding strength.
- The Importance of the Blend
Using a single flour might not give your buns the same texture as traditional buns. A well-crafted blend, however, provides the structure, chewiness, and rise you want in a hot dog bun. The combination of different flours and starches works together to give the dough the necessary properties for a perfect rise and soft texture.
2. Types of Flour in Gluten-Free Blends
There are several types of flours commonly used in gluten-free flour blends. Some provide structure, while others add moisture or elasticity. Below are some of the most popular options:
- Rice Flour: Rice flour is often the main base for many gluten-free blends. It’s neutral in flavor and provides a light texture to the buns.
- Tapioca Starch: This starch adds chewiness and a slightly elastic texture, which is important for giving your buns a more traditional feel. It also helps with binding.
- Potato Starch: Like tapioca starch, potato starch contributes to the chewiness of the buns, and it helps create a lighter texture.
- Sorghum Flour: Sorghum flour adds fiber and protein to your blend. It’s a great choice for adding density and structure to gluten-free baked goods.
- Almond Flour: Almond flour adds moisture and richness to your dough. It’s also a good source of protein, but it can make the buns denser, so it should be used in combination with other flours.
3. Commercial Gluten-Free Flour Blends vs. Homemade Blends
If you’re new to gluten-free baking, using a pre-made, commercial gluten-free flour blend might seem like an easy option. These blends are formulated to provide the right combination of flours, starches, and gums for baking. They often include ingredients like xanthan gum or guar gum, which help to bind the dough and improve the texture.
- Pre-made Flour Blends
Many well-known brands offer high-quality gluten-free flour blends that are ideal for baking. They are convenient and can often deliver a consistent result. However, they can sometimes be more expensive and may not give you the exact flavor and texture you want. - Homemade Flour Blends
If you prefer a more customized approach, you can create your own gluten-free flour blend. By mixing flours such as rice flour, sorghum flour, and a starch like potato or tapioca, you can control the texture and flavor to suit your preferences. Experimenting with different combinations can be fun, but it may require some trial and error to get the perfect blend.
4. The Role of Xanthan Gum or Guar Gum
In gluten-free baking, gums like xanthan gum and guar gum play a vital role in replicating the structure that gluten provides. These gums help to bind the ingredients together, adding elasticity and preventing the dough from being too crumbly.
- Xanthan Gum: This gum is commonly used in gluten-free recipes. It thickens the dough and provides a texture that mimics the chewiness of wheat-based bread.
- Guar Gum: Guar gum serves a similar purpose as xanthan gum but is sometimes considered a more natural option. It is less potent than xanthan gum, so you may need to use slightly more.
Both gums should be used in moderation, as too much can result in an overly dense or gummy texture.
5. How to Choose the Best Flour Blend for Your Buns
To choose the best gluten-free flour blend for your hot dog buns, consider the texture you want. If you prefer light, airy buns, opt for a blend with more starches like potato or tapioca starch. For buns with a bit more structure, a blend with sorghum flour or brown rice flour will provide a denser texture.
- For Soft and Light Buns: Choose a blend with higher starch content, such as a mix of rice flour, potato starch, and tapioca flour.
- For Dense and Chewy Buns: Look for blends with sorghum flour, almond flour, or even a small amount of gluten-free oat flour for added density.
6. Adjusting Your Blend for Personal Preference
Even after selecting your preferred blend, you can adjust the recipe by tweaking the ratios of the ingredients. If you want a fluffier bun, increase the amount of rice flour or potato starch in your blend. For a more robust flavor, add a bit more sorghum or almond flour.
- Experiment with Blends: If you’re making your own flour blend, don’t be afraid to experiment. Start with a base of rice flour or sorghum flour and add smaller amounts of starches. Gradually adjust until you find the perfect combination for your buns.
Avoiding Common Mistakes
When baking gluten-free hot dog buns, there are several pitfalls that can compromise the texture, flavor, and appearance of your buns. Whether you’re a beginner or an experienced baker, avoiding these common mistakes is essential for achieving the perfect gluten-free buns every time. In this section, we’ll explore the most frequent mistakes people make when making gluten-free buns and offer practical tips to prevent them.
1. Using the Wrong Flour Blend
One of the most common mistakes when baking gluten-free hot dog buns is using an inappropriate flour blend. Different gluten-free flours and starches behave differently, and using a single type of flour might not give you the desired texture. For example, rice flour is light but lacks elasticity, while almond flour can make your buns too dense.
- How to Avoid It
To achieve a soft, fluffy texture, use a well-balanced flour blend that includes a combination of rice flour, sorghum flour, and a starch such as potato or tapioca. These ingredients work together to provide the necessary structure and chewiness without making the buns overly dense.
2. Skipping the Proofing Step
Proofing is a crucial step when baking gluten-free bread or buns. Many beginners make the mistake of rushing through the proofing process or skipping it entirely. Proofing allows the yeast to activate and helps the dough rise. If you don’t allow the dough to rise properly, your buns will be dense and lack the light texture that you want.
- How to Avoid It
Always allow the dough to rise for the recommended time in a warm, draft-free environment. You may need to adjust the rise time based on the humidity and temperature in your kitchen. If you’re unsure, wait until the dough has roughly doubled in size before moving on to the next step.
3. Not Measuring Ingredients Correctly
Baking is a science, and accurate measurements are essential for success. Gluten-free baking, in particular, can be very sensitive to ingredient ratios. Using too much or too little flour, starch, or yeast can result in buns that are too heavy, crumbly, or fail to rise properly.
- How to Avoid It
Always measure your ingredients using the proper tools, such as a kitchen scale for flour and other dry ingredients. If you don’t have a scale, spoon the flour into your measuring cup and level it off with a knife. This method helps prevent packing the flour into the cup, which can lead to using more flour than necessary.
4. Overworking the Dough
Another mistake people often make is overworking the dough. Gluten-free dough lacks the elasticity of wheat dough, so it’s important to handle it gently. Kneading or overworking the dough can cause it to become dense and tough, leading to buns that are hard and unappetizing.
- How to Avoid It
Mix the dough until all the ingredients are fully incorporated, but avoid excessive kneading or handling. Once the dough has come together, stop working with it to prevent tough buns. Let it rest and rise as needed.
5. Not Using Enough Moisture
Gluten-free dough tends to be drier than traditional dough. If you don’t add enough moisture, your buns may turn out too dry or crumbly. This is especially true if you’re using gluten-free flours like rice or sorghum flour, which can absorb moisture differently than wheat flour.
- How to Avoid It
Make sure you add enough liquid to the dough. If your dough feels too dry or crumbly, add small amounts of warm water or another liquid until the dough reaches a soft, slightly sticky consistency. Don’t add too much liquid at once—add it gradually and test the dough’s texture as you go.
6. Forgetting to Add Gums
Xanthan gum or guar gum is essential in gluten-free baking to help bind the dough and improve its texture. If you forget to add these gums, your buns may be overly crumbly or lacking in structure. These gums mimic the elasticity that gluten provides in wheat-based baking.
- How to Avoid It
Always include xanthan gum or guar gum in your gluten-free dough recipes, especially when making buns. Follow the recipe instructions for the correct amount, as too much gum can make the texture too rubbery, while too little can make the buns fall apart.
7. Overbaking the Buns
Baking time is crucial for gluten-free buns. Overbaking can lead to dry, tough buns that are far from the soft, chewy texture you desire. Gluten-free dough often looks cooked on the outside before it’s done on the inside, so it’s important to keep an eye on them in the final stages of baking.
- How to Avoid It
Start checking the buns a few minutes before the recommended baking time is over. Look for golden-brown tops and listen for a hollow sound when you tap the bottoms. If they’re not quite done, bake for a few more minutes, but be careful not to overdo it.
8. Cooling the Buns Improperly
Many bakers make the mistake of letting their gluten-free buns cool in the pan or on the baking sheet. This traps steam, which can make the bottoms of the buns soggy and affect their texture. Proper cooling is essential to keep the buns light and airy.
- How to Avoid It
Once the buns are out of the oven, transfer them immediately to a wire rack. Let them cool completely on the rack to allow air to circulate around the buns. This prevents moisture buildup, ensuring that the buns stay crisp on the outside.
9. Not Giving the Buns Enough Time to Rise
If your buns haven’t risen enough before baking, they will be dense and lack the airy texture you want. Gluten-free dough requires more time to rise than traditional dough, especially if you are using a yeast-based recipe.
- How to Avoid It
Always allow the dough the full rise time before baking. Depending on the recipe and room temperature, you may need to let the dough rise longer than expected. Don’t rush the process—be patient for the best results.
Storage and Freshness Tips
Proper storage keeps your gluten-free hot dog buns fresh and delicious. Gluten-free bread tends to dry out or spoil faster, so it’s important to store them properly. Here are some simple ways to store your buns and keep them at their best.
1. Storing at Room Temperature
Store your gluten-free buns in an airtight container or wrap them tightly in plastic wrap. Keep them in a cool, dry place, away from heat and sunlight. They will stay fresh for about 2 to 3 days. If you live in a humid area, refrigerating them can help prevent mold growth.
2. Refrigerating for Freshness
If you need to keep your buns for a week or more, store them in the fridge. Wrap them tightly to prevent them from drying out. Gluten-free buns can last up to a week when refrigerated, but the texture may become denser.
3. Freezing for Long-Term Storage
For longer storage, freezing is the best option. Wrap each bun in plastic wrap or wax paper, and place them in a freezer-safe bag. They can stay fresh for up to 3 months in the freezer. When you’re ready to use them, thaw at room temperature or toast directly from the freezer.
4. Thawing and Reheating
Thaw frozen buns at room temperature. You can also microwave them briefly or toast them for a freshly baked feel. If the buns feel dry after thawing, wrap them in a damp paper towel and microwave for 10-15 seconds to restore moisture.
5. Reviving Stale Buns
If your buns have become stale, you can revive them. Wrap in a damp paper towel and microwave for 10-15 seconds, or reheat in the oven at a low temperature (300°F) for a few minutes.
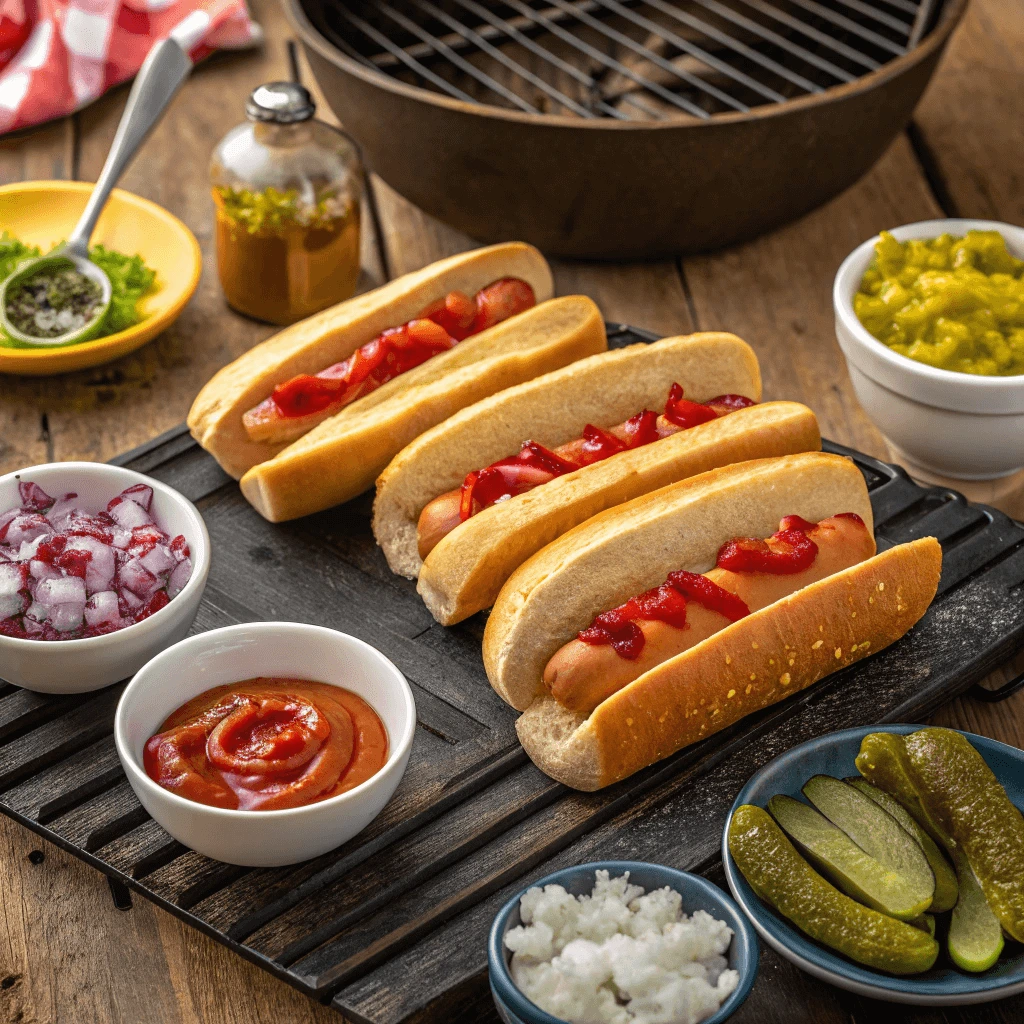
Creative Ways to Serve Gluten-Free Hot Dog Buns
Perfect for Grilling
Grilling is a fantastic way to enhance the flavor of your gluten-free hot dog buns. The heat from the grill adds a delightful crispness to the exterior, while keeping the inside soft and fluffy. Here’s how you can grill your gluten-free buns perfectly every time.
1. Preparing the Buns for the Grill
Before you place your buns on the grill, make sure they are fully cooled and ready to go. If they’re too fresh, they might be a bit soft and could fall apart on the grill. To ensure they grill evenly, you can slice your buns halfway through, making it easier to grill the cut side directly.
2. Applying Oil or Butter
To achieve that perfect golden-brown crust, brush the cut sides of your buns with a light layer of butter or oil. This not only helps with crisping but also adds flavor. Use a mild olive oil or melted butter for best results. For a savory twist, you can also use garlic butter or a sprinkle of herbs.
3. Preheating the Grill
Ensure your grill is preheated to a medium heat before placing your buns on it. The goal is to warm the buns and lightly toast them without burning. Avoid too high of a heat, which could make the buns burn quickly. A well-preheated grill ensures a crisp texture and nice grill marks.
4. Grilling the Buns
Place the buns on the grill, cut side down. Grill for about 1-2 minutes, keeping a close eye on them. You’re looking for a golden-brown color with grill marks. Flip the buns if you want the top side to warm slightly, but avoid overcooking them, as this can dry them out.
5. Adding Toppings and Serving
Once the buns are perfectly grilled, they’re ready for your favorite hot dog or sausage. Grilled gluten-free buns pair wonderfully with all sorts of fillings, from classic hot dogs to veggie-based sausages. Top them with your preferred condiments and enjoy the smoky, crispy texture.
6. Grilling Tips for Perfect Results
- Don’t press down on the buns: Pressing them with a spatula may cause them to become too hard or dry. Let them grill naturally.
- Watch the grill closely: Gluten-free buns can burn quickly. Stay attentive and flip them promptly to avoid overcooking.
- Grill in batches: If you’re grilling multiple buns, consider grilling in small batches to ensure even toasting.
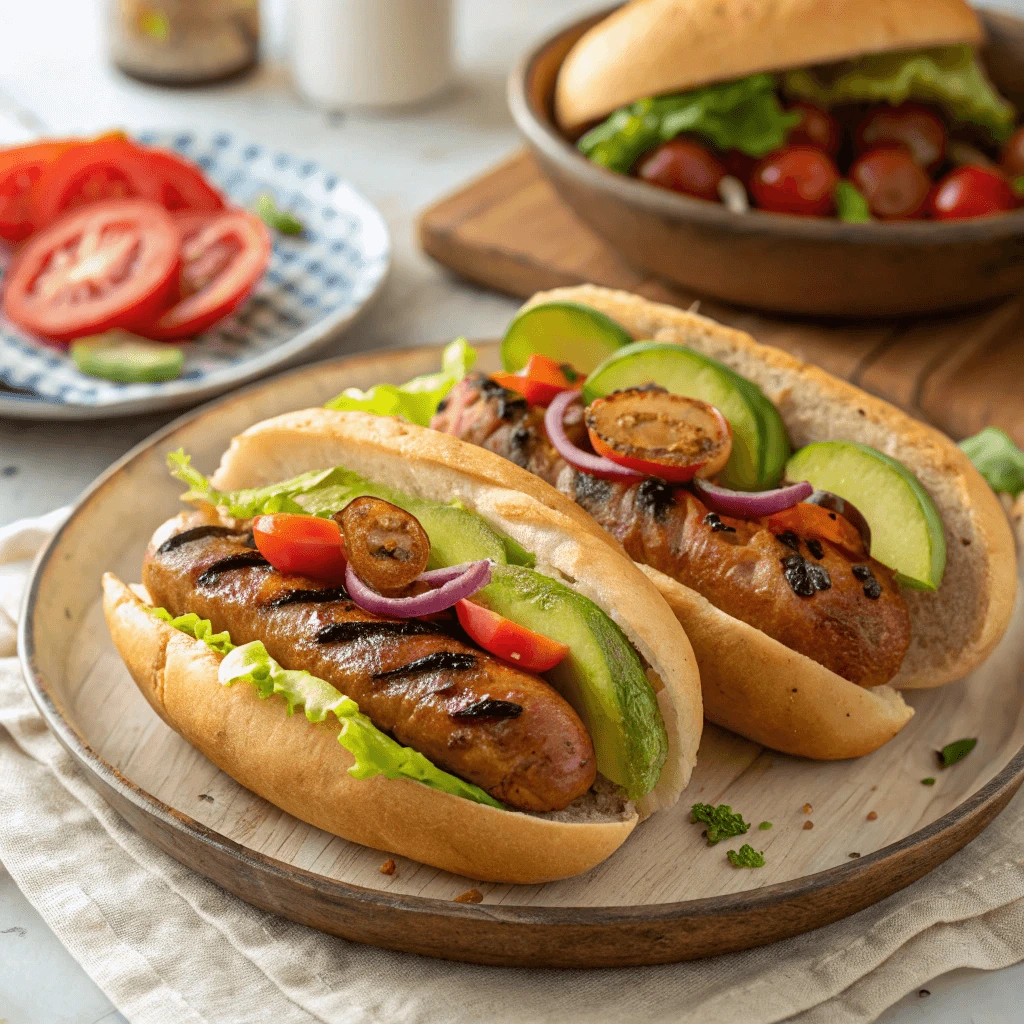
Breakfast or Snack Options
Gluten-free hot dog buns aren’t just for hot dogs! They’re a versatile addition to your breakfast or snack menu. Whether you’re looking for a quick bite in the morning or a savory afternoon treat, these buns can be transformed into countless delicious options. Let’s explore some ideas for breakfast and snack pairings.
1. Breakfast Sandwiches
Start your day off with a satisfying breakfast sandwich. Gluten-free buns make the perfect base for a variety of fillings, such as:
- Egg and Avocado: Scramble or fry an egg, and layer it on your toasted bun with creamy avocado. Add a sprinkle of salt and pepper for a simple yet tasty meal.
- Vegetarian Sausage and Cheese: Grill a plant-based sausage patty, top it with a slice of cheese, and sandwich it between your toasted gluten-free buns. For an added twist, you can throw in some sautéed spinach or a dollop of salsa.
- Tomato and Cheese: A simple but delicious choice, slice some fresh tomato and place it on your bun with melted cheese. You can even add a dash of your favorite sauce, like pesto or mustard, for an extra burst of flavor.
2. Nut Butter and Banana Toast
For a quick and easy snack, spread some almond or peanut butter on a lightly toasted gluten-free hot dog bun. Top it with banana slices and a drizzle of honey for a sweet and satisfying treat. This combination is packed with protein, healthy fats, and natural sugars, making it a great choice to keep you energized throughout the day.
3. Grilled Cheese with a Twist
Who doesn’t love a good grilled cheese sandwich? Gluten-free buns work wonderfully as a base for this classic dish. Try some variations to keep things interesting:
- Tomato and Basil Grilled Cheese: Add fresh basil leaves and sliced tomato between the cheese for a burst of flavor. The juicy tomato and aromatic basil complement the melted cheese perfectly.
- Cheese and Pesto: Spread some pesto on the buns before adding the cheese. The herby pesto adds a burst of flavor that elevates the basic grilled cheese into something special.
- Spinach and Mushroom Grilled Cheese: Add sautéed spinach and mushrooms for a hearty and savory grilled cheese. This combination is perfect for anyone craving a more filling snack.
4. Mini Pizzas
Turn your gluten-free hot dog buns into mini pizzas for a fun and easy snack. Split the buns in half and top them with your favorite pizza ingredients:
- Tomato Sauce and Mozzarella: Spread a thin layer of tomato sauce on each half, add mozzarella cheese, and pop them under the broiler until the cheese melts and gets bubbly.
- Vegetarian Delight: Load up the buns with sautéed veggies like bell peppers, onions, and mushrooms, top with cheese, and bake for a veggie-packed mini pizza.
- Olives and Feta: Top your buns with Kalamata olives and crumbled feta cheese for a Mediterranean-inspired mini pizza. Add some oregano or basil for extra flavor.
5. Savory Breakfast Toasts
Gluten-free hot dog buns can also serve as a great base for savory breakfast toasts. You can create various combinations based on your taste preferences:
- Tomato and Goat Cheese Toast: Toast the bun halves, spread with goat cheese, and top with fresh tomato slices and a drizzle of olive oil.
- Avocado and Poached Egg: For a healthier option, toast the buns, mash some avocado on top, and finish with a poached egg. Add a pinch of chili flakes for some spice.
- Smoked Salmon and Cream Cheese: For a more indulgent breakfast, spread cream cheese on the toasted buns, add smoked salmon, and garnish with fresh dill.
6. Light Snacks for Kids
Gluten-free buns make a perfect base for kid-friendly snacks too! Here are some options your little ones will love:
- Mini Sandwiches: Cut the buns into smaller pieces and fill them with their favorite vegetarian deli meats or cheese for a quick, bite-sized snack.
- Apple and Cheese Bites: Slice the buns into smaller portions and top with thin slices of apple and cheese for a crunchy and satisfying snack.
- Nut Butter and Jelly: Spread a layer of your child’s favorite nut butter, followed by a bit of jelly for a gluten-free take on the classic PB&J.
Kid-Friendly Meal Ideas
Gluten-free hot dog buns are a versatile base for many kid-friendly meals. These ideas are easy, fun, and packed with nutrients.
1. Mini Sandwiches
Turn buns into mini sandwiches with fillings like cheese and cucumber, turkey and avocado, or hummus and veggies. You can also cut them into fun shapes with cookie cutters for extra appeal!
2. Gluten-Free Pizza Buns
Split buns and top them with tomato sauce, cheese, and toppings like veggies or turkey pepperoni. Pop them under the broiler for a quick and customizable mini pizza.
3. Hot Dog Bun Sliders
Make sliders with beef or chicken patties, veggies, or even veggie patties. These mini burgers are easy to eat and fun for kids.
4. Grilled Cheese Buns
Spread butter on the buns, add cheese, and grill until golden. You can also sneak in some spinach, avocado, or tomato for added flavor.
5. Breakfast Buns
For breakfast, make egg and cheese buns, or top with peanut butter and banana slices for a sweet start to the day.
6. DIY Snack Kits
Let kids assemble their own meals with a DIY snack kit. Offer ingredients like deli meats, cheese, and veggies for sandwiches or mini pizzas.
These meal ideas keep things fun, healthy, and easy for kids to enjoy!
Conclusion
Making your own gluten-free hot dog buns is simple, fun, and offers a delicious alternative to store-bought options. Not only will you enjoy the satisfaction of homemade bread, but you’ll also have control over the ingredients, ensuring a fresh and healthy meal every time.
Try this recipe for your next family meal or barbecue – your taste buds (and your guests) will thank you!
Don’t forget to subscribe for more tasty gluten-free recipes and share this post with your friends and family. Happy baking!