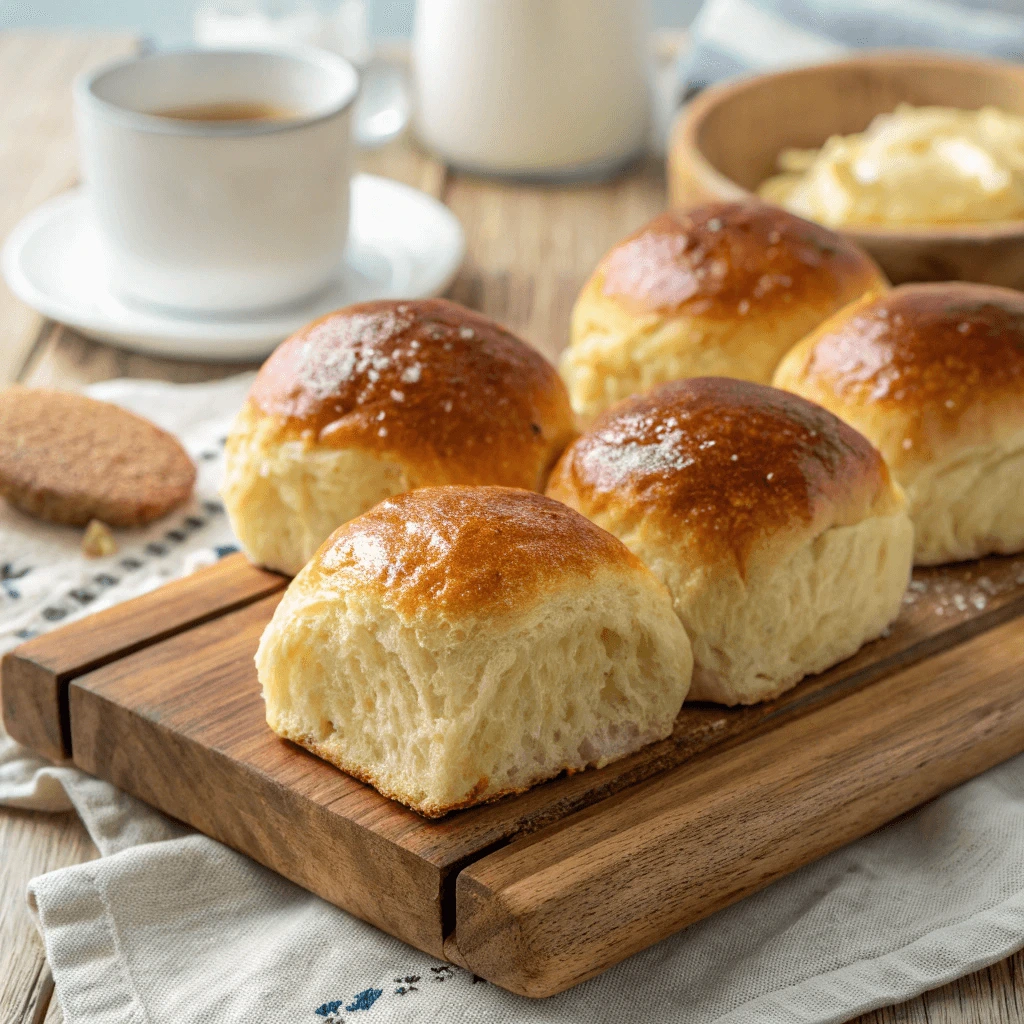
Craving soft, sweet Hawaiian rolls but need a gluten-free version? You’re in the right place! These Soft and Sweet Gluten-Free Hawaiian Rolls are just as fluffy and delicious as the classic ones. With a perfect balance of sweetness and softness, they’re ideal for anyone on a gluten-free diet. Whether for dinner, holidays, or a snack, these rolls are sure to become a favorite. Enjoy all the flavor without compromising on texture!
What Makes Gluten-Free Hawaiian Rolls Special?
Sweetness and Softness: The Heart of Gluten-Free Hawaiian Rolls
When it comes to Hawaiian rolls, the combination of sweetness and softness is what makes them irresistible. In this gluten-free version, these two key traits are preserved beautifully, allowing you to enjoy the full experience without any gluten.
Achieving the Perfect Sweetness
The sweetness in Hawaiian rolls comes from a delicate balance of ingredients. In our gluten-free recipe, honey or sugar plays a key role. The natural sweetness of honey gives the rolls a subtle, almost floral flavor. If you prefer a less intense sweetness, you can substitute with sugar or a sugar alternative like coconut sugar. By adjusting the amount of sweetener to your preference, you can achieve the perfect level of sweetness for your taste buds.
Maintaining Softness in Gluten-Free Dough
Gluten-free dough tends to be a little more challenging to work with when it comes to texture. However, with the right ingredients and techniques, you can still achieve that signature soft and airy texture. The combination of gluten-free flour blends (such as rice flour or tapioca flour) and coconut milk helps create a dough that rises beautifully, giving the rolls their soft texture. The addition of a small amount of yeast helps to create the fluffy structure that is so characteristic of Hawaiian rolls.
The Role of Yeast and Coconut Milk
Yeast helps provide the rolls with the rise they need, creating a light, airy texture. In traditional recipes, the gluten in the flour helps the dough rise. However, in gluten-free dough, yeast takes on this task with the support of coconut milk. The rich and creamy texture of coconut milk adds moisture, making the rolls even softer while also contributing to their subtle sweetness.
Texture That Melts in Your Mouth
The result is a roll that’s soft, fluffy, and perfect for tearing apart with your hands. When you bite into one of these gluten-free Hawaiian rolls, you’ll experience a light, airy texture with just the right amount of sweetness to complement the buttery flavor. These rolls melt in your mouth, making each bite feel like a treat.
Gluten-Free Ingredients: Key to Perfect Hawaiian Rolls
Making gluten-free Hawaiian rolls requires the right blend of ingredients to achieve both texture and flavor. Let’s dive into the essential ingredients that help create these delicious rolls, ensuring they remain soft, sweet, and gluten-free.
The Importance of Gluten-Free Flour Blends
In gluten-free baking, selecting the right flour blend is crucial for achieving the desired texture. Gluten-free flour blends are often made from a combination of different flours, such as rice flour, tapioca flour, and potato starch. These flours mimic the structure that gluten would provide in traditional rolls, helping to create a soft, airy texture. If you’re using a pre-made gluten-free flour blend, make sure it contains a binding agent like xanthan gum or guar gum to give the dough more elasticity and structure.
Coconut Milk for Moisture and Sweetness
Coconut milk is an essential ingredient in this gluten-free Hawaiian roll recipe. It brings moisture to the dough, which is often lacking in gluten-free recipes. The creamy texture of coconut milk also contributes to the softness of the rolls. Additionally, coconut milk adds a subtle sweetness, enhancing the overall flavor of the rolls. If you’re looking for a dairy-free option, coconut milk is an excellent substitute for heavy cream or regular milk in traditional recipes.
The Sweetness of Honey or Sugar
Sweetness is a hallmark of Hawaiian rolls, and in a gluten-free recipe, you’ll still want to maintain that signature taste. Honey or sugar serves as the sweetener in this recipe. Honey offers a mild, floral sweetness that complements the coconut milk, while sugar provides a more neutral sweetness. You can also use alternatives like coconut sugar or maple syrup for a slightly different flavor profile. By adjusting the amount of sweetener, you can control the level of sweetness in your rolls.
Yeast: Achieving That Soft, Fluffy Texture
Yeast plays a vital role in creating the airy, soft texture of gluten-free Hawaiian rolls. Since gluten-free dough lacks the natural elasticity of wheat-based dough, yeast helps the dough rise, making the rolls light and fluffy. When using yeast in gluten-free baking, it’s essential to let the dough rise for an appropriate amount of time. This will ensure that the yeast has enough time to work, creating the ideal texture without compromising the rolls’ structure.
Eggs for Binding and Structure
Eggs serve as both a binding agent and a structure-builder in gluten-free baking. They help hold the dough together, giving it a more cohesive structure. The proteins in eggs also contribute to the soft texture of the rolls, providing stability while maintaining moisture. If you prefer to make these rolls vegan, you can substitute eggs with flax eggs or chia eggs, which work well as binders in gluten-free recipes.
Add-Ins for Extra Flavor and Texture
To enhance the flavor of your gluten-free Hawaiian rolls, consider adding some optional ingredients. Vanilla extract gives the rolls a comforting aroma and depth of flavor. Salt balances the sweetness and enhances the overall taste. If you want to experiment, you can also add small amounts of coconut flakes or almond flour for extra texture and flavor. These additions are entirely optional, but they can elevate the rolls to the next level.
Perfect for Any Occasion: Versatile Gluten-Free Hawaiian Rolls
One of the best things about these Gluten-Free Hawaiian Rolls is their versatility. They are the perfect addition to almost any meal, whether you’re preparing for a special occasion, a casual family dinner, or a holiday feast. Let’s explore some of the occasions where these sweet, soft rolls will shine.
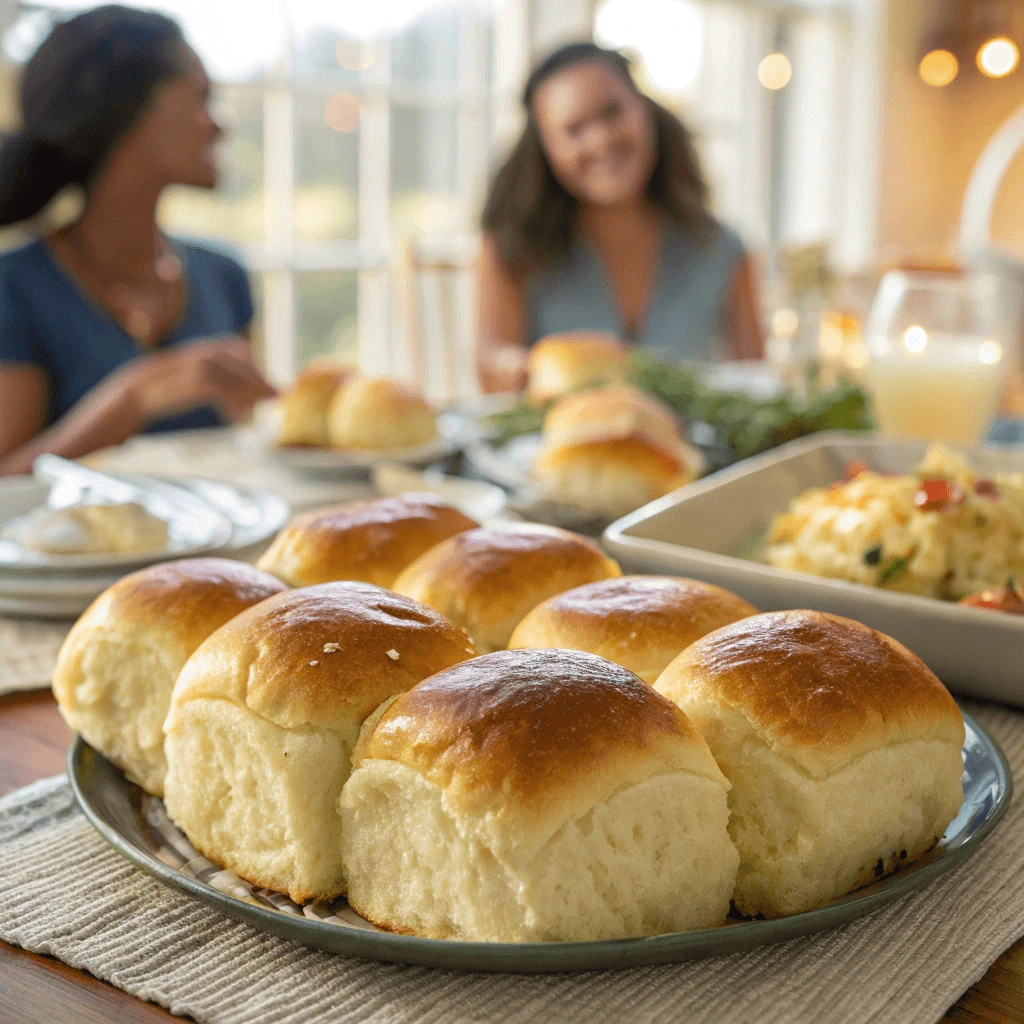
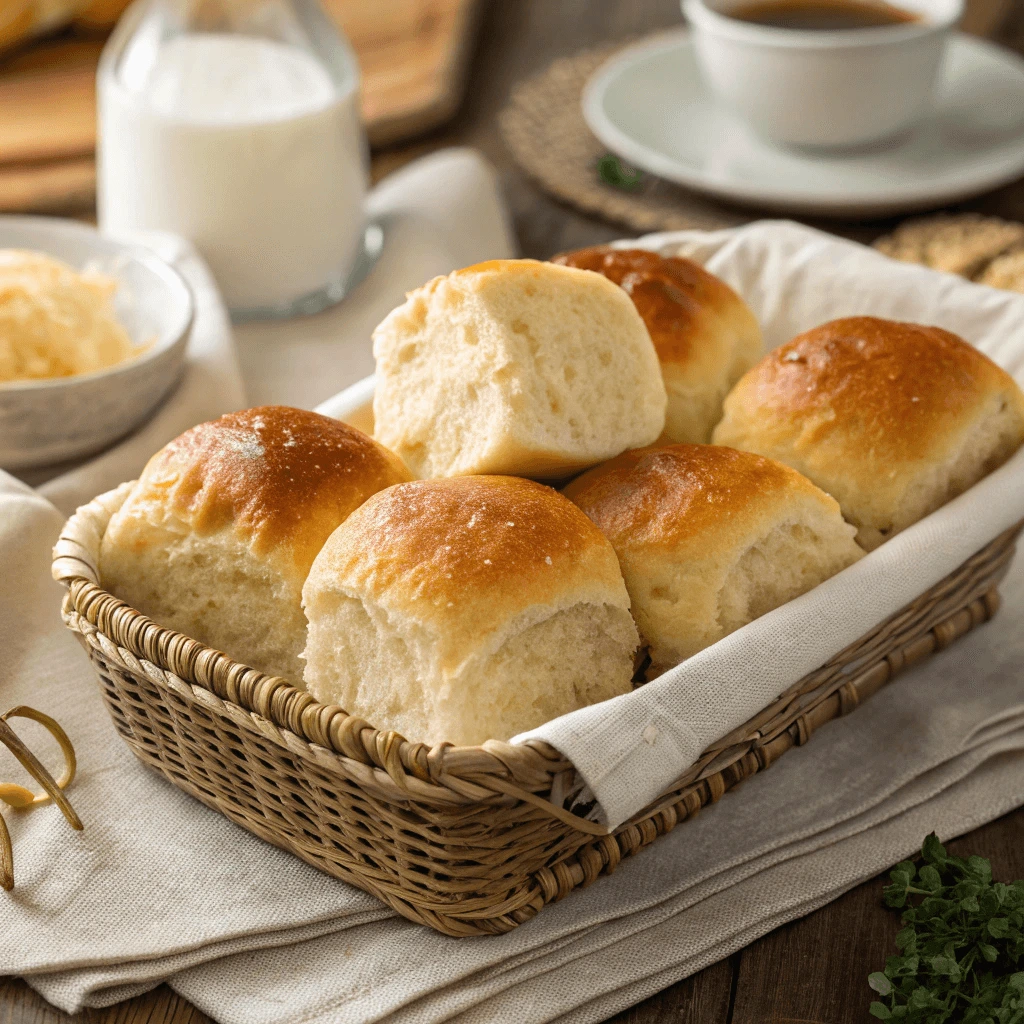
Ideal for Family Dinners
Nothing brings a family together like a warm basket of homemade rolls. These gluten-free Hawaiian rolls are perfect for weeknight dinners and family gatherings. Their soft, sweet texture pairs wonderfully with a variety of dishes. Serve them alongside your favorite roasted meats, soups, or even vegetarian dishes for a comforting meal that everyone can enjoy. Their mild sweetness complements savory dishes without overwhelming the taste, making them a crowd-pleaser at any table.
The Perfect Side for Holiday Feasts
Holiday dinners call for a special touch, and these gluten-free Hawaiian rolls fit the bill. Whether you’re celebrating Thanksgiving, Christmas, or any other holiday, these rolls make the perfect accompaniment to your spread. Their rich sweetness pairs beautifully with classic holiday dishes like roast turkey,or stuffing. If you’re hosting a holiday feast, these rolls will impress your guests and ensure everyone, regardless of dietary restrictions, has something delicious to enjoy.
Great for Special Occasions and Parties
Looking for a standout dish for your next party or special occasion? These rolls will definitely impress your guests. Serve them as a starter, or include them in a bread basket to accompany appetizers and main courses. Their soft texture and subtle sweetness make them a great choice for pairing with both savory dips and sweet spreads. You can also use them as mini slider buns for sandwiches at a party. Their unique flavor profile ensures they’ll be the star of the table.
Perfect for Lunchboxes and Quick Snacks
Gluten-free Hawaiian rolls are not just for big events—they’re also perfect for lunchboxes or quick snacks. Their small size makes them easy to pack and perfect for children and adults alike. Pair them with cheese, deli meat, or even fruit for a light meal that is both satisfying and easy to prepare. These rolls are a convenient snack option that doesn’t compromise on flavor, making them a great choice for busy days when you want something tasty yet quick.
Customizable for Your Taste
Another reason why these rolls are perfect for any occasion is their customizability. Feel free to adjust the sweetness level or add different ingredients based on what you’re serving. You can sprinkle some sesame seeds on top for a bit of crunch, or even incorporate fresh herbs like rosemary for a more savory twist. Whether you want your rolls to be extra sweet or just subtly flavored, you can modify the recipe to fit your needs. Their flexibility ensures they fit seamlessly into any menu.
Essential Ingredients for Soft and Sweet Gluten-Free Hawaiian Rolls
Gluten-Free Flour: The Key to Perfect Rolls
Choosing the right gluten-free flour is essential when baking these Hawaiian rolls. Since gluten-free flours lack the natural binding properties of wheat, finding a suitable flour blend can make all the difference. Let’s dive into the types of gluten-free flours you should consider and how to use them to achieve soft, fluffy rolls.
The Importance of a Good Gluten-Free Flour Blend
In gluten-free baking, it’s essential to use a flour blend that mimics the properties of wheat flour. A good gluten-free flour blend usually combines different types of flours to create a balanced texture. For our Hawaiian rolls, the goal is to achieve a light, airy, and slightly chewy texture—qualities that gluten-free flour blends can help replicate. Rice flour, potato starch, and tapioca flour are commonly used in blends for their ability to create soft, tender baked goods. These flours help create the structure while ensuring the dough doesn’t turn out too dense.
Rice Flour: A Staple in Gluten-Free Baking
Rice flour is one of the most commonly used gluten-free flours, and for good reason. It has a neutral flavor and a fine texture that works well in many baked goods, including rolls. In gluten-free Hawaiian rolls, rice flour contributes to the overall softness of the dough. It also helps the dough rise, giving the rolls their light texture. Since rice flour can sometimes create a slightly gritty texture on its own, it’s often combined with other ingredients, like tapioca flour, to ensure a smooth and consistent crumb.
Tapioca Flour: For Lightness and Softness
Tapioca flour (or tapioca starch) plays a crucial role in making these gluten-free rolls light and fluffy. Tapioca flour is known for its ability to create an elastic, chewy texture, which helps mimic the softness that traditional wheat flour provides. This flour also improves the dough’s ability to rise, which is especially important in gluten-free baking. Additionally, tapioca flour helps to trap moisture in the dough, ensuring the rolls remain soft after baking.
Potato Starch: Adding Structure and Stability
Potato starch is another vital ingredient in gluten-free baking, especially for creating the right texture in breads and rolls. This flour helps to add structure and stability to the dough, preventing it from becoming too crumbly. Potato starch also contributes to a smoother dough and improves the elasticity of the dough. Its slightly neutral flavor allows the sweetness of the rolls to shine through without being overpowering.
Xanthan Gum or Guar Gum: The Bindings You Need
Since gluten is the ingredient that binds traditional dough together, gluten-free dough requires a binding agent to hold everything in place. Xanthan gum or guar gum are commonly used in gluten-free recipes to add structure and elasticity. These gums create a web-like structure that holds the dough together, preventing it from falling apart. They also help the dough to rise properly and achieve a fluffy texture. Typically, you only need a small amount—usually around 1 teaspoon per batch of rolls.
Customizing Your Flour Blend
If you prefer to experiment with different gluten-free flours, feel free to swap out some of the components of the blend. For instance, you could try almond flour for added flavor and moisture, or use sorghum flour to boost the dough’s protein content. Just keep in mind that different flours absorb liquid differently, so you might need to adjust the amount of liquid you use in the recipe. The beauty of gluten-free baking is that you can personalize the flour blend to suit your preferences and dietary needs.
Sweeteners (Honey or Sugar): Balancing Flavor in Gluten-Free Hawaiian Rolls
When baking Gluten-Free Hawaiian Rolls, the choice of sweetener is one of the most important decisions that will directly affect the flavor and texture of the rolls. The sweetness is a hallmark of Hawaiian rolls, giving them that irresistible, light flavor that makes them so popular. Let’s explore the role of sweeteners like honey and sugar, their benefits, and how they contribute to creating the perfect rolls.
Why Sweetness is Essential for Hawaiian Rolls
Sweetness is a defining feature of Hawaiian rolls. Without it, the rolls would lack the rich flavor that makes them a favorite at dinner tables and special occasions. The sweetness balances the bread’s soft texture and enhances the overall eating experience. For gluten-free recipes, the right sweetener is essential to mimic the flavors of traditional wheat-based rolls. The sugar and honey in this recipe do more than just sweeten the dough—they help with browning, moisture retention, and improving the rolls’ shelf life.
Honey: A Natural Sweetener with Added Moisture
Honey is a popular choice in many baked goods, including gluten-free rolls, for several reasons. Not only does it add sweetness, but it also brings extra moisture to the dough. Since honey has a high water content, it helps keep the rolls soft and tender, preventing them from drying out after baking. Additionally, honey adds a floral sweetness that complements the richness of coconut milk and balances the flavor profile of the rolls.
Another benefit of using honey is its natural preservative qualities. Honey has antimicrobial properties, which can help extend the freshness of the rolls for a longer period. This makes it a great choice if you’re planning to make the rolls ahead of time and store them.
When using honey in this recipe, be sure to adjust the amount of liquid in the dough if necessary. Because honey is a liquid sweetener, you may need to slightly reduce other liquid ingredients to maintain the right dough consistency.
Sugar: A Simple and Reliable Option
Sugar is another essential sweetener that works beautifully in gluten-free Hawaiian rolls. It’s a straightforward, reliable option that brings clean sweetness to the dough. Whether you choose granulated sugar, coconut sugar, or brown sugar, sugar helps provide the classic sweet flavor that is synonymous with Hawaiian rolls.
While sugar lacks the moisture content of honey, it still plays an important role in maintaining the soft texture of the rolls. Sugar helps with browning during baking, giving the rolls a golden exterior while keeping the inside tender. In addition to sweetness, sugar supports the fermentation process by feeding the yeast, helping the dough rise and contributing to the roll’s light and airy texture.
If you prefer a more neutral or traditional sweetness, granulated white sugar is the best option. However, if you want a more complex flavor, brown sugar or coconut sugar can be used. These options bring subtle notes of molasses and caramel, enhancing the flavor of the rolls and giving them an extra depth.
Which Sweetener to Choose: Honey vs. Sugar
While both honey and sugar work well in gluten-free Hawaiian rolls, the choice between them depends on your personal preference and dietary needs. Here’s a quick comparison to help you decide:
- Honey: Adds moisture, a floral sweetness, and natural preservatives. Perfect if you want a slightly richer flavor and a softer texture.
- Sugar: Provides a cleaner sweetness with a crisp, golden exterior. Ideal if you’re looking for a more traditional flavor and a slightly firmer texture.
You can also experiment with a blend of both sweeteners to find the perfect balance of sweetness, moisture, and texture. Each option will give the rolls a slightly different flavor, so feel free to adjust based on your tastes.
Alternative Sweeteners for Dietary Needs
If you need to cater to specific dietary needs, such as vegan or low-carb diets, you can use alternative sweeteners. For a vegan option, you can substitute the honey with maple syrup or agave nectar. For those following a low-carb or keto lifestyle, you can use erythritol, stevia, or monk fruit sweetener. These alternatives provide sweetness without the added calories or carbohydrates, allowing you to enjoy the rolls while sticking to your dietary plan.
Yeast and Baking Powder: The Secret to Fluffy Gluten-Free Hawaiian Rolls
In baking, yeast and baking powder are the leavening agents that help dough rise and achieve the light, fluffy texture we expect from Hawaiian rolls. While traditional rolls rely heavily on yeast to create their airy texture, gluten-free rolls require a bit more balance. Combining both yeast and baking powder ensures that the rolls are soft, tender, and rise beautifully. Let’s take a closer look at how these ingredients work together to achieve the perfect roll.
Yeast: The Essential Leavening Agent
Yeast is a living organism that ferments sugars in the dough, releasing carbon dioxide gas as a byproduct. This gas forms bubbles within the dough, causing it to rise and expand. In traditional baking, yeast plays a crucial role in creating the chewy, airy texture of bread. In gluten-free baking, yeast can sometimes struggle to produce the same results, but it’s still essential for achieving the desired texture in these Hawaiian rolls.
Using active dry yeast or instant yeast is the best option for this recipe. Both types work well in gluten-free dough, but instant yeast has the advantage of not needing to be dissolved in water beforehand, making the process quicker and simpler. Instant yeast can be added directly to the dry ingredients, which saves time.
Yeast also contributes to the flavor of the rolls, creating subtle savory notes that balance the sweetness of the rolls. The longer the dough ferments, the more pronounced these flavors become. For best results, allow the dough to rise in a warm, draft-free area. Yeast works best at temperatures between 75°F and 85°F, so keep the dough in a cozy spot while it rises.
Baking Powder: The Supporting Leavening Agent
While yeast is the primary leavening agent in this recipe, baking powder plays a supporting role in creating the perfect texture. Baking powder is a chemical leavening agent, meaning it works through a chemical reaction rather than biological fermentation. It contains both an acid (usually cream of tartar) and a base (usually baking soda), which react when combined with moisture and heat to produce carbon dioxide gas. This gas causes the dough to rise, making the rolls lighter and fluffier.
Baking powder is especially helpful in gluten-free recipes because it helps compensate for the lack of gluten, which normally contributes to the structure and rise of the dough. The combination of yeast and baking powder ensures the dough achieves the right balance between softness and lift. In gluten-free Hawaiian rolls, this combination produces a soft crumb and a light texture that is characteristic of traditional Hawaiian rolls.
One important note: be careful not to overuse baking powder. Too much baking powder can give the rolls a bitter taste and cause them to rise too quickly, resulting in an uneven texture. The key is to use just the right amount for the dough to rise gently and evenly.
How Yeast and Baking Powder Work Together
When making gluten-free Hawaiian rolls, the combination of yeast and baking powder is what makes the rolls rise effectively while maintaining their delicate, fluffy texture. The yeast works over time to develop flavor and structure, while the baking powder provides an instant rise, ensuring the rolls don’t turn out too dense or heavy. Together, they balance each other, creating the perfect harmony between flavor, texture, and lightness.
- Yeast: Takes time to work, producing natural flavor and rise.
- Baking Powder: Adds instant lift, ensuring the dough doesn’t become too dense.
The result is a dough that is both flavorful and light, rising just enough to create a roll with a perfect soft, airy crumb.
Troubleshooting Common Issues with Yeast and Baking Powder
While using yeast and baking powder together is the key to successful gluten-free Hawaiian rolls, there are a few common challenges you may encounter:
- Underproofing or Overproofing the Dough: If you don’t give the dough enough time to rise, it will be dense and heavy. On the other hand, if the dough rises for too long, it can collapse and deflate. Make sure to give the dough the proper rise time—usually about 1-1.5 hours, depending on the ambient temperature.
- Too Much Baking Powder: If you add too much baking powder, the rolls may rise too quickly, causing them to collapse. Be sure to measure carefully.
- Inactive Yeast: Always check the expiration date of your yeast and make sure it’s active before using it. If your yeast doesn’t bubble or foam when mixed with warm water, it may be inactive, which will prevent the dough from rising.
How to Make Gluten-Free Hawaiian Rolls: Step-by-Step Guide
Prepare the Dough: The Foundation of Soft and Sweet Gluten-Free Hawaiian Rolls
Preparing the dough is the most crucial step when making gluten-free Hawaiian rolls. This process requires careful attention to detail to achieve the perfect texture and flavor. Unlike traditional bread dough, gluten-free dough behaves differently, so you’ll need to approach it with patience and the right technique. In this section, we’ll guide you through each stage of preparing the dough, ensuring that your rolls turn out soft, sweet, and absolutely delicious.
Step 1: Activating the Yeast
Before you can mix your dough, you need to activate the yeast. This is an essential step in gluten-free baking, as yeast is the key to helping the dough rise and develop a soft, airy texture. To activate the yeast, combine it with warm water (about 110°F, or the temperature of a warm bath) and a little bit of sugar or honey to feed the yeast.
Let the mixture sit for 5 to 10 minutes. You’ll know the yeast is active when it becomes bubbly and foamy. This step ensures the yeast is alive and ready to do its job. If your yeast does not foam, it may be expired or inactive, and you should start with a fresh packet.
Tip: Use a thermometer to measure the water temperature, as water that’s too hot can kill the yeast, while water that’s too cold will fail to activate it properly.
Step 2: Mixing the Dry Ingredients
Once the yeast is activated, move on to preparing the dry ingredients. In a separate bowl, combine your gluten-free flour, baking powder, and any other dry ingredients, such as salt or xanthan gum. The purpose of xanthan gum in gluten-free dough is to mimic the structure provided by gluten, helping the dough to hold together.
Whisk the dry ingredients together to ensure they’re evenly distributed. This step helps prevent any clumps and ensures that each roll is consistent in texture and flavor. Be sure to measure your gluten-free flour correctly using the spoon-and-level method to avoid adding too much flour, which could make the dough too dry.
Step 3: Mixing the Wet Ingredients
In another bowl, combine your wet ingredients, including the activated yeast mixture, honey (or sugar), and any other liquid ingredients, such as coconut milk or oil. You’ll also want to add any flavoring ingredients, like vanilla extract or a pinch of salt, at this point.
Whisk the wet ingredients together until well combined. The yeast mixture should be foamy and bubbly, which indicates it’s ready to blend with the other ingredients. If using coconut milk, make sure it’s well mixed, as it can separate when stored for a while.
Step 4: Combining Wet and Dry Ingredients
Now that you’ve prepared both the wet and dry ingredients, it’s time to combine them. Slowly pour the wet ingredients into the dry ingredients, stirring as you go. Use a spatula or spoon to gently fold the ingredients together, being careful not to overmix.
Unlike traditional bread dough, gluten-free dough tends to be stickier and more batter-like rather than dough-like. This is perfectly normal! The dough may not hold together in a ball right away, but as you mix, it should come together into a soft, slightly sticky consistency.
Tip: Avoid adding too much extra flour. Gluten-free dough requires a delicate balance of moisture, so the dough may seem wet at first but should firm up as it rests.
Step 5: Kneading the Dough (or Not)
For traditional bread, kneading is crucial for developing gluten and structure. However, gluten-free dough doesn’t require much kneading. In fact, overworking the dough can make the rolls tough. Instead of kneading, simply fold the dough a few times to ensure it’s evenly mixed and everything is incorporated.
If the dough feels too sticky to handle, you can lightly grease your hands or use a silicone spatula to help work with the dough. Don’t worry if it’s a bit wet—it’s better to have a slightly wetter dough than one that’s too dry.
Step 6: Letting the Dough Rise
After the dough is mixed, it’s time for it to rise. Transfer the dough into a greased bowl and cover it with a clean kitchen towel or plastic wrap. Let it rise in a warm, draft-free area for about 1 to 1.5 hours. During this time, the yeast will do its magic, creating small air bubbles that make the dough rise.
Tip: To help the dough rise more effectively, preheat your oven to a very low temperature (about 100°F), then turn it off. Place the dough inside the warm oven to encourage the yeast’s growth.
The dough should approximately double in size. If you’re working in a colder environment, it may take a little longer for the dough to rise.
Step 7: Shaping the Dough into Rolls
Once the dough has risen, it’s time to shape it into rolls. Grease your hands to prevent sticking, then divide the dough into equal portions (about 12 rolls). Gently roll each portion into a ball and place it in a greased baking pan, making sure the rolls are close together. The rolls will rise together, creating soft edges as they bake.
Tip: Don’t worry about making perfect, smooth balls. The slightly uneven shapes will result in rolls with natural texture and character.
Shaping and Rising the Rolls
Once your gluten-free dough has had time to rise, it’s time to shape and let it rise again. This step plays a crucial role in determining the final texture and appearance of your gluten-free Hawaiian rolls. By following the right technique, you’ll end up with soft, fluffy rolls that are golden brown on top and bursting with sweetness inside. In this section, we’ll guide you through shaping the dough and allowing it to rise a second time before baking.
Step 1: Divide the Dough into Equal Portions
After the first rise, your dough should have doubled in size. Gently punch the dough down to deflate it slightly, which helps release excess air bubbles. Now, it’s time to divide the dough into individual portions. Use a bench scraper, knife, or your hands to portion the dough evenly.
Aim for about 12 equal portions, depending on the size of rolls you want. Each piece of dough will become one roll, so the more even your portions, the more uniform your rolls will be in size and shape.
Tip: If you’re aiming for perfectly uniform rolls, you can use a kitchen scale to weigh each portion. This ensures all the rolls rise evenly during baking.
Step 2: Shape the Dough into Balls
Once you’ve divided the dough, it’s time to shape each portion into a ball. Lightly grease your hands with some oil or flour to prevent the dough from sticking. Take one piece of dough and gently roll it between your palms to form a smooth ball. The goal is to create a round, smooth surface without overworking the dough. Overworking it can cause the rolls to become dense.
Place the shaped dough balls in a greased baking dish or on a baking sheet lined with parchment paper. Leave enough space between each roll so they have room to expand during the second rise. For best results, the rolls should be placed closely together, as this encourages them to rise upward rather than spread outwards.
Tip: If you want to make mini rolls, divide the dough into more than 12 portions. This will give you smaller, bite-sized rolls that are perfect for appetizers or serving alongside a meal.
Step 3: Second Rise – Let the Dough Rest and Expand
Now that the dough is shaped, the second rise is critical to achieving soft, fluffy rolls. Cover the baking dish with a clean kitchen towel or plastic wrap. Place the dish in a warm, draft-free area. This second rise will allow the yeast to continue working, making the dough rise further and develop its light texture.
The rolls will rise and expand as the yeast ferments, creating air pockets within the dough. This step typically takes about 30 to 60 minutes, depending on the room temperature and humidity.
Tip: If your kitchen is cooler, try preheating the oven to its lowest setting for a few minutes and then turning it off. Place the dough inside the warm oven to create an ideal environment for rising.
You’ll know the rolls are ready for baking when they have nearly doubled in size and are touching each other in the baking dish. This close contact will allow them to bake together, creating soft, pull-apart edges that are perfect for serving.
Step 4: Adding the Finishing Touches
Before placing the rolls in the oven, you can brush the tops with a little bit of melted butter or coconut oil for an extra touch of flavor and a beautiful golden color. You can also sprinkle a pinch of sea salt on top for a slightly savory contrast to the sweet rolls. These finishing touches help elevate the flavor and appearance of your gluten-free Hawaiian rolls.
Tip: If you prefer a richer flavor, you can mix a small amount of honey or maple syrup into the melted butter before brushing it on the rolls. This enhances the sweetness and gives your rolls a glossy finish.
Step 5: Baking the Rolls
Once the rolls have finished rising and you’ve added the finishing touches, it’s time to bake! Preheat your oven to 350°F (175°C) and place the rolls in the middle of the oven. Bake for about 20 to 25 minutes or until the rolls are golden brown on top and have a soft, airy texture when you gently press them. The rolls should sound hollow when tapped on the bottom.
Tip: If you want your rolls to be extra soft, you can cover them loosely with aluminum foil during the first 15 minutes of baking. This traps the moisture and helps them retain softness.
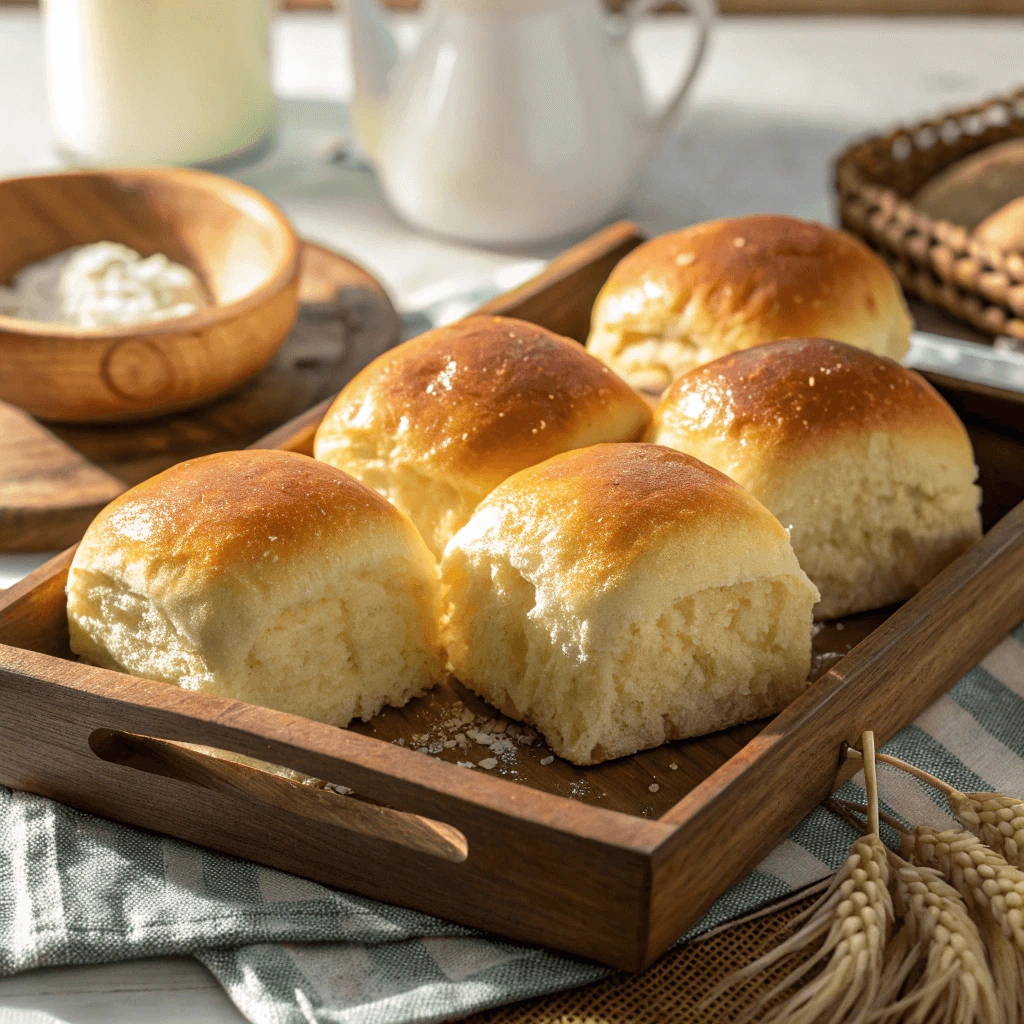
Step 6: Let the Rolls Cool
Once baked, remove the rolls from the oven and allow them to cool slightly before serving. Letting them rest for about 5-10 minutes helps them firm up and ensures they don’t fall apart when you handle them. Serve them warm for the best experience, whether for dinner, brunch, or a special occasion.
Baking the Rolls
Baking your gluten-free Hawaiian rolls is the most rewarding step in the process. This is where all the effort you’ve put into shaping and rising your dough will come together, creating soft, golden, and delicious rolls. Understanding the nuances of the baking process will help you achieve the perfect texture and color every time. In this section, we’ll cover the key steps involved in baking your rolls to perfection.
Preheating the Oven: Ensuring Optimal Heat
Before you even think about placing your rolls in the oven, make sure your oven is preheated. Preheating the oven ensures that your rolls cook evenly and rise properly as soon as they hit the heat. Set your oven to 350°F (175°C), the ideal temperature for baking gluten-free Hawaiian rolls.
Tip: Always give your oven 10-15 minutes to preheat fully before placing the rolls inside. This will help the rolls start baking immediately and ensures even heat distribution.
Brushing the Rolls with Butter: Adding Flavor and Shine
While the oven is preheating, take the time to brush the tops of your shaped dough with melted butter or coconut oil. This step is optional, but it adds flavor, moisture, and a beautiful golden-brown finish to the rolls. The butter also helps the rolls achieve a soft, glossy texture as they bake.
You can also experiment with adding a little honey or maple syrup to the melted butter before brushing it on the rolls. This enhances the natural sweetness of the rolls and gives them a slight caramelized finish.
Tip: If you prefer a vegan version, coconut oil is an excellent substitute for butter, providing a rich texture and flavor without any dairy.
Placing the Rolls in the Oven: The Key to Even Baking
Now that your oven is preheated and the rolls are brushed with butter, it’s time to place them in the oven. Arrange your rolls in the middle rack for even heat circulation. This position will ensure they cook uniformly without burning or overbaking on the top or bottom.
Tip: If you’re using a baking dish, ensure it’s the right size. The rolls should be close together, but not overcrowded. This encourages them to bake in a way that keeps them soft and tender while also allowing the tops to brown evenly.
Monitoring the Baking Process: Perfect Timing Is Essential
Once your rolls are in the oven, keep a close eye on them as they bake. The total baking time is usually around 20-25 minutes, but every oven is different, so it’s important to check them periodically. After about 15 minutes of baking, you can check the rolls by gently pressing the tops. If they spring back, they are likely done. If they feel soft and leave an indent, they need a little more time.
Tip: You can test the rolls’ doneness by tapping on the bottom. If it sounds hollow, that’s a good indication they are fully baked. If it sounds dense, let them bake for a few more minutes.
Optional: Cover with Foil for Extra Softness
If you want to make sure your gluten-free Hawaiian rolls turn out as soft as possible, you can loosely cover them with aluminum foil during the first 15 minutes of baking. This helps trap moisture, preventing the tops from becoming too dry while the rolls bake through. After 15 minutes, remove the foil to allow the tops to brown and develop a slightly crisp texture.
Tip: For a soft, pillowy texture, cover the rolls for the entire baking time. For a golden and slightly crispy top, remove the foil after the first 15 minutes, allowing the rolls to finish baking uncovered.
Cooling the Rolls: Let Them Rest Before Serving
Once your rolls have turned golden brown and passed the doneness tests, it’s time to take them out of the oven. Remove the rolls from the oven and place them on a cooling rack or a clean kitchen towel. Allow the rolls to cool for 5 to 10 minutes before serving. This cooling time helps them firm up slightly, making them easier to handle and preventing them from falling apart when you cut into them.
Tip: If you’re serving the rolls immediately, cover them with a clean kitchen towel to keep them warm. If you plan to serve them later, let them cool completely before storing them in an airtight container.
Final Touches: Perfecting the Appearance
To finish, you can brush the rolls with a final layer of melted butter or coconut oil for extra shine. This will give them a lovely gloss and enhance the overall appearance. It also adds just a bit more flavor and richness to each roll.
Tip: For a bit of extra sweetness, you can dust the tops with a small amount of sugar or cinnamon sugar after brushing with butter. This will give your rolls a beautiful sheen and a light touch of sweetness that complements the dough.
Tips for Perfect Gluten-Free Hawaiian Rolls Every Time
Use the Right Flour Blend
For soft, fluffy gluten-free Hawaiian rolls, choosing the right flour blend is crucial. Unlike wheat flour, gluten-free flours don’t contain gluten, which is necessary for elasticity and structure in baked goods. To achieve the best texture and taste, you need a mix of gluten-free flours, each contributing different qualities to the dough.
Why a Flour Blend Matters
A single gluten-free flour won’t give you the soft and chewy texture you’re aiming for in Hawaiian rolls. Using a blend of gluten-free flours helps recreate the structure and softness that traditional wheat flour would provide.
Popular Flour Blends to Try
- Rice and Tapioca Flour: This combination creates a light, airy texture perfect for soft rolls.
- Sorghum Flour and Potato Starch: Adds structure and chewiness while maintaining tenderness.
- Pre-made Gluten-Free All-Purpose Blends: Convenient and designed for consistent results with a mix of rice flour, potato starch, and binding agents.
Binders and Additives
Most gluten-free flour blends contain xanthan gum or guar gum, which help bind the dough and improve its texture. If your blend doesn’t contain these, you may need to add them separately to ensure the rolls don’t fall apart.
Tips for Success
- Adjust the liquid in your recipe based on the moisture-absorbing properties of your flour blend.
- If experimenting with custom flour blends, start with small batches to perfect your mix.
Choosing the right flour blend ensures that your gluten-free Hawaiian rolls come out soft, fluffy, and delicious every time.
Ensure Proper Rising
Proper rising is essential for achieving soft, fluffy gluten-free Hawaiian rolls. Since gluten-free dough lacks the elasticity of wheat dough, getting the right rise can be tricky but is crucial for the perfect texture.
Why Rising Matters
Rising helps gluten-free dough become light and airy, creating the soft texture of traditional Hawaiian rolls. Without the right conditions, the dough can become dense and tough.
Use the Right Amount of Yeast
Yeast is vital for the rise. Using the right amount will ensure your dough rises well. Too little yeast results in poor rising, while too much can cause it to rise too quickly and collapse. Instant yeast is easy to incorporate, while active dry yeast needs to be dissolved in warm water first.
Create a Warm, Humid Environment
Gluten-free dough needs warmth to rise effectively. Aim for a temperature between 75°F to 80°F (24°C to 27°C). If your kitchen is too cool, place the dough in a preheated oven (then turned off) or near a warm spot to encourage rising.
Avoid Overworking the Dough
After the dough rises, handle it gently to avoid releasing the air pockets. This will help preserve the softness and fluffiness of the rolls.
Achieve the Sweetness Balance
Sweetness plays a crucial role in creating the perfect gluten-free Hawaiian rolls. These rolls should have just the right level of sweetness to complement their fluffy texture without overwhelming the other flavors. Striking the right balance can elevate your rolls, giving them a delightful taste that everyone will enjoy.
How Sweetness Affects the Taste
The sweetness of gluten-free Hawaiian rolls is one of their defining features. If the rolls are too sweet, they might taste more like dessert than a side dish. On the other hand, if they’re not sweet enough, they won’t capture the signature flavor we love about Hawaiian rolls. Achieving the perfect level of sweetness ensures your rolls are flavorful without being overpowering.
Choosing the Right Sweetener
To balance sweetness in your rolls, you’ll need to select the best sweeteners. Popular options include honey, maple syrup, and sugar. Each of these sweeteners brings a unique flavor, so it’s important to choose one that fits the overall taste profile you want.
Honey vs. Sugar
- Honey: Adds a natural sweetness with a subtle floral flavor that enhances the bread’s taste. Honey also helps retain moisture in the dough, ensuring a soft and tender texture.
- Sugar: White or brown sugar can provide a more neutral sweetness, allowing other flavors to shine. Brown sugar, in particular, adds a touch of caramel flavor that complements the bread’s rich texture.
Maple Syrup
Maple syrup is another excellent option for achieving a rich, yet balanced sweetness. It offers a unique flavor and can contribute to the soft texture of the rolls. Be cautious with the amount, as it can be more potent than honey or sugar.
Balancing Sweetness with Other Flavors
While sweetness is important, it’s equally vital to balance it with the bread’s savory and rich flavors. You can achieve this by using a small pinch of salt, which helps to enhance the sweetness without making the rolls taste too sugary. Additionally, using a fat like butter or coconut oil adds richness, which can offset the sweetness and create a harmonious flavor profile.
How Much Sweetener to Use
Finding the right amount of sweetener is key. For gluten-free Hawaiian rolls, start with around 1/4 cup of sugar or honey for each batch. You can always adjust the sweetness to your liking, but remember that the dough will rise, and some sweetness may be lost during baking.
Test and Adjust
The sweetness of the dough will change slightly as it bakes. If you’re unsure, do a small taste test of the dough before it rises. Keep in mind that the final sweetness will be influenced by other ingredients like flour blends and the amount of fat used.
Perfect the Balance
With practice, you’ll find the ideal level of sweetness that complements your gluten-free rolls. Whether you prefer a light touch of sweetness with honey or a more substantial flavor with brown sugar, adjusting the amount and type of sweetener can help you master the perfect gluten-free Hawaiian roll.
Variations and Substitutions for Gluten-Free Hawaiian Rolls
Dairy-Free Option
Making gluten-free Hawaiian rolls without dairy is easy and still results in soft, fluffy rolls. Dairy-free alternatives ensure that you don’t sacrifice flavor or texture.
Substitute Milk with Non-Dairy Options
For dairy-free milk, try these alternatives:
- Almond Milk: A mild flavor and great moisture without overpowering sweetness.
- Coconut Milk: Adds a creamy, tropical taste that complements the rolls.
- Oat Milk: Mild and creamy, ideal for maintaining the dough’s consistency.
Swap Butter with Dairy-Free Alternatives
Replace butter with these options:
- Dairy-Free Butter: Mimics the richness of regular butter.
- Coconut Oil: Adds a slight coconut flavor and works well in baking.
- Olive Oil or Vegetable Oil: Neutral options that provide necessary fat.
Egg-Free Substitutes
If you’re avoiding eggs, use these alternatives:
- Flaxseed Meal: Mix 1 tbsp flaxseed meal with 3 tbsp water to replace one egg.
- Chia Seeds: Similar to flax, mix 1 tbsp chia seeds with 3 tbsp water.
- Applesauce: Use 1/4 cup applesauce to replace one egg.
Achieving the Right Texture
Use the correct dairy substitutes and balance the dough’s moisture to ensure the rolls rise properly. These adjustments keep your rolls light, airy, and delicious without sacrificing flavor.
Add-ins for Flavor
Adding flavorful ingredients can elevate your gluten-free Hawaiian rolls, making them even more delicious and unique. Whether you prefer tropical fruits, spices, or savory options, here are some great add-ins to try.
Tropical Fruits
- Pineapple: Chopped pineapple adds natural sweetness and a tangy flavor, keeping the rolls moist and flavorful.
- Coconut Flakes: Shredded coconut brings a tropical note and texture to the rolls. Toasted coconut adds an extra layer of flavor.
Spices and Flavorings
- Cinnamon: Ground cinnamon adds warmth and a gentle spice, perfect for complementing the sweetness of the rolls.
- Vanilla Extract: A touch of vanilla enhances the flavor, giving the rolls a fragrant and sweet aroma.
Savory Add-ins
- Garlic and Herbs: Minced garlic or herbs like rosemary and thyme add a savory contrast to the sweetness.
- Cheese (Dairy-Free): Dairy-free cheese, like mozzarella or cheddar, can make the rolls more savory and indulgent.
Sweet Add-ins
- Chocolate Chips: Dairy-free chocolate chips bring pockets of sweetness that contrast beautifully with the rolls’ tropical flavors.
- Honey Drizzle: A light drizzle of honey after baking enhances the sweetness and gives the rolls a glossy finish.
Using a Bread Machine for Gluten-Free Hawaiian Rolls
A bread machine simplifies making gluten-free Hawaiian rolls by automating the mixing, kneading, and rising processes. Here’s a step-by-step guide to using your bread machine effectively.
Choose the Right Bread Machine
Select a machine with a gluten-free setting, as it adjusts the kneading and baking times for gluten-free ingredients. If your machine lacks this setting, use a quick bread or basic bread cycle.
Prepare Ingredients and Load the Machine
Add ingredients in the order recommended by your machine, usually liquids first, then dry ingredients, and finally the yeast. This ensures proper mixing and yeast activation.
Select Settings
Set the machine to the gluten-free or quick bread setting. If unavailable, use the basic bread cycle, adjusting the baking time as needed based on the recipe.
Kneading and Rising
The machine will knead the dough and help it rise. Monitor the dough’s consistency after the first knead and adjust if needed. It should be soft and slightly sticky.
Shape and Second Rise
Once the dough rises, shape it into rolls and let them rise again outside the machine. This ensures they are fluffy and light.
Baking
Bake the rolls in the oven at 350°F (175°C) for 20-25 minutes, or use the bread machine’s baking cycle if preferred.
Conclusion
Making gluten-free Hawaiian rolls is simple and rewarding with the right ingredients and tools like a bread machine. By following key steps like choosing the right flour blend, using a gluten-free setting, and ensuring proper rising, you’ll create soft, sweet rolls that everyone will love.
Give this recipe a try and share your results! These rolls store well and can be enjoyed fresh for days when properly sealed. Don’t miss out on these delicious, gluten-free delights!