If you’ve ever wondered how to make deli-style beef salami at home, you’re in the right place. This easy beef salami recipe brings bold, savory flavor straight to your kitchen—without any complicated tools or hard-to-find ingredients. Whether you’re building the perfect charcuterie board, looking to cut down on store-bought preservatives, or simply craving that classic deli meat taste, homemade beef salami is a game-changer.
In this post, you’ll learn everything from the essential ingredients and curing process to slicing tips and serving ideas. Ready to take your love for cured meats to the next level? Let’s dive into how you can make your own deli-style beef salami from scratch!
What Is Beef Salami and Why Make It at Home?
Understanding Beef Salami as a Deli Meat
Beef salami is a cured, fermented sausage made exclusively from ground beef. It offers a savory, smoky flavor that many meat lovers enjoy. Unlike traditional salami that often includes pork, beef salami appeals to people who prefer a pork-free option due to dietary restrictions, religious practices, or personal choice. Its bold taste, long shelf life, and versatility make it a favorite in delis and home kitchens alike.
What Makes Salami “Deli-Style”?
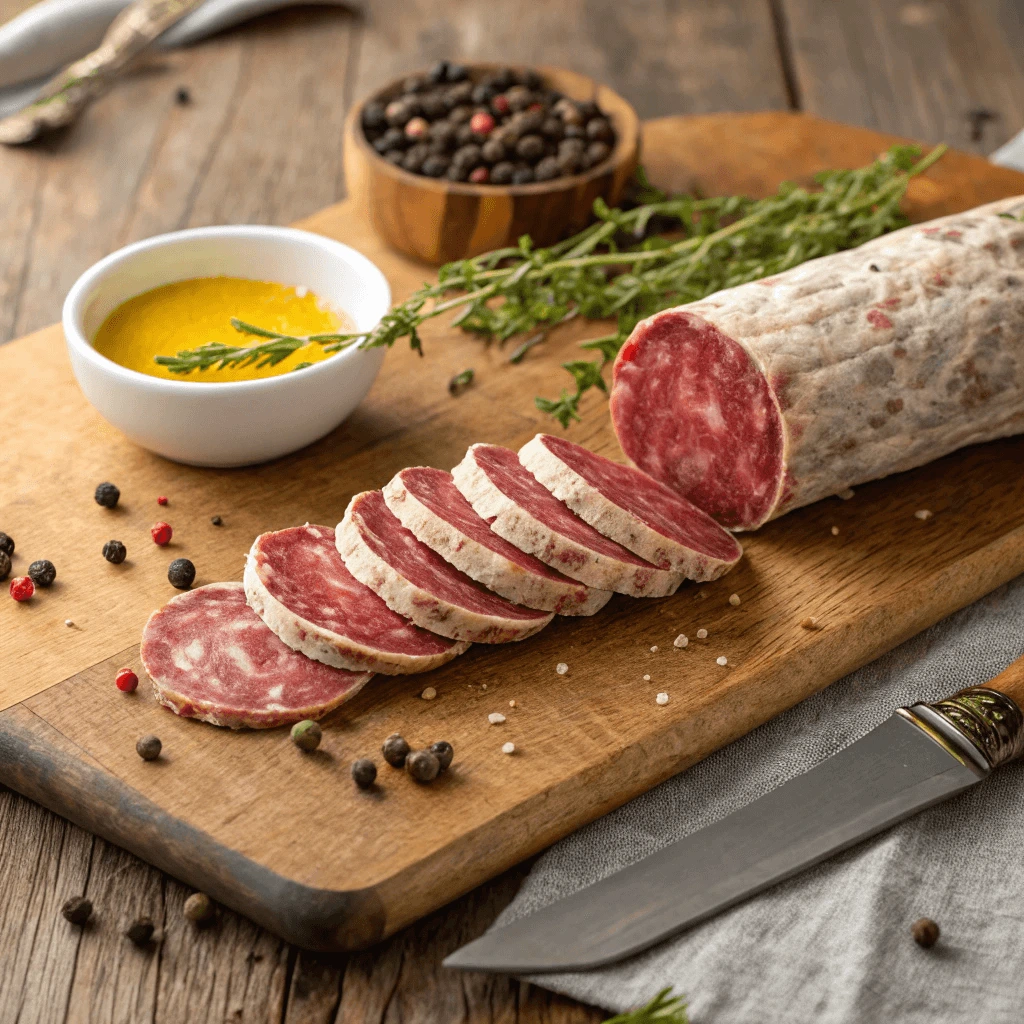
Deli-style salami stands out because of its smooth, firm texture and uniform seasoning. Delis typically serve it in thin slices, making it perfect for sandwiches, wraps, and snack platters. Manufacturers grind the meat finely and season it with a carefully balanced blend of spices, such as garlic, black pepper, coriander, and mustard seed. Then, they stuff it into a casing and allow it to ferment and dry under controlled conditions. This curing process gives the meat a distinctive tang and a chewy, satisfying bite.
When made properly, deli-style beef salami has a consistent appearance and a clean slice. This makes it easy to layer in sandwiches or arrange beautifully on a charcuterie board. Its flavor tends to be milder than artisanal or rustic varieties, making it more accessible to a wide range of palates.
The Role of Curing and Fermentation
Curing and fermentation are key to both the safety and flavor of beef salami. When you mix ground beef with salt, curing agents, and spices, you start the preservation process. During fermentation, beneficial bacteria lower the pH of the meat, which protects it from harmful microbes and creates its signature tangy flavor.
In traditional recipes, salami cures slowly over several weeks. Modern home recipes may speed up the process slightly while still producing rich flavor and proper texture. The drying period removes moisture, firms up the meat, and concentrates its taste.
Why People Choose Beef Over Pork
Many people choose beef salami over pork-based versions for health, cultural, or religious reasons. Since beef salami contains no pork, it’s a great alternative for those who follow halal, kosher, or pork-free diets. Additionally, beef brings a heartier, richer flavor that some people simply prefer. Home cooks often enjoy customizing their recipes, using leaner beef or adjusting spices to suit their own tastes.
Beef salami has earned its spot in the world of cured meats. Whether you add it to your sandwich, cube it for a salad, or serve it as part of an appetizer spread, it delivers bold flavor and satisfying texture every time.
Benefits of Homemade Beef Salami
Making your own beef salami gives you more than just great taste—it gives you full control over ingredients, flavor, and quality.
Flavor Control
When you make salami at home, you decide how it tastes. You can adjust the spice level, saltiness, or add herbs like garlic or fennel to match your preferences. Store-bought options can’t offer that level of customization.
Cleaner Ingredients
Many commercial salamis contain preservatives, artificial flavors, and fillers. Homemade versions let you skip the unnecessary additives and use fresh, whole ingredients. You’ll know exactly what’s in each bite.
Higher Quality Meat
You choose the meat, which means you can opt for leaner cuts, grass-fed beef, or organic options. This improves both the nutritional value and the taste of your final product.
Versatile Portions
Homemade salami can be shaped and sized however you like. Whether you want deli-style slices, snack sticks, or thicker cuts for grilling, you’re in charge.
More Cost-Effective
Over time, making your own salami can save money, especially if you enjoy it regularly. A single batch can last for weeks and cuts down on frequent deli purchases.
Beef Salami vs. Store-Bought Deli Meat
Homemade beef salami and store-bought deli meat may serve similar purposes in a sandwich or snack, but they differ significantly in quality, flavor, and nutrition. Understanding how they compare helps you make more informed choices at home and at the grocery store.
Taste and Texture Differences
Homemade beef salami usually delivers a richer, more authentic flavor. You control the spices, curing time, and meat blend, which results in a more complex taste profile. In contrast, store-bought deli meats often aim for mass appeal, so their flavor can be bland or overly salty. Their texture also tends to be smoother and softer due to extra processing. Homemade salami has a firmer bite and more natural chewiness, thanks to a slower curing and drying process.
Ingredient Quality
When you make salami at home, you decide exactly what goes into it. You can use grass-fed beef, organic spices, and natural curing agents like celery powder. Store-bought deli meats, on the other hand, frequently contain fillers, preservatives, and added sugars. Some even include nitrates or artificial flavors to extend shelf life or enhance taste. These additives can impact not only the flavor but also the nutritional value.
Nutrition and Health Factors
Homemade beef salami generally has fewer additives and less sodium than packaged deli meat. You can adjust the fat content by selecting lean cuts of beef and avoid unnecessary preservatives. Store-bought options often contain more sodium, stabilizers, and emulsifiers—ingredients that may concern health-conscious consumers. By making your own, you create a protein-rich, flavorful option that fits more easily into clean eating goals.
Cost and Convenience
While store-bought deli meats are quick and easy to grab, they come with recurring costs and shorter shelf lives once opened. Homemade beef salami requires time and planning, but it can be made in larger batches and stored for weeks. Over time, making your own may save money, especially if you regularly use deli meats in your meals.
Final Thoughts
Choosing between homemade beef salami and store-bought deli meat depends on your priorities. If you value flavor, control, and quality ingredients, homemade is the clear winner. But if convenience and speed matter more, store-bought may still have a place in your kitchen. Either way, knowing the differences can help you balance taste, health, and budget.
Essential Ingredients and Equipment
Key Ingredients for Deli-Style Beef Salami
Crafting authentic deli-style beef salami starts with understanding the essential ingredients. Each element plays a critical role in developing flavor, texture, and food safety. Here’s a breakdown of the core components you’ll need.
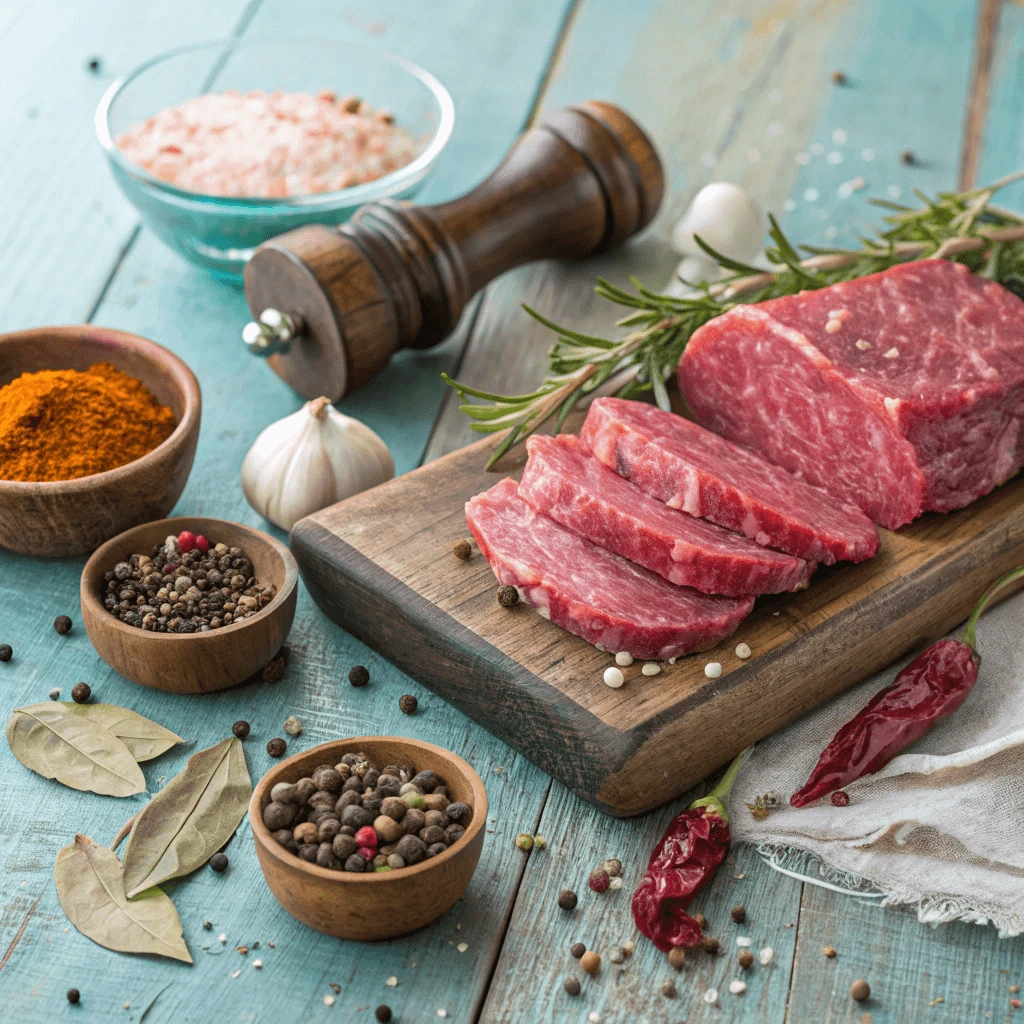
High-Quality Beef
Beef is the heart of any salami recipe. Choose lean ground beef with some fat content—ideally 80/20—for the perfect balance of moisture and flavor. Grass-fed or organic beef enhances both taste and nutritional value. Avoid overly lean meat, which can make the final product dry and crumbly.
Fat Content and Texture
Fat gives salami its signature richness and smooth mouthfeel. If your beef is too lean, consider blending in a small portion of beef fat or brisket trimmings. The goal is to maintain texture without overwhelming the salami with grease. Uniform fat distribution also improves curing and prevents spoilage.
Curing Salt and Seasonings
To make true deli-style salami, you’ll need curing salt—also known as Prague Powder #1. It contains sodium nitrite, which helps preserve the meat, prevent bacterial growth, and give the salami its classic pink color. For seasoning, use a mix of salt, black pepper, garlic powder, fennel, paprika, coriander, and sometimes sugar for balance. These spices define the flavor profile and create that signature deli aroma.
Optional Ingredients for Custom Flavor
Want a smoky or spicy kick? Add smoked paprika, crushed red pepper, or even a touch of liquid smoke. Prefer a more herbaceous version? Try dried oregano, basil, or rosemary. Homemade beef salami lets you explore different styles—from Mediterranean to spicy Italian—just by tweaking the spice blend.
Binders and Starters (Optional)
Some recipes include nonfat dry milk or soy protein as binders to help the salami retain moisture and improve slicing. While not essential, these ingredients can refine texture. Fermented salami recipes may also use starter cultures to create tanginess and enhance safety during the curing process.
Casing Choices
Finally, you’ll need a casing to shape and cure the meat. Natural beef casings, synthetic collagen casings, or even cheesecloth can all work. The casing allows moisture to escape during drying and gives your salami its iconic cylindrical shape.
Equipment You’ll Need for Salami Making
Making deli-style beef salami at home doesn’t require a full butcher’s shop, but using the right equipment ensures consistent results, food safety, and professional-quality texture. Here’s what you need to get started.
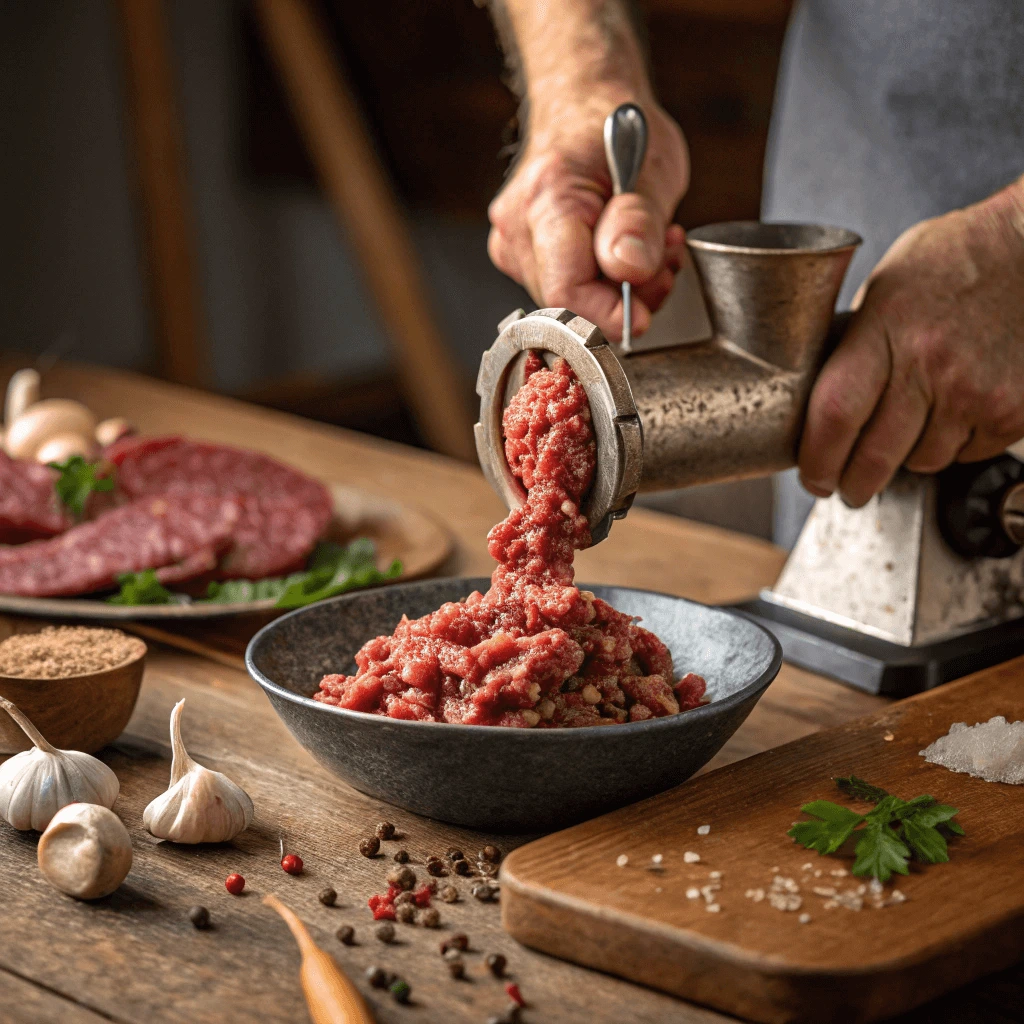
Meat Grinder
A good meat grinder is essential for preparing your beef salami. Grinding your own meat ensures freshness and allows you to control fat content and texture. Choose a grinder with multiple plate sizes so you can switch between coarse and fine grinds. Manual grinders work well for small batches, but an electric grinder will save time and effort if you plan to make salami often.
Mixing Bowls and Utensils
Use stainless steel mixing bowls for blending the ground meat and seasonings. Stainless steel is easy to sanitize and doesn’t absorb odors. Wooden or plastic utensils can harbor bacteria, so opt for metal spoons and spatulas when possible. Some salami makers even use food-safe gloves to maintain hygiene during mixing.
Sausage Stuffer
Once your mixture is ready, a sausage stuffer helps you fill casings cleanly and tightly. Hand-cranked stuffers provide great control and are ideal for beginners. Make sure your stuffer includes different nozzle sizes, so you can adjust the salami diameter based on your recipe.
Casings and Tying Supplies
Natural beef casings, collagen casings, or even cheesecloth work well for homemade salami. You’ll also need kitchen twine or string to tie the ends and create loops for hanging. Pre-soak natural casings before use to make them more flexible and easier to handle.
Curing Chamber or Controlled Environment
Proper curing is key to safe and flavorful salami. You can use a dedicated curing chamber—a mini fridge or wine cooler modified with a temperature and humidity controller. If you don’t have one, find a cool, dark space in your home that maintains stable temperatures between 50–60°F (10–15°C) and humidity levels around 70%.
Hygiene and Safety Tools
Cleanliness matters when curing meat. Always sanitize your equipment before and after each use. Keep food-safe sanitizer spray, paper towels, and clean cloths nearby. A meat thermometer helps ensure your salami reaches safe internal temperatures during drying or cooking, depending on the method.
Optional: pH Meter and Humidity Monitor
If you’re serious about curing, a pH meter allows you to track fermentation progress. A digital hygrometer helps you monitor humidity in your curing chamber. These tools give you more control over the process and help prevent spoilage.
Optional Add-Ins for Flavor Variations
One of the best parts of making beef salami at home is the freedom to customize flavors. By experimenting with spices, herbs, and unique ingredients, you can craft a salami that reflects your personal taste or cultural traditions. Below are several flavorful add-ins to inspire your next batch.
Spice It Up: Heat-Lovers’ Add-Ins
If you love spicy food, there are plenty of ways to turn up the heat in your beef salami:
- Crushed red pepper flakes add a classic spicy kick and mix easily into the meat blend.
- Cayenne pepper creates a deep, lingering heat that balances well with the richness of the beef.
- Chili powders like chipotle or ancho bring both spice and smoky complexity.
These ingredients not only build heat but also add dimension to the salami’s flavor profile. Always start small and adjust based on your heat tolerance.
Add Depth with Herbs and Aromatics
For those who prefer savory, herb-forward salami, aromatic herbs and seasonings offer endless combinations:
- Garlic (freshly minced or powdered) introduces bold, savory notes that enhance the beef.
- Dried oregano, thyme, or rosemary offer Mediterranean-inspired flair.
- Crushed coriander seeds or fennel seeds deliver sweet, earthy tones found in classic Italian salami.
Mix and match herbs to create regional flavor profiles—such as Italian, French, or Middle Eastern influences.
Try Sweet and Smoky Accents
Adding a hint of sweetness or smokiness can make your beef salami truly memorable:
- Brown sugar or maple syrup can add a subtle sweetness that balances spicy or salty notes.
- Smoked paprika or liquid smoke delivers a satisfying smoky aroma, perfect for those who enjoy BBQ-style meats.
- Whole mustard seeds or juniper berries lend a touch of tartness and complexity.
Keep in mind that sweet and smoky flavors work well in moderation and pair beautifully with traditional deli-style spices.
Get Creative with Bold Flavor Twists
Looking to go beyond the basics? These bold additions will give your salami a unique signature:
- Cracked black peppercorns offer a punchy bite and appealing texture.
- Sun-dried tomatoes or olives chopped into small pieces introduce umami richness.
- A dash of Worcestershire sauce or soy sauce enhances the savory umami layer in the meat.
These ingredients shine when used thoughtfully. Combine them in small amounts and test a sample batch before scaling up.
Choosing Your Flavor Style
When adding optional ingredients, think about your flavor goal. Do you want your salami spicy, smoky, sweet, or herbaceous? Stick to two or three main flavor directions to avoid overwhelming the palate. Always mix the seasoning thoroughly and chill the mixture before stuffing to let the flavors meld.
Step-by-Step Homemade Beef Salami Recipe
Preparing the Meat and Seasoning
The quality and preparation of your meat and seasoning directly influence the flavor, texture, and success of your homemade beef salami. Getting this step right lays the foundation for a delicious final product. Let’s walk through how to choose the best meat, mix in the right spices, and achieve the ideal texture for your salami.
Choose the Right Cut of Beef
When making salami, not all beef cuts are equal. You want meat that’s relatively lean but still contains enough fat to keep the salami moist and flavorful. Aim for an 80/20 or 75/25 lean-to-fat ratio.
- Ideal cuts include beef chuck, brisket, or round roast, which offer a balance of flavor and fat.
- Avoid overly lean cuts like sirloin or tenderloin—they lack the necessary fat and can result in a dry salami.
- Trim any silver skin or connective tissue before grinding to ensure a smoother texture.
Cold meat grinds better, so keep your beef slightly chilled before processing. This also helps preserve freshness and prevents fat smearing.
Grind and Mix for the Right Texture
Once you’ve selected and trimmed your beef, it’s time to grind it. Use a meat grinder with a medium plate (about 4.5mm) for classic salami texture.
- Chill your grinder parts (blades, plates, and auger) in the freezer for 30 minutes to keep the fat cold and firm during grinding.
- Pass the beef through the grinder once for a coarse grind. For a finer texture, grind it a second time.
- Mix the ground meat with your hands or a stand mixer using the paddle attachment until the mixture becomes sticky and cohesive. This binding action is crucial for salami structure.
Be careful not to overmix, as this can cause a dense, rubbery texture. Stop once the meat starts clumping together easily.
Blend in Your Seasonings
Seasoning is what transforms ground beef into savory deli-style salami. Create a spice blend that complements the beef while giving your salami its signature flavor.
Common ingredients include:
- Kosher salt or curing salt (if fermenting and drying)
- Black pepper and crushed red pepper flakes
- Garlic powder or fresh minced garlic
- Paprika (sweet, smoked, or hot)
- Ground coriander or fennel seed for complexity
- Sugar or dextrose to balance saltiness and feed beneficial bacteria during curing
Distribute the seasonings evenly throughout the meat to ensure every bite is flavorful. For best results, chill the seasoned meat for a few hours—or overnight—before stuffing to allow the flavors to meld.
Add Optional Flavor Enhancers
If you want to get creative, now is the time to add optional ingredients like:
- Whole mustard seeds for texture
- Liquid smoke for depth
- Red wine vinegar or soy sauce for acidity
- Chopped sun-dried tomatoes or olives for umami
Be sure these extras are finely chopped and evenly mixed to avoid uneven flavor pockets.
Let the Mixture Rest
Once your meat is seasoned and mixed, cover it tightly and place it in the refrigerator for 12 to 24 hours. This resting period allows the spices to penetrate the meat and helps firm up the texture for easier stuffing. If you’re using curing agents, this step also begins the curing process.
Stuffing and Fermenting the Salami
Once your meat is seasoned and rested, it’s time to stuff it into casings and begin the fermentation process. This step is essential to developing the classic tangy flavor and firm texture that define deli-style beef salami. With the right tools, ingredients, and patience, you can create salami that rivals your favorite deli.
Prepare the Casings
Before you stuff the salami, you need to properly prepare your casings. Most traditional salamis use natural beef or hog casings, though synthetic fibrous casings also work well for homemade versions.
- Rinse natural casings thoroughly under cold water to remove any salt or preservatives.
- Soak the casings in warm water for 30 minutes to 1 hour to soften them, making them easier to slide onto your stuffing tube.
- Check the casings for any holes or weak spots and cut off damaged sections.
If you’re using fibrous casings, soak them in warm water for 30 minutes before use to increase flexibility.
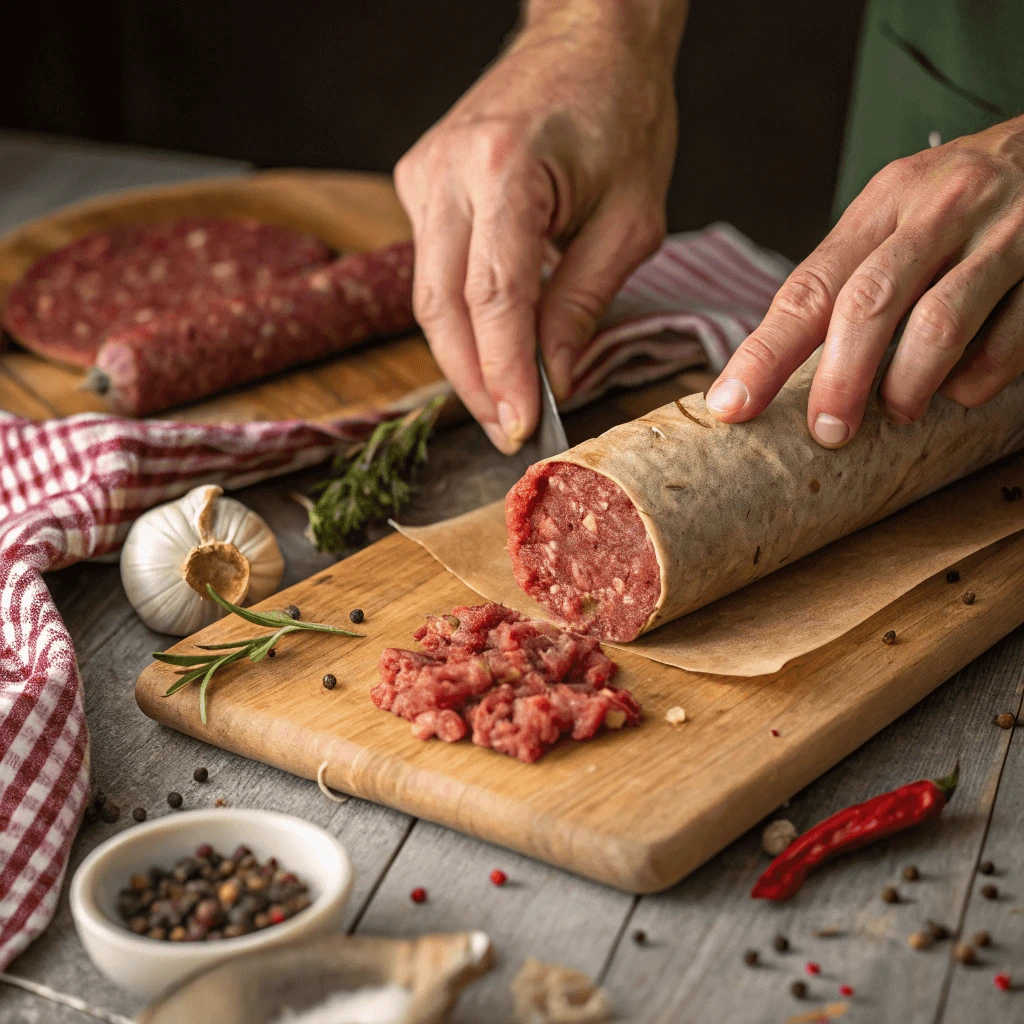
Stuff the Meat into Casings
Once the casings are ready, attach your stuffing tube to your sausage stuffer or stand mixer attachment. Work in small batches to maintain control and reduce air pockets.
- Fill the stuffer with your chilled, seasoned meat mixture.
- Carefully slide the casing onto the tube, leaving a few inches hanging off the end.
- Begin cranking slowly and allow the meat to fill the casing firmly, but not too tightly—this prevents bursting and allows for fermentation expansion.
- Twist or tie off the end of each salami log using butcher’s twine, creating even, consistent links.
As you work, gently prick any visible air bubbles with a sterilized needle to prevent spoilage during fermentation and drying.
Initiate the Fermentation Process
Fermentation is a crucial stage in traditional salami-making. It introduces beneficial bacteria that create acidity, prevent the growth of harmful microbes, and develop the signature tangy flavor of deli-style salami.
- Place your stuffed salami logs on a drying rack or hang them in a warm, humid space—ideally at 75–85°F (24–29°C) with 85–90% humidity.
- Let them ferment for 24–72 hours, depending on the ambient conditions and whether you use starter cultures (recommended for consistent results).
- Monitor the pH of your salami using pH strips or a digital pH meter. Once it reaches 5.3 or lower, fermentation is complete and it’s safe to move on to curing or cooking.
Use starter cultures like Bactoferm if you’re looking for reliable results and controlled fermentation. These cultures add beneficial bacteria that reduce pH more predictably and enhance flavor.
Tips for Fermenting Success
- Keep salami logs away from direct sunlight or drafts during fermentation.
- Rotate or reposition logs every 12 hours to ensure even exposure to humidity and warmth.
- If you don’t have a fermentation chamber, a turned-off oven with the light on and a bowl of warm water inside can simulate a warm, humid environment.
If you prefer not to dry-cure your salami, you can transition directly to cooking after fermentation. Oven-baking, smoking, or poaching are all suitable alternatives for a safe, fully cooked product.
Fermentation may sound complex, but once you try it, you’ll realize how much depth and authenticity it brings to homemade beef salami. With this step complete, you’re just a curing or cooking stage away from enjoying your own deli-style masterpiece.
Drying and Curing for Deli-Style Texture
Once your salami has fermented properly, the next crucial step is drying and curing. This process enhances the texture, deepens the flavor, and ensures the safety and preservation of your homemade deli-style salami. Whether you’re aiming for a firm, dry salami or a slightly moist and tender variety, the right drying and curing methods will help you achieve the perfect deli-style result.
The Importance of Drying and Curing
Drying and curing are vital for transforming your salami into the delicious, shelf-stable product you expect from a deli. These processes remove moisture from the meat, which prevents spoilage and allows beneficial bacteria to continue their work. As the salami dries, it loses weight and its texture becomes firmer. The curing agents in the seasoning also play a critical role in preserving the salami, providing it with a distinct, tangy flavor.
Without proper drying and curing, your salami could spoil or have a rubbery texture. That’s why this stage requires attention to detail and patience.
Choose the Right Drying Environment
Drying salami requires a specific environment with controlled temperature and humidity. Ideally, you want your drying space to be cool, dark, and well-ventilated. Here’s how to set it up:
- Temperature: Aim for a temperature range between 50–60°F (10–16°C). Too high a temperature can cause the salami to cook, while too low a temperature will slow down the drying process and may allow harmful bacteria to grow.
- Humidity: Maintain humidity levels between 70–80%. This is essential to prevent the salami from drying too quickly, which could cause it to become too hard or develop undesirable texture issues.
For optimal results, use a dedicated drying chamber or a cool, airy room with consistent conditions. If you lack a climate-controlled room, you can create a homemade drying setup using a small refrigerator or wine cooler with a humidity tray.
Drying the Salami
The drying process typically takes several weeks, but it varies depending on the size of the salami and the environmental conditions. Here’s how to dry your salami properly:
- Hang the salami: Suspend your salami from hooks or a drying rack, leaving enough space between each log to ensure air circulation.
- Check regularly: Every few days, inspect the salami for signs of mold growth. White mold on the casing is normal and safe, as it indicates that the beneficial bacteria are continuing their work. However, green or black mold is a sign of contamination and should be removed.
- Airflow: Ensure that the drying area is well-ventilated, as proper airflow prevents the salami from becoming overly moist and promotes even drying.
The Curing Process
The curing process is just as essential as drying and often overlaps with it. When you cure salami, you are essentially allowing the beneficial bacteria to continue breaking down the meat and creating lactic acid. This process ensures the salami has its signature tangy flavor and preserves the meat.
Curing also involves reducing the moisture content over time. The more moisture removed from the salami, the firmer and drier the texture becomes. You can monitor the curing progress by weighing the salami at regular intervals. Once the salami has lost about 30-40% of its original weight, it is usually considered fully cured.
Key Factors for Successful Curing
- Monitor humidity and temperature: As mentioned, humidity and temperature are critical factors in successful curing. Keeping these in the right range prevents the salami from drying too fast, which could lead to cracks or uneven texture.
- Time and patience: Curing takes time, typically anywhere from 3 weeks to several months, depending on the type of salami and your preferences. For traditional dry-cured salami, the process can take 1–3 months, whereas quicker varieties can be cured in 2–3 weeks.
- Test the salami: When your salami has cured sufficiently, test the texture. If it’s firm to the touch and doesn’t feel overly soft or spongy, it’s likely ready.
Finishing Touches
Once your salami has reached the desired dryness and texture, you can remove it from the drying environment and let it rest for a few days at room temperature before slicing and serving. The resting period helps redistribute the moisture evenly within the salami and allows the flavors to further develop.
If you plan to store your salami, consider wrapping it in butcher paper or vacuum-sealing it to maintain its freshness. For longer storage, hanging your salami in a cool, dry place will keep it preserved for months.
Tips for Perfecting Your DIY Beef Salami
How to Avoid Common Mistakes
Making deli-style beef salami at home can be a rewarding experience. However, it’s easy to make mistakes that can affect the taste, texture, and safety of your salami. Fortunately, with a bit of attention and care, you can avoid these common pitfalls. Below are the key mistakes to watch out for and how to prevent them.
1. Temperature and Humidity Control
Mistake: One of the most frequent mistakes is failing to control the temperature and humidity. If the temperature is too high, the salami might cook, while insufficient humidity can cause it to dry out too quickly.
Solution: To avoid this, keep the temperature between 50–60°F and the humidity at 70–80%. Additionally, use a thermometer and hygrometer to monitor the conditions, ensuring that they remain consistent throughout the process.
2. Wrong Meat-to-Fat Ratio
Mistake: Using the wrong meat-to-fat ratio is another common issue. If you use too much fat, the salami will become greasy, while too little fat will result in a dry texture.
Solution: For the best results, aim for a 70:30 ratio of lean meat to fat. Cuts like chuck or brisket are ideal for this ratio. Moreover, when grinding, ensure the fat remains in small, visible pieces, which contributes to a better texture.
3. Skipping Fermentation
Mistake: Many people try to rush through the fermentation process, which is crucial for the flavor of your salami. Without proper fermentation, your salami may taste bland and lack its signature tang.
Solution: To avoid this, allow 24–48 hours for fermentation at room temperature. Also, consider using a starter culture to promote the growth of the beneficial bacteria needed for fermentation.
4. Safety Checks
Mistake: Another mistake is neglecting safety measures during the salami-making process. If not handled properly, salami can pose health risks due to bacterial growth or spoilage.
Solution: To ensure safety, always use curing salt to prevent harmful bacteria from growing. Additionally, it’s important to test the salami’s pH level, making sure it drops below 4.6 for safety.
5. Stuffing Errors
Mistake: Overstuffing or leaving air pockets in the casing is a mistake that can lead to uneven curing or spoilage.
Solution: To avoid this, pack the casing tightly but not too full. Furthermore, use a skewer to prick out any air pockets, ensuring that the salami cures evenly and safely.
6. Impatience
Mistake: Rushing through the drying and curing process is a common mistake that can affect the salami’s final quality.
Solution: Be patient and allow your salami to dry and cure at its own pace. While it may be tempting to speed up the process, giving the salami enough time to develop its full flavor and texture will yield the best results.
Storing and Slicing Salami Properly
Once you’ve successfully made your homemade deli-style beef salami, it’s crucial to store and slice it properly to preserve its flavor, texture, and safety. Proper storage and slicing techniques ensure that your salami maintains its quality for a longer period. Here’s how you can do it:
1. Proper Storage for Fresh Salami
Storing Salami in the Refrigerator: After you’ve made your salami, it’s important to store it correctly to keep it fresh. First, wrap the salami tightly in butcher paper or plastic wrap to keep air exposure to a minimum. Then, place the wrapped salami in the refrigerator, where it should remain cool at around 40°F.
Aging Salami: If you want to age your salami further, you can store it in a cool, dry place like a basement or wine cellar. Ideally, it should be stored at temperatures between 50–60°F with a humidity level of 70–80%. This aging process allows the flavors to deepen and intensify over time.
Freezing Salami: If you want to extend the shelf life of your salami, freezing is an option. To do this, slice the salami before freezing, or freeze the entire salami. Wrap it tightly in plastic wrap or vacuum-sealed bags to prevent freezer burn. When you’re ready to enjoy it, thaw the salami in the refrigerator to maintain its flavor and texture.
2. Slicing Salami for the Best Results
How to Slice Salami: When it comes to slicing salami, the technique is just as important as how you store it. It’s best to slice salami thinly to allow its flavors to shine. Use a sharp knife or a meat slicer to cut even slices. For a more authentic deli-style experience, aim for slices that are thin enough to be slightly translucent.
Slicing Right Before Serving: While it may be tempting to slice your salami in advance, it’s best to slice it right before serving. This way, the flavors stay fresh and vibrant. Slicing too far ahead can cause the salami to lose moisture and compromise the texture.
Handling Leftover Slices: After you’ve sliced your salami, store any leftover pieces in an airtight container or wrap them tightly to preserve freshness. Leftover slices should be eaten within a few days to maintain the best quality.
3. Serving and Enjoying Your Salami
Serving Recommendations: When it comes to serving, presentation matters. Arrange the slices in a fan shape on a platter for a more elegant look. You can serve the salami with other deli meats, cheeses, pickles, or olives for a delightful charcuterie board. Salami also pairs wonderfully with fresh bread or crackers.
Pairing Suggestions: To complement the rich and savory flavor of your homemade salami, serve it with a variety of condiments such as mustard, horseradish, or a tangy fruit preserve. It also pairs well with refreshing beverages like sparkling water, lemonade, or iced tea.
Making It Nitrate-Free or Low Sodium
If you’re looking to make a healthier version of beef salami without nitrates or excessive sodium, there are some simple adjustments you can make.
1. Understanding Nitrates in Salami
Nitrates are commonly used in deli meats for preservation and flavor, but some prefer to avoid them due to potential health concerns. Nitrates can convert into nitrites, which in excess may be linked to health issues.
2. Nitrate-Free Alternatives
- Celery Powder: A natural source of nitrates, celery powder can replace traditional curing salts. It’s an easy swap—just use 1 teaspoon for every 5 pounds of meat.
- Pink Himalayan Salt: A great alternative to regular table salt, this adds minerals and works well for curing without the added sodium of commercial salts.
- Antioxidants: Vitamin C (ascorbic acid) or cherry powder can help preserve the salami naturally, contributing both flavor and preservation.
3. Creating Low-Sodium Beef Salami
- Reduce Salt: Cut back on the salt in your recipe to lower the sodium content.
- Use Herbs and Spices: Garlic, black pepper, and paprika can provide flavor without the extra sodium.
- Salt Alternatives: Consider using potassium chloride or low-sodium substitutes to keep the salt content in check.
By making these changes, you can enjoy homemade, nitrate-free, and low-sodium salami that still delivers great taste without the extra preservatives.
Serving Ideas and Variations
Pairing Beef Salami on a Charcuterie Board
Beef salami makes a fantastic addition to any charcuterie board. Its savory and robust flavor pairs beautifully with various ingredients, creating a well-rounded and delightful spread. Let’s take a look at how you can elevate your charcuterie board with beef salami.
1. Complementary Meats:
To start, consider adding other deli meats alongside the beef salami, such as turkey, chicken, or pastrami. This combination introduces a variety of textures and flavors, which complement the salami’s richness.
2. Cheese Pairings:
In addition to meats, beef salami pairs wonderfully with a variety of cheeses. For example, soft cheeses like Brie or goat cheese offer a creamy contrast to the firm salami, while hard cheeses like cheddar or Manchego bring a sharpness that enhances the flavor.
3. Fruits and Vegetables:
To balance the richness of the salami, add fresh fruits like grapes, pears, or apples. These naturally sweet options provide a refreshing contrast. Moreover, pickled vegetables, cucumbers, and cherry tomatoes introduce acidity and crunch, which complement the savory elements.
4. Condiments and Accompaniments:
Next, don’t forget to include tangy condiments such as Dijon mustard or sweet fig jam. These enhance the salami’s flavors, while briny olives add a satisfying bite. These additions also provide a variety of tastes that keep the board interesting.
5. Breads and Crackers:
For the base of your charcuterie board, include crusty baguette slices or crispy crackers. They provide a simple, yet essential texture, offering a neutral canvas that lets the salami and other ingredients shine.
6. Beverage Pairings:
Furthermore, pair your beef salami with beverages like craft beers, sparkling water, or even non-alcoholic drinks like iced tea. These drinks help cut through the richness of the salami, offering a refreshing contrast to the heavy, savory flavors.
7. Presentation Tips:
Finally, when arranging your charcuterie board, aim for a visually appealing spread. Neatly slice your salami and surround it with colorful fruits, cheeses, and crackers. A good mix of textures and colors ensures a well-balanced and inviting presentation.
By carefully pairing beef salami with complementary ingredients, you can create a charcuterie board that will impress your guests and delight their taste buds. The key is to balance flavors and textures, while also keeping the presentation both beautiful and appetizing.
Recipes Using Sliced Beef Salami
Sliced beef salami is a versatile and flavorful ingredient that can elevate a variety of dishes. Below, you’ll find several simple and delicious recipes to incorporate salami into your meals.
1. Beef Salami Sandwiches
To begin, layer slices of beef salami on your preferred bread. Then, add cheese, lettuce, tomatoes, and any condiments you like. Additionally, to enhance the flavor and texture, toast the sandwich to create a crispy, golden exterior. This simple yet satisfying option makes a great lunch or snack.
2. Beef Salami Wraps
Alternatively, if you’re seeking a lighter, on-the-go meal, consider wrapping slices of beef salami in a lettuce leaf or tortilla. Add fresh veggies and cheese for extra flavor. Then, roll everything up tightly, and you have a quick and delicious snack or appetizer that’s perfect for any occasion.
3. Beef Salami Pizza
For pizza lovers, topping your pizza with slices of beef salami can be a game-changer. Simply arrange the salami slices on the dough, and then add mozzarella cheese and your favorite toppings. After baking, the savory flavors of the salami meld beautifully with the gooey cheese and crispy crust, giving you a satisfying pizza that’s anything but ordinary.
4. Beef Salami Stir-Fry
If you’re craving something savory, a beef salami stir-fry is an excellent choice. Start by sautéing vegetables like bell peppers and onions in a hot pan. Once the veggies soften, add the beef salami slices. Stir-fry everything together for a few more minutes, then serve it over rice or noodles. The result is a quick and flavorful meal that’s both hearty and satisfying.
5. Beef Salami and Cheese Platter
When hosting a party or casual gathering, a beef salami and cheese platter is an easy yet impressive appetizer. Arrange slices of beef salami with various cheeses, crackers, and pickles. Not only is this option simple to put together, but it also offers a variety of flavors and textures that guests will enjoy.
6. Beef Salami Pasta
For a rich and savory pasta dish, try incorporating sliced beef salami into your favorite recipe. Toss the salami with tomato sauce or Alfredo sauce, and don’t forget to sprinkle some fresh herbs to enhance the flavor. This dish is perfect for a quick weeknight meal, and it’s sure to please everyone at the table.
7. Beef Salami Salad
Lastly, for a fresh and light option, toss mixed greens with sliced beef salami, cherry tomatoes, cucumbers, and onions. Afterward, drizzle your favorite dressing over the salad for a flavorful finish. This combination is not only refreshing but also filling enough to serve as a main dish or a side salad.
Flavor Variations You Can Try Next Time
Next time you make beef salami, consider experimenting with different flavor variations. By adding various seasonings and ingredients, you can create unique and exciting flavor profiles. Below, we’ll explore several fun and creative ways to modify your homemade beef salami, taking it from classic to innovative.
1. Spicy Beef Salami
If you love heat, why not spice up your beef salami with chili peppers or hot paprika? To make spicy salami, add red pepper flakes, cayenne pepper, or even finely chopped jalapeños to the meat mixture. These ingredients infuse the salami with an irresistible kick. Moreover, if you prefer a mild heat, you can balance it by adding a small amount of honey or brown sugar to mellow out the spiciness while still keeping that fiery flavor.
2. Smoky Beef Salami
For a smoky twist, incorporate smoked paprika, chipotle powder, or liquid smoke into the seasoning blend. These ingredients will give the salami a rich, smoky flavor without the need for actual smoking. Additionally, you can experiment with different types of wood chips when smoking your salami, like hickory or mesquite, to achieve different levels of smokiness. The smoky notes in the salami pair beautifully with bold cheeses and a tangy mustard sauce.
3. Herb-Infused Beef Salami
Herbs can bring a fresh and fragrant layer of flavor to your homemade beef salami. Try adding chopped fresh or dried herbs like rosemary, thyme, oregano, or basil to the meat mixture. The aromatic herbs not only complement the savory beef but also add complexity to the salami’s overall flavor. You can even use a blend of herbs that reflect your personal taste, creating a customized herb-infused salami that fits your palate.
4. Garlic and Onion Beef Salami
For those who enjoy robust and savory flavors, garlic and onion make an excellent addition to beef salami. Minced fresh garlic or onion powder can both work wonders, intensifying the salami’s taste. Garlic gives the salami a bold, earthy richness, while onions provide a sweet and slightly tangy flavor. Together, they create a balanced and satisfying salami that’s sure to please any crowd.
5. Sweet and Savory Beef Salami
If you’re a fan of sweet and savory flavor combinations, you can easily incorporate a touch of sweetness into your beef salami. Ingredients like brown sugar, maple syrup, or molasses can bring a subtle sweetness that contrasts beautifully with the savory beef. Furthermore, adding a pinch of cinnamon or nutmeg can add a surprising depth of flavor, making your salami unique. Sweet and savory salami pairs perfectly with mild cheeses and fruits like apple slices or pears.
6. Lemon and Pepper Beef Salami
A bright, zesty variation on the classic beef salami, lemon and pepper bring a refreshing, tangy twist to the recipe. Add fresh lemon zest or lemon juice to the meat mixture for an aromatic citrus flavor. Then, combine it with freshly ground black pepper to add a gentle heat. This flavor combination works well if you’re looking for a lighter, fresher version of beef salami, perfect for serving at summer gatherings.
Making deli-style beef salami at home may seem intimidating at first, but with the right tools and guidance, it becomes an enjoyable and rewarding process. Not only do you gain full control over the ingredients, but you also get to experiment with flavors and textures that suit your taste. As a result, your homemade salami can taste even better than store-bought versions.
Moreover, preparing your own salami allows you to avoid unnecessary additives while customizing each batch with herbs and spices. Whether you’re crafting charcuterie boards, upgrading sandwiches, or adding depth to pasta dishes, homemade beef salami becomes a versatile star in your kitchen.
To sum it up, by following this easy step-by-step recipe, you’ll be well on your way to creating mouthwatering beef salami that rivals your favorite deli’s. So gather your ingredients, trust the process, and get ready to impress your family and friends with your homemade culinary creation.