Creating a Spiderman cake doesn’t require superpowers—just a little creativity and guidance. Whether you’re making it for a Marvel-themed birthday or to surprise a superhero fan, this step-by-step guide will help you every step of the way. You’ll learn how to choose the perfect cake flavor, plan the design, and decorate with Spidey’s signature web style. This guide keeps things simple and fun, even if you’re new to baking. So grab your apron and get ready to bring your Spiderman cake to life!
Planning Your Ultimate Spiderman Cake Design

Choosing the Right Spiderman Cake Theme
Spiderman comes in many styles, from comic books to blockbuster movies. Choosing the right theme early helps you stay focused and makes decorating easier. It also ensures your cake matches the rest of your party setup.
🕷️ Classic Comic Book Spiderman
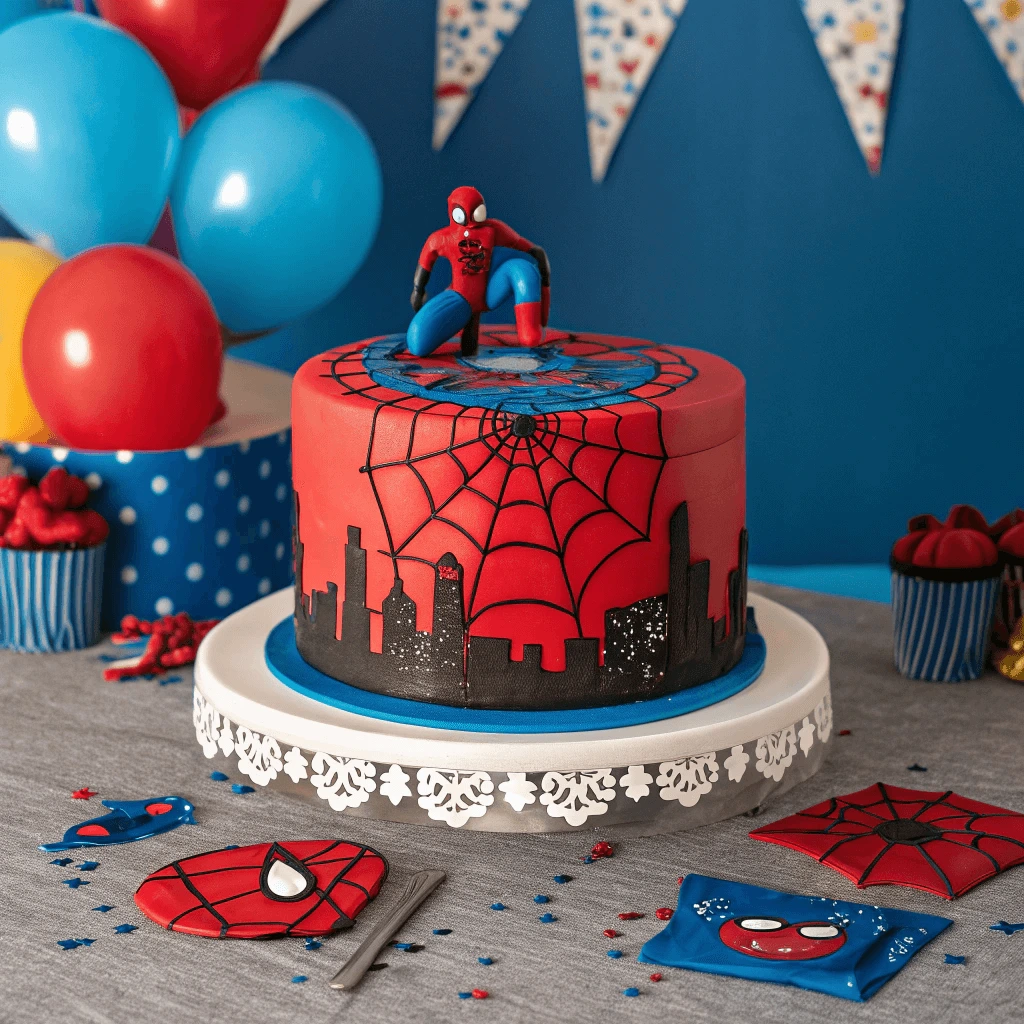
The classic Spiderman design is bold and colorful. Bright red and blue icing, thick black web lines, and the traditional spider logo create a fun, nostalgic look. You can take inspiration from comic book covers or action scenes. Add details like speech bubbles that say “Thwip!” or “Zap!” for extra excitement.
🎥 Movie-Inspired Spiderman
Modern movie versions offer a sleek, high-tech appearance. The Iron Spider suit or the black-and-red upgrade from recent films make great cake themes. Use edible images from the movies or create a fondant mask for a bold centerpiece. These designs work well for older kids and teens who follow the Marvel Cinematic Universe.
🕸️ Miles Morales and Spider-Verse Themes
Miles Morales brings a fresh twist to the Spiderman world. His red and black suit, combined with a graffiti-style edge, makes for a unique cake design. You can add spray-paint effects or use city skyline silhouettes in the background. Include other characters from the Spider-Verse for a fun multiverse theme.
🎉 Matching the Party Theme
Think about the birthday guest’s favorite version of Spiderman. A cake inspired by their choice will feel more personal and exciting. For younger kids, go with bright colors and playful designs. For older fans, a sleek or comic-accurate cake might be the better choice. Matching the cake to the party décor brings everything together.
Gathering Inspiration and Tools
Before you start baking, it helps to get inspired and prepare the right tools. Taking a little time to plan will make the decorating process smoother and more fun. Here’s how to do it.
📸 Find Visual Inspiration Online
Start by searching for Spiderman cake designs on Pinterest, Instagram, and baking blogs. You’ll find everything from simple sheet cakes to detailed 3D creations. Save the designs that catch your eye. Focus on the colors, shapes, and textures you want to recreate. Don’t be afraid to mix ideas or add your own twist. Your cake should reflect your style and the birthday person’s personality.
🧁 Choose a Decoration Style That Matches Your Skill Level
You don’t need to be a professional cake artist to create something amazing. If you’re a beginner, go with simpler designs like Spiderman’s face on a flat cake or cupcakes with edible toppers. More advanced decorators can try layered cakes, fondant figures, or even a cake shaped like Spidey’s mask. Choose a style that you feel confident working with and that fits your timeline.
🧰 Gather Essential Baking and Decorating Tools
Once you’ve picked a design, make a checklist of the tools you’ll need. Most Spiderman cakes require basic tools like:
- Round or square cake pans
- Piping bags and decorating tips
- Offset spatula and cake smoother
- Gel food coloring (especially red, blue, and black)
- Fondant and cutters
- Edible markers or piping gel for web details
If you’re using fondant, you might also need a rolling pin, cornstarch (to prevent sticking), and modeling tools. Check what you already have at home before shopping. Many stores offer themed cake decorating kits that include Spiderman toppers, edible images, and stencils.
📝 Plan Ahead and Stay Organized
Write down your steps and list the ingredients and tools in order. This helps you avoid last-minute stress and makes the decorating process more enjoyable. Set up your workspace before you begin, and give yourself plenty of time. The more prepared you are, the easier it will be to bring your Spiderman cake vision to life.
Selecting the Right Cake Flavor and Size
Choosing the perfect cake flavor and size sets the foundation for your Spiderman cake. You want something that tastes great, fits your guest list, and holds up well during decorating.
🍫 Pick a Crowd-Pleasing Flavor
Start by thinking about who will eat the cake. For kids’ parties, classic flavors like chocolate, vanilla, and funfetti usually go over well. These options are easy to make and work with most types of frosting and fillings.
If you’re serving adults too, consider something more unique like red velvet, cookies and cream, or lemon. Just make sure the flavor doesn’t overpower your decorations or cause the cake to crumble. Stick to sturdy cake recipes that hold their shape, especially if you’re layering or carving.
🎂 Match Cake Size to Your Guest Count
Next, figure out how many people you’re serving. This will help you choose the right cake size and shape. Here are some general guidelines:
- A 9-inch round cake serves about 12–14 people.
- A quarter sheet cake serves around 20–24.
- A two-tier cake can feed 30–50, depending on slice size.
If you’re expecting a big crowd, go with multiple tiers or a sheet cake. For smaller gatherings, a single-layer round or square cake should be enough. You can also bake matching cupcakes to give guests an individual treat and reduce slicing time.
🍰 Consider Cake Shape and Structure
The cake’s shape can add to the overall Spiderman theme. A round cake works well for Spidey’s mask, while a square or rectangular base gives you more decorating space. Want something eye-catching? Try sculpting the cake into a building or cityscape that Spiderman can “climb.”
Just make sure your cake has enough internal structure. Use dowels or cake boards between layers if you’re stacking tiers. That way, your cake stays stable from baking to serving.
📝 Test the Flavor Ahead of Time
If you’re trying a new recipe, bake a small test cake first. This step helps you check the taste, texture, and how well the cake holds up to frosting or fondant. A trial run gives you confidence before the big event—and lets you enjoy a mini treat along the way!
Baking the Perfect Cake Base
Best Cake Recipes for Decorating
The best Spiderman cake doesn’t just look amazing—it also tastes great and holds up during decorating. The right cake recipe gives you a sturdy base that stays moist and delicious under layers of frosting or fondant.
🍰 Choose a Sturdy Yet Moist Base
When decorating, avoid light or crumbly cakes. They may fall apart under the weight of icing, toppers, or fondant. Instead, choose a cake that has a tighter crumb and strong structure. Pound cake, butter cake, and sponge cake are top choices for decorators. These cakes don’t sink in the middle, and they hold their shape when stacked or carved.
If you need color contrast, make a red velvet or chocolate cake. These flavors add drama to every slice and make the cake feel more exciting for guests.
🎂 Vanilla Butter Cake: A Versatile Classic
Vanilla butter cake is one of the best options for detailed decorating. It has a smooth texture and dense crumb, which makes it ideal for carving. You can easily tint the batter with food coloring or add fun flavors like almond or citrus zest.
To decorate it, frost with buttercream or cover it with fondant. The cake holds up beautifully either way.
🍫 Chocolate Cake: Rich Flavor and Great Texture
Chocolate cake is another solid choice for Spiderman cakes. Pick a recipe that uses oil and buttermilk or sour cream—these ingredients create a moist, tender cake that still supports frosting and layering.
Avoid overly fudgy recipes or molten-style cakes. While delicious, they’re too soft for sculpting and might collapse under fondant. Stick to bakery-style chocolate cakes made for decorating.
🍓 Funfetti or Themed Flavor Variations
For a kid-friendly option, funfetti cake always brings a smile. The colorful sprinkles inside the batter match the playful vibe of a Spiderman party. You can also experiment with themed flavors like cookies and cream, strawberry, or even blue raspberry for an extra pop of surprise when slicing.
Just make sure the recipe can support decorations, especially if you’re planning tall tiers or heavy toppers.
📝 Test Your Recipe in Advance
Before decorating a full-size cake, bake a small test version of your chosen recipe. This lets you evaluate the flavor, texture, and how well it holds up under icing. It’s better to discover potential issues early than on the big day.
Once you find a recipe you love, stick with it. A reliable cake base makes the decorating process much smoother and far more enjoyable.
Creating Layers for a Tiered Look
A tiered Spiderman cake adds height, drama, and visual appeal to your dessert. It makes a bold statement at any birthday party. Creating layers for a tiered cake can be simple with the right approach, and it lets you get creative with different designs.
🎂 Choose the Right Cake Sizes for Stacking
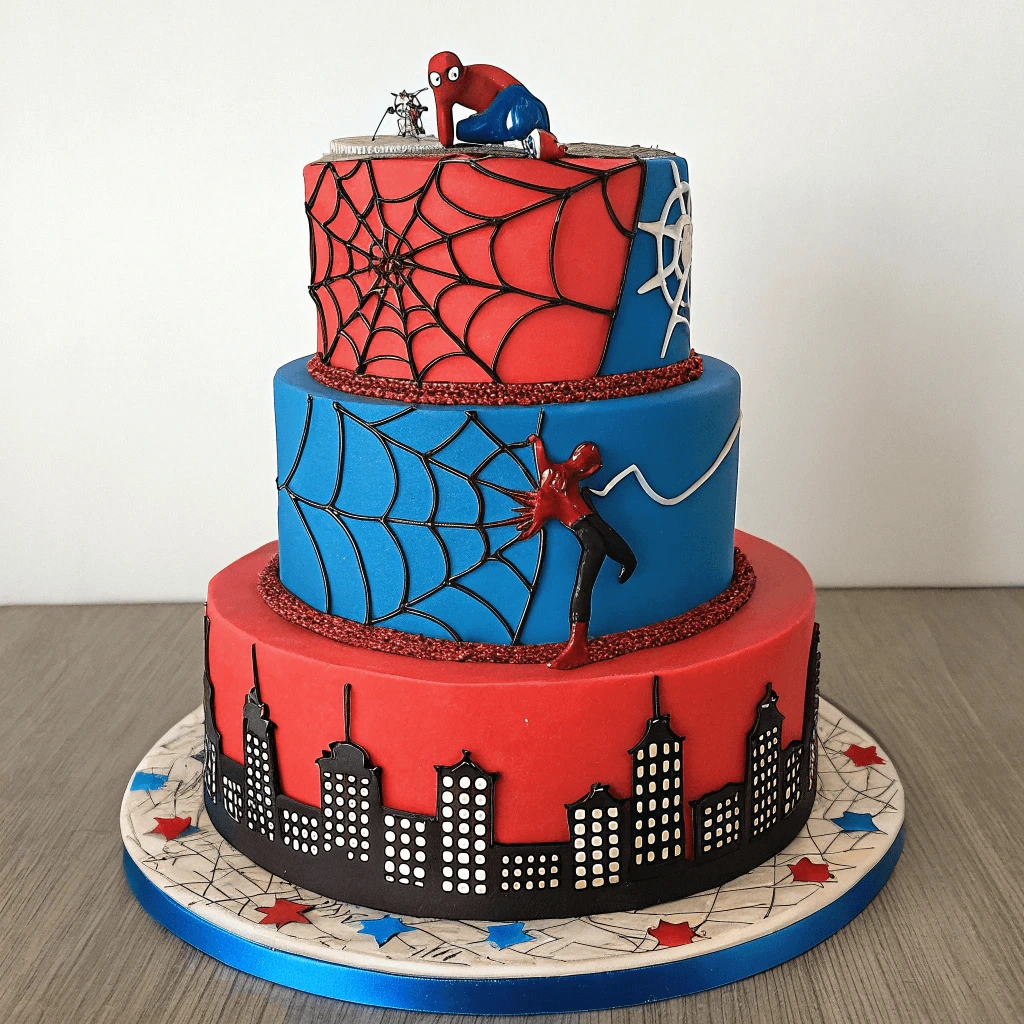
When designing a tiered cake, the key is selecting the right cake sizes. Typically, the bottom layer is the largest, and each layer above it is slightly smaller. For a basic three-tier cake, use these sizes:
- Bottom layer: 10–12 inches
- Middle layer: 8–10 inches
- Top layer: 6–8 inches
This creates a nice visual balance. You can adjust the sizes depending on your guest count or design preferences. Keep in mind that larger cakes will need more frosting and support.
🍰 Bake, Cool, and Level Your Cakes
Once you’ve chosen your cake sizes, bake each layer and allow them to cool completely. After cooling, level each layer using a serrated knife. This step is crucial because it creates a flat surface, which ensures your cake stacks evenly and doesn’t tip over.
To level the cakes, slice off the domed top of each layer. This allows the layers to stack neatly and avoids air pockets between them.
🧁 Stack with Dowels and Cake Boards for Support
Stacking a tiered cake requires strong support to prevent it from collapsing. Use dowels or straws as supports for each layer. Insert the dowels into the bottom tier, ensuring they are evenly spaced. Place a cake board on top of the dowels, then set the next layer of cake on top.
Repeat this process for each tier. For added stability, use a cake separator plate between the second and third layers. This will keep your tiers from shifting or sinking into one another.
🍰 Fill Each Layer with Frosting or Filling
To create smooth layers, spread a generous amount of frosting or filling between each cake layer. Buttercream, whipped cream, or ganache work well for tiered cakes. When stacking, press each layer gently to avoid shifting. Use an offset spatula to smooth the frosting for a clean, even surface.
If you want to add extra flavor, consider including fruit preserves, chocolate ganache, or cream cheese frosting between layers. Just make sure the filling isn’t too runny, as it could cause the cake to slide.
🎨 Cover the Cake and Add Final Touches
Once the cake is stacked, cover it with a smooth layer of frosting or fondant. To achieve a sleek look, use a cake smoother to smooth out the frosting. If you’re using fondant, roll it out and carefully drape it over the cake, smoothing it out around the edges.
Now it’s time for the fun part—decorating! Add Spiderman-themed details like webs, spider logos, and even Spidey’s face on the top tier. You can also incorporate small toys, edible images, or fondant sculptures to make the design pop.
Coloring and Flavoring the Batter
Coloring and flavoring the batter is a fun and creative part of making a Spiderman cake. Not only does it help bring the theme to life, but it also adds layers of flavor that will delight your guests. Whether you’re going for bold red and blue colors or a more subtle approach, here’s how to get it just right.
🎨 Use Gel Food Coloring for Vibrant Colors
When making a Spiderman cake, you’ll need to achieve rich, vibrant colors. Gel food coloring works best for this purpose. Unlike liquid food coloring, gel coloring gives you more control over the intensity without altering the cake’s texture.
Start with a small amount of gel, and add more gradually to achieve the desired shade. For a classic Spiderman cake, you’ll need red and blue for the cake batter. You can also use black for details like Spidey’s mask or webbing. Be sure to mix the gel thoroughly to avoid streaks and ensure even coloring throughout the batter.
🍓 Flavor the Cake for Extra Depth
While color is important, flavor is just as crucial to make your Spiderman cake a hit. Depending on the colors you’ve chosen, you can incorporate flavors that complement the cake’s look. Here are a few ideas:
- Red Velvet Cake: Adds a slight cocoa flavor and deep red color. It’s a perfect match for Spiderman’s vibrant red look.
- Vanilla or Almond: These flavors work well with almost any color and provide a neutral base for decorating.
- Chocolate Cake: Use chocolate cake for the blue layer to create contrast with the red velvet or vanilla layers.
Experiment with extracts to enhance the flavor. A touch of almond, vanilla, or lemon extract can elevate the taste. For a Spiderman-themed cake, I recommend using complementary flavors like vanilla with a hint of almond or chocolate with a rich vanilla buttercream.
🍫 Achieve Marble or Ombre Effects
For a creative twist, consider marbling or creating an ombre effect in your batter. To create a marbled look, mix red and blue batters together and swirl them with a knife before baking. This gives the cake a dynamic, playful design when you cut into it.
Alternatively, you can create an ombre effect by gradually transitioning from dark blue at the bottom layer to lighter blue at the top. This adds depth and interest to your cake’s overall appearance.
🧁 Testing the Flavor and Color
Before moving forward, it’s always a good idea to test your colored batter. Bake a small batch of your cake or cupcakes using the batter you’ve colored and flavored. This lets you check the color and flavor before committing to the full cake. Plus, it gives you a sneak peek of how the final product will look—and taste!
If the colors aren’t as vibrant as you want, you can add a little more gel food coloring. If the flavor isn’t bold enough, increase the amount of extract or flavoring oil to suit your taste.
🍰 Avoid Overmixing the Batter
When incorporating color or flavor into your batter, mix it gently. Overmixing can lead to tough cake layers. Mix the ingredients just until they’re combined and the color is evenly distributed. This ensures your cake remains soft, moist, and light, ready for the perfect decoration.
Decorating Like a Pro with Fondant and Frosting
Creating a Spiderman Web Design
The Spiderman web design is one of the most iconic elements of a Spiderman cake. This web design will make your cake stand out and tie the theme together perfectly. Whether you’re using fondant, buttercream, or edible images, you can create a stunning, intricate web pattern with the right techniques.
🕸️ Sketch the Web Design Before You Start
Before you dive into decorating, take a moment to plan your web design. You can sketch it lightly on a piece of parchment paper to visualize where the web will go on the cake. Some bakers prefer to sketch the web on the cake itself using a toothpick or edible marker as a guide.
To achieve the perfect web design, start with a simple grid. Draw concentric circles on the cake and then connect them with straight lines to form the web. Remember, the lines should be thin and evenly spaced to maintain the delicate look of a spider’s web.
🍰 Use Royal Icing or Buttercream for the Web
When it comes to creating the web, royal icing or buttercream are two of the most popular choices. Both offer smooth, easy-to-pipe consistency that will allow you to create clean, sharp lines.
- Royal Icing: Royal icing is ideal for detailed web designs. It hardens as it sets, which makes it perfect for creating a sturdy, intricate web that will last throughout the party. To make royal icing, mix powdered sugar, meringue powder, and water until it reaches a stiff consistency. Once prepared, place it in a piping bag with a fine tip to pipe the web onto the cake.
- Buttercream: For a softer, creamier look, use buttercream. Buttercream is easy to work with and creates a smooth texture, but it may soften over time. If you want your web to stay crisp for longer, consider refrigerating the cake until it’s time to serve.
🕷️ Piping the Web on the Cake
Start by piping the outermost circle of the web, then work your way inwards. Focus on symmetry by ensuring that each layer of the web lines up. After completing the circular outlines, pipe the straight lines that connect the rings. Keep the lines thin and spaced evenly to create a delicate, authentic web effect.
If you’re looking for a more artistic take on the web, you can experiment with the web’s shape. You can make it look like the web is wrapping around the sides of the cake or spilling over the top layer, adding movement and drama.
🎨 Add Spider Web Detailing with Fondant
If you prefer a 3D effect or a more polished look, consider using fondant to create the web. Roll fondant out into a thin sheet, and then use a sharp knife to cut out web designs. Afterward, attach the fondant webs to the cake using a little bit of water or edible glue. This method can give your cake a sharp, clean finish and help the web stand out as a primary design feature.
For an extra touch, add a small fondant spider to the web for authenticity. You can use black fondant or edible black coloring to create the spider’s body, legs, and details.
🕸️ Add Texture and Highlights to the Web
To make your web design pop, consider adding some texture or highlights. You can use a small brush to lightly dust the web with edible glitter or shimmer dust, which gives the web a magical, sparkling effect. Alternatively, pipe small dots of frosting or icing along the web’s lines for a bit of texture.
If you want to make the web even more dynamic, you can add some darker lines to give it depth, making the web look like it’s casting a shadow on the cake’s surface. This adds dimension and realism to your design.
Using Fondant for Spiderman’s Face or Suit
Fondant is a great medium for creating detailed Spiderman decorations like his mask, suit, and emblem. Its smooth texture makes it ideal for shaping and adding intricate details.
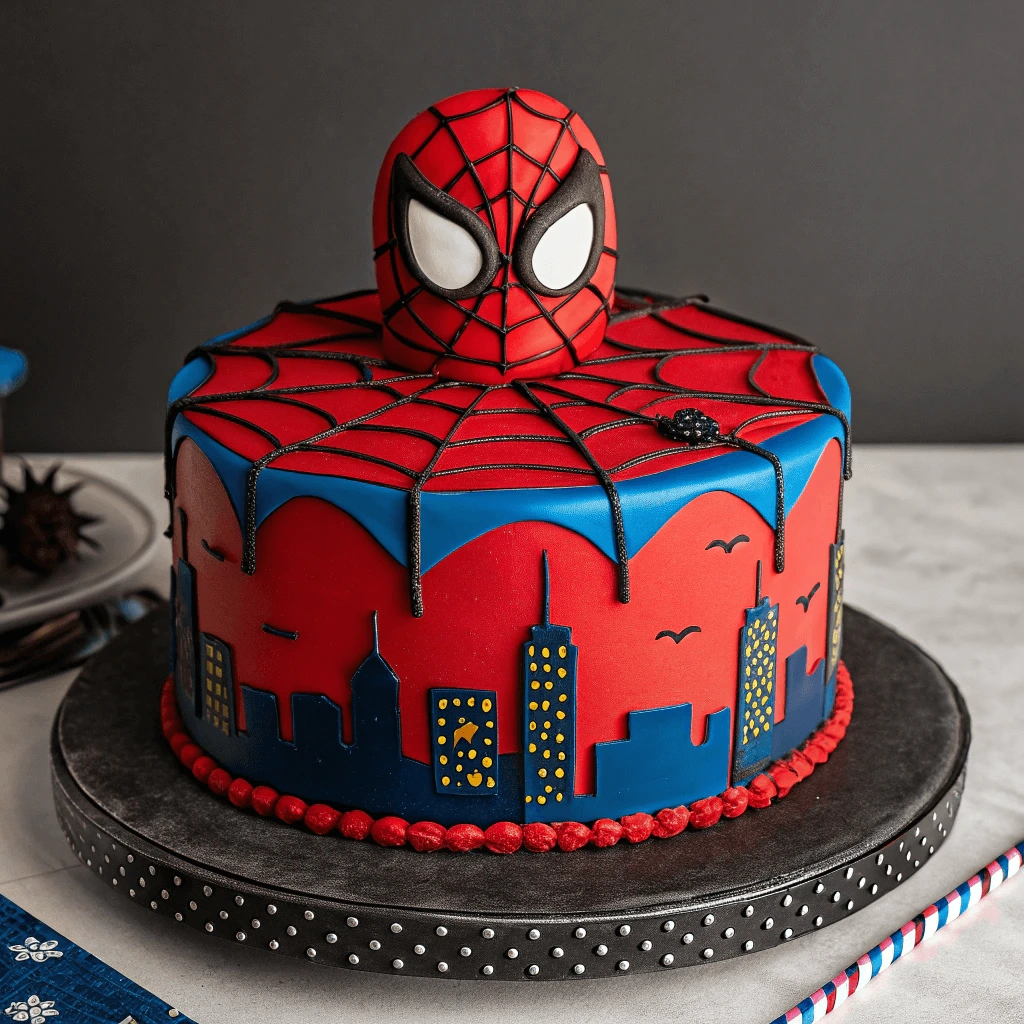
🎭 Creating Spiderman’s Face with Fondant
To create Spiderman’s face:
- Shape the Mask: Roll out a thin layer of white fondant into a circle and attach it to the cake.
- Add Eyes: Shape white fondant into eye shapes, then outline with black edible markers.
- Texturize the Mask: Use a fine mesh strainer or fabric to add texture for a realistic look.
- Attach the Mask: Use water or edible glue to secure the mask to the cake.
🕸️ Crafting Spiderman’s Suit with Fondant
For Spiderman’s suit:
- Spider Emblem: Roll black fondant into a spider shape and attach it to the chest area of the cake.
- Red Suit: Roll out red fondant to cover the cake, smoothing it over for a clean look.
- Webbing Design: Pipe royal icing or use fondant ropes to create a webbing pattern on the suit.
🕷️ Adding Hands and Feet
- Hands and Feet: Shape small pieces of red fondant for hands and feet, adding fingers and toes. Attach them to the cake and continue the webbing on these areas.
🍰 Tips for Perfect Fondant Work
Edible Glue: Use edible glue to secure fondant pieces and create seamless attachments.
Prevent Sticking: Use cornstarch or powdered sugar to keep fondant from sticking.
Keep It Covered: Store unused fondant in plastic wrap to prevent it from drying out.
Adding Superhero Cake Toppers
Superhero cake toppers bring your Spiderman cake to life, adding personality and flair. Whether you choose figurines or edible decorations, toppers elevate the design, making it stand out.
🦸♂️ Choosing the Right Toppers
Select toppers that align with your theme. For Spiderman, consider figurines of Spiderman, other Marvel characters, or superhero logos. Ensure the toppers are food-safe and durable.
- Figurines: Use action-packed Spiderman figurines as the centerpiece.
- Custom Toppers: Create edible toppers from fondant for a unique touch.
- Superhero Logos: Decorate with Spiderman logos or emblems made from fondant or edible printing sheets.
🕷️ Using 3D Spiderman Figurines
3D figurines are perfect for making the cake look dynamic. Position a Spiderman figurine on top or in action poses around the cake to add excitement and drama.
🕸️ Incorporating Superhero Symbols
Add superhero logos like Spiderman’s web or Iron Man’s arc reactor to complete the look. Use fondant or royal icing to create these symbols on the cake.
🍰 Placement and Presentation
Consider where to place your toppers for maximum impact. A figurine at the center or scattered superhero logos along the sides can create a balanced, eye-catching design.
Spiderman Cake Ideas for Birthday Parties
Spiderman Cake for Kids
A Spiderman cake for kids is the perfect way to make a birthday or special event even more exciting. Children love the vibrant colors, fun designs, and the fact that they get to enjoy a cake themed around their favorite superhero. In this section, we’ll explore how to create a Spiderman cake that’s fun, kid-friendly, and perfect for any celebration.
🕷️ Choose Kid-Friendly Cake Designs
When designing a Spiderman cake for kids, it’s important to keep it fun and visually exciting. Bright colors, action-packed designs, and playful elements will engage children and spark their imaginations.
- Simple Spiderman Face: Focus on creating a large, friendly Spiderman face as the cake’s centerpiece. Kids will love the cartoonish, approachable style over a realistic design.
- Webbing Design: Use bold, graphic lines to create a fun, easy-to-understand web design on the cake. Bright red and blue fondant will make this feature pop.
- Action Poses: Consider adding figurines of Spiderman in action, like swinging from webs or striking superhero poses. This adds energy and motion to the cake’s overall design.
🍰 Fun and Easy Decorations
The key to a successful Spiderman cake for kids is keeping the decorations playful and easy to understand. Use edible decorations that enhance the superhero theme without being too complex.
- Fondant Elements: Fondant is great for creating simple shapes like Spiderman’s eyes or the spider logo. You can also mold it into web patterns or create a textured mask.
- Cupcake Toppers: If you’re making cupcakes, add small Spiderman-themed toppers to each one. These can be fondant shapes or small plastic figurines.
- Edible Paint or Markers: Use edible markers or food coloring to draw Spiderman’s suit, mask, and webbing. It’s an easy way to create a custom design without any complicated techniques.
🕸️ Selecting the Right Flavor for Kids
The flavor of the cake is just as important as the design when making a cake for kids. You want something that is universally loved and easy for children to enjoy.
- Chocolate or Vanilla: Stick to classic flavors like chocolate or vanilla, which are kid favorites. You can also try fun variations like chocolate fudge or red velvet, which fit well with the vibrant colors of a Spiderman theme.
- Fun Fillings: Consider adding a fun filling, such as chocolate ganache, strawberry jam, or vanilla custard, to make each bite more exciting for kids.
- Smooth Buttercream: Use a smooth buttercream frosting for decorating. It’s easy to pipe, spreads well, and has a sweet flavor that kids love.
🎂 Serving and Presentation Tips
Once you’ve finished the cake, think about how to present it to the kids. The presentation plays a big role in creating excitement and enhancing the experience.
- Personalize the Cake: If you know the birthday child’s favorite Spiderman movie or comic, incorporate elements from that into the cake design. For example, you could include different versions of Spiderman from the comics or movies.
- Use Fun Cake Stands or Plates: Display your cake on a fun, superhero-themed cake stand or plate. This will help set the tone for the party and make the cake even more enticing.
- Create a Cake Cutting Ceremony: When it’s time to cut the cake, make it a special moment by involving the kids. You could pretend that Spiderman is “swinging” onto the cake or create a mini superhero story as you cut it.
🧁 Spiderman Cake for Party Favors
To extend the theme, consider giving out Spiderman-themed party favors alongside the cake. This can include small toys, Spiderman masks, or cupcakes decorated to match the theme. It’s a great way to keep the fun going long after the cake is eaten.
Spiderman Cake for Teens or Adults
Creating a Spiderman cake for teens or adults can balance fun and sophistication. Here’s how to design a cake that appeals to a more mature audience while keeping the superhero theme.
🕷️ Sleek and Modern Design
Opt for minimalist designs to appeal to older audiences. A subtle web pattern or a simple Spiderman mask can give the cake a refined look. Using bold colors like black, red, and silver adds sophistication.
🍰 Adult-Friendly Cake Flavors
Teens and adults enjoy richer flavors. Consider chocolate mousse, red velvet, or even unique options like lemon or carrot cake. These flavors enhance the Spiderman theme while offering a more mature taste.
🕸️ Advanced Decorating Techniques
Use techniques like airbrushing or 3D fondant sculptures to elevate your design. A Spiderman figurine or detailed web designs can create an impressive, superhero-inspired effect.
🎂 Presentation Ideas
Place the cake on a sleek stand and incorporate themed accessories, like Spiderman candles or figurines. These elements can enhance the theme without overwhelming the design.
🍰 Personalizing the Cake
Add personal touches such as the celebrant’s name in Spiderman-style font or incorporate other Marvel characters. This makes the cake unique and special for the person celebrating.
Themed Party Decorations to Match
For a complete Spiderman-themed party, the decorations should reflect Spiderman’s iconic colors and style. Use these ideas to create a fun and immersive atmosphere.
🕷️ Spiderman Color Scheme
Start with red, blue, and black as your main colors. Use them across all party elements, such as:
- Table Settings: Red and blue tablecloths, plates, and napkins. Add web patterns for extra detail.
- Balloons & Streamers: Red and blue balloons or ones shaped like Spiderman’s face. Hang streamers and banners to enhance the look.
🍰 Table Centerpieces
Make your table stand out with Spiderman-themed centerpieces:
- Spider Web Tablecloth: Use a black cloth with white yarn for a web effect.
- Spider Figurines: Place Spiderman figures at the center of the table.
- Webbed Candles: Opt for candle holders in the shape of webs.
🕸️ Wall Decorations & Photo Booth
Set the scene with Spiderman wall art and a photo booth for fun photos:
- Spider Web Wall Art: Hang Spiderman posters or use decals.
- Photo Booth Props: Include Spiderman masks and capes for guests to wear.
🎂 Party Favors
Send guests home with themed favors:
- Goodie Bags: Fill them with Spiderman toys, stickers, and treats.
- Themed Cookies/Cupcakes: Decorate cookies or cupcakes with Spiderman designs.
🕷️ Fun Activities & Games
Add some interactive fun with Spiderman-themed games:
- Web-Slinging Contest: Have guests throw webs into a target.
- Spiderman Trivia: Quiz guests on Spiderman facts, with small prizes for winners.
Final Tips, Storage, and Presentation
Transporting Your Spiderman Cake Safely
Once your Spiderman cake is decorated and ready, the next challenge is getting it to the party without damage. Proper transportation is key to preserving all your hard work. Here are some tips to ensure your cake arrives at its destination in perfect condition.
🚗 Choose the Right Cake Box or Carrier
To protect your cake, you need a sturdy box or cake carrier. The cake should fit snugly without being too tight. If you’re using a tiered cake, make sure the box is tall enough to accommodate the layers.
- Cake Box: A strong, corrugated cardboard box is a reliable option. It prevents your cake from shifting and keeps it stable.
- Cake Carrier: If you’re transporting a smaller cake, a plastic cake carrier with a secure lid is perfect. These often come with handles for easier transport.
🧊 Keep the Cake Cool
The temperature of your cake matters, especially if you’ve used buttercream or fondant. To keep everything in place, you’ll want to keep your cake cool during transportation.
- Chill the Cake Before Transport: Place the cake in the fridge for 30 minutes before you start the journey. This helps set the frosting and fondant, reducing the chances of it melting.
- Use Ice Packs: If you’re driving a long distance, place a few ice packs under the cake box to maintain a cool environment. Avoid placing ice directly on the cake.
🚙 Drive Carefully
When transporting a cake, driving carefully is essential. Try to avoid sudden stops, sharp turns, or bumpy roads, as these can cause the cake to shift or even collapse.
- Place the Cake on a Flat Surface: Ensure that the cake sits on a flat, level surface, such as the floor of the car or the back seat. Avoid placing it in the trunk or on the passenger seat where it could be jostled.
- Drive Slowly: Take extra care while driving, especially if you’re transporting the cake on a long journey. Avoid sudden stops or turns that could disrupt the structure of your cake.
🏠 Secure the Cake During Transit
To prevent the cake from moving around or tipping over, secure it during the drive.
- Non-Slip Mat: Place a non-slip mat under the cake box. This will keep it from sliding around as you drive.
- Cake Board: Ensure your cake is sitting on a sturdy cake board. This provides extra stability and makes it easier to lift or move the cake if necessary.
🍰 Quick Tips for Emergency Situations
Despite all your precautions, accidents can still happen. Here are some quick fixes for common issues:
- Fondant Cracks: If the fondant cracks during transit, gently smooth the cracks with your fingers or a tool and apply a little water to seal the damage.
- Melting Frosting: If your frosting starts to melt, place the cake in a cool area and let it set. You may need to apply a fresh layer of frosting if it becomes too soft.
- Cake Shifting: If the cake shifts, carefully reassemble the layers and ensure the decorations are intact. It’s helpful to bring a small repair kit (such as extra frosting or decorations) for emergencies.
🎉 Unloading and Displaying the Cake
When you arrive at the party, unload the cake with care. Choose a sturdy, flat surface to display it, such as a table or cake stand. Make sure the cake is positioned where guests can admire it but away from any hazards like heat or heavy traffic.
Storing Leftovers Without Losing Detail
Proper storage helps preserve your Spiderman cake’s freshness and design. Follow these tips to keep it looking great and tasting fresh, whether you’re storing it for a few days or freezing it for longer.
🍰 Refrigeration Tips
If your cake has buttercream or fondant, refrigeration is ideal.
- Wrap and Protect: Wrap the cake tightly in plastic wrap to avoid drying out and use an airtight container for extra protection.
- Cool, Stable Area: Store it in a consistent, cool spot in the fridge to maintain freshness.
🕸️ Storing Fondant-Topped Cakes
Fondant cakes should be stored differently to prevent them from sweating or cracking.
- Room Temperature for Short-Term: Keep the cake at room temperature for up to two days, away from heat and sunlight.
- Cool Storage: If storing for longer, place it in a cool, dry place, using a cake box or dome for protection.
🧁 Freezing Cake
For longer storage, freezing works well, especially for buttercream or fondant cakes.
- Wrap Well: Wrap the cake in plastic wrap and foil to lock in moisture.
- Thaw Slowly: Thaw frozen cake in the fridge for several hours, then bring it to room temperature before serving.
🎂 Storing Decorations
To protect intricate fondant decorations:
- Separate Storage: Keep decorations in an airtight container, away from moisture and the fridge.
- Careful Handling: When serving, cut the cake carefully to avoid damaging decorations.
Capturing the Perfect Cake Photos
Taking great photos of your Spiderman cake can highlight your hard work and creativity. With the right techniques, you can ensure that your cake looks just as stunning in pictures as it does in person. Here are a few tips to help you capture the perfect cake photos.
📸 Lighting Matters
Good lighting is key to capturing vibrant and clear photos of your cake.
- Natural Light is Best: Always try to take your photos in natural light. Place the cake near a window with soft, diffused light to avoid harsh shadows and overexposed areas.
- Avoid Direct Sunlight: Direct sunlight can cause colors to appear washed out. Opt for indirect light or shade to keep the cake’s details sharp.
- Use a Softbox for Studio Lighting: If you’re shooting indoors without natural light, use a softbox or a ring light to mimic soft, even lighting.
🍰 Choose the Right Angle
The angle you choose can significantly affect how your cake looks in photos. Different angles showcase different aspects of the design.
- Eye-Level Shots: For cakes with intricate details like the Spiderman web or facial features, shoot at eye level to highlight the decorations.
- Top-Down Shots: If your cake has multiple layers or a detailed design on top, a top-down shot captures the full effect.
- Close-Up Photos: Zoom in on unique decorations, such as the Spiderman face or web details. This draws attention to the finer elements of the design.
🕸️ Create a Clean Background
The background can either enhance or distract from your cake.
- Simple and Neutral Background: Use a simple tablecloth, wooden surface, or solid-colored backdrop to keep the focus on your cake. Avoid busy patterns that compete with the cake’s design.
- Complement the Theme: For a Spiderman cake, consider using themed decorations like comic books, action figures, or superhero symbols in the background. Just make sure they don’t overpower the cake.
🎉 Styling and Composition
Take time to arrange your scene for a well-composed photo.
- Place the Cake on a Decorative Stand: A cake stand elevates the cake and adds elegance to the shot. Choose one that complements the cake’s theme.
- Add Themed Props: Small superhero figurines, webbing, or even mini Spiderman toys can add to the atmosphere. Just don’t overcrowd the frame.
- Use the Rule of Thirds: Place the cake off-center in the frame for a more dynamic and visually pleasing composition. This technique helps create a balanced, professional look.
📱 Focus and Clarity
Clear, sharp photos are essential, so make sure your camera is focused correctly.
- Focus on the Details: Ensure that the cake’s design is in sharp focus. If you’re using a smartphone, tap the screen to focus on the cake’s most important details.
- Steady Your Camera: Use a tripod or steady your phone to avoid blurry photos. If you don’t have a tripod, hold your camera with both hands to minimize movement.
🧁 Post-Editing for Enhancement
After capturing your photos, some light editing can enhance your pictures.
- Adjust Brightness and Contrast: Fine-tune the brightness to ensure the cake’s details are visible. Increase contrast slightly to make the colors pop.
- Crop for Perfection: Crop your photos to remove any unnecessary distractions in the background or edges. This helps keep the focus on the cake.
Creating the ultimate Spiderman cake is a fun and rewarding experience that allows you to showcase your creativity. By following these steps—from selecting the right theme and flavor to adding the perfect decorations—you’ll craft a cake that’s sure to impress. Whether it’s for kids, teens, or adults, a Spiderman cake brings excitement to any celebration. Enjoy the process, and don’t forget to capture the perfect photo to remember your masterpiece!