Chocolate Covered Oreos are the ultimate indulgence, combining the rich, creamy goodness of chocolate with the crunch of an Oreo cookie. Whether you’re celebrating a special occasion or simply craving a sweet treat, these homemade delights are always a hit. Plus, with easy swaps for healthier ingredients, you can enjoy this classic snack guilt-free! By choosing dark chocolate, alternative sweeteners, and gluten-free Oreos, you can create a more nutritious version without sacrificing flavor. Let’s dive into how to make the perfect DIY Chocolate Covered Oreos right at home!
Why DIY Chocolate Covered Oreos Are the Ultimate Sweet Treat
The Combination of Chocolate and Oreos
The combination of chocolate and Oreos is a match made in dessert heaven. The smooth, creamy chocolate coats the crunchy, slightly sweet Oreo, creating a perfect balance of textures and flavors. This sweet and salty duo is loved by many for its satisfying crunch followed by the rich taste of chocolate.
Perfect Flavor Balance
Chocolate adds a velvety sweetness, while the Oreo brings a slight saltiness and crunch. Together, they create a flavor contrast that tantalizes the taste buds and keeps you coming back for more.
A Versatile Treat
You can mix it up with different types of chocolate—milk, dark, or white—and even add fun toppings like sprinkles or crushed nuts. The options are endless, making chocolate-covered Oreos perfect for any occasion.
Nostalgic Comfort
For many, chocolate-covered Oreos bring back memories of childhood treats. The familiar combo evokes feelings of comfort and joy, which is why it continues to be a favorite for dessert lovers of all ages.
Perfect for All Occasions
Chocolate-covered Oreos are more than just a sweet snack; they are the ideal treat for any occasion. Whether you’re celebrating a holiday, hosting a party, or simply enjoying a casual dessert, these decadent treats fit seamlessly into any event. Their versatility, ease of customization, and irresistible flavor make them a favorite choice for a variety of occasions.
Celebrations and Holidays
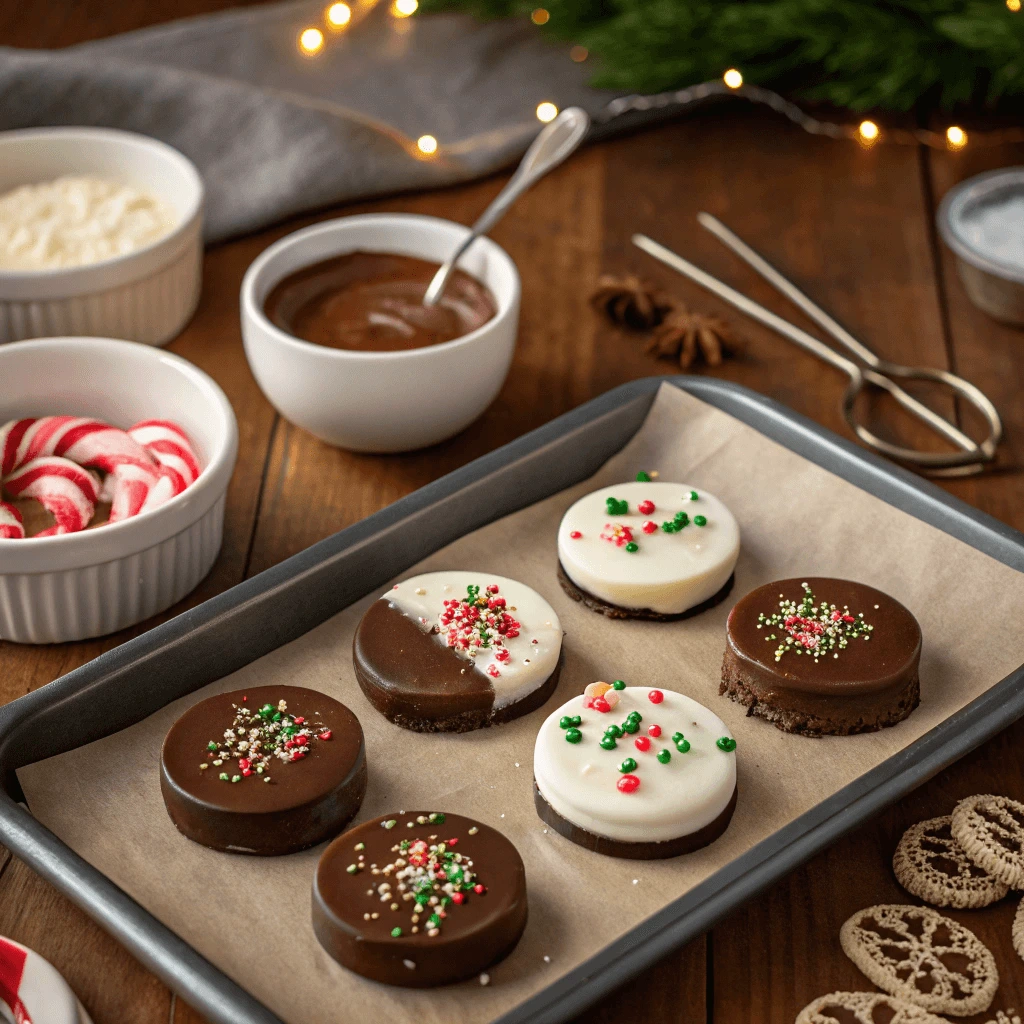
Chocolate-covered Oreos are perfect for special celebrations like birthdays, anniversaries, or holiday gatherings. You can easily customize them with festive decorations to match the theme of the occasion. For example, red and green sprinkles for Christmas, pastel candy for Easter, or pink frosting for Valentine’s Day make these treats both visually appealing and delicious. They add a personalized touch to any celebration, delighting guests and leaving a lasting impression.
Casual Gatherings and Parties
If you’re hosting a casual get-together or a party, chocolate-covered Oreos make for an effortless yet crowd-pleasing snack. They’re easy to make in large batches, ensuring there’s enough to go around. Whether served on a dessert table or individually wrapped for guests to take home, these treats always impress. Their versatility also allows you to tailor the toppings to your guest’s tastes—sprinkles, nuts, or even a dash of sea salt for an extra twist.
Simple Sweet Treat for Anytime
Chocolate-covered Oreos are also great for everyday indulgence. After a long day, a few of these delicious cookies can be the perfect pick-me-up. They’re simple to make, so you can easily prepare them whenever you need a sweet treat. Their rich chocolate coating and crunchy texture offer a satisfying snack any time of day, whether you enjoy them with coffee in the morning or as a dessert after dinner.
Customizable with Toppings
One of the best things about chocolate-covered Oreos is how easily you can customize them with a variety of toppings. This adds flavor, texture, and a personal touch to your treats.
Crunchy Additions
For extra crunch, try adding chopped nuts like almonds, pistachios, or walnuts. These pair perfectly with the smooth chocolate and provide a satisfying bite.
Fruity Toppings
For a refreshing twist, top your Oreos with dried fruits like cranberries, raisins, or shredded coconut. These additions bring natural sweetness and a chewy texture that balances the crunch of the cookie.
Sweet and Savory Combinations
To create an interesting contrast, sprinkle a little sea salt on top or drizzle with caramel or peanut butter. These savory-sweet combinations add depth to the flavor and make the treats even more irresistible.
How to Make DIY Chocolate Covered Oreos: Step-by-Step Guide
Melting the Chocolate
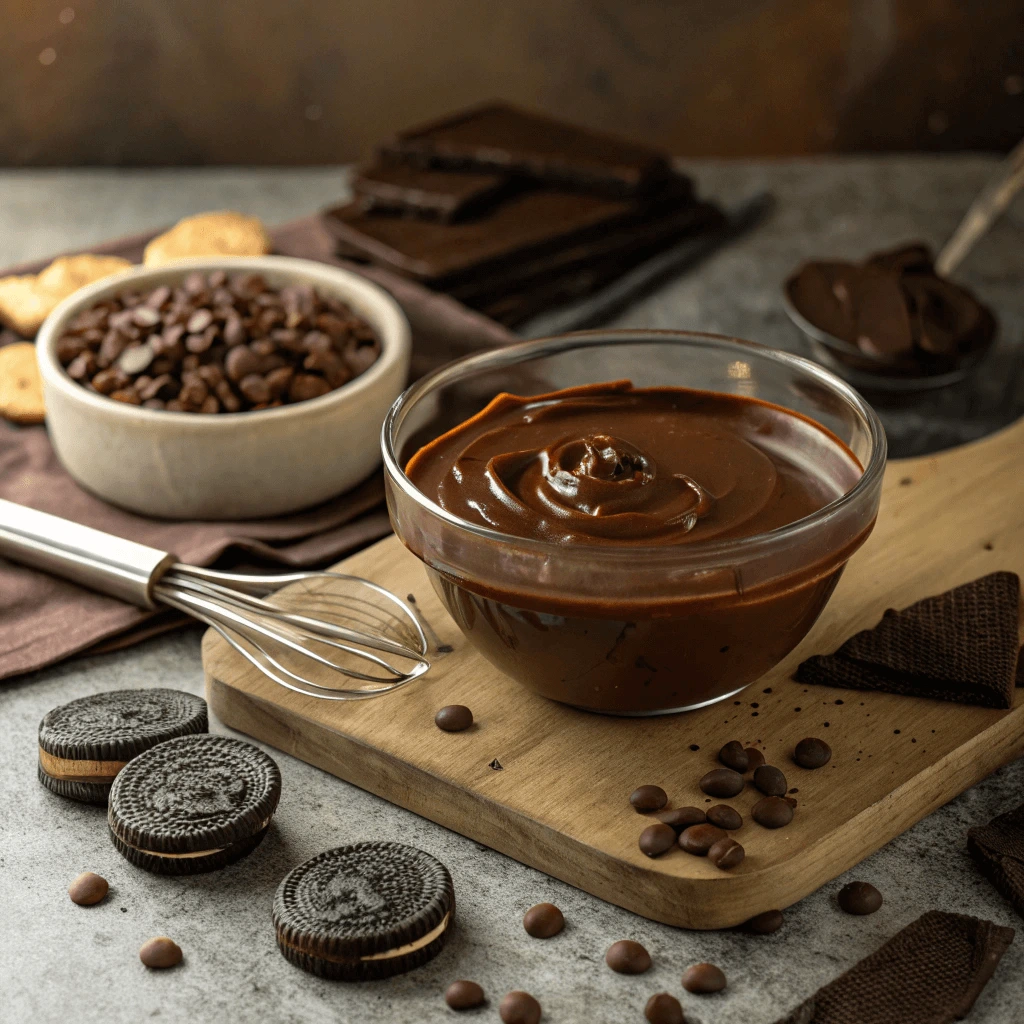
Melting chocolate is key to making perfect chocolate-covered Oreos. It’s important to melt it properly to achieve a smooth, glossy coating.
Choosing the Right Chocolate
For the best results, use high-quality chocolate chips or bars. You can choose milk, dark, or white chocolate, based on your preference. Avoid “baking chocolate” unless it’s made for melting.
Double Boiler Method
Place a heatproof bowl over simmering water, ensuring the bowl doesn’t touch the water. Stir the chocolate frequently as it melts. This method offers gentle, even heat, preventing the chocolate from burning.
Microwave Method
For a faster method, heat the chocolate in a microwave-safe bowl in 20-30 second intervals. Stir between bursts to ensure even melting. Avoid overheating, as it can cause the chocolate to seize.
Tempering Chocolate (Optional)
Tempering gives the chocolate a glossy finish and ensures it sets properly. To temper, melt the chocolate, then cool it by stirring in some unmelted chocolate.
Dipping Oreos
Dipping Oreos into melted chocolate transforms them into an irresistible treat. While the process is simple, a few key techniques can help you achieve a perfect coating and make the process easier and more enjoyable.
Preparing the Oreos for Dipping
Start by placing your Oreos on a tray lined with parchment paper. This makes it easier to handle them once they’re dipped. Using a fork or a dipping tool can also help you maintain a clean process, ensuring you don’t end up with chocolate all over your hands.
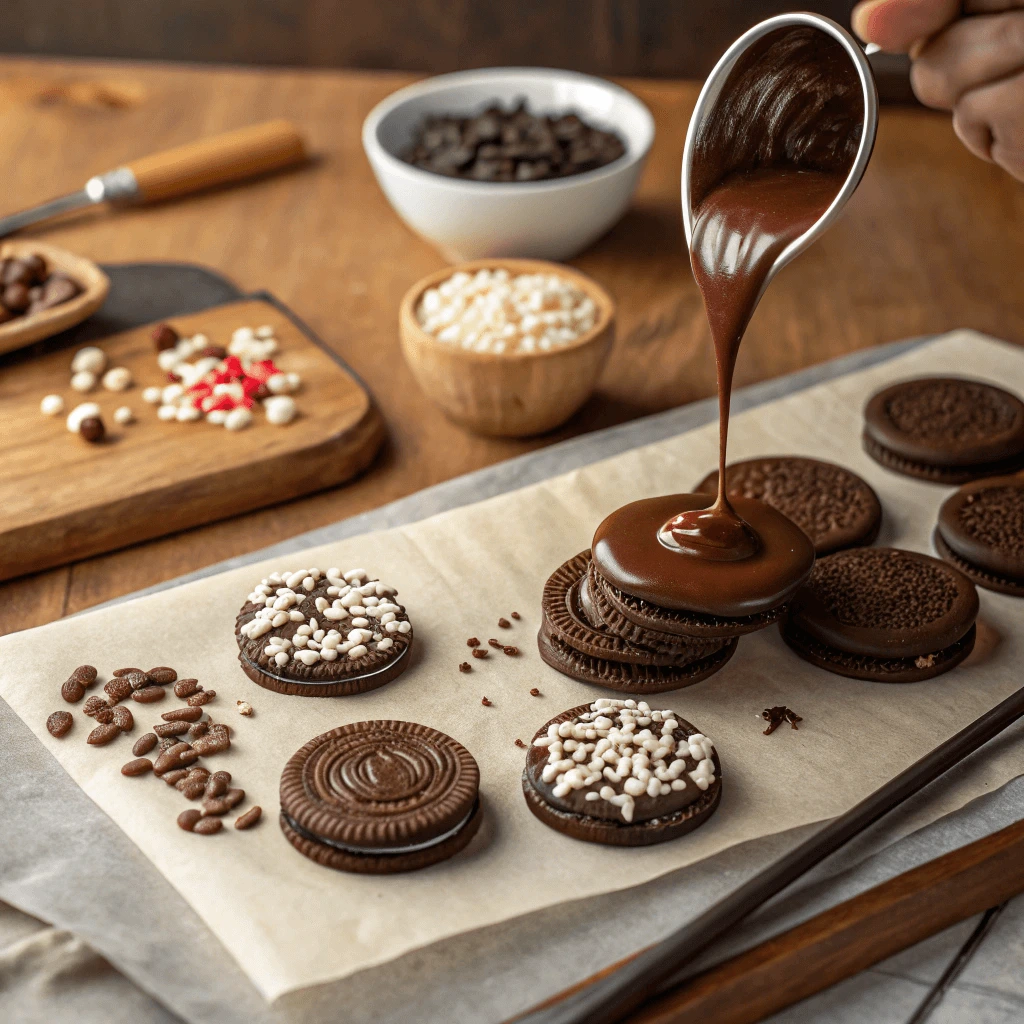
Mastering the Dipping Technique
To dip the Oreos, gently lower them into the melted chocolate, ensuring they’re fully submerged for an even coat. Once covered, carefully lift the cookie out, tapping the fork against the edge of the bowl to remove any excess chocolate. This prevents clumps and ensures the perfect layer of chocolate.
Enhancing with Toppings
While the chocolate is still wet, you can quickly add a variety of toppings for extra flavor and texture. Consider sprinkling crushed nuts, colorful sprinkles, or even a pinch of sea salt over the chocolate-coated Oreos. If you’re feeling creative, drizzle a different type of chocolate over the top for a striking look and a new taste.
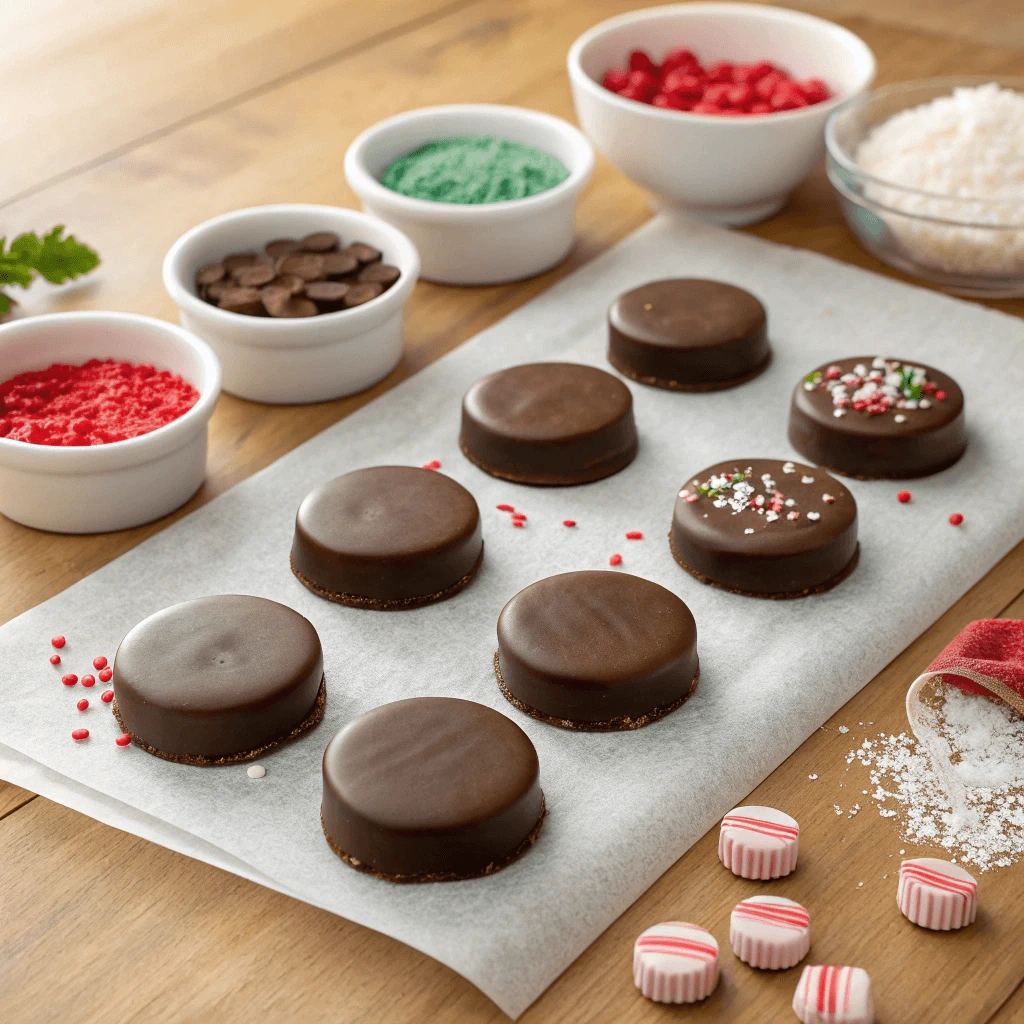
Letting the Chocolate Set
Once your cookies are dipped and decorated, place them on the parchment-lined tray. Let them cool at room temperature, or if you’re in a rush, speed up the process by chilling them in the fridge for about 10–15 minutes. The chocolate will firm up, giving each Oreo a glossy, crisp finish.
Troubleshooting Common Dipping Issues
If your chocolate is too thick, simply add a teaspoon of vegetable oil or shortening to thin it out. If the chocolate starts to harden too quickly, just pop it back in the microwave for a few seconds and stir. Lastly, if an Oreo breaks while dipping, use a fork to gently handle it to prevent further cracks.
Adding Toppings
Adding toppings to your chocolate-covered Oreos allows you to personalize each treat. Whether you prefer sweet, crunchy, or even savory finishes, the right toppings can elevate the flavor and visual appeal of your cookies.
Sweet and Crunchy Toppings
For extra crunch, consider adding chopped nuts like almonds or walnuts, or go for crushed candy pieces or sprinkles. You can even add crushed pretzels for a salty-sweet twist.
Fruity Toppings
Dried fruits like cranberries or raisins bring a chewy sweetness. For a refreshing twist, add zest from citrus fruits or small pieces of fresh strawberries. Just be sure to serve these right away.
Savory Toppings
To get creative, try adding a pinch of sea salt for contrast or drizzle some caramel or peanut butter over the chocolate. This unexpected touch can make your Oreos stand out with bold flavors.
Quick Tips for Topping
Apply your toppings while the chocolate is still wet for the best adhesion. Press lightly to ensure they stay in place. Be quick, as the chocolate can set fast.
Healthier Ingredient Alternatives for DIY Chocolate Covered Oreos
Using Dark Chocolate Instead of Milk Chocolate
Switching milk chocolate for dark chocolate in your chocolate-covered Oreos enhances both flavor and texture. Dark chocolate provides a rich, bold taste and offers several benefits.
Healthier Choice
Dark chocolate is lower in sugar and higher in antioxidants compared to milk chocolate. These antioxidants may support heart health and improve brain function, making dark chocolate a slightly healthier indulgence.
Richer Flavor
Dark chocolate’s intense, slightly bitter flavor balances the sweetness of Oreos. This contrast creates a sophisticated taste, making the treat feel less sugary and more refined.
Better Texture
Dark chocolate sets firmer than milk chocolate, giving the Oreo a crispier and more satisfying bite. It creates a smooth, velvety coating that enhances the overall experience.
Customizable Taste
Dark chocolate is available in various cocoa percentages, from 50% to 90%. The higher the cocoa content, the more intense the flavor, allowing you to adjust the chocolate’s sweetness to your liking.
Alternative Sweeteners
If you’re looking to reduce sugar in your chocolate-covered Oreos, there are several alternative sweeteners that provide the sweetness you crave without the excess sugar.
Stevia
Stevia is a natural sweetener with zero calories, perfect for low-carb or diabetic diets. It’s much sweeter than sugar, so use it in moderation. It may have a slight aftertaste but works well when balanced properly in your recipe.
Erythritol
Erythritol is a sugar alcohol with 70% of the sweetness of sugar but fewer calories. It doesn’t spike blood sugar and has a mild taste, making it a great choice for chocolate-covered Oreos.
Monk Fruit Sweetener
Monk fruit is a zero-calorie, zero-carb sweetener that’s 150-200 times sweeter than sugar. It has a clean, natural taste and is perfect for those looking for a sugar substitute with no aftertaste.
Coconut Sugar
Coconut sugar offers a caramel-like flavor and a lower glycemic index than regular sugar. It contains small amounts of nutrients like iron and zinc, making it a slightly more nutritious option.
Xylitol
Xylitol, a sugar alcohol, is as sweet as sugar but has fewer calories and doesn’t spike blood sugar. However, it’s toxic to dogs, so be cautious when using it.
Gluten-Free Oreos
For those who need to avoid gluten, gluten-free Oreos offer a great alternative to the classic treat. They’re made with gluten-free ingredients, so everyone can enjoy chocolate-covered Oreos without worry.
What Makes Gluten-Free Oreos Different?
Gluten-free Oreos replace wheat flour with rice flour, potato starch, and tapioca starch. These ingredients help mimic the texture and flavor of regular Oreos, making them a suitable option for those with gluten sensitivities or celiac disease.
Why Choose Gluten-Free Oreos?
Gluten-free Oreos are perfect for anyone with gluten intolerance or celiac disease. They also provide an option for those who want to avoid gluten in their diet, even if they’re not gluten-sensitive, as they are free from many processed ingredients.
How to Use Gluten-Free Oreos
Using gluten-free Oreos in your chocolate-covered recipe is just like using regular ones. Simply dip the cookies in your preferred chocolate and let them set. The taste and texture will be just as satisfying.
Where to Buy Gluten-Free Oreos
You can find gluten-free Oreos in most major grocery stores, health food stores, or online. They are often stocked in gluten-free sections or directly from retailers like Amazon.
Tips for Perfectly Dipped DIY Chocolate Covered Oreos Every Time
Use a Dipping Fork
Using a dipping fork is an essential tool when making chocolate-covered Oreos. It allows you to dip the cookies easily without making a mess, ensuring the chocolate coating is smooth and even. Let’s explore why a dipping fork is so useful and how to use it effectively.
Why Choose a Dipping Fork?
A dipping fork is designed to make the dipping process cleaner and more efficient. With its thin, evenly spaced prongs, it holds the Oreo securely and allows for even coverage of chocolate. It also prevents the cookie from getting stuck to your hands or falling apart in the melted chocolate. The fork helps keep the Oreo intact while dipping, allowing you to handle multiple cookies with ease.
How to Use the Dipping Fork
To use a dipping fork, start by holding the cookie with the prongs. Gently lower the cookie into the melted chocolate, making sure it is fully submerged. Once it’s coated, lift the cookie out of the chocolate and allow any excess to drip off. Gently tap the fork on the edge of the bowl to remove excess chocolate and create a smooth, even coating.
Benefits of Using a Dipping Fork
Using a dipping fork offers several benefits. First, it prevents direct contact with your hands, keeping the chocolate clean and avoiding any messy fingerprints. Second, it helps control the amount of chocolate on each Oreo, allowing you to create a consistent coating. Finally, using a dipping fork makes the process quicker and more efficient, especially when you are making a large batch of chocolate-covered Oreos.
Alternatives to a Dipping Fork
If you don’t have a dipping fork, you can use other tools, such as a regular fork or a skewer. However, a dipping fork is specifically designed to make the process easier. If you use an alternative, you may find it more challenging to handle the cookies and achieve a smooth, even coating.
Chill Your Oreos
Chilling your chocolate-covered Oreos is essential for achieving the perfect set. This step helps the chocolate harden and ensures the treats maintain their shape and texture.
Why Chilling Matters
After dipping your Oreos, chilling helps the chocolate solidify, preventing smudges and keeping the coating glossy. Without chilling, the chocolate may stay soft and ruin the appearance and texture.
How to Chill Your Oreos
Place your dipped Oreos on a parchment-lined baking sheet. Ensure they’re spaced out to avoid sticking. Refrigerate for 15-30 minutes until the chocolate sets. For faster results, you can use the freezer, but be careful not to freeze them for too long.
Chill Tips
Test the chocolate by lightly touching it. Once it feels firm, it’s ready. Store the cookies in the fridge for up to a week to maintain freshness.
Work with Parchment Paper
Using parchment paper for chocolate-covered Oreos makes the process smoother and cleaner. It prevents sticking, ensures easy removal, and simplifies cleanup.
Why Parchment Paper Helps
Parchment paper keeps your Oreos from sticking to the surface, preserving the chocolate coating. It also saves you from scrubbing sticky trays afterward, as you can simply discard the paper.
How to Use It
Line your baking sheet with parchment paper. Place the dipped Oreos on it, leaving space between each cookie. The paper will allow you to remove the cookies easily once the chocolate sets.
Alternatives
If you don’t have parchment paper, silicone mats or wax paper can also work, but parchment remains the most reliable option.
Creative Variations of DIY Chocolate Covered Oreos to Try
Festive Toppings for Your DIY Chocolate Covered Oreos
Festive toppings bring an extra flair to your chocolate-covered Oreos. Whether for a casual snack or a treat to share, they add color and flavor to your creation.
Popular Toppings
- Sprinkles: Add a fun burst of color with vibrant sprinkles. They’re easy to find in various colors and shapes.
- Crushed Candy Canes: If you want a minty twist, crushed candy canes offer a crunchy, refreshing flavor.
- Colored Sugar: For a sparkling finish, use colored sugar in gold, silver, or any shade that matches your mood.
Flavor Variations
- Nuts & Seeds: Chopped almonds, pistachios, or sunflower seeds give your Oreos a crunchy texture.
- Mini Marshmallows: Soft and chewy marshmallows balance the rich chocolate coating.
- Shredded Coconut: Adds a tropical flavor with a chewy texture that complements the chocolate.
How to Apply Toppings
Apply toppings immediately after dipping your Oreos while the chocolate is still wet to ensure they stick. For a more covered look, you can roll the sides in your chosen toppings.
Flavor Infusions to Enhance Your DIY Chocolate Covered Oreos
Infusing flavors into your chocolate coating can add a creative twist to your chocolate-covered Oreos. Whether you prefer sweet, spicy, or refreshing flavors, infusions can elevate your treat.
Extracts to Try
- Vanilla Extract: Adds a classic, sweet flavor.
- Almond Extract: Provides a nutty depth.
- Peppermint Extract: Perfect for a refreshing, minty touch.
Spices and Zests
- Cinnamon: Brings warmth and comfort to the chocolate.
- Chili Powder: Adds a spicy kick for those who like heat.
- Orange or Lemon Zest: Offers a fresh, tangy contrast to the sweetness of chocolate.
Coffee and Tea
- Coffee: Gives a bold, rich flavor that complements chocolate.
- Matcha Green Tea: Adds an earthy, slightly bitter note.
- Chai Spice: A cozy blend of spices for a warming effect.
How to Infuse Flavors
- Add a few drops of extracts or a pinch of spices to melted chocolate.
- Stir well to ensure an even distribution of flavor.
- Taste and adjust the flavor if needed before dipping your Oreos.
Flavor infusions are an easy way to make your chocolate-covered Oreos stand out with unique and delicious variations.
Making Stuffed DIY Chocolate Covered Oreos: Fillings to Try
Stuffed Oreos offer a fun twist on the classic treat, allowing you to add different fillings between two Oreo cookies. These variations can introduce new flavors and textures, making your chocolate-covered Oreos even more indulgent.
Popular Filling Choices
- Peanut Butter: A creamy and rich filling that complements the chocolate perfectly.
- Nutella: For a hazelnut-chocolate twist.
- Fruit Jam: Adds a fruity, sweet contrast to the chocolate and Oreo cookie.
How to Stuff Oreos
- Separate the Oreo cookies carefully.
- Spread your chosen filling on one half of the cookie.
- Gently press the top half back on, sealing the filling inside.
Combining Fillings
- Peanut Butter & Nutella: A delicious combination of creamy and chocolatey flavors.
- Strawberry Jam & Cream Cheese: A tangy and sweet mix that pairs well with the chocolate coating.
Once stuffed, dip the Oreos in melted chocolate and decorate as desired for an extra touch.
Conclusion
Making DIY Chocolate Covered Oreos is a fun and simple process that allows for endless creativity. Whether you opt for healthier ingredients or try unique flavor combinations, these treats can be easily tailored to suit any preference. The possibilities for toppings and fillings are limitless, so feel free to experiment and create your perfect bite.
We’d love to hear about your favorite Oreo variations! Share your creations or post photos of your homemade chocolate-covered Oreos in the comments below or on social media. Let’s inspire each other with delicious ideas!