Looking for a baked chicken breast recipe that’s never dry or bland? This simple yet flavorful method guarantees juicy, tender results every time. Perfect for busy weeknights, meal prep, or a healthy dinner, this recipe uses basic ingredients like olive oil, garlic, and herbs to bring out rich, delicious flavor. No more guessing—just follow a few easy steps to bake chicken breasts that are moist, tasty, and perfectly cooked. Say goodbye to rubbery chicken and hello to your new go-to dinner favorite!
Why This Is the Best Baked Chicken Breast Recipe
Moist and Juicy Every Time
Keeping chicken breast moist in the oven can be tricky, but with the right techniques, you’ll get juicy results every time. This baked chicken breast recipe focuses on temperature control, prep techniques, and rest time to lock in flavor and tenderness.
Pound the Chicken Evenly
Start by pounding your chicken breast to an even thickness. This ensures the meat cooks uniformly and prevents thinner parts from drying out before the center is done.
Don’t Skip the Marinade or Oil
Even a quick marinade with olive oil, lemon juice, and seasoning helps tenderize the meat and keep it juicy. Olive oil creates a protective barrier that holds moisture inside the chicken during baking.
Watch the Oven Temperature
Bake at 400°F (204°C) for 20–25 minutes depending on the size of the breast. Avoid high heat, which can dry out the meat quickly. Use a meat thermometer and remove the chicken once it reaches 165°F (74°C).
Let It Rest Before Slicing
Always rest your baked chicken breast for 5–10 minutes after cooking. This allows juices to redistribute and keeps every bite moist and flavorful.
Quick and Easy for Busy Weeknights
A baked chicken breast recipe should be simple enough for busy nights but still deliver great flavor. With a few smart steps, you can get dinner on the table fast—without sacrificing taste or nutrition.
Minimal Ingredients, Maximum Flavor
You don’t need a long shopping list. Basic pantry staples like olive oil, garlic powder, paprika, and salt come together to season the chicken perfectly. Add a squeeze of lemon for brightness, and you’re done prepping in five minutes or less.
Fast Cook Time
This baked chicken breast recipe cooks in just 20–25 minutes at 400°F (204°C). While the chicken bakes, you can steam vegetables, toss a salad, or prep your favorite grain. It’s a full meal without multitasking stress.
Effortless Clean-Up
Use a parchment-lined baking sheet or oven-safe dish to make cleanup quick. Fewer dishes mean more time to relax after dinner.
This recipe is ideal when time is tight but you still want a wholesome, home-cooked meal. It’s also perfect for meal prep—you can cook multiple portions at once and enjoy them all week. Quick, easy, and full of flavor, this baked chicken breast recipe fits perfectly into your busiest days.
Healthy, Low-Fat Protein Option
A good baked chicken breast recipe does more than taste great—it also supports a healthy lifestyle. Chicken breast is naturally low in fat and high in protein, making it an ideal choice for balanced meals.
Lean and Nutritious
Skinless chicken breast contains very little saturated fat, especially when baked instead of fried. It delivers around 26 grams of protein per 3-ounce serving, helping you feel full longer and supporting muscle health.
Great for Weight Management
Because it’s low in calories yet rich in protein, chicken breast fits well into many weight loss or maintenance plans. The baking method reduces the need for extra oil or heavy sauces, keeping your meals light without sacrificing flavor.
Heart-Healthy and Versatile
A baked chicken breast recipe is heart-smart too—lean protein supports cardiovascular health when paired with vegetables, whole grains, and healthy fats like olive oil. Plus, it’s easy to flavor with herbs and spices, making it suitable for various dietary needs, from keto to Mediterranean.
Whether you’re counting macros or just looking for a nutritious weeknight dinner, this baked chicken breast recipe is a smart, delicious, and easy go-to protein source.
Essential Ingredients for Flavorful Chicken Breast
Basic Pantry Staples That Add Big Flavor
You don’t need fancy ingredients to make your baked chicken breast recipe taste incredible. With just a few everyday staples, you can build bold, balanced flavors that transform simple chicken into a crave-worthy meal.
Olive Oil Adds Moisture and Richness
A quality extra virgin olive oil coats the chicken breast and locks in moisture during baking. It also helps herbs and spices stick to the surface and brown beautifully in the oven. Use just 1–2 tablespoons to keep the dish light but flavorful.
Garlic and Onion Powder Provide Savory Depth
These two pantry MVPs instantly boost the savory notes in your chicken. Unlike fresh garlic or onions, powders distribute evenly and won’t burn during baking. They bring out natural umami flavor and pair well with most spice blends.
Paprika Enhances Color and Subtle Sweetness
Whether you use sweet, smoked, or hot paprika, this bright red spice adds both visual appeal and a gentle layer of flavor. It’s especially great in a baked chicken breast recipe because it creates a beautiful, appetizing crust when roasted at high heat.
Dried Herbs Add Aroma and Balance
Keep oregano, thyme, rosemary, or Italian seasoning on hand. These dried herbs blend well with garlic and olive oil and infuse your chicken with earthy, aromatic notes. Use about ½ to 1 teaspoon per breast for bold, balanced flavor.
Salt and Black Pepper Bring It All Together
Even the best ingredients fall flat without proper seasoning. Salt enhances every other flavor in your seasoning mix, while freshly cracked black pepper adds a mild bite that makes the chicken more dynamic.
With these simple pantry staples, your baked chicken breast recipe goes from plain to powerhouse—all in under 30 minutes.
Best Seasoning Mix for Chicken Breast
A great baked chicken breast recipe starts with the right seasoning. Skip store-bought blends and create your own with a few pantry staples that lock in flavor and keep your chicken juicy and satisfying.
Build a Balanced Flavor Base
Start with sea salt and freshly ground black pepper. Salt enhances all other ingredients, while pepper adds a gentle bite. These two create the foundation for every successful seasoning mix.
Add Boldness with Garlic and Onion Powders
Garlic powder adds warm, savory depth. Onion powder complements it with a touch of sweetness. Together, they give chicken breast that rich flavor you often taste in restaurant-style recipes—without overpowering the dish.
Brighten It Up with Paprika and Herbs
Paprika does more than add color—it brings a mild smokiness and a subtle sweetness. Choose smoked paprika if you want a slightly bolder, BBQ-style result. Pair it with dried herbs like thyme, oregano, or Italian seasoning to round out the mix with earthy, aromatic notes.
Customize Based on Your Cravings
You can tailor your seasoning mix to suit your mood or dietary goals. Add a pinch of cayenne for heat, lemon zest for brightness, or cumin for a touch of warmth. Mixing spices in a small bowl before rubbing them on the chicken helps ensure even coverage.
Use It Right for Maximum Flavor
Coat your chicken breast lightly in olive oil, then rub in the seasoning mix. This technique helps the spices stick and creates a flavorful crust during baking. For a baked chicken breast recipe that’s flavorful and never bland, your seasoning blend is key.
Optional Add-Ins for Extra Taste
Once you’ve mastered the basics of seasoning, you can easily enhance your baked chicken breast recipe with a few optional add-ins. These ingredients layer in extra flavor, texture, and aroma without adding much prep time.
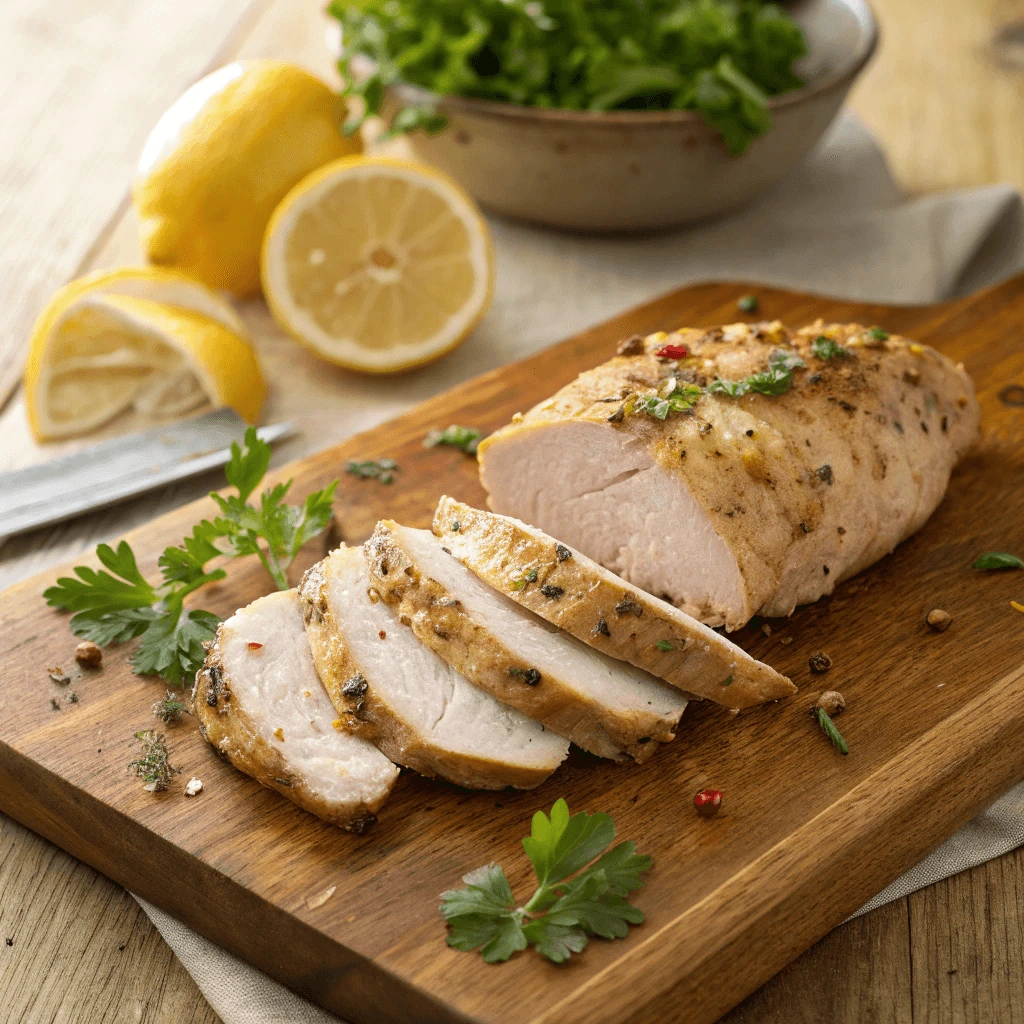
Add Natural Acidity for Brightness
Fresh lemon juice or zest brightens up the chicken and balances out savory flavors. You can squeeze lemon juice over the chicken just before baking or stir a little zest into your seasoning mix. Balsamic vinegar or apple cider vinegar also add tang and depth without overwhelming the dish.
Boost Flavor with Sauces and Condiments
A light brush of Dijon mustard gives your chicken a subtle tang and complexity. For a touch of sweetness, try adding a drizzle of honey or maple syrup. These also help caramelize the surface, creating a flavorful crust. For a Mediterranean spin, mix in sun-dried tomato paste or a spoonful of pesto.
Elevate with Fresh Herbs and Aromatics
Fresh rosemary, thyme, or chopped parsley bring out herbaceous notes that dried versions can’t match. Add these herbs during the last few minutes of baking or sprinkle them on top just before serving. Garlic cloves, thinly sliced shallots, or red pepper flakes add sharpness and aroma without overwhelming the dish.
Step-by-Step: How to Bake Chicken Breast Perfectly
Prepping the Chicken for Even Cooking
Proper preparation of chicken breast is essential to ensure it cooks evenly, stays juicy, and develops a tender texture. Taking a few extra steps before cooking can make all the difference in your baked chicken breast recipe.
Trim Excess Fat and Tendons
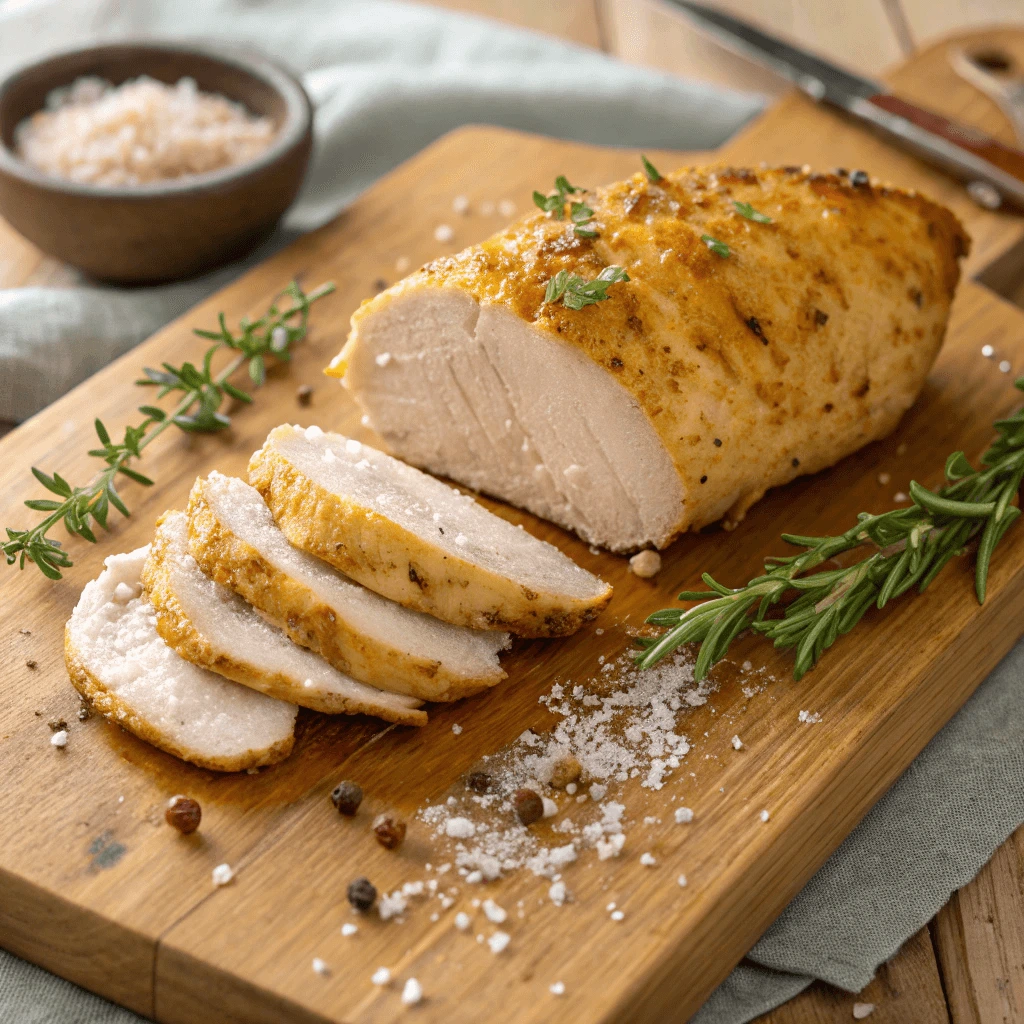
Begin by inspecting each chicken breast. Use a sharp knife to trim away any excess fat, silver skin, or tendons. Removing these parts helps prevent chewy textures and ensures the chicken cooks more uniformly. It also improves presentation and makes the chicken easier to slice after cooking.
Pat the Chicken Dry
Next, use paper towels to pat the chicken breasts dry thoroughly. Excess moisture on the surface can hinder proper browning and cause the chicken to steam instead of roast. Dry chicken also allows seasonings and marinades to stick better, enhancing the final flavor.
Pound the Chicken to an Even Thickness
Chicken breasts often have uneven thickness, with one end thicker than the other. This unevenness causes thinner parts to overcook while waiting for thicker sections to finish. To solve this, place the chicken between two sheets of plastic wrap or inside a large zip-top bag and gently pound it using a meat mallet or rolling pin. Aim for a uniform thickness of about ½ to ¾ inch. This step promotes even cooking and reduces overall bake time.
Season or Marinate Before Cooking
Once the chicken is evenly flattened and dry, season it liberally with your chosen spices, herbs, or marinades. Applying the seasoning at this stage ensures it penetrates the meat and enhances the flavor throughout. For extra tenderness, marinate the chicken for 15 to 30 minutes before baking.
Baking Temperature and Timing Guide
Baking chicken breast perfectly means cooking it long enough to be safe and juicy without drying it out. Getting the temperature and timing right is key.
Set the Oven Temperature
Preheat your oven to 400°F (204°C). This temperature cooks the chicken quickly, helping it brown nicely while keeping the inside tender. Lower temps like 350°F work but take longer, and higher temps risk drying the meat.
How Long to Bake
Bake chicken breasts that weigh about 6 ounces each for 20 to 25 minutes. Thicker pieces may need a few extra minutes, while smaller ones cook faster. Time can vary, so don’t rely on the clock alone.
Use a Meat Thermometer
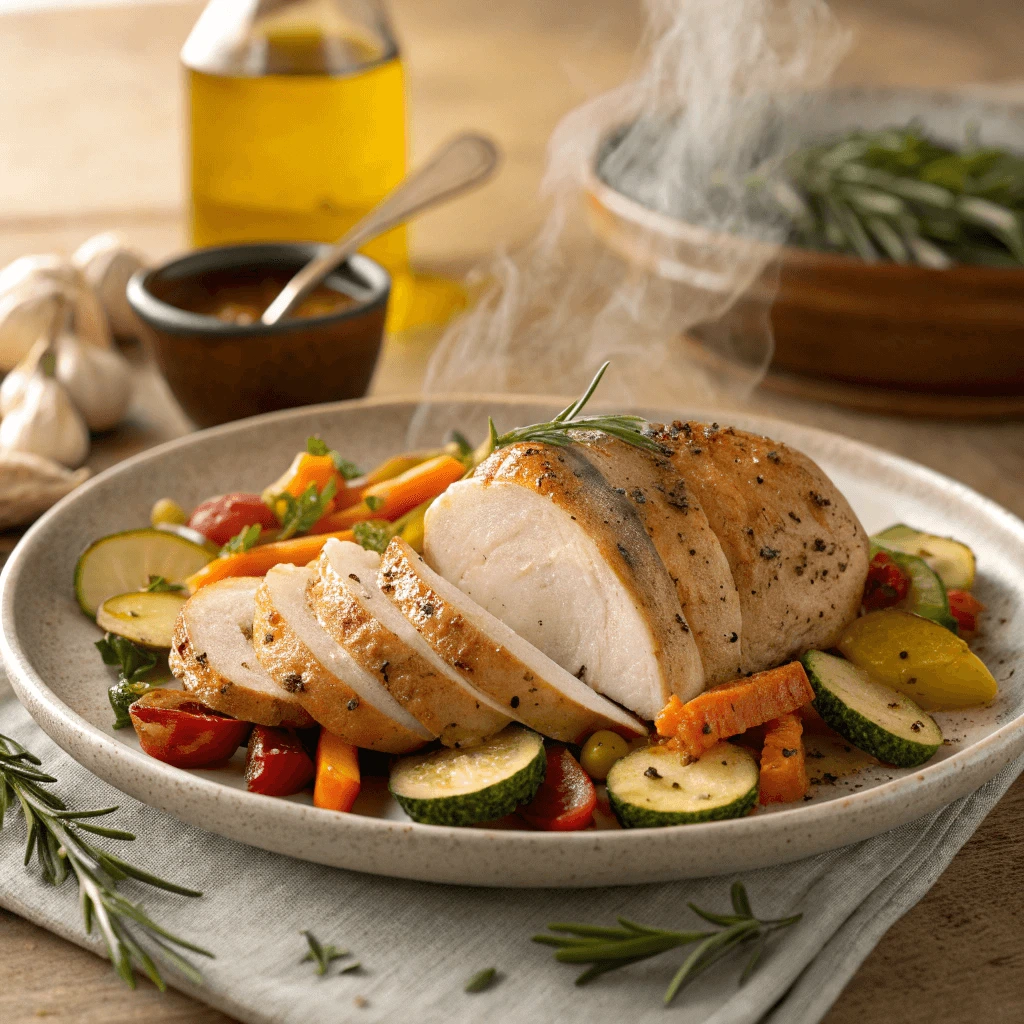
The best way to check doneness is with a meat thermometer. Insert it into the thickest part of the chicken. Once it reaches 165°F (74°C), the chicken is safe to eat and perfectly cooked. Remove it promptly to avoid overcooking.
Let It Rest
After baking, let the chicken rest for 5 to 10 minutes. Resting allows the juices to redistribute inside the meat, making every bite juicy and flavorful.
Resting for Juiciness and Tender Texture
Resting cooked chicken breast is a crucial step that many home cooks overlook. This simple pause ensures the chicken stays juicy and tender instead of becoming dry and tough.
What Happens During Resting?
During cooking, muscle fibers contract and push juices toward the center of the meat. Cutting into the chicken immediately causes these juices to spill out, resulting in dryness. Allowing the chicken to rest gives the fibers time to relax and reabsorb the juices, which creates moist, flavorful chicken breast.
How Long Should You Rest?
Aim to rest an average-sized chicken breast for 5 to 10 minutes after baking or cooking. To keep it warm, place the chicken on a clean plate or cutting board and loosely tent it with foil. Avoid wrapping it tightly since trapped steam can make the crust soggy. Moreover, resting lets the internal temperature stabilize for perfect doneness.
Tips for Effective Resting
- Remove the chicken from heat promptly once it reaches 165°F (74°C), as verified with a meat thermometer.
- Keep the chicken covered loosely during resting to maintain warmth without trapping moisture.
- Additionally, resting allows residual heat to gently finish cooking the chicken, enhancing tenderness.
Benefits of Resting Your Chicken Breast
Beyond improved texture, resting intensifies flavor and tenderness. Lean cuts like chicken breast especially benefit from this step, which helps lock in juices and ensures every bite is delicious.
Expert Tips to Keep Chicken Breast Moist in the Oven
Use a Meat Thermometer to Avoid Overcooking
Using a meat thermometer is one of the simplest yet most effective ways to prevent overcooking your baked chicken breast. Because chicken breast is lean and can dry out easily, monitoring its internal temperature ensures juicy, tender results every time.
Why Overcooking Happens
Chicken breast tends to dry out when cooked beyond its ideal temperature. Many home cooks rely on visual cues or cooking times, which can vary greatly depending on oven accuracy and chicken size. These methods often lead to guesswork and risk overcooking.
How a Meat Thermometer Helps
A meat thermometer provides an accurate internal temperature reading, so you know precisely when to remove the chicken from the oven. Insert the probe into the thickest part of the breast without touching bone to get the most reliable reading. The USDA recommends cooking chicken to a safe internal temperature of 165°F (74°C).
Types of Meat Thermometers
There are several types of meat thermometers to consider:
- Instant-read thermometers: Provide quick temperature readings in seconds and are great for checking doneness just before removing the chicken.
- Digital probe thermometers: Can stay in the chicken during cooking and alert you when the target temperature is reached.
- Dial thermometers: Usually less expensive but take longer to give accurate readings.
Tips for Best Results
To use the thermometer correctly, insert it after the chicken has cooked most of the way through, typically within the last 5 minutes. Check the temperature frequently to avoid letting the chicken go past 165°F (74°C), which causes moisture loss. Once the target temperature is reached, remove the chicken immediately and let it rest, allowing the juices to redistribute.
Cover with Foil or Bake in Parchment
Covering chicken breast with foil or baking it in parchment helps keep it moist and tender. These methods trap steam, preventing the chicken from drying out during baking.
Using Foil
Place the seasoned chicken breast on a baking sheet and loosely tent it with foil. This allows steam to circulate, keeping the chicken juicy while allowing some browning. Don’t wrap it too tightly—some airflow helps balance moisture and color.
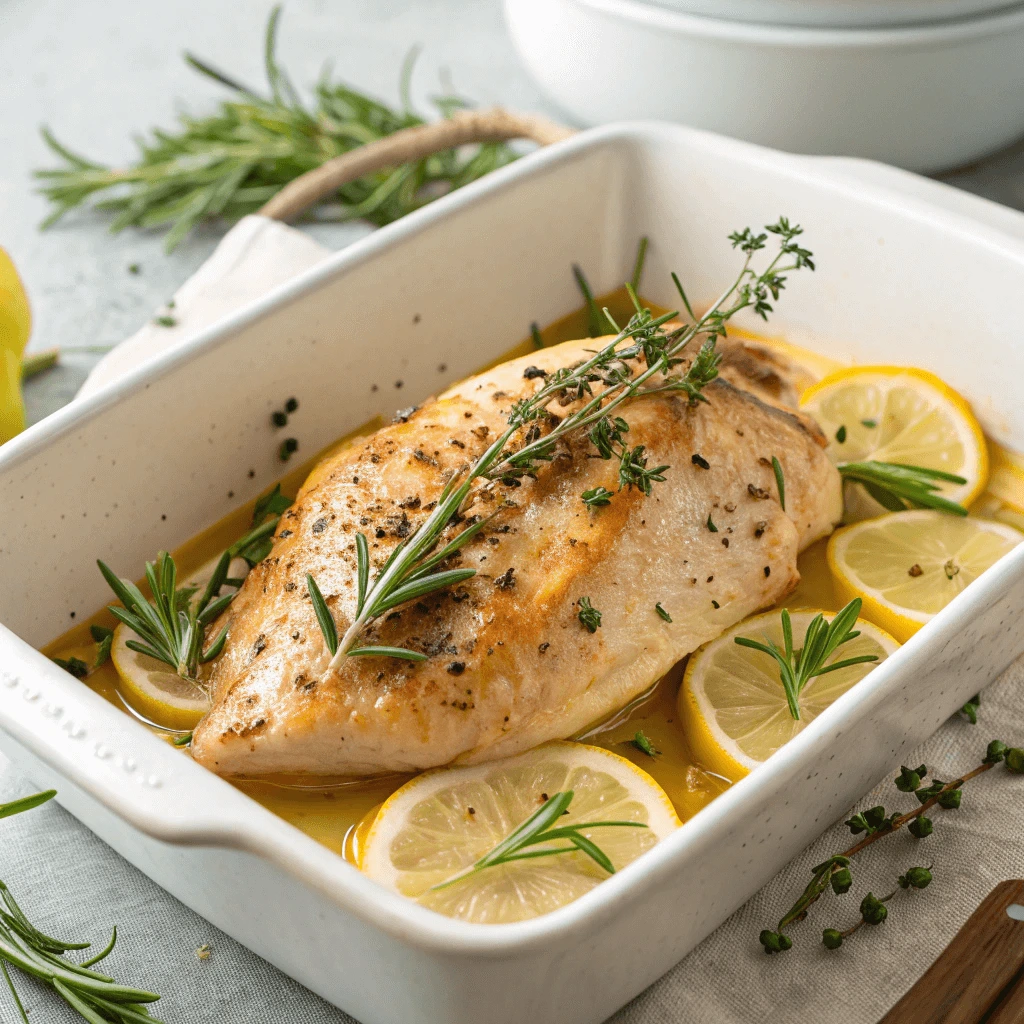
Baking in Parchment
Baking in parchment, also called en papillote, seals the chicken in a packet. Add herbs, lemon slices, or garlic with the chicken, then fold the parchment to trap steam inside. This technique infuses flavor and keeps the chicken moist.
Tips for Success
Use foil if you want a looser cover that lets the chicken brown. Choose parchment for a sealed environment with delicate flavor infusion. Always pat the chicken dry before covering, and adjust baking time slightly if covered.
Add a Splash of Broth or Lemon Juice Before Baking
Adding a splash of broth or lemon juice before baking your chicken breast helps keep it moist and infuses it with extra flavor. This simple step can elevate even the most basic baked chicken breast recipe.
Why Add Broth?
Pouring a small amount of chicken broth into the baking dish creates steam during cooking. The steam surrounds the chicken, helping prevent dryness and promoting a tender texture. Additionally, broth adds subtle savory notes that complement the seasoning without overpowering the natural flavor of the chicken.
Benefits of Lemon Juice
Lemon juice adds bright, fresh acidity that balances the richness of the chicken. Its natural tenderizing properties break down proteins slightly, making the meat softer and juicier. Plus, lemon juice enhances the overall flavor profile with a pleasant citrus aroma.
How to Use Broth or Lemon Juice
Before placing your seasoned chicken breast in the oven, pour about ¼ cup of low-sodium chicken broth or freshly squeezed lemon juice into the baking dish. Make sure the liquid doesn’t cover the chicken but creates a thin layer on the bottom to generate steam. You can also combine the two for a zesty, savory twist.
Tips for Best Results
- Use low-sodium broth to control salt levels in your recipe.
- For a more intense lemon flavor, add lemon zest along with the juice.
- Consider adding fresh herbs like thyme or rosemary to the broth or lemon juice for extra aroma.
- Pour the liquid right before baking to keep the steam fresh and effective.
By incorporating a splash of broth or lemon juice, your baked chicken breast recipe stays juicy and flavorful with minimal extra effort.
Storage, Reheating, and Serving Ideas
How to Store Cooked Chicken Breast Safely
Storing cooked chicken breast properly helps preserve its flavor, texture, and safety. Whether you want to save leftovers for a quick meal or meal prep for the week, following the right steps prevents spoilage and foodborne illness.
Cool the Chicken Quickly
After cooking, allow the chicken breast to cool slightly at room temperature—but no longer than two hours. Leaving it out longer encourages bacterial growth. To speed cooling, slice the chicken into smaller pieces or spread it out on a shallow dish.
Use Airtight Containers
Place cooled chicken breast in airtight containers or resealable bags. Removing as much air as possible prevents freezer burn and keeps the chicken moist. Label containers with the date so you can track freshness.
Refrigerate Within Two Hours
Put the chicken in the refrigerator within two hours of cooking. Store it at 40°F (4°C) or below. Proper refrigeration slows bacterial growth and keeps the chicken safe to eat for 3 to 4 days.
Freeze for Longer Storage
For extended storage, freeze cooked chicken breast. Wrap it tightly in plastic wrap or foil before placing it in freezer bags or airtight containers. Frozen chicken breast maintains quality for up to 3 months. Thaw it safely in the refrigerator or use the defrost setting on your microwave.
Reheat Safely
When reheating, ensure the chicken reaches an internal temperature of 165°F (74°C) to kill any potential bacteria. Use a food thermometer for accuracy. Avoid reheating multiple times, as repeated heating and cooling increase food safety risks.
Best Reheating Methods to Keep It Juicy
Reheating chicken breast without drying it out can be tricky, but using the right techniques helps keep it moist, tender, and flavorful.
Oven Reheating for Even Warmth
One of the best ways to reheat chicken breast is by using the oven. Begin by preheating your oven to 300°F (150°C). Then, place the chicken breasts in an oven-safe dish, adding a splash of broth or water to create steam and prevent dryness. Cover the dish tightly with foil to trap moisture. Heat the chicken for about 15–20 minutes, or until it reaches an internal temperature of 165°F (74°C). This gentle reheating method warms the chicken evenly and maintains its juiciness.
Microwave with Moisture Protection
Microwaving offers a quick option but often dries out the chicken. To combat this, slice the chicken into smaller pieces and place them in a microwave-safe dish. Add a tablespoon of water or broth, then cover the dish with a microwave-safe lid or damp paper towel. Heat on medium power in 30-second intervals, checking frequently to avoid overheating. Flipping or stirring between intervals ensures even warming throughout.
Stovetop Reheating for Flavor Retention
For a flavorful reheating method, use the stovetop. Heat a small amount of olive oil or broth in a skillet over medium heat. Add the sliced chicken and cover the skillet with a lid to lock in moisture. Stir occasionally and reheat until the chicken reaches 165°F (74°C). This method helps retain moisture while allowing you to refresh the seasoning if desired.
Meal Ideas Using Leftover Chicken Breast
Leftover chicken breast is a great ingredient to create quick and tasty meals. Instead of letting it go to waste, use it to make delicious dishes that save time and effort.
Chicken Salad
Dice or shred the chicken and combine it with fresh veggies like celery or apples. Mix in Greek yogurt or mayonnaise, add salt, pepper, and herbs, then toss well. Serve it on greens, in a wrap, or as a sandwich filling for a light and refreshing meal.
Stir-Fries and Bowls
Cut the chicken into bite-sized pieces and sauté with colorful vegetables such as bell peppers and broccoli. Add your favorite sauce, like soy or teriyaki, for extra flavor. Serve over rice or quinoa for a balanced, filling dish.
Soups and Stews
Leftover chicken also works great in soups or stews. Simply add it to simmering broth with vegetables, beans, or pasta. Season with herbs like thyme or paprika to boost flavor and enjoy a warm, comforting meal.
Conclusion
Mastering a baked chicken breast recipe that’s moist, flavorful, and easy is within your reach. By using simple techniques like proper seasoning, careful temperature control, and adequate resting, you can consistently enjoy juicy, tender chicken. Whether you’re preparing a quick weeknight dinner or meal prepping for the week, this recipe offers a reliable way to elevate your meals without any fuss. So, give it a try today and savor the perfect balance of taste and texture that makes baked chicken breast a versatile kitchen staple.