A crepe pan might seem like a specialty tool, but it’s a must-have for every home chef. Its flat surface and low edges make it perfect for creating thin crepes, pancakes, omelets, and more. With the right crepe pan, cooking becomes easier, faster, and a lot more fun. Let’s see why it’s worth adding to your kitchen!
What Is a Home Chef Crepe Pan and Why It Matters
Understanding the Unique Design of a Home Chef Crepe Pan
A crepe pan stands out from a regular frying pan because of its simple yet smart design. Every feature — from the low edges to the lightweight feel — plays a role in helping you cook crepes with ease.
Low Edges for Easy Flipping
One of the most important features of a crepe pan is its low, sloped edges. These shallow sides make it simple to slide a spatula under a crepe without tearing it. They also allow you to flip or roll crepes smoothly, which is much harder to do in a standard skillet with high sides.
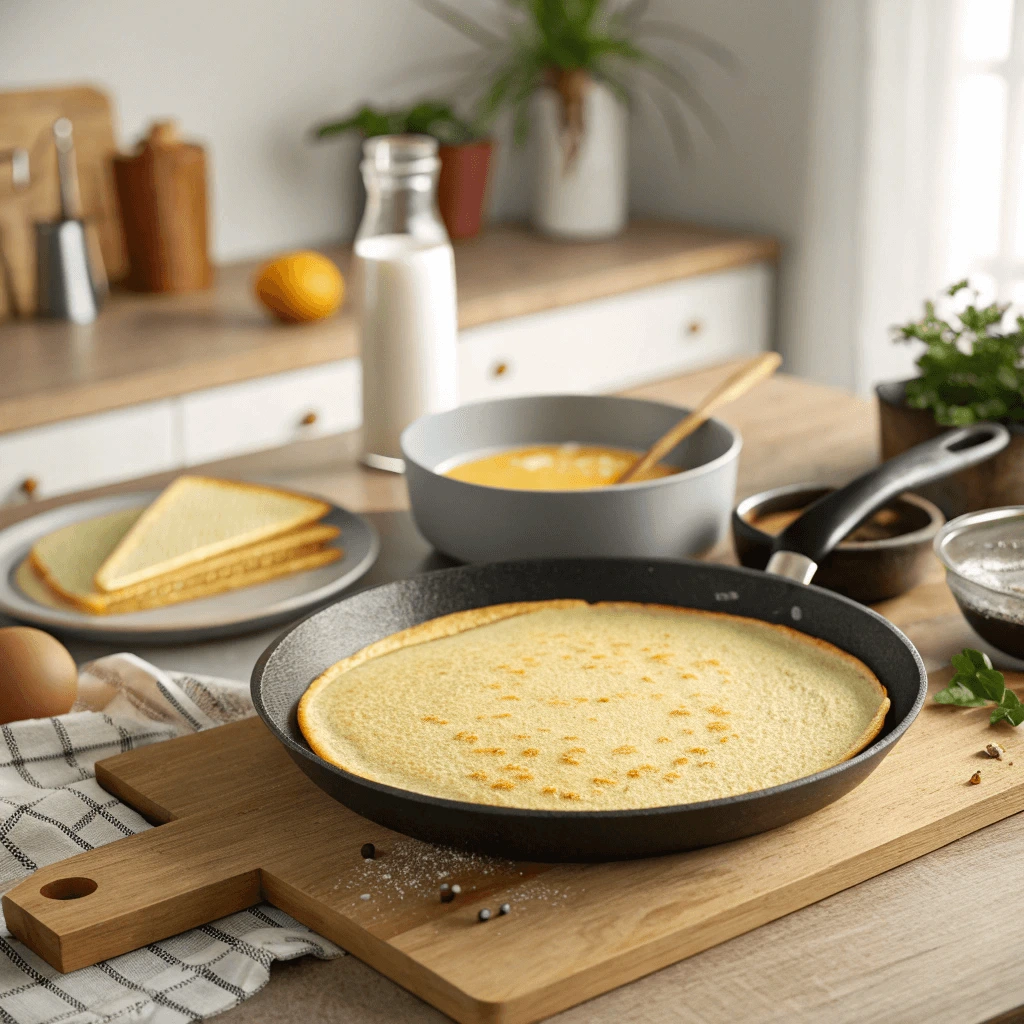
Flat, Even Surface for Perfect Cooking
The cooking surface of a crepe pan is completely flat and evenly heated. This design ensures that the batter spreads out thinly and cooks evenly without developing hot spots. Regular pans often have curved surfaces, which can cause crepes to cook unevenly or burn in certain areas.
Lightweight and Easy to Handle
Crepe pans are usually lighter than traditional pans, making them easier to tilt and swirl the batter quickly. This is especially helpful because swirling the batter evenly across the pan creates the paper-thin crepes that everyone loves. A heavy pan would make this step difficult and tiring.
Home Chef Crepe Pan vs. Regular Frying Pan: Key Differences
At first glance, a crepe pan and a regular frying pan may look similar, but they are built for very different purposes. Understanding these differences helps you choose the right tool for making perfect crepes and much more.
Shape and Edge Design
A crepe pan has very low, slightly sloped sides, while a regular frying pan usually has higher, steeper edges. These low sides on a crepe pan make it much easier to spread batter, flip crepes, and slide them out onto a plate. In contrast, the higher edges on a regular frying pan can get in the way when you’re trying to flip something as delicate as a crepe.
Cooking Surface and Heat Distribution
The surface of a crepe pan is designed to be completely flat and very smooth. This flatness ensures the batter spreads thinly and cooks evenly, creating that signature crepe texture. Regular frying pans often have a slight curve at the edges and may heat unevenly, which can cause crepes to cook inconsistently or develop burnt spots.
Weight and Handling
Crepe pans are generally lighter than regular frying pans. The lighter weight allows you to easily swirl the batter to coat the pan and handle the pan for flipping. A heavier regular frying pan can make these motions more difficult, leading to thicker crepes or tearing during flipping.
The History of Crepes and the Evolution of the Home Chef Crepe Pan
Crepes have a long and delicious history, dating back hundreds of years. They began as a humble dish but evolved into one of the most beloved foods in French cuisine. Along the way, the tools used to make crepes became just as important as the recipes themselves.
The Origins of Crepes
Crepes originated in Brittany, a region in northwest France, during the 13th century. Farmers would use simple ingredients like flour, water, and salt to create thin pancakes cooked over an open fire. These early crepes were made with buckwheat flour, which gave them a hearty and slightly nutty flavor. Over time, crepes became a staple in French households and expanded beyond savory dishes to include sweet versions filled with fruits, creams, and chocolates.
Traditional Tools for Making Crepes
In the beginning, crepe makers relied on large cast iron griddles, known as billigs, placed over open flames. Cooks used a small wooden tool called a rozell to spread the batter thinly across the hot surface. This simple combination allowed them to produce perfectly thin, golden crepes. Although modern kitchens rarely use open fires today, the classic flat, heavy cooking surface remains a key part of crepe-making tools.
Modern Crepe Pans and Their Evolution
Today’s crepe pans are designed to mirror the traditional methods while offering more convenience for home cooks. Modern crepe pans often feature non-stick coatings, lighter materials like aluminum or carbon steel, and ergonomically designed handles. Despite these upgrades, they still respect the original design principles — flat surfaces and low edges — that made crepe-making so successful centuries ago.
Top Benefits of Using a Home Chef Crepe Pan at Home
Achieve Paper-Thin Crepes Easily with a Home Chef Crepe Pan
Making thin, delicate crepes can feel intimidating at first, but with the right techniques and tools, it becomes a simple and enjoyable task. A good crepe pan plays a big role, but technique matters just as much.
Start with the Right Batter
A smooth, thin batter is the foundation for perfect crepes. Always sift your flour to remove any lumps before mixing. Use a blender or whisk the ingredients thoroughly until the batter is silky and runny, almost like heavy cream. Letting the batter rest for about 30 minutes allows the gluten to relax, making the crepes tender and easier to spread thinly.
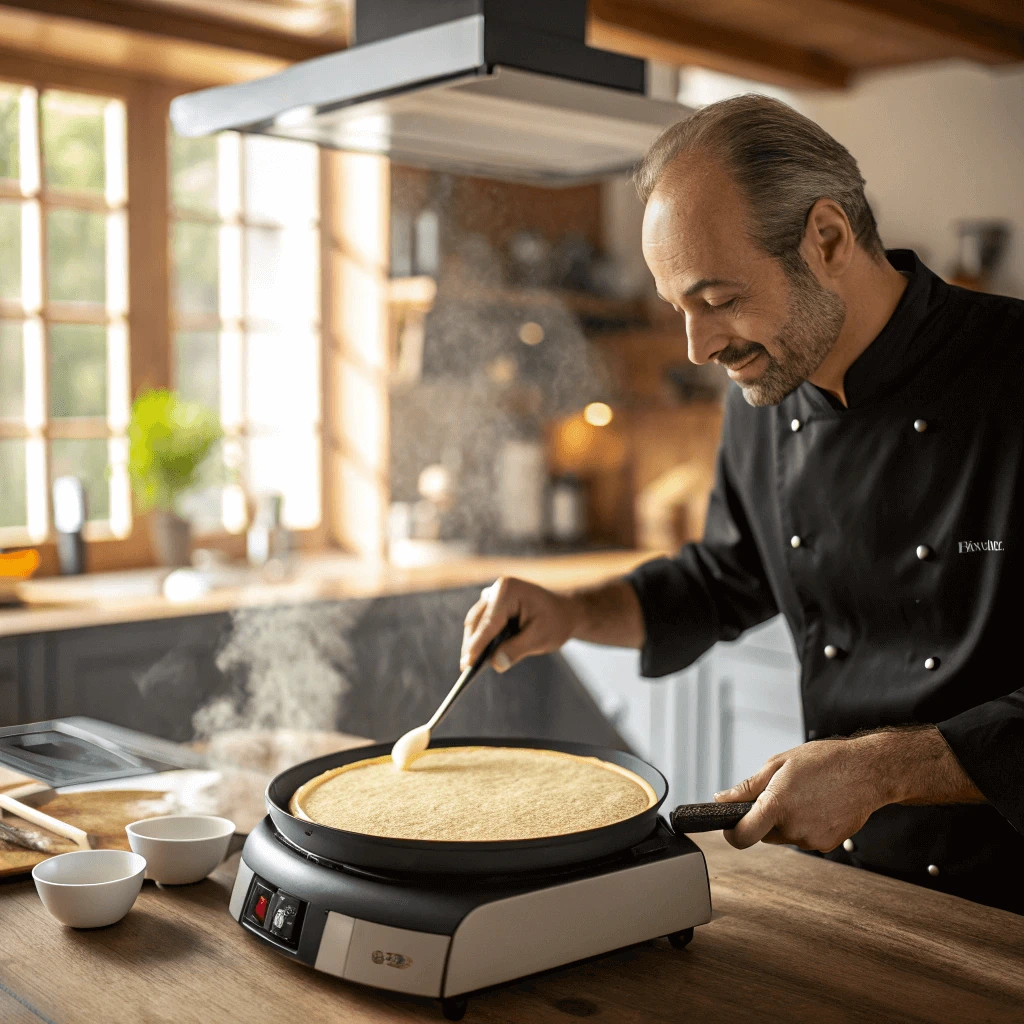
Master the Pour and Swirl Technique
Heat the crepe pan over medium heat until it’s hot but not smoking. Lightly grease the surface with butter or oil, then pour a small amount of batter into the center of the pan. Immediately lift and tilt the pan, swirling the batter evenly across the surface. Moving quickly ensures a thin, even layer before the batter starts to cook and set.
Use the Right Tools for Flipping
Once the crepe looks dry on top and lightly golden underneath, use a thin spatula or even your fingers to gently lift the edge. Flip it carefully and cook for just a few more seconds on the other side. A crepe pan’s low edges make this step easy, reducing the chance of tearing. With practice, flipping crepes becomes smooth and effortless.
Home Chef Crepe Pan Versatility: Beyond Crepes to Pancakes, Omelets, and More
While crepe pans are perfect for making delicate, thin crepes, their usefulness goes far beyond that. Thanks to their unique design, crepe pans can handle a variety of dishes and make everyday cooking even easier.
Cook Perfectly Even Eggs and Omelets
A crepe pan’s flat surface and even heat distribution make it ideal for cooking eggs. Whether you prefer fried eggs, scrambled eggs, or fluffy omelets, the low sides allow for easy flipping and sliding onto a plate. You can create restaurant-quality omelets without worrying about them sticking or tearing.
Sear and Toast with Ease
Because crepe pans heat quickly and stay hot, they are excellent for searing small cuts of meat, fish, or vegetables. You can also use them to toast tortillas, flatbreads, or sandwiches. The flat surface creates a consistent golden-brown finish that’s hard to achieve with deeper, heavier pans.
Prepare Quick Snacks and Desserts
Beyond savory dishes, a crepe pan handles sweet treats beautifully. You can whip up pancakes, blinis, quesadillas, or even warm up pastries and croissants. The non-stick surface helps delicate foods cook evenly and prevents burning, making quick snacks and desserts a breeze to prepare.
How a Home Chef Crepe Pan Saves Time and Energy
A crepe pan doesn’t just make better crepes — it helps you cook faster, cleaner, and more efficiently. With the right techniques and tools, you can save precious time and cut down on kitchen fatigue.
Faster Cooking with Even Heat Distribution
Crepe pans are designed to heat up quickly and distribute heat evenly across the surface. This fast, consistent heating allows food to cook more uniformly, reducing the time you spend adjusting burners or waiting for the pan to reheat. Whether you’re making crepes, eggs, or sandwiches, you can move from one batch to the next without long pauses.
Easy Cleanup Thanks to Nonstick Surfaces
Most modern crepe pans feature high-quality nonstick coatings. These surfaces prevent batter, eggs, or cheese from sticking and burning, which makes cleanup almost effortless. A simple wipe with a damp cloth or quick rinse often returns the pan to spotless condition, saving you from tedious scrubbing after cooking.
Reduced Energy Consumption
Because crepe pans retain heat efficiently, they require less energy to maintain cooking temperatures. You don’t have to crank up the heat or leave burners on for extended periods. Using a crepe pan means shorter cooking times and lower energy bills — a win for both your wallet and the environment.
Choosing the Right Crepe Pan for Home Cooking
Non-Stick vs. Cast Iron Crepe Pans: Which One to Choose?
When choosing a crepe pan, one of the most important decisions you’ll make is whether to go with a non-stick or cast iron option. Both types have their advantages and offer unique features, but understanding their differences will help you pick the right one for your cooking style.
Non-Stick Crepe Pans: Quick and Easy Cooking
Non-stick crepe pans are extremely popular for their ease of use and minimal cleanup. Their smooth, non-stick surface ensures that crepes, eggs, and other delicate dishes release easily without sticking or tearing. These pans are perfect for beginners who want to avoid the frustration of food sticking to the pan while flipping or removing.
Because non-stick pans heat quickly and evenly, they require less oil or butter to coat the surface, which is great for healthier cooking. Additionally, the cleanup is a breeze since food residues wipe away with little effort, making them ideal for busy home cooks.
Cast Iron Crepe Pans: Durability and Heat Retention
Cast iron crepe pans, while heavier and slower to heat, offer excellent heat retention and even cooking. Once preheated, cast iron pans maintain a consistent temperature, making them perfect for producing a uniform cook on your crepes. They also create a beautiful sear on savory dishes, adding a layer of flavor that non-stick pans can’t match.
Cast iron pans require a little more maintenance than their non-stick counterparts, as they need to be seasoned regularly to maintain their non-stick surface and prevent rusting. However, once properly cared for, cast iron pans can last for decades and improve with age, becoming more naturally non-stick over time.
Which One Is Right for You?
The choice between a non-stick and cast iron crepe pan depends on your cooking preferences. If you’re looking for convenience, ease of use, and quick cleanup, a non-stick pan might be your best bet. On the other hand, if you enjoy cooking with traditional tools and value long-term durability, a cast iron pan may be more your style.
Essential Features to Look for in a Quality Crepe Pan
When choosing a crepe pan, it’s important to know which features matter most for creating the perfect crepes every time. Several factors can influence the cooking experience, from the pan’s material to its handle design. By understanding these key features, you can make an informed decision and invest in a crepe pan that suits your cooking style.
1. Material and Heat Distribution
The material of your crepe pan is one of the most important factors affecting its performance. Crepe pans are typically made from three materials: non-stick, cast iron, and stainless steel.
- Non-stick pans are easy to use and great for beginners. They heat quickly and evenly, providing a smooth surface that makes flipping crepes effortless.
- Cast iron pans provide excellent heat retention and even cooking, making them ideal for professionals or those who prefer a traditional approach. However, they require proper care and seasoning.
- Stainless steel pans are durable and resistant to corrosion but may take longer to heat and have a less even cooking surface.
Choosing the right material depends on your preference for convenience, heat retention, and long-term durability.
2. Size and Shape
Crepe pans typically come in sizes ranging from 8 to 12 inches. The size you choose will depend on your cooking needs and how many crepes you plan to make at once.
- Smaller pans (8-10 inches) are perfect for single servings and ideal for small kitchens or those who only need to make a few crepes at a time.
- Larger pans (11-12 inches) offer more space, allowing you to make multiple crepes at once, which is great for family meals or gatherings.
The shape of the pan also matters. A round, flat design with low sides helps in spreading the batter evenly and flipping crepes without difficulty.
3. Handle Design and Ergonomics
The handle is another crucial feature to consider. A good crepe pan should have an ergonomic handle that provides a secure and comfortable grip. Look for heat-resistant handles that stay cool during cooking to ensure your safety.
- Long handles offer better control when swirling the batter across the pan.
- Side handles or helper handles on larger pans can make flipping and moving the pan easier, especially for larger batches of crepes.
Ensure that the handle feels sturdy and comfortable in your hand, as this will affect the ease with which you cook.
4. Non-Stick Coating or Seasoning
If you opt for a non-stick crepe pan, the quality of the non-stick coating is crucial. Look for PFOA-free coatings to ensure your pan is safe for cooking. High-quality non-stick surfaces make flipping crepes easy, reducing the likelihood of sticking or tearing.
For cast iron pans, a properly seasoned surface will naturally prevent sticking and enhance the flavor of your food. Make sure to choose a cast iron pan that comes pre-seasoned or that can be easily seasoned at home.
5. Durability and Maintenance
The durability of your crepe pan is essential, especially if you plan to use it frequently. Non-stick pans typically wear out faster than cast iron or stainless steel pans, which can last for generations when properly cared for.
- Non-stick pans may require more frequent replacement after heavy use.
- Cast iron and stainless steel pans can handle high temperatures and, with the right maintenance, can last for many years.
Factor in the amount of time you’re willing to spend on maintenance, as cast iron requires seasoning, while non-stick pans need to be handled with care to avoid damaging the coating.
Top Brands for High-Quality Crepe Pans Recommended by Home Chefs
When it comes to crepe pans, the right brand can elevate your cooking experience. Several brands stand out due to their performance, durability, and design. Here are some of the most popular brands trusted by home chefs:
1. Le Creuset
Le Creuset is famous for its high-quality cast iron cookware, and their crepe pans are no exception. Known for even heat distribution and excellent heat retention, these pans deliver perfect crepes every time.
- Why Chefs Love It: Durable, stylish, and great for induction stovetops.
2. T-fal
T-fal’s non-stick crepe pans are a favorite for their affordability and ease of use. Their Titanium-reinforced non-stick surfaces ensure smooth cooking with minimal cleanup.
- Why Chefs Love It: Affordable, lightweight, and equipped with Thermo-Spot technology for precise heat control.
3. Cuisinart
Cuisinart’s stainless steel crepe pans offer professional-grade performance at home. They heat evenly and come with an ergonomic handle for comfort.
- Why Chefs Love It: High-quality, versatile, and durable non-stick coating.
4. Lodge
Lodge’s pre-seasoned cast iron crepe pans are perfect for those who prefer traditional cookware. Their heat retention is unbeatable, giving crepes a crispy, golden finish.
- Why Chefs Love It: Strong and durable, ideal for crispy crepes.
5. GreenPan
GreenPan provides eco-friendly ceramic-coated pans that cook without harmful chemicals. Their pans offer smooth, non-stick cooking with easy cleanup.
- Why Chefs Love It: Eco-friendly and safe, with a non-stick surface that doesn’t wear down quickly.
How to Use and Care for Your Crepe Pan
Tips for Making Perfect Crepes at Home
Making the perfect crepe requires a combination of the right tools, ingredients, and technique. Whether you’re a beginner or experienced home chef, following a few simple tips can ensure your crepes turn out light, delicate, and delicious every time.
1. Use the Right Pan
The key to making perfect crepes starts with the right pan. A crepe pan with low sides and a non-stick surface helps you spread the batter evenly and flip your crepes easily. A well-seasoned cast iron or high-quality non-stick pan ensures the batter cooks evenly without sticking.
- Tip: Avoid using a regular frying pan, as it may have higher sides and could make flipping difficult.
2. Rest the Batter
For the best texture, let your batter rest for at least 30 minutes to an hour. This allows the flour to fully absorb the liquid, making the batter smoother and ensuring your crepes are tender.
- Why It Matters: Resting the batter helps the gluten relax, resulting in crepes that are less chewy and more delicate.
3. Get the Right Consistency
Crepe batter should be thinner than pancake batter. If the batter is too thick, your crepes will turn out dense and heavy. The ideal consistency should be similar to heavy cream, allowing it to spread quickly in the pan.
- Tip: If your batter is too thick, add a bit more milk to thin it out.
4. Use the Right Temperature
Achieving the perfect crepe requires the right cooking temperature. The pan should be heated over medium heat, and you should test it by adding a small drop of batter. If it sizzles lightly, the pan is ready.
- Tip: Don’t make the pan too hot, as it can cause the crepes to cook unevenly or burn. You should also avoid using too much oil or butter—just enough to coat the pan lightly.
5. Spread the Batter Evenly
Once the batter hits the pan, tilt the pan in a circular motion to spread the batter evenly over the surface. This ensures that your crepes will be thin and uniform. You can also use a crepe spreader for more precision.
- Tip: Be quick when spreading the batter, as crepes cook fast.
6. Flip with Confidence
Flipping crepes can seem tricky at first, but it becomes easier with practice. Once the edges of the crepe begin to lift, slide a spatula under it. Gently flip the crepe with a quick wrist motion.
- Why It’s Important: Flipping at the right moment (when the edges are golden brown) ensures that your crepe is perfectly cooked on both sides.
7. Fill and Fold Your Crepes
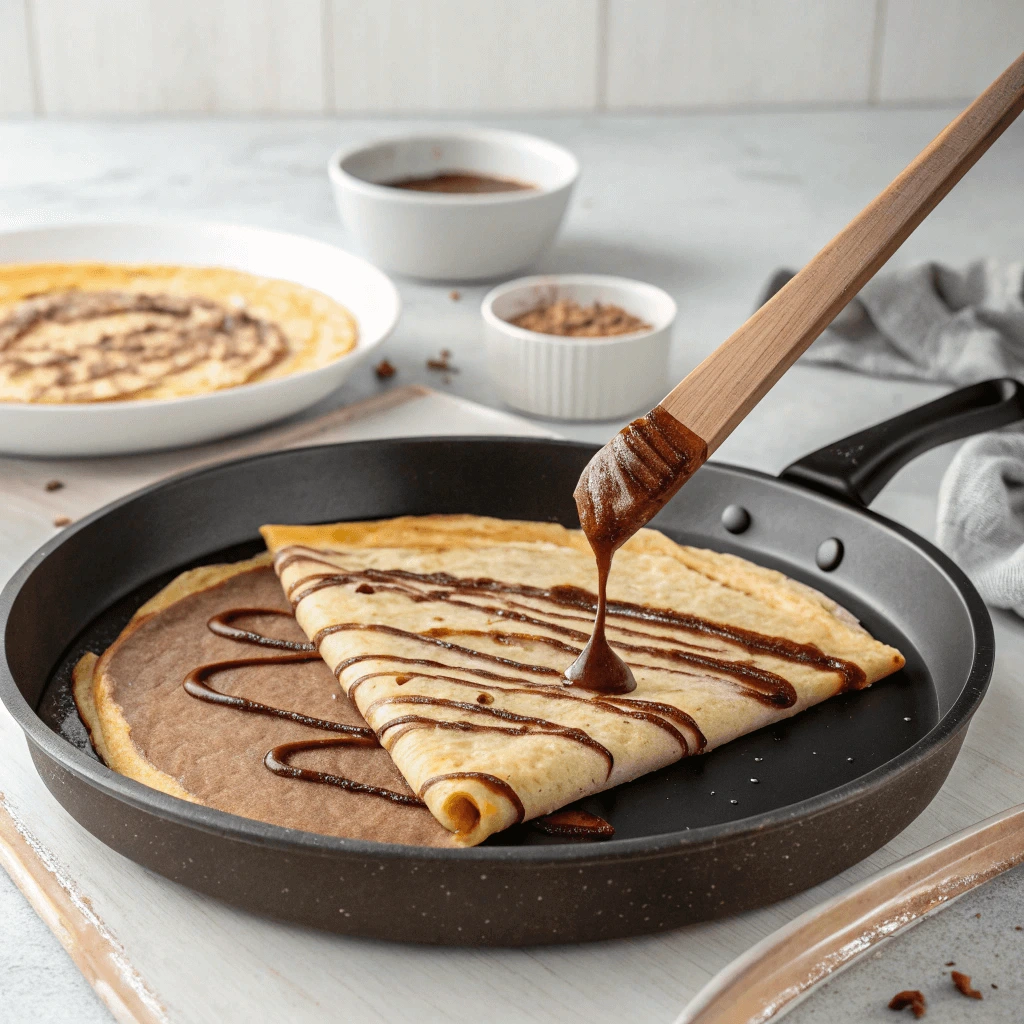
Once the crepe is cooked, you can fill it with a variety of delicious fillings, from sweet options like Nutella and berries to savory choices like spinach, mushrooms, and cheese. After filling, fold your crepe into a quarter or roll it up.
- Tip: Make sure not to overfill your crepes, as they may tear when you fold them.
Proper Care and Maintenance of Non-Stick and Cast Iron Crepe Pans
To keep your crepe pan in top condition, regular cleaning and proper maintenance are essential. Whether you have a non-stick or cast iron crepe pan, following a few simple steps will extend its lifespan and ensure it performs well.
1. Clean Right After Use
Wipe the pan with a soft cloth or sponge immediately after use. Avoid soaking the pan, especially if it’s made of cast iron, as this can lead to rust.
2. Avoid Harsh Scrubbers
Use soft sponges or nylon scrubbers instead of abrasive materials. Harsh scrubbers can damage the pan’s surface, especially non-stick coatings.
3. Dry Thoroughly
After cleaning, dry your pan completely to prevent rust. For cast iron, heat the pan on the stove to remove any remaining moisture.
4. Season Cast Iron Pans
For cast iron pans, regularly season them to maintain their non-stick surface. Rub a thin layer of oil onto the pan and heat it in the oven to keep it in great condition.
5. Store Properly
Store your pan in a dry place. For cast iron, make sure there’s no moisture buildup, and for non-stick pans, stack them with a paper towel to prevent scratches.
6. Inspect Regularly
Check the surface of your crepe pan for signs of damage. Replace the pan if the non-stick coating begins to peel or if you notice any cracks.
Avoid These Common Mistakes When Using a Crepe Pan
Making crepes can be tricky, but avoiding a few key mistakes will help you perfect your technique and enjoy better results.
1. Not Preheating the Pan
Failing to preheat your crepe pan can result in uneven cooking. Always heat the pan until drops of water sizzle on the surface.
2. Using Too Much Batter
Using excess batter can lead to thick crepes. Pour just enough to create a thin layer that evenly covers the pan.
3. Not Using the Right Tool for Spreading
Using a spoon or spatula can create uneven crepes. A crepe spreader or ladle helps you distribute the batter more smoothly.
4. Overcrowding the Pan
Cooking too many crepes at once prevents even cooking. Make one crepe at a time for best results.
5. Cooking at the Wrong Temperature
Too high or too low heat can affect the texture. Start at medium heat and adjust as needed to avoid burning or undercooking.
6. Not Oiling the Pan
Even non-stick pans need a light coating of oil to prevent sticking and ensure the perfect texture.
7. Flipping Too Early or Too Late
Wait until the edges lift and the crepe firms up before flipping it. Timing is crucial for a perfect crepe.
8. Forgetting to Let the Batter Rest
Resting the batter for 30 minutes ensures smoother, softer crepes. Skipping this step can affect texture.
9. Using the Wrong Flour
Use all-purpose flour or crepe-specific flour for the best results. Avoid specialty flours unless you’re making a specific type of crepe.
Must-Try Crepe Recipes to Try with Your Crepe Pan
Classic French Crepes
Classic French crepes are known for their thin, delicate texture, making them a versatile dish that can be filled with both sweet and savory ingredients. They are a staple in French cuisine and easy to master with just a few basic ingredients.
Ingredients You Need
For classic French crepes, you’ll need:
- Flour: All-purpose flour works best for a smooth, tender texture.
- Eggs and Milk: These provide the structure and richness needed for soft, pliable crepes.
- Butter: Adds richness and helps prevent sticking.
You may also add a pinch of salt for flavor and a bit of sugar or vanilla for sweetness, depending on your preference.
Simple Cooking Technique
- Mix the Batter: Combine the ingredients to make a smooth, slightly runny batter.
- Let the Batter Rest: Allow it to sit for 30 minutes to ensure the crepes are smooth and flexible.
- Cook the Crepes: Pour the batter into a heated pan, spreading it thinly. Cook for 1-2 minutes on each side until golden.
Sweet or Savory?
French crepes can be filled with various ingredients:
- Sweet Crepes: Popular fillings include Nutella, fresh berries, whipped cream, or sugar with lemon.
- Savory Crepes: Try fillings like cheese, spinach, or smoked salmon.
Folding and Serving
Once cooked, fold or roll the crepes to serve. For sweet crepes, fold them into quarters or roll them, while savory ones can be rolled or folded with their fillings inside.
Savory Breakfast Crepes
Savory breakfast crepes are a wonderful way to enjoy a filling and flavorful start to your day. These crepes can be filled with various ingredients like vegetables, cheese, and eggs, making them versatile and satisfying.
Popular Savory Fillings
- Egg and Cheese: A classic combo of scrambled eggs and cheese creates a simple yet delicious filling.
- Spinach and Feta: Sauteed spinach and creamy feta cheese are a perfect vegetarian choice.
- Smoked Salmon and Cream Cheese: For an elegant twist, smoked salmon and cream cheese bring richness and flavor.
- Mushroom and Swiss: Sauteed mushrooms and Swiss cheese add depth and earthiness to your crepes.
How to Make Savory Crepes
- Prepare the Batter: Use the same batter as for sweet crepes, simply leaving out the sugar. You can add herbs like chives or parsley to the batter for added flavor.
- Cook the Crepes: Heat a lightly greased pan and pour in a small amount of batter. Cook until the edges lift, then flip to cook the other side.
- Fill and Fold: Once cooked, fill the crepes with your desired fillings and fold them to close.
Serving Tips
- Serve with a side salad to balance the richness of the crepes.
- Top with fresh herbs like parsley or chives for a burst of color and flavor.
- Pair with a light sauce like hollandaise or a tangy vinaigrette to complement the flavors.
Sweet Dessert Crepes
Sweet dessert crepes are a delicious treat that can be customized with a variety of fillings and toppings. Their delicate texture pairs perfectly with a wide range of sweet ingredients, making them a favorite for dessert lovers. Whether you prefer chocolate, fruits, or creamy fillings, dessert crepes are always a crowd-pleaser.
Classic Sweet Fillings
- Nutella and Banana: A beloved classic, Nutella pairs wonderfully with fresh banana slices for a creamy and sweet dessert.
- Strawberries and Whipped Cream: Sweet, juicy strawberries combined with fluffy whipped cream create a refreshing and satisfying treat.
- Lemon and Sugar: For a simple yet delightful dessert, sprinkle sugar over your crepe and add a squeeze of fresh lemon juice.
- Chocolate and Raspberry: Rich chocolate spread or melted chocolate pairs perfectly with the tartness of fresh raspberries.
How to Make Sweet Dessert Crepes
- Prepare the Batter: For dessert crepes, use a traditional crepe batter but add a tablespoon of sugar to enhance sweetness. You can also flavor the batter with a splash of vanilla extract.
- Cook the Crepes: Pour a small amount of batter into a heated, greased pan, swirling to cover the surface evenly. Once the edges lift, flip the crepe to cook the other side.
- Add the Fillings: Once cooked, generously fill the crepe with your chosen ingredients. You can spread Nutella, sprinkle fruit, or top with whipped cream.
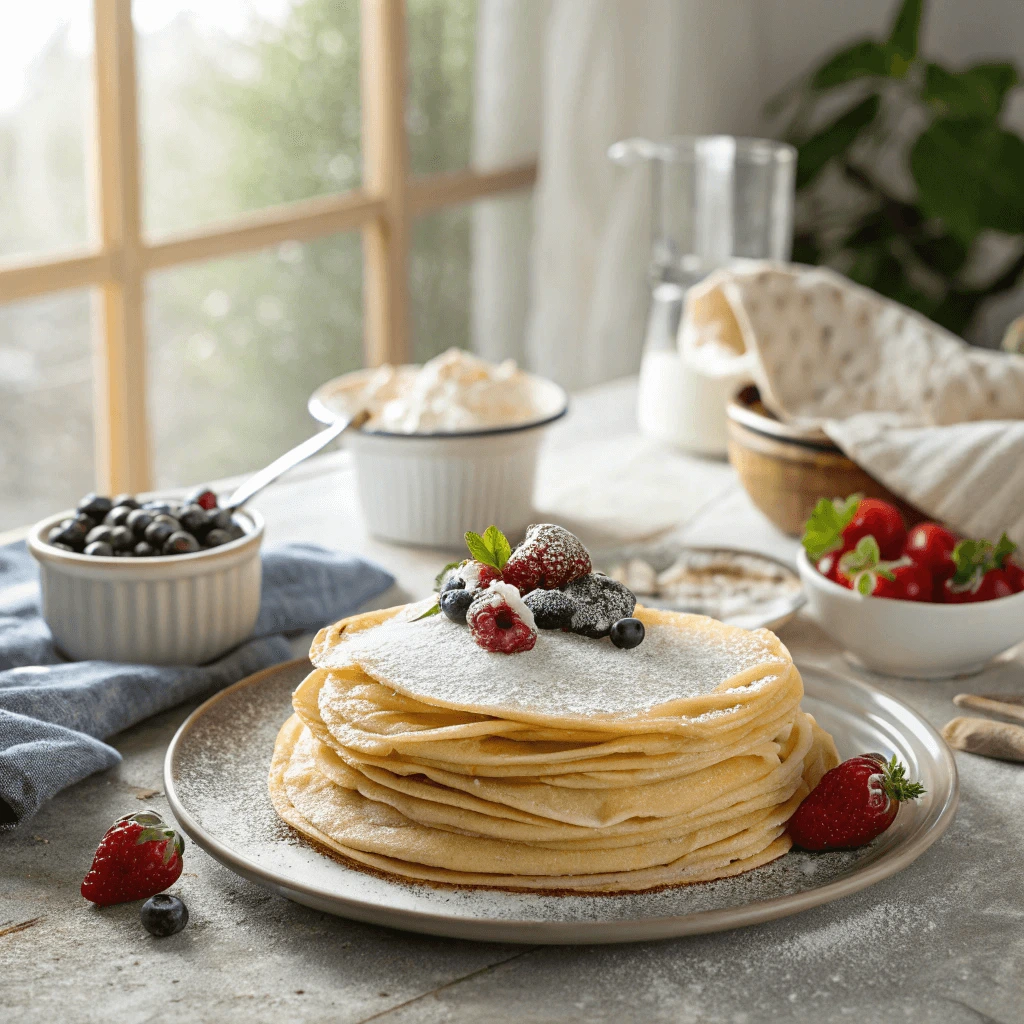
Serving Suggestions
- Top with powdered sugar: A light dusting of powdered sugar enhances the sweetness and makes your crepes look beautiful.
- Serve with a drizzle of syrup or honey: Add a bit of syrup or honey on top for extra sweetness and shine.
- Pair with ice cream: For a decadent touch, serve your sweet crepes with a scoop of your favorite ice cream flavor, such as vanilla, chocolate, or berry.
A crepe pan is an essential tool for any home chef who enjoys creating delicious, delicate dishes. With its flat, non-stick surface and even heat distribution, a crepe pan ensures perfect crepes every time. Whether you’re making sweet desserts, savory breakfast options, or experimenting with other dishes, this versatile pan elevates your cooking experience. Invest in a high-quality crepe pan to unlock endless culinary possibilities and bring the art of crepe-making into your kitchen with ease.