Making perfect crepes at home can seem tricky, but with the right crepe pan, it becomes much easier. A good crepe pan is designed to create thin, evenly cooked crepes without hassle. Its flat surface, low edges, and even heat distribution help home chefs flip and cook with confidence.
Whether you’re whipping up a quick breakfast or a sweet dessert, using the right pan can make all the difference. In this post, we’ll explore why a crepe pan is essential, how to choose the best one, and simple tips to help you master the art of crepes at home.
Why Every Home Chef Needs a Perfect Crepe Pan
How a Crepe Pan Improves Crepe-Making
Crepes are all about achieving that perfect, paper-thin texture and even cooking. To achieve this, using the right tools is essential, and a crepe pan is designed specifically for this purpose. Its unique features offer many advantages that significantly improve the crepe-making process.
1. Even Heat Distribution
One of the biggest challenges in making crepes is ensuring the batter cooks evenly. A crepe pan typically has a flat, smooth surface that allows for uniform heat distribution. Unlike regular frying pans, which may have hot spots, a crepe pan provides consistent heat across the surface, resulting in evenly cooked crepes. This is crucial to prevent undercooked areas or burnt patches.
2. Low, Sloping Sides for Easy Flipping
Crepes require careful flipping, and that can be tricky without the right tool. Crepe pans have low, slightly sloping sides, which make it much easier to slide a spatula under the thin crepes. The shape allows you to tilt the pan and lift the edges of the crepe without it tearing, enabling you to flip it with ease. This feature is especially beneficial for beginners who may struggle with flipping crepes using standard pans.
3. Ideal Size for Perfect Crepes
Crepe pans often come in sizes that are specifically suited to making thin crepes. A typical crepe pan ranges from 8 to 12 inches, giving you enough surface area to spread the batter evenly without overcrowding. The size helps you control the batter’s spread, ensuring the crepes are thin and consistent in thickness, which is crucial for that signature texture.
4. Non-stick Surface for Easy Removal
A high-quality crepe pan usually features a non-stick surface, making it easier to remove crepes without sticking. This is especially helpful when you’re working with thin batter that can be delicate. A non-stick coating reduces the amount of butter or oil needed and also helps in the flipping process, ensuring your crepes stay intact and maintain their smooth, tender texture.
Benefits Over Regular Frying Pans
A crepe pan provides several advantages over a regular frying pan, making it the better choice for cooking perfect crepes.
1. Even Heat Distribution
Crepe pans are designed for uniform heat distribution, which helps prevent hot spots that could burn the crepes. This ensures consistent cooking, unlike a regular frying pan that may have uneven heat.
2. Shallow, Sloping Sides for Easy Flipping
The low, sloped sides of a crepe pan make it easier to flip crepes without breaking them. In comparison, the higher sides of a regular frying pan can make flipping more difficult.
3. Ideal Size for Crepes
Crepe pans are typically smaller (8 to 12 inches), making them perfect for creating the ideal thin and round shape. A regular frying pan can be too large and may cause the crepes to become too thick.
4. Non-Stick Surface for Easy Cooking
Most crepe pans have a non-stick surface, which reduces the need for extra butter or oil and prevents the crepes from sticking. Regular frying pans might require more grease and still cause the crepes to stick.
5. Precision Cooking
Crepe pans offer a flat surface and consistent heat, which makes it easier to cook crepes at the perfect temperature. Regular frying pans can have uneven surfaces, making it harder to get the precise cooking needed for perfect crepes.
Essential Kitchen Tools for Perfect Crepes
To make perfect crepes, you need more than just the right batter. The right tools ensure your crepes come out thin, delicate, and beautifully cooked every time. Here are the essential tools you’ll need for flawless crepes.
1. Crepe Pan
A crepe pan is the most important tool. Its flat, shallow surface allows for even heat distribution, while the low edges make flipping easier. Choose a non-stick pan to prevent sticking and ensure smooth cooking.
2. Spatula or Crepe Turner
A flexible spatula or crepe turner helps you lift and flip crepes without tearing. Opt for a silicone or wooden spatula to protect the non-stick surface of your pan.
3. Crepe Spreaders or Batter Dispensers
For a thin, even layer of batter, use a crepe spreader. This tool helps spread the batter evenly across the pan. Alternatively, a batter dispenser can offer more precision and less mess.
4. Ladle or Measuring Cup
Use a ladle or measuring cup to control the batter amount. This ensures consistent crepe thickness. Too much batter can result in thick crepes, while too little can cause uneven cooking.
5. Mixing Bowls and Whisks
A mixing bowl and a whisk are essential for creating a smooth, lump-free batter. A bowl with a spout makes pouring the batter easier and less messy.
6. Cooling Rack
Place cooked crepes on a cooling rack to prevent them from becoming soggy. This allows air to circulate, keeping the crepes crisp and preventing them from sticking together.
Choosing the Best Crepe Pan for Your Kitchen
Non-Stick vs. Cast Iron Crepe Pans
When selecting the perfect crepe pan, you’ll likely come across two common types: non-stick and cast iron. Both have their advantages, but understanding their differences can help you make the best choice for your cooking style.
Non-Stick Crepe Pans
Non-stick pans are designed to prevent the crepes from sticking, making them ideal for beginners. These pans are usually lighter, easier to handle, and require less oil to cook crepes. The non-stick coating ensures easy flipping and cleanup. However, they are more prone to wear and tear over time, especially if you use metal utensils or scrub them harshly. To maximize their lifespan, always use wooden or silicone spatulas and avoid high heat.
Pros:
- Easy cleanup: Non-stick surfaces reduce the amount of residue left on the pan.
- Less oil needed: You don’t need much oil to prevent sticking, which is great for healthier crepes.
- Quick heating: Non-stick pans heat up quickly, making them perfect for busy mornings.
Cons:
- Durability issues: The non-stick coating can degrade over time, especially with improper care.
- Not ideal for high heat: Non-stick pans can be damaged if exposed to high temperatures for extended periods.
Cast Iron Crepe Pans
Cast iron pans, on the other hand, are known for their durability and heat retention. These pans provide even cooking, allowing crepes to cook uniformly. While they require seasoning (to develop a natural non-stick surface), cast iron pans can last a lifetime if properly maintained. They are perfect for those who enjoy slow, controlled cooking and can handle a bit of extra weight in their kitchen tools.
Pros:
- Superior heat retention: Cast iron distributes heat evenly and retains it well, making it ideal for cooking at consistent temperatures.
- Durable and long-lasting: With proper care, cast iron pans can last generations.
- Versatile: You can use cast iron pans for more than just crepes — they work great for other types of cooking as well.
Cons:
- Requires seasoning: You must maintain and season cast iron to keep it non-stick.
- Heavier: Cast iron pans are much heavier, which might make flipping crepes a little trickier for some.
Which is Best for You?
Choosing between a non-stick or cast iron crepe pan depends on your priorities:
- If you prefer a lighter, low-maintenance option, a non-stick crepe pan will serve you well.
- If you value durability, heat retention, and don’t mind putting in a little extra effort for seasoning, a cast iron crepe pan is the way to go.
Key Features to Look For in a Crepe Pan
Choosing the right crepe pan can make all the difference when it comes to making perfect crepes at home. Here are some essential features to consider.
1. Size and Shape
Crepe pans typically range from 8 to 12 inches in diameter. Larger pans allow for bigger crepes, while smaller pans are perfect for personal-sized servings. Look for pans with shallow edges to make flipping easier and to prevent the crepe from tearing.
2. Heat Distribution
Even heat distribution is crucial. A pan that heats evenly will prevent hot spots and ensure your crepes cook uniformly. Cast iron pans are great for heat retention, while non-stick pans heat up quickly but may not retain heat as well.
3. Non-Stick Coating
Non-stick surfaces make crepe flipping easy and require less oil or butter. Look for pans with ceramic or PTFE coatings. Remember that non-stick pans need to be treated gently to avoid scratches, which can affect their performance.
4. Material
Crepe pans are made from various materials like cast iron, carbon steel, aluminum, and stainless steel. Cast iron and carbon steel are great for heat retention, while aluminum pans heat up quickly but may not retain heat as effectively.
5. Handle Design
A comfortable, heat-resistant handle is important for control and safety. Opt for a handle that stays cool and is ergonomically designed for easy flipping.
6. Easy Cleanup
A non-stick coating simplifies cleaning, while cast iron requires special care. Make sure to follow the manufacturer’s care instructions to maintain the longevity of your pan.
Top Crepe Pan Brands Trusted by Home Chefs
Choosing the right crepe pan can significantly impact the quality of your crepes. Here are some of the most trusted brands among home chefs, known for their reliability and performance.
1. T-fal
T-fal crepe pans are known for their affordable price and durable non-stick surfaces. They heat evenly and are easy to clean, making them perfect for beginners and experienced chefs alike. The ergonomic handle ensures safety and comfort while flipping crepes.
2. Le Creuset
Le Creuset is a premium brand offering cast iron crepe pans with excellent heat retention. Their enamel coating makes them easy to clean and prevents rust. These pans are perfect for those who want crispy crepes and don’t mind a slightly heavier pan.
3. Cuisinart
Cuisinart offers reliable, budget-friendly crepe pans that feature non-stick surfaces and even heat distribution. With ergonomic handles for easy flipping, these pans are ideal for home chefs looking for dependable, affordable options.
4. Lodge
Lodge’s cast iron crepe pans are known for their durability and superior heat retention. Though heavier, they provide even cooking and develop a natural non-stick surface with use. Regular maintenance is required to keep them in top shape, but they last for years.
5. Mauviel
Mauviel’s high-end crepe pans, often made from copper or stainless steel, offer precise heat control. They are excellent for those who want fast, even cooking and are willing to invest in premium cookware for top-tier crepes.
6. Tama
Tama offers budget-friendly non-stick crepe pans that heat evenly and are lightweight. They’re a good choice for home chefs looking for an affordable, dependable option to start making crepes.
The right crepe pan depends on your budget and preferences. Whether you opt for an affordable brand like T-fal or a premium brand like Le Creuset, each offers unique features to help you create perfect crepes at home.
Step-by-Step: How to Master Crepe-Making at Home
Mixing the Perfect Crepe Batter
Making the perfect crepe batter is key to getting smooth, delicate crepes. The process starts with the right ingredients and mixing techniques. Here’s a more concise guide to achieving the ideal crepe batter:
1. Gathering Ingredients
The basic crepe batter ingredients are flour, eggs, milk, butter, and a pinch of salt. For sweet crepes, you can add a little sugar and vanilla extract for flavor.
2. Choosing the Right Flour
All-purpose flour is the most common choice, but if you want lighter crepes, you can use cake flour. You can also experiment with gluten-free flour for dietary needs.
3. Mixing Techniques
Start by whisking eggs and milk together, then gradually add flour while stirring. Use a blender or whisk to ensure the batter is smooth. If lumps form, let the batter rest and blend again.
4. Getting the Right Consistency
The batter should be thin but not watery. To test, dip a spoon into the batter—when lifted, it should flow off easily, leaving a slight trail. Adjust with milk or flour to get the right texture.
5. Resting the Batter
Let the batter rest for 30 minutes to relax the gluten and improve the texture. This step helps create tender, smooth crepes.
6. Optional Additions
For extra flavor, consider adding melted butter, herbs, or a touch of vanilla depending on whether you’re making sweet or savory crepes.
By following these tips, you’ll have the perfect batter for delicious, paper-thin crepes every time.
Heating and Flipping Techniques
Heating the pan to the perfect temperature and mastering the flip are essential steps in making perfect crepes. These techniques ensure that your crepes cook evenly and have a smooth texture.
1. Preheating the Crepe Pan
Before you start cooking, it’s essential to preheat your crepe pan over medium heat. This allows the pan to reach an even temperature, which ensures that the batter spreads evenly. You can test the temperature by sprinkling a few drops of water onto the pan. If the water sizzles and evaporates immediately, the pan is ready.
2. Oiling the Pan
Once the pan is preheated, use a light coat of oil or butter. This helps prevent sticking and gives your crepes a golden-brown color. You don’t need much—just a small amount, spread evenly with a paper towel or brush.
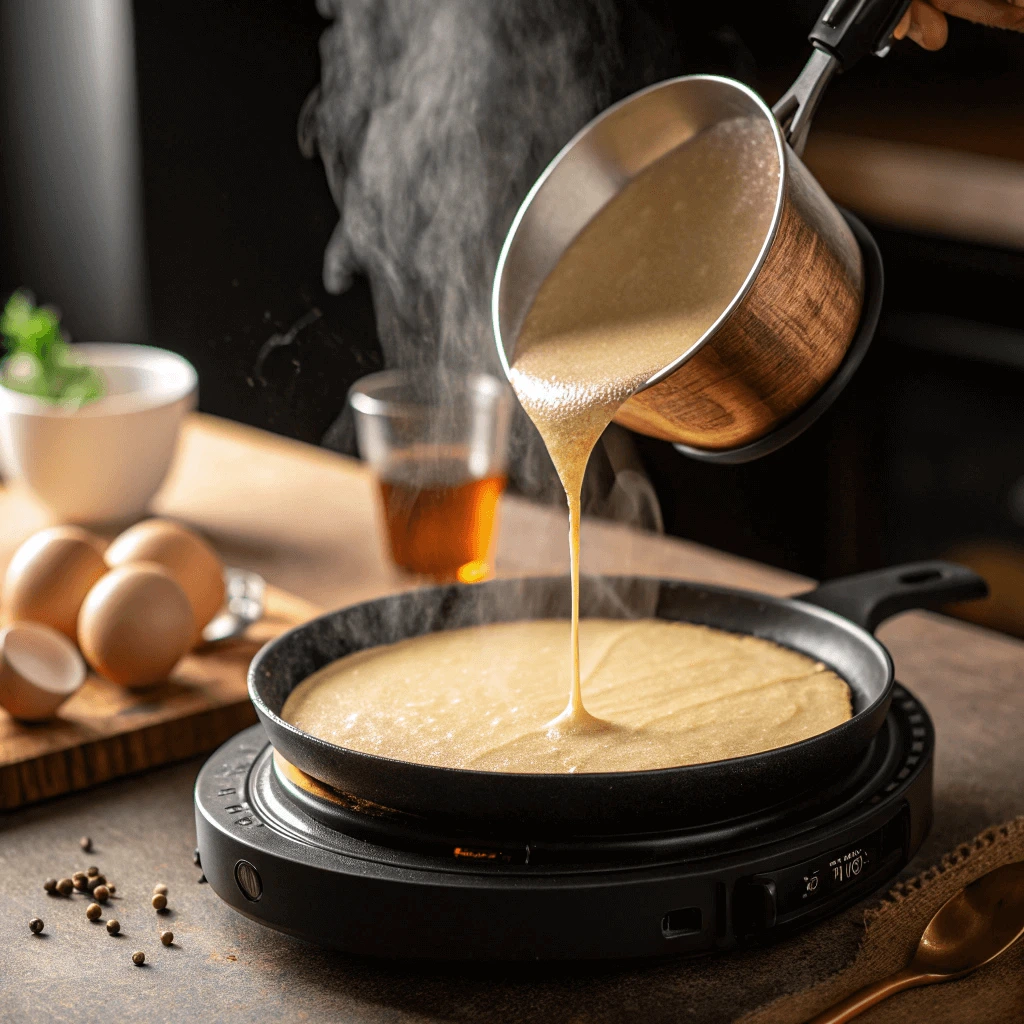
3. Pouring the Batter
Pour a small ladle or measuring cup of batter onto the pan. Swirl the pan quickly to spread the batter in a thin, even layer. The batter should immediately start to form a thin film that covers the bottom of the pan.
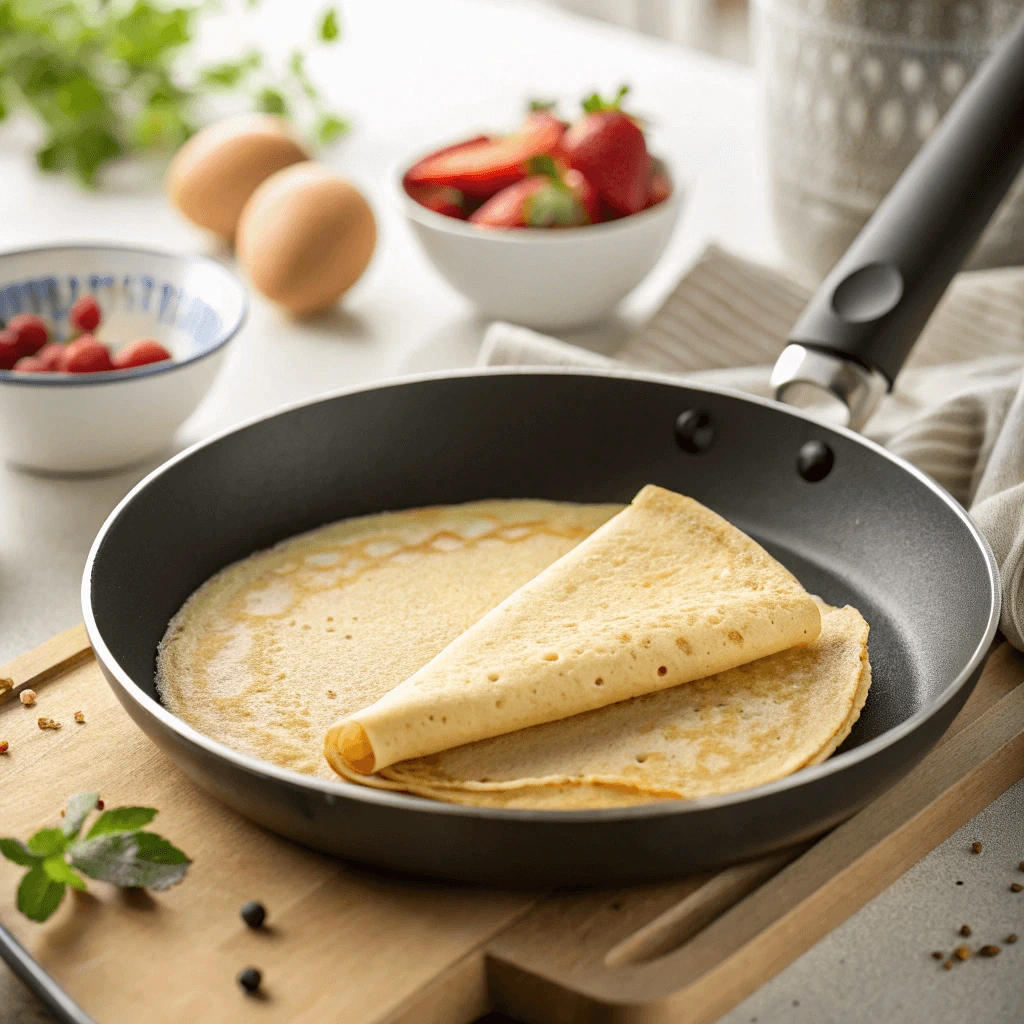
4. Cooking the Crepe
Let the crepe cook for about 1 to 2 minutes on the first side. You’ll know it’s ready to flip when the edges start to lift from the pan and the center no longer looks wet. The bottom will have a slightly golden color.
5. Flipping the Crepe
Flipping crepes can be tricky, but with practice, it becomes second nature. Here’s how:
- Use a thin spatula: Slide it under the crepe, making sure to get under the edges.
- Toss or flip: You can either gently toss the crepe with a flick of the wrist or flip it with the spatula. To flip with a toss, hold the pan at a slight angle and quickly flick your wrist upward to flip the crepe over.
- Cook the other side: After flipping, let the crepe cook for about 30 seconds to 1 minute. The second side will cook much faster than the first.
6. Stacking the Crepes
Once your crepe is cooked, slide it onto a plate and cover it with a clean kitchen towel to keep it warm. Continue cooking the remaining crepes, stacking them on top of one another. The heat from the stack will help keep them warm while you finish.
With these heating and flipping techniques, you’ll master the art of making flawless crepes every time!
Common Mistakes to Avoid When Making Crepes
Making crepes can be tricky if you’re not careful. To ensure perfect crepes every time, here are some common mistakes to avoid.
1. Using Cold Batter
Cold batter can cause uneven cooking and tough crepes. Let the batter sit at room temperature for about 30 minutes before cooking.
2. Not Preheating the Pan
A cold pan can lead to sticky crepes. Always preheat your pan on medium heat before adding the batter. A quick water drop test can help you know when it’s ready.
3. Using Too Much Batter
Pour too much batter, and your crepes will be thick. Use just enough to cover the bottom of the pan and swirl it to spread evenly.
4. Overcooking or Undercooking Crepes
Overcooked crepes can be dry, while undercooked ones will be doughy. Aim to cook each side for 1-2 minutes or until golden and set.
5. Not Using the Right Utensils
Use a wooden or plastic spatula for flipping to avoid damaging your pan, especially with non-stick surfaces.
Caring for Your Crepe Pan to Make It Last
Cleaning a Non-Stick Crepe Pan Properly
A non-stick crepe pan is an excellent tool for making delicate crepes, but to ensure its longevity and maintain its performance, you must clean it properly. Here’s a guide to keeping your non-stick crepe pan in top condition.
1. Let the Pan Cool
Before cleaning, always allow your pan to cool down. Sudden temperature changes can cause warping, so never attempt to clean your non-stick pan while it’s hot.
2. Use Gentle Cleaning Tools
Avoid abrasive scrubbing pads that can damage the non-stick coating. Instead, use a soft sponge or cloth. This will help prevent scratches that may degrade the non-stick surface over time.
3. Avoid Harsh Chemicals
When cleaning, skip harsh chemicals or abrasive cleaners. A mild dish soap and warm water will do the job effectively without compromising the non-stick layer. If there are stubborn spots, you can soak the pan in soapy water for a few minutes to loosen them.
4. Scrape Off Food Gently
If food remains stuck to the surface, use a wooden or plastic spatula to gently scrape it off. Do not use metal utensils, as they can scratch and damage the coating.
5. Dry the Pan Thoroughly
Once cleaned, make sure to dry your pan thoroughly with a soft towel. Excess moisture can promote rusting, especially around the handle or rivets.
6. Season Your Pan (Occasionally)
While non-stick pans don’t require frequent seasoning, applying a light coat of oil occasionally can help restore the non-stick surface and prevent food from sticking. Simply heat the pan on low and wipe it with a paper towel dipped in a small amount of oil.
Seasoning and Maintaining a Cast Iron Crepe Pan
A well-maintained cast iron crepe pan can last a lifetime and offer great heat retention for perfect crepes. To keep it in top condition, here’s how to properly season and maintain your pan.
1. Seasoning Your Cast Iron Pan
To create a non-stick surface, start by cleaning the pan. Wash it gently with warm water and mild soap. Dry it thoroughly before applying a thin layer of oil, like vegetable or flaxseed oil. Preheat the oven to 450°F (232°C), place the pan upside down inside, and bake for one hour. Let it cool in the oven.
2. Maintaining the Pan
Avoid soaking your pan in water. After use, wash it with warm water and dry it completely. Apply a thin layer of oil after each cleaning to maintain the seasoning.
3. Dealing with Rust
If rust forms, scrub it off with a steel wool pad, then re-season the pan by applying oil and baking it again to restore the surface.
4. Long-Term Care
Store the pan in a dry place, and continue to use it regularly to keep the seasoning strong. Proper maintenance ensures your cast iron crepe pan remains a reliable kitchen tool for years.
Storage Tips to Protect Your Cookware
Proper storage is key to extending the life of your cookware, particularly for delicate items like crepe pans. Whether you have a non-stick or cast iron crepe pan, the way you store your cookware affects its longevity and performance. Here are some essential tips for keeping your pans in excellent condition:
1. Avoid Stacking Cookware Directly
While it may be tempting to stack your pans to save space, stacking them without protection can cause scratches and damage, especially for non-stick pans. To prevent this, use pan protectors, paper towels, or cloths between pans when storing them. This simple step will help maintain the integrity of the non-stick coating and prevent chips or scratches.
2. Store Pans in a Dry Place
Moisture is a major enemy to cast iron and non-stick pans. To prevent rusting and corrosion, always store your cookware in a dry area. For cast iron pans, store them in a well-ventilated cupboard to allow air circulation. If you live in a humid area, consider using a desiccant like silica gel or a moisture-absorbing packet inside the storage area.
3. Use Hooks or Hanging Racks for Easy Access
If you have limited cabinet space, consider installing hooks or a hanging rack in your kitchen. This not only saves space but also prevents unnecessary stacking. Hanging your crepe pan can protect it from scratches and damage, and it also gives your kitchen a stylish, professional look.
4. Avoid Storing Cookware with Food Residue
Before storing your crepe pan, ensure it’s thoroughly cleaned and dried. Even small amounts of food residue or oil can cause build-up, which may attract pests or lead to unpleasant odors over time. For cast iron pans, apply a thin layer of oil after cleaning to protect the surface from moisture and rust.
5. Use a Protective Cover
If you’re storing your cookware for an extended period, consider investing in a protective cover for both non-stick and cast iron pans. A cover can shield your pans from dust, dirt, and accidental scratches while preserving their surfaces. For cast iron, a cloth cover helps to absorb moisture and prevent rust.
Must-Try Crepe Recipes for Home Chefs
Classic French Crepes with Simple Fillings
Classic French crepes are known for their thin, delicate texture and endless versatility. While elaborate fillings are tempting, sometimes simple ingredients make the best crepes. Let’s explore how to make a perfect crepe and the simple fillings that elevate its flavor.
1. Making the Perfect Crepe Batter
A smooth and thin batter is essential for perfect crepes. Start by whisking together flour, eggs, and milk, adding water to adjust the consistency. Once smooth, stir in melted butter and a pinch of salt. For sweet crepes, you can add vanilla. Rest the batter for at least 30 minutes for best results.
2. Simple Fillings for French Crepes
- Sugar and Lemon: A sprinkle of sugar and a squeeze of fresh lemon juice is a simple, refreshing filling that complements the delicate crepe flavor.
- Nutella and Banana: For a rich filling, spread Nutella on the crepe and add thin banana slices. The chocolate and banana create a sweet, creamy combination.
- Jam or Marmalade: Fruit preserves, like strawberry jam or orange marmalade, offer a tangy-sweet option for filling crepes.
3. Folding or Rolling Crepes
Once your crepes are cooked, you can fold them into quarters or roll them into a tube. Folding gives a neat, traditional presentation, while rolling is great for a more casual serving, especially for on-the-go breakfasts.
Why Simple Fillings Work Best
The key to great French crepes is using simple fillings that don’t overpower the crepe’s delicate flavor. By keeping the fillings minimal, you allow the light, buttery taste of the crepe to shine. Simple ingredients like lemon, sugar, or jam provide just the right balance without overwhelming the dish.
Savory Breakfast Crepes with Eggs and Vegetables
Savory breakfast crepes are a tasty and nutritious way to start your day. By filling these thin, delicate crepes with eggs and vegetables, you get a delicious, satisfying meal that’s easy to make and full of flavor.
1. Choosing the Right Fillings
For savory crepes, you want to choose ingredients that complement the crepe’s soft texture. Scrambled eggs work wonderfully, providing creaminess. Add sautéed vegetables like spinach, mushrooms, bell peppers, and onions for a burst of flavor and nutrition. You can also sprinkle some cheese like feta or cheddar for extra richness.
2. Cooking the Vegetables
Sauté your vegetables in a little olive oil or butter. This helps bring out their natural sweetness. You can add herbs like basil or thyme to enhance the flavor. Be sure not to overcook the vegetables to keep them fresh and vibrant.
3. Assembling the Crepes
Once your crepes are cooked, it’s time to assemble. Place the eggs and vegetables in the center, and add a sprinkle of cheese. Fold the crepe over the filling to create a neat, flavorful pocket.
4. Serving Ideas
For a complete meal, serve your savory breakfast crepes with a side of fresh fruit or a light salad. A dollop of sour cream or Greek yogurt adds richness, and if you like, a drizzle of hollandaise sauce can take the dish to the next level.
Savory crepes with eggs and vegetables offer a healthy and delicious breakfast option that’s easy to customize and always satisfying.
Sweet Dessert Crepes with Nutella and Berries
Sweet dessert crepes are a delightful treat, perfect for satisfying your sweet cravings. Nutella and berries make an irresistible combination, blending rich chocolate-hazelnut spread with fresh fruit for a delightful flavor profile.
1. Making the Crepes
Start by preparing a simple crepe batter. Pour a small amount into a hot, lightly greased pan, swirling it to form a thin layer. Cook until golden, then flip to cook the other side. This ensures soft, light crepes that serve as the perfect base for your sweet toppings.
2. Spreading Nutella
Once your crepe is cooked, spread Nutella generously across the surface. The warm Nutella melts easily, creating a creamy, rich layer of chocolate-hazelnut goodness.
3. Adding Berries
Top the Nutella with fresh berries like strawberries, raspberries, or blueberries. The tartness of the berries perfectly complements the sweetness of Nutella, adding freshness and color to the dish.
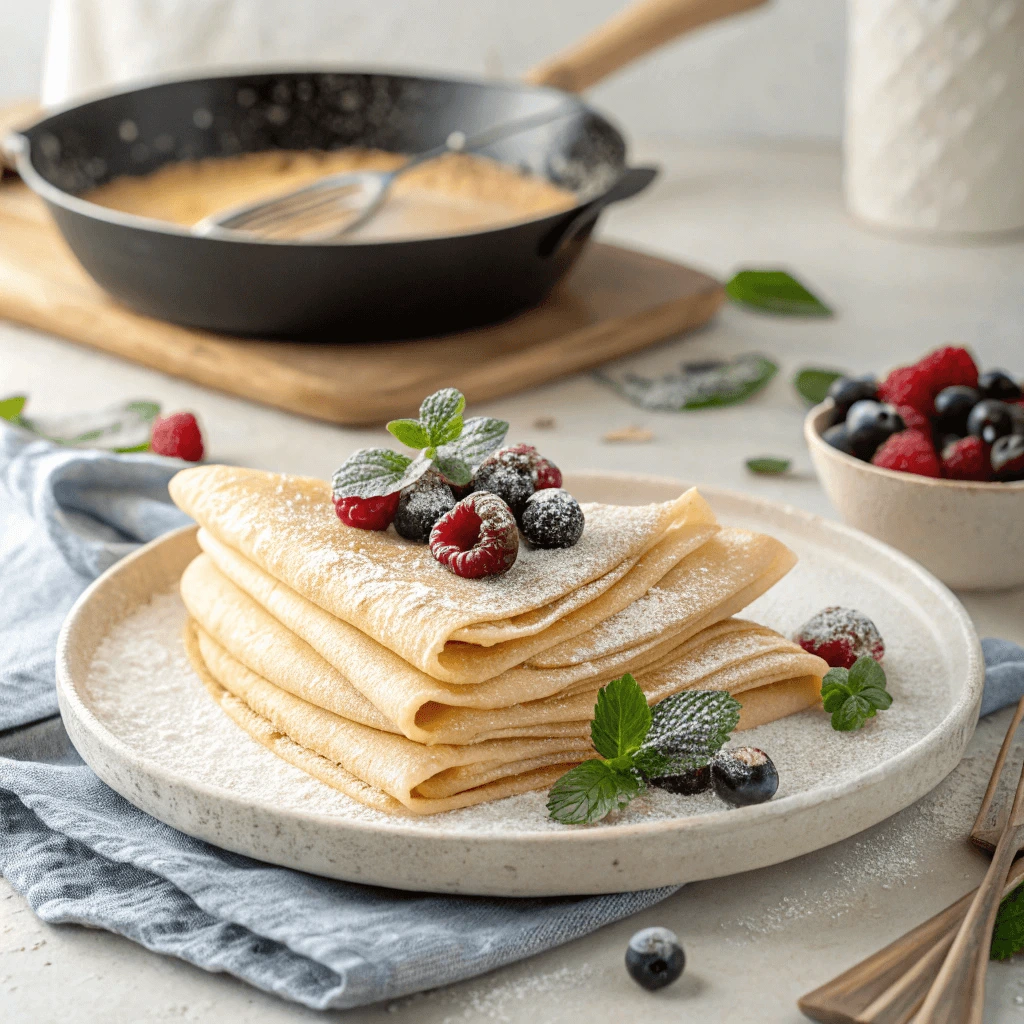
4. Folding and Serving
Fold the crepe into a triangle or roll it up. You can also dust it with powdered sugar or drizzle honey over the top for an extra touch of sweetness.
Sweet dessert crepes are easy to make and versatile, offering endless options for customization with various fruits or toppings. They make for a delightful dessert or special treat at any time!
In conclusion, a high-quality crepe pan is key to mastering the art of crepes. It ensures even heat, easy flipping, and perfect results every time. Whether you’re making savory or sweet crepes, the right pan elevates your cooking and helps you achieve restaurant-quality dishes at home.