Craving something sweet, nutty, and a little bit fancy? These homemade pistachio chocolate bars are the perfect treat. With just a few simple ingredients and no special skills required, you can whip up a batch of rich, chocolatey bars studded with crunchy pistachios right in your own kitchen. Whether you’re looking for a healthier alternative to store-bought candy, a creative edible gift, or a quick no-bake dessert, this step-by-step recipe has you covered. Let’s dive in and create a delicious blend of creamy chocolate and roasted pistachios that looks gourmet but couldn’t be easier to make.
Why You Should Try Homemade Pistachio Chocolate Bars
The Perfect Balance of Flavor in Homemade Pistachio Chocolate Bars
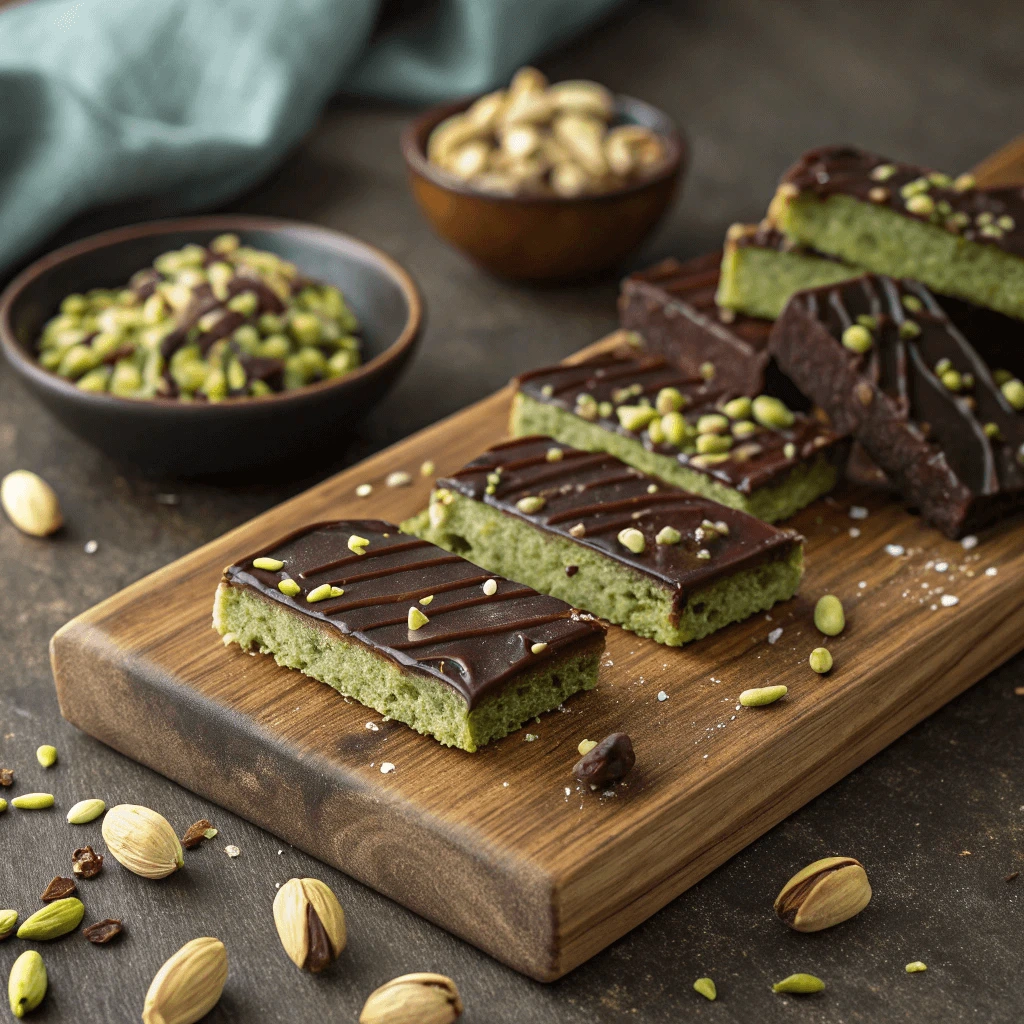
Chocolate and pistachios are a match made in dessert heaven. Their contrasting textures and flavors create a rich, satisfying experience in every bite. The smooth, creamy melt of chocolate pairs beautifully with the crunchy, buttery texture of roasted pistachios.
Why Chocolate Works So Well with Pistachios
Dark or milk chocolate offers deep cocoa notes that enhance the slightly sweet, earthy flavor of pistachios. The natural oils in the nuts blend with the chocolate’s richness to create a luxurious mouthfeel. When combined, these two ingredients deliver balance—neither one overpowers the other.
Texture and Taste: A Perfect Contrast
Texture plays a huge role in what makes these bars irresistible. While chocolate provides a silky base, the pistachios add a delightful crunch. Each bite surprises you with a satisfying snap followed by a smooth finish. This contrast is what keeps people coming back for more.
Loved by All Ages
Adults love the sophisticated flavor of roasted pistachios, while kids enjoy the sweet satisfaction of the chocolate. This combination makes pistachio chocolate bars a crowd-pleasing option for family gatherings, lunchbox treats, or festive gift boxes.
Whether you’re using dark, milk, or even white chocolate, pistachios elevate the flavor profile with their unique taste and texture. It’s no wonder this pairing continues to gain popularity in kitchens and confectioneries around the world.
How Homemade Pistachio Chocolate Bars Are Healthier Than Store-Bought Options
Making your own pistachio chocolate bars at home gives you total control over the ingredients—and that’s where the health benefits really shine. You skip the artificial additives and excess sugar often found in store-bought versions, and instead, create a treat that’s just as delicious and much more wholesome.
Control Over Ingredients
When you make chocolate bars yourself, you get to choose high-quality chocolate, whether it’s dark, milk, or vegan. You can opt for organic cocoa, unsweetened chocolate, or dairy-free options to suit your preferences. Unlike commercial brands, homemade versions don’t rely on preservatives, flavor enhancers, or stabilizers.
Natural Sweeteners, Less Sugar
Most store-bought chocolate bars pack in processed sugars. At home, you can sweeten your bars with natural alternatives like honey, maple syrup, or coconut sugar. This not only cuts down on empty calories but also avoids the sugar crashes that come with overly sweet snacks.
Nutrient-Rich Nuts
Pistachios add more than just crunch. They’re loaded with healthy fats, protein, fiber, and important nutrients like vitamin B6 and potassium. Combining pistachios with antioxidant-rich dark chocolate creates a treat that’s both indulgent and nourishing.
Fewer Additives, More Flavor
Without emulsifiers or artificial flavorings, your homemade chocolate bars offer a cleaner, more authentic taste. Roasted pistachios and real chocolate shine on their own—no need for fillers.
Homemade Pistachio Chocolate Bars: A Great Gift or Snack
Whether you’re making a batch for yourself or wrapping them up for a friend, homemade pistachio chocolate bars check every box. They’re easy to prepare, beautiful to look at, and perfect for any occasion.
A Thoughtful Homemade Gift
Homemade treats show care in a way that store-bought items can’t match. Pistachio chocolate bars feel luxurious and personal—especially when wrapped in parchment paper and tied with a ribbon or placed in a decorative box. People love receiving handcrafted gifts, especially ones they can eat and enjoy. You can easily customize the bars with flavor variations like sea salt, dried fruit, or swirls of white chocolate to suit the recipient’s taste.
Perfect for Snacking Anytime
Keep a batch in your fridge or freezer for quick snacks. These bars make an excellent mid-afternoon energy boost or a light dessert after dinner. Pistachios provide lasting fuel thanks to their protein and healthy fats, while the chocolate satisfies sweet cravings without going overboard. When you make your own, you can cut them into snack-size squares or larger bars depending on your needs.
Ideal for Special Occasions
These bars add a special touch to parties, holiday gatherings, or dessert platters. They pair beautifully with coffee or tea and look elegant on a serving tray. You can even make themed versions for events—adding a sprinkle of edible gold dust, crushed freeze-dried raspberries, or colored chocolate drizzle for visual flair.
Whether you’re gifting them or saving them for snack time, homemade pistachio chocolate bars deliver both flavor and charm in every bite.
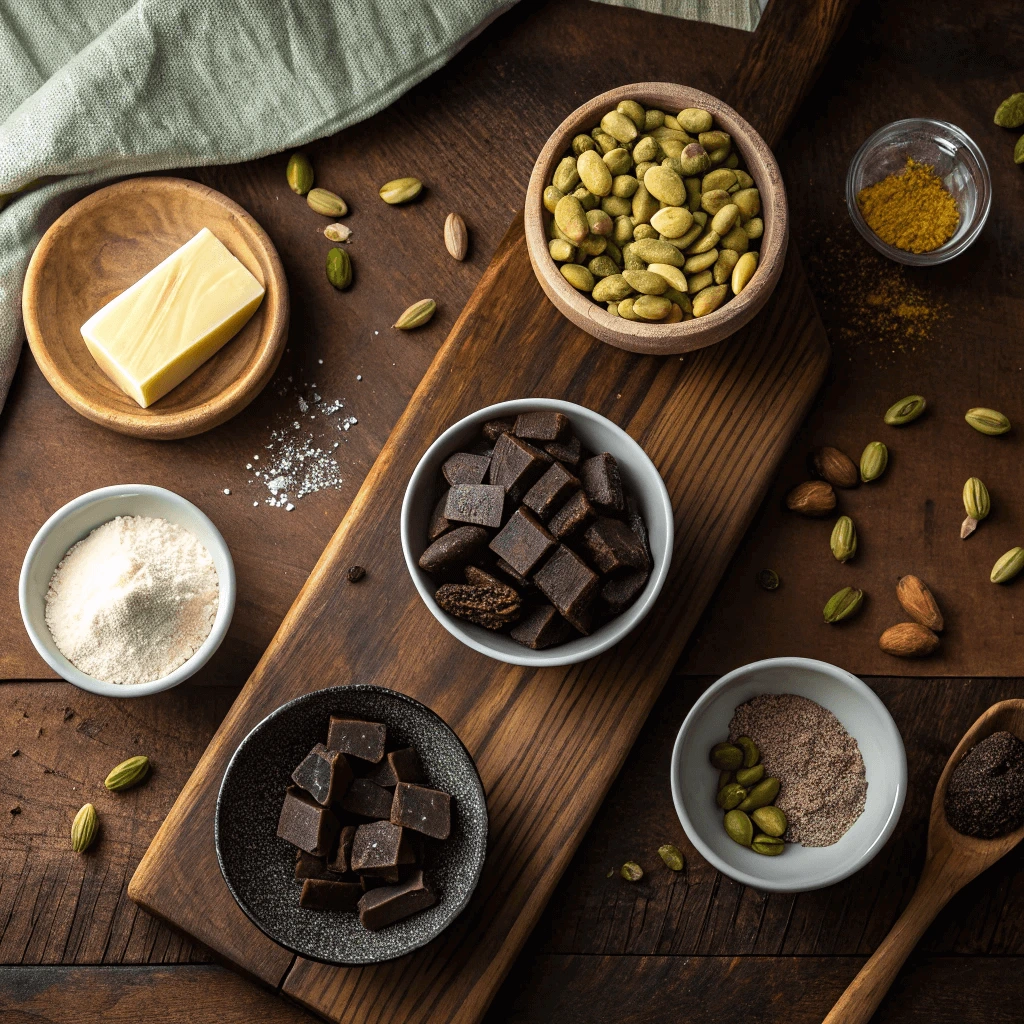
Ingredients You’ll Need to Make Pistachio Chocolate Bars
Chocolate Base Options
The beauty of homemade pistachio chocolate bars is their versatility. You can choose a chocolate base that fits your taste, dietary preferences, or nutritional goals. Whether you prefer something rich and bold or creamy and sweet, there’s a chocolate for every mood and occasion.
Dark Chocolate: Bold and Antioxidant-Rich
Dark chocolate is a popular choice for a reason. It offers an intense cocoa flavor and pairs exceptionally well with the earthy crunch of pistachios. Look for a bar with 70% cocoa or higher for maximum health benefits and minimal added sugar. Dark chocolate also contains antioxidants and a lower glycemic index than milk chocolate, making it ideal for more health-conscious snackers.
Milk Chocolate: Creamy and Classic
If you’re a fan of sweetness and smooth texture, milk chocolate may be your go-to. It melts beautifully and gives the bars a rich, velvety feel. While it contains more sugar than dark chocolate, milk chocolate remains a comforting and familiar favorite—especially for kids or anyone with a sweet tooth.
White Chocolate and Vegan Alternatives
White chocolate adds a buttery richness and a lighter color contrast that makes pistachios pop. However, if you’re avoiding dairy, try vegan chocolate or dairy-free chocolate chips made with coconut or oat milk. These alternatives melt well and offer creamy texture without animal products. Many brands now offer plant-based chocolate bars that taste just as indulgent as the originals.
Nutty Goodness: Pistachios
Pistachios aren’t just tasty—they’re tiny powerhouses of flavor and nutrition that elevate your chocolate bars from ordinary to gourmet. Whether you’re going for crunch, color, or health benefits, pistachios deliver on all fronts.
A Nutritional Powerhouse
Pistachios provide more than just texture. They’re packed with healthy fats, plant-based protein, and essential nutrients like vitamin B6, fiber, magnesium, and potassium. These nuts support heart health, aid in digestion, and help keep blood sugar levels stable. When combined with dark chocolate, they create a snack that’s both satisfying and nourishing.
Flavor That Stands Out
Unlike some other nuts, pistachios have a distinctive flavor—mildly sweet with a rich, buttery undertone. That subtle sweetness blends perfectly with the intensity of dark or milk chocolate, making every bite more complex and rewarding. Roasted pistachios, in particular, bring out a deeper, nuttier flavor that enhances the entire chocolate bar.
A Visual and Textural Upgrade
Pistachios add a beautiful pop of green that makes your homemade bars look artisanal and inviting. Sprinkle chopped pistachios over the top of the melted chocolate for a rustic look, or stir them into the base for an even bite. Their crunch provides contrast to the smoothness of the chocolate, making the texture more interesting and enjoyable.
Whether you’re using them for their health benefits, unique flavor, or visual appeal, pistachios truly earn their place in this recipe. They take your chocolate bars from simple to spectacular—one nut at a time.
Optional Add-Ins and Flavors
One of the best parts of making homemade pistachio chocolate bars is the freedom to get creative. With just a few extra ingredients, you can completely transform the flavor, texture, and appearance of your bars. Whether you want something spicy, fruity, or indulgent, the possibilities are endless.
Sweet and Fruity Twists
Add a touch of natural sweetness with dried fruits like cranberries, cherries, apricots, or raisins. Their chewy texture contrasts beautifully with the crunch of pistachios and the snap of chocolate. You can also use orange zest or freeze-dried berries to add bursts of citrusy or tart flavor. These add-ins brighten the overall taste and make the bars more dynamic.
A Hint of Spice or Salt
For a more adventurous edge, sprinkle in some sea salt, crushed pink peppercorns, or a pinch of cayenne. Sea salt enhances the richness of chocolate, while a little spice adds warmth and depth. You can also use cinnamon, cardamom, or ginger for a cozy, aromatic twist that complements the nuttiness of pistachios.
Indulgent Toppings and Textures
Make your bars look and taste luxurious with toppings like shredded coconut, toasted almonds, mini chocolate chips, or edible gold flakes. You can drizzle the top with white chocolate, add a layer of cookie crumbs, or even press in caramelized nuts for extra crunch. These additions don’t just taste great—they turn your bars into gift-worthy gourmet treats.
Tools and Equipment for Easy Chocolate Making at Home
Basic Kitchen Tools
You don’t need a professional kitchen to make delicious homemade pistachio chocolate bars. With a few basic tools, you can melt, mix, and mold your way to gourmet-style chocolate treats right at home. Here’s what you’ll need to get started.
Double Boiler or Microwave-Safe Bowl
To melt your chocolate evenly and smoothly, use a double boiler or a microwave-safe glass bowl. A double boiler gently heats the chocolate over simmering water, reducing the risk of burning. If you’re short on time, melt your chocolate in 15- to 30-second intervals in the microwave, stirring between each round. This ensures a silky texture and prevents clumps.
Silicone Spatula and Mixing Tools
Use a heat-resistant silicone spatula to stir the melted chocolate and fold in your pistachios or other add-ins. A good spatula allows you to scrape every bit of chocolate from the bowl—no waste! You might also want a small whisk if you’re blending in flavor extracts or spices.
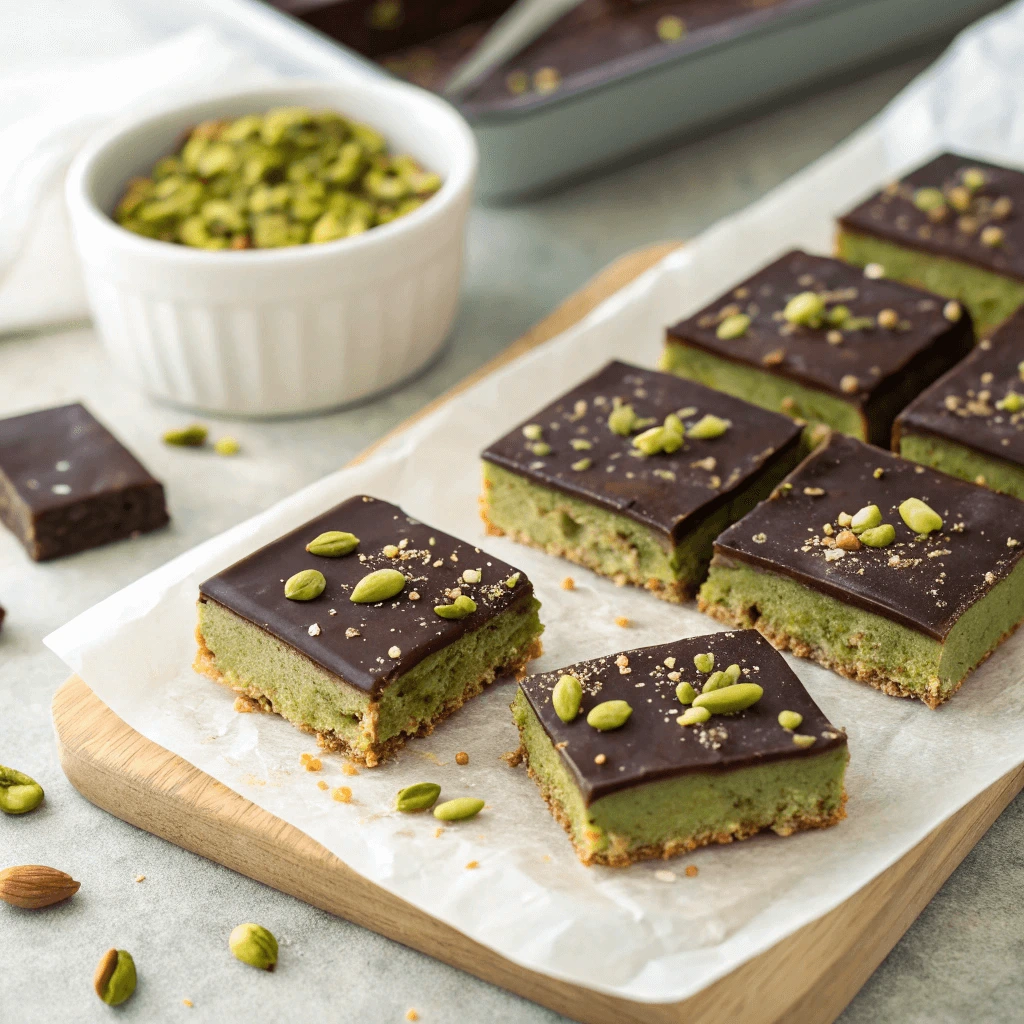
Chocolate Molds or Lined Baking Dish
To shape your bars, pour the melted mixture into silicone chocolate molds or a parchment-lined baking dish. Silicone molds make it easy to pop the bars out once they’ve hardened, and they come in various shapes and sizes. If you’re using a baking dish, choose one with a flat bottom for even thickness, then cut the slab into squares once it’s set.
Optional but Helpful Tools
- A kitchen scale ensures precise ingredient measurements, especially when melting chocolate in bulk.
- Offset spatulas help spread chocolate evenly into molds.
- A refrigerator or freezer speeds up the hardening process, giving you ready-to-eat bars in under an hour.
Having the right tools on hand simplifies the process and helps you achieve consistent results every time. These basic kitchen essentials make your pistachio chocolate bar recipe not only doable—but also enjoyable.
Chocolate Bar Molds
Choosing the right mold for your homemade pistachio chocolate bars plays a significant role in achieving a professional-looking result. Whether you want perfectly rectangular bars or creative shapes, the mold you select helps determine the final presentation. There are various options available, each offering its own advantages.
Silicone Molds: Flexible and Easy to Use
Silicone molds are a favorite among home chocolatiers for good reason. They provide flexibility, making it easy to pop your chocolate bars out once they’ve set. The non-stick surface of silicone also ensures a smooth finish without any unwanted cracks or breaks in the chocolate. Silicone molds come in a wide variety of shapes, from traditional rectangular bars to fun shapes like hearts, squares, and even holiday-themed designs. The best part? Silicone molds are reusable, making them an eco-friendly choice.
Plastic Molds: Sturdy and Affordable
Plastic molds are another excellent option for making chocolate bars. They’re typically less expensive than silicone molds and are sturdy enough to handle repeated use. Plastic molds come in a wide range of sizes and designs, offering plenty of options for customizing your chocolate bars. However, compared to silicone, plastic molds can be harder to clean and may require a bit more care to ensure the chocolate doesn’t stick.
Metal Molds: For Professional-Grade Results
If you’re aiming for a more polished, professional look, metal molds can help achieve sharp, clean lines. Made from stainless steel or aluminum, these molds retain heat well, helping the chocolate to set evenly. While metal molds can be a bit more difficult to remove the chocolate from, they provide a sleek finish that many experienced chocolatiers prefer. Metal molds are also highly durable and can withstand high temperatures, making them great for repeated use.
How to Choose the Right Mold for You
The mold you choose depends on your preferences and needs. If you’re just starting out, silicone molds are generally the most forgiving, easy to use, and budget-friendly. If you’re looking to get more creative or want your bars to look extra fancy, plastic or metal molds could be a good investment. Consider the number of bars you plan to make, the design you prefer, and how easy the mold is to clean when making your decision.
Chocolate molds not only shape your bars but also add a personal touch to the presentation. Whether you’re making a batch for yourself or preparing a special gift, the right mold can elevate your homemade pistachio chocolate bars into a gourmet masterpiece.
Storage Containers
Proper storage is key to maintaining the freshness and flavor of your homemade pistachio chocolate bars. With the right containers, you can keep them delicious for longer.
Airtight Containers for Freshness
Store your chocolate bars in airtight containers to prevent air exposure, which can dry out the chocolate or make it absorb unwanted odors. Plastic containers, glass jars, or sealed tins work great. Clear containers are ideal so you can easily check your chocolate.
Cool, Dry Storage
Keep your chocolate in a cool, dry place away from sunlight. The optimal temperature for storing chocolate is about 65–70°F (18–21°C). If it’s too warm, refrigerate the chocolate but let it come to room temperature before eating for the best texture.
Parchment Paper for Layering
To avoid bars sticking together, use parchment paper between each layer in your container. This ensures that your chocolate bars stay intact, especially when stacked.
Freezing for Long-Term Storage
For long-term storage, wrap each bar in plastic wrap or foil and place it in a freezer-safe airtight container. Frozen chocolate can last several months, but allow it to thaw completely before enjoying.
By following these tips, your pistachio chocolate bars will stay fresh and delicious until you’re ready to enjoy them!
Step-by-Step Instructions for Homemade Pistachio Chocolate Bars
Step 1: Melt the Chocolate Base
The first step in making your homemade pistachio chocolate bars is to melt the chocolate base. This sets the foundation for smooth, creamy bars. Here’s how to do it perfectly.
Choose the Right Chocolate
You can use dark, milk, or white chocolate for the base. Dark chocolate gives a richer flavor, milk chocolate adds sweetness, and white chocolate offers a lighter, creamier taste. Choose the one that best suits your preference.
Melting Methods: Double Boiler or Microwave
- Double Boiler: Place a heatproof bowl over a pot of simmering water and stir the chocolate until melted. This method ensures gentle, even heating.
- Microwave: Place chopped chocolate in a microwave-safe bowl. Heat in short bursts (20–30 seconds), stirring in between, until fully melted.
Stir for Smoothness
Stir the chocolate frequently to ensure it melts evenly. You want a smooth, glossy texture without any lumps.
Avoid Water Contact
Make sure no water touches the chocolate. Even a drop of water can cause it to seize up, resulting in a grainy texture.
Once your chocolate is melted and smooth, you’re ready to proceed with adding pistachios or other ingredients.
Step 2: Mix in the Pistachios and Add-Ins
Now that your chocolate base is ready, it’s time to mix in the pistachios and any optional add-ins. This step is where the real fun begins, as you get to customize your chocolate bars to your liking. Let’s walk through the process.
Toast Your Pistachios for Extra Flavor
Before adding pistachios to your melted chocolate, consider toasting them lightly. This enhances their natural flavor, giving them a deeper, nuttier taste. To toast, simply place the pistachios on a baking sheet and bake them at 350°F (175°C) for about 5–7 minutes, stirring occasionally. Once toasted, chop the pistachios into smaller pieces to make them easier to mix into the chocolate.
Add the Pistachios to the Chocolate
Once your pistachios are prepped, it’s time to fold them into the melted chocolate. Pour them in slowly, stirring gently to ensure even distribution throughout the chocolate. Aim for a nice balance so that every bite of your chocolate bar has a good amount of pistachio flavor. The combination of creamy chocolate and crunchy pistachios creates a delightful contrast in texture and taste.
Incorporate Other Add-Ins
This is also the time to get creative and add other mix-ins to your bars. Here are a few ideas:
- Dried Fruit: Chopped dried cherries, cranberries, or apricots add a sweet-tart bite to balance the richness of the chocolate.
- Sea Salt: A sprinkle of flaky sea salt can enhance the flavors, bringing out the sweetness of the chocolate and the nutty pistachios.
- Spices: A pinch of cinnamon or cardamom can infuse warmth into your chocolate, offering a unique flavor profile.
- Other Nuts: For more variety, you could add other crunchy nuts like almonds, walnuts, or hazelnuts.
Ensure Even Mixing
As you incorporate the pistachios and any add-ins, make sure everything is evenly distributed throughout the chocolate. Stir slowly and thoroughly to ensure that no pistachio or other ingredient is left behind. The goal is to have each piece of your chocolate bar packed with flavor and texture.
Test the Flavor
Before pouring the mixture into your molds, take a small spoonful of the chocolate and taste it. This is your chance to adjust the flavor, if needed. If you want more sweetness, add a bit of honey or maple syrup. If you prefer a more intense nutty flavor, toss in a few more pistachios. This step ensures the final product is exactly to your liking.
Step 3: Pour, Set, and Chill
Now that your pistachio chocolate mixture is ready, it’s time to pour it into molds, set it, and chill it. This is where the chocolate takes its final shape.
Choose Your Molds
Pick molds that suit the shape you want. Silicone molds are flexible and easy to use, while metal molds offer a more defined shape. If you don’t have molds, a small dish lined with parchment paper works too.
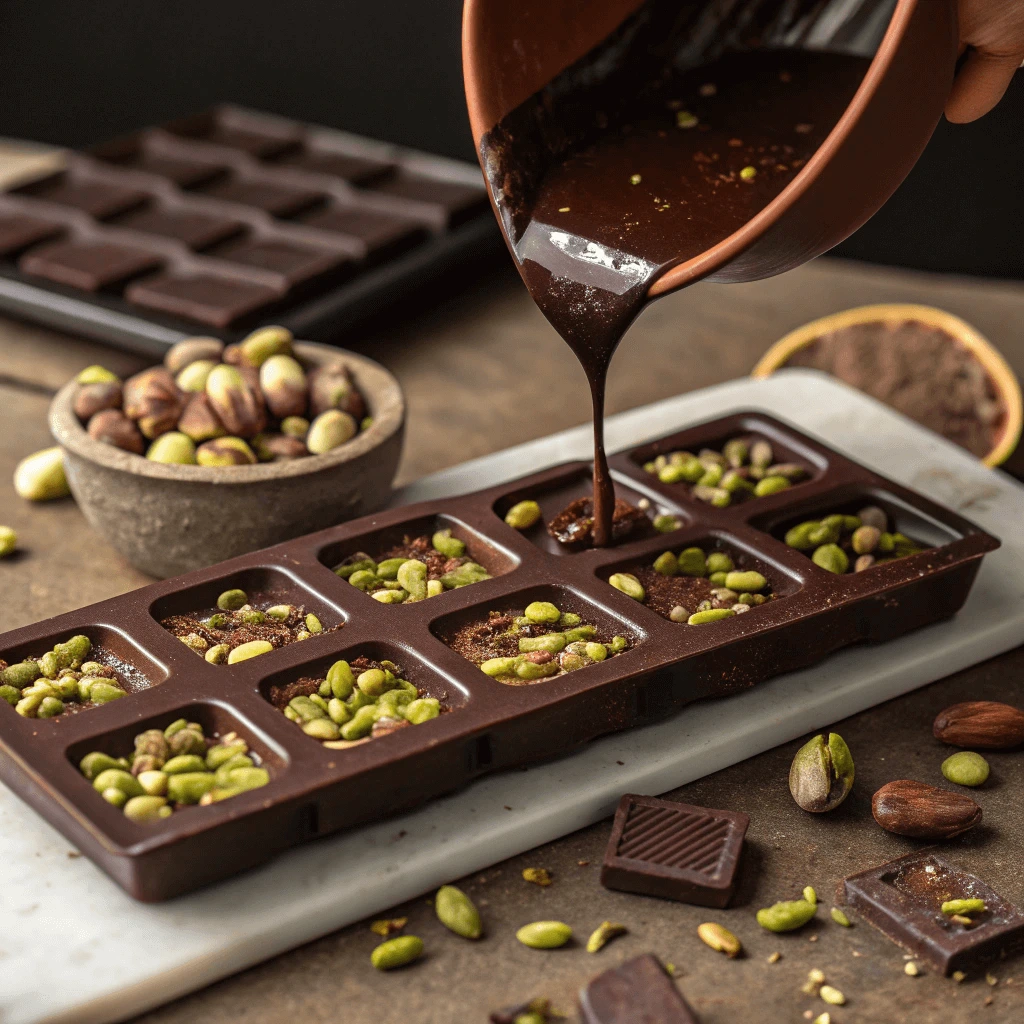
Pour the Chocolate
Carefully pour the chocolate into the molds, ensuring an even spread. Use a spoon or spatula to smooth the surface and make sure the pistachios are well distributed. Don’t overfill; leave a little room for expansion.
Tap to Remove Air Bubbles
Gently tap the molds on the counter to eliminate any air bubbles. This will ensure the chocolate sets smoothly without holes or uneven spots.
Let it Set at Room Temperature
Leave the molds at room temperature for about 30–60 minutes to allow the chocolate to set. If you’re in a hurry, place them in the fridge for a quicker set, but avoid leaving them in for too long.
Chill for Firmness
After the chocolate has set at room temperature, transfer the molds to the fridge for 1-2 hours to fully harden. This step ensures your bars have the perfect crisp texture.
Tips, Variations, and Storage Advice
Flavor Variations to Try
Pistachio chocolate bars are delicious on their own, but you can enhance them with a variety of flavors. Here are some ideas to elevate your homemade treats:
Spices for Extra Warmth
Add a pinch of cinnamon, nutmeg, or cayenne pepper for a warm, aromatic kick. Sea salt sprinkled on top adds a delightful sweet-and-salty contrast.
Fruity Touch
Incorporating dried cranberries, raisins, or apricots brings a balance of sweetness and tartness. The chewy fruit adds texture to the smooth chocolate.
Crunchy Add-ins
Add extra nuts like almonds or cashews, or even pretzels for crunch. Toffee bits also add a sweet, crispy layer to your bars.
Infused Chocolate
Try espresso powder, vanilla extract, or mint for flavored chocolate bases. These infusions create unique twists that pair wonderfully with pistachios.
Coconut
Shredded coconut gives a tropical vibe, adding sweetness and texture that complements the pistachios.
Flavored Chocolate
Experiment with different types of chocolate—dark, milk, or white—to create a richer or creamier taste that suits your preference.
Make It Vegan or Sugar-Free
Creating homemade pistachio chocolate bars can be easily adapted for both vegan and sugar-free diets. Here’s how you can make your treats fit these preferences:
Vegan Pistachio Chocolate Bars
To make your pistachio chocolate bars vegan, start by choosing dairy-free chocolate. Many dark chocolates are naturally dairy-free, but always check the label. Substitute vegan butter or coconut oil for regular butter to keep it plant-based. For sweeteners, opt for maple syrup or agave nectar instead of refined sugars.
Sugar-Free Pistachio Chocolate Bars
Making your pistachio chocolate bars sugar-free is simple with the right chocolate. Use sugar-free chocolate that contains sweeteners like stevia or erythritol. If you’re making the chocolate base from scratch, try using natural sweeteners like xylitol or monk fruit. These alternatives provide sweetness without the sugar rush.
Why Choose Vegan or Sugar-Free?
Both options come with health benefits. Vegan bars are often lower in saturated fats and free from lactose, making them ideal for those with dietary restrictions. Sugar-free bars are great for managing blood sugar and reducing overall sugar intake.
How to Store for Freshness
Storing your homemade pistachio chocolate bars correctly ensures they stay fresh and delicious for longer. Here’s how to store them based on how soon you plan to enjoy them:
1. Room Temperature Storage
If you plan to eat your bars within a week or two, store them at room temperature. Keep them in an airtight container in a cool, dry place away from direct sunlight or heat.
2. Refrigeration for Longer Freshness
For longer storage, refrigerate your bars. Wrap them tightly in wax paper or plastic wrap, then place them in an airtight container to keep them fresh. Let them sit at room temperature for a few minutes before eating to soften them.
3. Freezing for Extended Storage
To store your bars for several months, wrap them in plastic wrap, then place them in a freezer-safe container. Label and date them, then freeze. Thaw at room temperature for best texture.
4. Keep Away from Strong Odors
Avoid storing your chocolate bars with strong-smelling foods, as chocolate can absorb odors. Always store them in a separate, sealed container.
In conclusion, homemade pistachio chocolate bars offer a delicious and customizable treat that’s both simple to make and perfect for any occasion. With just a few basic ingredients, you can create a delightful combination of creamy chocolate and crunchy pistachios. Whether you choose to enjoy them yourself, share them with friends, or give them as a gift, these bars are sure to impress. By following this step-by-step recipe, you can enjoy a fresh, healthier alternative to store-bought chocolate bars, tailored to your taste preferences. Happy baking!