How to Make Summer Sausage at Home: Easy Recipe Guide

Summer sausage is a flavorful and versatile treat enjoyed by many. You can savor it on a charcuterie board, pair it with cheese, or snack on it throughout the day. Making it at home allows you to customize the seasonings and create a unique sausage that fits your tastes.

In this easy guide, you’ll learn how to make summer sausage from scratch. We’ll cover everything, from selecting the best meats and spices to stuffing the casings and achieving that perfect smoky flavor. Whether you’re a beginner or an experienced sausage maker, you’ll be able to create delicious summer sausage right in your kitchen. Let’s dive in!

Essential Ingredients for Homemade Summer Sausage

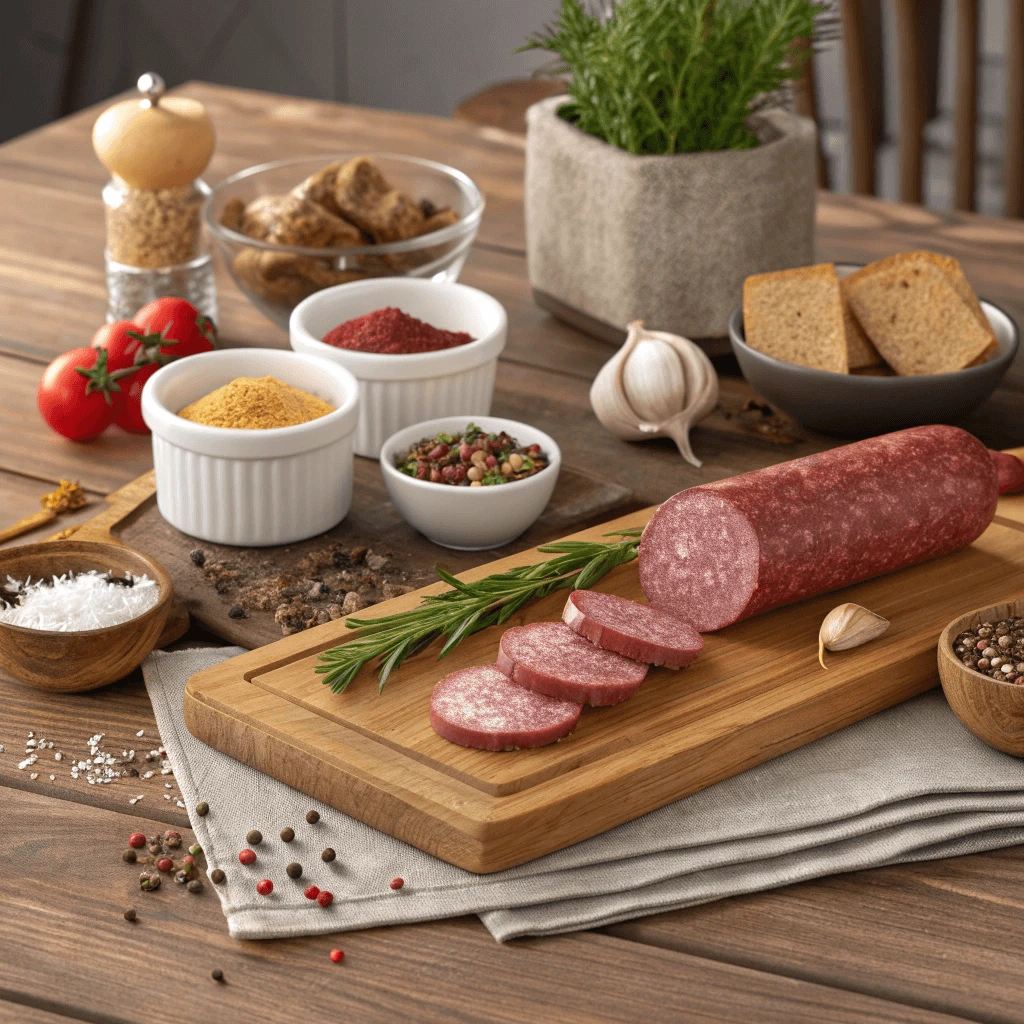
Fresh ground meat and seasoning mix for homemade summer sausage.
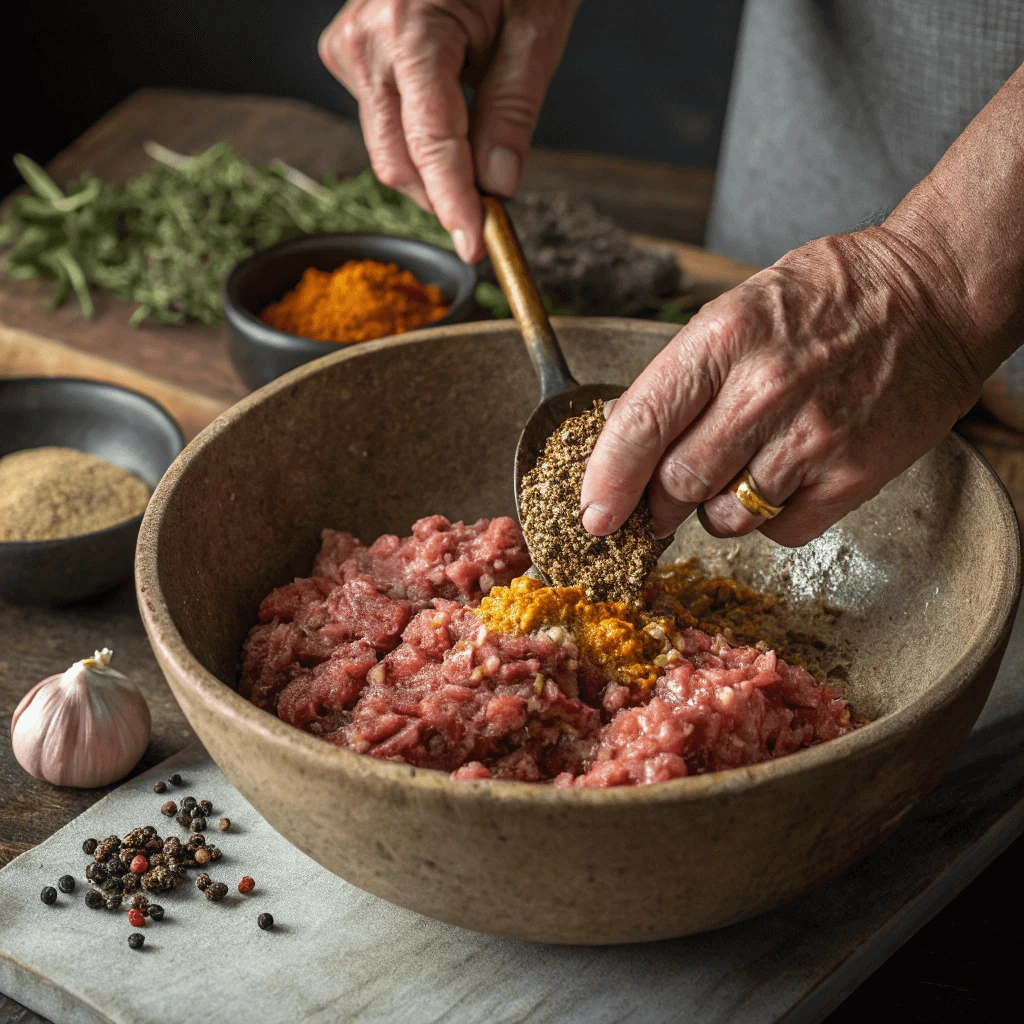
Ground meat and spices mixed for the ultimate homemade summer sausage.

Ground Beef: Choosing the Best Cuts

When making summer sausage, the choice of ground beef is crucial. It directly impacts the texture and flavor of your final product. To achieve the right balance of flavor and fat content, opt for a cut with enough marbling. You want the fat to enhance the richness of the sausage without overwhelming the taste.

Ideal Cuts for Summer Sausage

For summer sausage, look for cuts that provide a good mix of lean meat and fat. Commonly used cuts include chuck, brisket, and round. These cuts have the perfect amount of fat content to keep the sausage juicy and flavorful. Chuck, for example, typically contains 80-85% lean meat and 15-20% fat, which creates the right texture for sausage.

Brisket is another excellent option for sausage making. It has a high fat content that helps retain moisture, resulting in a tender sausage. Round cuts, like bottom round or eye of round, have less fat but provide a firm texture. When mixed with fattier cuts, they create the ideal consistency for a homemade summer sausage.

Fat-to-Meat Ratio

A key to making delicious summer sausage is getting the fat-to-meat ratio right. Too much fat can make the sausage greasy, while too little fat can lead to dry, tough sausages. The ideal ratio is around 70% lean meat to 30% fat. You can adjust this ratio depending on your personal preference and the cuts you’re using.

If you’re purchasing ground beef from a butcher or grocery store, be sure to ask for specific cuts. You can also grind your own meat, which gives you full control over the quality and ratio of fat to lean meat. Grinding your own beef can also help prevent any unwanted fillers that might be present in pre-ground meat.

Freshness Matters

When selecting beef, freshness is key. Freshly ground meat ensures the best possible flavor and texture. If you’re grinding your own beef, use chilled cuts and keep everything as cold as possible during the grinding process. This helps maintain the integrity of the fat and results in a smoother texture for your sausage.

Opt for high-quality beef from a trusted source. Grass-fed beef often offers a richer flavor, while pasture-raised beef can add a unique depth to the sausage. However, both options tend to be leaner, so you might need to supplement with extra fat for balance.

Key Seasonings for Summer Sausage

The flavor profile of your summer sausage depends heavily on the seasonings you use. The right combination of spices will give your sausage that signature taste, balancing savory, smoky, and sometimes tangy notes. Let’s explore some key seasonings commonly used in summer sausage recipes.

Must-Have Seasonings
  1. Garlic – A classic seasoning, garlic adds a bold, aromatic flavor to your summer sausage. Fresh garlic, minced or crushed, can be used for a more intense flavor, while garlic powder offers a milder note. Garlic’s natural oils help infuse the sausage with rich, savory undertones.
  2. Black Pepper – Black pepper is a must for a little kick. It brings a sharp, spicy heat that enhances the other flavors without overwhelming them. Freshly ground black pepper works best, as it provides a more aromatic and intense flavor compared to pre-ground pepper.
  3. Coriander – Coriander adds a subtle citrus-like flavor to the sausage. It balances the richness of the fat and complements the other spices in the mix. Ground coriander gives a warm, aromatic backdrop to the sausage that is unique and unforgettable.
  4. Paprika – Whether you use sweet, smoked, or hot paprika, this spice brings vibrant color and depth to your sausage. Smoked paprika adds a smoky, slightly bitter flavor that pairs beautifully with the natural flavor of the meat. Sweet paprika provides a gentle sweetness that balances the spiciness from black pepper and red pepper flakes.
  5. Red Pepper Flakes – If you like your sausage with a bit of heat, red pepper flakes are a perfect addition. They infuse the sausage with a spicy kick, making each bite a little more exciting. You can adjust the amount based on your preference for heat, from mild to fiery.
  6. Mustard Seeds – Mustard seeds add a tangy, slightly bitter flavor to the sausage. They pair well with garlic, black pepper, and paprika. The mustard flavor can also complement the tanginess in a cured sausage, giving it a distinctive zest.
Optional Additions for Extra Flavor

While the above seasonings are the core ingredients in most summer sausage recipes, you can also experiment with additional spices to enhance the flavor profile.

  1. Fennel Seeds – Fennel seeds bring a licorice-like flavor that complements the savory sausage meat. They add a layer of complexity and work well with garlic and coriander.
  2. Cloves – Cloves have a sweet, aromatic flavor and can bring a slight warmth to the sausage. Be cautious when using cloves, as their strong flavor can easily overpower the other spices if used in excess.
  3. Brown Sugar – For a slight sweetness, brown sugar can help balance the heat from red pepper flakes and black pepper. It also contributes to the curing process, ensuring your sausage retains moisture and flavor.
  4. Cumin – Ground cumin has a warm, earthy flavor that can lend a deep, smoky essence to your sausage. It pairs well with coriander and paprika for a more complex flavor profile.
The Importance of Salt and Cure

Salt is one of the most important ingredients in summer sausage. It not only enhances the flavor of the sausage but also helps in the curing process, drawing out moisture and helping preserve the meat. When making summer sausage, use a good quality curing salt that contains sodium nitrite. This curing salt will give the sausage its distinctive pink color and ensure it is safe for long-term storage.

In addition to curing salt, you’ll need regular salt to enhance the seasoning mix. The amount of salt used in your recipe will depend on personal taste, but generally, aim for about 1.5 to 2 tablespoons per pound of meat. Be sure to mix the salt evenly with the other seasonings to ensure consistent flavor throughout.

Curing Salt

Curing salt plays an essential role in making summer sausage. It’s crucial not only for preserving the meat but also for developing the distinct color, texture, and flavor that summer sausage is known for. Using curing salt correctly is key to ensuring your sausage is safe to eat, flavorful, and has the proper shelf life.

What is Curing Salt?

Curing salt, also known as pink salt or Prague Powder #1, is a mixture of sodium chloride (table salt) and sodium nitrite. Sodium nitrite serves as a preservative, preventing bacterial growth and curing the meat. The sodium nitrite also contributes to the development of that signature pink hue you see in cured sausages. While curing salt is not the same as regular table salt, both serve a similar purpose in seasoning. However, regular salt does not offer the same protective qualities as curing salt, which is why it’s essential to use it in sausage-making recipes.

Why Is Curing Salt Important for Summer Sausage?
  1. Preservation: One of the main functions of curing salt is preservation. The sodium nitrite in curing salt inhibits the growth of harmful bacteria like Clostridium botulinum, which can cause botulism. This is especially important for sausages that are air-dried or stored at room temperature for extended periods.
  2. Color Development: Curing salt helps the sausage maintain its characteristic pink color. Without it, the sausage would appear brownish or gray. The chemical reaction between the sodium nitrite and the meat’s proteins results in a stable pink color, which signals that the sausage is properly cured.
  3. Flavor Profile: Curing salt enhances the flavor of the sausage by promoting the development of complex, savory, and tangy notes. The curing process allows the flavors from the seasonings to penetrate the meat, creating a deliciously unique taste. While curing salt itself doesn’t contribute much to the taste, it’s necessary for ensuring the sausage has the right texture and flavor after curing.
  4. Safety: The use of curing salt is essential for the safety of your summer sausage. Regular salt alone cannot prevent spoilage or bacterial growth. Curing salt ensures that harmful microorganisms are kept in check, making your sausage safe for consumption.
How to Use Curing Salt in Summer Sausage
  1. Proportion: Always use curing salt in the correct ratio to meat. The general rule of thumb is to use about 1 teaspoon of curing salt per 5 pounds of meat. It’s important to measure it accurately because too much curing salt can result in an overly salty taste and potential health risks, while too little can result in unsafe sausage.
  2. Even Distribution: Curing salt needs to be evenly mixed into the meat to ensure that every piece of sausage is cured properly. It’s a good idea to mix your seasonings and curing salt together before adding them to the meat, ensuring even distribution. After adding the salt mixture, knead or massage the meat for several minutes to allow the curing salt to penetrate the fibers of the meat evenly.
  3. Resting Time: After mixing the meat with the curing salt and seasonings, let the mixture rest for a few hours, or even overnight, in the fridge. This resting period allows the curing salt to work its magic, drawing moisture out of the meat and beginning the curing process. The longer you allow the mixture to rest, the better the flavors will develop.
Types of Curing Salt

There are different types of curing salts available, and it’s important to choose the right one for your recipe:

  1. Prague Powder #1 (Pink Salt): This is the most common curing salt used for making sausages like summer sausage. It’s used for curing meats that will be cooked or smoked at a temperature of 200°F or higher. It contains 6.25% sodium nitrite and is typically dyed pink for safety, so it’s easy to distinguish from regular salt.
  2. Prague Powder #2: This curing salt is similar to Prague Powder #1 but contains sodium nitrate in addition to sodium nitrite. It is used for long-term dry curing, where the sausage isn’t cooked or smoked at high temperatures. This type of curing salt is typically used for products like salami or dry-cured hams.
  3. Morton Tender Quick: This is a branded curing salt that contains a mix of salt, sugar, and sodium nitrite. While not exactly the same as Prague Powder, it can be used in recipes for summer sausage and other cured meats, though the proportions may differ. It’s a good option if you’re new to curing meats, as it simplifies the process.
Alternatives to Curing Salt

Some people prefer not to use curing salt due to concerns about sodium nitrite. If you are one of them, there are some alternatives available, though they may not be as effective in preserving the sausage. Some options include:

  • Celery Powder: Celery powder contains natural nitrates, which can be used as a substitute for synthetic sodium nitrite. However, this may not be as reliable in preventing bacteria growth and achieving the same color and flavor.
  • Curing with Salt Alone: For sausages that will be cooked immediately or stored under refrigeration for short periods, using only regular salt may be sufficient. However, this approach will not offer the same shelf life or protection from harmful bacteria.

Sausage Casings

Sausage casings are a crucial element in the sausage-making process. They hold the meat mixture together, shape the sausage, and help the sausage maintain its texture during the curing and cooking processes. Choosing the right casing is essential for making high-quality summer sausage, as it impacts both the final product’s appearance and the eating experience.

Types of Sausage Casings

There are several types of sausage casings available, each offering unique benefits and characteristics. The main categories are natural casings, collagen casings, and synthetic casings. Each type has its own uses depending on the style of sausage you’re making.

  1. Natural Casings
    • What They Are: Natural casings are made from the intestines of animals, typically pigs, cows, or sheep. These casings are the traditional choice for sausage-making and are known for their ability to expand as the sausage cooks.
    • Advantages: Natural casings are flexible, allow for excellent flavor absorption, and impart a satisfying snap when bitten into. They are ideal for summer sausage, providing an authentic texture and flavor.
    • Considerations: They need to be soaked in water before use to soften them. Additionally, natural casings can be more expensive and sometimes harder to find.
  2. Collagen Casings
    • What They Are: Collagen casings are made from animal hides, bones, and connective tissues. These casings are designed to mimic natural casings but are more consistent in size and shape.
    • Advantages: Collagen casings are easy to use and require less preparation compared to natural casings. They provide a uniform appearance and are more readily available in most markets.
    • Considerations: While they perform well for most sausages, they lack the same “snap” that natural casings provide. Collagen casings can also be slightly more brittle, so they may break more easily if mishandled.
  3. Synthetic Casings
    • What They Are: Synthetic casings are typically made from materials like plastic or cellulose. These casings are often used for mass-produced sausages and are designed for a variety of sausage styles.
    • Advantages: Synthetic casings are easy to use and don’t require any soaking. They are often used in the production of sausages that will be smoked or cooked in large quantities.
    • Considerations: Synthetic casings lack the natural flavor profile of their counterparts and may not be suitable for high-quality, traditional sausages like summer sausage. They also don’t have the same “snap” when bitten.
Choosing the Right Sausage Casing for Summer Sausage

For making summer sausage at home, the choice of casing is particularly important. You want a casing that holds the sausage together while allowing it to cook and cure properly. Here are some tips for choosing the best casing for your homemade summer sausage:

  1. Natural Casings for Authentic Flavor: If you’re looking for an authentic summer sausage experience, natural casings are your best bet. They will give your sausage that perfect snap and allow it to develop a traditional texture and flavor. Natural casings are also ideal for curing since they allow moisture to escape while keeping the sausage’s shape intact.
  2. Collagen Casings for Easy Handling: If you’re new to sausage-making or want a casing that’s easier to work with, collagen casings can be a good option. They are easier to stuff, hold their shape well, and are available in a variety of sizes. While they may not provide the same level of flavor as natural casings, they still offer a good texture and are perfectly suitable for summer sausage.
  3. Synthetic Casings for Convenience: Synthetic casings are less common for homemade summer sausage but can work well for bulk production or if you don’t have access to natural or collagen casings. They don’t require soaking, and they are available in a variety of sizes and shapes. However, they’re better suited for sausages that will be cooked or processed in a factory setting, as they don’t provide the same artisanal experience as natural or collagen casings.
How to Stuff Sausage Casings

Stuffing sausage casings can be a delicate process, but with the right technique, you can create perfectly shaped summer sausages. Here’s how to do it:

  1. Prepare the Casings: Whether you’re using natural, collagen, or synthetic casings, it’s essential to properly prepare them before stuffing. For natural casings, rinse them well and soak them in warm water for 30 minutes to soften. Collagen and synthetic casings typically do not require soaking, but it’s a good idea to read the manufacturer’s instructions.
  2. Stuff the Sausage: Use a sausage stuffer to gently fill the casings with your sausage mixture. Be sure to pack the mixture tightly to prevent air pockets, but avoid overstuffing, as this can cause the casing to break. If you’re using natural casings, you can tie them off at regular intervals to create individual sausage links.
  3. Tie Off the Casings: Once you’ve stuffed the sausages, tie off the open ends of the casings with butcher’s twine or clip them with sausage clips. If you’re making a larger, single sausage, you can simply twist the ends of the casing to seal it.
Storing Sausage Casings

After stuffing your sausages, you need to store them properly. Here are some tips to ensure the casings remain in good condition:

  • Natural Casings: If you haven’t used all your natural casings, you can store them in saltwater or freeze them for later use. Make sure to rinse and rehydrate them before using them again.
  • Collagen and Synthetic Casings: These casings usually come in sealed packaging and can be stored in a cool, dry place until you are ready to use them. Once opened, store them in an airtight container to maintain freshness.

Tools You’ll Need to Make Summer Sausage at Home

Stuffing casings with sausage mixture
Filling sausage casings with a delicious homemade meat mixture.

Sausage Grinder: The Essential Tool

A sausage grinder is crucial for making summer sausage at home. It helps you achieve the desired texture and consistency, ensuring that your sausage is perfectly ground. Whether you are new to sausage making or looking to upgrade your equipment, understanding your grinder options is key.

Types of Sausage Grinders

There are a few different types of grinders you can use for making summer sausage: manual, electric, and stand mixer attachments. Each type has its advantages and fits different needs.

  1. Manual Sausage Grinders
    Manual grinders are simple to use and require no electricity. You load the meat into the hopper and turn the crank to grind it.
    • Pros: They are portable, easy to clean, and affordable.
    • Cons: They can be slow and require more physical effort, making them better for smaller batches.
  2. Electric Sausage Grinders
    Electric grinders operate with the press of a button, making them much faster than manual models.
    • Pros: They save time, handle larger volumes, and require less physical effort.
    • Cons: They are more expensive and need access to electricity.
  3. Stand Mixer Grinder Attachments
    For those with stand mixers like KitchenAid, an attachment can help you grind meat efficiently.
    • Pros: You can use the same appliance for different kitchen tasks.
    • Cons: They are typically less powerful than standalone electric grinders, limiting their use for large batches.
How to Use Your Sausage Grinder

To make perfect summer sausage, follow these steps when using your grinder:

  1. Prepare the Meat
    • Cut into Chunks: Before grinding, cut the meat into small, manageable pieces (about 1-2 inches).
    • Chill the Meat: Cold meat grinds better and prevents the fat from smearing. Place the meat in the freezer for 30 minutes before grinding.
  2. Assemble the Grinder
    • Set Up Securely: Ensure the grinder is properly assembled and securely clamped (manual) or plugged in (electric).
    • Choose the Grinding Plate: Select the appropriate plate based on your desired sausage texture. A coarser plate is ideal for summer sausage.
  3. Grind the Meat
    • Feed Slowly: Start feeding the meat into the grinder. For manual grinders, turn the handle slowly, while electric grinders will process it automatically.
    • Grind Twice for Finer Texture: For a smoother sausage, grind the meat twice. After the first pass, run it through the grinder again with a finer plate.
Tips for Using a Sausage Grinder
  1. Clean After Each Use: Always disassemble and wash your grinder thoroughly after each use to avoid residue buildup and ensure hygiene.
  2. Use a Meat-to-Fat Ratio of 70:30: For summer sausage, maintain a ratio of around 70% meat and 30% fat to achieve the perfect balance of flavor and juiciness.
  3. Grind Safely: Whether manual or electric, always ensure your grinder is securely attached. For manual grinders, turn the crank slowly and never use your hands to push meat into the hopper.
  4. Avoid Overloading the Grinder: Stuffing too much meat into the grinder can cause it to overheat or clog. Feed the meat slowly for better results.
Choosing the Best Sausage Grinder

Selecting the right grinder depends on the amount of sausage you plan to make and how often you plan to grind meat. If you make sausage occasionally, a manual grinder might suit you. However, for larger batches or frequent use, an electric grinder will save you time and effort. If you already own a stand mixer, an attachment could be a great addition for occasional use

Sausage Stuffers: The Essential Tool for Filling Casings

A sausage stuffer is a crucial tool for making summer sausage at home. It allows you to pack the sausage mixture tightly into casings, ensuring an even texture and preventing air pockets. With the right sausage stuffer, you can create professional-quality sausages at home with ease.

Types of Sausage Stuffers

There are different types of sausage stuffers to choose from, and each type has its own benefits. Selecting the right one depends on how much sausage you plan to make and your preferences.

  1. Vertical Sausage Stuffers
    Vertical stuffers are often favored by both beginners and experienced sausage makers due to their ease of use and efficiency.
    • Pros: They are compact, easy to store, and suitable for smaller batches.
    • Cons: They require more effort to operate than horizontal stuffers for large quantities of sausage.
  2. Horizontal Sausage Stuffers
    Horizontal stuffers are perfect for larger batches of sausage and are often used by professionals.
    • Pros: They are faster for filling large casings, and the sausage mixture flows smoothly through the tube.
    • Cons: They are bulkier and typically take up more space than vertical stuffers.
  3. Manual vs. Electric Stuffers
    Depending on how much sausage you make, you can choose between manual and electric stuffers.
    • Manual Sausage Stuffers: These are affordable and ideal for small, occasional batches. You simply crank the handle to force the sausage mixture into the casing.
    • Electric Sausage Stuffers: These machines are powered by electricity, making them faster and easier to use, especially when stuffing larger quantities of sausage.
How to Use a Sausage Stuffer

Once you’ve chosen the right stuffer, you’ll want to follow the proper procedure to ensure the sausage is packed into the casings correctly. Here’s how:

  1. Prepare the Sausage Mixture
    • Chill the Meat: Before stuffing, ensure the sausage mixture is chilled. Cold meat is firmer and easier to stuff, reducing the chances of air pockets.
    • Mix Thoroughly: Combine your seasonings with the meat and fat until the mixture is sticky and homogeneous.
  2. Prepare the Sausage Stuffer
    • Assemble the Stuffer: Install the appropriate stuffing tube and attach the sausage casing to the tube’s opening. Ensure everything is properly tightened.
    • Load the Mixture: Place the sausage mixture into the stuffer’s hopper. If using a vertical stuffer, pack the mixture tightly for smooth stuffing.
  3. Stuff the Casings
    • Start Stuffing: Slowly begin cranking the handle or turning on the electric stuffer. Hold the casing tightly against the stuffing tube as the mixture enters.
    • Avoid Overstuffing: Don’t overstuff the casing, as it can cause the sausage to burst during cooking. Stuff the sausage until it is firm but not stretched.
  4. Tie the Ends
    Once the casing is full, twist the sausage into links and tie the ends with string or twine. Make sure there are no air pockets. If you notice any, you can prick the casing gently with a needle to release the air.
Tips for Stuffing Sausage Casings
  1. Use Proper Casing Sizes: Make sure the casings you choose are the right size for the type of sausage you’re making. If the casings are too small, the sausage may burst during cooking; if they are too large, the sausage may be uneven.
  2. Keep the Casing Moist: To make it easier to slide the casing onto the stuffing tube, soak it in water before use. This will also help prevent it from tearing during the stuffing process.
  3. Stuff Slowly and Steadily: Don’t rush the process. Allow the sausage mixture to flow evenly into the casing without forcing it too quickly.
  4. Tighten and Twist the Links: After stuffing, twist the sausage into links and tie off each end to secure the filling.
Choosing the Right Sausage Stuffer for Your Needs

When selecting a sausage stuffer, consider the following:

  1. Batch Size: If you’re making small batches, a manual or vertical stuffer should work fine. For large batches, a horizontal or electric stuffer is ideal.
  2. Budget: Manual stuffers are more affordable but require more effort, while electric models are pricier but easier to use.
  3. Storage Space: Consider how much room you have for storing your stuffer. Vertical stuffers are compact, while horizontal ones require more space.
Maintaining Your Sausage Stuffer

Keep your stuffer in good condition by cleaning it thoroughly after each use. Disassemble all parts and wash them with warm, soapy water to remove any residue. Dry the parts thoroughly before storing them to prevent rust.

Smoking Equipment: Essential Tools for Perfect Summer Sausage

To make homemade summer sausage, smoking equipment plays a crucial role. Smoking the sausage enhances its flavor, giving it that distinct, rich, smoky taste. Here’s a guide to help you choose the right smoking equipment and use it effectively.

Types of Smokers for Sausage

When choosing a smoker, you have a few options depending on your preferences and how much sausage you plan to make.

  1. Charcoal Smokers
    Charcoal smokers are a classic choice for sausage making. They offer a great balance of flavor and authenticity, allowing you to control the temperature and smoke.
    • Pros: Charcoal smokers provide an authentic, smoky flavor and are relatively inexpensive. They are also portable.
    • Cons: They require more attention to maintain the right temperature. You need to keep an eye on the charcoal and adjust airflow frequently to prevent over-heating.
  2. Electric Smokers
    Electric smokers are a more modern option and are ideal for beginners who want a simple, hands-off approach. These smokers provide consistent heat and smoke levels.
    • Pros: Easy to use with automatic temperature control. Great for beginners and those who want a hassle-free smoking process.
    • Cons: They can be more expensive, and you’ll need a power outlet, limiting their portability.
  3. Wood Pellet Smokers
    Wood pellet smokers offer the convenience of electric smokers with the added benefit of using real wood pellets for a natural smoky flavor. They’re popular for smoking sausages at home.
    • Pros: Provide consistent heat and flavor, plus the ability to use different wood pellet flavors to customize your sausage’s taste.
    • Cons: Higher cost and reliance on electricity to operate.
  4. Wood or Gas Smokers
    These smokers use either wood logs or propane to generate heat and smoke. They are versatile and allow you to customize the smoking process for more control.
    • Pros: You can use a wide range of wood types, giving you many flavor options.
    • Cons: They require more attention and practice to maintain consistent temperatures and smoke levels.
Choosing the Right Wood for Smoking

The type of wood you use will directly affect the flavor of your summer sausage. Here are some popular options:

  1. Hickory: Known for its strong and smoky flavor, hickory wood is a favorite among sausage makers. It pairs well with richer meats like summer sausage, giving it a robust taste.
  2. Applewood: This wood provides a mild, slightly sweet flavor that works well with sausages that contain pork. It’s a great choice if you prefer a lighter smokiness.
  3. Mesquite: Mesquite wood produces a strong, bold flavor, which can overwhelm more delicate sausages. It works well for those who enjoy a heavier smoky taste.
  4. Cherry Wood: Cherry wood gives sausages a subtle fruity flavor. It’s perfect for those who want a balanced, mild smokiness without overpowering the natural flavors of the meat.
  5. Oak: Oak is versatile and provides a medium, well-rounded smoky flavor. It’s perfect if you want a less intense but still flavorful smoke.
Preparing Your Smoker

Before smoking your summer sausage, you need to prepare your smoker to ensure it runs smoothly during the process.

  1. Season the Smoker: If you’re using a new smoker, it’s a good idea to season it before smoking any food. This helps remove factory oils and ensures that the smoking process is safe. To season your smoker, run it at a high temperature with some wood chips for about an hour.
  2. Maintain the Temperature: Consistent temperature control is key to perfectly smoked sausage. The ideal smoking temperature for summer sausage is around 160-180°F (71-82°C). Keep a thermometer on hand to monitor the internal temperature of the smoker.
  3. Soak the Wood Chips or Pellets: If using wood chips, soak them in water for about 30 minutes before adding them to the smoker. This prevents the wood from burning too quickly, allowing the sausage to absorb the smoky flavor over time.
Smoking Process for Summer Sausage

Once your smoker is prepared and your sausage is stuffed and ready, it’s time to start smoking. Here’s how to smoke summer sausage effectively:

  1. Preheat the Smoker: Preheat your smoker to 160-180°F (71-82°C). This is the ideal range for slowly cooking and smoking the sausage without drying it out.
  2. Place the Sausage in the Smoker: Hang or place the sausages on racks inside the smoker. Make sure they are not touching each other to allow smoke to circulate evenly around each sausage.
  3. Monitor the Temperature: Throughout the smoking process, use a meat thermometer to track the internal temperature of the sausage. You’ll want the sausage to reach an internal temperature of 155°F (68°C) for safe consumption.
  4. Smoke for 4-6 Hours: Depending on your smoker and the size of your sausages, the smoking process typically takes between 4 to 6 hours. Make sure to check the sausages periodically, adding more wood chips or pellets if necessary to maintain smoke levels.
  5. Finish with a Quick Heat Blast: Once the sausage reaches the target internal temperature, you can finish with a quick blast of heat to help form a beautiful, caramelized outer layer. This step is optional but can enhance the appearance and flavor of the sausage.
Maintaining Your Smoker

Proper maintenance is crucial for the longevity of your smoker and the quality of your smoked sausages. After each use, follow these steps:

  1. Clean the Interior: Remove any leftover ash, grease, and food particles. Use a damp cloth to wipe down the interior, making sure to dry it thoroughly afterward.
  2. Check the Heating Elements: For electric smokers, inspect the heating elements for any signs of wear or malfunction. Clean them periodically to prevent buildup that could affect performance.
  3. Inspect the Seals: Check the seals on your smoker to ensure they are intact. If the seals are worn or damaged, replace them to prevent heat and smoke leakage.

Food-Safe Gloves and Other Safety Tools

Maintaining safety and hygiene is essential when making summer sausage at home. Proper tools like food-safe gloves and other safety equipment help ensure your process is clean and reduces the risk of contamination. This section breaks down the importance of these tools and how to use them effectively.

Why Use Food-Safe Gloves?

Food-safe gloves play a critical role in maintaining hygiene during sausage preparation. They act as a barrier between your hands and the food, preventing contamination and ensuring a clean working environment.

  1. Prevent Cross-Contamination
    Raw meat can carry harmful bacteria like salmonella or E. coli. Wearing gloves minimizes the chances of transferring these bacteria to other surfaces or ingredients. Always use separate gloves for raw and cooked ingredients to avoid cross-contamination.
  2. Protect Your Hands
    Handling raw meat, spices, and curing salts can cause skin irritation. Food-safe gloves protect your hands from prolonged exposure to these substances while providing a better grip for handling slippery ingredients.
  3. Improve Hygiene
    Even with clean hands, touching raw meat repeatedly can introduce bacteria into the sausage-making process. Disposable gloves ensure that your hands remain clean throughout the process, and they can easily be replaced as needed.
Types of Food-Safe Gloves

Not all gloves are created equal. Here are the most commonly used types for sausage making:

  1. Nitrile Gloves
    • Features: Durable, flexible, and resistant to punctures. They provide excellent grip and are ideal for tasks that involve a lot of handling.
    • Best Use: Perfect for grinding meat, stuffing sausages, and handling wet or oily ingredients.
  2. Vinyl Gloves
    • Features: Cost-effective and disposable. They are less durable than nitrile gloves but suitable for light tasks.
    • Best Use: Ideal for seasoning or mixing ingredients where heavy-duty protection isn’t necessary.
  3. Latex Gloves
    • Features: Highly flexible and comfortable, with good tactile sensitivity. However, some individuals may have latex allergies.
    • Best Use: Useful for detailed tasks like tying sausage casings but should be avoided if there’s a risk of allergic reactions.
Additional Safety Tools for Sausage Making

In addition to gloves, other safety tools can make your sausage-making process safer and more efficient.

  1. Cut-Resistant Gloves
    When working with sharp knives, cleavers, or meat grinders, cut-resistant gloves offer an added layer of protection. They are made of materials like stainless steel or high-performance polyethylene, designed to prevent cuts and abrasions.
  2. Meat Thermometer
    Ensuring the sausage reaches the proper internal temperature (155°F or 68°C) is critical for food safety. A reliable meat thermometer helps you monitor the cooking process and avoid undercooked sausage.
  3. Sanitizing Wipes or Solution
    Keeping your workstation clean is essential. Use food-safe sanitizing wipes or solutions to regularly disinfect surfaces, tools, and equipment during sausage preparation.
  4. Face Masks and Hairnets
    While not always necessary, wearing a face mask and hairnet can be beneficial in maintaining a sanitary environment, especially when preparing sausages for a large gathering or storage.
Tips for Safe and Hygienic Sausage Preparation
  1. Change Gloves Regularly
    Replace your gloves after handling raw meat, especially if you need to touch other ingredients or equipment. This habit minimizes contamination risks.
  2. Wash Hands Before and After Glove Use
    Always wash your hands thoroughly before putting on gloves and after removing them. Clean hands reduce the risk of bacteria transferring to the gloves during handling.
  3. Store Gloves Properly
    Keep your gloves in a clean, dry place to ensure they remain sanitary before use. Avoid storing them in areas with high moisture or direct sunlight, as this can compromise their integrity.
  4. Use the Right Tool for Each Task
    For example, wear nitrile gloves for heavy-duty tasks like grinding and mixing, and switch to lighter vinyl gloves for seasoning or packaging.
Maintaining Safety Throughout the Process

By using food-safe gloves and other safety tools, you can create a cleaner, more professional sausage-making environment. Proper hygiene not only improves the taste and quality of your summer sausage but also ensures it is safe to consume. Always prioritize cleanliness and safety at every stage of the process, from handling raw ingredients to the final packaging.

The Step-by-Step Process of Making Summer Sausage

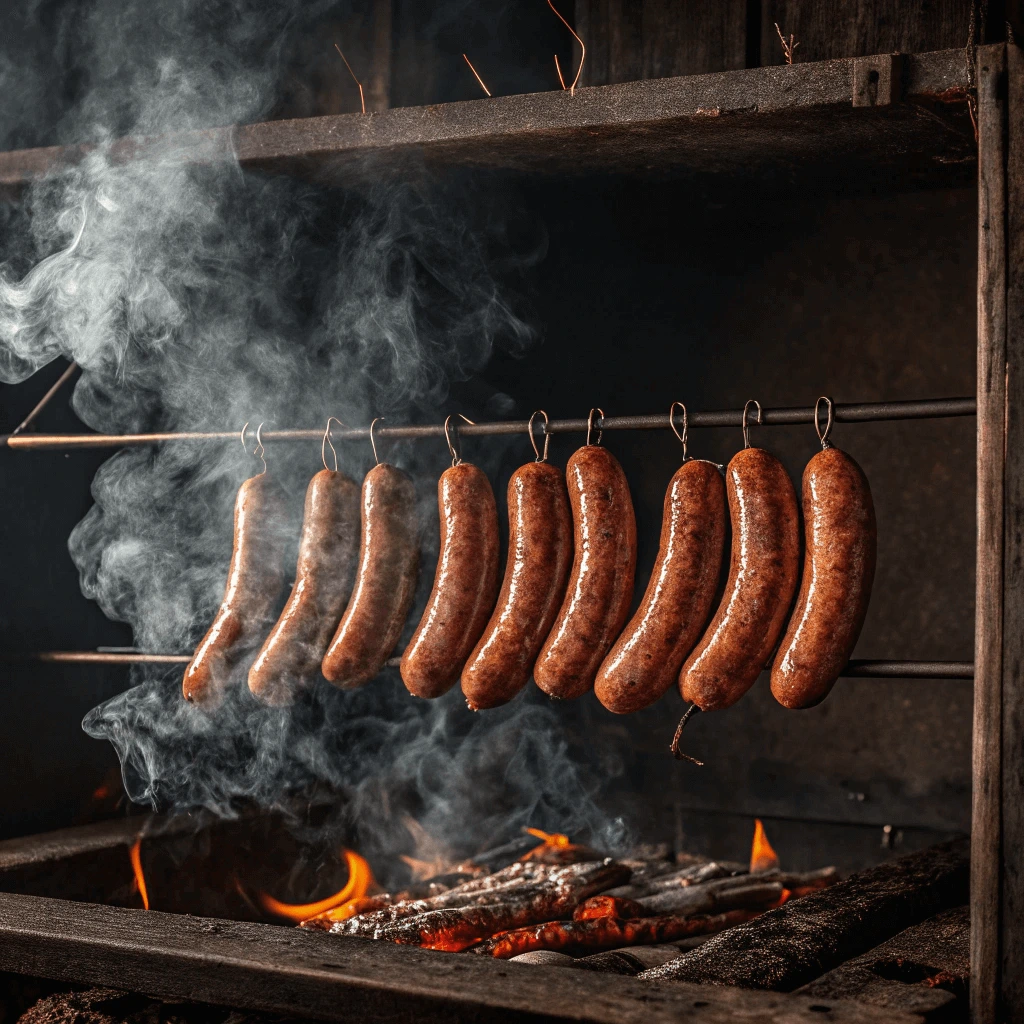
 Smoked summer sausage hanging in a smoker.
Smoking homemade summer sausage for that delicious smoky flavor.

Preparing the Meat

The foundation of any great summer sausage lies in the careful preparation of the meat. Choosing the right cuts, properly handling the meat, and ensuring optimal texture are essential for creating delicious, flavorful sausages. Here’s a comprehensive guide to preparing your meat for summer sausage.

Selecting the Right Meat Cuts

Choosing high-quality cuts of meat is crucial for flavor and texture. Summer sausage typically combines beef or a mixture of both.

  1. Beef Cuts
    • Best Options: Chuck, brisket, or round cuts work well due to their fat content and rich flavor. Avoid lean cuts, as they may result in dry sausage.
    • Why It Matters: Fat enhances flavor and ensures the sausage remains moist during the cooking process.
Grinding the Meat

Proper grinding is essential to achieve the desired texture. It also ensures the seasoning blends evenly throughout the sausage.

  1. Choose the Right Grinder Plate
    • Fine Grind: Use a fine grinder plate for a smoother texture.
    • Coarse Grind: Opt for a coarse plate for a chunkier, more traditional feel.
  2. Keep the Meat Cold
    • Why: Chilled meat grinds better and prevents the fat from smearing, which can compromise the sausage’s texture.
    • How: Chill the meat in the freezer for 20–30 minutes before grinding.
  3. Grind in Batches
    • Work with small portions to ensure an even grind and prevent the grinder from overheating.
Incorporating Fat for Flavor and Texture

Fat plays a vital role in the success of your summer sausage. The ideal fat-to-meat ratio is typically 30% fat to 70% lean meat.

  1. Use High-Quality Fat
    Pork fat is commonly preferred for its rich flavor. You can add fatback or trimmings to balance lean meat cuts.
  2. Mix Thoroughly
    After grinding, mix the fat and meat evenly to ensure consistent flavor and texture throughout the sausage.
Mixing in Seasonings and Curing Salt

Once the meat and fat are properly ground and combined, it’s time to add your seasonings and curing salt.

  1. Distribute Evenly
    Sprinkle the seasonings across the surface of the meat rather than dumping them in one spot. This ensures a consistent flavor profile.
  2. Use Clean Hands or a Mixer
    Knead the mixture thoroughly by hand or use a stand mixer with a paddle attachment. Proper mixing is crucial to evenly distribute seasonings and curing agents.
  3. Chill After Mixing
    Once the meat is seasoned, refrigerate it for at least an hour. This step allows the flavors to meld and makes the mixture easier to handle during stuffing.
Handling Meat Safely

Maintaining a clean and safe environment while preparing the meat is non-negotiable. Follow these best practices:

  1. Work on Clean Surfaces
    Sanitize all surfaces and tools before and after use to prevent cross-contamination.
  2. Wash Hands Regularly
    Always wash your hands with soap and warm water, especially after handling raw meat.
  3. Use Separate Cutting Boards
    Dedicate one cutting board for raw meat to avoid cross-contaminating other ingredients.
  4. Chill Meat Properly
    Keep the meat refrigerated until you’re ready to grind or mix it. This step preserves freshness and prevents bacterial growth.
Testing the Flavor

Before stuffing the sausage, test the seasoning by cooking a small patty of the meat mixture in a skillet.

  1. Adjust Seasonings if Needed
    Tweak the salt, spices, or herbs according to your taste after testing.
  2. Keep Track of Ratios
    If you adjust the seasoning, make sure to scale the changes consistently for the entire batch.

Stuffing the Casings

Stuffing the sausage casings is one of the most critical steps in creating perfectly textured summer sausage. Properly stuffing and handling the casings ensures an even distribution of meat and maintains the sausage’s structural integrity during cooking and smoking. Here’s a detailed guide to help you master this step.

Preparing the Casings

Before you start stuffing, it’s essential to properly prepare the casings.

  1. Rinse Natural Casings
    • Rinse natural casings thoroughly in cold water to remove excess salt used during storage.
    • Soak the casings in warm water for at least 30 minutes to soften them, making them more pliable and easier to work with.
  2. Inspect the Casings
    • Check for tears or holes that might compromise the sausage structure. Discard any damaged sections.
  3. Synthetic Casings
    • If using synthetic casings, follow the manufacturer’s instructions. Some require soaking, while others are ready to use directly from the package.
Preparing the Sausage Stuffer
  1. Select the Right Nozzle
    • Use a nozzle size appropriate for the diameter of your sausage casings. Smaller nozzles work well for snack-size sausages, while larger ones are suitable for summer sausages.
  2. Fill the Stuffer
    • Pack the seasoned meat mixture into the stuffer’s cylinder, avoiding air pockets. Compress the mixture gently to ensure even flow during stuffing.
  3. Attach the Casings
    • Slide the prepared casing over the nozzle, leaving a small overhang at the end. Tie the open end with a knot or secure it with butcher’s twine.
Stuffing the Meat into Casings
  1. Work Slowly and Steadily
    • Operate the stuffer at a slow and consistent speed to avoid overstuffing or underfilling the casings.
  2. Avoid Air Pockets
    • As the meat fills the casing, guide it gently with your hand to ensure even distribution. If air bubbles form, prick them with a sterilized pin to release the trapped air.
  3. Control the Pressure
    • Apply light pressure on the casing as it comes off the nozzle to ensure it fills evenly without stretching or bursting.
Forming the Sausage Links
  1. Tie Off the Ends
    • Once the casing is filled to the desired length, twist it tightly and tie off the end with butcher’s twine.
  2. Create Uniform Links
    • For smaller sausages, twist the casing at regular intervals to form links. Alternate the direction of the twists to prevent the links from unraveling.
  3. Leave Space for Expansion
    • Avoid overstuffing, as the sausage will expand slightly during cooking or smoking. Leave a small amount of slack in the casing to accommodate this.
Quality Check and Final Adjustments
  1. Inspect for Air Pockets
    • Hold the stuffed sausages up to a light source to check for any air bubbles or uneven filling. Prick any bubbles with a pin.
  2. Ensure Even Sizes
    • Lay the sausages on a flat surface and adjust their length for consistency. Uniform sizing ensures even cooking later.
Safety Tips for Handling Casings
  1. Work in a Cool Environment
    • Keep the meat mixture chilled throughout the stuffing process to maintain its texture and prevent bacterial growth.
  2. Use Clean Tools
    • Sanitize all equipment before and after use to prevent contamination.
  3. Store Properly if Delayed
    • If you can’t cook the sausages immediately, refrigerate them in a sealed container or plastic wrap until you’re ready to proceed.

Curing the Sausage

Curing is an essential step in making summer sausage. It not only preserves the meat but also develops the distinct flavors and textures that make summer sausage unique. Proper curing ensures the sausage remains safe to eat while enhancing its quality. Here’s a detailed guide to help you navigate the curing process effectively.

What is Curing?

Curing is the process of treating the sausage with a mixture of curing agents, typically including salt and nitrites, to preserve the meat and inhibit the growth of harmful bacteria. It also contributes to the characteristic pink color and deep flavor of summer sausage.

The Role of Curing Salt
  1. Preservation
    • Curing salt, such as Prague Powder #1, prevents spoilage by inhibiting bacterial growth.
  2. Flavor Development
    • The salt enhances the sausage’s taste, balancing the spices and seasonings.
  3. Safety
    • By using curing salt, you protect the sausage from botulism and other foodborne illnesses during the smoking and storage stages.
Preparing the Sausage for Curing
  1. Mix the Meat Thoroughly
    • Combine the ground meat, seasonings, and curing salt in a large bowl. Ensure the curing salt is evenly distributed to avoid any uneven curing.
  2. Allow Time for Absorption
    • Let the mixture sit for about 10–15 minutes after combining. This allows the salt to begin absorbing into the meat.
  3. Shape the Sausages
    • Stuff the sausage mixture into casings, or form it into logs if you’re making casing-free summer sausage.
Curing Time and Conditions
  1. Refrigeration is Key
    • Place the sausages or logs on a tray lined with parchment paper and refrigerate them. Keep the temperature between 35°F (1.6°C) and 40°F (4.4°C) for optimal results.
  2. Curing Duration
    • Allow the sausages to cure for at least 24 hours. For enhanced flavor and texture, you can cure them for up to 48 hours.
  3. Prevent Cross-Contamination
    • Store the sausages in a covered container or wrap them tightly in plastic wrap to avoid contact with other foods.
Tips for Successful Curing
  1. Monitor the Temperature
    • Use a refrigerator thermometer to ensure the curing environment remains consistently cool.
  2. Use the Correct Amount of Curing Salt
    • Follow the recommended dosage for curing salt. Using too little may not preserve the meat properly, while too much can affect the taste and safety of the sausage.
  3. Label and Date the Sausages
    • Mark the date on the container to keep track of the curing time. This ensures you don’t over or under-cure the sausages.
After Curing: Preparing for Smoking
  1. Check the Sausages
    • Inspect the cured sausages for any discoloration or irregularities. They should have a uniform texture and color.
  2. Dry the Sausages
    • Before smoking, let the sausages air dry for about 1–2 hours at room temperature. This step helps the smoke adhere better to the casing.
  3. Prepare the Smoking Equipment
    • While the sausages dry, set up your smoker and select the wood chips or pellets for flavoring.
Common Curing Mistakes to Avoid
  1. Skipping the Curing Salt
    • Regular salt cannot replace curing salt. Always use curing salt specifically designed for sausages.
  2. Uneven Mixing
    • Failing to mix the curing salt thoroughly can result in uneven flavor and texture.
  3. Improper Storage
    • Leaving the sausages in temperatures above 40°F (4.4°C) during curing can lead to spoilage or bacterial growth.

Smoking the Sausage

Smoking is the final step in creating flavorful summer sausage. This process imparts the signature smoky aroma and taste while also completing the cooking process. By controlling the smoking temperature and duration, you ensure the sausages are safe to eat and bursting with flavor. Below is an expanded guide to smoking summer sausage effectively.

Why Smoking is Essential
  1. Flavor Enhancement
    • Smoking infuses the sausage with rich, smoky notes that elevate its overall taste.
  2. Preservation
    • The low-and-slow smoking process helps preserve the sausage by reducing moisture content.
  3. Texture and Appearance
    • Smoking contributes to the distinct texture and deep, reddish-brown color associated with summer sausage.
Preparing the Sausages for Smoking
  1. Air-Drying the Sausages
    • Before smoking, let the sausages air dry for 1–2 hours at room temperature. Drying ensures the smoke adheres uniformly to the casing.
    • Place the sausages on a rack or hang them in a well-ventilated area to allow even drying.
  2. Setting Up the Smoker
    • Preheat the smoker to 130°F (54°C). Ensure the smoker is clean and free of residual grease to prevent unwanted flavors.
    • Choose wood chips or pellets that complement the sausage, such as hickory, apple, cherry, or oak.
Smoking Process: Step-by-Step
  1. Initial Low-Temperature Smoking
    • Start by placing the sausages in the smoker at 130°F (54°C). Smoke at this temperature for 1 hour to allow the casings to dry further.
  2. Gradual Increase in Temperature
    • Gradually raise the smoker temperature to 150°F (66°C). Maintain this level for 2–3 hours to develop flavor. Ensure the sausages are exposed to continuous smoke during this stage.
  3. Cooking the Sausages
    • Increase the temperature to 170°F (77°C) and continue smoking until the internal temperature of the sausages reaches 160°F (71°C). Use a meat thermometer to monitor the internal temperature accurately.
Tips for Consistent Smoking
  1. Monitor Temperature Regularly
    • Use a reliable thermometer to check the smoker’s temperature. Fluctuations can impact the sausage’s texture and flavor.
  2. Avoid Over-Smoking
    • Over-smoking can lead to a bitter taste. Stick to the recommended smoking times and temperatures.
  3. Rotate the Sausages
    • Rotate or rearrange the sausages halfway through the process to ensure even exposure to heat and smoke.
  4. Maintain Airflow
    • Ensure proper ventilation in the smoker to allow the smoke to circulate evenly around the sausages.
Cooling the Sausages
  1. Immediate Cooling
    • Once the sausages reach the desired internal temperature, remove them from the smoker.
    • Place them in an ice bath for 10–15 minutes to cool rapidly and halt the cooking process.
  2. Drying the Sausages
    • After cooling, pat the sausages dry with a clean towel. This prevents moisture from collecting on the surface during storage.
Common Mistakes to Avoid
  1. Skipping the Pre-Smoke Drying Step
    • Skipping air drying can lead to uneven smoke adhesion and undesirable flavors.
  2. Using Green or Resinous Woods
    • Avoid woods that produce excessive resin, as they can impart an unpleasant taste to the sausages.
  3. Overlooking Temperature Monitoring
    • Failing to monitor the smoker temperature can result in undercooked or overcooked sausages.
Enhancing the Smoking Experience
  1. Experiment with Woods
    • Mix different wood chips to create a unique flavor profile for your summer sausage. For example, a blend of hickory and applewood offers a balance of robust and sweet flavors.
  2. Add Moisture to the Smoker
    • Place a pan of water in the smoker to maintain humidity. This prevents the sausages from drying out during the smoking process.
  3. Infuse Additional Flavors
    • Sprinkle herbs, spices, or citrus zest onto the wood chips for an extra layer of aroma.

Cooking and Storing Your Homemade Summer Sausage

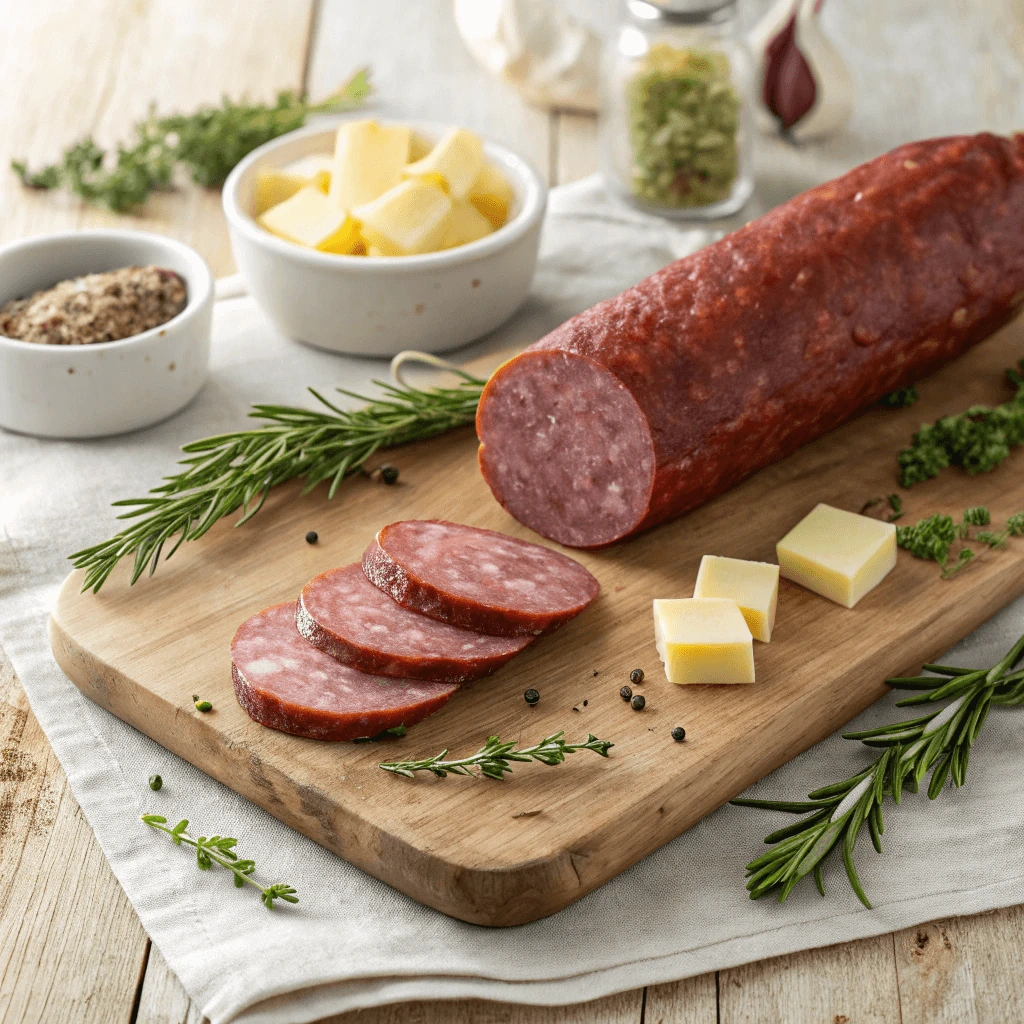
Homemade summer sausage on a platter with crackers and cheese.
Serve homemade summer sausage with crackers and cheese for a delicious snack.

How to Cook Your Homemade Summer Sausage

Cooking homemade summer sausage is a crucial step to ensure the perfect blend of texture, flavor, and safety. This process involves selecting the right method and maintaining control over temperature and time. Below, we explore the various cooking techniques and provide tips to achieve excellent results.

Choosing the Right Cooking Method
  1. Oven Cooking
    • Preheat your oven to 170°F (77°C). Use an oven thermometer to verify the temperature’s accuracy.
    • Place the sausages on a wire rack over a baking sheet. This setup allows heat to circulate evenly and prevents the sausages from sitting in their juices.
  2. Smoking
    • If you have a smoker, this method adds an extra layer of flavor. Smoke the sausages at 170°F (77°C) until the internal temperature reaches 160°F (71°C).
    • Use wood chips such as hickory, applewood, or cherry for a distinctive aroma.
  3. Sous Vide Cooking
    • Sous vide offers precise temperature control for consistent results. Vacuum-seal the sausages and cook them in a water bath set to 160°F (71°C) for 1–2 hours.
    • After sous vide cooking, you can quickly sear the sausages on a grill or in a pan to enhance their appearance.
Steps for Oven Cooking
  1. Preheat the Oven
    • Set your oven to 170°F (77°C) and allow it to reach the correct temperature before adding the sausages.
  2. Prepare the Sausages
    • Arrange the sausages evenly on the wire rack. Avoid crowding to ensure proper airflow around each sausage.
  3. Monitor Internal Temperature
    • Insert a meat thermometer into the thickest part of one sausage. Cook until the internal temperature reaches 160°F (71°C).
    • Avoid overcooking, as this can dry out the sausage.
Tips for Consistent Cooking
  1. Use a Reliable Thermometer
    • A digital meat thermometer ensures you achieve the right internal temperature without guesswork.
  2. Avoid High Temperatures
    • Cooking summer sausage at high temperatures can cause the fat to render out, leaving the sausage dry and crumbly.
  3. Rotate the Sausages
    • Rotate or flip the sausages halfway through the cooking process for even heating.
Post-Cooking Steps
  1. Cooling the Sausages
    • Once cooked, remove the sausages from the oven and let them cool to room temperature.
    • For quicker cooling, place them in an ice bath for 10–15 minutes. This step halts the cooking process and ensures the sausages retain their shape.
  2. Drying
    • Pat the sausages dry with a clean kitchen towel before storage. This prevents excess moisture from accumulating.
Storing Your Cooked Sausage
  1. Refrigeration
    • Store the cooked sausages in an airtight container or wrap them tightly in plastic wrap. They will stay fresh in the refrigerator for up to 10 days.
  2. Freezing
    • For longer storage, freeze the sausages in vacuum-sealed bags. Label them with the date for easy tracking.

Storing Leftovers

Properly storing leftover summer sausage is essential to maintain its freshness, flavor, and safety. By following these steps, you can ensure your sausage remains a delicious addition to meals or snacks for days or even months. Let’s explore the best practices for storage, refrigeration, and freezing.

Cooling the Sausage
  1. Allow Sausage to Cool Completely
    • Before storing, let the cooked sausage cool to room temperature. Storing hot sausage in the refrigerator or freezer can create excess condensation, which affects texture and shelf life.
    • Cooling also helps prevent uneven temperatures inside the storage container.
  2. Use an Ice Bath for Faster Cooling
    • If you’re in a hurry, place the sausage in an ice bath for 10–15 minutes to cool it rapidly.
Refrigeration Tips
  1. Wrap Tightly
    • Use plastic wrap, aluminum foil, or airtight containers to seal the sausage tightly. This step keeps air out and prevents moisture loss, maintaining the sausage’s flavor and texture.
  2. Storage Duration
    • Refrigerated summer sausage stays fresh for up to 7–10 days. Always label the container with the date to track freshness.
  3. Place in the Coldest Area
    • Store the sausage in the back of the refrigerator, where the temperature remains consistently cold. Avoid the door, as frequent opening causes temperature fluctuations.
Freezing Leftover Summer Sausage
  1. Preparation for Freezing
    • Slice the sausage into smaller portions if you plan to use it in meals later. Smaller portions thaw more quickly and prevent waste.
    • Wrap each portion tightly with plastic wrap or freezer-safe bags. Use a vacuum sealer if available to remove excess air, which prevents freezer burn.
  2. Label Clearly
    • Add a label with the date and type of sausage to ensure easy identification in the freezer.
  3. Storage Duration
    • Frozen summer sausage can last for up to 6 months. However, for optimal flavor, try to consume it within 3 months.
Reheating Leftovers
  1. Thawing in the Refrigerator
    • Move the frozen sausage to the refrigerator 24 hours before use. Slow thawing preserves its texture and flavor.
  2. Quick Thawing Options
    • For quicker results, use a sealed plastic bag and submerge it in cold water. Change the water every 30 minutes until the sausage is thawed.
  3. Reheating Methods
    • Warm leftover sausage in a skillet over low heat or in the oven at 325°F (163°C) until heated through. Avoid overheating, which can dry out the sausage.
Maintaining Quality During Storage
  1. Inspect for Spoilage
    • Check refrigerated sausage for signs of spoilage, such as an off smell, discoloration, or slimy texture. Discard if any of these signs are present.
    • For frozen sausage, look for ice crystals or a grayish color, indicating freezer burn.
  2. Rotate Stock
    • Use the “first in, first out” method: consume older sausage before newer batches to minimize waste.

How to Tell When Your Sausage Is Fully Cooked

Cooking summer sausage to perfection ensures it is safe to eat and retains its rich, savory flavor. Identifying the right doneness requires a combination of visual cues, texture checks, and accurate temperature measurements. Here’s a detailed guide to help you determine when your sausage is fully cooked.

Use a Meat Thermometer
  1. Check the Internal Temperature
    • The most reliable way to determine if your summer sausage is fully cooked is by using a meat thermometer. Insert the thermometer into the thickest part of the sausage, avoiding the casing.
    • The ideal internal temperature should reach 160°F (71°C) for ground beef or pork and 165°F (74°C) for poultry sausages. This ensures harmful bacteria have been eliminated.
  2. Avoid Guesswork
    • Relying solely on appearance can be misleading, as sausages may look browned on the outside but remain undercooked internally. A thermometer removes any uncertainty.
Examine the Texture and Firmness
  1. Perform a Press Test
    • Gently press the sausage with a pair of tongs or your fingers (while wearing heat-resistant gloves). A fully cooked sausage feels firm but has a slight springiness.
    • If it feels soft or mushy, it likely needs more cooking time.
  2. Slice to Inspect
    • Cut the sausage to check the center. Fully cooked sausage has a uniform color throughout, with no raw or pink spots in the middle.
Monitor Cooking Time
  1. Follow Recipe Guidelines
    • Most summer sausages take 2–3 hours to cook at low temperatures when smoking or baking. Adjust the time based on your sausage size and thickness.
  2. Avoid Overcooking
    • Overcooked sausage becomes dry and loses its natural juices. Monitor closely during the final stages of cooking to achieve the perfect texture.
Observe the Juices
  1. Look for Clear Juices
    • When fully cooked, the juices that seep out of the sausage will run clear. Pink or red juices indicate it needs additional cooking time.
    • Pierce the sausage gently with a fork to check the color of the juices.
  2. Avoid Excess Leakage
    • To retain moisture, avoid poking the sausage multiple times. Excess piercing can lead to dry, flavorless sausage.
Cooking Methods and Their Cues
  1. Smoking Method
    • Sausages cooked in a smoker should develop a golden or reddish-brown hue with a slightly crisp casing. The smoky aroma and visual cues complement the internal temperature check.
  2. Oven Baking
    • If baking, the sausage will appear evenly browned, and the casing should look slightly wrinkled, indicating moisture retention and proper cooking.
  3. Grilling or Pan-Frying
    • Grilled or pan-fried sausages should have a caramelized exterior with grill marks or a seared crust, signaling that the heat has evenly cooked the surface.

Shelf Life of Homemade Summer Sausage

Understanding the shelf life of your homemade summer sausage is crucial for maintaining its quality and ensuring food safety. Several factors, including storage methods and the ingredients used, can influence how long your summer sausage remains fresh. Here’s everything you need to know about its shelf life and how to store it effectively.

Refrigerated Storage
  1. How Long Does It Last in the Fridge?
    • Homemade summer sausage typically lasts up to 3 weeks in the refrigerator if stored properly. Its curing salts and seasonings help extend its freshness compared to regular sausages.
  2. Storage Tips
    • Wrap the sausage tightly in plastic wrap or aluminum foil to minimize air exposure. Alternatively, use an airtight container to lock in freshness and prevent odor absorption.
    • Store it on a shelf in the fridge rather than the door to maintain a consistent temperature.
Freezing for Long-Term Storage
  1. Shelf Life in the Freezer
    • When frozen, homemade summer sausage can last 6 to 12 months without significant loss of flavor or texture. Freezing is the best option if you plan to store it for an extended period.
  2. Freezing Tips
    • Slice the sausage into portions before freezing to make it easier to thaw only what you need.
    • Use vacuum-sealed bags or freezer-safe zip-lock bags for optimal storage. Label each bag with the date to track its age.
Factors That Affect Shelf Life
  1. Ingredients and Additives
    • The use of curing salts, such as Prague powder, significantly extends the shelf life by inhibiting bacterial growth. Sausages without these preservatives will spoil faster.
  2. Humidity and Temperature
    • Proper storage conditions are essential. A refrigerator set to 34–40°F (1–4°C) slows down bacterial activity, while freezing at 0°F (-18°C) halts it entirely.
  3. Handling Practices
    • Always use clean utensils and food-safe gloves when handling your sausage to prevent cross-contamination. Avoid leaving it out at room temperature for extended periods.
Signs of Spoilage
  1. Visual Changes
    • Check for mold, unusual discoloration, or a slimy texture. These are clear indicators that the sausage has gone bad.
  2. Off Odors
    • A sour or rancid smell suggests that the sausage is no longer safe to eat. Discard it immediately if you notice any unpleasant odors.
  3. Taste and Texture
    • If the flavor tastes off or the texture feels overly dry or mushy, the sausage may have passed its prime.
Maximizing Shelf Life
  1. Use a Vacuum Sealer
    • Vacuum sealing reduces air exposure, extending the shelf life of your sausage, whether refrigerated or frozen.
  2. Consume Fresh
    • To enjoy the best flavor and texture, consume homemade summer sausage within the first two weeks of making it.
  3. Rotate Stock
    • If you make sausage regularly, follow the “first in, first out” rule to ensure older batches are used before newer ones.

By understanding the factors that affect its shelf life and following proper storage practices, you can keep your homemade summer sausage fresh and delicious for weeks or even months. This not only ensures food safety but also helps you savor the flavors of your hard work.

Tips for Perfecting Your Homemade Summer Sausage

Experimenting with Different Seasonings

Creating summer sausage at home allows for endless flavor possibilities, as you can tailor the seasoning blend to suit your taste. Experimenting with different seasonings not only enhances your sausage but also makes the process fun and creative. Here’s a comprehensive guide to help you explore various seasoning combinations.

Classic Seasoning Blends
  1. Traditional Flavors
    • Start with a base of curing salt, garlic powder, onion powder, and black pepper. These seasonings give your sausage a balanced and timeless taste.
    • Paprika, whether sweet or smoked, adds a mild sweetness and a hint of smoky depth.
  2. Enhancing with Herbs
    • Include dried herbs like thyme, oregano, or parsley to add subtle, earthy notes. These work particularly well in combination with garlic and pepper.
Regional and International Inspiration
  1. Spicy Southwest Style
    • For a bold flavor, mix in cayenne pepper, chili powder, and ground cumin. These spices lend your sausage a fiery kick, reminiscent of Southwest cuisine.
  2. Italian-Inspired Blend
    • Use fennel seeds, red pepper flakes, and Italian seasoning for a sausage with classic Italian flavors. Add a touch of grated Parmesan for an extra layer of richness.
  3. Asian-Inspired Flavors
    • Experiment with soy sauce, ginger powder, and sesame seeds for an umami-packed profile. A sprinkle of five-spice powder can introduce a unique, aromatic twist.
Sweet and Savory Combinations
  1. Maple and Honey Infusion
    • Adding a touch of maple syrup or honey to your spice mix can create a sweet-savory contrast. Pair this with black pepper and garlic for a balanced flavor.
  2. Fruit-Based Twists
    • Incorporate dried fruits like cranberries, apricots, or raisins along with cinnamon and nutmeg. This combination adds a delightful sweetness and depth to the sausage.
Customizing for Dietary Preferences
  1. Low-Sodium Alternatives
    • Replace regular salt with low-sodium options or use herbs like rosemary and basil to enhance flavor naturally.
  2. Keto-Friendly Options
    • Focus on bold spices like smoked paprika, garlic, and chili powder while avoiding sweet additives like sugar or honey.
Tips for Experimenting
  1. Start Small
    • When trying a new seasoning combination, work with a small batch of meat to test the flavor. This way, you can make adjustments before committing to a full recipe.
  2. Balance is Key
    • Combine bold spices with mild ones to avoid overpowering the sausage. For instance, balance the heat of cayenne with the sweetness of brown sugar.
  3. Label Your Blends
    • Keep track of your experiments by labeling your seasoning mixes and noting the ratios used. This ensures consistency when recreating your favorite combinations.
Common Seasoning Additives and Their Effects
  1. Mustard Seed
    • Provides a tangy bite and subtle crunch. It’s a staple in many traditional summer sausage recipes.
  2. Cloves and Allspice
    • These warm spices add a hint of complexity and are perfect for festive or holiday-themed sausages.
  3. Liquid Smoke
    • If you don’t have access to a smoker, liquid smoke can infuse your sausage with that signature smoky flavor.
Seeking Feedback
  1. Taste Tests
    • Share your sausage creations with friends and family to gather opinions on your seasoning blends. Their feedback can inspire new variations.
  2. Documenting Results
    • Keep a journal of your seasoning experiments, including what worked and what didn’t. This helps refine your recipes over time.

By experimenting with different seasonings, you can create unique summer sausages that stand out. Whether you prefer bold and spicy flavors or sweet and savory notes, the possibilities are virtually endless. Let your creativity guide you as you craft your own signature sausage blend.

Adjusting the Fat-to-Meat Ratio for the Perfect Texture

When making summer sausage, achieving the right fat-to-meat ratio is key to obtaining the perfect texture. A well-balanced ratio ensures your sausage is juicy, flavorful, and has the ideal consistency. Too much fat will make the sausage greasy, while too little fat will result in a dry, crumbly texture. Here’s how to adjust the fat-to-meat ratio to suit your preferences.

Understanding the Ideal Ratio
  1. Traditional Fat-to-Meat Ratio
    • The standard fat-to-meat ratio for summer sausage is around 80% lean meat to 20% fat. This ratio offers a great balance of moisture, tenderness, and flavor. The fat helps bind the ingredients together, contributing to a smooth texture while also enhancing the sausage’s taste.
  2. Adjusting for Personal Preference
    • If you prefer a juicier, more tender sausage, increase the fat content slightly—about 75% lean meat to 25% fat. This adjustment will result in a more succulent sausage with a softer bite.
  3. Lean Alternatives
    • On the other hand, if you’re looking to reduce the fat content, go for a leaner cut of meat, like 90% lean to 10% fat. While this will make the sausage less greasy, you may notice a firmer texture and less richness in the flavor.
Choosing the Right Cuts of Meat
  1. Ideal Meat Cuts for Summer Sausage
    • Ground beef, particularly from chuck or brisket, works well due to its higher fat content. These cuts provide the necessary fat for a balanced sausage.
    • For leaner sausages, opt for cuts like sirloin or round. These provide less fat and leaner texture but can be drier without additional fat.
  2. Using Pork Fat
    • Pork fat is commonly used in summer sausage for its ability to provide a smooth texture and rich flavor. If you want to experiment, try using pork belly or back fat. These are excellent sources of high-quality fat that contribute to a succulent sausage.
Adding Fat and Its Effect on Texture
  1. Fat and Moisture Balance
    • The amount of fat in the sausage directly impacts moisture. When the fat percentage is too low, the sausage may dry out during smoking or cooking. Conversely, a higher fat percentage adds richness and helps maintain moisture throughout the sausage’s shelf life.
  2. Types of Fat to Use
    • Use solid fat that will retain moisture when cooking. Fatty cuts of beef, such as chuck, or pork fat from the belly, are the most commonly used and provide the best texture. Make sure the fat is well-marbled with the meat to achieve uniform distribution and avoid clumping.
Texture Testing and Adjustments
  1. Test Before Stuffing
    • After grinding the meat and fat together, take a small amount of the mixture and cook it to test the texture. This will help you gauge whether it has the right consistency. If the mixture seems too greasy or dry, adjust the fat content accordingly before proceeding to the stuffing process.
  2. Consistency Check
    • The ideal sausage mixture should be moist but not too runny. It should hold together well and not crumble when you form it into a log shape. If the texture is too dry, add a bit more fat; if it’s too soft, reduce the fat or increase the lean meat.
How Fat Affects the Smoking Process
  1. Fat and Smoking Time
    • Fat in the sausage affects how the meat holds up during smoking. Sausages with higher fat content tend to hold up better during the smoking process and stay moist. Sausages with lower fat content may dry out or cook too quickly, requiring careful attention.
  2. Smoking Fat Distribution
    • While smoking, the fat within the sausage should render slowly, giving the sausage a smooth and juicy texture. If your sausage mixture is too lean, it may dry out during the smoking process.
Adjusting Fat Based on Texture Goals
  1. For a Leaner Sausage
    • If you want a leaner sausage, aim for a 90/10 meat-to-fat ratio. This makes the sausage firmer and drier but still edible. You can offset some of the dryness by incorporating moisture-rich seasonings or ingredients like grated cheese or even liquid (such as beef broth).
  2. For a Juicier Sausage
    • To make a sausage that’s more succulent, aim for a 75/25 or 80/20 meat-to-fat ratio. This will yield a soft, juicy sausage with a tender bite. The additional fat ensures moisture retention, and the result is a rich, flavorful sausage.

Common Mistakes to Avoid When Making Summer Sausage

Making summer sausage at home can be a rewarding experience, but it’s easy to make mistakes that could affect the final product. Understanding and avoiding common mistakes ensures that your sausage turns out juicy, flavorful, and perfectly cooked. Here’s a guide to help you avoid some of the most common pitfalls:

1. Using the Wrong Fat-to-Meat Ratio

One of the most critical aspects of making summer sausage is getting the fat-to-meat ratio just right. Too little fat leads to dry and tough sausage, while too much fat can make it greasy. The recommended ratio for traditional summer sausage is about 80% lean meat to 20% fat, but you can adjust based on your preferences.

Mistake to avoid:

  • Using lean cuts of meat without adding enough fat. This will result in a dry texture.
  • Adding too much fat, leading to greasy sausage that may not hold its shape.

Tip:

  • Test the mixture by cooking a small piece before stuffing the casings. This allows you to adjust the fat content before committing to the entire batch.
2. Not Grinding the Meat Properly

Grinding the meat properly is key to achieving the right texture. If the meat is ground too coarsely or too finely, it can affect the sausage’s consistency and texture.

Mistake to avoid:

  • Grinding meat at the wrong temperature. If the meat is too warm, the fat can melt during grinding, leading to a greasy sausage.
  • Not grinding the meat enough times. A coarse grind can result in a crumbly sausage that doesn’t hold together well.

Tip:

  • Grind the meat when it’s partially frozen to prevent fat from melting. Aim for a medium grind, and consider running the mixture through the grinder twice for better texture.
3. Overworking the Sausage Mixture

It’s essential to mix the sausage ingredients evenly, but overworking the mixture can result in a dense, tough sausage. Overmixing causes the proteins in the meat to break down too much, which leads to an undesirable texture.

Mistake to avoid:

  • Mixing too aggressively, which can cause the sausage to become tough and dry.
  • Failing to mix evenly, leading to uneven seasoning distribution and a lack of consistency.

Tip:

  • Mix the sausage by hand until the ingredients are just combined. If using a mixer, use the lowest speed to avoid overworking the mixture.
4. Not Properly Stuffing the Sausage Casings

Stuffing the casings is an essential step that requires care. If you don’t stuff the casings evenly, air pockets may form, which can result in uneven cooking and spoilage. Additionally, stuffing them too tightly or too loosely can affect the texture and cooking time.

Mistake to avoid:

  • Overstuffing the casings, which can cause the sausage to burst during smoking.
  • Understuffing the casings, leaving air pockets inside that can spoil the sausage.

Tip:

  • Use a sausage stuffer to ensure even and consistent stuffing. Stuff the casings gently, allowing them to be filled without too much pressure. Tie the ends securely but not too tightly.
5. Skipping the Curing Process

Curing the sausage is essential for both flavor and safety. The curing process involves using curing salts, which prevent the growth of harmful bacteria and give the sausage its characteristic flavor. Skipping this step or using insufficient curing salt can result in unsafe sausages.

Mistake to avoid:

  • Forgetting to add curing salt, which can lead to a lack of preservation and an unsafe final product.
  • Using the wrong type of curing salt. There are different curing salts for various sausage recipes, and using the wrong one can affect the taste and safety of the sausage.

Tip:

  • Follow the recipe carefully to ensure you’re using the correct amount of curing salt. Measure accurately, as using too much or too little can affect both flavor and safety.
6. Not Controlling the Temperature During Smoking

Smoking the sausage is an essential step that imparts flavor and preserves the meat. However, if the smoking temperature is too high or too low, it can affect both the flavor and texture of the sausage. Overcooking can cause the sausage to dry out, while undercooking can lead to safety concerns.

Mistake to avoid:

  • Smoking at too high a temperature, which can cause the fat to render too quickly, leading to dry sausage.
  • Smoking at too low a temperature, which may prevent the sausage from fully cooking or result in uneven cooking.

Tip:

  • Maintain a low and slow smoking temperature, around 160–180°F (71–82°C). Use a meat thermometer to ensure the sausage reaches an internal temperature of 160°F (71°C) to ensure it is safe to eat.
7. Not Letting the Sausage Rest After Smoking

After smoking, it’s tempting to cut into your homemade summer sausage right away, but this is a mistake. The sausage needs to rest to allow the juices to redistribute and settle. Cutting into the sausage too soon can lead to dry meat and a less flavorful sausage.

Mistake to avoid:

  • Cutting the sausage immediately after smoking, which can cause the juices to escape, resulting in dry sausage.
  • Not letting the sausage cool completely before refrigerating or storing.

Tip:

  • Let the sausage rest for at least an hour after smoking to allow the juices to redistribute. Once it has cooled, store it properly in the fridge or freezer.
8. Improper Storage

Storing homemade summer sausage incorrectly can reduce its shelf life and affect its flavor. If the sausage isn’t properly sealed or stored, it may dry out or spoil prematurely.

Mistake to avoid:

  • Storing sausage in a container that isn’t airtight, which can cause it to dry out or absorb unwanted odors.
  • Leaving the sausage at room temperature for too long, which can encourage bacterial growth.

Tip:

  • Store the sausage in an airtight container or vacuum-seal it for longer shelf life. Keep the sausage in the refrigerator or freezer, depending on when you plan to use it.

How to Slice and Serve Your Sausage for the Best Presentation

When it comes to serving homemade summer sausage, presentation matters. The way you slice and serve the sausage can elevate its appeal and make it the centerpiece of any meal or gathering. Whether you’re serving it as an appetizer, part of a charcuterie board, or as the main dish, knowing how to slice and serve your sausage can enhance both its visual appeal and taste.

1. Slicing the Sausage

Slicing the sausage correctly is key to both presentation and flavor. To achieve the best results, follow these simple guidelines for slicing:

Tip:

  • Use a sharp knife: A sharp, non-serrated knife ensures smooth, clean cuts, which will maintain the shape and texture of the sausage.
  • Slice at the right thickness: Slice the sausage into uniform pieces for a polished presentation. For most serving purposes, aim for slices about 1/8 to 1/4 inch thick. Thin slices allow the flavor to shine, while thicker slices provide a heartier bite.

Mistake to avoid:

  • Slicing too thick or thin: Slices that are too thick can overpower the other components of the dish, while slices that are too thin might fall apart or lack texture.

Tip:

  • Slice against the grain: Cutting the sausage against the grain will result in tender, easy-to-chew slices. This is especially important for sausages with a firmer texture.
2. Serving with the Right Accompaniments

The right accompaniments can transform your sausage from a simple dish to an elegant spread. Here are some ideas for serving your sausage in a way that complements its flavors:

Tip:

  • Cheese pairings: Summer sausage pairs wonderfully with a variety of cheeses. Sharp cheeses like cheddar, gouda, or aged parmesan provide a nice contrast to the savory flavors of the sausage.
  • Pickles and fruits: Add pickled vegetables, such as gherkins or pickled onions, to balance the richness of the sausage. Fresh fruits like apples, grapes, or figs add a sweet contrast that complements the sausage’s flavor.

Mistake to avoid:

  • Overcrowding the plate: While accompaniments are important, avoid overcrowding the serving platter. A simple, clean presentation is often more appealing than a cluttered one.

Tip:

  • Crackers and bread: Provide a variety of crackers or crusty bread as a base for the sausage. These items help absorb the flavors and offer a crunchy contrast to the softness of the sausage.
3. Arranging the Sausage for Maximum Appeal

The arrangement of the sausage on the serving platter is crucial to creating an inviting presentation. A well-organized platter shows care and attention to detail.

Tip:

  • Create visual interest: Arrange the sausage slices in a fan shape or in a circular pattern. You can even stack the slices slightly to create height and dimension. Avoid simply piling them in the center of the plate.
  • Color contrast: To create a visually appealing platter, contrast the deep red of the sausage with vibrant green herbs or garnishes. Fresh parsley, rosemary, or thyme sprigs can add a pop of color and fragrance.

Mistake to avoid:

  • Placing the sausage too close together: When the slices are packed too tightly, it can look messy and overwhelming. Leave some space between the slices to give the platter a more polished look.

Tip:

  • Use garnishes strategically: Fresh herbs or edible flowers can be used to decorate the platter. They not only add color but also bring a hint of freshness that complements the rich flavor of the sausage.
4. Serving Temperature

Serving your homemade summer sausage at the right temperature can greatly enhance the eating experience. Sausage that is too cold may be too firm, while sausage that is too warm can lose its texture.

Tip:

  • Serve at room temperature: Allow the sausage to sit at room temperature for about 30 minutes before serving. This helps the flavors to develop fully and gives the sausage a more pleasant texture. If the sausage was previously refrigerated, make sure it’s not too cold when sliced.

Mistake to avoid:

  • Serving sausage straight from the fridge: Cold sausage can become too hard and chewy. Let it rest at room temperature to bring out the best texture and flavor.
5. Creative Ways to Serve Summer Sausage

If you’re looking to get creative with how you serve your sausage, consider turning it into a more elaborate dish. Here are a few ideas:

Tip:

  • Summer sausage sliders: Slice the sausage into thick rounds and serve it on small buns with a dollop of mustard, cheese, and a pickle. This makes for a fun and easy-to-eat snack for gatherings.
  • Charcuterie board: Include summer sausage as part of a larger spread of meats, cheeses, nuts, fruits, and spreads. This allows guests to explore different flavor combinations and creates an appealing, varied presentation.

Mistake to avoid:

  • Overcomplicating the dish: While adding creativity is great, don’t overwhelm the sausage with too many competing flavors. Let the sausage be the star of the show, with simple, complementary additions.
6. Presentation Tips for Special Occasions

For special occasions like parties or holiday meals, go the extra mile to make your sausage shine.

Tip:

  • Use decorative platters: Choose platters or boards that complement the sausage’s rustic nature. Wooden boards or slate platters provide a great backdrop for the sausage and give it a gourmet touch.
  • Add a personal touch: If you’re serving sausage as part of a meal, consider adding personalized touches, like custom name tags for a buffet-style spread or arranging the sausage in the shape of a festive pattern for a holiday meal.

Mistake to avoid:

  • Overloading the platter: More is not always better. Focus on quality and presentation over quantity. Keep your platter clean and uncluttered for a more elegant and professional look.
In conclusion, making homemade summer sausage is a rewarding and enjoyable process that allows you to experiment with different ingredients, flavors, and techniques. Whether you’re a seasoned sausage maker or a beginner, taking the time to slice, serve, and present your sausage with care can truly elevate the experience. From choosing the right equipment to perfecting the seasoning and fat-to-meat ratio, each step plays an essential role in creating a delicious final product.

By paying attention to small details like the thickness of your slices, the right accompaniments, and the perfect serving temperature, you can ensure that your homemade sausage becomes the star of the show. With a little creativity and thoughtful presentation, you’ll be able to impress your guests and make every meal a memorable occasion. So, next time you make summer sausage, remember to take your time, enjoy the process, and, most importantly, savor the results!

Leave a Comment