
Craving a rich and creamy dessert but short on time? This 3-ingredient peanut butter fudge is the perfect solution! You only need a few pantry staples and a few minutes to prepare this no-bake treat.
Whether you’re making a quick dessert, preparing a holiday gift, or satisfying a sweet tooth, this fudge delivers smooth, melt-in-your-mouth goodness with minimal effort. In this guide, we’ll cover the simple ingredients and easy steps so you can enjoy homemade peanut butter fudge anytime. Let’s get started! 🍫🥜
Why You’ll Love This 3-Ingredient Peanut Butter Fudge
Quick and Easy to Make
If you’re wondering how to make 3-ingredient peanut butter fudge without spending hours in the kitchen, you’re in luck. This recipe is one of the easiest desserts you’ll ever prepare. With just three pantry staples and a microwave or stovetop, you can have delicious, creamy fudge ready in minutes. You don’t need baking experience, fancy tools, or extra ingredients. Anyone can do it!
Ready in Under 10 Minutes
This fudge comes together incredibly fast. Start by melting peanut butter and butter together. Once the mixture turns smooth and creamy, stir in the powdered sugar. That’s it! You’ve just made peanut butter fudge in under 10 minutes. This speed makes it perfect for last-minute dessert emergencies or late-night cravings.
No Special Equipment Needed
You don’t need a stand mixer, candy thermometer, or any complicated gear. A microwave-safe bowl, a spoon, and an 8×8 baking pan are all you need. If you prefer, you can melt the ingredients on the stovetop. The process is so simple that even kids can help with supervision, making it a fun family kitchen activity.
Minimal Clean-Up Required
Because you only use one bowl and a single pan, cleanup is quick and painless. Line your baking pan with parchment paper before pouring in the fudge to make removal even easier. When you learn how to make 3-ingredient peanut butter fudge, you also learn how to save time on dishes—something we can all appreciate.
Minimal Ingredients, Maximum Flavor
One of the best things about learning how to make 3-ingredient peanut butter fudge is realizing that you don’t need a long list of ingredients to create a rich and flavorful dessert. This recipe sticks to the basics—peanut butter, butter, and powdered sugar—but delivers big taste.
Simple Ingredients, Big Impact
Creamy peanut butter gives this fudge its bold, nutty flavor. Butter adds smoothness and a bit of salt to balance the sweetness, while powdered sugar brings it all together with a soft, melt-in-your-mouth texture. Even without chocolate or extra flavorings, each bite is full of rich, satisfying flavor.
When you master how to make 3-ingredient peanut butter fudge, you get the perfect blend of sweet and salty using items you probably already have in your pantry. It’s proof that less really can be more in dessert-making.
Great for Holidays and Gifting
If you’ve been searching for a go-to treat that’s perfect for parties, gift baskets, and festive gatherings, learning how to make 3-ingredient peanut butter fudge is your answer. This sweet and creamy fudge is not only easy to make but also ideal for sharing.
The Perfect Homemade Gift
Everyone loves a homemade treat—especially during the holidays. Once you know how to make 3-ingredient peanut butter fudge, you can whip up several batches in no time. Wrap the squares in wax paper, place them in decorative tins, and you’ve got a thoughtful, budget-friendly gift.
Because this fudge requires minimal effort, you can make large quantities without spending all day in the kitchen. That makes it great for gifting to teachers, coworkers, neighbors, or party guests.
A Festive Favorite
This fudge fits into almost any celebration. Whether you’re making it for Christmas, Thanksgiving, or a birthday party, its classic flavor and soft texture appeal to all ages. You can even dress it up with a sprinkle of sea salt or a drizzle of melted dark chocolate for a more elegant presentation.
Once you learn how to make 3-ingredient peanut butter fudge, you’ll find yourself returning to it again and again—especially when you want something delicious, personal, and quick to prepare for special occasions.
Ingredients You’ll Need for This Easy Fudge Recipe
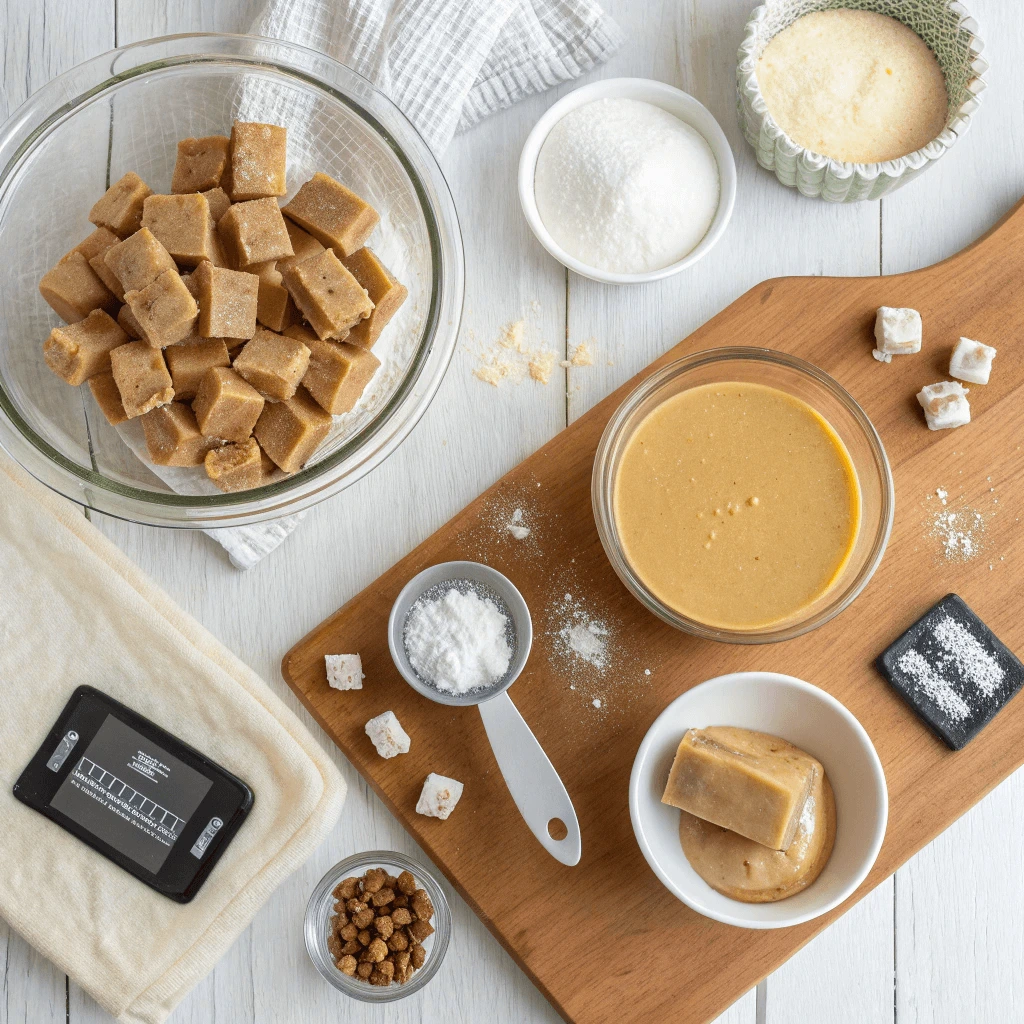
Creamy Peanut Butter
Choosing the right peanut butter is a key step in learning how to make 3-ingredient peanut butter fudge. It’s the main ingredient, so the texture and flavor of your fudge depend on what you use.
Stick with Creamy, Not Crunchy
Creamy peanut butter works best in this recipe. It blends smoothly with the butter and powdered sugar, creating that melt-in-your-mouth consistency you want in a good fudge. Crunchy peanut butter can interrupt that silky texture and make the fudge harder to cut cleanly.
Brands like Jif or Skippy offer consistent results, making them ideal for this quick and easy treat. Natural peanut butter can work, but it often separates or contains more oil, which might affect the texture.
Use Fresh, Room Temperature Peanut Butter
Make sure your peanut butter is fresh and at room temperature. Cold peanut butter doesn’t melt easily and can lead to clumps in your fudge. When it’s soft, it combines more smoothly with the other ingredients, saving you time and effort.
Flavor You Can Count On
If you’re learning how to make 3-ingredient peanut butter fudge for the first time, starting with a classic creamy peanut butter ensures rich, nutty flavor in every bite. The natural saltiness of peanut butter also helps balance the sweetness from the sugar, making this dessert irresistibly satisfying.
Butter or Dairy-Free Alternative
Butter plays an important role in creating the smooth, rich texture that makes this dessert irresistible. Whether you’re sticking with the classic or exploring plant-based options, choosing the right fat helps you master how to make 3-ingredient peanut butter fudge every time.
Why Butter Works So Well
Butter adds a creamy texture and rich flavor that balances the sweetness of powdered sugar and enhances the nutty depth of the peanut butter. It also helps the ingredients bind together smoothly. Using unsalted butter gives you better control over the overall taste, especially since peanut butter usually contains salt.
Vegan or Dairy-Free? Try These Substitutes
If you follow a dairy-free or vegan diet, you can still learn how to make 3-ingredient peanut butter fudge with amazing results. Plant-based alternatives like vegan butter or refined coconut oil melt just as easily and blend well with the other ingredients. Coconut oil adds a subtle tropical note, while vegan butters often mimic the texture and flavor of traditional butter almost perfectly.
Stick to Solid Fats, Avoid Liquid Oils
When substituting, avoid using liquid oils like canola or olive oil. These don’t offer the same structure and may leave your fudge too soft or oily. Solid fats, like butter or coconut oil, help the fudge set firmly once it chills.
Making this one simple swap allows more people to enjoy this easy dessert without sacrificing taste or texture. So whether you’re making it traditional or vegan, you’ll know exactly how to make 3-ingredient peanut butter fudge your way.
Powdered Sugar
When you’re learning how to make 3-ingredient peanut butter fudge, powdered sugar becomes the secret weapon that brings everything together. It’s more than just a sweetener—it gives the fudge structure, texture, and that classic, melt-in-your-mouth finish.
Why Powdered Sugar Matters
Powdered sugar, also known as confectioners’ sugar, dissolves easily and blends seamlessly with peanut butter and butter. Unlike granulated sugar, it won’t leave a gritty texture. Its ultra-fine consistency ensures a smooth, creamy fudge every time.
Because the sugar also adds bulk to the mixture, it helps the fudge firm up once chilled. Without it, the fudge would stay too soft or oily and might not hold its shape.
Sifting for Smoothness
For the best results, sift the powdered sugar before mixing it into the melted peanut butter and butter. This simple step breaks up clumps and prevents lumps in your final fudge. It may seem minor, but it makes a noticeable difference in the smoothness of the texture.
If you’re showing someone how to make 3-ingredient peanut butter fudge for the first time, always mention the importance of this step—they’ll thank you later!
Sugar Alternatives for Special Diets
Want a lower-sugar version? Use a powdered sugar substitute like monk fruit sweetener or erythritol blends. Just make sure the alternative is finely ground to match the texture of traditional powdered sugar. These options work well for keto or diabetic-friendly versions of this fudge.
Whether you stick with the classic or opt for a low-carb twist, powdered sugar plays a key role in helping you master how to make 3-ingredient peanut butter fudge the right way.
How to Make 3-Ingredient Peanut Butter Fudge Step-by-Step
Melt the Butter and Peanut Butter
The first step in learning how to make 3-ingredient peanut butter fudge is melting the butter and peanut butter together. This step is simple but crucial to achieving a smooth, creamy texture that sets well and tastes amazing.
Use a Microwave or Stovetop
You can melt the ingredients using a microwave or stovetop—whichever you prefer. For the microwave method, combine the butter and peanut butter in a microwave-safe bowl. Heat it in 30-second intervals, stirring in between, until the mixture is smooth and fully melted. Most people find that 60 to 90 seconds is enough.
If you use the stovetop, place both ingredients in a saucepan over low heat. Stir continuously to prevent burning and make sure everything blends evenly. Avoid overheating, as it can affect the texture of your fudge later on.
Aim for a Silky, Unified Texture
You want the mixture to be completely smooth and glossy before moving to the next step. Any unmelted chunks of peanut butter or butter can create a lumpy texture in your final product. Stir well to combine both fats evenly for a consistent base.
When you follow this technique, you’re not just melting ingredients—you’re setting the foundation for rich, satisfying fudge. And once you master this step, you’re well on your way to knowing how to make 3-ingredient peanut butter fudge like a pro.
Troubleshooting Tips
If your mixture looks greasy or separated, lower the heat and stir more thoroughly. A gentle melt helps everything blend smoothly. Don’t rush it—this part only takes a few minutes, and getting it right makes all the difference.
Mix in Powdered Sugar
After melting the peanut butter and butter together, the next step in how to make 3-ingredient peanut butter fudge is mixing in the powdered sugar. This step transforms your warm mixture into a thick, creamy fudge base.
Add Gradually for Best Results
Don’t dump in the powdered sugar all at once. Add it gradually—about half a cup at a time—while stirring continuously. This method helps the sugar blend more evenly and prevents clumps from forming. As you stir, you’ll notice the mixture thickening into a soft dough-like consistency.
Sifting the powdered sugar beforehand can also help keep the mixture smooth. This simple step takes only a minute and makes a big difference in the texture of your fudge.
Mix Until Smooth and Uniform
Keep stirring until all the sugar is fully incorporated. The mixture should look thick but smooth, with no visible dry spots. If it gets too difficult to stir with a spoon, you can switch to a rubber spatula or even knead it briefly with clean hands to finish combining everything evenly.
At this stage, you’re more than halfway through learning how to make 3-ingredient peanut butter fudge, and your kitchen is probably smelling amazing already!
Adjusting for Texture
If the mixture feels too soft or sticky, add a tablespoon of powdered sugar at a time until it firms up slightly. On the other hand, if it becomes too dry or crumbly, mix in a teaspoon of melted peanut butter to restore balance.
Once you achieve the perfect consistency, you’re ready to press the fudge into a pan and let it set.
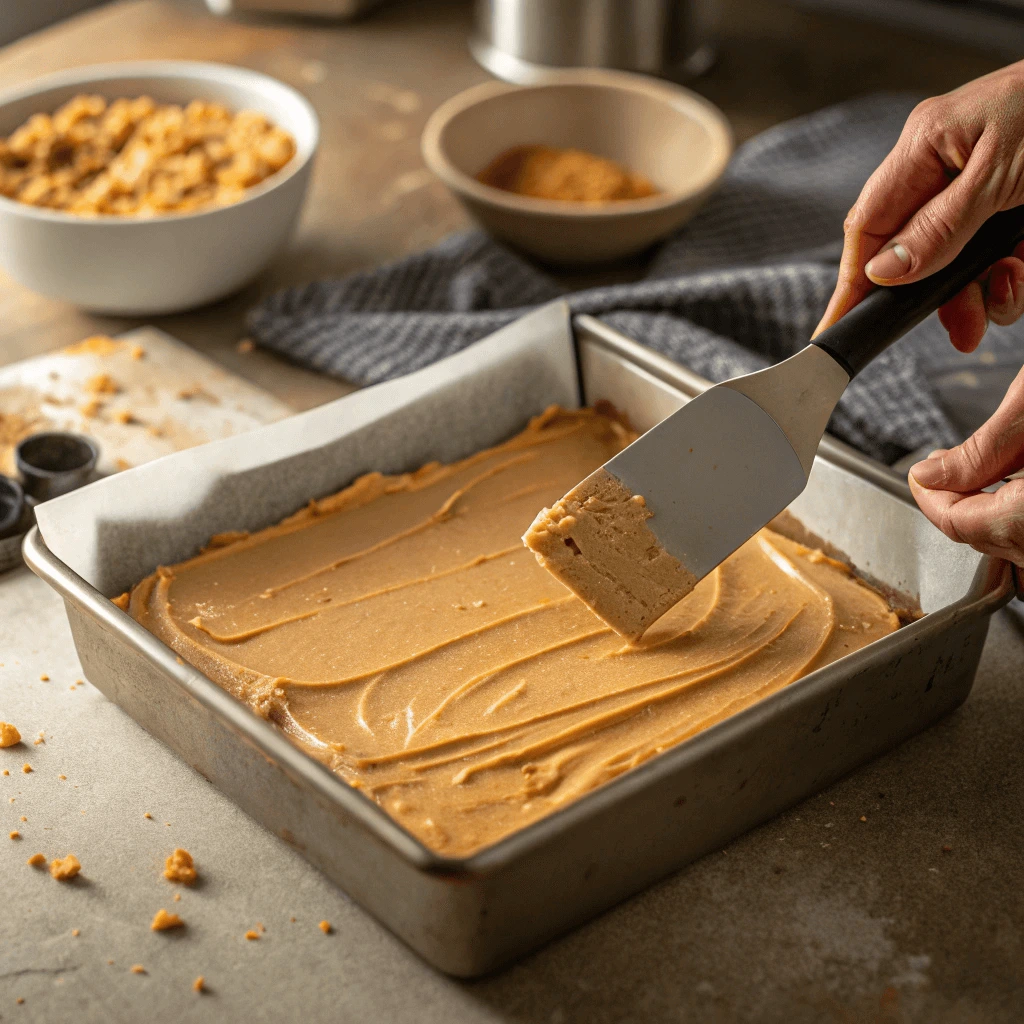
Press into a Pan and Chill
Once your fudge mixture is ready, it’s time to shape and set it. This step is key to finishing off your simple recipe for how to make 3-ingredient peanut butter fudge.
Prepare the Pan
Line an 8×8-inch pan with parchment paper or lightly grease it. This makes it easy to remove the fudge once it sets and ensures cleaner slices.
Spread and Flatten
Transfer the mixture into the pan. Use a spatula to press it down evenly, making sure it fills the corners. You can place another piece of parchment paper on top and gently press to smooth the surface.
Chill to Set
Refrigerate the fudge for about 2 hours. This allows it to firm up properly. Once chilled, lift it from the pan using the parchment paper and cut it into small squares. Now you’ve completed the final step in how to make 3-ingredient peanut butter fudge—ready to enjoy or gift!
Tips for the Best Peanut Butter Fudge Every Time
Use Fresh Ingredients
One of the simplest ways to make your fudge taste amazing is to start with fresh, high-quality ingredients. When each item counts, freshness makes a noticeable difference.
Choose Fresh Peanut Butter
Always check the expiration date and texture of your peanut butter. Fresh peanut butter has a creamy, smooth consistency and full nutty flavor. If it smells off or looks dry and separated (especially if it’s not the natural kind), it may not work well in your recipe.
Butter Should Be Pure and Flavorful
Use fresh, unsalted butter for better control of saltiness and a cleaner, richer flavor. Butter that’s been sitting in the fridge for too long can absorb odors and affect the final taste of your fudge. So when you’re preparing how to make 3-ingredient peanut butter fudge, make sure the butter is soft, fresh, and ready to blend smoothly.
Don’t Forget the Sugar
Powdered sugar may seem shelf-stable, but it can clump or develop a stale taste if stored too long. For the best texture, sift the sugar before adding it and make sure it’s fresh and dry.
When you use fresh ingredients, you improve the flavor, texture, and overall success of your peanut butter fudge. It’s a small step that leads to a big payoff in every delicious bite!
Line Your Pan with Parchment Paper
This simple step can make a big difference when you’re learning how to make 3-ingredient peanut butter fudge. Lining your pan ensures your fudge sets cleanly and comes out perfectly every time.
Why Parchment Paper Matters
Parchment paper prevents sticking, which helps your fudge maintain its shape when it’s time to remove and slice it. Unlike foil or plastic wrap, it doesn’t tear or leave behind residue. It also makes cleanup easier—just lift and toss when you’re done.
How to Line Your Pan Properly
Choose an 8×8-inch pan or something similar. Cut a piece of parchment paper large enough to hang slightly over the edges. This overhang creates handy “handles” for lifting the fudge out once it sets. Press the paper firmly into the corners and smooth it down so the mixture lays flat.
For extra security, lightly grease the bottom of the pan before adding the paper. This helps hold it in place as you spread the fudge mixture.
Smooth Results Every Time
When you’re following the steps for how to make 3-ingredient peanut butter fudge, neat presentation matters—especially if you’re gifting it. Using parchment paper helps your finished fudge look smooth and professional, with crisp, clean edges that are easy to slice.
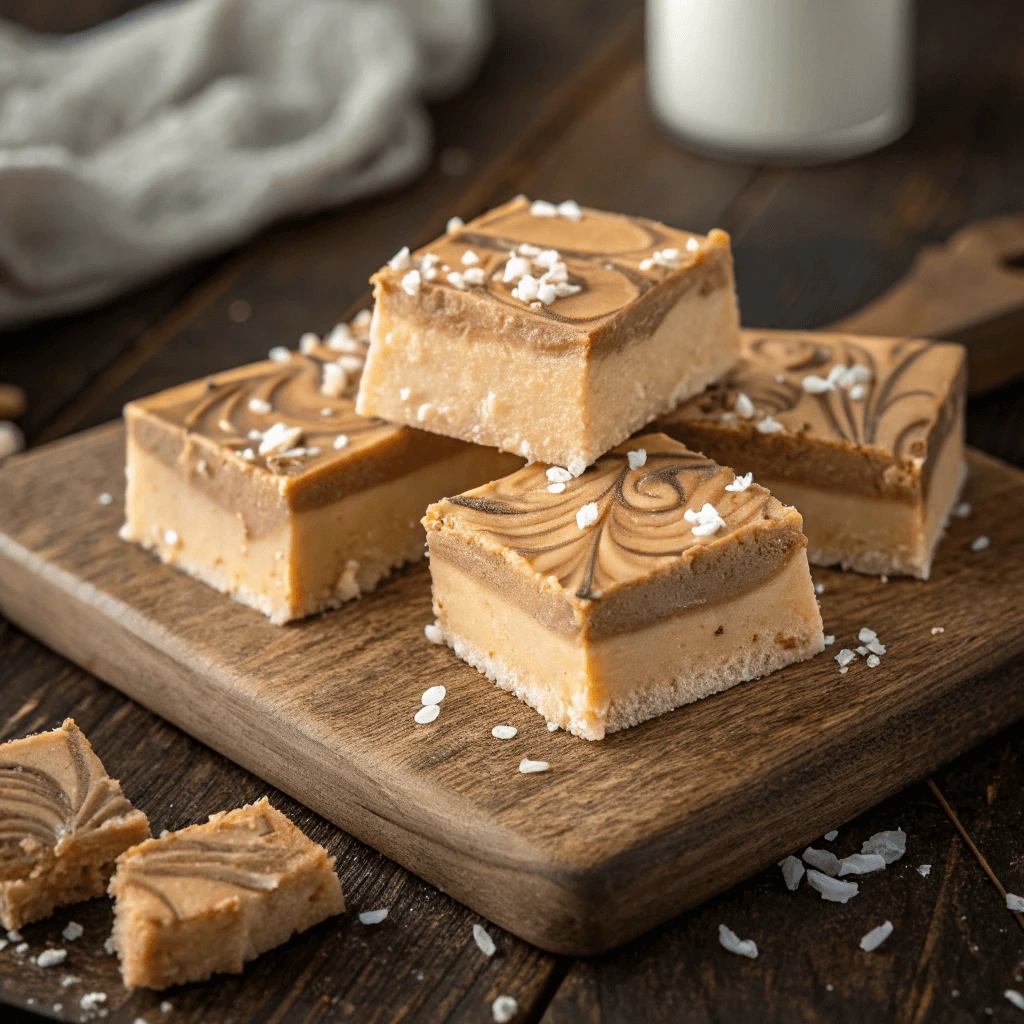
Cut Clean Squares with a Hot Knife
After your fudge has chilled and set, the final touch is cutting it into perfect squares. Using a hot knife gives you smooth, clean edges—ideal for presentation, gifting, or simply making your fudge look as good as it tastes.
Why a Hot Knife Works Best
Cold fudge can be firm, and using a room-temperature knife often results in rough edges or cracked pieces. When you warm the blade slightly, it glides through the fudge like butter. This technique makes a big difference, especially when you’re showing others how to make 3-ingredient peanut butter fudge that looks as professional as it tastes.
How to Heat Your Knife
Run your knife under hot water for 10–15 seconds. Dry it completely with a towel before cutting. Slice through the fudge in one smooth motion, then wipe the blade clean and reheat it before making the next cut. Repeat this process for every row.
If your fudge is particularly thick or chilled, a longer warm-up may help. Avoid using a serrated knife—stick with a sharp, straight-edged blade for best results.
Tips for Even Slices
Use a ruler or the edge of the parchment paper as a guide to mark your cuts. Start by cutting the fudge into rows, then turn and slice into squares. Even pieces not only look nicer, but also help with portion control—especially if you’re wrapping them for gifts.
Healthy Ingredient Alternatives for Guilt-Free Indulgence
Natural Peanut Butter Instead of Processed
When you want to make your fudge a little healthier without sacrificing flavor, switching to natural peanut butter is a smart choice. It changes the texture slightly but still delivers a rich, nutty taste.
Why Choose Natural Peanut Butter
Natural peanut butter typically contains just peanuts and salt—no added sugar, oils, or preservatives. This makes it a cleaner ingredient, especially if you’re aiming to simplify your treat. Since you’re focusing on how to make 3-ingredient peanut butter fudge, every ingredient counts.
Processed peanut butter, on the other hand, often contains hydrogenated oils and added sugars that can affect both flavor and texture. Natural varieties keep the flavor rich and true to the nut.
Adjust the Recipe if Needed
Because natural peanut butter has a runnier consistency than processed brands, you might need to tweak the ratio slightly. If the mixture feels too soft, add a little extra powdered sugar until the fudge firms up to the right texture. If it becomes too dry, stir in a teaspoon of melted natural peanut butter to loosen it.
Always stir the natural peanut butter well before using—it tends to separate in the jar, and you want a consistent texture for even mixing.
Flavor and Nutrition Upgrade
Choosing natural peanut butter not only supports a cleaner recipe, but it also adds more protein and fewer additives to your fudge. That makes this version of how to make 3-ingredient peanut butter fudge a little more wholesome, while still keeping it indulgent and delicious.
Coconut Oil Instead of Butter
Looking for a dairy-free alternative that doesn’t compromise on flavor or texture? Coconut oil works wonderfully in place of butter in this simple recipe. It’s a great option for vegan diets and adds a subtle richness to your fudge.
Why Use Coconut Oil?
Coconut oil is plant-based, solid at room temperature, and melts easily—making it a great substitute for butter in no-bake recipes. It helps bind the ingredients while giving your fudge a smooth, melt-in-your-mouth consistency. Plus, it pairs naturally with peanut butter’s nutty flavor.
If you’re showing others how to make 3-ingredient peanut butter fudge, using coconut oil lets you offer a dairy-free twist without sacrificing quality.
How to Substitute Properly
To replace butter, use the same amount of coconut oil. Make sure it’s solid or just slightly melted when mixing. If it’s too liquid, the fudge might not set firmly. You can refrigerate the coconut oil for a few minutes to firm it up before using.
Refined coconut oil has a neutral taste, while unrefined (virgin) coconut oil adds a light coconut flavor. Choose based on your flavor preference.
Health and Texture Benefits
Coconut oil contains healthy fats and fits well into plant-based or paleo-style eating. It also gives your fudge a glossy finish and helps it set up nicely in the fridge. With this swap, you’re learning how to make 3-ingredient peanut butter fudge in a way that’s just as creamy—and a little more inclusive for dietary needs.
Monk Fruit or Erythritol-Based Powdered Sweeteners
If you’re looking for a lower-sugar or keto-friendly version of your fudge, monk fruit and erythritol-based powdered sweeteners make an excellent alternative to traditional powdered sugar. They help keep the fudge sweet while reducing calories and blood sugar impact.
Why Choose Sugar-Free Sweeteners?
Monk fruit and erythritol are popular among low-carb and diabetic-friendly diets. They don’t spike blood sugar, and they taste remarkably similar to regular sugar—especially in baking and no-bake treats. When you’re experimenting with how to make 3-ingredient peanut butter fudge, this swap lets you enjoy your dessert with fewer carbs and less guilt.
How to Use These Sweeteners
Look for sweeteners that are designed to mimic powdered sugar. Many brands offer blends specifically for baking, often labeled “confectioners” or “powdered” style. Use the same amount as you would with regular powdered sugar.
To avoid a gritty texture, make sure the sweetener is fine and well-blended. Some brands may need extra mixing time to dissolve completely into the warm peanut butter and coconut oil or butter. If you’re unsure, you can pulse your sweetener in a food processor to make it even finer before using.
Taste and Texture Tips
These sweeteners can sometimes leave a cooling aftertaste, especially when used in large amounts. Combining monk fruit and erythritol often balances the flavor better than using just one. Once your fudge sets, the result is smooth, sweet, and delicious—without the sugar crash.
Using monk fruit or erythritol-based sweeteners is a smart, modern twist on the classic how to make 3-ingredient peanut butter fudge recipe. It’s a simple swap that supports your health goals while still delivering rich, satisfying flavor.
Conclusion
Making peanut butter fudge doesn’t have to be complicated. With just three simple ingredients and a few easy steps, you can whip up a rich, creamy treat in minutes. Whether you’re preparing it for holidays, gifting, or a quick dessert fix, this no-bake fudge delivers big flavor with minimal effort. Plus, with healthy alternatives like natural peanut butter and sugar-free sweeteners, you can customize it to fit your needs. Now that you know how to make 3-ingredient peanut butter fudge, it’s time to enjoy every bite!