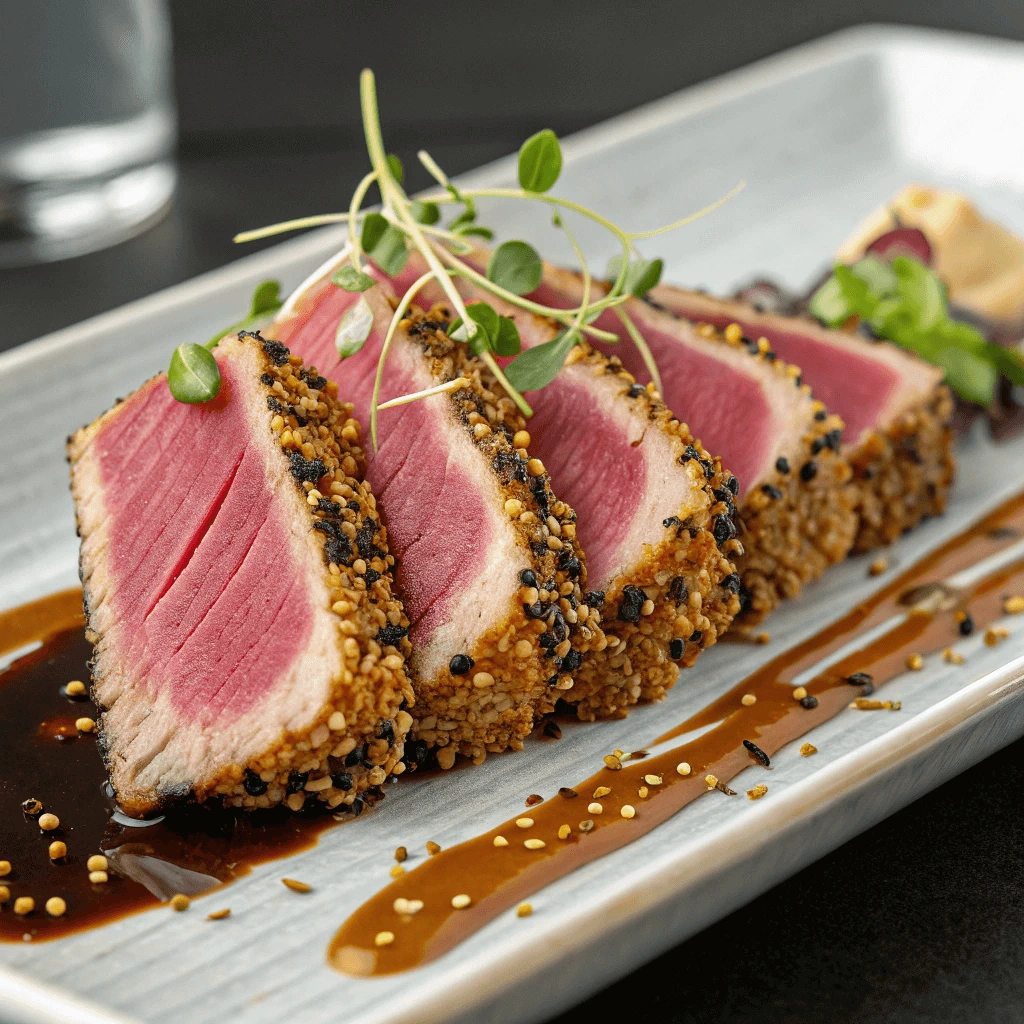
If you’re looking for a quick, delicious meal, this Seared Ahi Tuna Recipe is the perfect choice. It’s easy to make, bursting with flavor, and highlights the fresh, tender texture of ahi tuna. Whether you’re cooking for a weeknight dinner or a special occasion, this Seared Ahi Tuna Recipe offers a simple yet impressive dish that anyone can prepare. With just a few ingredients and straightforward steps, you’ll master the art of perfectly seared tuna in no time. Try this recipe and enjoy a healthy, satisfying meal today.
Why Seared Ahi Tuna Is a Must-Try Seafood Dish

What Is Ahi Tuna (Yellowfin Tuna)?
Ahi tuna, commonly known as yellowfin tuna, is a popular fish used in both raw and cooked dishes, especially in Asian and Pacific cuisines. It’s recognized for its deep red flesh, mild flavor, and firm, meaty texture. The word “ahi” originates from the Hawaiian language and refers to both yellowfin and bigeye tuna, though yellowfin is more commonly used in seared recipes.
Where Does Ahi Tuna Come From?
Yellowfin tuna live in warm waters, especially in the Pacific, Atlantic, and Indian Oceans. They are often caught around Hawaii, the Gulf of Mexico, and Southeast Asia. These powerful, fast-swimming fish are known to grow quite large, sometimes weighing several hundred pounds. Their widespread availability and sustainable fishing practices make them a popular choice in global seafood markets.
What Makes It Ideal for Searing?
Sashimi-grade ahi tuna is safe to eat raw or lightly cooked, making it ideal for quick searing. Its dense texture holds up well under high heat, allowing the outside to form a flavorful crust while keeping the center rare and tender. This method locks in moisture and enhances the natural umami flavor of the fish.
Ahi Tuna vs. Other Tuna Varieties
Yellowfin tuna differs from other types like albacore or skipjack in both taste and texture. It’s leaner than bluefin tuna but still rich in heart-healthy omega-3 fatty acids. Its mild flavor allows it to pair well with bold seasonings, soy-based marinades, and citrus glazes, making it a versatile protein in many recipes.
Health Benefits of Seared Ahi Tuna
Seared ahi tuna isn’t just delicious—it’s packed with nutrients that support heart health, brain function, and overall wellness. If you’re looking for a light, satisfying meal that fuels your body, ahi tuna is a smart and flavorful choice.
Rich Source of Lean Protein
Ahi tuna provides a high amount of lean protein without added fat or carbs. Just one 3-ounce serving of seared tuna delivers over 20 grams of protein, making it ideal for muscle repair, energy, and appetite control. This makes it especially popular among those following high-protein or low-carb diets.
Loaded with Omega-3 Fatty Acids
One of the biggest health perks of ahi tuna is its omega-3 content. These healthy fats help reduce inflammation, lower blood pressure, and improve cholesterol levels. Unlike fatty red meats, ahi tuna offers these benefits without the added saturated fat. Regular consumption of omega-3s has also been linked to better brain function and a reduced risk of heart disease.
Supports Weight Management and Satiety
Thanks to its high protein and low-calorie profile, seared ahi tuna promotes fullness without weighing you down. You can enjoy a flavorful, satisfying meal that keeps you energized without spiking blood sugar levels. This makes it a great option for people managing their weight or blood sugar.
Low in Carbohydrates and Gluten-Free
Naturally low in carbs and free from gluten, seared ahi tuna suits a variety of dietary needs, including keto, paleo, and gluten-sensitive diets. When paired with vegetables or healthy fats like avocado, it becomes a complete, nutrient-rich meal.
Healthy Ingredient Alternatives
You can make your seared ahi tuna even healthier with a few smart ingredient swaps—without sacrificing flavor or texture.
Low-Sodium Sauces
Instead of traditional soy sauce, try low-sodium soy sauce or coconut aminos. These options reduce sodium intake and are better for heart health. Coconut aminos are also naturally gluten-free and slightly sweeter.
Better Cooking Oils
Skip vegetable oil and use avocado oil or extra virgin olive oil. These oils offer healthy fats and handle high heat well, making them ideal for searing.
Clean Marinades
Avoid sugary or processed marinades. Make your own with fresh ingredients like garlic, ginger, lime juice, and a touch of honey or orange juice for natural sweetness.
Gluten-Free Sides
If you’re avoiding gluten, serve your tuna with cauliflower rice, zucchini noodles, or gluten-free soba noodles instead of traditional rice or pasta.
Ingredients You’ll Need for This Easy Seared Ahi Tuna Recipe
Core Ingredients for Authentic Flavor
Creating a delicious seared ahi tuna dish starts with a handful of high-quality, flavorful ingredients. Each one plays a key role in enhancing the taste, texture, and aroma of the final dish.
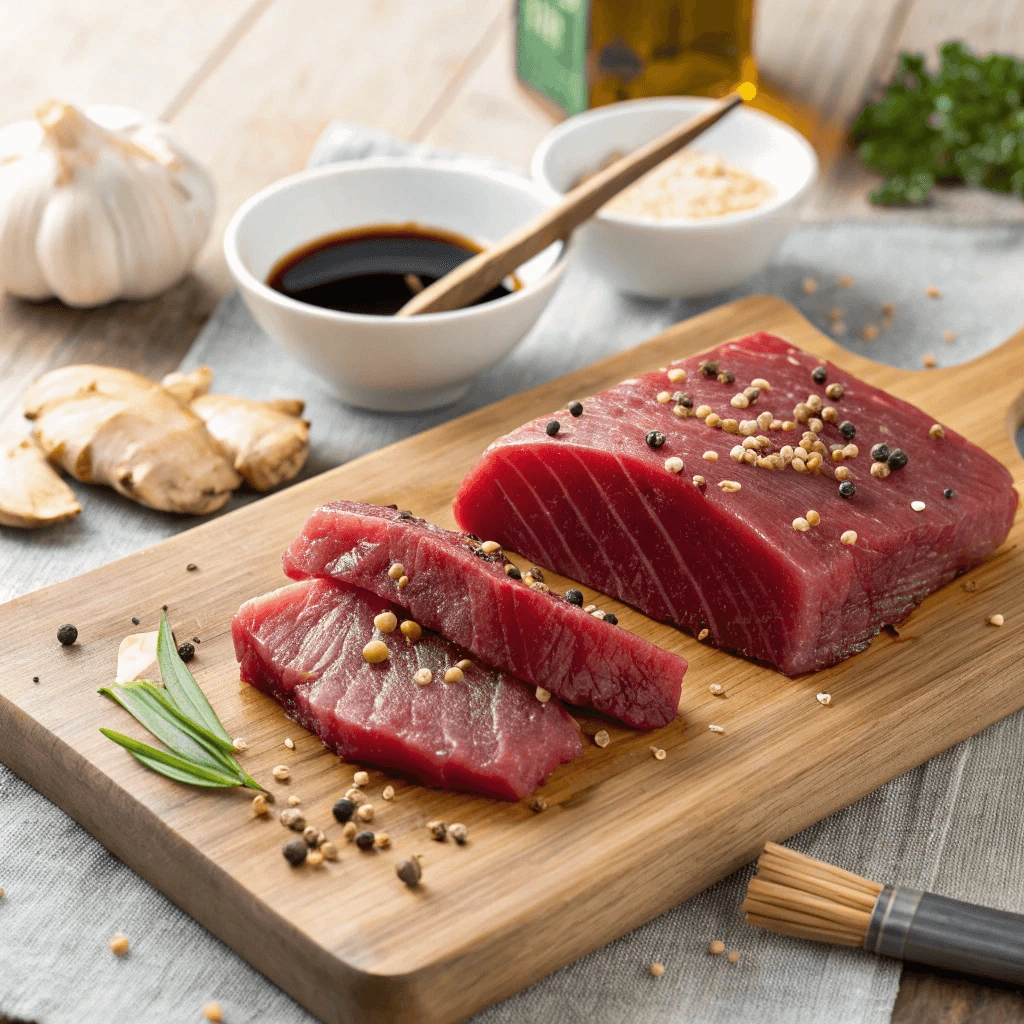
Sushi-Grade Ahi Tuna
The star of the dish is sushi-grade ahi tuna steaks. Choose fresh or flash-frozen yellowfin tuna from a trusted source. Look for deep red color, firm texture, and no fishy odor. High-quality tuna sears beautifully and delivers a clean, rich flavor.
Soy Sauce or Coconut Aminos
A splash of soy sauce adds a deep umami base. For a healthier, gluten-free option, try coconut aminos. Both bring a savory richness that complements the natural flavor of the tuna.
Sesame Oil for Depth
A drizzle of toasted sesame oil provides a nutty, aromatic depth. Use it sparingly—its strong flavor goes a long way. You can also mix it with olive oil to balance the taste and improve searing.
Fresh Garlic and Ginger
Grated garlic and fresh ginger add warmth and brightness. These two staples are essential for any Asian-inspired marinade and give the dish its signature bite and zest.
Lime Juice or Rice Vinegar
A splash of lime juice or rice vinegar brightens the marinade and balances the savory notes. Acid helps tenderize the tuna and enhances its natural flavors.
Together, these ingredients create a bold, fresh, and balanced flavor profile. They’re simple, but when combined, they elevate the dish into something truly special.
Optional Add-Ons and Flavor Boosters
You can easily elevate your seared ahi tuna by adding bold toppings, dips, and textures. These optional add-ons bring variety and personalization to your plate.
Crushed Pepper and Spice Rubs
Coating your tuna in cracked black pepper, red pepper flakes, or a spicy chili rub adds heat and crunch. A pepper crust sears beautifully and creates a flavorful contrast to the tender interior.
Wasabi and Ponzu Sauce
For a traditional Japanese twist, serve seared tuna with a dab of wasabi or a light drizzle of ponzu sauce. Wasabi delivers a sharp, sinus-clearing kick, while ponzu offers a tangy citrus-soy blend that balances the tuna’s richness.
Fresh Herbs and Citrus Zest
Top your tuna with fresh cilantro, basil, or mint to brighten the dish. For extra aroma, grate a bit of lemon or lime zest over the finished tuna. These additions enhance freshness and give the dish a vibrant finish.
Avocado or Pickled Vegetables
Sliced avocado adds creaminess, while quick-pickled cucumber or radish brings crunch and acidity. These textures complement the soft tuna and create a more dynamic eating experience.
Toasted Sesame Seeds or Nori
Sprinkle toasted sesame seeds or crumbled nori (seaweed) for added texture and umami flavor. These ingredients not only taste great but also boost the dish’s visual appeal.
These add-ons are simple, but they allow you to customize the flavor profile to suit your taste—whether you prefer bold, spicy, tangy, or herbaceous.
Healthy Ingredient Alternatives
You can enjoy the bold flavors of seared ahi tuna while making smart ingredient choices that support your health goals. These simple swaps reduce sodium, eliminate unnecessary additives, and align with a variety of dietary needs.
Swap Soy Sauce for Low-Sodium or Gluten-Free Options
Traditional soy sauce delivers great flavor, but it’s often high in sodium and contains gluten. Replace it with low-sodium soy sauce to cut back on salt, or use coconut aminos or tamari for a gluten-free alternative. Both options preserve the umami profile while being gentler on your heart and digestive system.
Choose Heart-Healthy Oils for Searing
Instead of using vegetable or canola oil, opt for avocado oil or extra virgin olive oil. These oils are rich in monounsaturated fats and remain stable under high heat, making them perfect for searing tuna. They also add subtle flavor and nutritional value.
Use Natural Sweeteners Instead of Refined Sugars
If your marinade includes sugar, switch to natural sweeteners like honey, maple syrup, or even a splash of fresh orange juice. These alternatives offer complexity and sweetness without the crash associated with refined sugar.
Incorporate Gluten-Free Sides and Toppings
Instead of serving your seared tuna with traditional noodles or bread, try zucchini noodles, cauliflower rice, or quinoa. These substitutes are naturally gluten-free and loaded with fiber and vitamins, making them a lighter complement to the rich tuna.
Add Whole, Fresh Ingredients
Use fresh garlic, grated ginger, lime juice, and herbs instead of packaged spice mixes or bottled marinades. This reduces your intake of preservatives and boosts both flavor and nutrition.
How to Make the Perfect Seared Ahi Tuna Step-by-Step
Preparing and Marinating the Tuna Steaks
Proper preparation and marination bring out the best in seared ahi tuna. This step is simple but essential if you want to enhance flavor, achieve the perfect sear, and preserve the tuna’s natural freshness.
Choose High-Quality Sushi-Grade Tuna
Start by selecting sushi-grade ahi tuna steaks. Look for steaks that are about 1 to 1.5 inches thick, deep red in color, and free of any strong fishy odor. Always buy from a reputable fishmonger or grocery store that specializes in fresh seafood. The quality of the fish will directly impact the final flavor and texture.
Pat Dry and Trim if Needed
Before marinating, pat each tuna steak dry with a paper towel to remove excess moisture. This helps the marinade stick better and ensures a good sear. If the steak has uneven edges or membrane, trim those areas slightly to help the tuna cook more evenly.
Make a Simple, Flavorful Marinade
Create a basic marinade using ingredients like low-sodium soy sauce, freshly grated ginger, minced garlic, lime or lemon juice, and a touch of toasted sesame oil. You can also add chili flakes or a dash of wasabi for heat. This blend enhances the natural flavor without overpowering the fish.
Marinate Briefly for Best Results
Place the tuna steaks in a shallow dish or a resealable bag. Pour the marinade over the steaks, ensuring they are evenly coated. Let them marinate in the refrigerator for 15 to 30 minutes—no longer, as over-marinating can begin to break down the delicate flesh and affect texture.
Bring to Room Temperature Before Cooking
After marinating, remove the tuna from the fridge and let it sit at room temperature for about 10 minutes. This helps the steaks cook more evenly when seared and prevents a cold center.
Searing Tuna for the Best Texture
Searing ahi tuna the right way gives it that perfect contrast—crispy on the outside, tender and rare in the center.
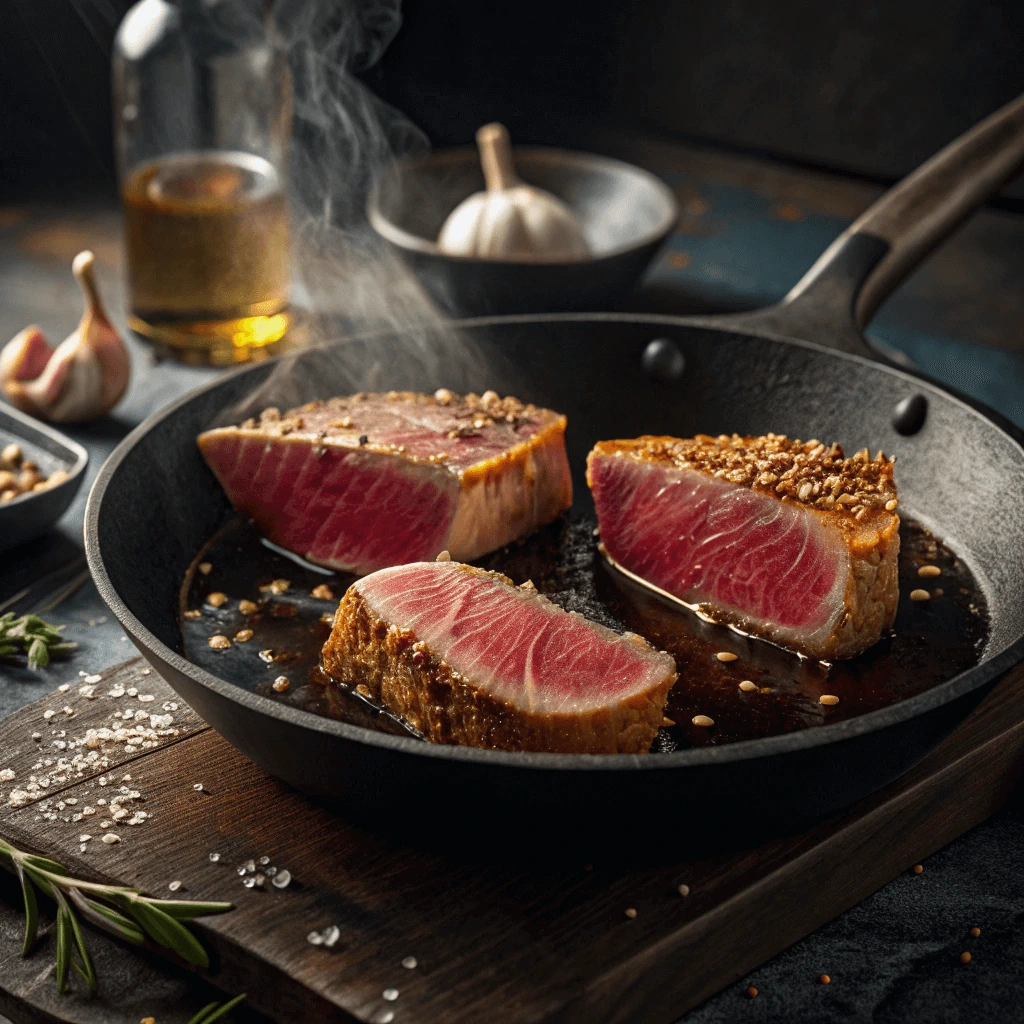
Choose the Right Pan and Oil
Use a cast iron or heavy-bottomed pan to retain high heat. Add a small amount of high smoke-point oil like avocado oil, and let the pan get hot before cooking.
Quick Sear for Perfect Doneness
Place the marinated tuna in the hot pan and sear each side for 1 to 1½ minutes. This quick sear locks in flavor while keeping the center pink and juicy. Don’t overcook—ahi tuna tastes best when it’s still rare in the middle.
Let It Rest and Slice Right
After searing, rest the tuna for a few minutes. Then slice it against the grain for maximum tenderness and clean presentation.
Healthy Ingredient Alternatives
Enhancing your seared ahi tuna recipe with healthy ingredient swaps allows you to enjoy bold flavors while supporting specific dietary needs. Whether you’re cutting down on sodium, avoiding gluten, or choosing heart-friendly fats, these alternatives keep your dish delicious and wholesome.
Choose a Cleaner Soy Sauce Substitute
Regular soy sauce is rich in flavor but also high in sodium and gluten. Swap it with low-sodium soy sauce, tamari (for a gluten-free version), or coconut aminos. These alternatives maintain that savory umami taste without overwhelming your meal with salt or allergens.
Use Heart-Healthy Cooking Oils
Instead of cooking with vegetable oil, choose avocado oil, extra virgin olive oil, or grapeseed oil. These oils contain healthy monounsaturated fats and handle high heat well, making them perfect for searing without sacrificing nutrition.
Opt for Natural Marinade Sweeteners
If your marinade needs a touch of sweetness, avoid refined sugars. Use honey, pure maple syrup, or even fresh orange juice for a cleaner flavor. These options add subtle sweetness and acidity while keeping your ingredients more natural.
Swap Sides with Whole Grains and Veggies
Serve your tuna with quinoa, wild rice, or steamed broccoli instead of white rice or pasta. These choices add fiber, nutrients, and texture while keeping the dish lighter and more balanced.
Flavor with Fresh Ingredients
Choose fresh aromatics like grated ginger, minced garlic, lime zest, and fresh herbs over pre-made spice mixes or bottled sauces. Fresh ingredients provide bold flavor without preservatives, added sugar, or excessive sodium.
These simple, healthy swaps can help you build a better version of your favorite seared ahi tuna—nutritious, flavorful, and perfectly suited to your lifestyle.
Serving Suggestions and Flavor Pairings for Seared Ahi Tuna Recipe
What to Serve with Seared Ahi Tuna Recipe
Pairing the right sides with seared ahi tuna helps create a balanced, flavorful meal. Whether you want something light and fresh or bold and filling, these ideas enhance the tuna’s delicate texture and rich flavor.
Light and Fresh Sides
To keep things refreshing, pair your tuna with cucumber salad, steamed edamame, or a simple mixed greens salad. Toss your greens with sesame vinaigrette or citrus-based dressing to complement the tuna’s umami notes.
Grains and Fiber-Rich Bases
For something heartier, serve your seared ahi tuna over a bed of quinoa, brown rice, or wild rice. These grains add texture, fiber, and a mild nutty flavor that won’t overpower the tuna. You can also try a cold soba noodle salad with sesame and scallions for a Japanese-inspired twist.
Sauces and Dips for Extra Flavor
Add dipping sauces like wasabi mayo, ponzu sauce, or a soy-ginger glaze. These sauces bring out the tuna’s savory profile and add variety in every bite. Make your own at home with simple ingredients like tamari, citrus juice, and garlic to control sodium and sugar levels.
Choosing the right sides and sauces lets your seared ahi tuna shine as the centerpiece of a well-rounded, restaurant-worthy meal.
Dipping Sauces That Enhance Your Seared Ahi Tuna Recipe
A well-chosen dipping sauce brings out the best in seared ahi tuna. Whether you love bold heat, tangy citrus, or creamy textures, there’s a perfect sauce to match your preferences.
Soy-Based Sauces for Umami Richness
Soy sauce blends, like ponzu or soy-ginger glaze, offer deep savory flavor that complements ahi tuna beautifully. You can make your own by combining low-sodium soy sauce with fresh ginger, garlic, lime juice, and a splash of sesame oil. These sauces deliver that signature umami flavor without overpowering the fish.
Creamy Sauces for Texture Contrast
If you prefer a richer dipping experience, try a wasabi mayo, sriracha aioli, or avocado-lime crema. These sauces add a creamy element that pairs well with the firm texture of seared tuna. To keep it healthy, use Greek yogurt or avocado instead of mayonnaise.
Citrus and Herb Sauces for Brightness
Bright, zesty sauces like a citrus vinaigrette, yuzu dressing, or herb-chili oil bring a fresh burst of flavor. These work especially well when you serve the tuna over salad or grains, helping to tie all elements together.
Dipping sauces not only enhance taste—they also offer a chance to personalize each bite. Mix and match to create your own signature flavor profile that complements the tuna’s clean, delicate sear.
Healthy Ingredient Alternatives for Seared Ahi Tuna Recipe Sides and Sauces
Creating a wholesome ahi tuna meal doesn’t mean compromising on flavor. With a few smart substitutions, you can enjoy a balanced, nutrient-rich plate that tastes just as indulgent as the original.
Swap Out Heavy Carbs
Traditional sides like white rice or creamy mashed potatoes add unnecessary starch. Instead, serve seared ahi tuna with quinoa, cauliflower rice, or roasted sweet potatoes. These alternatives are high in fiber and nutrients while keeping your dish light and satisfying.
Choose Cleaner Condiments
Avoid high-sodium or sugar-laden sauces by making your own low-sodium soy dipping sauce, coconut aminos glaze, or citrus vinaigrette. These options add depth without the extra salt or preservatives. Fresh ingredients like lime juice, ginger, and garlic keep the flavor bold and clean.
Include More Vegetables
Rather than heavy pasta or fried sides, add color and crunch with steamed asparagus, blistered green beans, or a crisp cucumber salad. Leafy greens with sesame or miso dressing also pair beautifully with the umami-rich tuna.
Go Gluten-Free with Ease
Use tamari or coconut aminos in place of soy sauce, and swap breadcrumbs or flour in side dishes for almond flour or crushed nuts. These alternatives maintain texture and taste while making the meal suitable for gluten-sensitive diets.
Tips, Variations, and Storage for Seared Ahi Tuna Recipes
Flavor Variations to Try in Your Seared Ahi Tuna Recipe
To get restaurant-quality seared ahi tuna at home, you need more than good ingredients—you need the right techniques. Follow these expert tips to sear tuna steaks with confidence and flavor.
Start with Fresh, High-Quality Tuna
Always choose sushi-grade or sashimi-grade ahi tuna. This grade ensures the tuna is safe to eat rare or medium-rare, which is the ideal doneness for seared tuna. Look for deep red color, firm texture, and no fishy smell. Freshness directly affects the flavor and texture of the final dish.
Pat Dry and Season Properly
Before searing, pat the tuna steaks dry with paper towels. Removing excess moisture helps achieve a better crust. Then, season generously with salt, pepper, and optional add-ons like sesame seeds or crushed coriander. For added flavor, marinate the tuna for 15–30 minutes in a mix of soy sauce, lime juice, and sesame oil.
Sear Over High Heat
Use a cast iron skillet or heavy-bottomed pan for even searing. Heat your pan until it’s nearly smoking, then add a small amount of oil. Sear the tuna for just 60–90 seconds per side to get that perfect outer crust while keeping the center tender and rare. Don’t press down on the steaks—let them sear naturally to avoid squeezing out moisture.
Let It Rest Before Slicing
After searing, rest the tuna for 2–3 minutes to let the juices redistribute. Use a sharp knife to slice the tuna against the grain for the best texture and visual appeal.
Flavor Variations to Try in Your Seared Ahi Tuna Recipe
Experimenting with different flavor profiles can transform your seared ahi tuna into a new culinary experience each time. Here are some tasty variations that add exciting twists while preserving the tuna’s natural richness.
Asian-Inspired Flavors
Create a bold, savory taste by marinating tuna in a mixture of soy sauce, sesame oil, grated ginger, and garlic. Add a touch of honey or brown sugar to balance the saltiness. Top the cooked tuna with toasted sesame seeds and sliced green onions for extra crunch and aroma.
Mediterranean Twist
For a fresh and herbaceous approach, season tuna with lemon zest, minced garlic, and chopped fresh herbs like oregano, thyme, or rosemary. Drizzle with olive oil before searing. Serve alongside a light cucumber and tomato salad dressed with lemon juice and olive oil to complete the Mediterranean vibe.
Spicy Kick
Add heat by rubbing the tuna with chili powder, cayenne pepper, or a spice blend like Cajun seasoning before cooking. Pair it with a cooling avocado or yogurt-based sauce to balance the spice and keep the dish refreshing.
Tropical and Fruity
Introduce sweetness and tang by serving your tuna with a mango salsa or pineapple chutney. Combine diced mango or pineapple with red onion, cilantro, lime juice, and a little jalapeño for a vibrant, colorful topping that complements the seared fish perfectly.
Trying these flavor variations lets you enjoy seared ahi tuna in multiple delicious ways. You can easily adapt each recipe to suit your preferences or dietary needs.
Healthy Ingredient Alternatives for Seared Ahi Tuna Recipe Variations and Storage
Making your ahi tuna dishes healthier is easier than you might think. By swapping a few ingredients, you can reduce calories, cut down on sodium, and boost the nutritional value without losing flavor.
Replace High-Sodium Sauces
Many traditional ahi tuna recipes call for soy sauce, which often contains a lot of sodium. Choose low-sodium soy sauce, tamari, or coconut aminos to retain that signature savory flavor but with less salt. These alternatives suit gluten-free diets as well.
Use Heart-Healthy Oils
Instead of vegetable oil or butter, use extra virgin olive oil, avocado oil, or grapeseed oil. These oils provide healthy fats that support heart health and stand up well to the high heat needed for searing tuna.
Sweeten Naturally
Avoid refined sugar by sweetening marinades and sauces with natural options like honey, pure maple syrup, or fresh citrus juice. These alternatives add flavor and subtle sweetness while maintaining a clean ingredient list.
Choose Whole Food Sides
Swap out white rice or pasta for quinoa, cauliflower rice, or steamed green vegetables. These choices add fiber, vitamins, and minerals, making your meal more balanced and satisfying.
Conclusion
The Seared Ahi Tuna Recipe is a quick and easy way to enjoy a flavorful, restaurant-quality meal at home. This Seared Ahi Tuna Recipe highlights the tuna’s fresh, meaty texture, perfectly complemented by simple seasonings and healthy sides. Whether you’re a beginner or an experienced cook, this Seared Ahi Tuna Recipe delivers delicious results every time. Try this recipe to enjoy a nutritious, satisfying dish that fits perfectly into busy lifestyles or special dinners. The Seared Ahi Tuna Recipe truly makes cooking tuna simple and enjoyable.