Craving a delicious and crispy chocolate graham cracker but don’t want to rely on store-bought options? Make chocolate graham crackers from scratch is easier than you think! With just a few simple ingredients like graham flour, cocoa powder, and butter, you can whip up a batch in no time. These homemade crackers are richer in flavor, free from preservatives, and fully customizable to suit your taste.
Whether you enjoy them as a snack, a base for s’mores, or a crunchy dessert crust, homemade chocolate graham crackers offer freshness and versatility. Plus, they’re perfect for anyone looking for a healthier alternative with control over sweetness and ingredients. Follow this quick and easy recipe, and soon you’ll have a batch of warm, crispy, and chocolaty graham crackers ready to enjoy!
Benefits of Making Homemade Chocolate Graham Crackers
Customize Ingredients for Healthier Snacks
Making homemade chocolate graham crackers lets you control exactly what goes into your snack. You can swap out processed ingredients for healthier options to boost nutrition without losing flavor.
Use Whole Grain Flours
Choose whole wheat or other whole grain flours instead of refined white flour. Whole grains add fiber and important nutrients that help keep you full longer. Gluten-free options like oat or almond flour also work well if you need alternatives.
Pick Natural Sweeteners
Replace refined sugar with natural sweeteners like honey, maple syrup, or date syrup. These provide sweetness along with some vitamins and minerals, making your crackers healthier and tastier.
Opt for Healthy Fats
Instead of butter, try coconut oil, avocado oil, or plant-based margarine. These fats offer heart-healthy benefits and give your crackers a crisp texture.
Enjoy Freshness That Store-Bought Can’t Match
When you make chocolate graham crackers from scratch, you unlock a level of freshness that store-bought options simply cannot offer. Freshness directly impacts both flavor and texture, creating a snack experience that feels homemade and wholesome.
Freshly Baked Flavor
Homemade crackers deliver a rich, aromatic flavor that often gets lost in mass-produced products. The moment you pull them from the oven, the smell of toasted cocoa and warm spices fills your kitchen. This aroma enhances the taste, making every bite more satisfying.
Superior Texture and Crunch
Store-bought graham crackers often contain preservatives that can make them softer or stale over time. Homemade crackers, on the other hand, stay crisp and crunchy when you follow proper baking and cooling techniques. This fresh crunchiness adds to the overall enjoyment and makes them perfect for dipping or snacking.
No Unwanted Additives
By baking at home, you avoid preservatives, artificial flavors, and unnecessary additives common in commercial crackers. This means you get a cleaner, purer snack with ingredients you recognize and trust. Freshness goes beyond taste—it’s about knowing exactly what you’re eating.
A Fun and Simple Baking Project for All Ages
Making homemade chocolate graham crackers is an enjoyable and straightforward activity that anyone can try. Whether you bake with kids, friends, or by yourself, this recipe offers a rewarding experience that combines creativity, learning, and delicious results.
Easy-to-Follow Steps
The recipe breaks down into simple steps: mixing ingredients, rolling out the dough, cutting shapes, and baking. These tasks are manageable, even for beginners. Clear instructions help everyone stay confident and engaged throughout the process.
Great Activity for Kids
Kids especially love this baking project. Rolling out dough and using cookie cutters to shape crackers sparks creativity and fine motor skills. Plus, children enjoy tasting the fresh crackers and sharing the results with family. Baking together also builds bonding moments and teaches basic kitchen skills.
Minimal Equipment Needed
You don’t need fancy gadgets to make these crackers. Basic kitchen tools like a rolling pin, cookie cutters, mixing bowls, and a baking sheet will do. This simplicity keeps the process accessible and stress-free for bakers of all ages and experience levels.
Encourages Customization
This baking project encourages creativity by allowing you to customize flavors and shapes. Add nuts, spices, or experiment with natural sweeteners. Kids can choose their favorite shapes or decorations, making the activity even more fun.
Key Ingredients for Perfect Chocolate Graham Crackers
Whole Wheat Flour, Cocoa Powder & Sweeteners
When making homemade chocolate graham crackers, selecting quality core ingredients plays a crucial role in the final taste and texture. Using whole wheat flour, rich cocoa powder, and natural sweeteners enhances both flavor and nutrition.
Why Whole Wheat Flour?
Whole wheat flour adds a nutty flavor and provides more fiber compared to all-purpose flour. It helps create a slightly denser, heartier cracker that still stays crisp after baking. Using whole wheat flour also boosts the nutritional value, contributing vitamins and minerals for a healthier snack option.
Choosing the Right Cocoa Powder
Cocoa powder gives these graham crackers their distinct chocolate flavor. Opt for unsweetened cocoa powder to control the sweetness level yourself. High-quality cocoa powder has a deep, rich taste that makes your crackers taste indulgent without extra calories. You can also experiment with Dutch-processed cocoa, which offers a smoother, less acidic flavor.
Sweetener Options
Sweeteners balance the bitterness of cocoa and add that satisfying touch of sweetness. Honey and molasses are traditional choices, offering natural sweetness along with unique flavor notes. Honey imparts floral undertones, while molasses adds a subtle depth with its rich, slightly smoky taste. For those seeking alternatives, maple syrup or coconut sugar can also complement the chocolate flavor beautifully.
Balancing Ingredients for Texture
Getting the right balance between flour, cocoa powder, and sweeteners is key to achieving a perfect texture—crispy yet tender. Too much flour can make the crackers tough, while too much sweetener can lead to a softer, chewier result. Measuring carefully and following the recipe ensures your crackers bake up just right every time.
Essential Flavor Boosters and Leavening Agents
Adding the right flavor boosters and leavening agents is key to making delicious homemade chocolate graham crackers. These ingredients improve both taste and texture.
Vanilla Extract for Rich Flavor
Vanilla extract adds warmth and depth to the dough. It balances the bitterness of cocoa powder and enhances sweetness. Using pure vanilla gives the best flavor.
Salt to Enhance Taste
A small pinch of salt brightens all the flavors. It cuts through sweetness and makes the chocolate taste more vibrant.
Baking Soda for Light Texture
Baking soda helps the dough rise slightly by reacting with acidic ingredients like molasses. This creates a light, crisp texture without making the crackers too puffy.
Baking Powder for Tenderness
Baking powder works as a gentler leavening agent. It helps create a tender bite and balances the texture without a bitter aftertaste.
Using these flavor boosters and leavening agents in the right amounts makes your homemade chocolate graham crackers tasty and perfectly crisp every time.
Must-Have Kitchen Tools for Baking Success
Using the right tools can make baking homemade chocolate graham crackers easier and more enjoyable. Here are the essential kitchen items you’ll need to get great results every time.
Rolling Pin for Even Dough Thickness
A good rolling pin helps you roll out the dough evenly. Consistent thickness ensures the crackers bake uniformly, giving you that perfect crunch. You can choose from wooden, marble, or silicone rolling pins based on your preference.
Cookie Cutters for Fun Shapes
Cookie cutters let you create uniform shapes quickly. They add a playful touch, especially if you’re baking with kids. Traditional shapes like rectangles work well, but you can also get creative with stars, hearts, or other fun designs.
Baking Sheet and Parchment Paper for Easy Cleanup
A sturdy baking sheet provides a flat surface to bake the crackers. Line it with parchment paper to prevent sticking and simplify cleanup. Parchment also helps crackers bake evenly without burning on the bottom.
Mixing Bowls and Measuring Tools for Accuracy
Use mixing bowls to combine ingredients smoothly. Accurate measuring cups and spoons ensure you add the right amounts of flour, cocoa, and sweeteners, which is crucial for consistent flavor and texture.
Cooling Rack to Maintain Crunch
After baking, transfer your crackers to a cooling rack. This lets air circulate around them, preventing sogginess and helping maintain their crispness.
How to Make Chocolate Graham Crackers from Scratch
Preparing and Mixing the Dough Efficiently
Making the dough for homemade chocolate graham crackers doesn’t have to be complicated or time-consuming. With the right steps and tools, you can prepare the dough quickly while ensuring it has the perfect texture.
Measure Ingredients Accurately
Start by measuring all your dry and wet ingredients precisely. Use measuring cups and spoons to get the correct amounts of whole wheat flour, cocoa powder, sweeteners, and leavening agents. Accurate measurements ensure your dough binds well and tastes balanced.
Combine Dry Ingredients First
Place the flour, cocoa powder, baking soda, and salt into a large mixing bowl. Use a whisk to blend these dry ingredients thoroughly. This step helps distribute the leavening agents evenly, which improves the texture of your crackers.
Cream Wet Ingredients Separately
In another bowl, mix your wet ingredients like melted butter or oil, honey or molasses, and vanilla extract. Creaming these ingredients together helps develop a smooth base for your dough.
Mix Dry and Wet Ingredients Together
Slowly add the dry mixture to the wet ingredients while stirring with a spatula or using a stand mixer on low speed. Mix just until the dough comes together. Overmixing can make the crackers tough, so stop once you see a uniform dough.
Adjust Dough Consistency if Needed
If the dough feels too sticky, sprinkle in a little more flour and fold it in gently. If it’s too dry and crumbly, add a teaspoon of water or milk substitute to bring it together. Your dough should be soft but firm enough to roll out easily
Rolling, Cutting, and Baking Tips for Even Crackers
Achieving perfectly even chocolate graham crackers starts with careful rolling, precise cutting, and attentive baking. These steps ensure your crackers bake uniformly and have a great texture.
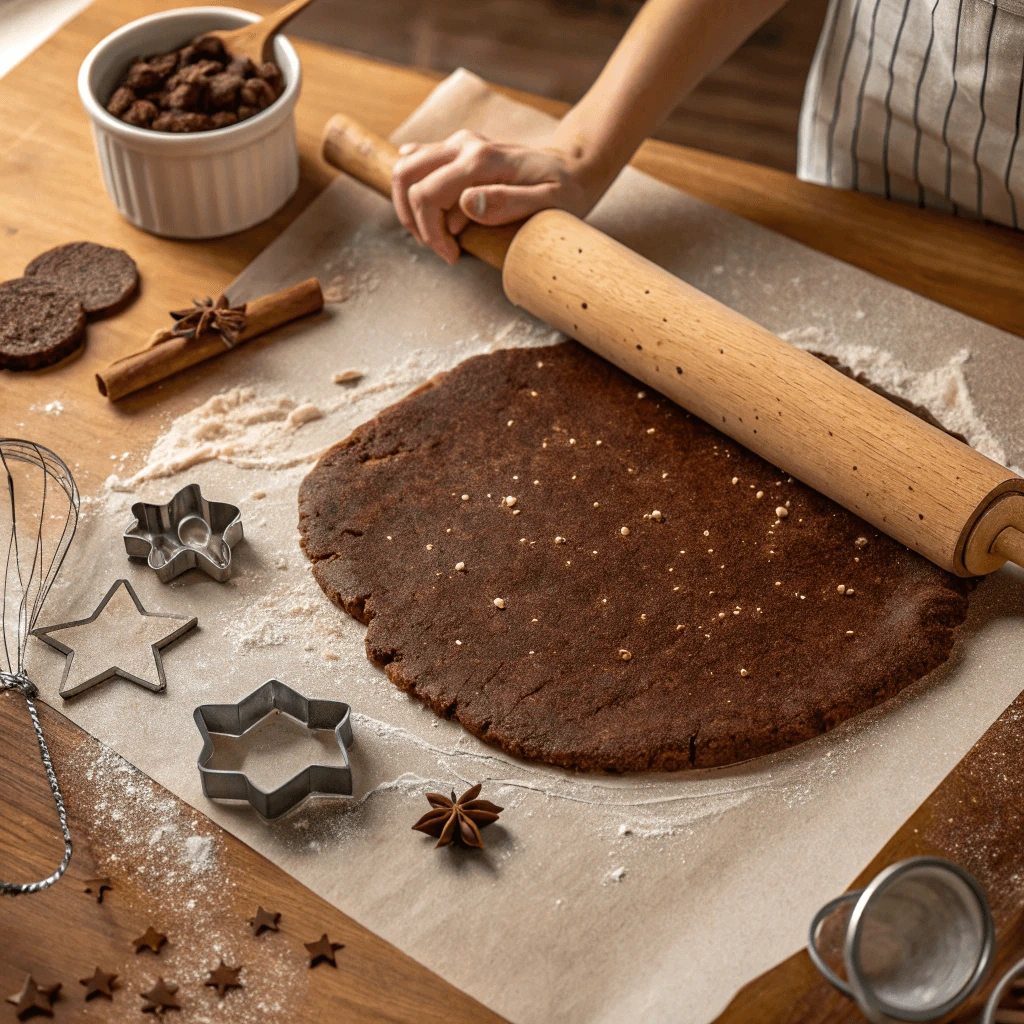
Rolling the Dough Evenly
First, lightly flour your work surface and rolling pin to prevent sticking. Roll the dough out to about 1/8-inch thickness. Try to maintain an even thickness across the entire dough sheet to ensure the crackers bake evenly. Using a ruler or a rolling pin with thickness guides can help you stay consistent.
Cutting Uniform Shapes
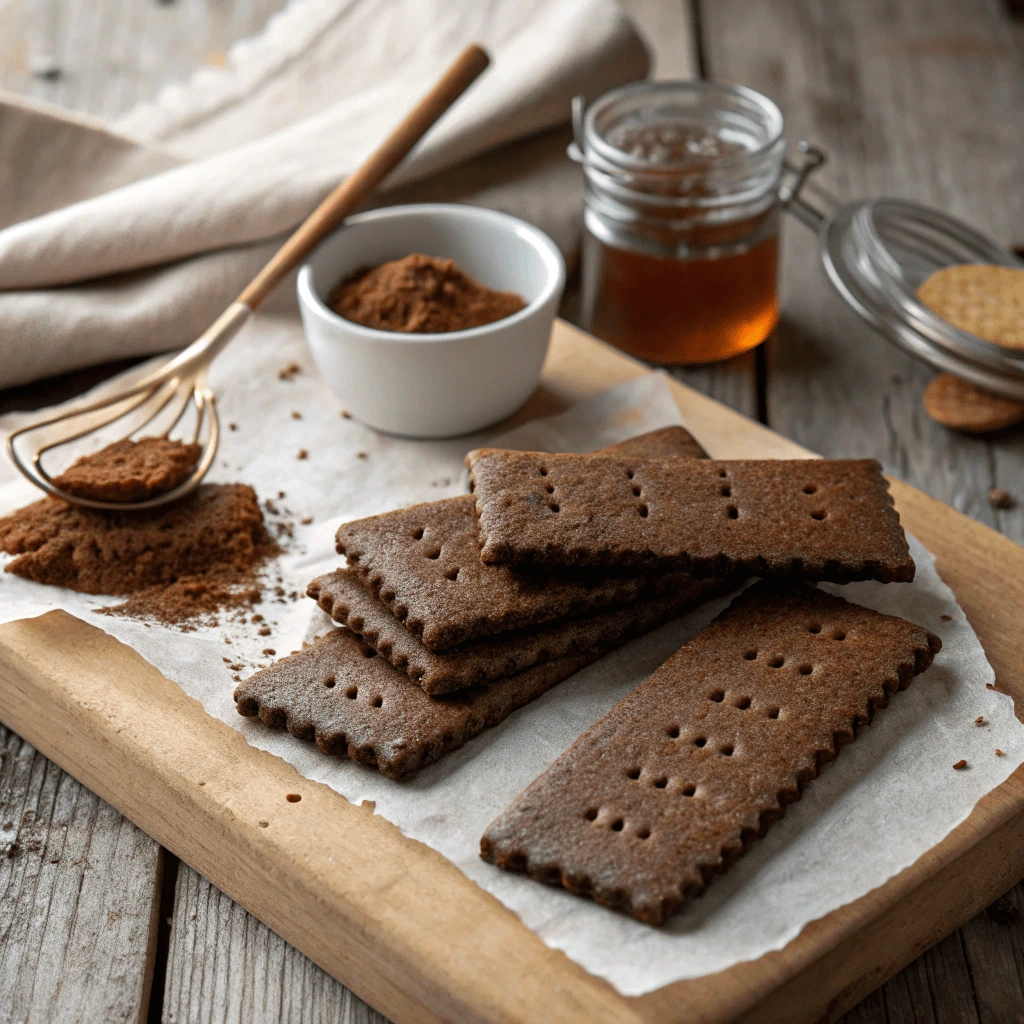
Once your dough is rolled out, use cookie cutters or a sharp knife to cut the dough into your desired shapes, such as rectangles or squares. Arrange the pieces evenly on a parchment-lined baking sheet, leaving space between each cracker so heat circulates properly. Press gently but firmly to create classic graham cracker perforations if desired.
Baking at the Right Temperature
Preheat your oven to the recommended temperature, usually around 350°F (175°C). Place the baking sheet in the center of the oven to promote even heat distribution. Bake the crackers for 10-12 minutes, or until the edges turn slightly golden. Keep a close eye on them as baking times can vary depending on your oven.
Checking for Doneness
Remove a cracker from the oven and let it cool slightly. It should feel crisp but not too hard. If the crackers need more time, bake them for another 1-2 minutes, checking frequently to avoid burning.
Cooling and Handling
Transfer the baked crackers to a wire rack to cool completely. Cooling allows them to firm up and reach the ideal crunch. Avoid stacking crackers while they’re still warm, as this can cause them to soften.
Proper Cooling and Storing for Ideal Crunch
Ensuring your homemade chocolate graham crackers stay crisp and delicious starts right after baking. Proper cooling and storage play key roles in maintaining their perfect crunch and flavor.
Cooling the Crackers Correctly
Once you remove the crackers from the oven, transfer them immediately to a wire cooling rack. This step allows air to circulate around each cracker, helping moisture escape and preventing sogginess. Avoid leaving the crackers on the baking sheet, as residual heat and steam can soften them. Let the crackers cool completely—this typically takes 15 to 20 minutes.
Avoiding Moisture Exposure
Moisture is the enemy of crispness. To keep your crackers crunchy, store them away from humidity. Once cooled, place the crackers in an airtight container. Make sure the container seals tightly to block out air and moisture that can make the crackers lose their crunch.
Using the Right Storage Containers
Choose containers made of glass, plastic, or metal with secure lids. Adding a small food-safe silica gel packet inside the container can help absorb any leftover moisture. You can also layer parchment paper between stacks of crackers to keep them from sticking and breaking.
Storing at Room Temperature
Store your homemade chocolate graham crackers at room temperature in a cool, dry place. Avoid refrigerating them because the cold can introduce moisture and cause the crackers to become soft. If you live in a humid climate, storing the crackers in the fridge inside an airtight container with desiccants may help, but generally, room temperature storage works best.
Refreshing Softened Crackers
If your crackers lose some crunch over time, you can restore crispness by warming them briefly in an oven preheated to 300°F (150°C) for 5 minutes. Let them cool completely before storing again.
Healthy Ingredient Alternatives for Homemade Chocolate Graham Crackers

Using Natural Sweeteners
Natural sweeteners provide a healthier alternative to refined sugar while adding unique flavors to your homemade chocolate graham crackers.
Honey: Sweet and Moist
Honey adds a mild floral sweetness and helps keep the crackers moist. Use raw honey for the best flavor and nutrients. Since honey is quite sweet, use a bit less than you would sugar.
Maple Syrup: Rich and Earthy
Maple syrup brings a smooth, caramel-like flavor that pairs perfectly with cocoa. It works well in vegan recipes and adds depth to your crackers.
Date Syrup: Thick and Fruity
Date syrup offers a rich, fruity sweetness and extra nutrients like fiber and potassium. Because it’s thicker, you might want to thin it with a little water before mixing.
Adjusting Liquid Amounts
Since these sweeteners add moisture, reduce other liquids in your recipe slightly to keep the dough from becoming too wet.
Using natural sweeteners not only enhances flavor but also makes your chocolate graham crackers a healthier treat.
Gluten-Free and Whole Grain Flour Substitutes
Choosing the right flour can make your homemade chocolate graham crackers healthier and suitable for different dietary needs. You can swap traditional wheat flour with gluten-free or whole grain options without sacrificing taste or texture.
Gluten-Free Flour Options
If you need a gluten-free recipe, try oat flour, almond flour, or a gluten-free baking blend. Oat flour adds a mild, nutty flavor and works well for a tender cracker. Almond flour brings richness and moisture but may require extra binding agents like flaxseed or chia seeds. Gluten-free blends usually combine rice flour, potato starch, and tapioca flour to mimic wheat flour’s texture. Always check if your blend contains xanthan gum or add it yourself for better dough elasticity.
Whole Grain Flour Benefits
Using whole grain flours like whole wheat, spelt, or rye increases fiber and nutrients in your crackers. Whole wheat flour adds a hearty flavor and a slightly denser texture, which pairs beautifully with cocoa powder. Spelt flour offers a mild sweetness and works well if you want a lighter cracker. Rye flour contributes a distinctive earthy taste but can make the dough a bit heavier, so combine it with other flours for balance.
Tips for Flour Substitution
When swapping flours, remember that whole grain and gluten-free flours absorb liquids differently. Adjust the liquid ingredients gradually to get the right dough consistency. Whole grain flours may need a bit more moisture, while some gluten-free flours can make the dough crumbly without extra binder or eggs. Testing small batches helps you find the perfect balance.
Dairy-Free and Vegan-Friendly Ingredient Options
Making homemade chocolate graham crackers suitable for dairy-free and vegan diets is easy with the right ingredient swaps. You can keep your crackers tasty and wholesome without using animal products.
Plant-Based Milk Alternatives
Replace regular milk with almond, oat, soy, or coconut milk. Almond milk adds a light nutty flavor, oat milk gives creaminess, soy milk has a neutral taste, and coconut milk brings a subtle tropical note.
Butter Substitutes
Instead of butter, use dairy-free margarine, coconut oil, or vegetable oil. Dairy-free margarine closely mimics butter’s texture, coconut oil adds a mild coconut flavor and crispness, while vegetable oils keep the dough moist.
Egg Replacements
Eggs help bind the dough, but flaxseed meal mixed with water or chia seeds soaked in water work well as vegan binders. Applesauce or mashed bananas add moisture but might change the flavor slightly.
Using these simple swaps lets you bake delicious, dairy-free, and vegan chocolate graham crackers everyone can enjoy.
Serving Ideas and Storage Advice for Homemade Chocolate Graham Crackers
Creative Pairings
Homemade chocolate graham crackers offer endless possibilities for delicious pairings. These snacks pair wonderfully with classic favorites and healthier options, making them versatile treats for any occasion.
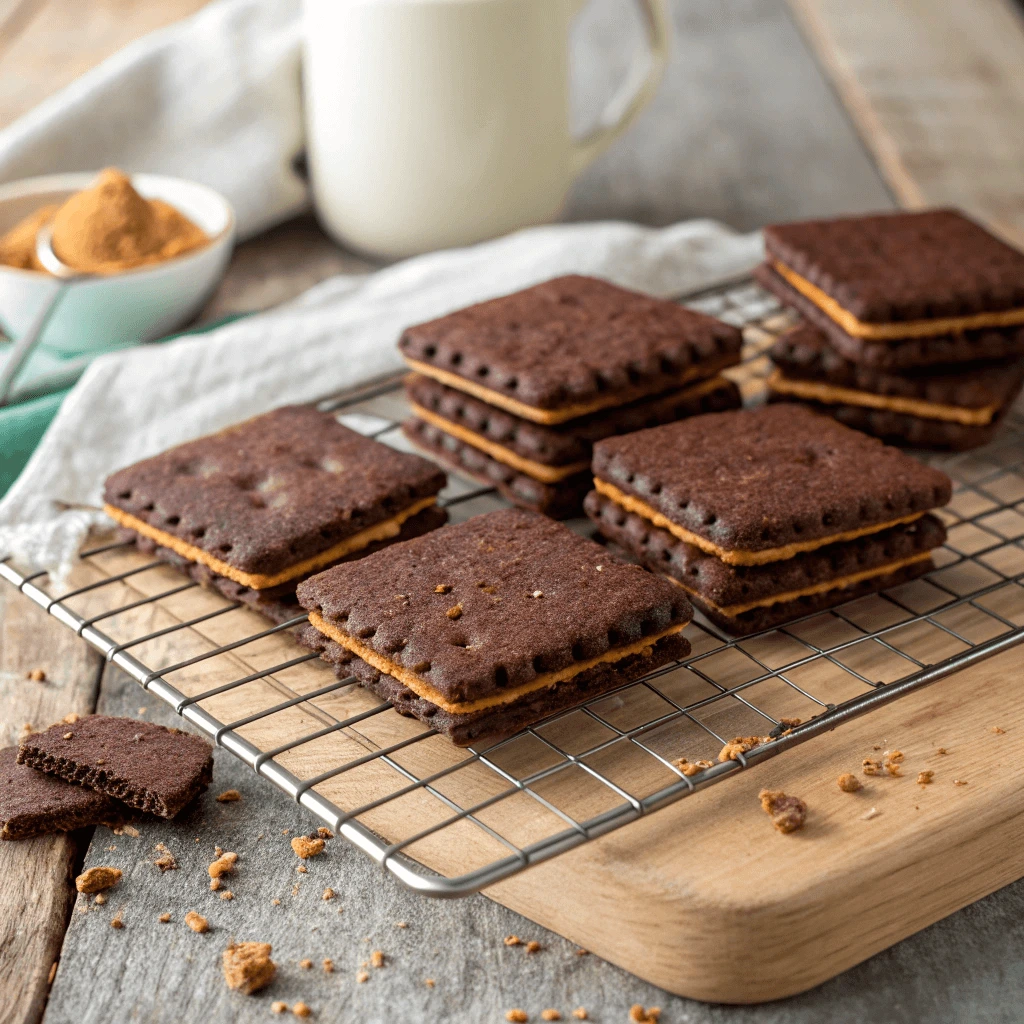
Classic S’mores Delight
Use your homemade chocolate graham crackers to create the perfect s’mores. Layer a toasted marshmallow and a piece of chocolate between two crackers. The fresh, crispy texture of your crackers enhances the gooey marshmallow and melted chocolate, elevating the traditional campfire treat.
Nut Butter for a Protein Boost
Spread almond butter, peanut butter, or cashew butter on the crackers for a satisfying and protein-packed snack. Nut butters add rich flavor and creamy texture, complementing the chocolate notes in the crackers. Add a drizzle of honey or sprinkle of chia seeds for extra nutrition and crunch.
Yogurt for a Refreshing Twist
Pair your chocolate graham crackers with a bowl of Greek yogurt or plant-based yogurt. The creamy tanginess balances the sweetness of the crackers, creating a refreshing and wholesome snack. Add fresh fruit or granola for an added layer of flavor and texture.
These pairing ideas make homemade chocolate graham crackers a fun and versatile treat that fits both indulgent and healthy lifestyles.
Best Practices to Store for Maximum Freshness
Proper storage plays a crucial role in keeping your homemade chocolate graham crackers fresh, crunchy, and delicious for as long as possible. Follow these simple tips to maintain their perfect texture and flavor.
Use Airtight Containers Immediately
After your crackers cool completely, place them in an airtight container. This step prevents moisture from getting in and keeps the crackers crisp. Choose containers with tight-fitting lids or use resealable plastic bags with air removed to create a sealed environment.
Store in a Cool, Dry Place
Keep your container in a cool, dry spot away from direct sunlight and heat sources. Warm temperatures and humidity can cause crackers to become soft or stale quickly. A pantry or cupboard works well for this purpose.
Avoid Refrigeration Unless Necessary
Refrigerators introduce moisture, which can make your crackers soggy. Only refrigerate them if you live in a very humid climate or if you’ve added perishable ingredients. If refrigerated, ensure the crackers are in a completely sealed container to minimize moisture exposure.
Separate Layers with Parchment Paper
If you stack your crackers in a container, place parchment paper or wax paper between layers. This prevents them from sticking together and helps maintain their individual crispness.
Check Freshness Regularly
Periodically check your stored crackers for signs of moisture or staleness. If they start to lose crunch, you can refresh them by warming them in an oven at low heat for a few minutes.
Tips for Freezing Dough and Baked Crackers to Make Chocolate Graham Crackers from Scratch
When you make chocolate graham crackers from scratch, freezing dough and baked crackers is a great way to save time and keep your snacks fresh. Here are some essential tips to help you freeze and store your homemade treats properly.
How to Freeze Dough to Make Chocolate Graham Crackers from Scratch
After you prepare your dough to make chocolate graham crackers from scratch, shape it into a disk or roll it out flat between parchment paper. Wrap the dough tightly with plastic wrap, then place it in a freezer-safe bag or container. Don’t forget to label it with the date to track freshness.
Thawing Dough When You Make Chocolate Graham Crackers from Scratch
To make chocolate graham crackers from scratch successfully, thaw the dough slowly in the refrigerator overnight. This method keeps the dough firm and easy to work with. Before rolling, let the dough rest at room temperature for about 10 minutes.
Freezing Baked Crackers After You Make Chocolate Graham Crackers from Scratch
Once you bake your homemade chocolate graham crackers from scratch, allow them to cool completely. Freeze the crackers on a baking sheet until they are firm, usually about an hour. Then transfer them to an airtight container, placing parchment paper between layers to prevent sticking.
Enjoying Frozen Crackers Made When You Make Chocolate Graham Crackers from Scratch
When you’re ready to enjoy your homemade snacks, thaw frozen crackers at room temperature for 15-20 minutes. If they have lost their crunch, simply warm them in a 300°F oven for 5 minutes to refresh their crispness.
Avoid Refreezing When You Make Chocolate Graham Crackers from Scratch
To maintain the best texture and flavor when you make chocolate graham crackers from scratch, freeze dough or crackers in portions that you will use at once. Avoid refreezing to keep your homemade treats tasting fresh.
Conclusion:Make Chocolate Graham Crackers from Scratch in No Time
Making chocolate graham crackers from scratch in no time is easier than you might think. With simple ingredients and basic kitchen tools, you can create delicious, fresh crackers that beat store-bought options in flavor and quality. By customizing ingredients and following easy steps, you’ll enjoy a fun baking experience and healthier snacks. Whether you want to freeze dough for later or try creative pairings, homemade chocolate graham crackers offer endless possibilities. Start baking today and savor the rich, chocolatey goodness you made yourself!