
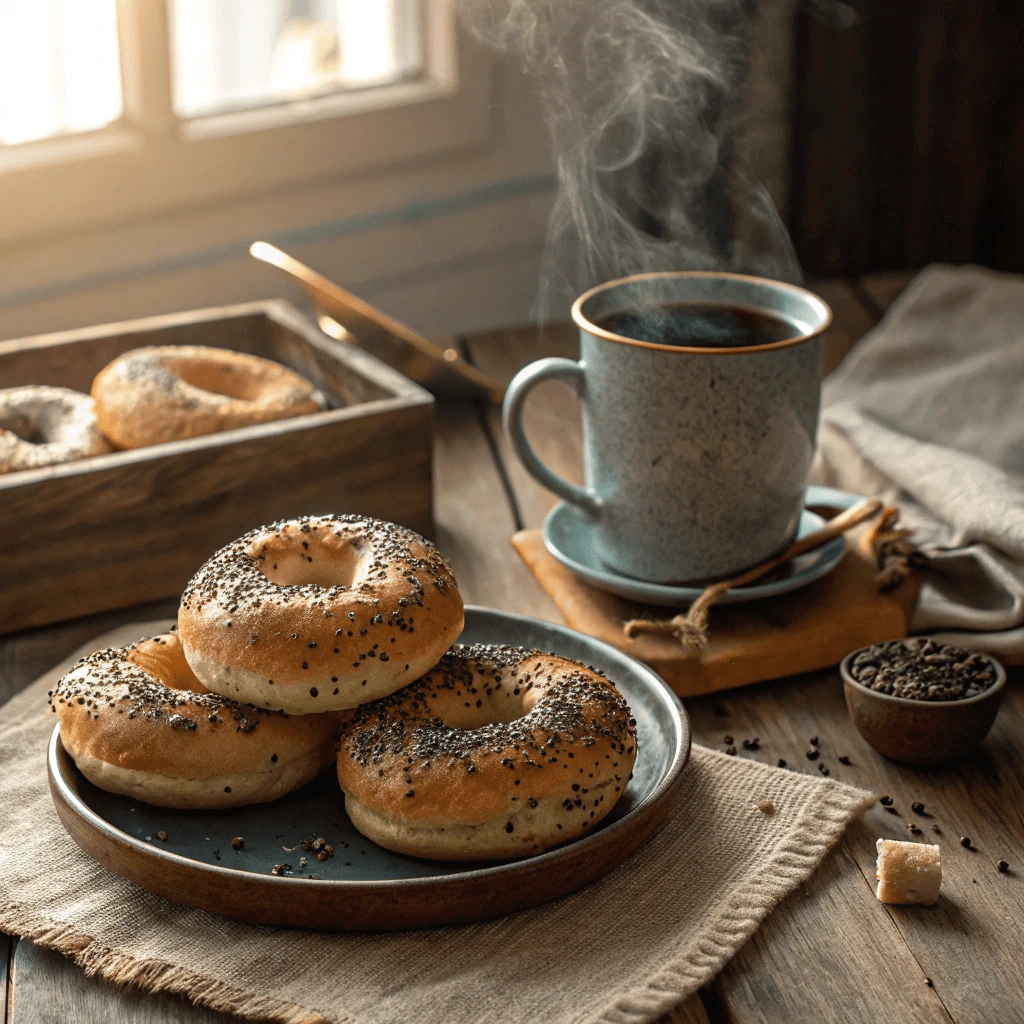
Love bagels? Then you’ll enjoy making these classic poppy seed bagels right at home. They’re golden, chewy, and generously topped with crunchy poppy seeds—just like your favorite bakery version. Perfect for breakfast or brunch, this easy recipe walks you through each step so you can enjoy fresh, homemade bagels with simple ingredients and big flavor.
Why Make Classic Poppy Seed Bagels at Home?
The Freshness and Flavor of Homemade Poppy Seed Bagels
When it comes to bagels, nothing rivals the taste and aroma of a freshly baked batch from your own kitchen. Store-bought options often fall short—either too soft, overly chewy, or lacking that deep, satisfying flavor. By baking at home, you unlock a level of freshness that grocery bagels simply can’t match.
Smell and Texture That Say “Homemade”
Right out of the oven, homemade poppy seed bagels offer a crisp crust and a soft, chewy center. The scent of freshly baked dough fills your kitchen and invites everyone to the table. Unlike packaged bagels, which often contain preservatives, these fresh ones rely solely on simple ingredients for flavor.
Control Over Baking Time and Crust
When you bake at home, you decide how dark and crisp your crust gets. Prefer a soft golden finish? Pull them early. Like a deep, bakery-style crust? Leave them in a minute longer. This kind of control is impossible with pre-packaged bagels, which are mass-produced to meet shelf-life standards—not personal preference.
Immediate Enjoyment Makes a Difference
Store-bought bagels may sit for days before you eat them, but fresh bagels go from oven to plate in minutes. That short window between baking and eating makes a world of difference in taste and texture. Toasted or plain, fresh bagels offer more flavor, better chew, and a homemade warmth that just can’t be replicated.
Full Control Over Ingredients in Your Poppy Seed Bagels
One of the biggest advantages of making your own poppy seed bagels is the ability to control every ingredient and fine-tune the texture to your liking. Unlike store-bought versions, which often rely on preservatives and additives, homemade bagels allow you to focus on quality and customization.
Choose Cleaner, Fresher Ingredients
When you bake at home, you decide what goes into your bagels. You can use organic flour, filtered water, and natural sweeteners like honey or maple syrup. This means no artificial flavors, no preservatives, and no unnecessary sugars or oils. It’s especially helpful if you’re avoiding allergens or following a specific diet.
Adjust Dough for Desired Texture
Do you like your bagels super chewy or a bit soft and airy? Homemade bagels give you the flexibility to experiment with hydration levels, kneading time, and proofing stages. For example, a slightly wetter dough creates a softer texture, while more kneading results in a firmer, chewier bite.
Personalize Seasonings and Toppings
Beyond the base dough, you have full freedom to adjust the salt level, add seeds or spices to the dough, or mix in ingredients like onions, garlic, or dried herbs. Want more or fewer poppy seeds? That’s your choice. Prefer sesame or everything seasoning? You can blend your own topping and control how thickly it’s applied.
Save Money by Making Classic Poppy Seed Bagels at Home
Homemade poppy seed bagels go far beyond your average breakfast—they’re versatile, impressive, and practical for a variety of occasions. Whether you’re hosting a weekend brunch, prepping meals for the week, or sharing something heartfelt, these bagels fit the moment beautifully.
Host the Ultimate Brunch Spread
Poppy seed bagels bring texture, flavor, and elegance to any brunch table. Pair them with cream cheese spreads, lox, sliced veggies, or even egg salad. Guests will appreciate the fresh, homemade touch—something that store-bought options rarely match. Toast them lightly and offer toppings buffet-style for an interactive, make-your-own-bagel experience.
Make Meal Prep Easy and Delicious
Bagels store well and reheat beautifully, making them ideal for weekly meal prep. Bake a batch on Sunday and enjoy them throughout the week for breakfast, lunch, or snacks. Split and freeze them individually, then toast from frozen for a fast, satisfying meal. Add a protein like eggs or turkey slices and you have a filling sandwich ready in minutes.
Share as Thoughtful Homemade Gifts
Few gifts say “I care” like warm, freshly baked bagels wrapped in parchment and tied with a ribbon. Whether you’re bringing them to a new neighbor, gifting a friend, or surprising a loved one, homemade bagels feel personal and special. Package them with a small jar of flavored cream cheese or homemade jam to make your gift even more memorable.
Essential Ingredients for Classic Poppy Seed Bagels
Key Ingredients for Classic Poppy Seed Bagels Recipe
Crafting the perfect classic poppy seed bagel starts with selecting high-quality, essential ingredients. Each one plays a critical role in achieving that signature chewy texture, rich flavor, and irresistible crust.
Bread Flour: The Key to Chewy Texture
Use bread flour instead of all-purpose flour to get the dense, chewy texture that defines an authentic bagel. Bread flour contains more protein, which helps develop strong gluten strands when kneaded. This added gluten structure supports the dough during boiling and baking, creating that satisfying bite you expect from a good bagel.
Poppy Seeds: Crunch, Flavor, and Tradition
Poppy seeds do more than decorate—they add a subtle nutty flavor and crunchy contrast to the soft interior. Always choose fresh, high-quality poppy seeds for the best results. Toast them lightly before sprinkling to intensify their flavor. Coat the tops generously after boiling to ensure even coverage and a beautiful finish.
Yeast: The Dough Riser
Yeast gives your bagels their lift and signature texture. Use active dry yeast or instant yeast, depending on your preference. Activate the yeast in warm water with a pinch of sugar to jumpstart the fermentation process. This step ensures the dough rises properly and develops flavor during proofing.
The Role of Bread Flour in Perfect Poppy Seed Bagels
Using the right tools makes homemade poppy seed bagels easier to prepare and more consistent in quality. These recommended essentials help you save time, reduce mess, and achieve professional-looking results from your kitchen.
Stand Mixer: Make Kneading Effortless
A stand mixer with a dough hook attachment streamlines the kneading process. Instead of manually working the dough for 10–15 minutes, you can let the mixer do the heavy lifting while you prep other ingredients. It creates an evenly mixed, elastic dough that rises well and bakes up with a chewy bite. If you don’t have a stand mixer, you can still knead by hand—it just takes more effort and attention to gluten development.
Parchment Paper: Prevent Sticking and Maintain Shape
Line your baking sheet with parchment paper to prevent the bagels from sticking during baking. It also helps maintain the round shape of the bagels after boiling. Parchment makes transferring bagels between stages much smoother and keeps your pan clean, reducing cleanup time. Avoid wax paper, which isn’t heat-safe and can burn in the oven.
Cooling Rack: Preserve Texture and Prevent Sogginess
Once your bagels finish baking, place them on a cooling rack right away. The rack allows air to circulate underneath, helping the crust stay firm and crisp. Letting bagels cool directly on a pan can trap steam and soften the bottoms. A cooling rack ensures they cool evenly and retain their texture until ready to eat or store.
Choosing the Best Poppy Seeds for Homemade Bagels
Creating that iconic chewy texture in bagels isn’t luck—it comes down to two critical steps: using bread flour and boiling the dough. Both of these elements play a unique role in shaping the bite, crust, and flavor of traditional poppy seed bagels.
Bread Flour Builds Strong Gluten Structure
Bread flour contains more protein than all-purpose flour—usually around 12–14%. This higher protein content encourages stronger gluten development, which gives bagels their signature chew and helps them hold their shape during shaping, boiling, and baking. When you use bread flour, you create a dough that’s elastic and resilient, ideal for forming sturdy rings that rise beautifully in the oven.
Swapping in all-purpose flour may result in softer, more bread-like bagels without the classic dense texture that defines a New York-style bagel. If you’re aiming for authentic chewiness, stick with high-quality bread flour.
Boiling Sets the Crust Before Baking
Boiling the bagels before baking them is another crucial step. This short bath in hot water gelatinizes the surface starches of the dough, creating a tight outer layer. It locks in the shape and ensures that the bagel develops a shiny, golden-brown crust during baking.
If you skip boiling, you’ll likely end up with rolls that resemble bagels in appearance but lack their distinctive crust and chewy bite. To enhance the texture even more, you can add a bit of barley malt syrup or baking soda to the boiling water, which deepens the color and flavor of the crust.
Step-by-Step Guide to Making Classic Poppy Seed Bagels
Preparing the Dough for Perfect Poppy Seed Bagels
Making the perfect dough for bagels is an art that begins with the proper mixing and kneading of ingredients. Once you combine your dry and wet ingredients, you’ll need to knead the dough to develop its structure. After that, allowing the dough to rise properly ensures the bagels have the perfect texture. Here’s a closer look at how to do this step-by-step.
Mixing the Ingredients
Start by combining your dry ingredients—bread flour, salt, sugar, and yeast—in a large mixing bowl. In a separate bowl, add warm water and honey (or malt syrup) to activate the yeast. Once the yeast becomes frothy, it’s ready to combine with the dry ingredients.
Mix everything together, and then stir until a rough dough begins to form. This is the point where you’ll start kneading, and it’s crucial to focus on the consistency of your dough. The dough should be firm yet smooth, and not too sticky. If it feels too wet, add a little more flour; if it’s too dry, a splash of water can help bring it together.
Kneading the Dough for a Smooth Texture
Once you’ve combined the ingredients, it’s time to knead the dough. Turn it out onto a clean surface and begin working it with your hands. Kneading helps develop the gluten in the dough, which is essential for the chewy texture of bagels. You should knead for about 8–10 minutes until the dough is smooth and elastic.
If you prefer, you can use a stand mixer fitted with a dough hook, which can make this process faster and less labor-intensive. Be sure to knead long enough so the dough becomes firm and stretchy—this will ensure a perfect rise later.
Allowing the Dough to Rise
After kneading, form the dough into a ball and place it in a lightly oiled bowl. Cover it with a clean towel or plastic wrap to prevent it from drying out. The dough needs time to rise, typically 1 to 1.5 hours, or until it has doubled in size. During this rise, the yeast ferments, producing bubbles and causing the dough to expand.
Make sure you let the dough rise in a warm spot, away from drafts. If your kitchen is a bit cool, you can place the bowl in the oven with just the oven light on to create a warm environment. Once the dough has doubled in size, it’s ready to be punched down and shaped into bagels.
Shaping and Proofing Classic Poppy Seed Bagels
Shaping and proofing your bagels correctly is key to achieving the perfect texture and shape. Proper shaping ensures your bagels hold their form during boiling, while proofing gives them the right amount of rise.
Shaping the Bagels
After the dough has risen, divide it into equal portions. Roll each portion into a ball, then poke a hole in the center with your thumb and gently stretch the dough to form a ring. Be sure not to make the hole too large, as it may expand during proofing and boiling.
Proofing the Bagels
Place your shaped bagels on a floured surface or parchment paper, ensuring there’s enough space between them. Cover them with a kitchen towel and let them proof for 30 minutes to an hour. This will allow the dough to expand and get ready for the boiling process.
Proofing Tips
For the best texture, proof your bagels at room temperature or place them in the fridge overnight for slower fermentation. To check if they’re ready, lightly press on the dough—if it doesn’t spring back, they’re good to go!
Boiling and Baking Classic Poppy Seed Bagels for That Signature Crust
Achieving the perfect bagel involves two crucial steps: boiling and baking. These steps are what give bagels their signature texture—crispy on the outside and chewy on the inside. Let’s dive into how you can master both for the perfect bagel crust.
Why Boiling Is Essential
Boiling the bagels before baking is what sets them apart from other bread types. When you drop the shaped bagels into boiling water, the dough quickly forms a protective crust, preventing it from expanding too much during baking. This gives the bagels their chewy texture and glossy exterior.
Boiling Tips:
- Add a tablespoon of sugar or honey to the water to help with browning and flavor.
- Boil the bagels for about 1-2 minutes on each side for the right amount of chewiness.
- Make sure your water is at a rolling boil before adding the bagels in.
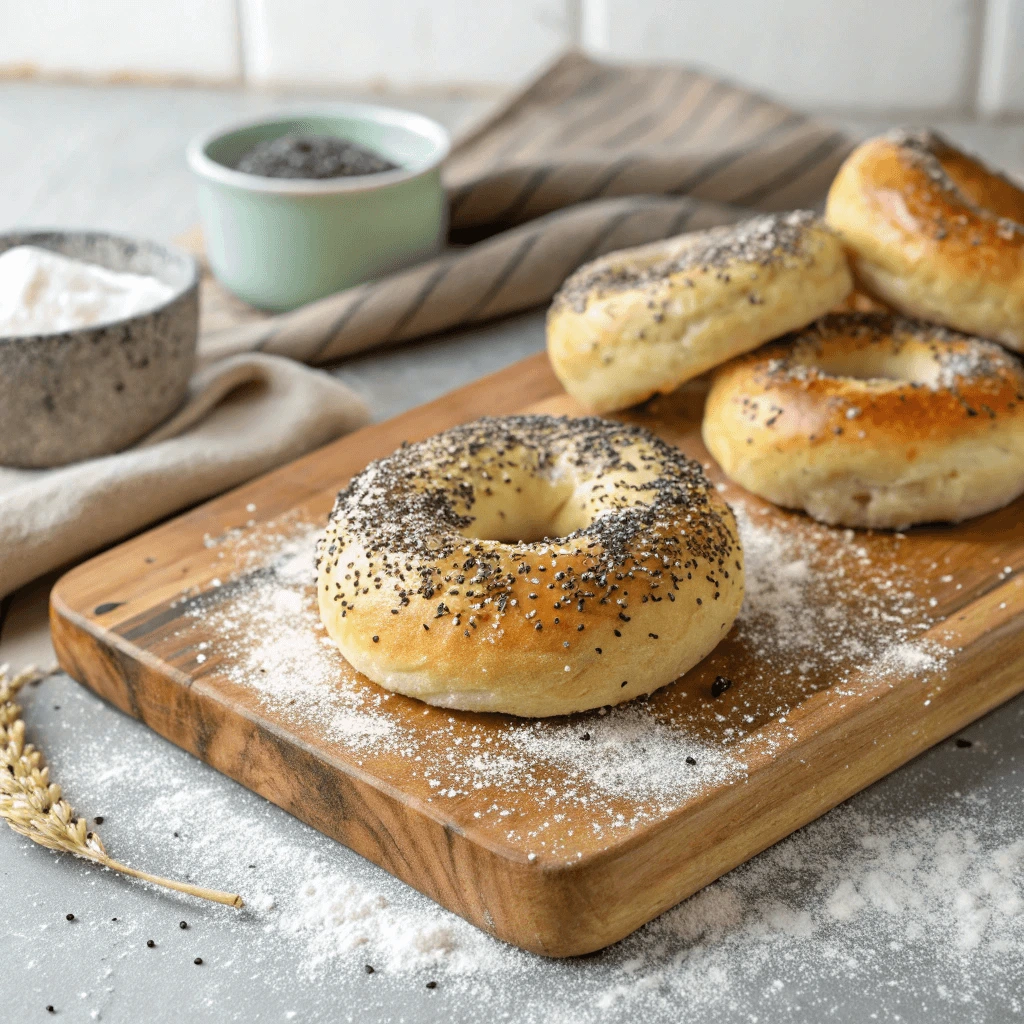
Baking for the Perfect Crust
After boiling, it’s time to bake. Preheat your oven to 425°F (220°C) to get that hot, even heat. Place the bagels on a baking sheet lined with parchment paper or a silicone baking mat. For an extra golden, crisp finish, brush the bagels with a bit of egg wash (a beaten egg mixed with a tablespoon of water) before baking.
Baking Tips:
- Bake the bagels for about 20 minutes, or until they reach a deep golden-brown color. Keep an eye on them to ensure they don’t overbake and become too hard.
- For an even crispier crust, bake the bagels directly on a preheated pizza stone or baking steel.
Getting the Signature Crust Right
The combination of boiling and baking creates that iconic bagel crust—glossy, golden, and slightly chewy. These two steps are non-negotiable when it comes to making truly authentic bagels. By ensuring your water boils at the right temperature and your oven is hot enough, you’ll get the best crust every time.
Best Toppings for Classic Poppy Seed Bagels
Classic Toppings: Cream Cheese, Avocado, or Jam
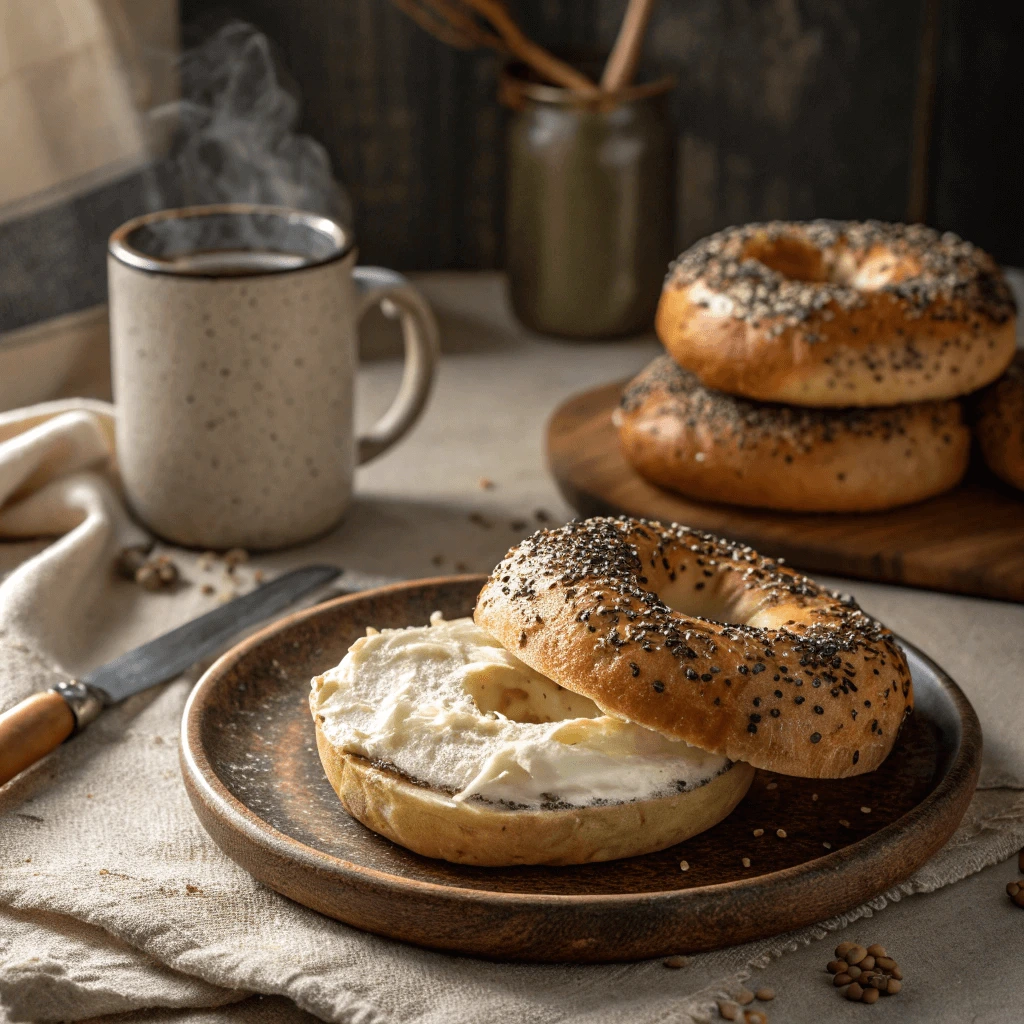
Once your homemade poppy seed bagels are golden and fresh out of the oven, the next step is choosing the perfect topping. Classic combinations bring out the flavor and texture of a well-made bagel without overpowering it. Whether you’re going for a savory breakfast or a light afternoon snack, these topping ideas never go out of style.
Cream Cheese: The Timeless Choice
Cream cheese remains the gold standard when it comes to bagel toppings. Its cool, creamy texture contrasts beautifully with the chewy, warm bagel. You can stick to plain cream cheese for a simple pairing, or explore flavored versions like chive, garden veggie, or honey walnut for a twist.
For an elevated presentation, spread your cream cheese generously and add a few slices of cucumber, tomato, or smoked salmon (if you eat fish) for a café-style bagel experience at home.
Avocado: A Healthy, Trendy Option
Avocado on a bagel has become a favorite for health-conscious eaters and brunch lovers alike. Mash a ripe avocado with a pinch of salt, black pepper, and a squeeze of lemon juice, then spread it over a toasted bagel half. You can top it with cherry tomatoes, red onion, or even a poached egg for extra protein.
This option doesn’t just taste amazing—it also delivers fiber, healthy fats, and essential nutrients, making your bagel both satisfying and nutritious.
Jam or Fruit Preserves: Sweet Simplicity
For those who enjoy a sweet start to the day, fruit jam or preserves are a perfect match for poppy seed bagels. The slightly nutty flavor of the poppy seeds balances beautifully with the natural sweetness of strawberry, raspberry, or apricot jam.
Warm your bagel slightly before spreading the jam for an indulgent, comforting breakfast or snack. You can also add a thin layer of butter beneath the jam if you prefer an old-fashioned treat.
Cream Cheese and More: Classic Poppy Seed Bagel Toppings
Poppy seed bagels are the perfect base for satisfying and customizable breakfast sandwiches. Whether you’re going for a hearty start or a light bite, these creative combinations skip the pork and deliver delicious flavor.
1. Egg and Veggie Delight
Scrambled or fried eggs with spinach, tomato, and cheddar cheese on a toasted poppy seed bagel. Add grilled zucchini or mushrooms for an earthy upgrade.
2. Hummus and Roasted Veggie Stack
Creamy hummus layered with roasted red peppers, eggplant, and zucchini. Top with fresh parsley or dill for a refreshing, plant-based option.
3. Turkey and Avocado Bagel Sandwich
Sliced roasted turkey breast paired with avocado, Dijon mustard, and crisp lettuce. A perfect high-protein breakfast choice.
Serving Suggestions for Brunch Boards
A brunch board built around poppy seed bagels adds warmth and charm to any breakfast or midday gathering. Whether you’re hosting a casual get-together or a special occasion, you can impress your guests with a delicious, pork-free spread that looks as good as it tastes.
Offer a Variety of Bagels
Make poppy seed bagels the centerpiece, but add variety to your board with plain, everything, sesame, or whole wheat bagels. Slice them in halves or quarters to make serving easier and to encourage guests to try different flavors.
Include a Range of Spreads
Offer both savory and sweet options to cater to all tastes. Serve plain and flavored cream cheeses, such as chive or honey walnut. Include avocado mash, hummus, or a dairy-free spread for more choices. Add fruit preserves like strawberry, fig, or apricot to balance the savory elements.
Add Fresh Toppings and Proteins
Set out fresh vegetables like sliced cucumbers, red onions, cherry tomatoes, and capers. For protein, include hard-boiled eggs, scrambled eggs, or thin slices of roasted turkey. Smoked salmon is a traditional choice that pairs well with cream cheese and red onion if you’d like to include fish.
Garnish and Arrange with Care
Use lemon wedges, fresh herbs like dill or parsley, and edible flowers to elevate presentation. Arrange ingredients in small bowls and spread them evenly across a large board or tray. Balance colors and textures to make the display visually appealing and easy to navigate.
Storing and Freezing Classic Poppy Seed Bagels
Best Ways to Store Fresh Bagels
Keeping your freshly baked poppy seed bagels soft and flavorful starts with proper storage. Whether you plan to enjoy them the same day or later in the week, choosing the right method will preserve their texture and taste.
Store at Room Temperature for Short-Term Freshness
If you plan to eat your bagels within one to two days, keep them in a paper bag or wrap them in a clean kitchen towel. Then place the bag or towel inside a plastic bag—but don’t seal it completely. This method allows a bit of airflow, which helps prevent the crust from becoming overly soft while avoiding staleness.
Use Airtight Containers for Extended Shelf Life
When you need to store bagels for up to five days, use an airtight container or a resealable plastic bag. Place a paper towel inside to absorb excess moisture and keep the bagels from turning soggy. Keep the container in a cool, dry spot, away from direct sunlight or heat.
Avoid Refrigeration
Storing bagels in the fridge might seem like a good idea, but it actually causes them to go stale faster. The cold temperature accelerates the hardening of the starches, leaving you with dry, tough bagels. Stick to room temperature or freezer storage instead.
Slice Before Freezing for Convenience
If you bake in bulk or want to save a few bagels for later, freeze them right after they cool. Slice them beforehand so you can pop them straight into the toaster without thawing. Wrap each bagel tightly in plastic wrap or aluminum foil, then place them in a freezer-safe bag. This method prevents freezer burn and maintains flavor for up to three months.
Label and Rotate for Fresh Use
To avoid forgetting your stash, label each bag with the date you froze it. When you add new bagels, rotate older ones to the front so you use them first. This habit ensures you always enjoy your bagels at peak quality.
How to Freeze Bagels Without Losing Texture
Freezing bagels the right way keeps them tasting fresh, soft, and chewy—even weeks after baking. Follow these steps to lock in flavor and texture so you can enjoy bakery-quality bagels any time.
Cool the Bagels Completely Before Freezing
Allow your freshly baked bagels to cool to room temperature on a wire rack. If you freeze them while they’re still warm, steam will get trapped and cause sogginess or freezer burn. Patience here ensures the best possible texture later.
Slice Bagels in Advance for Easy Reheating
Before freezing, slice the bagels in half. This makes it easy to toast them straight from the freezer without needing to thaw first. Use a sharp serrated knife for clean, even cuts. Pre-slicing also helps retain the bagel’s crisp exterior and chewy interior during reheating.
Wrap Each Bagel Individually for Best Results
Wrap each sliced bagel tightly in plastic wrap or foil to protect it from air and moisture. This individual wrapping helps prevent freezer burn and keeps your bagels from sticking together. It also allows you to grab just one or two at a time without defrosting the entire batch.
Use Freezer-Safe Bags or Containers
Place the wrapped bagels into a heavy-duty freezer bag or a reusable airtight container. Squeeze out as much air as possible before sealing. Removing excess air minimizes ice crystal formation and keeps your bagels tasting just-baked.
Label and Date for Easy Tracking
Mark the storage date on your bag with a permanent marker. Bagels freeze well for up to 3 months, but the sooner you eat them, the fresher they’ll taste. Rotating older bagels to the front makes it easy to use them in the right order.
Reheat Properly to Restore Texture
To enjoy a frozen bagel, skip thawing and place it directly into the toaster or toaster oven. Toast until the crust crisps up and the interior softens. If you prefer a softer bagel, warm it in a 350°F (175°C) oven for about 10 minutes after wrapping it in foil.
Toasting Tips for Reheating Like New
When reheated correctly, poppy seed bagels taste just as fresh and satisfying as the day you made them. Proper toasting restores their signature chewy interior and crisp golden crust—without drying them out or burning the seeds.
Use a Toaster for a Quick Crisp
For a fast and simple method, use a standard toaster. Slice the bagel if you haven’t already, and toast it on medium heat. This setting gives the outside a satisfying crunch while warming the inside evenly. Avoid toasting at the highest setting, as poppy seeds can burn and turn bitter.
Try a Toaster Oven for Even Heating
Toaster ovens work great if you prefer a little more control. Preheat the oven to 375°F (190°C), and place your bagel halves cut side up on the rack or a baking tray. Toast them for 5–7 minutes, or until the tops are golden and the bottoms are firm but not hard. This method is ideal for frozen bagels or if you want to toast multiple bagels at once.
Add Moisture When Needed
If your bagel feels a little dry, lightly mist the cut sides with water before toasting. This small trick adds steam during heating, which softens the interior while preserving the crispness of the crust. Don’t overdo it—just a light spray is enough.
Avoid Microwaving for Best Texture
While microwaving seems convenient, it often leaves bagels rubbery or unevenly heated. If you must use a microwave, wrap the bagel in a damp paper towel and heat it in short bursts (10–15 seconds). Then, finish it off in a toaster or oven for a better texture.
Bonus Tip: Toast Before Topping
Always toast your bagel before adding toppings like cream cheese or avocado. Toasting first helps prevent sogginess and lets you enjoy the full contrast of crispy crust and smooth spreads.
Classic poppy seed bagels offer the perfect balance of chewy texture and nutty flavor, making them an ideal choice for breakfast, brunch, or even a midday snack. With simple ingredients and a bit of care, you can create bakery-quality bagels right at home. Whether you serve them plain, topped with cream cheese, or layered into a hearty sandwich, these homemade bagels are sure to impress.