Carmel Salt Pancakes or Waffle Mix is more than just a breakfast staple—it’s a versatile base for creating mouthwatering sweet and savory dishes that everyone will love. The unique combination of rich caramel sweetness and a hint of salt makes it perfect for a variety of recipes, whether you’re crafting indulgent desserts, satisfying snacks, or creative brunch ideas.
If you’ve been sticking to traditional pancakes or waffles, it’s time to think outside the box. In this post, we’ll share 5 creative ways to use Carmel Salt Pancakes or Waffle Mix to elevate your meals and impress your family or guests. Get ready to transform your mix into dishes that are as versatile as they are Delicious!
Make Sweet and Salty Dessert Bars
Caramel Salt Blondies
Caramel salt pancake mix makes a surprisingly delicious base for quick, chewy blondies. Its sweet-salty flavor blends well with chocolate, nuts, or fruit, and you can make them healthier with a few simple swaps.
Healthier Ingredient Swaps
Instead of butter, use mashed banana or unsweetened applesauce. Choose coconut sugar or maple syrup over white sugar, and opt for dark chocolate chips or chopped nuts for texture and richness. You can also add chia seeds or protein powder to boost nutrition.
Quick Recipe
Mix 1½ cups of caramel salt pancake mix with ½ cup mashed banana or applesauce, ¼ cup coconut sugar or maple syrup, and 2 eggs (or flax eggs). Fold in ½ cup dark chocolate chips or nuts.
Pour into a greased 8×8-inch pan and bake at 350°F (175°C) for 18–22 minutes. Let cool before slicing.
Tip
Store in an airtight container for up to 5 days, or freeze for longer storage. These blondies are perfect for lunchboxes, dessert trays, or a cozy afternoon snack.
No-Bake Bars
No-bake bars offer a quick and easy way to enjoy caramel salt pancake mix without using the oven. They come together fast and make a tasty snack or dessert, especially when you add healthy ingredients.
Why Make No-Bake Bars?
These bars are simple to prepare and don’t require baking skills. The caramel salt pancake mix gives them a sweet and salty flavor that stands out. Plus, the mix helps the bars hold their shape without extra effort.
Ingredients to Boost Nutrition
Use natural nut butter like almond or peanut butter to bind the ingredients. Sweeten with honey or maple syrup. Add chia or flaxseeds for fiber and healthy fats. Toss in chopped nuts, dried fruit, or dark chocolate chips for extra texture and flavor.
How to Prepare
Warm the nut butter and honey until smooth. Mix the caramel salt pancake mix, seeds, and add-ins in a bowl. Pour the warm nut butter mixture over the dry ingredients and stir until fully combined. Press the mixture into a lined pan, flatten the top, and refrigerate for at least two hours. Cut into bars once firm.
Storage Tips
Store the bars in an airtight container in the fridge for up to a week. Wrap individual bars for easy snacks on the go. You can also freeze them for longer storage.
Layered Dessert Squares
Layered dessert squares use caramel salt pancake mix to create a delicious, eye-catching treat. The mix forms a sweet and salty base that pairs well with creamy and crunchy layers.
Creating the Base
Combine the pancake mix with melted butter or coconut oil to make a firm crust. Press it into a lined pan and bake at 350°F (175°C) for about 10 minutes until set.
Adding the Creamy Layer
Prepare a creamy topping like cheesecake filling, pudding, or yogurt sweetened with honey or maple syrup. Spread this layer evenly over the cooled crust.
Toppings and Finishing Touches
Top your dessert with chopped nuts, granola, fresh fruit, or a drizzle of melted dark chocolate. Refrigerate the squares for at least two hours to let the layers firm up before slicing.
Storage Tips
Keep the squares in an airtight container in the fridge for up to five days. They also freeze well for longer storage.
Turn It Into Mini Muffins or Cupcakes
Salted Caramel Muffins
Salted caramel muffins are a delicious twist on a classic treat. Using caramel salt pancake mix makes them quick and easy to prepare while adding a perfect balance of sweet and salty flavors.
Why Use Caramel Salt Pancake Mix?
This mix already has the right amount of sweetness and salt, so you don’t need to add much extra sugar or salt. It also contains leavening agents that help your muffins rise nicely.
Ingredients and Preparation
Combine the pancake mix with eggs, milk, and melted butter. Add vanilla extract for extra flavor. Mix in caramel chips or swirl caramel sauce into the batter. Sprinkle a pinch of sea salt on top before baking.
Baking Instructions
Preheat the oven to 375°F (190°C) and line a muffin tin with paper liners. Fill each cup two-thirds full with batter. Bake for 15 to 18 minutes until a toothpick comes out clean. Let cool before serving.
Storage Tips
Store muffins in an airtight container for up to three days. Freeze individually wrapped muffins for longer storage and thaw when ready to eat.
Cream-Filled Cupcakes
Cream-filled cupcakes offer a delightful surprise inside each bite. Using caramel salt pancake mix as the base gives these cupcakes a rich, sweet, and slightly salty flavor that complements the creamy filling perfectly.
Why Use Caramel Salt Pancake Mix?
The caramel salt pancake mix adds depth to the cupcake batter with its balanced sweetness and saltiness. This mix simplifies the baking process because it already contains leavening agents and flavorings, ensuring your cupcakes turn out moist and fluffy.
Ingredients for the Cupcakes and Filling
For the cupcakes, combine the pancake mix with eggs, milk, and melted butter or oil. Vanilla extract enhances the flavor further. For the filling, whip cream cheese with powdered sugar and a splash of vanilla extract to create a smooth, sweet cream.
Baking and Filling Instructions
Preheat the oven to 350°F (175°C) and line a muffin tin with paper liners. Mix the wet and dry ingredients until just combined, then pour the batter into the muffin cups, filling them about two-thirds full. Bake for 15 to 18 minutes or until a toothpick inserted in the center comes out clean. Allow cupcakes to cool completely.
Once cooled, use a small knife or cupcake corer to remove the center of each cupcake. Fill a piping bag with the cream cheese filling and pipe it into the hollow centers. You can also top the cupcakes with whipped cream or frosting to finish.
Serving and Storage Tips
Serve these cupcakes chilled or at room temperature. Store them in the refrigerator in an airtight container for up to three days to keep the filling fresh. For longer storage, freeze the cupcakes and thaw before serving.
Mini Waffle Bites
Mini waffle bites make a fun and delicious snack or breakfast option. Using caramel salt pancake mix adds a unique flavor, blending sweetness and saltiness that enhances every bite. These bite-sized waffles cook quickly and are easy to customize with various toppings and mix-ins.
Why Choose Mini Waffle Bites?
Mini waffle bites are perfect for portion control and sharing. Their small size makes them ideal for dipping or pairing with sauces like chocolate, caramel, or fruit preserves. They also work well as party appetizers or kids’ snacks.
Preparing the Batter
Mix the caramel salt pancake mix with eggs, milk, and melted butter or oil. For added flavor, consider adding vanilla extract or a pinch of cinnamon. Stir the ingredients just until combined to keep the waffles light and fluffy. Avoid overmixing to prevent toughness.
Cooking Mini Waffle Bites
Preheat your mini waffle maker and lightly grease it with oil or non-stick spray. Spoon small portions of batter onto the waffle iron, close the lid, and cook for 3 to 5 minutes or until golden brown and crisp. Cooking times may vary depending on your waffle maker, so check frequently.
Serving Suggestions
Serve mini waffle bites warm with toppings such as whipped cream, fresh berries, chopped nuts, or drizzles of caramel or chocolate sauce. For a healthier option, pair them with Greek yogurt and honey. You can also mix ingredients like mini chocolate chips or blueberries directly into the batter before cooking.
Storage Tips
Store leftover mini waffle bites in an airtight container in the refrigerator for up to three days. Reheat them in a toaster or oven to restore their crispiness before serving again. You can freeze them individually and reheat as needed for convenient snacks.
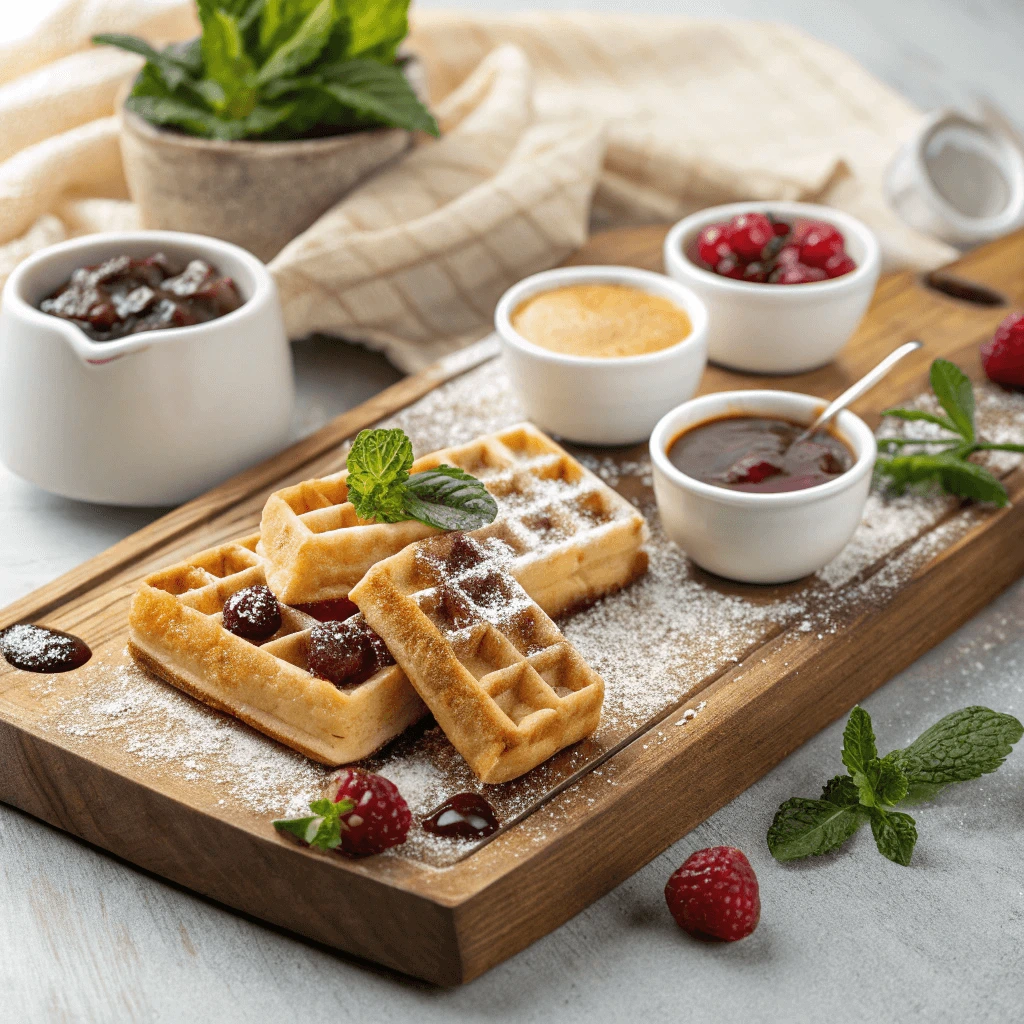
Create a Sweet and Savory Brunch Board
Waffle Dippers
Waffle dippers turn classic waffles into a fun, handheld snack perfect for dipping. Using caramel salt pancake mix adds a delicious sweet-and-salty flavor that pairs beautifully with a variety of dips, from creamy to fruity.
Why Make Waffle Dippers?
Waffle dippers are convenient for parties, kids’ snacks, or quick breakfasts. Their long, narrow shape makes them perfect for dipping into sauces like chocolate, caramel, or fruit compotes without mess.
Preparing the Batter
Start by mixing the caramel salt pancake mix with eggs, milk, and melted butter or oil. Adding a splash of vanilla extract enhances the flavor. Stir the ingredients just until combined to keep the batter light and fluffy—avoid overmixing, which can make the dippers tough.
Cooking Your Waffle Dippers
Preheat a waffle maker that can create long, thin waffles or use a standard waffle iron and cut the waffles into strips after cooking. Lightly grease the waffle iron before adding batter. Pour enough batter to fill the waffle iron and cook for 3 to 5 minutes until golden and crisp.
If you don’t have a specialized waffle maker, bake the batter in a sheet pan and cut the cooked waffle into sticks. You can also use a grill pan to achieve a similar texture.
Delicious Dipping Options
Serve waffle dippers with a variety of dips to satisfy different tastes. Classic choices include melted chocolate, caramel sauce, or vanilla yogurt. For a healthier twist, try peanut butter or fruit purees. You can also sprinkle cinnamon sugar on top for extra sweetness before serving.
Storage and Serving Tips
Store leftover waffle dippers in an airtight container at room temperature for up to two days or refrigerate for longer freshness. Reheat them in the toaster or oven to bring back their crispness before serving.
Savory Pancake Sliders
Savory pancake sliders transform sweet caramel salt pancake mix into a flavorful base for bite-sized sandwiches. These sliders offer a perfect balance of sweet and salty, making them a fun and unique appetizer or meal option.
Why Choose Savory Sliders?
Using caramel salt pancake mix adds a subtle sweetness that complements savory fillings like cheese, herbs, and meats. The small slider size makes them ideal for parties, snacks, or creative brunch dishes.
Preparing the Pancakes
Mix the caramel salt pancake mix with eggs, milk, and a bit of melted butter or oil. To shift the flavor toward savory, add finely chopped herbs such as chives, parsley, or thyme. You can also include a pinch of black pepper or smoked paprika for extra depth.
Cook the pancakes on a non-stick griddle or skillet over medium heat. Pour small spoonfuls of batter to form mini pancakes about 2-3 inches in diameter. Cook until bubbles appear on the surface, then flip and cook the other side until golden brown.
Filling Ideas for Savory Sliders
Layer your mini pancakes with savory fillings such as sliced cheese, crispy bacon or turkey slices, fresh arugula, or sautéed mushrooms. Spread a bit of cream cheese or savory aioli on the pancakes to add moisture and flavor. Experiment with combinations like smoked salmon and dill or roasted vegetables with goat cheese.
Assembling and Serving
Stack the mini pancakes with your chosen fillings to create sliders. Secure them with toothpicks if needed. Serve warm or at room temperature, and pair them with dipping sauces like mustard, honey mustard, or a tangy yogurt dip.
Storage and Reheating Tips
Store leftover mini pancakes and fillings separately in airtight containers in the refrigerator for up to two days. Reheat the pancakes in a skillet or toaster oven before assembling the sliders to keep them fresh and warm.
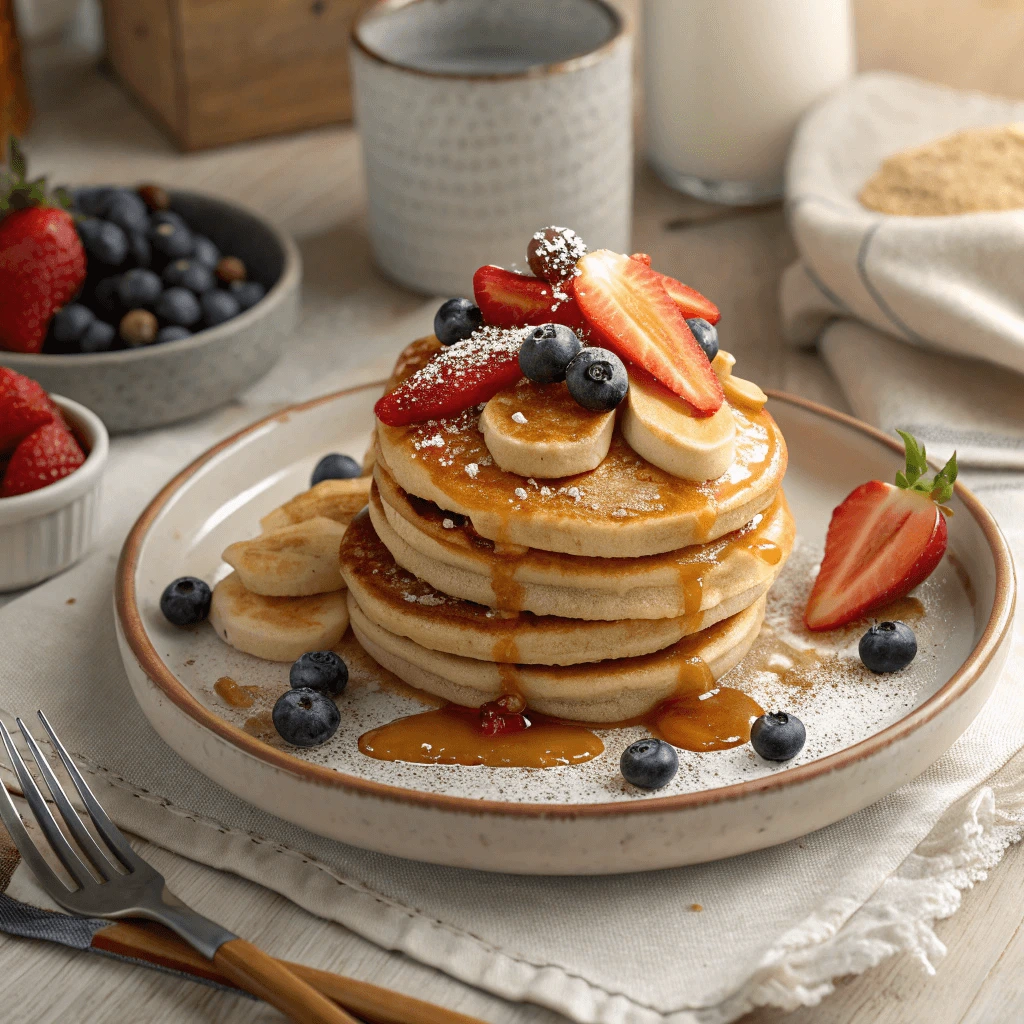
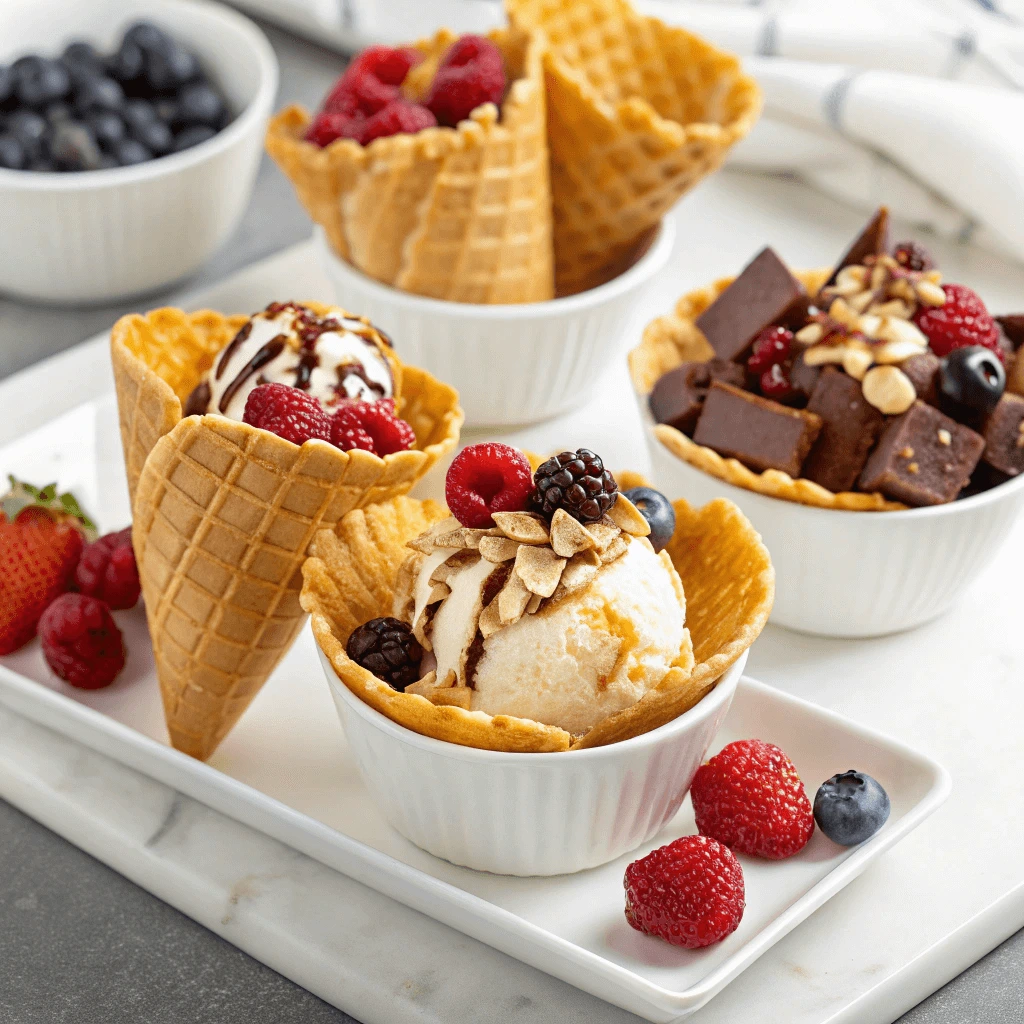
Fruit & Nut Toppings
Adding fruit and nut toppings to caramel salt pancakes or waffles creates a vibrant and textured breakfast or snack. These toppings add natural sweetness, crunch, and nutritional benefits, perfectly complementing the rich caramel salt flavor.
Choosing the Right Fruits
Fresh fruits like berries, sliced bananas, and diced apples work wonderfully as toppings. Their natural sweetness balances the salty notes in the pancake mix. You can also use dried fruits such as raisins, cranberries, or chopped dates to add chewy texture and concentrated sweetness.
Selecting Nuts for Crunch
Nuts add a satisfying crunch and healthy fats to your pancakes or waffles. Popular choices include toasted almonds, walnuts, pecans, and hazelnuts. Toast the nuts lightly in a dry pan to bring out their flavor before sprinkling them on top.
Combining Fruits and Nuts
Try mixing fresh berries with chopped nuts for a delicious combination. For instance, blueberries and toasted almonds create a sweet and crunchy topping. You can also pair sliced bananas with walnuts and drizzle a bit of honey or maple syrup on top.
Additional Flavor Boosters
Enhance your fruit and nut toppings by adding a sprinkle of cinnamon, a dollop of Greek yogurt, or a drizzle of nut butter. These additions add complexity to the flavor and increase the nutritional value of your meal.
Serving and Storage Tips
Serve your caramel salt pancakes or waffles immediately after adding fruit and nuts to maintain freshness and crunch. If you prepare toppings ahead of time, store fresh fruits in the refrigerator and nuts in an airtight container at room temperature.
Bake a Quick Coffee Cake or Loaf
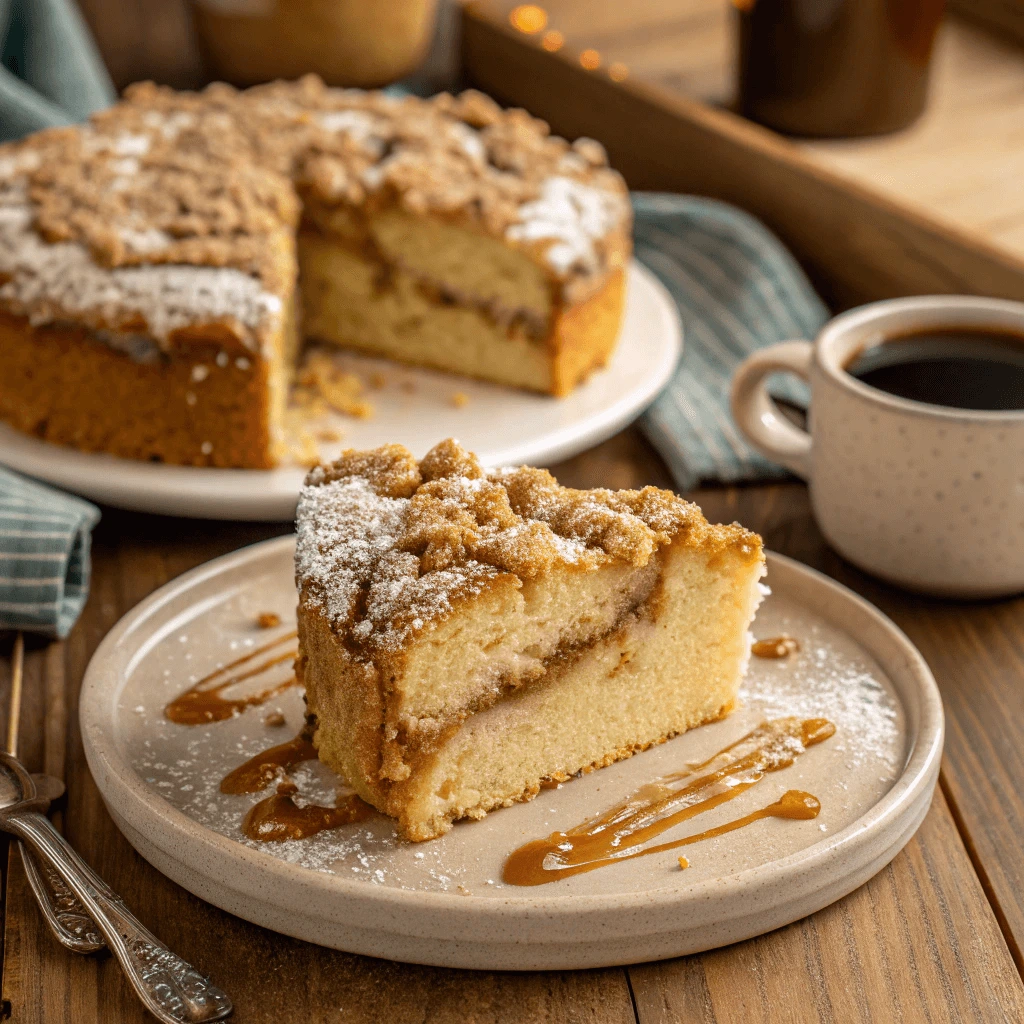
Caramel Streusel Coffee Cake
Caramel Streusel Coffee Cake offers a decadent twist on a classic breakfast favorite by incorporating caramel salt pancake mix. The cake’s tender crumb and rich streusel topping combine to create a comforting and indulgent treat perfect for brunch or dessert.
Preparing the Cake Batter
Begin by mixing the caramel salt pancake mix with eggs, milk, and melted butter or oil. The caramel salt adds a subtle sweet and salty depth to the batter that elevates the overall flavor. Add vanilla extract and a touch of cinnamon to enhance the warm, cozy notes.
Making the Streusel Topping
The streusel topping adds a crunchy, buttery contrast to the soft cake. Combine brown sugar, flour, cinnamon, and cold butter. Use your fingers or a pastry cutter to mix until the mixture resembles coarse crumbs. For an extra layer of texture, fold in chopped nuts like pecans or walnuts.
Assembling the Coffee Cake
Pour half of the batter into a greased baking pan. Sprinkle half of the streusel topping evenly over the batter. Pour the remaining batter on top and finish with the rest of the streusel. This layering ensures every bite contains a perfect balance of soft cake and crunchy topping.
Baking and Serving
Bake the coffee cake at 350°F (175°C) for about 35 to 40 minutes, or until a toothpick inserted in the center comes out clean. Let the cake cool slightly before serving to allow the flavors to meld. Serve warm with a cup of coffee or tea for a delightful breakfast or afternoon treat.
Storage Tips
Store any leftovers in an airtight container at room temperature for up to two days. Reheat slices gently in the microwave or oven to restore their soft texture and bring out the aroma of caramel and cinnamon.
Salted Caramel Banana Bread
Salted caramel banana bread combines the comforting flavors of ripe bananas with the rich, sweet-savory notes of caramel salt pancake mix. This twist on a classic quick bread adds depth and moisture, making each slice irresistibly delicious.
Preparing the Banana Bread Batter
Start by mashing ripe bananas in a bowl until smooth. Then, mix the caramel salt pancake mix with eggs, melted butter, and a touch of brown sugar to enhance the caramel flavor. Stir the mashed bananas into the batter, blending everything evenly without overmixing to keep the bread tender.
Adding the Salted Caramel Touch
The caramel salt in the pancake mix introduces a subtle salty sweetness that balances the natural sugars in the bananas. To boost this effect, you can drizzle a bit of caramel sauce into the batter or swirl it on top before baking. A sprinkle of flaky sea salt on the crust intensifies the salty contrast and adds a delightful crunch.
Baking Your Banana Bread
Pour the batter into a greased loaf pan and bake at 350°F (175°C) for about 50 to 60 minutes. Check doneness by inserting a toothpick in the center; it should come out clean or with a few moist crumbs. Allow the bread to cool slightly before slicing to let the flavors settle.
Serving and Storing
Serve your salted caramel banana bread warm or at room temperature, either plain or with a smear of butter or cream cheese. Store leftovers wrapped tightly in plastic wrap or in an airtight container to keep it moist for several days. You can also freeze slices for longer storage and thaw as needed.
Glazed Breakfast Loaf
A glazed breakfast loaf made from caramel salt pancake mix combines sweet and salty flavors into a moist, flavorful treat. This loaf works perfectly for a cozy morning or an afternoon snack.
Making the Batter
Mix the caramel salt pancake mix with eggs, milk, melted butter, and vanilla extract. The caramel salt adds a rich, buttery sweetness with a hint of salt. Stir gently until the batter is smooth, but avoid overmixing to keep the loaf tender.
Baking the Loaf
Pour the batter into a greased loaf pan and bake at 350°F (175°C) for 40 to 45 minutes. Insert a toothpick into the center—if it comes out clean, the loaf is done. Let it cool in the pan for 10 minutes, then transfer it to a wire rack to cool completely.
Preparing and Adding the Glaze
Mix powdered sugar with milk and vanilla extract until smooth. For a salty-sweet twist, add a pinch of sea salt or a little caramel sauce. Drizzle the glaze over the cooled loaf, letting it drip down the sides for an attractive finish.
Serving and Storage
Slice and serve the loaf warm or at room temperature. Store leftovers in an airtight container at room temperature for up to three days. For longer storage, refrigerate or freeze the loaf and reheat slices before eating.
Whip Up Decadent Dessert Waffles
ice cream Sandwich Waffles
Ice cream sandwich waffles make a fun and delicious twist on a classic dessert. Using caramel salt pancake or waffle mix gives the waffles a unique sweet and salty flavor that pairs perfectly with creamy ice cream.
Making the Waffles
Start by preparing the waffle batter using the caramel salt pancake mix according to the package instructions. The mix adds a rich caramel flavor with just the right hint of saltiness. Preheat your waffle iron and cook the waffles until they turn golden brown and crispy on the outside while remaining fluffy inside.
Choosing Your Ice Cream
Select your favorite ice cream flavor to create the perfect sandwich. Classic vanilla complements the caramel salt flavor nicely, but you can also try chocolate, caramel, or even coffee-flavored ice cream for a richer taste. Scoop generous amounts to ensure each sandwich is indulgent and creamy.
Assembling the Ice Cream Sandwiches
Allow the waffles to cool slightly before assembling. Place a scoop of ice cream between two waffles and gently press together to form a sandwich. For extra flair, roll the edges in toppings like crushed nuts, chocolate chips, or sprinkles. Serve immediately or wrap and freeze for a cool treat later.
Serving Suggestions and Storage
Serve ice cream sandwich waffles as a refreshing dessert after a meal or a fun snack on a warm day. If you prepare them ahead, store wrapped sandwiches in the freezer and thaw slightly before enjoying. This treat brings together warm, crispy waffles and cold, creamy ice cream in every bite.
Chocolate Drizzled Waffle Slices
Chocolate drizzled waffle slices make a simple yet indulgent treat. Using caramel salt waffle mix adds a wonderful blend of sweet and salty flavors that pair beautifully with rich chocolate.
Preparing the Waffles
Begin by mixing the caramel salt waffle batter according to the package directions. This mix infuses the waffles with a deep caramel flavor and a subtle hint of saltiness. Pour the batter onto a preheated waffle iron and cook until the waffles are golden brown and crisp on the outside but soft inside.
Slicing and Arranging
Once the waffles cool slightly, cut them into bite-sized slices or triangles. This makes them easier to dip or drizzle and perfect for sharing at parties or family gatherings.
Making the Chocolate Drizzle
Melt your favorite chocolate—dark, milk, or white chocolate works well—using a double boiler or microwave in short bursts, stirring frequently to prevent burning. For extra flavor, stir in a pinch of sea salt or a few drops of vanilla extract.
Drizzling and Serving
Use a spoon or a piping bag to drizzle the melted chocolate evenly over the waffle slices. The warm chocolate contrasts nicely with the caramel salt flavor, creating a delightful combination. Serve the slices immediately as a dessert or snack. For added texture, sprinkle chopped nuts, shredded coconut, or mini chocolate chips over the top.
Storage Tips
If you want to save some for later, store the waffle slices in an airtight container in the refrigerator. Before serving again, allow them to come to room temperature or warm slightly to bring back their softness.
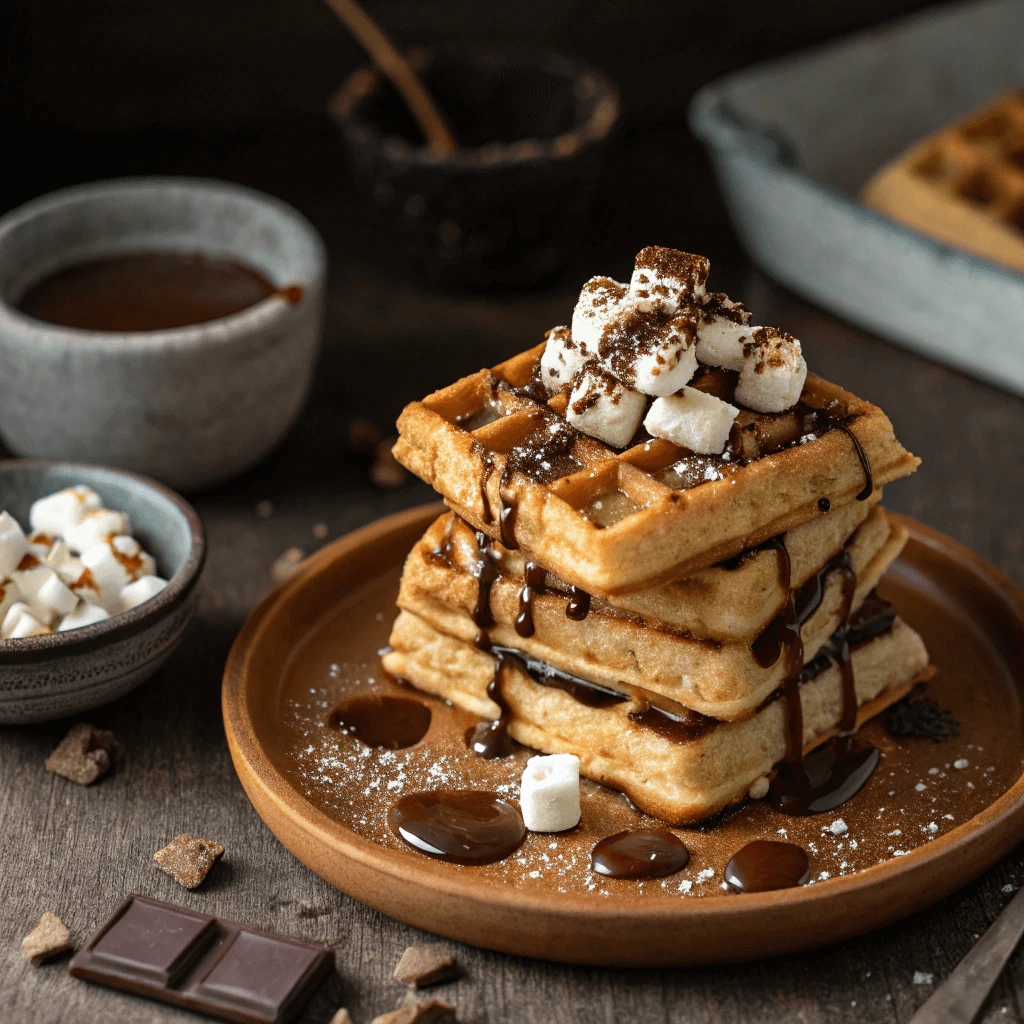
S’mores Waffles
S’mores waffles are an irresistible twist on the classic campfire treat, made even better by using Carmel Salt Pancakes or Waffle Mix. This mix adds a perfect balance of sweetness and saltiness to your waffles, enhancing the flavors of chocolate, marshmallows, and graham crackers in every bite.
Preparing the Waffle Batter with Carmel Salt Pancakes or Waffle Mix
To make these delicious s’mores waffles, start by preparing the batter using Carmel Salt Pancakes or Waffle Mix according to the package instructions. The caramel notes combined with a hint of salt create a unique base that pairs wonderfully with the gooey marshmallows and rich chocolate you’ll add later. Heat up your waffle iron and cook the waffles until they turn golden and crisp on the outside.
Building the Perfect S’mores Waffles
After your waffles are cooked using Carmel Salt Pancakes or Waffle Mix, layer them with chunks of your favorite chocolate and mini marshmallows. The warmth of the waffles helps melt the chocolate slightly, while softening the marshmallows for that classic gooey texture. For an authentic s’mores experience, you can toast the marshmallows separately before adding them.
Adding the Graham Cracker Crunch
No s’mores waffle is complete without the crunch of graham crackers. Crush some graham crackers and sprinkle them generously over your waffles made from Carmel Salt Pancakes or Waffle Mix. This adds a delightful texture contrast that enhances each bite.
Serving and Storing Your S’mores Waffles
Serve your s’mores waffles fresh and warm for the best experience. Drizzle with caramel or chocolate syrup for extra indulgence, or add fresh fruit toppings if you want to mix things up. If you have leftovers, store them in an airtight container in the fridge and reheat gently to maintain their crispness.
Using Carmel Salt Pancakes or Waffle Mix in this recipe elevates traditional waffles into a gourmet treat that perfectly complements the nostalgic flavors of s’mores.
Conclusion
Carmel Salt Pancakes or Waffle Mix offers incredible versatility, transforming simple breakfasts into creative and delicious treats. From s’mores waffles to caramel streusel coffee cake, these ideas showcase just how fun and flavorful this mix can be. We encourage you to try one of these recipes or invent your own unique twist using caramel salt pancake and waffle mix. Don’t forget to share your tasty creations in the comments below or tag us on social media—we love seeing your delicious experiments! Happy cooking!