Graduation is a special time, and what better way to celebrate than with custom graduation cookies? These personalized treats add a unique touch to any celebration, making them a hit at graduation parties or as a thoughtful gift for a graduate.
In this guide, you’ll learn how to make and decorate custom graduation cookies like a pro. From choosing the right cookie dough to mastering royal icing techniques, we’ll cover everything you need to know. You’ll be able to create stunning designs, from classic graduation caps to creative Class of 2025 designs. Ready to impress your guests? Let’s dive into the world of custom graduation cookies!
Essential Supplies for Custom Graduation Cookies

Cookie Dough Basics
When it comes to making the perfect custom graduation cookies, it all starts with the dough. Choosing the right cookie dough is key to achieving a sturdy base for your intricate decorations. Below are some essential tips and insights to help you select and prepare the best dough for your custom cookies.
Types of Cookie Dough
The most common type of dough used for decorated cookies is sugar cookie dough. It’s easy to work with, holds its shape well when baked, and has a mild flavor that complements any frosting or icing. Another popular choice is shortbread dough, which gives cookies a more buttery flavor and a crisp texture.
If you’re looking for a dough that holds up well under icing, go for a rolled sugar cookie dough. This dough is thicker and less likely to spread during baking, which is important when you’re aiming for clean lines and intricate designs. Avoid soft or thin cookie doughs, as they may lose their shape when you bake them.
Preparing Your Cookie Dough
Once you’ve selected your dough, follow the recipe’s instructions carefully to achieve the perfect consistency. Make sure your dough is cold before rolling it out. If it’s too warm, it will stick to your rolling pin or surface and may spread too much during baking. To prevent this, chill your dough in the fridge for at least 30 minutes before rolling it out. This step ensures your cookies hold their shape and makes them easier to cut into the desired designs.
It’s also a good idea to flour your rolling surface and rolling pin lightly to prevent the dough from sticking. However, don’t overdo it with flour, as too much can alter the texture of your cookies.
Rolling Out the Dough
When rolling out your dough, aim for an even thickness to ensure uniform baking. Too thin, and your cookies may break easily; too thick, and they may not bake all the way through. A good rule of thumb is to roll your dough to about 1/8 to 1/4 inch thick. For best results, use a rolling pin with adjustable thickness rings to ensure even dough.
Use cookie cutters to create fun, graduation-themed shapes such as caps, diplomas, or numbers. If you’re not using cookie cutters, you can easily shape the dough into squares, circles, or freehand designs with a sharp knife.
Chilling the Dough Again
After cutting your cookies into shapes, place them on a baking sheet lined with parchment paper and chill them once again for about 10-15 minutes. This step is crucial to help your cookies maintain their shape during baking. By chilling the cut-out cookies, you’ll reduce the chances of them spreading out of shape.
Baking Your Cookies
Preheat your oven to the recommended temperature, usually around 350°F (175°C), and bake your cookies for 8-10 minutes or until the edges begin to turn golden brown. The baking time may vary slightly depending on the size and thickness of your cookies, so keep a close eye on them. Once baked, allow the cookies to cool completely on a wire rack before decorating. This ensures that the icing or royal icing will set properly and not slide off.
Royal Icing and Edible Colors
Creating beautifully decorated graduation cookies starts with mastering royal icing and using vibrant edible colors. The right consistency and shades will make your cookies look polished and professional.
Making the Perfect Royal Icing
To achieve the best royal icing for decorating, you need three basic ingredients: powdered sugar, egg whites (or meringue powder), and water. Start by whisking the egg whites until frothy, then gradually add powdered sugar. Mix until the icing forms stiff peaks but remains smooth. If the icing is too thick, add a few drops of water to thin it. Conversely, if it’s too runny, mix in more powdered sugar.
Adjusting Consistency for Different Techniques
Royal icing can be adjusted to suit different decorating techniques:
- Stiff consistency: Ideal for piping intricate details like lettering or borders.
- Medium consistency: Works well for outlining and controlled designs.
- Flood consistency: Used for filling in larger areas smoothly. Thin the icing with water until it flows easily but doesn’t run off the cookie.
Choosing and Mixing Edible Colors
Edible gel colors provide vibrant hues without affecting the icing’s texture. Liquid food coloring, in contrast, can thin the icing too much, making it harder to work with. Start by adding a small amount of gel color and mix well. If you need a darker shade, let the icing sit for a few hours—colors deepen over time.
For graduation cookies, classic colors like black, gold, navy blue, and red create an elegant look. If you want a personalized touch, match the icing colors to the school’s official colors.
By using the right royal icing consistency and high-quality edible colors, your graduation cookies will look stunning and professional. Now, let’s move on to using the best decorating tools for precise and creative designs!
Decorating Tools
Using the right decorating tools can make all the difference when creating custom graduation cookies. Whether you’re a beginner or an experienced baker, having the proper tools will help you achieve clean lines, smooth icing, and professional-looking designs.
Essential Tools for Cookie Decorating
To start decorating with ease, gather these essential tools:
- Piping Bags and Tips: A set of piping bags and various tips allows for precise detailing. A small round tip (such as #1 or #2) works well for fine lettering, while larger tips help with outlining and flooding.
- Scribe Tool or Toothpick: These tools help spread icing evenly, remove air bubbles, and fix small mistakes.
- Offset Spatula or Palette Knife: Great for spreading icing smoothly across large areas.
- Couplers: These allow you to switch piping tips without changing the bag, making decorating more efficient.
Tools for Advanced Decorating
If you want to take your cookie decorating to the next level, consider using these additional tools:
- Airbrush Kit: This tool allows you to create smooth color gradients, add shading, and achieve a professional finish.
- Stencil and Stencil Holder: Stencils help create intricate designs, such as school logos or detailed patterns, with royal icing or an airbrush.
- Edible Markers: Perfect for adding fine details, names, or even sketching designs before applying icing.
- Silicone Baking Mat: Provides a non-stick surface for working with delicate decorations like fondant accents.
Keeping Your Tools Clean and Organized
Clean tools ensure smooth icing application and prevent color contamination. After each use, wash piping tips, spatulas, and stencils thoroughly with warm, soapy water. Store them in an organized container to keep everything easily accessible for your next decorating session.
By using the right decorating tools and maintaining them properly, you can create stunning graduation cookies with ease. Next, let’s explore the best techniques for decorating like a pro!
Step-by-Step Guide to Making Custom Graduation Cookies
Preparing and Baking the Cookies
Baking the perfect custom graduation cookies starts with careful preparation. The process can be fun and rewarding, and ensuring you have the right techniques will make a big difference in the final product. This section covers everything from mixing your dough to baking the cookies to perfection. Let’s walk through the key steps to ensure your cookies come out delicious and beautiful.
1. Gathering the Ingredients
Before you start baking, make sure you have all your ingredients ready. The basic ingredients for sugar cookies typically include:
- Flour: Use all-purpose flour for a sturdy cookie dough.
- Butter: Use unsalted butter for the best flavor.
- Sugar: Granulated sugar will give the cookies a nice texture.
- Eggs: Eggs help bind the dough together.
- Vanilla Extract: This adds a delightful flavor to the cookies.
- Baking Powder: This will help the cookies rise slightly for a soft, chewy texture.
To ensure your cookies have a good balance of flavor and texture, make sure you measure the ingredients carefully. Too much flour can make the dough too dry, while too much butter can cause your cookies to spread too much while baking.
2. Preparing the Cookie Dough
Now that you have all the ingredients, it’s time to prepare the dough. Follow these steps:
- Cream the butter and sugar: Use a mixer to beat the butter and sugar together until light and fluffy. This helps create a smooth, consistent dough.
- Add eggs and vanilla: Mix in the eggs and vanilla extract until fully incorporated.
- Gradually add dry ingredients: In a separate bowl, whisk together the flour, baking powder, and any other dry ingredients. Gradually add this mixture to the wet ingredients while mixing on low speed. This will prevent the flour from flying out of the bowl.
- Chill the dough: Once your dough is fully mixed, wrap it in plastic wrap and refrigerate it for at least 1 hour. Chilling the dough will help it firm up, making it easier to roll out and cut into shapes.
3. Rolling Out the Dough
Once the dough has chilled, you’re ready to roll it out. Here’s how to do it:
- Prepare your work surface: Dust your countertop or work surface lightly with flour to prevent the dough from sticking.
- Roll the dough: Use a rolling pin to roll the dough to an even thickness, about 1/4 inch. If you roll it too thin, the cookies may become too crispy; if it’s too thick, they may not bake evenly.
- Cut the cookies: Use your custom cookie cutters to cut the dough into fun shapes. For graduation cookies, consider cutters shaped like caps, diplomas, or even the number for the class year. Make sure the cutters are well-floured to avoid sticking to the dough.
4. Baking the Cookies
Now it’s time to bake your cookies. Here are some key tips to ensure they bake perfectly:
- Preheat the oven: Always preheat the oven to the temperature specified in the recipe (typically around 350°F or 180°C).
- Place the cookies on a baking sheet: Arrange your shaped cookies on a baking sheet lined with parchment paper or a silicone baking mat. Leave enough space between each cookie to allow for even baking.
- Bake the cookies: Bake the cookies for 8 to 12 minutes, depending on their size and thickness. Keep an eye on them and remove them from the oven when the edges just begin to turn golden brown. The centers should look slightly soft.
- Cool the cookies: Allow the cookies to cool on the baking sheet for a few minutes before transferring them to a wire rack to cool completely. This will prevent them from breaking while they are still hot.
5. Ensuring Consistency in Baking
To ensure all your cookies bake evenly, there are a few tips you can follow:
- Use a light-colored baking sheet: Darker baking sheets tend to absorb more heat, which can cause cookies to burn. Opt for a light-colored or reflective baking sheet to ensure the cookies bake evenly.
- Rotate the baking sheet: If your oven has hot spots, rotate the baking sheet halfway through the baking process. This will help your cookies bake evenly across the sheet.
- Avoid overcrowding: Overcrowding the baking sheet can cause cookies to bake unevenly. Make sure there’s enough space between each cookie for heat circulation.
6. Cooling and Preparing for Decorating
Once your cookies have cooled, they are ready for decorating. Be sure the cookies are completely cool before you start decorating. If they’re even slightly warm, the icing may melt and become runny.
- Storage before decorating: If you’re not planning to decorate the cookies right away, store them in an airtight container to keep them fresh. They will stay good for a few days, but it’s always best to decorate them within 1-2 days of baking for optimal results.
Preparing Royal Icing
Royal icing is one of the most important components when it comes to decorating cookies. It’s versatile, dries hard, and can hold intricate designs. Whether you’re making detailed graduation cap designs or simply outlining the edges of your cookies, mastering royal icing is essential. Let’s dive into the steps for preparing royal icing and tips for achieving the perfect consistency for decorating your custom graduation cookies.
1. Ingredients for Royal Icing
Royal icing consists of just a few ingredients, but they need to be measured carefully to ensure the icing is smooth and holds its shape. Here are the essential ingredients:
- Powdered Sugar: Also known as icing sugar, powdered sugar is the base for royal icing. It provides sweetness and helps the icing set quickly.
- Egg Whites: Traditionally, royal icing is made with raw egg whites. They help give the icing its smooth texture and structure. If you’re concerned about using raw egg whites, you can use pasteurized egg whites or meringue powder as a substitute.
- Lemon Juice or Cream of Tartar: These acidic ingredients help stabilize the icing. They also enhance the flavor and prevent the icing from becoming too stiff.
- Water: Small amounts of water help achieve the right consistency, allowing for smooth mixing and easy spreadability.
Make sure you use fresh ingredients to ensure the best results. Powdered sugar should be sifted to remove any lumps before mixing.
2. Mixing the Royal Icing
Now that you have your ingredients, let’s get mixing:
- Start with egg whites: If you’re using raw egg whites, place them in a clean, dry mixing bowl. If you’re using meringue powder, mix the powder with water as per the package instructions.
- Add powdered sugar: Gradually sift powdered sugar into the bowl with egg whites. Start mixing on low speed to avoid sugar dust clouds, then increase the speed to medium-high. Mix until the mixture becomes smooth and shiny.
- Incorporate the lemon juice: Add a few drops of lemon juice or cream of tartar to help stabilize the icing and prevent it from becoming too runny.
- Adjust with water: If the icing is too stiff and hard to work with, add a few drops of water at a time. Conversely, if it’s too runny, add more powdered sugar until the consistency thickens. You’re aiming for a consistency that’s stiff enough to hold its shape but soft enough to pipe easily.
3. Consistency of Royal Icing
The key to successful royal icing decoration is getting the right consistency. You’ll need different consistencies for different techniques, so here’s a breakdown:
- Stiff Consistency: This consistency is perfect for outlining your cookies and making detailed decorations like graduation caps or diploma designs. To test the stiffness, lift your mixer attachment or spatula, and the icing should hold its shape without drooping.
- Medium Consistency: This is ideal for filling in shapes or flooding your cookies. You’ll want the icing to spread easily but not run off the edge of the cookies. You can test medium consistency by lifting your spatula and watching the icing slowly fall back into the bowl with a smooth, flowing motion.
- Flooding Consistency: This consistency is slightly thinner and used for flooding the surface of the cookies. You can test it by dragging a knife through the icing and seeing if it smooths out in 10-15 seconds.
To achieve these consistencies, start with a stiff batch of royal icing and then add small amounts of water until you reach the desired consistency. Always mix in water slowly so you don’t make the icing too runny.
4. Storing Royal Icing
Royal icing can dry out quickly, so it’s important to store it properly to keep it usable for your decorating session.
- Cover immediately: As soon as you’re done mixing, cover the icing with plastic wrap, ensuring the plastic touches the surface of the icing. This will prevent air from drying it out.
- Store in an airtight container: If you’re not using the icing right away, store it in an airtight container. You can keep it at room temperature for up to 24 hours, but if you plan on storing it for longer, refrigerate it.
- Rehydrate if needed: If the icing starts to harden or separate, add a few drops of water and mix gently to restore its consistency.
5. Coloring Royal Icing
For your graduation cookies, you might want to use different colors of royal icing to create colorful designs. Here’s how to color your icing:
- Gel food coloring: Liquid food coloring can make the royal icing too runny, so it’s best to use gel or paste food coloring. This type of coloring is more concentrated and doesn’t affect the consistency of the icing as much.
- Mixing the color: Start with a small amount of food coloring and add more until you reach the desired color. Be careful not to add too much, as it can change the texture of the icing. Mix the color in gently with a spoon or spatula to avoid air bubbles.
- Separate colors: If you need multiple colors, divide your icing into separate bowls and add different food coloring to each one.
6. Piping and Flooding with Royal Icing
Once you’ve prepared your royal icing, you’re ready to start decorating! Here’s a simple guide to piping and flooding your custom graduation cookies:
- Piping: Use a piping bag fitted with a small round tip (such as a #1 or #2) to outline the edges of the cookies or create intricate designs like graduation caps and messages. Be sure to apply gentle, consistent pressure as you pipe.
- Flooding: For larger areas of the cookie, you can flood the surface with a thicker consistency of royal icing. Fill in the outlined areas, using a toothpick or scribe tool to smooth out any air bubbles and spread the icing evenly to the edges.
Decorating Your Cookies
Decorating your custom graduation cookies is where your creativity shines. It’s the perfect opportunity to personalize your cookies and make them stand out at the celebration. Whether you’re making cookies in the shape of caps, diplomas, or the year of graduation, the possibilities are endless. Let’s walk through the steps to ensure your graduation cookies are not only beautiful but delicious too!
1. Choosing the Right Cookie Designs
Before you start decorating, decide on the types of designs you want for your cookies. The right design will help guide the decoration process and inspire your creativity.
- Graduation Caps: A classic design for any graduation party. You can make the cookies in the shape of a cap or simply decorate the top of round or square cookies to resemble a cap.
- Diplomas: These are easy to create using a rectangular cookie shape. You can add some intricate details like a ribbon or bow using royal icing.
- Graduation Year Numbers: Another popular option is making cookies in the shape of numbers representing the graduation year. This can be a fun way to incorporate the year into your decorations.
- School Logos or Mascots: If you’re feeling extra creative, consider making cookies that represent the school, whether it’s the school’s logo, mascot, or colors. These add a personalized touch to the cookies.
Choose designs that reflect the theme of the graduation party, but also consider how much time you have for decorating. Simple shapes are quicker to decorate, while more intricate designs may require more patience and precision.
2. Piping Your Outline
The first step in decorating your cookies is to pipe the outline using royal icing. Outlining your cookies helps create a clean boundary that prevents the flood icing from spilling over.
- Piping Bag Setup: Fill a piping bag with your royal icing, and use a small round tip (size #1 or #2). This will give you control over the delicate outlines.
- Outlining: Gently pipe along the edges of your cookie design. For example, if you’re making a graduation cap, start by outlining the square top and then the tassel or ribbon. This initial outline acts as a barrier for the flooding step and keeps the icing contained.
- Practice Steady Pressure: Apply steady, even pressure to the piping bag as you outline. It might take a little practice to get the right flow, so don’t be discouraged if the lines are a bit wobbly at first.
Once you’ve outlined your cookies, let the royal icing dry for about 15-20 minutes. This will allow the outline to set before moving on to the next step.
3. Flooding the Cookies
Flooding is the process of filling in the outlined sections of the cookies with a thicker or runnier royal icing, depending on the design. This is where you add color and smooth, even coverage to the cookie.
- Consistency: For flooding, your royal icing should have a medium to thin consistency. It should be able to spread easily without being too runny. If the icing is too thick, add a few drops of water to loosen it up.
- Flooding Method: Fill the piping bag with the flood icing (use the same tip or a larger one, such as a #3 or #4). Begin by outlining the section you want to flood, then slowly fill in the space. Use a toothpick or scribe tool to spread the icing evenly, making sure it reaches all the edges.
- Smooth Finish: Once the cookie is filled, gently shake it from side to side to help the icing settle and smooth out. You can also use the scribe tool to pop any air bubbles and smooth the surface if needed.
Allow the flooded cookies to dry for several hours to ensure the icing has fully set before moving on to additional decorations.
4. Adding Details with Royal Icing
After the base layer has dried, it’s time to add finer details. Royal icing gives you the flexibility to add intricate designs, from small dots to elaborate patterns.
- Text or Numbers: If you want to write a message on the cookies, such as “Congrats” or the graduation year, use royal icing to pipe the text. A fine round piping tip, like a #1 or #2, will help you write clearly.
- Tassels and Ribbons: For graduation cap cookies, use royal icing to pipe small tassels or ribbons. Start with the top of the tassel and pipe downward to create a flowing look.
- Small Dots and Lines: You can also use royal icing to add small dots, lines, or patterns to your cookies for extra detail. For example, small dots of yellow icing can represent the end of a tassel or the decoration on the scroll cookie design.
Let each detail dry before adding more to prevent smudging or mixing colors. The beauty of royal icing is that you can layer designs on top of each other once each layer is dry.
5. Using Edible Decorations for Extra Flair
While royal icing is essential, you can also use edible decorations to add a bit of sparkle and texture to your graduation cookies.
- Sprinkles: Edible sprinkles come in various shapes and colors, so they can add fun accents to your cookies. You can use star-shaped sprinkles for a celebratory look or use school colors to match the party theme.
- Sugar Pearls: Sugar pearls or nonpareils are perfect for creating elegant details, like on the tips of a graduation cap or the border of a diploma cookie.
- Edible Markers: For more intricate designs, edible markers can help you write or draw directly onto your cookies. They are especially great for fine lines or detailed graduation symbols that are difficult to achieve with royal icing.
Add sprinkles or other edible decorations once the royal icing has set. This will keep the design looking clean and prevent smudging.
6. Final Touches and Drying
After decorating, your cookies need time to dry and set completely. Royal icing can take anywhere from 6 to 8 hours to fully harden, depending on the thickness of your icing. Be patient and avoid touching the cookies until the icing is firm.
Once they’re dry, you can inspect your cookies for any final touches. You may want to add a little more detailing or reapply any accents that need extra color.
7. Packaging and Presentation
Finally, don’t forget about how you’ll present your beautiful graduation cookies. You can use cellophane bags tied with ribbons in the school’s colors, or place them on decorative platters for guests to enjoy. Consider adding a personal touch by labeling each cookie with a small tag or name for a fun and unique way to hand out treats.
Popular Graduation Cookie Designs and Themes
Graduation Cap Cookies
Graduation cap cookies are a must-have for any graduation celebration. They are not only fun to make but also add a personalized touch to the party. These cookies can be decorated in a variety of ways, from classic black and gold to your school colors or even more elaborate designs with tassels and small embellishments. Here’s how you can make and decorate your own graduation cap cookies.
1. Shaping the Graduation Cap Cookies
Before you start decorating, you need to prepare the base of your graduation cap cookies. Here’s how to shape the perfect graduation cap:
- Cookie Cutter or Freehand: If you have a graduation cap-shaped cookie cutter, it makes the process easier. If not, you can shape the cookies by hand. Start by cutting a square or rectangle for the top of the cap. Then, cut a small rectangle or trapezoid for the cap’s base. When these two parts are connected, they should resemble the look of a graduation cap.
- Size and Proportions: The size of your cookies depends on your preference. Some people opt for larger cookies, so they have plenty of room for decoration, while others prefer bite-sized versions. It’s important to ensure that the proportions between the cap and base are balanced for an authentic look.
- Baking: After shaping your cookies, bake them according to your recipe instructions. Allow them to cool completely before decorating, as warm cookies can cause the icing to melt or slide off.
2. Outlining and Flooding the Cookie
Once your cookies are cool and ready to decorate, it’s time to start with the icing.
- Outlining with Royal Icing: Begin by outlining the edges of the cookie with royal icing. Using a piping bag with a small round tip, trace the outline of the square top and the rectangular base. This outline will help you create clean lines and prevent the flooding icing from spilling over the edges.
- Flooding the Cookie: Once the outline is set, flood the cookie with royal icing to fill in the spaces. For graduation caps, a classic black or dark color works well for the top. The base of the cap can be decorated with a complementary color, such as gold, silver, or your school’s colors. Be sure to spread the icing evenly, and use a scribe tool or toothpick to smooth it out.
Let the flooding icing set for at least 15-20 minutes before proceeding with more detailed decorations. This will allow the base layer to dry enough to prevent smudging.
3. Decorating the Tassel
The tassel is one of the key features that give the graduation cap cookie its unique look. Here’s how you can decorate the tassel:
- Creating the Tassel: Use royal icing to pipe a thin line that hangs off the side of the cap, representing the string of the tassel. Then, pipe a small round dot at the bottom of the string to create the tassel’s hanging end.
- Adding Detail: For added detail, you can use a contrasting color for the tassel, like gold, yellow, or even your school’s colors. After piping the main part of the tassel, you can add extra lines or details using the same color to create a more realistic texture.
- Tassel Tips: If you want your tassel to look more realistic, pipe small lines coming off the hanging portion to give the illusion of threads. You can also create a small loop at the top of the string to mimic how a real tassel would be attached to a graduation cap.
Let the tassel dry for several hours before moving the cookie. The details are delicate, and letting the icing set will ensure the tassel maintains its shape.
4. Adding Decorative Touches
Now that you have your basic graduation cap cookie, it’s time to add extra details for a finished look. Here are some ideas for how you can enhance the design:
- Gold or Silver Borders: Consider adding a gold or silver outline around the edges of the cap or base. This adds a touch of elegance and highlights the shape of the cookie. You can also use edible glitter or gold leaf to make the cap sparkle and look even more festive.
- Monograms or Names: Personalize the cookies by adding the initials or name of the graduate. Use a fine piping tip and royal icing to carefully write the letters on the surface of the cookie. This adds a personal touch and makes each cookie even more special.
- School Colors: To make your cookies fit the theme of the graduation, use the school’s colors for the tassel, cap, or base. If you’re making these cookies for a group of graduates, consider creating a variety of cap cookies in different colors based on the school or the graduate’s favorite color.
5. Drying and Presentation
Once you’ve decorated your graduation cap cookies, be sure to let them dry completely before handling them. Royal icing can take several hours to set, so allow enough time for all the details to harden properly. This will prevent smudging or damage when you move or serve the cookies.
When the cookies are fully dry, you can present them in various ways:
- Individually Wrapped: Place each cookie in a cellophane bag and tie it with a ribbon. You can even add a small graduation-themed tag to each bag, such as “Congrats Grad!” or the graduate’s name.
- Cookie Platter: Arrange the decorated cookies on a large platter or cake stand to display them at the party. This creates a beautiful centerpiece that guests will enjoy.
- Graduation Party Favors: You can also give these decorated cookies as party favors. Wrap each cookie in a clear bag and tie it with a ribbon in the graduate’s school colors.
Final Thoughts
Graduation cap cookies are not only fun and festive but also a meaningful way to celebrate a milestone in a graduate’s life. By shaping the cookies with care, adding royal icing, and decorating them with personalized details like tassels, monograms, or school colors, you can create beautiful treats that everyone at the party will enjoy. With the right tools and a bit of creativity, you can master the art of decorating graduation cap cookies like a pro!
Diploma Cookies
Diploma cookies are a delightful and creative way to celebrate graduates. Shaped like rolled-up diplomas, these cookies bring a fun twist to the traditional graduation-themed treats. Decorating diploma cookies can be simple or intricate, depending on the look you’re aiming for. Whether you’re planning to hand them out as favors, use them as a table centerpiece, or add them to your dessert spread, diploma cookies are sure to be a hit at any graduation celebration.
1. Shaping the Diploma Cookies
The first step in making diploma cookies is shaping the dough. While you can use a rolled cookie cutter for easy shaping, it’s also possible to shape them by hand. Here’s how you can do it:
- Cutting the Basic Shape: Roll out your cookie dough to about 1/4 inch thick. Cut a long rectangle or oval for the body of the diploma. You can use a standard cookie cutter or simply cut the shape freehand with a sharp knife. For a more authentic diploma look, ensure the ends are slightly tapered, creating a slight curve that mimics a rolled-up paper.
- Rolled Look: To make the cookies look more like a rolled diploma, leave one side of the rectangle with a smaller edge, which will serve as the side you roll. You can gently bend the dough after baking or even create a slightly raised edge to help simulate the rolled paper look.
2. Baking the Diploma Cookies
Once your cookies are shaped, it’s time to bake them:
- Even Baking: Bake the diploma cookies according to your recipe’s instructions. Be sure to monitor the cookies closely as they bake, ensuring they are golden but not overdone. You want the cookies to be sturdy but soft enough for easy decoration and handling.
- Cooling: Let the cookies cool completely on a wire rack before decorating them. Warm cookies can make it difficult to apply icing or decorations without smudging.
3. Decorating the Diploma Cookies
After your diploma cookies are cooled and ready, it’s time to decorate. There are several ways to make your diploma cookies look festive and creative.
- Icing the Base: The first step in decorating the cookies is to cover them with royal icing or fondant. Royal icing works well for a smooth finish and can be colored to match school colors or other graduation-themed hues. Use a piping bag with a small round tip to outline the edges of the cookie. Once outlined, flood the inside with icing to create a smooth, uniform surface.
- Adding the Scroll Details: After the base layer is set, you can start adding the diploma’s signature details. One popular way to do this is by using edible gold or silver dust to create the effect of a ribbon or seal that ties the rolled-up paper. You can pipe icing in a small ribbon shape around the center of the rolled cookie to mimic the tie of a diploma.
- Personalizing the Design: To make the cookies more personalized, consider adding the graduate’s initials or graduation year. This could be piped directly onto the cookie or written with edible markers. If you want a fun twist, you could even decorate the diploma cookie to reflect the graduate’s major or hobbies—like adding mini books for a literature student or a small science flask for a chemistry graduate.
4. Using Colored Icing or Fondant
Using colored icing or fondant allows you to customize your diploma cookies and match them to the theme of the graduation party. Here are some ideas for using these materials:
- Colored Royal Icing: You can add vibrant colors to your diploma cookies using royal icing. Choose colors that represent the graduate’s school, or go with classic graduation colors like gold, silver, or black. To make a seamless look, you can cover the entire cookie with a layer of the icing and then pipe more intricate details such as ribbons, bows, or messages.
- Fondant: If you prefer working with fondant, it’s a great option for covering the cookie in a smooth layer. Roll out the fondant to match the size of your cookie and cut out shapes. Place the fondant on top and use tools to smooth out the edges. Fondant can be easily molded into small ribbons, seals, and other decorations that add to the look of the rolled-up diploma.
5. Adding Special Touches
To make your diploma cookies stand out even more, consider adding small decorative touches that elevate the design:
- Edible Glitter: Sprinkling a little edible glitter on the cookies can give them an extra sparkle and make them look festive. This is especially effective for a graduation party, as the glitter mimics the celebratory nature of the event.
- Small Edible Seals: You can make edible seals out of fondant or royal icing by piping out a small circle and adding intricate details inside. Use this edible seal to place on the center of the rolled-up cookie, adding a classy touch.
- Graduation Cap Toppers: For an additional decorative element, you can place tiny fondant graduation caps on top of your diploma cookies. These can be shaped out of fondant or molded into small pieces to fit perfectly atop your decorated cookies.
6. Packaging the Diploma Cookies
After your diploma cookies are decorated, you’ll want to package them to ensure they stay fresh and presentable. Here are some ideas for presenting them as party favors or treats:
- Individually Wrapped: Wrap each diploma cookie in a clear cellophane bag and tie it with a ribbon. You can even choose a ribbon in the graduate’s school colors to make the packaging extra personalized.
- Cookie Platters: Arrange your diploma cookies on a large platter or cake stand for a beautiful presentation. This creates a visually stunning centerpiece for your graduation dessert table. You can also mix and match the diploma cookies with other graduation-themed cookies, like caps or diplomas, for a well-rounded treat display.
Final Thoughts
Diploma cookies are an excellent way to add a personal touch to a graduation celebration. With a little creativity and attention to detail, you can create beautifully decorated cookies that resemble real diplomas. Whether you’re making them for a graduation party or giving them as gifts, these cookies will make the event feel even more special. By shaping, baking, decorating, and adding personalized touches, you can easily master the art of diploma cookies and impress everyone at your celebration.
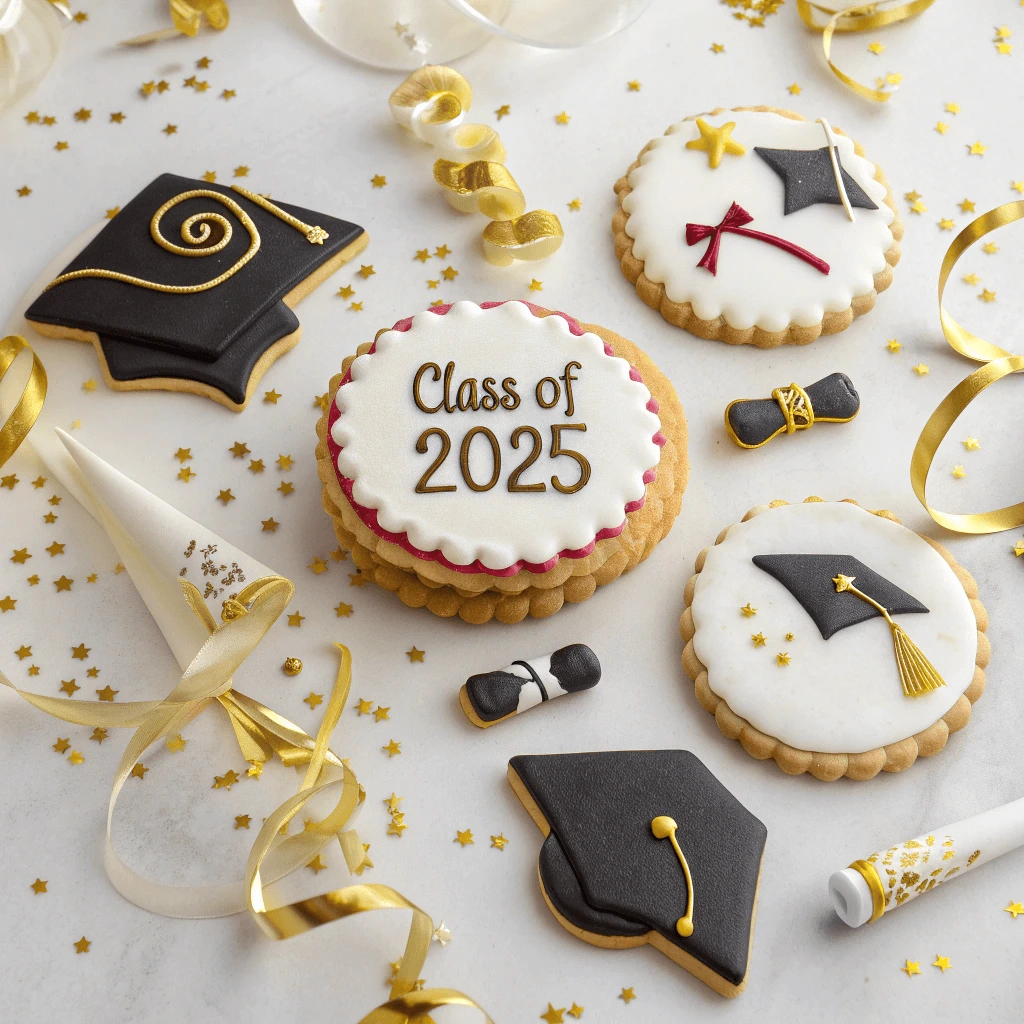
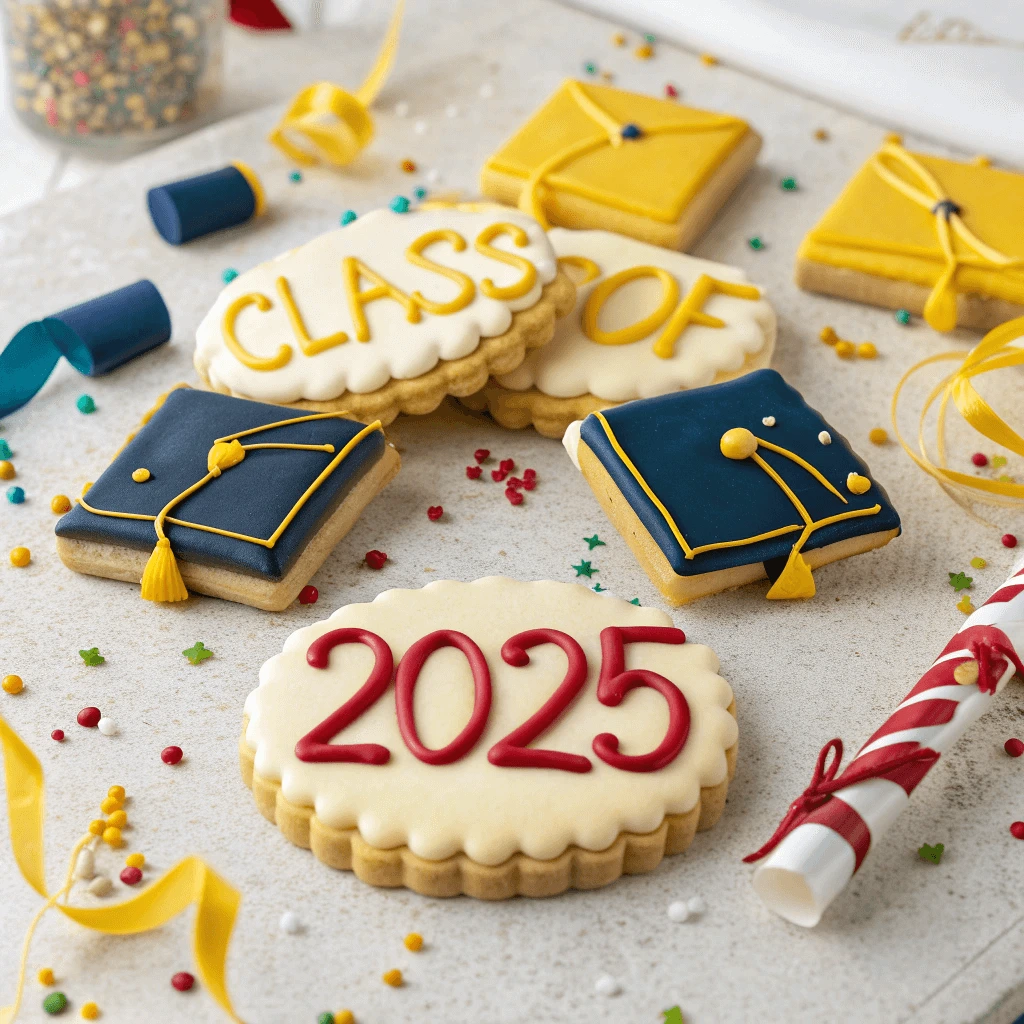
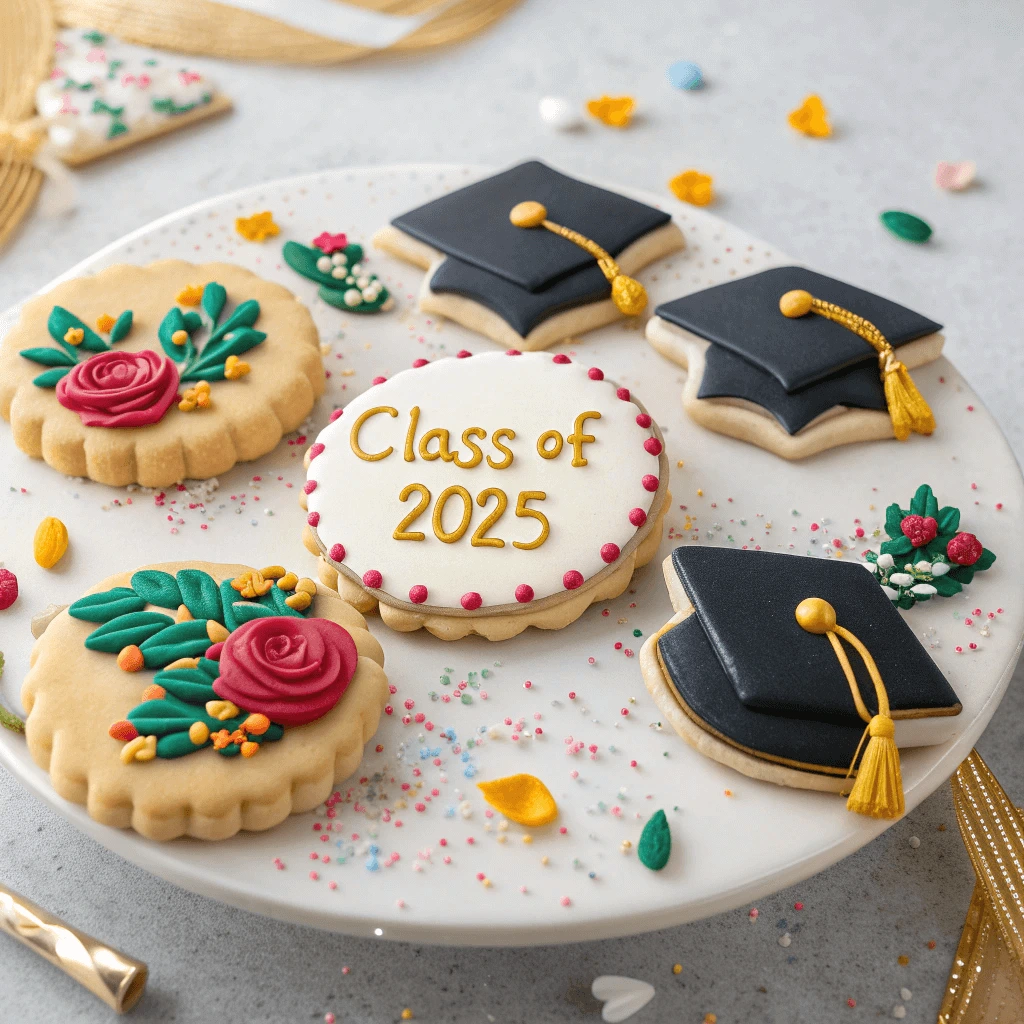
Class of 2025 Cookies
Creating cookies to celebrate the “Class of 2025” is a fun way to commemorate a special milestone. Whether you’re baking for a graduation party or crafting personalized gifts for graduates, Class of 2025 cookies can be a unique way to honor the class. The best part about these cookies is that they offer a lot of room for creativity, from using the year itself as the main design element to incorporating school colors, mascots, or other iconic symbols. Below are tips on how to make your Class of 2025 cookies stand out.
1. Shaping Your Class of 2025 Cookies
The first step in creating your Class of 2025 cookies is determining what shapes you want to use. You could use simple round or square shapes or get creative with custom cookie cutters. Here are some ideas for shaping your cookies:
- Number Shaped Cookies: Use cookie cutters in the shape of numbers, specifically “2,” “0,” “2,” and “5,” to create individual cookies that form the full year when placed together. These can be decorated to highlight the graduating class.
- Graduation Cap Shape: A graduation cap is one of the most recognizable symbols of graduation. You can create cookies shaped like caps and decorate them with “Class of 2025” written across the cap, or use the year as a part of the tassel design.
- Custom-Shaped Cutters: If you want to go the extra mile, use custom cookie cutters shaped like a diploma or even a school building. A combination of different shapes like these will make the Class of 2025 cookies a fun and dynamic addition to your party.
2. Decorating with Class of 2025 Theme
Once you’ve baked the cookies and allowed them to cool, it’s time to start decorating them. Class of 2025 cookies should represent the spirit of the graduation year and the memories of students. Here are a few decorating techniques to consider:
- Using Edible Markers: Write the numbers “2025” on the cookies using edible food markers. You can draw out the digits on individual cookies or spell out “Class of 2025” on a larger, more visible cookie for a centerpiece.
- Royal Icing Designs: Royal icing allows for precision and detail when decorating cookies. You can use royal icing to write “Class of 2025” or “Congrats” in beautiful script across the surface of each cookie. To add extra flair, consider using metallic edible paints in gold or silver to make the text shine.
- Incorporating School Colors: If you’re baking for a specific school, use the school’s official colors to decorate the cookies. You can color the royal icing or fondant in the school’s colors and use sprinkles, edible glitter, or colored sugar to further personalize the design.
3. Adding Personal Touches
To make these cookies even more special, add personal touches that reflect the achievements of the Class of 2025. Here are some ways to incorporate custom designs:
- Student Names: If you’re making cookies for a specific group of graduates, consider adding their names or initials to individual cookies. This makes the cookies feel more personalized and allows each student to feel special.
- Icons and Symbols: Depending on the interests or achievements of the class, you can incorporate specific symbols. For example, you could add small icons of books for academic achievements, a football for sports accomplishments, or even musical notes for students involved in the arts. These small details can make the cookies even more meaningful.
- Mini Graduation Caps: Use fondant or royal icing to craft tiny graduation caps and place them on top of the cookies as additional decorations. These can be placed on the number-shaped cookies, or even arranged on a larger, round cookie to mimic the shape of a cap.
4. Decorating with Royal Icing and Fondant
Royal icing and fondant are the most common mediums used for decorating Class of 2025 cookies. Both options provide you with the flexibility to create clean, professional-looking designs. Here’s how to use each:
- Royal Icing: Royal icing is ideal for achieving smooth, precise designs. You can pipe thin lines, write text, or flood the surface with a single color. For Class of 2025 cookies, consider flooding the cookie with a single color that complements your overall theme, such as the school’s colors or a graduation gold. After flooding, you can use thinner royal icing to pipe finer details, like the year “2025” or a congratulatory message.
- Fondant: Fondant gives cookies a smooth, polished appearance and can be easily molded into different shapes. Roll out the fondant, cut it into the desired shape (such as the number “2” or a cap), and carefully apply it to the top of the cookie. You can then decorate the fondant with smaller details, like a ribbon or additional designs in edible food paint.
5. Final Touches and Presentation
Once your cookies are decorated, you’ll want to focus on presenting them. Packaging plays a key role in making your Class of 2025 cookies look even more professional and celebratory. Here are some ideas for presentation:
- Individually Wrapped Cookies: Wrap each cookie in a clear cellophane bag and tie it with a ribbon in your school’s colors or a metallic hue. This will help preserve the cookies and make them look even more festive. Personalized tags with the graduate’s name or a thank-you message can also be added for a more special touch.
- Cookie Platters: Arrange your decorated Class of 2025 cookies on a large, elegant platter or cake stand for an impressive display. You can mix and match different designs, such as cookies with the year “2025” and others shaped like graduation caps, to make a beautiful cookie table centerpiece.
- Gift Boxes: If you are gifting these cookies to the graduate or using them as party favors, consider placing them in small gift boxes lined with tissue paper. Add a personalized note or tag for that extra thoughtful touch.
Common Decorating Mistakes to Avoid
Overworking the Icing
Overworking royal icing is a common mistake when decorating cookies. It can cause the icing to lose its smooth texture, become too thin or thick, and affect your final design.
1. What Does “Overworking” the Icing Mean?
Overworking refers to mixing or handling royal icing too much. This can lead to a runny, crumbly texture or a lack of gloss, which are undesirable in decorated cookies.
2. Signs You’ve Overworked the Icing
- Too Thin: Icing runs off the cookie and doesn’t hold its shape.
- Dry or Crumbly: The icing loses its smoothness, making it hard to pipe or smooth.
- Loss of Gloss: Properly mixed icing should shine. Overworked icing may appear dull.
3. How to Avoid Overworking the Icing
- Mix Carefully: Stir the icing only until it reaches the desired consistency.
- Use Low Speed: If using an electric mixer, keep the speed low to avoid over-aerating the icing.
- Work in Small Batches: Mix and pipe small amounts of icing at a time to prevent overhandling.
4. Fixing Overworked Icing
- Thin It Out: Add a few drops of water to restore consistency.
- Rest the Icing: Let it sit for a few minutes to regain smoothness.
- Re-whip It: Mix gently to bring back stability without over-aerating.
By avoiding overworking the icing, you’ll achieve smooth, glossy finishes and beautiful cookie designs every time!
Cookie Spread Issues
Cookie spread issues can be frustrating, especially when you expect perfectly shaped, uniform cookies. Understanding the common causes of cookie spread and how to fix them can help you achieve the ideal results every time.
1. What Causes Cookies to Spread?
Several factors influence how much your cookies spread while baking. These include the dough’s temperature, the type of fat used, and the ratio of ingredients.
- Dough Temperature: Warm cookie dough tends to spread more in the oven. If your dough is too soft, it may lose its shape.
- Butter: Too much butter or melted butter can cause excessive spreading. Cold butter is often better for keeping the shape intact.
- Flour-to-Fat Ratio: If the ratio of flour to fat is unbalanced, the cookies may spread too much.
- Leavening Agents: Using too much baking soda or baking powder can cause cookies to spread more than intended.
2. How to Prevent Excessive Cookie Spread
Knowing the right techniques can help you prevent unwanted spreading and keep your cookies looking perfect.
- Chill the Dough: One of the best ways to prevent spreading is to chill your dough for at least 30 minutes before baking. This helps solidify the fat in the dough, keeping the cookies from spreading too much.
- Use the Right Butter Consistency: For most cookie recipes, use softened butter (not melted) to help control spreading.
- Don’t Overwork the Dough: Overworking the dough can lead to cookies that spread more. Mix the dough just until combined.
- Add Extra Flour: If your dough is too soft, adding a little extra flour can help stiffen it up and reduce spreading.
3. Troubleshooting Cookie Spread
If your cookies still spread too much, consider these adjustments:
- Check Your Oven Temperature: An oven that runs too hot can cause cookies to spread too quickly. Use an oven thermometer to ensure your oven is at the right temperature.
- Use a Silpat or Parchment Paper: Baking cookies on a Silpat or parchment paper can help provide a consistent surface for even baking and prevent excessive spreading.
- Adjust the Amount of Sugar: A higher sugar content can lead to more spread. Consider reducing the sugar slightly if your cookies are spreading too much.
4. What to Do If Cookies Spread Anyway
If your cookies have already spread too much in the oven, don’t worry. There are ways to fix or salvage them.
- Shape After Baking: If the cookies have spread more than desired, gently use a cookie cutter to shape them while they are still warm.
- Use Cookie Cutters for Consistency: Pre-shaping the dough with cookie cutters can help control the shape, even if the dough spreads a bit.
Uneven Decoration
Uneven decoration can be a common problem when decorating cookies, especially when you’re aiming for professional-looking results. Fortunately, several factors contribute to uneven decoration, and understanding them can help you avoid this issue. By applying a few simple tips and techniques, you can achieve a smooth and uniform appearance for your decorated cookies every time.
1. Why Does Decoration Become Uneven?
Uneven decoration can happen for various reasons, from inconsistencies in icing to improper application techniques. Here are some common causes:
- Inconsistent Icing Consistency: If your royal icing is too thick, it won’t spread evenly on the cookie. If it’s too thin, it may flood the surface unevenly or drip off the edges.
- Uneven Application: When decorating, using the wrong type of tool or applying icing in an unsteady hand can lead to uneven coverage.
- Imbalanced Pressure: Applying inconsistent pressure when piping or spreading icing can result in an uneven texture and finish on the cookies.
2. How to Achieve Even Decoration
To create smooth and evenly decorated cookies, you need to control the consistency of your icing and the way you apply it. Follow these tips for uniform results:
- Control Icing Consistency: Aim for the right consistency by adjusting the thickness of your royal icing. The icing should flow smoothly but still hold its shape. To check consistency, dip a spoon into the icing and see if it runs off slowly. If it runs too fast, it may be too thin; if it clumps, it’s too thick.
- Use the Right Tools: Invest in quality piping tips, brushes, and spatulas to help you achieve even coverage. A thin piping tip is great for fine details, while a wider tip works better for covering larger areas. For smoother edges, use a small spatula or offset spatula to spread the icing evenly.
- Practice Steady Hand Techniques: Apply even pressure when using piping bags or squeeze bottles. When piping outlines or flooding, try to keep a steady, consistent motion. If you’re using a brush to spread the icing, avoid overloading the brush with too much icing, which can cause streaks.
3. Fixing Uneven Decoration
Even experienced bakers sometimes end up with uneven decoration. If you notice that your decorated cookies have uneven spots, you can fix them with these simple tricks:
- Smooth Out With a Toothpick or Spatula: After applying the icing, use a toothpick or offset spatula to smooth out the surface and remove any lumps. Gently drag the tool across the surface in one direction to achieve an even layer of icing.
- Touch Up After Drying: If your icing dries unevenly, use a clean piping bag to add more icing to the areas that need more coverage. Afterward, smooth the icing with a spatula for a consistent finish.
- Use a Sprayer for Finishing Touches: For a smooth, professional look, you can use an airbrush or icing sprayer to add a thin layer of color. This technique ensures an even coating across the entire cookie.
4. Practice Makes Perfect
Like any decorating technique, achieving even decoration takes practice. The more you practice piping and spreading icing, the more comfortable you will become with controlling the tools and achieving an even finish. Take the time to experiment with different designs and tools until you perfect your decorating style.
Storing and Packaging Your Custom Graduation Cookies
Storing Decorated Cookies
Properly storing decorated cookies ensures they stay fresh and intact. Follow these tips to preserve your creations:
1. Drying the Cookies
Before storing, let your decorated cookies dry completely. Royal icing needs at least 4 to 12 hours to set. Keep them on a flat surface to prevent smudging.
2. Choosing the Right Storage Container
Store cookies in airtight containers to keep them fresh. Plastic or glass containers work well, and you can use parchment paper between cookies to avoid sticking.
3. Room Temperature Storage
For short-term storage (up to a week), keep the cookies at room temperature in an airtight container. Make sure the cookies are placed in a dry, cool area, away from sunlight.
4. Freezing for Long-Term Storage
If you need to store cookies for longer periods, freeze them. Lay them flat on a baking sheet to freeze, then transfer to an airtight container or freezer bag. To thaw, let the cookies sit at room temperature.
5. Special Decoration Considerations
For cookies decorated with fondant, edible markers, or glitter, store them in a cool, dry place. Avoid humidity to prevent decorations from melting or fading.
With these storage tips, your decorated cookies will stay fresh and beautiful until you’re ready to enjoy them.
Creative Packaging Ideas
Packaging plays a crucial role in presenting your decorated cookies, especially when giving them as gifts or for a special event. Creative packaging can make your cookies look even more enticing while keeping them safe. Here are some fun and unique ideas to help you package your custom cookies like a pro:
1. Clear Cellophane Bags
Clear cellophane bags offer a simple yet elegant way to package your cookies. These bags allow your decorated cookies to be the focal point while keeping them secure. You can tie the bags with decorative ribbon or twine to match the theme of the event. For an extra personal touch, add a thank-you note or a personalized label.
2. Cookie Boxes
For a more polished presentation, consider using custom cookie boxes. These boxes are available in various sizes, allowing you to pack several cookies together. You can line the inside with tissue paper or crinkle paper for added cushioning and visual appeal. Personalize the box with a sticker or a special message to make the packaging extra special.
3. Tin Containers
Tin containers offer a great way to store cookies while keeping them fresh. They come in various shapes and sizes and can be decorated with ribbons, stickers, or labels to fit the theme of the occasion. Tin containers are also a practical option since they can be reused later, making them a sustainable choice for packaging your cookies.
4. Cookie Jars
If you’re looking for something unique, a personalized cookie jar can make a lasting impression. You can use jars with airtight lids to keep your cookies fresh for a longer time. To add a personal touch, decorate the jar with stickers, paint, or a ribbon to match the graduation or event theme. This option is great for larger batches of cookies.
5. Glassine Envelopes
For an elegant and minimalistic approach, use glassine envelopes. These envelopes are ideal for small batches of cookies and give a vintage, classy vibe. You can seal them with a wax stamp or a decorative sticker for an extra special finish. Glassine envelopes work well for sending cookies by mail or handing them out at events.
6. Decorative Paper Bags
Decorative paper bags offer a rustic charm that works well for casual or outdoor events. You can find them in a variety of colors and patterns, or even customize them with stamps or designs that fit the occasion. Add a ribbon or twine around the bag for an extra pop, and these bags will keep your cookies both secure and stylish.
7. Personalized Labels and Tags
Adding personalized labels and tags to your packaging can give it a unique touch. Print custom labels with your name, the event details, or a thank-you message. You can also attach a tag that describes the flavor of the cookies or shares a special memory related to the event.
8. Themed Packaging
If you’re packaging cookies for a specific theme, such as a graduation, birthday, or wedding, customize the packaging to match. Use school colors, graduation caps, or class year numbers as inspiration. Customization will make your cookies stand out and show extra thoughtfulness, especially for special occasions like graduations.
Shipping Cookies Safely
Shipping cookies can be tricky, but with the right steps, your cookies can arrive fresh and intact. Here’s how to ship cookies safely:
1. Pick Sturdy Cookies
Choose cookies that are firmer and less likely to break, like shortbread or biscotti. Soft cookies or those with icing may not handle shipping as well.
2. Cool the Cookies
Make sure cookies are completely cool before packing to avoid softness or sticking to packaging.
3. Use Airtight Packaging
Seal cookies in airtight bags or containers to preserve freshness. Place parchment paper between decorated cookies to prevent smudging.
4. Cushion the Cookies
Pack the cookies in a sturdy box with padding, such as bubble wrap or tissue paper, to prevent shifting and damage during transit.
5. Seal the Box Tight
Secure the box with strong tape along all edges to avoid it coming open during shipping.
6. Choose a Reliable Shipping Service
Opt for a reliable shipping service with expedited delivery options to ensure your cookies arrive fresh.
7. Label the Box Clearly
Label the box with the recipient’s address, adding “Fragile” or “Perishable” to ensure careful handling.
8. Avoid Extreme Weather
Don’t ship during extreme heat or cold, as it can affect the cookies’ quality. Use ice packs if necessary in warmer conditions.
Conclusion
Custom graduation cookies are a fun way to celebrate the big day. From choosing the right dough to decorating with royal icing, the process is full of creative opportunities. Don’t be afraid to experiment with different themes and designs.
Get inspired and share your cookie creations on social media with #GraduationCookies. We’d love to hear your favorite design ideas in the comments!