Graduation is a special milestone that deserves a sweet celebration! Whether you’re hosting a party or gifting treats, DIY graduation cookies add a personal touch. With the right tools and simple techniques, you can create beautifully decorated cookies that impress guests.
This guide will teach you easy decorating tips and tricks for graduation cookies. You’ll learn how to choose the best shapes, master icing techniques, and add creative details. Whether you’re a beginner or an experienced baker, these ideas will help you make festive cookies that celebrate the graduate in style. Let’s get started! 🎓🍪
Essential Tools and Ingredients for DIY Graduation Cookies
Must-Have Baking Tools for DIY Graduation Cookies
Before decorating graduation cookies, you need the right baking tools. These essentials will help you create perfect cookies with clean edges and smooth surfaces.
1. Cookie Cutters for Graduation-Themed Shapes
Graduation-themed cookie cutters allow you to create fun and festive designs. Look for shapes like:
- Graduation caps – A must-have for any celebration.
- Diplomas – Rolled-up scroll shapes add variety.
- Stars and Numbers – Perfect for featuring “Class of 2025.”
If you don’t have themed cutters, you can use a sharp knife or templates to hand-cut designs.
2. Rolling Pin for Even Dough Thickness
A rolling pin helps flatten dough evenly, ensuring uniform baking. Choose from these options:
- Adjustable rolling pins – They let you control thickness precisely.
- Classic wooden rolling pins – These provide a traditional feel and smooth rolling.
- Silicone rolling pins – Non-stick surfaces prevent dough from sticking.
Rolling dough evenly prevents some cookies from baking too quickly while others remain undercooked.
3. Piping Bags and Tips for Detailed Decorating
A good piping set is essential for decorating. Use:
- Reusable or disposable piping bags – Reusable ones are eco-friendly, while disposables save cleanup time.
- Piping tips – Fine tips work for detailed writing, while wider ones are great for flooding cookies with icing.
- Squeeze bottles – A great alternative for beginners who want more control.
For smooth icing application, hold the bag at a 45-degree angle and apply gentle pressure.
4. Baking Sheets and Silicone Mats for Even Baking
Quality baking sheets help cookies bake evenly without burning. Choose:
- Aluminum baking sheets – These distribute heat evenly.
- Silicone baking mats – They prevent cookies from sticking and reduce the need for parchment paper.
- Parchment paper – If you don’t have silicone mats, this works as a great alternative.
Place cookies at least an inch apart to prevent them from merging while baking.
5. Cooling Racks to Prevent Overbaking
Once cookies come out of the oven, transferring them to a cooling rack stops the baking process. Cooling racks allow air to circulate, preventing soggy or overbaked bottoms. Choose racks with:
- Sturdy, non-stick material – Ensures cookies don’t break.
- Multiple layers – Saves counter space when cooling large batches.
- Evenly spaced wires – Provides proper airflow for consistent cooling.
Using a cooling rack ensures that cookies remain crisp and ready for decorating.
Key Ingredients for DIY Graduation Cookies
The right ingredients make all the difference when baking and decorating graduation cookies. Using high-quality ingredients ensures your cookies taste delicious and hold their shape for decorating. Below are the essential ingredients you’ll need.
1. Cookie Dough for a Sturdy Base
A strong cookie base helps decorations stay intact. The best options include:
- Sugar Cookie Dough – Holds its shape well and has a neutral flavor that pairs with any decoration.
- Shortbread Dough – Buttery and firm, making it a great choice for clean edges.
- Chocolate Cookie Dough – Adds variety and a rich taste while still being sturdy.
For best results, chill the dough before cutting shapes. This prevents spreading and keeps designs crisp.
2. Royal Icing for Smooth Decoration
Royal icing is essential for creating detailed graduation cookies. It dries hard, making it ideal for intricate designs. You’ll need:
- Powdered Sugar – Provides the base for smooth, sweet icing.
- Egg Whites or Meringue Powder – Helps icing dry with a firm finish.
- Lemon Juice or Vanilla Extract – Adds flavor and balances the sweetness.
Adjust icing consistency depending on your design. Use thicker icing for outlines and thinner icing for flooding.
3. Edible Decorations for Extra Flair
Decorative toppings bring your graduation cookies to life. Some popular choices include:
- Edible Markers – Perfect for writing “Class of 2025” or drawing details.
- Fondant – Can be shaped into graduation caps, diplomas, or numbers.
- Sprinkles & Edible Glitter – Adds color and texture to your cookies.
Using the right combination of ingredients ensures your graduation cookies look and taste amazing. Experiment with different decorations to match your celebration theme!
Where to Buy Supplies for DIY Graduation Cookies
Having the right supplies makes decorating graduation cookies easier and more enjoyable. Whether you prefer shopping in-store or online, several options offer high-quality ingredients and tools. Below are the best places to find everything you need.
1. Local Baking Supply Stores
Specialty baking stores carry a wide selection of cookie cutters, decorating tools, and high-quality ingredients. Shopping in person allows you to see the products up close and get expert advice. Some stores even offer custom cookie cutters for personalized designs.
Look for:
- Specialty cookie cutters in graduation cap, diploma, or number shapes.
- High-quality food coloring and edible markers for detailed decorations.
- Piping bags, tips, and other icing tools for precision.
Check local directories or ask fellow bakers for recommendations on the best baking supply stores in your area.
2. Grocery Stores and Supermarkets
Most major grocery stores carry essential baking supplies. While their selection may be limited, they provide a convenient option for last-minute shopping.
What you can find:
- Flour, sugar, eggs, and butter for making the cookie dough.
- Powdered sugar, meringue powder, and vanilla extract for royal icing.
- Basic cookie cutters and food coloring in the baking aisle.
For more variety, visit larger supermarkets with dedicated baking sections.
3. Online Retailers for a Wider Selection
Online shopping offers convenience and access to unique decorating tools. Websites like Amazon, Etsy, and specialty baking stores provide a broad selection of cookie cutters, edible decorations, and custom supplies.
Top online sources:
- Amazon – Sells a variety of baking tools, from rolling pins to edible markers.
- Etsy – Offers custom cookie cutters and handmade decorations.
- Baking Supply Websites – Stores like Wilton and Sugar Art specialize in professional-quality baking products.
Ordering online allows you to compare prices and find unique items not available locally. Plan ahead to allow time for shipping.
4. Craft Stores for Decorative Supplies
Craft stores like Michaels, Hobby Lobby, and Joann Fabrics carry a range of cookie decorating supplies. These stores often have seasonal sections where you can find graduation-themed items.
What to buy:
- Fondant tools and molds for creating edible decorations.
- Stencils and airbrushing kits for professional-looking designs.
- Cake boards and treat bags for packaging your cookies as gifts.
Many craft stores also offer coupons and discounts, making them a budget-friendly option.
5. Wholesale Clubs for Bulk Supplies
If you’re baking a large batch of graduation cookies, wholesale clubs like Costco, Sam’s Club, and BJ’s offer bulk ingredients at lower prices.
Best bulk purchases:
- Flour, sugar, and butter for making multiple cookie batches.
- Large packs of eggs and vanilla extract for royal icing.
- Bulk food coloring and sprinkles for decorating many cookies.
Buying in bulk saves money and ensures you have enough supplies for all your cookie-making needs.
How to Bake the Perfect Graduation Cookies
Best Cookie Dough for Decorating
Choosing the right cookie dough is essential for creating beautifully decorated graduation cookies. The best dough holds its shape well, provides a smooth surface for icing, and tastes delicious. Below are some of the top options, along with tips for preparing and handling them.
1. Classic Sugar Cookie Dough
Sugar cookie dough is the most popular choice for decorated cookies. Its sturdy texture and mild sweetness make it ideal for icing and detailed designs.
Why it works:
- Holds its shape well during baking.
- Provides a smooth surface for decorating.
- Has a neutral flavor that pairs well with any icing.
Pro Tips:
- Chill the dough before rolling it out to prevent spreading.
- Roll the dough evenly to about ¼ inch thick for consistent cookies.
- Use a sharp-edged cookie cutter for clean lines.
2. Shortbread Cookie Dough
Shortbread dough creates rich, buttery cookies with a crumbly texture. It is slightly more delicate than sugar cookie dough but still works well for simple designs.
Why it works:
- Has a tender, melt-in-your-mouth texture.
- Requires fewer ingredients, making it easy to prepare.
- Holds intricate shapes with minimal spreading.
Pro Tips:
- Handle the dough gently to prevent overworking the butter.
- Use a lower baking temperature for an even, golden color.
- Avoid using excessive icing, as shortbread is more delicate.
3. Chocolate Cookie Dough
Chocolate cookie dough adds a rich cocoa flavor while still being firm enough for decorating. It offers a darker base, making white or brightly colored icing stand out.
Why it works:
- Adds variety to a cookie platter with a bold chocolate taste.
- Holds its shape well, similar to sugar cookie dough.
- Pairs beautifully with vanilla or cream cheese frosting.
Pro Tips:
- Use Dutch-processed cocoa powder for a deeper chocolate flavor.
- Reduce the sugar slightly if you plan to use a very sweet icing.
- Chill the dough for at least 30 minutes before cutting shapes.
4. Gingerbread Cookie Dough
While gingerbread is commonly associated with the holidays, it also works well for graduation-themed cookies. The warm spices and firm texture make it a great option for sturdy, decorated cookies.
Why it works:
- Offers a unique, spiced flavor.
- Creates strong cookies that hold their shape.
- Complements royal icing and fondant decorations.
Pro Tips:
- Use molasses for a rich color and chewy texture.
- Let the cookies cool completely before decorating to prevent icing from melting.
- Pair with vanilla or lemon icing for a balanced flavor.
Tips for Even Baking
Evenly baked cookies ensure a professional look and consistent texture, making decorating easier. Follow these essential tips to prevent uneven browning, undercooked centers, or overly crisp edges.
1. Use the Right Baking Sheet
The type of baking sheet affects how cookies bake. A light-colored, heavy-gauge aluminum baking sheet is the best option because it distributes heat evenly.
Tips for better results:
- Avoid dark baking sheets, as they absorb too much heat and can burn the bottom of the cookies.
- Use rimless baking sheets or flip a rimmed sheet upside down for better airflow.
- Line the baking sheet with parchment paper or a silicone mat to prevent sticking and ensure even browning.
2. Roll Dough to a Consistent Thickness
Uneven dough thickness causes cookies to bake at different rates, leading to some being overcooked while others remain soft in the center.
How to achieve uniform thickness:
- Use rolling pin guides or rolling pin rings to maintain a consistent height.
- Roll the dough between two sheets of parchment paper to prevent sticking.
- Keep the dough at about ¼ inch thick for sturdy, well-baked cookies.
3. Chill the Dough Before Baking
Chilled dough holds its shape better and bakes more evenly. If the dough is too soft, it spreads too much, resulting in irregular cookies.
Best chilling practices:
- Refrigerate the dough for at least 30 minutes before cutting out shapes.
- If rolling out dough in advance, chill it in sheets for easier handling.
- Once the cookies are cut, place them back in the fridge for 10–15 minutes before baking to help maintain their shape.
4. Space Cookies Evenly on the Baking Sheet
Placing cookies too close together prevents proper air circulation, leading to uneven baking.
Proper spacing tips:
- Leave at least 1 inch of space between each cookie.
- Arrange cookies in staggered rows rather than straight lines for better airflow.
- Bake similar-sized cookies together to ensure even baking times.
5. Preheat the Oven and Check the Temperature
An oven that is too hot or too cool affects baking times and results in unevenly cooked cookies. Many ovens have slight temperature variations, so it’s important to check accuracy.
How to ensure the right baking temperature:
- Always preheat the oven for at least 10–15 minutes before baking.
- Use an oven thermometer to verify the actual temperature.
- Avoid opening the oven door frequently, as it causes temperature fluctuations.
6. Rotate the Baking Sheet Midway
Hot spots in the oven can cause one side of the cookies to brown faster than the other. Rotating the baking sheet helps distribute heat more evenly.
Best rotation techniques:
- Turn the baking sheet 180 degrees halfway through baking.
- If baking multiple trays, switch their positions from top to bottom.
- Avoid rotating too early—wait until cookies are set but not fully baked.
7. Allow Cookies to Cool on the Baking Sheet
Moving cookies too soon can cause them to break or become misshapen. Letting them cool slightly before transferring them ensures they firm up properly.
Cooling tips:
- Let cookies rest on the baking sheet for 5 minutes after removing them from the oven.
- Transfer them to a wire rack to cool completely before decorating.
- If cookies feel too soft, let them sit a bit longer before handling.
By following these tips, you’ll achieve evenly baked cookies that are perfect for decorating. With the right tools, preparation, and baking techniques, your graduation cookies will look and taste amazing!
Preventing Cookie Spread
Nothing is more frustrating than carefully cutting out cookie shapes, only to have them spread in the oven and lose their definition. The right techniques can help keep your graduation cookies crisp, clean, and picture-perfect for decorating. Follow these essential tips to prevent unwanted spreading.
1. Use the Right Type of Flour
The type of flour in your dough significantly affects how much your cookies spread.
Best flour choices:
- All-purpose flour: Provides the best balance of structure and softness.
- Cake flour: Too soft, leading to excess spread. Avoid using it alone.
- Gluten-free flour: May require adjustments, as some blends cause cookies to spread more.
Tip: Always measure flour correctly by spooning it into the measuring cup and leveling it with a knife. Too little flour causes spreading, while too much makes cookies dry.
2. Chill the Dough Properly
Warm cookie dough spreads more in the oven, resulting in misshapen cookies.
Best chilling practices:
- Refrigerate the dough for at least 30–60 minutes before rolling it out.
- If the dough softens while working with it, return it to the fridge for 15 minutes.
- After cutting the cookies, chill them again for 10–15 minutes before baking.
3. Avoid Over-Creaming the Butter and Sugar
Creaming butter and sugar creates air pockets that help cookies rise, but too much aeration makes them spread excessively.
How to mix properly:
- Beat butter and sugar only until light and fluffy, about 1–2 minutes.
- Use room-temperature butter—not melted or too soft.
- If your kitchen is warm, refrigerate the butter briefly before mixing.
4. Choose the Right Fat Content
The type of fat in the dough impacts how much cookies spread.
Best options:
- Unsalted butter: Ideal for structure and flavor.
- Shortening: Helps cookies hold their shape but lacks rich flavor.
- Margarine: Contains too much moisture, causing excessive spread.
Tip: If your cookies spread too much, try replacing some butter with shortening for a more stable dough.
5. Roll Dough to an Even Thickness
Unevenly rolled dough leads to cookies that bake at different rates, which can contribute to spreading.
How to achieve uniform thickness:
- Roll the dough between two sheets of parchment paper for consistency.
- Use rolling pin guides or spacers to keep the dough at ¼ inch thick.
- Avoid rolling too thin, as thinner cookies spread more.
6. Use Parchment Paper Instead of Greased Pans
Greasing a baking sheet adds extra fat to the bottom of the cookies, causing them to spread more.
Better alternatives:
- Line baking sheets with parchment paper or a silicone baking mat.
- Avoid using wax paper, as it can burn in the oven.
- If reusing a baking sheet, let it cool completely before placing new dough on it.
7. Bake at the Right Temperature
Oven temperature plays a major role in cookie spread.
Tips for correct baking temperature:
- Preheat the oven to 350°F (175°C) before baking.
- Use an oven thermometer to ensure accurate temperature settings.
- Avoid opening the oven door too often, as temperature fluctuations can affect baking.
8. Reduce Leavening Agents If Needed
Too much baking powder or baking soda causes cookies to puff up and then collapse, leading to spreading.
How to adjust leavening:
- If cookies spread too much, try reducing baking powder or baking soda by ¼ teaspoon.
- Avoid overmixing the dough after adding leavening agents, as it activates them too early.
By following these strategies, you can ensure your graduation cookies maintain their shape and look flawless for decorating. With the right preparation, you’ll achieve bakery-quality cookies that impress everyone!
Creative Graduation Cookie Decorating Ideas
Graduation Cap Cookies
Graduation cap cookies are a fun and festive way to celebrate a special graduation day. These cookies are not only delicious but also make a perfect edible centerpiece for a graduation party. Whether you’re decorating for a high school or college graduation, these cap-shaped cookies can be customized with school colors, personalized messages, or creative designs. Here’s how to make perfect graduation cap cookies that will wow your guests!
1. Cookie Shape and Cutter Selection
The first step in making graduation cap cookies is choosing the right cookie cutter. A simple square or square with rounded edges works well for the base of the cap. You can also use a round cookie cutter for the top part of the cap, if you’re going for a more classic look.
Recommended cutters:
- Square or rectangle for the base of the cap
- Circle for the cap’s top part
- Graduation cap-shaped cutter available in specialty stores for ease
If you don’t have a dedicated graduation cap cutter, you can always use a knife or pizza cutter to carefully shape your cookies. A stencil is also a great option if you want to create a uniform design.
2. Preparing the Dough for Perfect Shapes
Once you have your cookie cutters ready, it’s important to prepare the dough properly to ensure clean, sharp cookie edges. Follow these tips to avoid spreading and make sure your shapes remain intact during baking.
Dough tips:
- Chill the dough: After rolling out the dough, refrigerate it for 30 minutes to 1 hour to prevent spreading while baking.
- Roll to uniform thickness: Use rolling pin guides or spacers to roll the dough evenly.
- Cut out shapes quickly: Work fast when cutting out your cookies to prevent the dough from warming up, which could result in spreading.
Once your dough is prepared and chilled, carefully cut out the graduation cap shapes and transfer them to a parchment-lined baking sheet for baking.
3. Decorating the Graduation Cap Cookies
Decorating your graduation cap cookies is where the real fun begins! To create realistic and festive graduation cap designs, you’ll need to use a combination of royal icing, fondant, and other edible decorations.
Step-by-step decorating tips:
- Base Icing: Use royal icing to cover the entire cookie with a smooth, even coat. You can use a piping bag with a flood consistency icing to fill the entire surface. Let it dry completely before moving on to the next steps.
- Top of the Cap: For the top of the cap, roll out fondant in the color of your choice and cut it into a square or circle to fit the top of the cookie. Fondant gives a smooth, polished look and can be easily shaped and molded.
- Tassels and Strings: A graduation cap isn’t complete without a tassel! Roll out a small piece of yellow or gold fondant to form a thin string, then cut small pieces to create the tassel effect. For the string holding the tassel, you can use a small edible pearl or a bit of fondant shaped into a string and placed on top.
- Personalization: If you’re making these for a specific graduate, consider adding their name, graduation year, or school logo on the cookie. Use royal icing to pipe these messages on the cookies, or even write them with edible markers for more precision.
4. Adding Color and Details
To make your graduation cap cookies even more special, add some color and shine! Choose your school colors or go for a classic black and gold look for a universally appealing design. Here’s how you can incorporate color and other design elements:
Coloring tips:
- School colors: Use food coloring to tint your icing and fondant in the school’s official colors.
- Gold or silver luster dust: Give your cookies a fancy touch by brushing the fondant or royal icing with a bit of edible luster dust. This adds a shiny, celebratory effect that’s perfect for a graduation theme.
- Edible glitter: Add some sparkle to your cookies by dusting them with edible glitter in your chosen colors. This is a fun, festive way to make the cookies even more eye-catching.
You can also get creative with small decorative elements, like mini chocolate chips for buttons or tiny edible pearls for added texture and design.
5. Packaging and Presentation
Once your graduation cap cookies are decorated and dried, it’s time to present them beautifully. Packaging your cookies for gift-giving or party favors can be just as important as decorating them. Here are a few ideas:
Presentation ideas:
- Cellophane bags: Place your cookies in clear cellophane bags tied with a ribbon in the school’s colors.
- Cookie boxes: If you’re making a batch of cookies for a party or as a gift, consider placing them in a decorative cookie box with a clear lid.
- Display trays: If serving the cookies at a party, arrange them on a display tray with a themed banner or graduation-themed decorations around them.
These simple but elegant presentation ideas will make your graduation cap cookies even more memorable for the guests at the celebration.
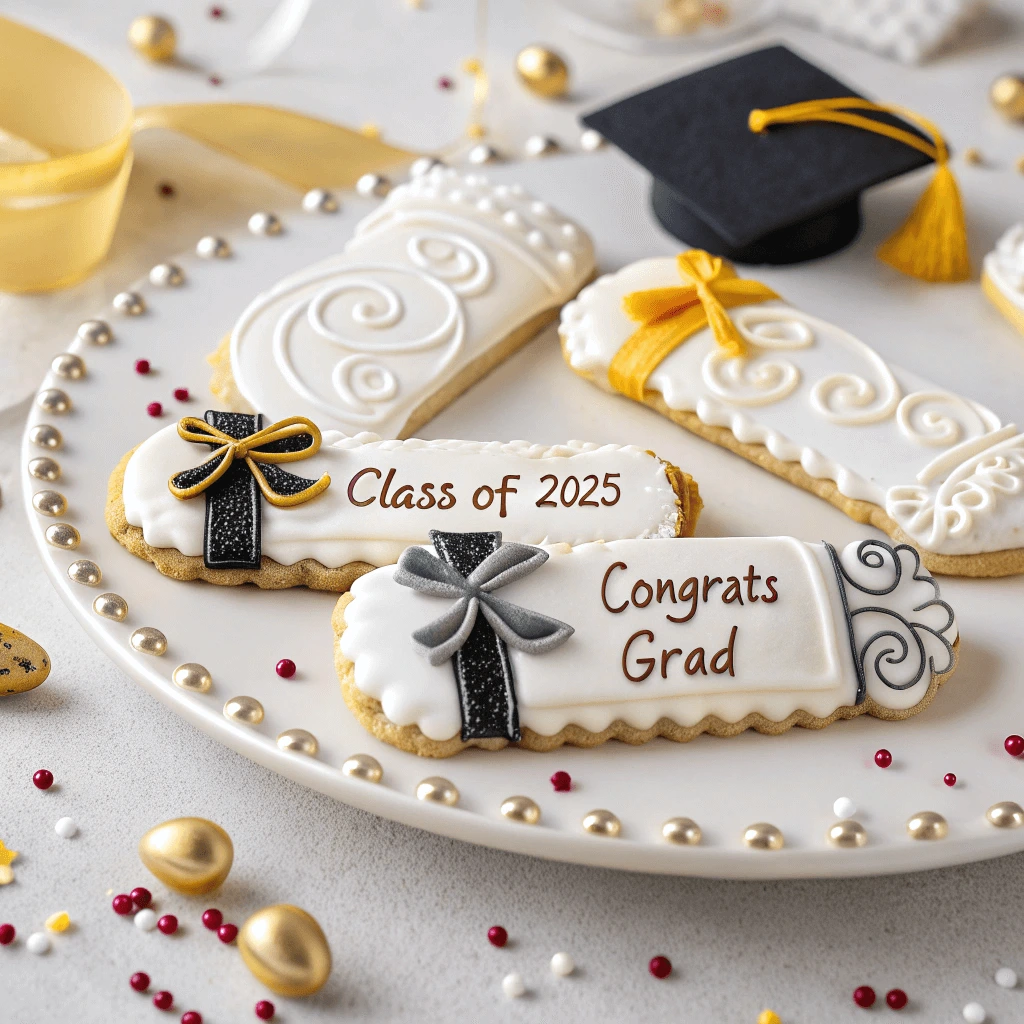
Diploma Cookies
Diploma cookies are a creative and playful way to celebrate graduation. These cookies resemble rolled-up diplomas, complete with a ribbon or bow to resemble the traditional graduation scrolls. They make excellent party favors, snacks, or even a fun activity to involve guests in as part of the celebration. Here’s how to make perfect diploma-shaped cookies that are as delicious as they are charming.
1. Shaping the Dough for Diploma Cookies
The first step to creating diploma cookies is shaping the dough into the right form. You’ll need to roll the dough into long, thin rectangles that will be easily rolled into a scroll-like shape.
Tips for shaping the cookies:
- Roll dough into even rectangles: When rolling out your dough, use a rolling pin and a guide to ensure even thickness throughout. For diploma cookies, a dough thickness of around 1/8-inch is perfect.
- Cutting rectangles: After rolling the dough, use a sharp knife or pizza cutter to slice it into long, narrow rectangles. The size of the rectangles can vary, but make sure they’re large enough to roll up into a nice, tight scroll.
It’s important to remember that the cookies will be rolled up, so the dough should be flexible enough to avoid cracking. You can use a slightly softer dough recipe to achieve this, or gently handle the dough to ensure it doesn’t become too stiff.
2. Baking the Diploma Cookies
Once you’ve shaped the dough into rectangles, it’s time to bake the cookies. Since you’ll be rolling them, it’s essential that the dough doesn’t spread too much during baking, which could distort the shape of the cookies.
Baking tips:
- Chill the dough: Before baking, refrigerate the rolled-out dough for 30 minutes. This helps the cookies maintain their shape and prevents excessive spreading.
- Use parchment paper: Line your baking sheet with parchment paper to ensure the cookies bake evenly and don’t stick to the surface.
- Watch the baking time: Bake the cookies at 350°F for 8-10 minutes, or until the edges are golden brown. Keep an eye on the cookies, as you don’t want them to overbake and become too hard for rolling.
Once the cookies have baked and cooled, it’s time to give them their signature “scroll” shape.
3. Rolling the Cookies Into Scrolls
After the cookies have cooled, carefully roll each rectangle into a tight cylinder to mimic the shape of a diploma scroll. This step gives your cookies their signature appearance, so it’s essential to roll them tightly but not too tightly, as you don’t want the cookie to crack.
Tips for rolling:
- Roll with care: Gently roll each cookie from one end to the other, making sure it stays even and smooth.
- Use a little frosting: If you find that the cookies won’t stay rolled, you can use a dab of royal icing to help secure the edges. Just apply a small amount where the end of the cookie meets the rest of the roll.
- Shape as needed: If your cookies have spread a bit during baking and aren’t perfect rectangles, you can gently reshape them with your hands before rolling.
Rolling the cookies is a delicate process, but with patience, you’ll end up with the perfect cylindrical shape that mimics an actual diploma.
4. Decorating Diploma Cookies
Now that you have your cookies shaped, it’s time to decorate them! Diploma cookies are traditionally adorned with a ribbon or bow to enhance the look and make them resemble the iconic graduation scrolls.
Decoration ideas:
- Royal icing for ribbon: To create the ribbon, use royal icing to pipe a thin line down the length of the scroll and then pipe a bow at the top. If you’d like a more realistic look, use a piping tip to create loops that form a detailed bow.
- Fondant ribbons: If you want to create a smoother, more polished ribbon effect, roll out fondant and cut it into thin strips. Use these strips to wrap around the ends of the rolled cookies, and use fondant to make small decorative bows.
- Edible markers for personalization: You can also use edible markers to write on the diplomas, such as the graduate’s name or year of graduation. This adds a personal touch and makes each cookie feel unique.
- Colored sugars or sprinkles: Add sparkle by sprinkling edible glitter or colored sugar over the ribbons or bows. You can also use small edible pearls for extra decoration around the ribbon.
Decorating diploma cookies is a great way to get creative, and the decorations can reflect the school’s colors or even the graduate’s favorite colors.
5. Packaging and Serving Diploma Cookies
Once your diploma cookies are decorated and completely dry, it’s time to package and serve them. Diploma cookies make fantastic party favors, so consider packaging them in a way that matches the graduation theme.
Packaging ideas:
- Cellophane bags: Place the diploma cookies in clear cellophane bags, then tie the bags with a ribbon that matches the school colors.
- Graduation-themed containers: For a larger batch, present the cookies in a graduation-themed gift box or decorative tin.
- Cookie display: If you’re serving the cookies at a graduation party, consider displaying them on a tray or a cookie stand. Add some themed decorations, like mini caps or tassels, to tie the look together.
Class of 2025 Designs
As the Class of 2025 prepares to walk across the stage, it’s time to celebrate the moment with themed treats that reflect the spirit of the graduating class. Graduation cookies are a great way to add a personal touch to your celebration, and incorporating the “Class of 2025” theme into your designs will make the cookies even more special. Here’s how you can create cookie designs that proudly showcase the Class of 2025 while being both stylish and tasty.
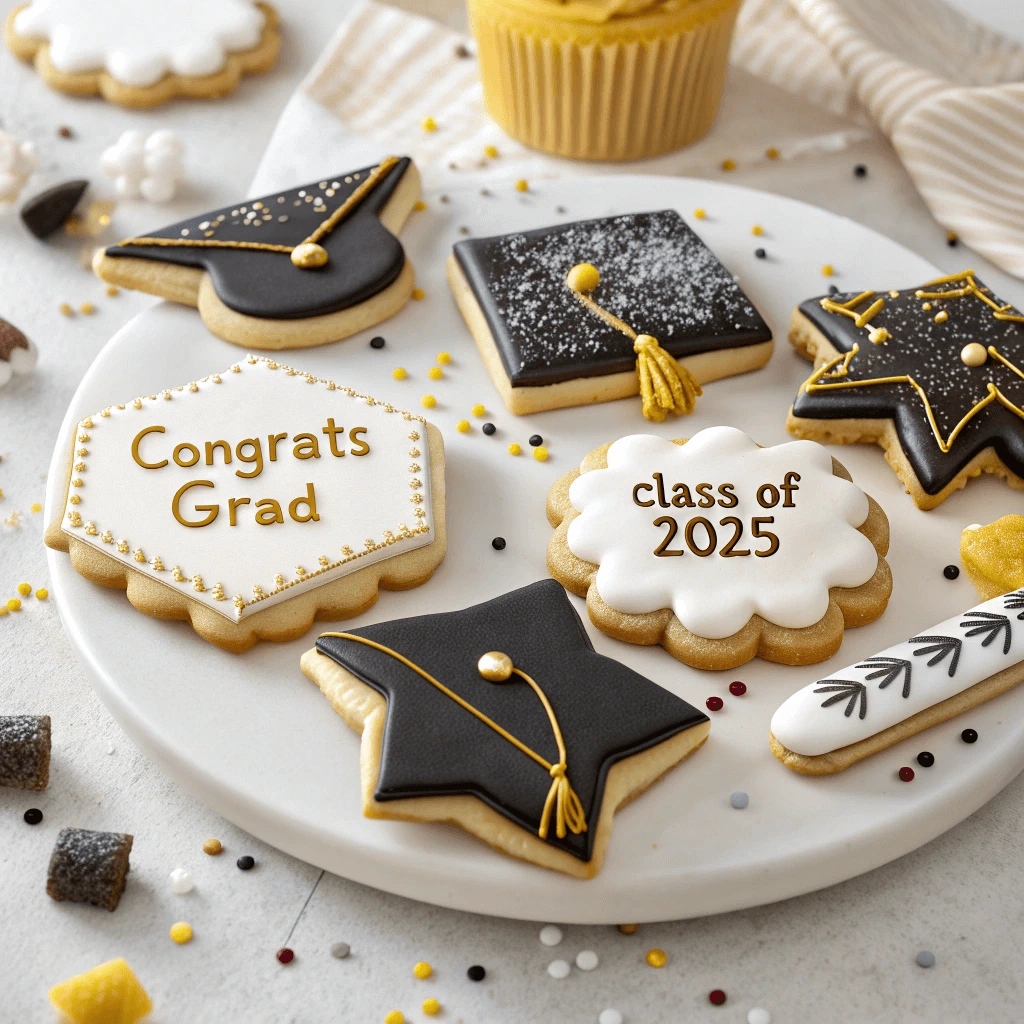
1. Simple “Class of 2025” Text Cookies
One of the easiest yet most impactful ways to feature the Class of 2025 is by adding the year directly onto the cookies. Simple text designs give the cookies a timeless feel while providing a clear nod to the graduate’s big year. You can use royal icing, edible markers, or fondant to create these designs.
Tips for creating text cookies:
- Choose a bold font: Make sure the font is easy to read. You can opt for a simple script font or a bold block-style font, depending on your style preference.
- Use contrasting colors: To make the “Class of 2025” stand out, use a high-contrast color combination. For example, a dark blue or black text on a light-colored background, or vice versa, will make the text pop.
- Add flourishes: To make the text more decorative, consider adding some fun flourishes or embellishments, like little stars, confetti, or dots, around the numbers or letters.
These cookies can be made in various shapes, such as circles, rectangles, or even graduation cap shapes, and they can be arranged in a way that displays the full class year across a tray.
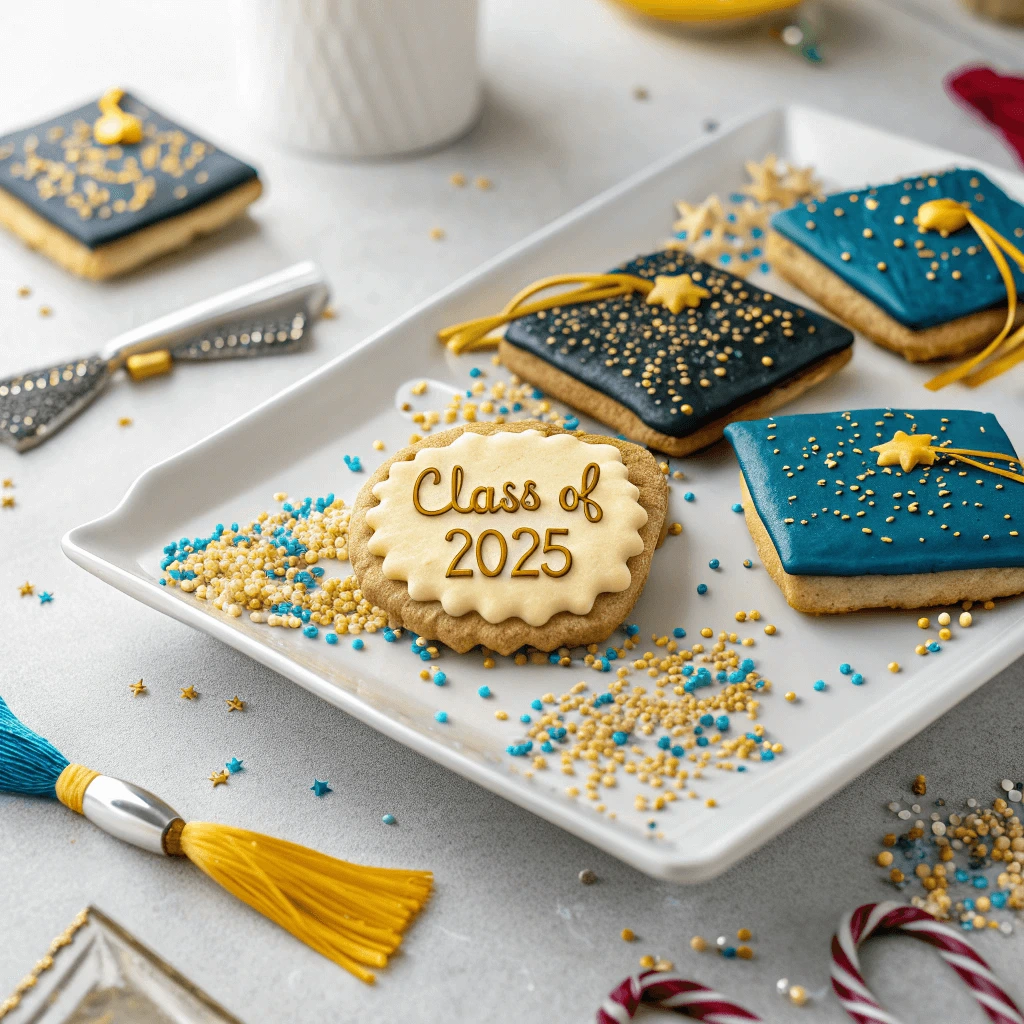
2. Graduation Caps with “Class of 2025” Elements
Another way to incorporate the Class of 2025 theme into your cookies is by designing them in the shape of graduation caps. This iconic symbol of graduation will immediately tie your cookies to the celebration, and you can personalize them with the year.
Design ideas for graduation cap cookies:
- Add the year to the tassel: For a creative twist, make the tassel out of royal icing or fondant and write “2025” directly on it. This will highlight the graduating year while keeping the design simple.
- Use color to represent the school: Decorate the hats in the school’s colors, so the design feels even more personalized. You can use different colors for the cap and the tassel for added contrast.
- Shape the cap with precision: Use a graduation cap cookie cutter for a clean shape, or create your own template by hand cutting the dough into a square or triangular shape for a classic look.
These cookies are ideal for large parties or as small treats to pass out during the graduation ceremony. They are also a fun way to represent the graduation theme without overwhelming the design.
3. Custom Graduation Cap and Year Tag
For an elegant touch, combine the graduation cap design with a small tag on the cookie featuring the Class of 2025. This combination will give the cookies a more sophisticated look and allow for additional customization.
Tag design ideas:
- Create a mini tag shape: You can cut out small tag shapes using fondant, which will be placed next to or beneath the graduation cap. On this tag, use edible markers to write “Class of 2025.”
- Use gold or silver accents: Consider decorating the tag with gold or silver edible paint or sprinkles to add a touch of luxury to the design. This will make the cookies feel more like a formal party favor and give them a celebratory vibe.
- Tassel and tag combo: Attach a small fondant tassel to the tag, connecting it to the graduation cap for a polished look.
These cookies can be served at a graduation reception or handed out as personalized party favors to guests. The Class of 2025 on the tag can be easily read and will highlight the special significance of the cookies.
4. Graduation Cap Cookie Bouquets with Class of 2025 Themes
If you’re looking to take your cookie designs to the next level, a cookie bouquet featuring a mix of graduation cap cookies and Class of 2025 designs is a fun, creative option. This arrangement allows you to create a stunning centerpiece for your graduation celebration, and it’s also a great gift idea.
How to make a graduation cookie bouquet:
- Mix shapes: Combine various shapes such as graduation caps, “Class of 2025” cookies, and diploma cookies in the same bouquet. Each cookie will complement the others, making the arrangement more dynamic and eye-catching.
- Use sticks or skewers: After decorating your cookies, attach each one to a lollipop stick or skewer. You can place them in a vase or decorative container, arranging them so that they look like a flower bouquet.
- Add personalization: To make the bouquet more personal, consider including the graduate’s name, school colors, or a special graduation message on a few of the cookies.
This design is perfect for a dessert table or as a gift for the graduate to display proudly.
5. Graduation Year Cookies with Class of 2025 Colors
Adding color to your cookies will bring life to the design. Incorporate the Class of 2025 colors to personalize the theme even further. You can make simple round cookies and decorate them with the year “2025,” or get more creative by shaping them into other designs such as stars or hearts.
Color ideas for Class of 2025 cookies:
- School colors: Always try to incorporate the school’s colors in your designs to make the cookies even more meaningful to the graduate and their family.
- Classic gold and black: For a timeless look, combine gold (or yellow) and black. These colors are often associated with graduation and give the cookies a formal, celebratory feel.
- Fun and festive colors: If the graduate prefers a more playful approach, opt for bright, bold colors like turquoise, pink, or purple. These can create a fun atmosphere and make your cookies pop at the celebration.
By using these colors, you can create cookies that are cohesive with the overall theme of the event and ensure that the “Class of 2025” theme shines through in every detail.
Pro Tips for Decorating Like a Bakery
Using Royal Icing Like a Pro
Royal icing is a versatile and essential decorating tool for cookie decorators, particularly when you’re creating intricate designs like graduation-themed cookies. It dries to a hard, glossy finish that makes it ideal for adding fine details and elaborate decorations to your cookies. Whether you’re new to using royal icing or an experienced decorator, there are some key tips and techniques to help you perfect your royal icing skills and create beautiful cookies every time.
1. Master the Right Consistency
Achieving the right consistency of royal icing is crucial to making smooth, precise designs. Royal icing can be used for flooding, outlining, and fine detailing, but each application requires a different consistency.
- Flooding Consistency: This is ideal for filling in larger areas of your cookie. The icing should flow smoothly, but not be too runny. To test it, drag a knife through the icing, and the lines should disappear in 10-15 seconds.
- Outlining Consistency: For creating clean, defined borders or lettering, your icing should be thicker. It should hold its shape and not spread once piped. A good test is to pipe a line that holds its shape without drooping.
- Detailing Consistency: For intricate work like fine lines or small lettering, royal icing should be even thicker. It should pipe easily without flowing, allowing you to create small, precise details on your cookies.
By practicing and adjusting the consistency of your royal icing, you’ll be able to achieve the perfect look for any design.
2. Color Your Royal Icing
Adding color to your royal icing can enhance your graduation cookie designs and make them even more eye-catching. There are a few key things to keep in mind when coloring royal icing:
- Use Gel Food Colors: Liquid food coloring can dilute your royal icing, affecting its texture and consistency. Instead, opt for gel food colors, which are more concentrated and provide vibrant hues without changing the consistency of your icing.
- Mix Gradually: Start by adding a small amount of gel food coloring to your royal icing. You can always add more if you want a deeper color. Mix thoroughly to ensure the color is even and there are no streaks.
- Separate Icing for Multiple Colors: If you plan on using multiple colors for your design, divide your icing into separate bowls before adding the food coloring. This way, you’ll have a variety of colors ready for different parts of your cookie design.
Using color wisely will give your cookies a polished, professional look. Remember, royal icing colors should be vibrant but not overpower the overall theme of your graduation cookies.
3. Piping Techniques for Detailed Designs
Piping royal icing on cookies can seem tricky, but with the right tools and techniques, you can create beautiful, intricate designs. Here’s how you can get the perfect results:
- Use Piping Bags and Tips: To achieve smooth lines and delicate details, use piping bags with various tips. A round tip is perfect for fine lines, lettering, and outlining, while a star or petal tip works well for texture and flourishes.
- Practice Consistency in Pressure: When you pipe royal icing, consistent pressure is essential to create even, uniform lines. Practice controlling the flow of icing so that it flows steadily and smoothly. Avoid squeezing too hard, as it may lead to uneven or messy lines.
- Control the Angle: Hold your piping bag at a 45-degree angle to the surface of your cookie. This position allows for a steady flow of icing and gives you better control over the shape and size of the designs.
- Use Toothpicks for Touch-Ups: Sometimes, the royal icing may flow where you didn’t intend it to. A toothpick can help you clean up any mistakes or smooth out rough edges, ensuring that your designs stay neat and precise.
With patience and practice, you can refine your piping techniques and create impressive designs on your graduation cookies.
4. Let the Icing Dry Properly
Proper drying time is essential when using royal icing. Royal icing dries to a hard, shiny finish, but it requires time to set fully. Follow these tips to ensure your cookies dry correctly:
- Let the Icing Set Between Layers: If you plan to add multiple layers or colors to your cookies, make sure each layer dries completely before adding the next. This prevents colors from bleeding into each other and ensures each design element is crisp and clean.
- Allow Cookies to Dry Overnight: For best results, allow your decorated cookies to sit for at least 6-8 hours or overnight at room temperature. This ensures that the icing hardens fully and won’t smudge when you handle the cookies.
- Avoid Humidity: Royal icing is sensitive to humidity, which can affect its drying time and finish. If you’re decorating on a particularly humid day, consider using a fan or dehumidifier to speed up the drying process.
By allowing sufficient time for drying, your cookies will have that perfectly smooth, glossy finish that makes them look professionally done.
5. Troubleshooting Common Royal Icing Issues
Even the most experienced decorators face challenges with royal icing from time to time. Here are some common problems and how to fix them:
- Icing Too Runny: If your royal icing is too runny and doesn’t hold its shape, add more powdered sugar to thicken it. Mix it in small increments and test until you achieve the right consistency.
- Icing Too Thick: If your icing is too thick and won’t pipe smoothly, add a small amount of water to loosen it. Be careful not to add too much water, as it can alter the consistency.
- Air Bubbles: If air bubbles form in your royal icing, tap the piping bag lightly on the countertop to release them before piping. Additionally, you can use a toothpick to gently pop any bubbles that appear on the cookie surface after you’ve piped the icing.
By troubleshooting common issues as they arise, you’ll ensure that your royal icing consistently produces beautiful results.
Adding Details with Edible Markers and Sprinkles
Adding intricate details to your graduation cookies can elevate your designs and make them look even more polished. Edible markers and sprinkles are two fantastic tools to add flair and personalization to your cookies, especially when you’re working on a special occasion like graduation. Here’s how you can use them effectively to enhance your cookies.
1. Edible Markers for Precise Detailing
Edible markers are an excellent choice for adding fine lines, text, or small designs to your cookies. These markers come in various colors and are perfect for detailing delicate elements such as the year, names, or tiny graduation symbols like caps or diplomas.
- Choosing the Right Edible Markers: Look for edible markers that are food-safe and made specifically for use on baked goods. Some popular brands offer markers that are perfect for cookie decorating, with both fine and broad tips. These markers allow for maximum control and precision when drawing or writing on cookies.
- Use on Hard Icing: Make sure your royal icing has dried completely before using edible markers. Writing or drawing on soft icing may cause smudging, but once the icing has hardened, you can add fine details without worry.
- Personalization: Use edible markers to personalize your graduation cookies by writing the graduate’s name, “Class of 2025,” or the year of graduation. You can also draw symbols like mortarboards, diplomas, or stars for a more celebratory touch. The best part about edible markers is that you can add intricate details without having to worry about making a mess or using piping bags.
Edible markers are a game-changer when it comes to detailed and personalized cookie designs. With their ease of use and precision, they make it easy to add text and tiny decorations that would be difficult to achieve with royal icing alone.
2. Sprinkles for Texture and Visual Appeal
Sprinkles are a simple yet effective way to enhance your graduation cookies. They add texture, color, and sparkle, making your cookies look more festive and fun. Here’s how to incorporate sprinkles into your designs:
- Choosing the Right Sprinkles: There are various types of sprinkles, from classic sugar crystals to nonpareils and jimmies. For graduation-themed cookies, you can find sprinkles in colors like gold, silver, blue, and white. You can also use specialty graduation-themed sprinkles, such as tiny graduation caps or diploma shapes.
- Adding Sprinkles to Wet Icing: The best time to add sprinkles to your cookies is while the icing is still wet. This ensures that the sprinkles stick to the icing and don’t fall off once the icing hardens. Gently press the sprinkles into the icing to make sure they adhere properly.
- Creative Placement: Be creative with where you place your sprinkles. You can use them as borders, scatter them across the surface of the cookie, or even create fun patterns. For example, you could add gold sprinkles around the edges of a graduation cap cookie or use blue and silver sprinkles to form the “Class of 2025” text. Sprinkles can also add dimension, especially if you use different sizes and shapes.
Sprinkles are an easy way to make your cookies pop, giving them that celebratory sparkle perfect for graduation parties. They add not only visual appeal but also a slight crunch, making the cookies even more enjoyable.
3. Combining Edible Markers and Sprinkles for Maximum Impact
The real magic happens when you combine both edible markers and sprinkles on your cookies. Together, they provide both detail and texture, taking your graduation cookies to the next level.
- Layering Effects: After outlining or drawing details with edible markers, you can add sprinkles around those designs for an extra layer of texture. For example, you might outline a diploma with edible markers and then place silver sprinkles around it to make it stand out.
- Creating Contrast: Use the contrast between the fine lines of edible markers and the bright, colorful sprinkles to create a dynamic design. The clean lines of the markers will pop against the sparkling sprinkles, adding a professional, well-thought-out touch to your cookies.
- Experiment with Placement: Play around with how you use each element. You can make designs where edible markers form the focal point of the cookie and use sprinkles to frame them or provide accents. The combination of these two elements allows for creativity and will give your graduation cookies a stunning, custom-made look.
By layering edible markers and sprinkles, you can create multi-dimensional cookies that are eye-catching and uniquely tailored for the graduate.
4. Final Touches: Shine and Extra Details
Once you’ve finished adding edible markers and sprinkles to your graduation cookies, consider adding a final touch to give them that extra shine and finesse.
- Edible Glitter: For added sparkle, try using edible glitter. It’s an easy way to give your cookies a professional look without much effort. Sprinkle it lightly over the icing or on top of the sprinkles for a subtle yet elegant effect.
- Shimmer Spray: Edible shimmer spray can also be a fun way to add a shiny finish to your graduation cookies. Lightly spritz the cookies once the icing has dried to add a glossy, celebratory sheen.
- Gold or Silver Leaf: For an upscale touch, consider using edible gold or silver leaf. It can be applied to the graduation cap cookies or diploma cookies for an elegant, luxurious look. This finishing touch will make your cookies stand out and be the talk of the celebration.
Avoiding Common Decorating Mistakes
Decorating graduation cookies can be a fun and rewarding experience, but it’s easy to make a few mistakes along the way. These common decorating errors can affect both the appearance and taste of your cookies, so it’s important to know how to avoid them. Here are some tips to ensure your cookies look as good as they taste, while preventing common decorating mishaps.
1. Overloading the Cookies with Icing
One of the most common mistakes people make when decorating cookies is applying too much icing. While it may seem like a good idea to pile on the frosting for a thick, smooth finish, it can lead to uneven drying, soft cookies, and even a messy look.
- How to Avoid It: Aim for a thin, even layer of icing to cover the entire cookie. Use a piping bag or an offset spatula to spread the icing smoothly. The icing should be spread out enough to cover the entire surface but not so thick that it pools at the edges. Let each layer dry completely before adding additional layers to avoid smudging.
- Tip for Perfect Consistency: Royal icing should be at the right consistency—smooth but not runny. You can test this by lifting your spatula and watching how the icing flows. If it’s too runny, it will spread unevenly, and if it’s too thick, it will not spread smoothly.
2. Underestimating Drying Time
Sometimes, decorators rush through the process and don’t give the icing enough time to dry fully. This can cause colors to bleed into each other, create smudges, and ruin the entire design. Patience is key to creating beautiful, clean graduation cookies.
- How to Avoid It: Make sure to allow enough time for each layer of icing to dry thoroughly before applying the next one. For best results, leave the cookies to dry in a cool, dry place for several hours or even overnight. If you’re in a hurry, use a fan or place the cookies in a low-temperature oven to speed up the drying process.
- Tip for Faster Drying: If you’re using multiple colors on the same cookie, ensure each layer is fully dry before adding the next color. This prevents colors from bleeding into each other and helps preserve the sharp lines and designs you’ve created.
3. Using the Wrong Tools for the Job
Using the wrong decorating tools can make the decorating process more difficult and affect the final result. For instance, using a blunt tip for detailed work or trying to decorate small areas with a large piping bag can lead to sloppy results.
- How to Avoid It: Invest in a few essential cookie decorating tools to make the job easier and more precise. A fine piping tip for intricate details, a small offset spatula for spreading icing, and a squeeze bottle for filling in large areas are all helpful tools to have. If you’re working on small or detailed designs, don’t hesitate to use tools that give you greater control.
- Tip for Precision: Practice with your piping bags and tips before you start decorating your cookies. Get familiar with the pressure needed to control the flow of icing and experiment with different nozzle shapes to achieve the designs you want.
4. Ignoring Cookie Shape and Size
Another common mistake is neglecting to consider the shape and size of your cookies when planning your designs. Certain designs may be difficult to achieve on smaller cookies, or they may look crowded or out of proportion.
- How to Avoid It: Choose simple, clean designs for smaller cookies, and save more intricate patterns for larger cookies. Take into account the cookie size when planning your decorations. For example, a detailed graduation cap design might look great on a large round cookie, but on a small one, it may appear too crowded.
- Tip for Scaling Designs: When decorating smaller cookies, scale down the details so that they fit comfortably on the cookie. For larger cookies, you can use more elaborate designs, like writing or detailed pictures.
5. Not Using Enough Contrast
One of the keys to creating striking cookie designs is using contrasting colors. When all the colors are too similar or too muted, the details can become lost and the cookie can look flat. This is especially important for themed designs, like graduation cookies, where you want your decorations to stand out.
- How to Avoid It: Choose colors that contrast well with each other. For example, a graduation cap in black or blue will pop against a yellow or white background. Using darker colors for outlines and lighter colors for filling in areas helps the designs stand out.
- Tip for Contrast: If you’re unsure about your color choices, experiment with a few combinations on a practice cookie. Think about how your colors will complement each other while still ensuring they don’t blend into one another.
6. Overcomplicating Designs
It can be tempting to go all out with overly complicated designs, especially if you want your graduation cookies to impress. However, overcomplicating things can lead to frustration and potentially ruin the aesthetic of your cookies.
- How to Avoid It: Keep your designs simple and clean. Remember, less is often more, and intricate designs can sometimes become cluttered. Focus on making a few bold, clear statements, like the year, a graduation cap, or the graduate’s name, rather than trying to fit in too many elements.
- Tip for a Balanced Look: Choose one or two design elements and focus on making them stand out. For instance, a large graduation cap on the center of the cookie, with “Class of 2025” written underneath, makes a striking yet simple design.
7. Not Planning in Advance
Many decorators dive right in without creating a plan, and this can lead to mistakes or missing key details. Planning ahead helps you avoid errors and ensures your designs come together seamlessly.
- How to Avoid It: Sketch out your cookie designs on paper before you start decorating. This helps you visualize how the final product will look and gives you the opportunity to make adjustments. Consider factors like color combinations, placement of design elements, and cookie sizes before you begin decorating.
- Tip for Efficiency: Organize your decorating steps before you start, from outlining the designs to filling them in with color. This way, you’ll have a clear path to follow, and the decorating process will feel much smoother.
Storing and Packaging Your Graduation Cookies
Best Ways to Store Decorated Cookies
Proper storage is essential to keep your decorated cookies fresh and maintain their appearance. Follow these tips for optimal results:
1. Allow Cookies to Dry Completely
Before storing your cookies, make sure the icing is fully dry. Allow at least 6–12 hours for the decorations to harden. For quicker drying, you can place cookies in front of a fan. This prevents smudging when storing.
2. Use Airtight Containers
Once dried, store your cookies in airtight containers to maintain freshness. To prevent decorations from touching, place parchment paper between layers of cookies. This will help preserve both texture and appearance.
3. Store in a Cool, Dry Place
Keep your cookies in a cool, dry place away from direct sunlight and heat. A kitchen cupboard or pantry works best. Avoid storing cookies in humid areas, as moisture can soften the icing and affect the design.
4. Freezing for Long-Term Storage
If you need to store cookies longer, freezing is a great option. Freeze cookies individually on a baking sheet before transferring them to airtight containers or freezer bags. When ready to use, let them thaw at room temperature.
5. Avoid Storing for Too Long
Decorated cookies are best enjoyed within 1–2 weeks if stored at room temperature. For longer storage, freezing is ideal. However, try to consume cookies sooner to maintain freshness.
By following these steps, you can ensure that your DIY graduation cookies stay fresh, delicious, and visually appealing!
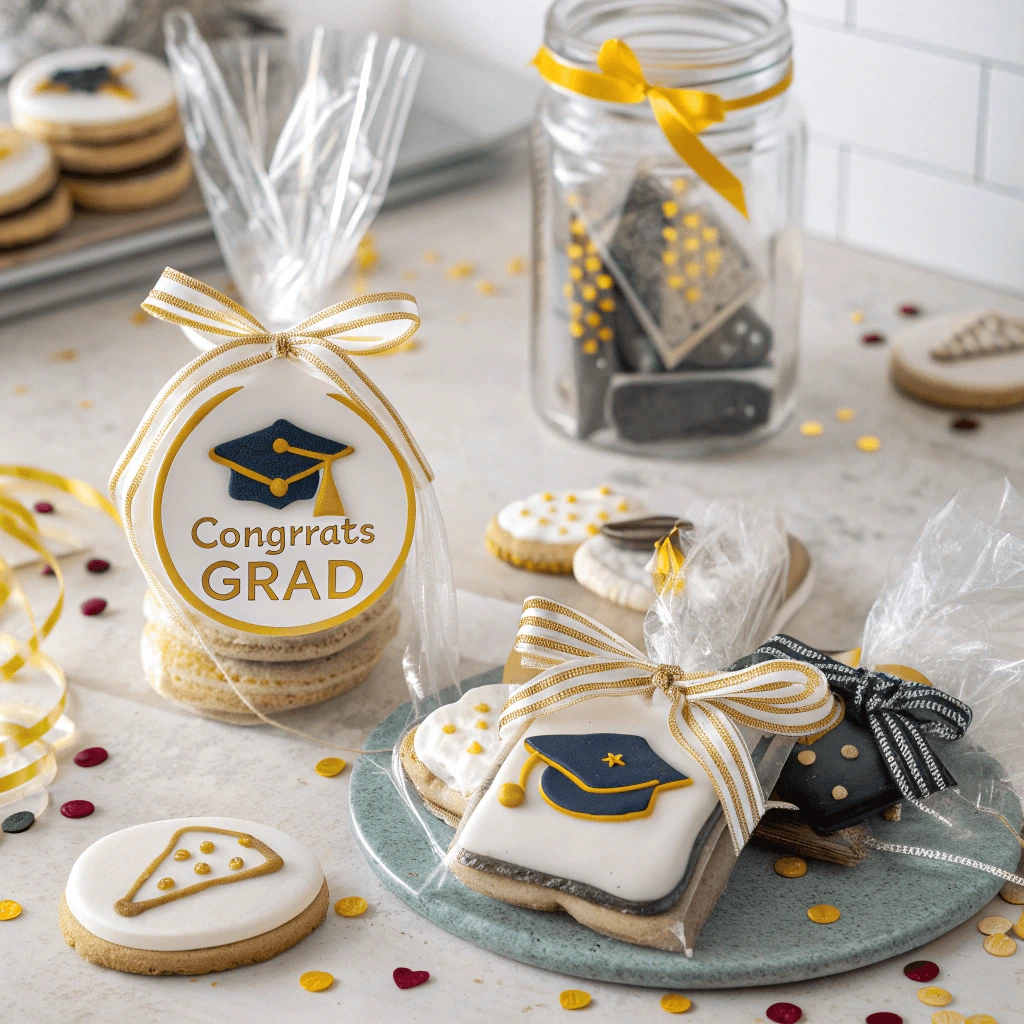
Gift-Wrapping Ideas for Grad Parties
When presenting your DIY graduation cookies, creative gift wrapping can enhance the experience. Here are a few fun and stylish ways to wrap your cookies:
1. Clear Cellophane Bags
A simple and classic choice, clear cellophane bags showcase your decorated cookies. Add ribbon or twine in school colors and a custom tag for a personalized touch.
2. Graduation-Themed Cookie Boxes
Opt for cookie boxes, which are perfect for a more elegant presentation. Line the box with tissue paper or filler, and decorate with graduation-themed stickers or washi tape.
3. Cookie Jars
For an eco-friendly and reusable gift, use decorated cookie jars. Fill the jar with your cookies, add a ribbon, and personalize the lid with the graduate’s name or year.
4. Creative Gift Bags
Choose gift bags with graduation designs like caps or diplomas. Add a personal touch by including a note or a photo of the graduate, and fill with colorful tissue paper.
5. Graduation-Themed Paper
For a traditional approach, wrap your cookies with graduation-themed paper. Pair it with a ribbon and add a personalized tag for a special touch.
By using any of these wrapping ideas, you’ll ensure your cookies look as great as they taste, making the perfect graduation gift!
Shipping Cookies Safely
Shipping graduation cookies can be a delicate process, but with the right techniques, you can ensure your decorated treats arrive at their destination safely and looking as fresh as when you baked them. Follow these simple steps for a secure and successful shipping experience.
1. Choose the Right Packaging
The key to protecting your cookies during shipping is choosing sturdy packaging. Select a strong, food-safe box that can withstand the rigors of transit. If you’re shipping multiple cookies, consider using dividers or individual cookie bags to keep them from touching each other and getting damaged.
2. Wrap Cookies Properly
Before placing your cookies in the box, wrap each cookie individually in plastic wrap, wax paper, or parchment paper. This not only protects the cookies from moisture but also preserves the shape and decoration. You can also use bubble wrap or foam sheets for added protection if you have delicate cookie designs.
3. Use Padding and Filler Materials
To prevent your cookies from shifting inside the box, use plenty of padding. Crumpled tissue paper, packing peanuts, or bubble wrap work well to cushion the cookies. Make sure the cookies are snugly packed in the box, leaving minimal space to reduce the risk of them moving around.
4. Label the Box Clearly
Make sure to label the box as “fragile” to alert the postal service to handle it with care. Include a clear “This Side Up” label to ensure the cookies remain in the right orientation during shipping. You may also want to include an “Enjoy by” date to ensure recipients can enjoy the cookies while they’re at their best.
5. Select the Right Shipping Method
Choose a reliable shipping service that offers quick delivery to minimize the time your cookies spend in transit. Opt for expedited shipping or priority mail to ensure freshness. Consider shipping the cookies early in the week to avoid them sitting in a warehouse over the weekend.
6. Plan for Weather Conditions
If you’re shipping cookies during hot weather, consider adding ice packs or insulation to the package. This will help prevent the frosting from melting or becoming damaged. If you’re shipping during colder months, ensure the packaging is sturdy enough to protect against freezing temperatures.
7. Check Local Laws
For international shipping, be sure to check the local laws and regulations for sending baked goods. Some countries have restrictions on food shipments, so researching ahead of time can save you from any potential issues.
By following these guidelines, you can safely ship your graduation cookies to friends, family, or clients, ensuring they arrive in perfect condition and delight everyone who receives them!
Conclusion
Baking and decorating DIY graduation cookies is a fun and rewarding way to celebrate this momentous occasion. By choosing the right ingredients, tools, and techniques, you can create beautifully decorated cookies that are perfect for gift-giving or serving at graduation parties. Whether you’re making classic graduation cap designs or experimenting with your own creative twists, the possibilities are endless!
Remember, the key is to enjoy the process and let your creativity shine. Don’t be afraid to try new decorating ideas, use different colors, or incorporate unique designs that reflect the graduate’s personality or school spirit.
We’d love to see your beautiful creations! Feel free to share your DIY graduation cookies on social media or leave a comment below with your favorite design ideas. Happy baking, and congratulations to all the graduates!