Looking to impress a superhero fan with a show-stopping dessert? This DIY Spiderman cake is the perfect way to bring some Marvel magic to your next celebration. Whether you’re baking for a birthday, themed party, or just because, this fun and easy recipe will help you create a cake that looks amazing and tastes delicious. With simple ingredients, step-by-step decorating tips, and creative design ideas, you don’t need to be a pro baker to make a Spidey masterpiece. Let’s get started and swing into action with your very own Spiderman cake!
Getting Started with Your DIY Spiderman Cake
Essential Tools and Ingredients for Your DIY Spiderman Cake
Creating a DIY Spiderman cake becomes much easier when you’re well-prepared. To ensure smooth baking and decorating, gather all your tools and ingredients before you begin. Here’s what you’ll need.
Basic Baking Tools
Start with these kitchen essentials:
- Mixing bowls – Have at least two medium-sized ones ready for batters and frosting.
- Measuring cups and spoons – Use these for accuracy with dry and wet ingredients.
- Cake pans – Opt for 8 or 9-inch round pans, or choose a rectangular one if you’re shaping Spiderman’s face.
- Cooling rack – Helps cakes cool evenly before decorating.
- Electric mixer – A hand or stand mixer will save time and energy when mixing batter or whipping frosting.
Key Ingredients for the Cake
For a moist and delicious cake base, you’ll need:
- Flour – Use all-purpose flour or cake flour for a light texture.
- Sugar – Granulated sugar works best for most cake recipes.
- Eggs – They provide structure and richness.
- Butter or oil – Butter gives great flavor, while oil adds moisture.
- Baking powder and baking soda – These leavening agents help your cake rise.
- Vanilla extract – A splash enhances flavor and aroma.
- Milk or buttermilk – Keeps the cake tender and soft.
Ingredients for Decorating
To bring Spiderman to life, decoration is key. Here’s what you’ll need:
- Red, blue, and black gel food coloring – These are essential for the signature Spiderman look.
- Buttercream frosting – Great for layering and base coating.
- Fondant – Use red for Spiderman’s suit, white for eyes, and black for the web design.
- Piping bags and tips – Use a round tip for outlining and a star tip for texture.
- Edible markers – These are handy for adding fine details, especially on fondant.
Optional Supplies
For added flair and convenience:
- Spiderman-themed cake toppers – These give an instant superhero finish.
- Cake leveler or serrated knife – Helps you create even cake layers.
- Turntable – Makes frosting and decorating the cake easier from all angles.
Choosing the Right Flavor for Your DIY Spiderman Cake
The flavor of your Spiderman cake is just as important as its appearance. Whether you’re baking for kids, teens, or adult superhero fans, selecting the right cake flavor helps turn your creation into a memorable treat. Let’s explore some popular and crowd-pleasing options to suit every taste.
Classic Choices That Never Fail
Sometimes, sticking with the classics is the best move—especially for picky eaters or larger parties.
- Vanilla cake: Light, fluffy, and a universal favorite. Vanilla works well with colorful frosting and is easy to pair with fruit or cream fillings.
- Chocolate cake: Rich and indulgent, this option is perfect for chocolate lovers. Its deep color contrasts beautifully with red and blue Spiderman decorations.
- Marble cake: Can’t decide between vanilla and chocolate? Go with marble. The swirled appearance adds visual flair while offering the best of both flavors.
Fun Flavors for Kids
When baking for children, consider bright and exciting flavors that add extra fun.
- Strawberry or funfetti: These colorful cakes often become a hit at kids’ parties. Pink or confetti interiors surprise and delight once the cake is sliced.
- Red velvet: With its vibrant color and mild chocolatey flavor, red velvet is great for Spiderman-themed cakes and adds an elegant twist.
- Banana or lemon: These fresh, fruity flavors are lighter alternatives and pair wonderfully with vanilla or cream cheese frosting.
Sophisticated Picks for Adults and Teens
Older guests may prefer flavors that feel more refined or unique.
- Carrot cake: Moist, slightly spiced, and great with cream cheese frosting—perfect for an adult celebration with a superhero twist.
- Mocha or espresso: A favorite among coffee lovers, this flavor adds depth and pairs well with chocolate ganache.
- Coconut or almond: These less traditional options provide a delicate taste and pleasant texture, especially when paired with a tropical or nutty filling.
Tips for Making the Final Choice
- Consider allergies and dietary needs: Always check for common allergens like nuts, dairy, or gluten before baking.
- Match with frosting and filling: Make sure your cake flavor complements your choice of frosting. For instance, chocolate cake pairs well with peanut butter or raspberry fillings.
- Think about color and design: Some flavors, like red velvet or funfetti, add visual interest when sliced—perfect for a dramatic Spiderman cake reveal.
Planning a Creative DIY Spiderman Cake Design
Before you dive into baking and decorating, take a moment to plan the overall look and theme of your Spiderman cake. A thoughtful design not only saves time but also ensures that your cake turns out impressive and cohesive.
Choose Your Spiderman Theme
Start by picking the version of Spiderman you want to feature. Classic comic book Spiderman with red and blue colors is always a hit, but you can also explore modern interpretations from the Marvel movies, like the Tom Holland version or “Into the Spider-Verse” characters such as Miles Morales and Spider-Gwen. Each theme offers different colors, logos, and symbols that can be reflected in your cake design.
Decide on Cake Shape and Size
Next, determine the shape and size of your cake. A round cake works great for showcasing Spiderman’s face, while a sheet cake provides a flat canvas for action scenes and web details. Tiered cakes offer room for creativity—you can dedicate each layer to a different scene, character, or cityscape.
- Single-tier cake: Simple, elegant, great for beginners.
- Two-tier cake: Ideal for adding extra elements like webs, buildings, or character figures.
- Sheet cake: Best for drawing scenes or comic panels.
Sketch the Layout
Take a few minutes to draw a rough sketch of your cake. Mark where the main features will go—Spiderman’s face, webs, eyes, logos, or toppers. This step helps prevent overcrowding and ensures everything fits nicely.
Choose Your Decorative Elements
Decide on the cake’s key features. Will you use fondant or buttercream? Want to add a 3D topper or keep it flat and graphic? Here are a few ideas:
- Web designs piped in black or white icing.
- Fondant cutouts of Spiderman’s eyes, mask, or logo.
- Mini skyscrapers or New York City silhouettes.
- Text bubbles with words like “Zap!” or “Thwip!” for comic flair.
Pick a Color Palette
Stick to Spiderman’s signature red, blue, and black for a classic look. Or add pops of white and silver for a modern twist. If you’re including other Spider-Verse characters, pull their unique colors into the design for contrast.
Creating the Base for Your DIY Spiderman Cake
How to Bake the Perfect Layers for a DIY Spiderman Cake
Creating flawless cake layers is essential for a professional-looking Spiderman cake. With the right preparation, timing, and attention to detail, your cake will be sturdy, moist, and delicious—ready to hold up under all that superhero decoration.
Select the Right Cake Pan
Start by choosing the correct size and shape of your pans based on your cake design. Round pans work well for character faces, while rectangular or square pans offer a great surface for webbing and action scenes.
- Round pans: Ideal for tiered cakes and face designs.
- Sheet pans: Best for creating cityscapes or multiple character elements.
- Springform pans: Helpful for layered cakes needing easy release.
Make sure to grease and line your pans with parchment paper to prevent sticking and ensure easy removal.
Mix the Batter Evenly
Follow your chosen cake recipe carefully, measuring ingredients accurately. Use room-temperature butter, eggs, and milk to achieve a smooth, even batter. Mix until just combined—overmixing can cause the cake to be dense and dry.
To make the layers more flavorful and colorful, consider adding:
- A teaspoon of vanilla or almond extract.
- Gel food coloring for vibrant red or blue tones.
- Zest of citrus for a fresh twist.
Fill and Tap the Pans
Evenly distribute the batter among your prepared pans, using a kitchen scale if needed to make sure the layers are uniform. Gently tap each pan on the counter to release air bubbles—this helps create a smooth, level top when baking.
Bake and Test for Doneness
Place the pans in a preheated oven and bake according to the recipe’s instructions. Try not to open the oven too early, as it can cause the cake to sink. Begin checking for doneness about five minutes before the expected finish time.
Use a toothpick or cake tester in the center—if it comes out clean or with just a few crumbs, it’s done!
Cool and Level the Layers
Allow the cakes to cool in the pan for 10–15 minutes before transferring them to a wire rack. Once completely cool, use a serrated knife or cake leveler to trim the tops if needed. Level layers stack more easily and look cleaner once frosted.
Coloring Your DIY Spiderman Cake Batter Red and Blue
Adding vibrant red and blue colors to your cake batter is an exciting part of making your DIY Spiderman cake. These colors bring the superhero theme to life, and getting them just right can make all the difference in creating an impressive cake. Here’s how to achieve the perfect shades of red and blue, while ensuring your batter remains smooth and delicious.
Choosing the Right Food Coloring
The key to achieving bright, vivid colors is using high-quality food coloring. Gel food coloring is often the best choice for cakes because it is more concentrated than liquid coloring, which can affect the consistency of your batter.
- Gel food coloring: Opt for gels like Wilton or AmeriColor, which deliver intense color without watering down your batter.
- Liquid food coloring: If you use liquid coloring, be cautious about the amount, as it can make the batter too thin.
It’s best to stick with professional food coloring brands for the best results.
Preparing the Batter for Coloring
Before you start adding colors, prepare your cake batter according to your recipe. Make sure the batter is mixed evenly and is smooth, without lumps. Once your batter is ready, divide it into two bowls—one for red and one for blue.
- Tip: If you’re making a layered cake, consider using a different bowl for each color. This will make it easier to control how much batter you need to color and prevent cross-contamination.
Adding the Color to the Batter
Add a few drops of red or blue gel food coloring to one of the bowls. Start small and gradually add more to achieve the desired shade.
- Red coloring: For Spiderman’s suit, start with a small amount of red gel and mix well. Red tends to be a strong color, so you can always add more if needed.
- Blue coloring: Similarly, add blue gel coloring slowly. If you’re making the web or accent details in blue, you’ll want to control the color intensity to make sure it doesn’t overpower the red.
Mix the batter thoroughly to ensure the color is evenly distributed. You can use a spoon, spatula, or mixer for this. If you’re using a mixer, mix on a low speed to prevent splashing.
Testing the Color
Once you’ve mixed in the color, test the batter by placing a small spoonful on a white plate or piece of parchment paper. This allows you to see the true color and decide if you need to add more. Remember that the cake will bake in a slightly darker shade than it looks when raw.
- Tip: It’s always better to start with a lighter color and build up, as it’s easier to deepen a color than to lighten it.
Layering Red and Blue Batter
Once your colors are ready, you can layer the batter in your cake pans. To create a dynamic Spiderman cake, alternate between the red and blue batter layers, or swirl them together for a fun marbled effect.
For an even distribution, drop spoonfuls of the colored batter into the center of the pan and gently spread it out to cover the base. This technique helps create a smoother, even layer when baked.
Baking Tips for Color Retention
Baking the cake at the correct temperature will help the colors stay vibrant. Ensure your oven is preheated and maintain the temperature recommended in your recipe. Overheating the cake can cause the colors to dull.
- Tip: Once your cake layers are baked and cooled, you’ll notice that the colors may slightly deepen or settle, so be prepared for subtle changes.
Trimming and Stacking Your DIY Spiderman Cake for Stability
Trimming and stacking your cake layers correctly is crucial for a professional-looking, stable, and well-balanced Spiderman cake. This process ensures that your layers are level, easy to stack, and capable of holding the decoration without shifting or collapsing. Let’s go over the steps to trim and stack your cake layers for the ultimate superhero cake.
Trimming the Cake Layers for Evenness
Before you begin stacking your layers, it’s essential to ensure that each one is perfectly flat. Uneven layers can make it difficult to build a stable structure, which may result in a lopsided cake. Trimming the tops of the layers will create an even base for stacking and decorating.
- Tools you’ll need: A serrated knife or a cake leveler, both of which will help you cut through the cake evenly.
- How to trim: Allow your cake layers to cool completely before trimming. Place the cooled cakes on a flat surface or cutting board, and then gently cut away any domed top with a serrated knife, creating a flat surface. You can also use a cake leveler for a more uniform cut.
By trimming the cakes, you create a stable foundation for decorating. This process is especially important if you plan on adding multiple layers of frosting, fondant, or other decorations.
Stacking the Layers for Stability
After trimming the layers, it’s time to stack them. This part of the process can be tricky, but with the right tools and technique, you’ll create a stable cake that can support all your Spiderman decorations.
- Using dowels or straws: If you’re creating a multi-layer cake, it’s essential to insert support dowels or sturdy drinking straws between the layers. This prevents the top layers from collapsing into the ones below. Place dowels in the center of each layer, cutting them to the height of the cake. Be sure to keep the dowels straight as you insert them.
- Frosting as glue: Spread a thin layer of frosting (crumb coat) between each cake layer. This will act as “glue,” keeping the layers in place and preventing them from shifting as you add the next one. Apply a generous amount of frosting on top of the first layer, then gently place the second layer on top. Repeat this for each subsequent layer.
Ensuring Even Alignment
As you stack each cake layer, it’s crucial to ensure that the layers are aligned properly. Misaligned layers can cause your cake to lean or become unstable.
- Use a cake board: Placing each layer on a sturdy cake board will help you handle the cake easily and keep the layers from shifting. Cake boards provide support for the entire cake structure.
- Level the layers: After stacking each layer, use a leveler to check if the cake is standing straight. You can gently push or pull the layers to adjust them into place.
Adding Frosting Between Layers
The frosting between the layers is not just for flavor—it also helps to smooth out the cake’s surface. As you stack the layers, use an offset spatula to spread a thin but even layer of frosting on top of each layer. This not only helps to keep the layers stable, but it also creates a smooth surface for the fondant or any additional decorations.
- Smooth out excess frosting: After adding each layer of frosting, use a bench scraper to smooth the surface. This ensures that the cake looks neat and is prepared for the final finishing touches.
Decorating Your DIY Spiderman Cake
Using Fondant to Shape Spiderman’s Suit or Face
Fondant is a versatile tool for cake decorators, providing a smooth and polished finish, ideal for creating intricate designs like Spiderman’s suit and face. Whether you are looking to create a detailed mask or the bold red suit, fondant can help you achieve a professional look. Here’s how to use fondant for these components of your Spiderman cake.
Preparing the Fondant
Start by kneading the fondant to make it soft and pliable. If you find that the fondant is too stiff, you can add a small amount of shortening or fondant conditioner. Kneading is key to making it smooth and easy to roll out, ensuring it doesn’t crack when placed on your cake.
Rolling Out the Fondant
Roll the fondant on a clean, lightly dusted surface to prevent sticking. Use a rolling pin and roll the fondant to the desired thickness (typically about 1/8 inch thick). For Spiderman’s suit, you want it thick enough to hold its shape but not so thick that it overwhelms the cake’s texture.
Cutting the Fondant for the Face and Suit
For Spiderman’s face, roll the fondant into the shape of his mask. You can use a template or freehand it. Once the fondant is rolled out, place it on top of your cake and smooth it around the sides, trimming the excess. For Spiderman’s iconic red suit, you can cover the cake with a single layer of fondant, ensuring it hugs the cake’s curves perfectly.
To create the web pattern or intricate suit details, roll out fondant in different colors (like black or white) and cut them into thin strips for Spider-Man’s iconic design. Place these strips onto the base layer and gently press them into the fondant.
Adding Details to the Face
For Spiderman’s face, use fondant to sculpt his eyes. Roll out small balls of white fondant and shape them into ovals. You can color them black for the pupils, or use edible markers to add extra detail for a more realistic look. Place these eye pieces on the mask, ensuring they align symmetrically.
Ensuring a Smooth Finish
After applying the fondant, use a fondant smoother to gently smooth out any imperfections. This helps ensure a polished, professional appearance. Don’t forget to trim any edges carefully to give your Spiderman cake a clean and neat look.
Final Touches
Once you have covered the cake in fondant and added details like the suit’s webbing or Spider-Man’s face, allow the fondant to firm up for a couple of hours before further decorating. You can add extra decorations, such as edible glitter for a superhero glow or 3D elements like Spiderman’s logo to bring the cake to life.
Using fondant allows you to achieve clean, precise designs for a Spiderman cake. With practice, you can make Spiderman’s suit and face look incredibly realistic, making your cake the star of the party.
Piping Web Designs on Your DIY Spiderman Cake with Frosting
Piping web designs with frosting is one of the most fun and creative steps when decorating your Spiderman cake. The web is an iconic feature of Spiderman’s costume, and recreating it on a cake using frosting adds that perfect finishing touch. This technique involves both steady hands and a little patience, but with a bit of practice, you can achieve a detailed, impressive design that captures the essence of Spiderman’s web. Here’s how to pipe web designs with frosting effectively.
Preparing Your Piping Tools
To begin, you’ll need the right tools. A piping bag, fitted with a fine round tip (such as a #1 or #2), is ideal for creating the delicate lines of the web. You can use a variety of tips depending on the width of the lines you want. For the thin, fine lines of the web, you’ll want to use a very small round tip. Also, ensure your frosting is at the right consistency: it should be thick enough to hold its shape but smooth enough to pipe easily without breaking or being too stiff.
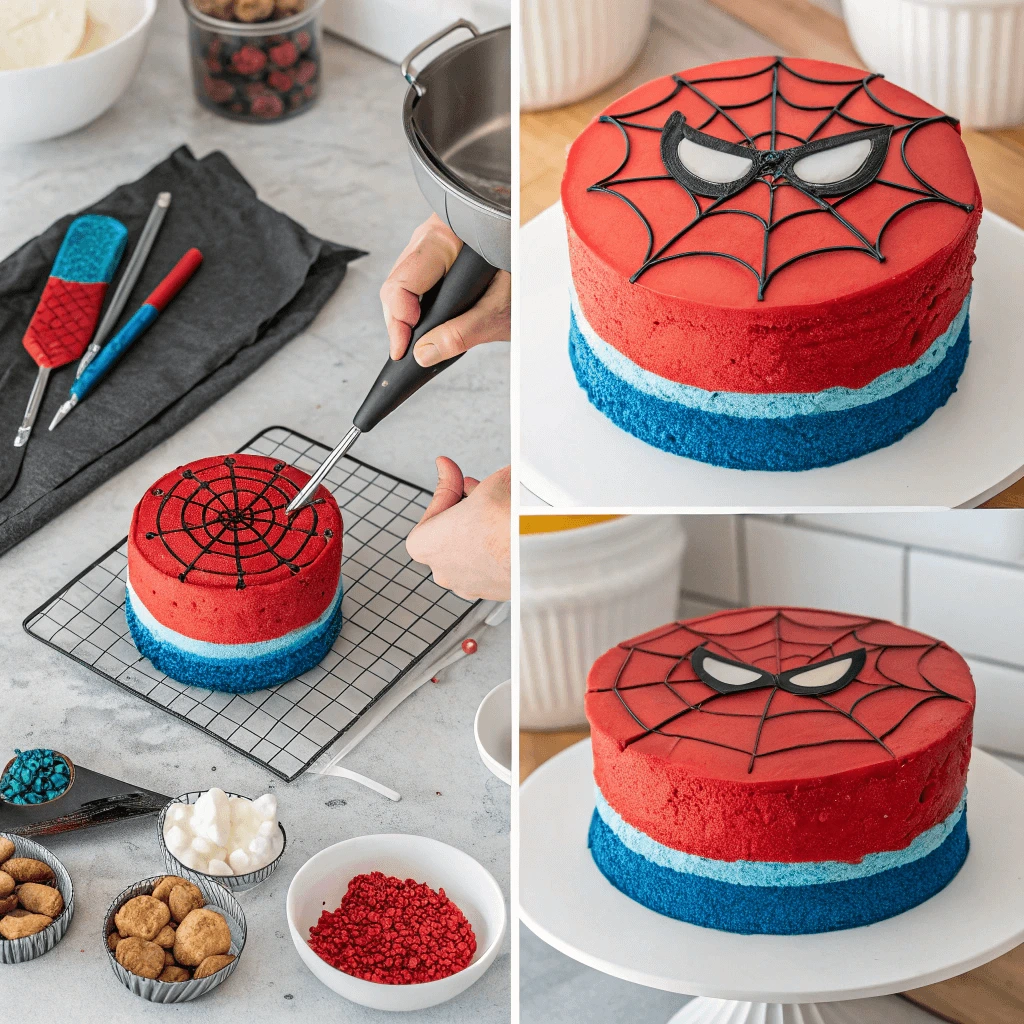
Creating the Web Base
Start by outlining the web design. Use your piping bag filled with a thick buttercream frosting (usually white or black for contrast against the red fondant) to draw a series of concentric circles on the top of the cake. Begin by piping the outermost ring of the web, and then move inward, piping smaller circles toward the center. You can lightly sketch these circles with a toothpick beforehand to help guide you.
For the outer rings, keep the lines wider apart. As you move closer to the center, narrow the rings to create the familiar look of Spiderman’s web.
Drawing the Web’s Radiating Lines
Once you’ve piped the concentric circles, it’s time to pipe the radiating lines that form the crisscross pattern of the web. Start by drawing lines from the center of the cake outward, like spokes on a wheel. Ensure the lines are evenly spaced as they radiate outward. The length of the lines should match the circles’ spacing, creating a symmetrical and balanced design.
Make sure the frosting lines are consistent in thickness and neat. You can use a light touch when piping, gradually building the lines until they form a perfect shape. When piping the radiating lines, work quickly before the frosting hardens.
Adding the Inner Web Structure
Now that you have the base web structure, it’s time to add the finer details. To achieve the distinct triangular sections of the web, pipe small “V” shapes between the radiating lines. These small triangles should gradually get smaller as you approach the center of the cake.
The smaller, inner triangles create the intricate details that complete the look of the web. This step requires precision, as these lines should be thin and delicate to mimic the fine structure of Spiderman’s web. Don’t worry if it’s not perfect at first—practice will help you get the shapes just right.
Tips for a Smooth Web Design
If you notice the frosting beginning to smudge or dry out, lightly cover the cake with a damp cloth or spray it with a fine mist of water to keep the piping smooth and manageable.
Additionally, always work on a clean surface and keep your piping bag free of excess frosting buildup. Clean the tip of your piping bag regularly to avoid messy, uneven lines.
Enhancing the Web Design
Once you’ve piped the main web design, you can add extra touches to enhance it. For example, you could use edible glitter or silver or gold edible paint to highlight certain areas of the web, making it sparkle like Spiderman’s actual web. Some decorators also choose to outline the web with black frosting for added definition, making the design pop against the red cake layers.
If you want to add even more dimension, consider adding a small Spider-Man figurine to the top of the cake in front of the web or placing his logo in the center of the cake to complete the superhero look.
Letting the Design Set
Once you’ve completed the piping, allow the web to set for a few minutes before handling or transporting the cake. This ensures that the frosting holds its shape and the web remains intact.
Piping web designs with frosting not only gives your Spiderman cake an authentic look but also adds an intricate, detailed touch that will impress your guests. With a little practice and patience, you’ll be able to pipe a stunning, professional-quality Spiderman web that enhances the overall theme of your cake.
Adding Fun and Thematic Toppers to Your DIY Spiderman Cake
Spiderman cake toppers are the perfect way to enhance your cake’s superhero theme. These fun additions bring the character to life, creating a memorable centerpiece for any celebration. Here’s how to effectively use Spiderman cake toppers in your design.
Choosing the Right Toppers
Select toppers that match the theme and age group of your party. For children, action figure toppers or colorful edible images work well. For adults, consider more refined designs like the Spiderman logo or a minimalist silhouette. Choose toppers that complement your overall cake design.
Using Edible Toppers
Edible toppers are a great way to keep the cake fully edible while still capturing the Spiderman look. Edible wafer paper images or fondant shapes can be used to create Spiderman’s mask or logo. These toppers can be placed directly onto the cake for a polished, clean finish.
Positioning the Toppers
When placing the toppers, make sure they are balanced. Place larger figurines or toppers at the center or top of the cake. Smaller toppers can be scattered around the sides for a balanced look. Ensure the toppers are stable by securing them with frosting or royal icing if needed.
Customizing Your Toppers
To add a personal touch, you can get custom toppers with the birthday person’s name or a special message. This extra detail will make the cake feel unique and tailored to the celebration. Customize toppers with names, ages, or even a fun birthday message for an added personal flair.
Final Touches
After positioning the toppers, step back to ensure everything is balanced. If necessary, add extra accents like edible glitter or sprinkles to finish the look. These small details can elevate your cake without overwhelming the main design.
Making Your DIY Spiderman Cake Party-Ready
DIY Spiderman Cake Ideas for Kids’ Birthday Parties
Creating a Spiderman cake for kids offers a fun way to bring their favorite superhero to life. Whether it’s for a birthday or special occasion, these ideas will help you design the perfect cake that will impress both kids and adults alike.
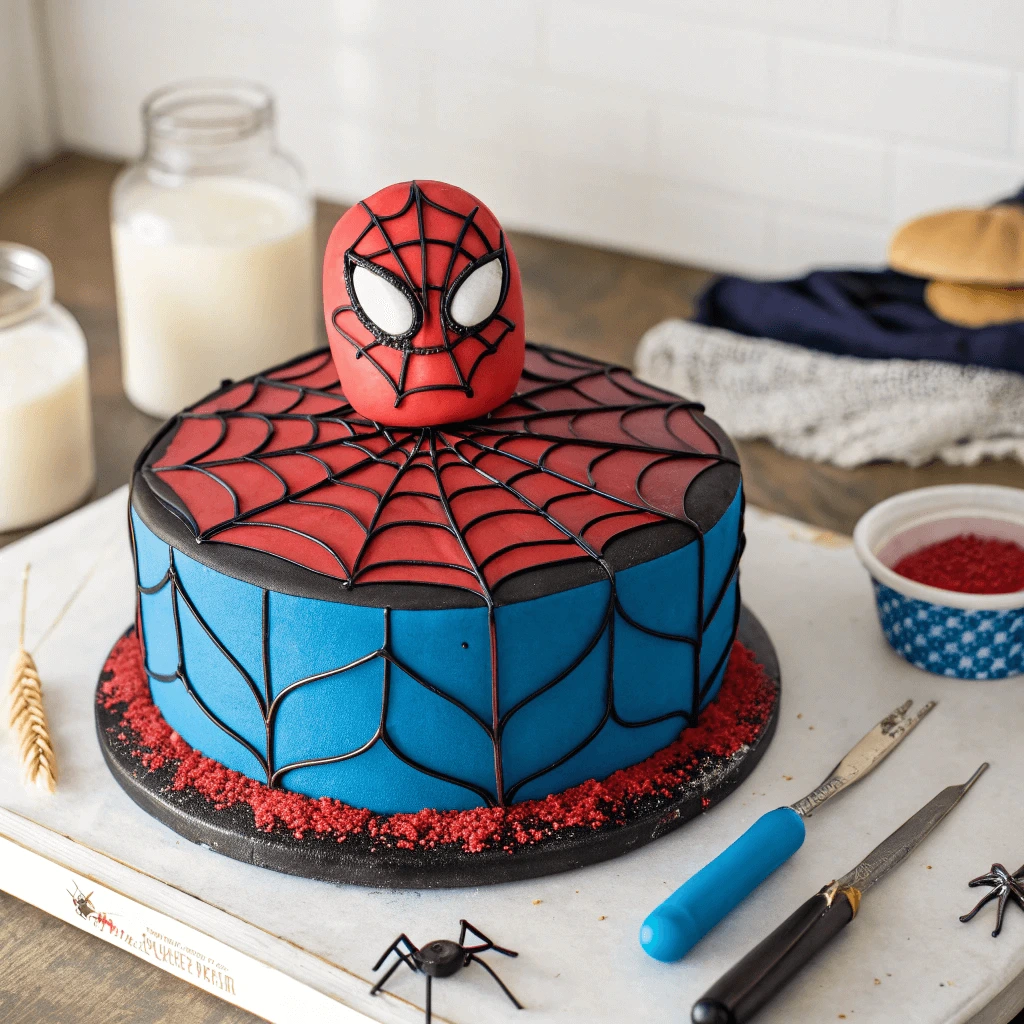
Spiderman Face Cake Design
A classic and popular choice is to create a Spiderman cake shaped like his face. Using fondant, you can sculpt the red and blue mask and add large, bold eyes for a cartoonish look. This design brings Spiderman’s iconic mask to the forefront, creating a striking visual that will surely catch the kids’ attention.
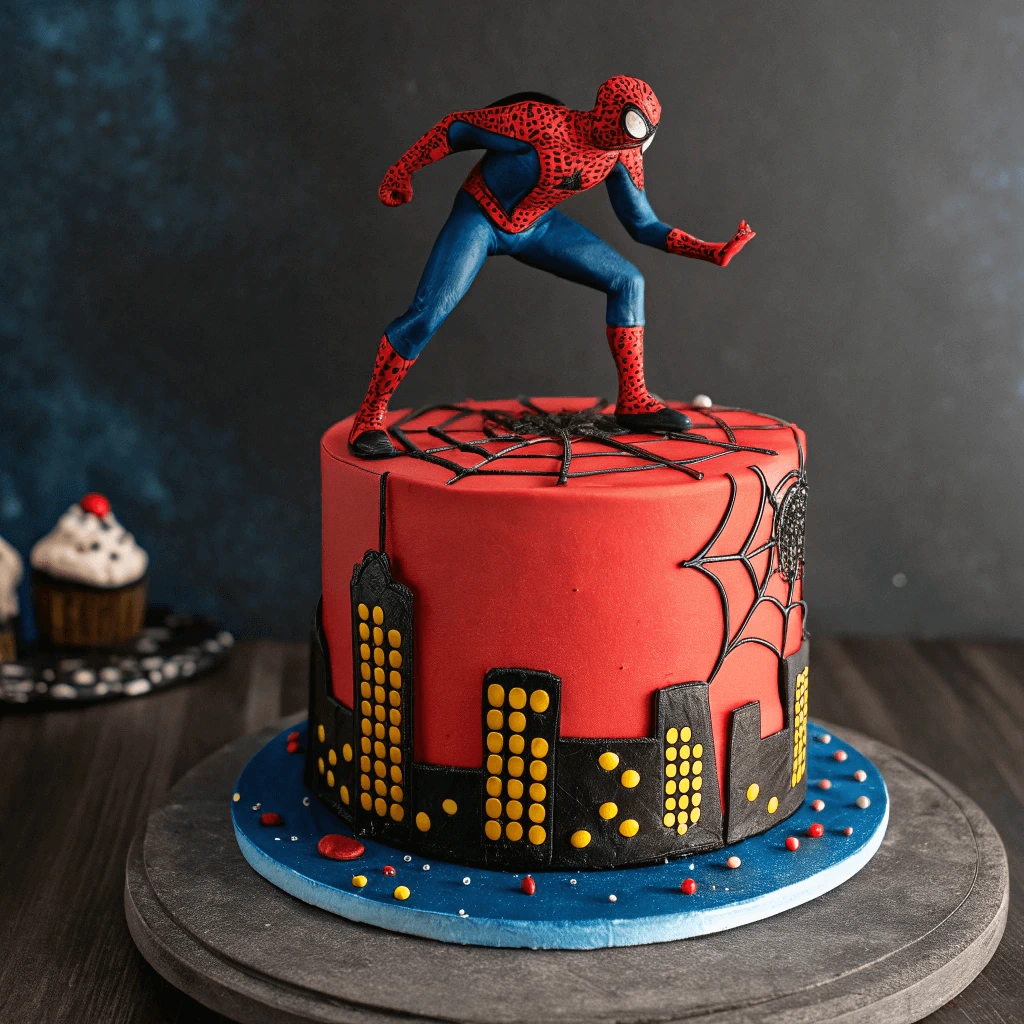
Web Cake with Figurines
Another fun idea is to design a cake with a web pattern that features a Spiderman action figure on top. You can pipe a web with royal icing or use fondant for a more structured design. Placing a mini Spiderman figurine on the cake enhances the theme and adds an interactive element to the celebration.
Cupcake Spider-Man
If you’re looking for a simpler option, a Spider-Man cupcake cake works perfectly. Arrange cupcakes in the shape of Spiderman’s face or logo, with each cupcake decorated with different parts of the superhero’s suit. It’s a great option for easy serving and gives you a chance to play with various designs and toppings.
These ideas can help create a Spiderman cake that kids will love, bringing a superhero touch to their special day.
Superhero Cake Themes for Teens
Designing a superhero cake for teens should strike the perfect balance between fun and maturity. Teens appreciate sophisticated, stylish designs that still reflect their love for their favorite superheroes. Here are some ideas to create a cake that’s sure to impress.
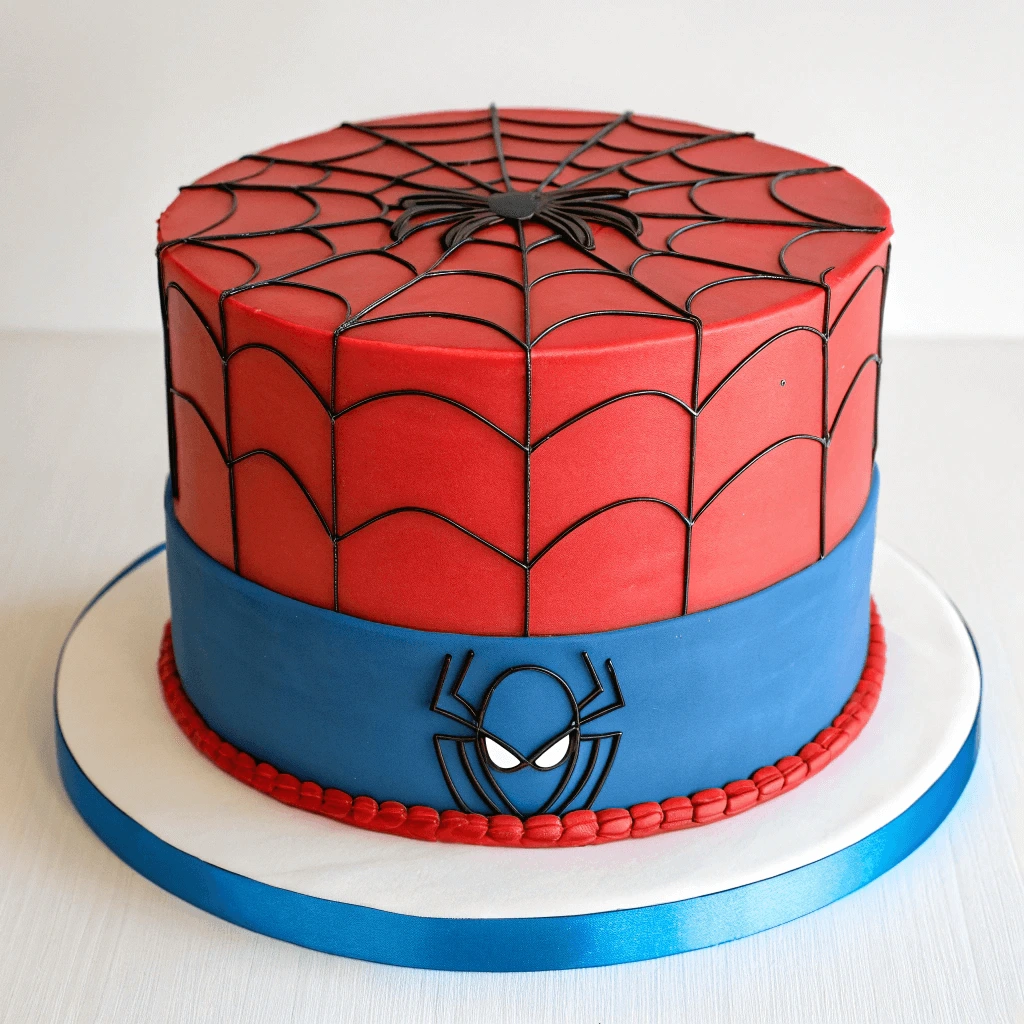
1. Minimalistic Superhero Logos
For a sleek and modern look, you can opt for a cake featuring minimalistic superhero logos, like Spider-Man, Batman, or Wonder Woman. Keep it simple with bold, clean lines. A black-and-white color scheme or metallic accents can add a mature touch, making this design perfect for teens who want a subtle superhero reference.
2. Comic Strip Cake Design
Teenagers who are comic book fans will enjoy a cake that resembles a comic strip. Create panels with action-packed scenes, complete with bold text like “BAM!” and “POW!” You can either use edible printing or hand-paint the designs for a personal feel. This theme adds an extra layer of excitement to the cake and allows for creative storytelling.
3. 3D Superhero Figures
If you want to go all out, a 3D superhero cake with sculpted figures can be a showstopper. Think Spider-Man in an action pose or Iron Man soaring through the air. These cakes often have multiple tiers with action-packed details, and you can use fondant or pre-made figurines to bring the superheroes to life.
By combining these ideas, you can create a superhero cake that’s both visually striking and suited to the interests of a teen audience.
Matching Party Decorations and Table Setup with Your Spiderman Cake
When it comes to creating a cohesive superhero party theme, the table setup and decorations play a crucial role. These elements should complement your Spiderman cake and enhance the overall superhero experience for your guests. Here’s how to match the decorations and set up the table to make your Spiderman cake the centerpiece of the event.
1. Superhero-Themed Tableware
Start with superhero-themed plates, cups, and napkins. Choose colors that match the Spiderman theme, such as red, blue, and black. You can find these items easily online or in party supply stores, and they’re perfect for setting the tone of the party. Incorporating Spider-Man’s logo or action scenes on the tableware will add a personal touch to your event.
2. Color Coordinated Tablecloths and Centerpieces
A red or blue tablecloth will tie together the Spiderman theme while providing a vibrant background for your cake and other treats. Add a few superhero-themed centerpieces, like a small Spider-Man figurine or web decorations. You could also use red and blue balloons scattered across the table for a dynamic and fun look. Centerpieces could be something as simple as a Spider-Man mask or an action figure holding a web.
3. Themed Cake Stands and Cupcake Holders
A cake stand can elevate your Spiderman cake to make it stand out. Choose one that either matches the theme—like a webbed design—or go for a sleek, modern stand that lets the cake shine. Pair the cake stand with superhero-themed cupcake holders to serve additional treats. Cupcakes topped with Spider-Man’s face or web designs can be placed next to the cake, giving your table a uniform and festive feel.
4. Adding Webbed Decorations
Since Spiderman is all about webs, consider adding some fun, web-themed decorations to your table. You can create a DIY web using string, or you can buy ready-made web decorations to place around the cake. These webs can be placed along the table’s edge or hung from above to complete the look. If you have extra space, using webbed garlands will give the party a finished touch.
5. Matching Party Favors
Add superhero-themed party favors, such as Spider-Man figurines, keychains, or mini comic books, to give your guests a fun takeaway. You can place these party favors in matching bags with superhero designs. This will not only complete the setup but also keep your party’s theme consistent.
When setting up the decorations, keep the color palette and superhero theme in mind. Combining the right colors, themed tableware, and fun additions like web decorations will make your Spiderman cake stand out and tie the whole event together. With attention to detail, your party will be an unforgettable superhero experience.
Final Touches for Your DIY Spiderman Cake Presentation
Capturing the Perfect Cake Photos
After spending time creating your Spiderman cake, you’ll want to take great photos to showcase your hard work. Whether you’re sharing on social media or keeping a memory for yourself, here are some tips to help you capture the best shots.
1. Lighting is Key
Natural light is your best friend when it comes to cake photography. Place the cake near a window where the light is soft and even, avoiding direct sunlight. If indoors at night, try soft artificial lighting to give the cake a gentle glow.
2. Pick the Right Angle
Experiment with different angles to show off your cake. For a straightforward look, shoot from eye level. To highlight details like the webbing or layers, try an overhead or close-up shot.
3. Set the Scene
The background should complement your cake without overpowering it. Use a simple, themed backdrop—like a red-and-blue tablecloth or Spider-Man party decorations—to keep the focus on the cake.
4. Focus on the Details
Close-up shots of the cake’s finer details, like the web design or Spider-Man logo, help capture the effort you put into decorating. These detailed images make the cake look more polished.
5. Action Shots
Instead of just posed photos, capture moments when people are enjoying the cake. Shots of kids taking a bite or the cake being cut bring life to your photos and show how much fun everyone is having.
By following these tips, you can take photos that highlight both the design and the joy your Spiderman cake brings!
Transporting Your Cake Safely
Transporting a cake, especially one with intricate designs like a Spiderman cake, can be a bit tricky. To ensure that your masterpiece reaches its destination in perfect condition, follow these tips for safe and secure cake transport.
1. Use a Sturdy Cake Box
A sturdy cake box is essential for keeping your cake safe during transport. Choose one that fits your cake snugly, leaving just a bit of space for air circulation but not so much that the cake might shift around. If you’re using a multi-tier cake, consider using a box with a solid base to support the weight and prevent the layers from shifting.
2. Keep It Level
To avoid any risk of the cake toppling or being damaged, make sure the cake stays level during transport. Whether you are driving or walking, always place the cake on a flat surface, like the floor of your vehicle. The seat of a car, where the surface might not be even, is not ideal. If you are walking to your venue, carry the cake on a flat tray.
3. Secure the Cake Inside the Vehicle
If you’re driving, ensure the cake is secured. Place it in the passenger seat or flat on the floor of the car to avoid jostling during the journey. In some cases, it might be helpful to use non-slip mats or towels around the cake box to keep it from sliding around. Consider using a cooler or a large box for added protection, especially if the cake has delicate decorations.
4. Plan for a Smooth Ride
The smoother the ride, the better. Avoid abrupt turns, sudden stops, or sharp acceleration when transporting your cake. If possible, drive slowly and steadily, taking care to avoid bumps and sharp corners. You might even want to ask a friend or family member to hold the cake while you drive if the cake is too large or heavy to handle on your own.
5. Keep Temperature in Mind
Certain elements of your cake, especially frosting or fondant, might be sensitive to temperature changes. If it’s a hot day, consider using a cooler or insulated bag to maintain a cool temperature. If it’s cold, make sure your cake isn’t exposed to freezing temperatures, as this could cause decorations to harden or become brittle.
6. Carry Extra Supplies
Accidents happen, so it’s a good idea to carry some backup supplies in case of minor mishaps. Keep a small bag with extra frosting, piping bags, or a few tools to fix any decorations that might get slightly damaged during the journey. Having a spatula or extra cake board can help if you need to make quick adjustments when you arrive.
Storing Leftovers Without Losing Detail
After your Spiderman cake has been enjoyed by everyone, you may find yourself with some leftover slices. To preserve both the flavor and intricate decorations, follow these simple steps.
1. Let the Cake Cool Completely
Always ensure the cake has cooled down before storing it. If you store a warm cake, it can become soggy. Let the cake rest on a wire rack until it’s fully cool, preserving the design and texture.
2. Cover the Cake Properly
Wrap the leftover cake with plastic wrap or store it in an airtight container. If your cake has fondant decorations, avoid pressing the wrap too tightly. You can also use a cake dome for protection, especially if the cake is decorated with delicate designs.
3. Refrigerate If Necessary
For cakes with buttercream or cream-based fillings, refrigeration is essential to keep them fresh. Store the cake in an airtight container to prevent it from absorbing fridge odors and maintain its quality.
4. Freezing Leftover Cake
For longer storage, you can freeze your cake. Cut it into individual slices, wrap each piece tightly in plastic wrap, and then place them in a freezer-safe container. Thaw slices in the fridge or at room temperature before serving.
5. Refreshing the Cake
After storing, the cake might lose some texture. You can reapply frosting or smooth out any fondant to refresh its look, ensuring the cake remains as delicious as when you first made it.
Making a DIY Spiderman cake is a fun and creative way to celebrate any superhero-themed event. With the right ingredients and a bit of imagination, you can create a cake that not only looks impressive but tastes amazing too. Whether it’s for kids, teens, or adults, this cake is easily customizable to fit any party style. From choosing the right flavors to adding those perfect Spiderman details, each step brings you closer to creating a show-stopping dessert. Enjoy the process, and soon you’ll have a Diy Spiderman cake that’s both a treat for the eyes and the taste buds!