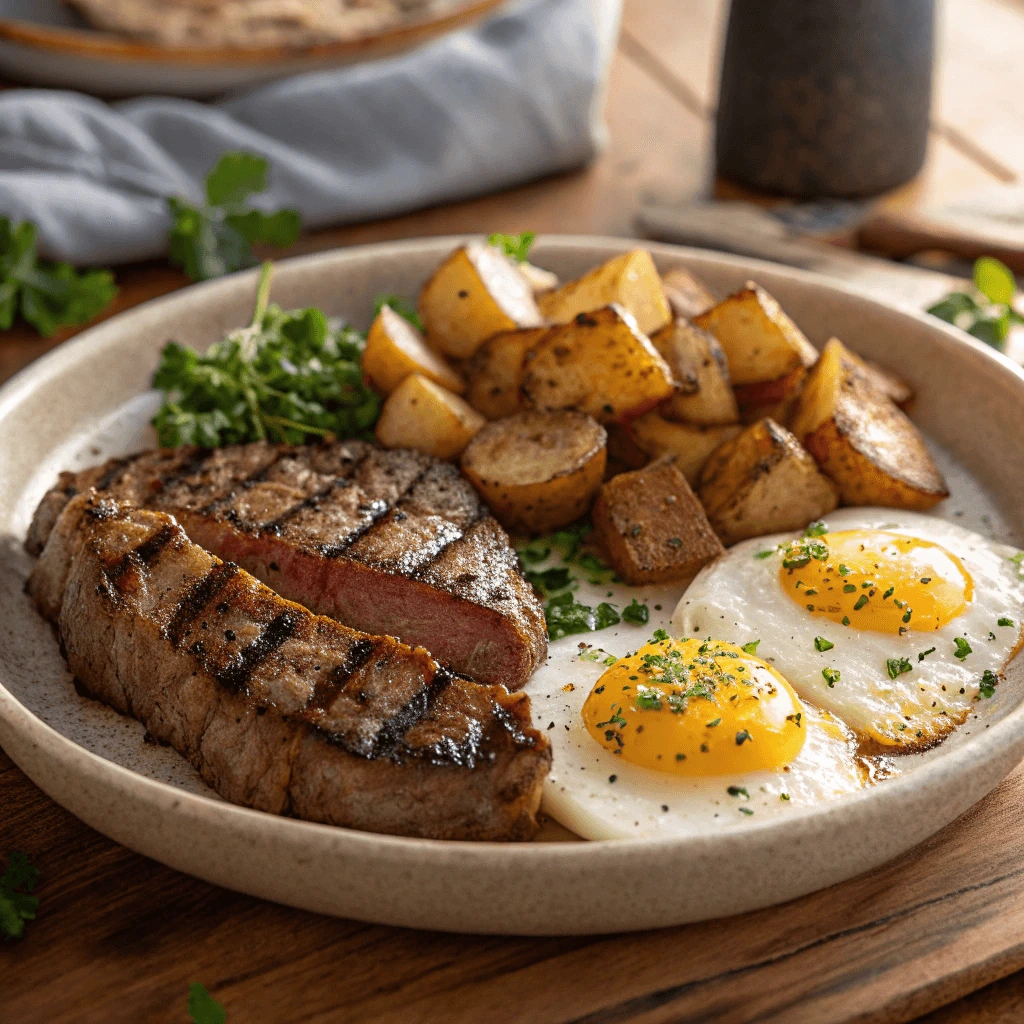
Steak and eggs is a timeless breakfast dish that combines the savory richness of steak with the satisfying comfort of eggs, making it a perfect meal to kickstart your day. Whether you’re looking for a hearty weekend brunch or a quick protein-packed breakfast, this easy steak and eggs recipe delivers both flavor and satisfaction. The beauty of this dish lies in its simplicity—perfectly seared steak paired with eggs cooked just the way you like them. In this guide, we’ll walk you through selecting the best steak, cooking methods, egg styles, and delicious sides to elevate your meal. Get ready to indulge in a filling and mouthwatering breakfast that’s as easy as it is delicious!
Why Steak and Eggs Make a Perfect Breakfast
🥩 Protein-Packed Breakfast for Lasting Energy
Starting your day with a protein-rich meal like steak and eggs gives your body sustained energy and helps keep hunger at bay. This combination provides essential nutrients that fuel your muscles and brain throughout busy mornings.
Why Protein Matters in Breakfast
Protein plays a crucial role in repairing and building muscle tissue, especially after overnight fasting. It also slows digestion, which stabilizes blood sugar levels and prevents energy crashes that often come after carb-heavy breakfasts. Eating steak and eggs supplies your body with complete proteins containing all essential amino acids, vital for overall health.
How Steak Contributes to Energy
Steak delivers a dense source of high-quality protein and important minerals like iron and zinc. Iron helps transport oxygen in your blood, which boosts endurance and reduces fatigue. Zinc supports immune function, keeping you healthy and ready to tackle your day.
The Role of Eggs in Sustained Energy
Eggs complement steak by providing choline, a nutrient that supports brain function and memory. Their healthy fats help maintain fullness longer and provide a steady energy supply. This balanced combination of protein and fat keeps you energized without spikes or crashes.
🥓 Low-Carb and Keto-Friendly Meal Option
Steak and eggs make a perfect low-carb, keto-friendly breakfast. They provide plenty of protein and healthy fats while keeping carbohydrates very low. This helps your body burn fat for energy and maintain steady fuel throughout the day.
Why Low-Carb Works for Keto
Keto diets limit carbs to encourage your body to enter ketosis, where it uses fat instead of sugar for energy. Steak and eggs contain almost no carbs but deliver essential nutrients and energy through protein and fats.
Healthy Fats from Steak and Eggs
Steak supplies saturated fats and beneficial compounds like conjugated linoleic acid (CLA). Eggs add monounsaturated fats and omega-3 fatty acids, especially if they come from pasture-raised hens. These fats support heart health and keep you feeling full.
Staying Full and Focused
Because of their high protein and fat, steak and eggs keep hunger away longer than carb-heavy breakfasts. This helps reduce cravings and supports muscle maintenance. Adding keto-friendly sides like avocado or spinach can boost nutrients without adding carbs.
🥩 Nutritional Benefits of Steak and Eggs
Steak and eggs combine to make a nutrient-packed meal that fuels your body and supports good health. They deliver high-quality protein, healthy fats, vitamins, and minerals essential for your daily needs.
Protein for Muscle and Satiety
Both steak and eggs provide complete protein, meaning they contain all the amino acids your body needs. Protein helps build and repair muscles, supports your immune system, and keeps you feeling full longer.
Vitamins for Energy and Health
Steak is rich in B vitamins like B12, which is important for brain function and red blood cell production. Eggs also provide B vitamins such as riboflavin and folate, helping convert food into energy and supporting healthy skin and hair.
Minerals for Strength and Immunity
Iron in steak helps carry oxygen in your blood, boosting energy levels. Zinc supports your immune system and helps heal wounds. Eggs provide selenium, an antioxidant that protects your cells.
Healthy Fats for Brain and Heart
Eggs provide healthy fats, including omega-3s, which support brain health and reduce inflammation. Steak offers saturated fats that supply energy and support hormones. These fats also help your body absorb important vitamins.
Choosing the Best Steak Cuts for Your Recipe
🥩 Ribeye vs. Sirloin: Which is Better for Breakfast?
Choosing the right steak cut is crucial for a satisfying breakfast. Ribeye and sirloin are two popular options, each with distinct qualities that suit different tastes and cooking styles. Understanding their differences helps you pick the best cut for your morning meal.
Ribeye: Rich, Juicy, and Flavorful
Ribeye stands out because of its high fat content and marbling. This fat melts during cooking, creating a juicy and tender steak packed with flavor. The marbling also helps the steak stay moist, making it ideal for a hearty breakfast. Ribeye cooks well in a cast iron skillet, developing a delicious crust without drying out. If you enjoy a rich, buttery steak with bold flavor, ribeye is a great choice for breakfast.
Sirloin: Lean, Tender, and Quick to Cook
Sirloin offers a leaner alternative with less fat but still plenty of flavor. It cooks faster than ribeye because of its lower fat content, making it perfect for busy mornings. Sirloin tends to be firmer but remains tender when cooked properly. It pairs well with eggs and lighter sides, providing a balanced meal without overwhelming richness. If you prefer a healthier option or want to control fat intake, sirloin fits the bill.
Which Steak Works Best for You?
Your choice depends on your taste preferences and dietary goals. Ribeye satisfies those craving indulgence and rich flavor, while sirloin appeals to people who want a leaner, faster-cooking steak. Both cuts pair beautifully with eggs and simple seasonings. For a classic breakfast, either works well; just adjust cooking time and heat to match the cut’s fat content.
🥩 How to Select Quality Steak
Choosing the right steak makes a big difference in taste and nutrition. Understanding terms like “grass-fed” and “organic” helps you shop smarter and eat better.
Grass-Fed vs. Grain-Fed
Grass-fed beef comes from cows raised on natural pasture. It’s leaner, slightly more earthy in flavor, and rich in nutrients like omega-3s and antioxidants. Grain-fed beef, by contrast, is more marbled, juicier, and has a richer flavor—perfect if you prefer a tender and buttery bite.
The Meaning of “Organic”
Organic steak comes from cattle raised without hormones, antibiotics, or GMOs. These animals usually graze in open pastures. Choosing organic means supporting more natural farming practices and getting cleaner meat on your plate.
What to Look for in Stores
Check for labels like USDA Prime, Choice, or Select. Prime offers the most marbling and tenderness. Also, look for steaks that are bright red with even marbling and avoid cuts that look gray or dry.
If you want the freshest option, buy from a local butcher or trusted farm.
🥩 Ideal Thickness and Portion Sizes for Easy Cooking
Choosing the right steak thickness and portion size helps ensure even cooking and a better breakfast experience. Whether you’re feeding one or preparing a weekend brunch, the right cut makes everything simpler and tastier.
Optimal Thickness for Better Results
Aim for steaks that are about 1 to 1.5 inches thick. This thickness gives you enough surface area to sear while keeping the inside juicy and tender. Thinner steaks (under 1 inch) tend to overcook quickly and don’t allow much control over doneness. Thicker steaks take longer and require more skill to cook evenly, especially for breakfast.
Cooking Benefits of the Right Size
A 1-inch steak cooks quickly and evenly in a hot skillet, which is ideal for busy mornings. It allows for a proper sear without drying out the meat. Thicker steaks work better when you have more time and don’t mind finishing them in the oven for even heating.
Ideal Portion Sizes per Person
For a satisfying breakfast, aim for 4 to 6 ounces of steak per person. This amount provides enough protein without feeling too heavy. Pairing it with eggs and a side like avocado or greens completes a balanced and energizing meal.
Tips for Easy Handling and Storage
Cut large steaks into smaller portions before cooking if needed. This helps with faster cooking and easier meal prep. Store unused portions in an airtight container and reheat gently to maintain tenderness.
How to Cook the Perfect Steak and Eggs
🔥 Searing Steak in a Cast Iron Skillet for Flavorful Crust
Searing your steak properly is the key to unlocking rich flavor and restaurant-quality texture. A cast iron skillet is the ideal tool for this job thanks to its even heat retention and ability to create a deep, caramelized crust.
Why Choose a Cast Iron Skillet?
Cast iron holds high, steady heat better than most pans. When you preheat it well, the surface becomes hot enough to brown meat quickly without overcooking the inside. This creates that golden-brown crust full of savory flavor, known as the Maillard reaction.
Prepping Your Steak for the Skillet
Before cooking, take the steak out of the fridge and let it come to room temperature—this helps it cook evenly. Pat it dry with paper towels to remove surface moisture. Season generously with salt and pepper (or your preferred spice mix). A dry, well-seasoned surface leads to a better sear.
Step-by-Step Searing Technique
- Preheat your cast iron skillet over medium-high heat for 3–5 minutes. It should be hot but not smoking excessively.
- Add a small amount of high smoke-point oil (like avocado or canola oil).
- Lay the steak flat in the pan without crowding.
- Let it cook undisturbed for 3–4 minutes to develop a rich crust.
- Flip once and sear the other side for another 2–4 minutes, depending on thickness and desired doneness.
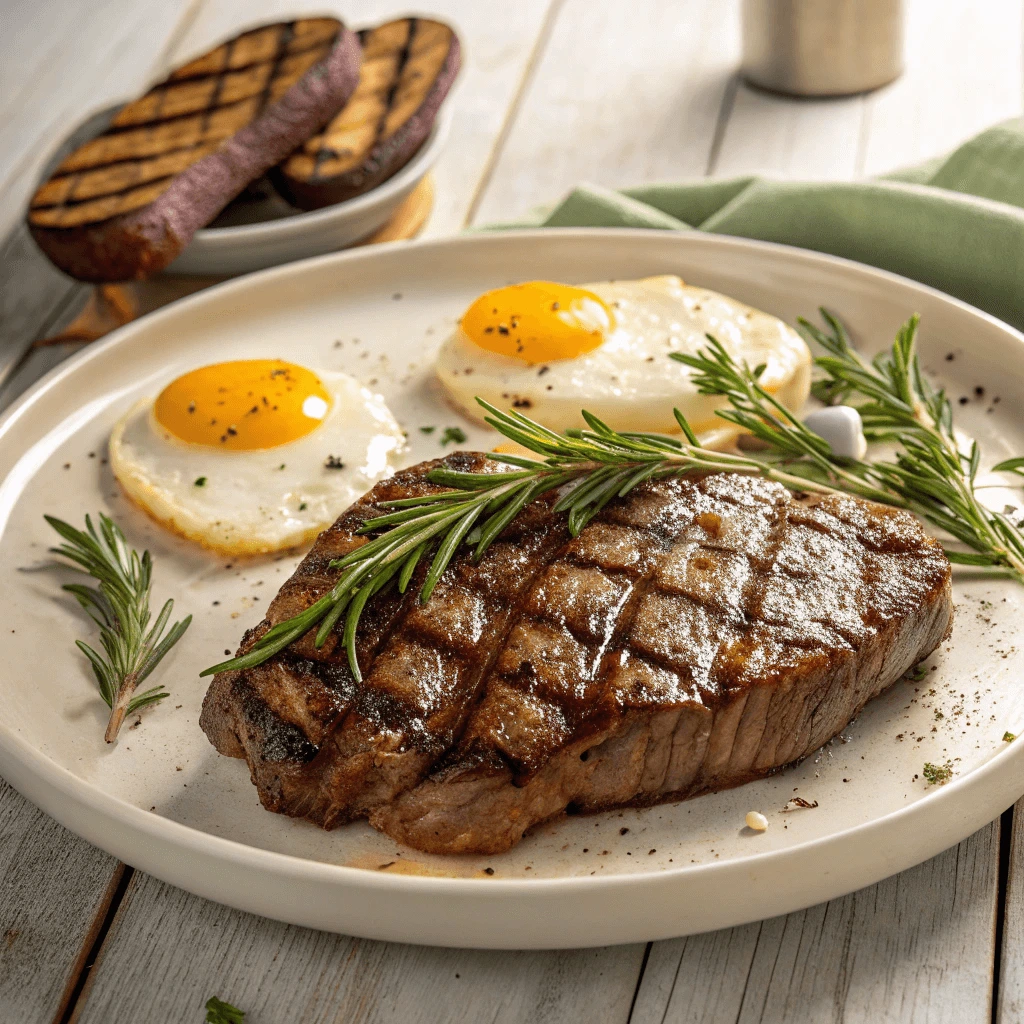
For extra flavor, add butter and fresh herbs like thyme or rosemary during the last minute. Baste the steak with melted butter by tilting the pan and spooning it over the meat repeatedly.
Final Tip: Don’t Skip the Rest
After searing, let the steak rest on a cutting board for about 5 minutes. This step allows the juices to redistribute, so your steak stays moist and tender when sliced.
🍳 Cooking Eggs
Eggs are the perfect match for steak, and cooking them the right way makes your breakfast even more satisfying.
☀️ Sunny Side Up
For sunny side up eggs, heat a non-stick pan over medium-low. Add a bit of oil or butter. Crack the eggs into the pan and let them cook without flipping. Once the whites are fully set and the yolk is still runny, they’re ready. You can cover the pan briefly to help cook the tops of the whites.
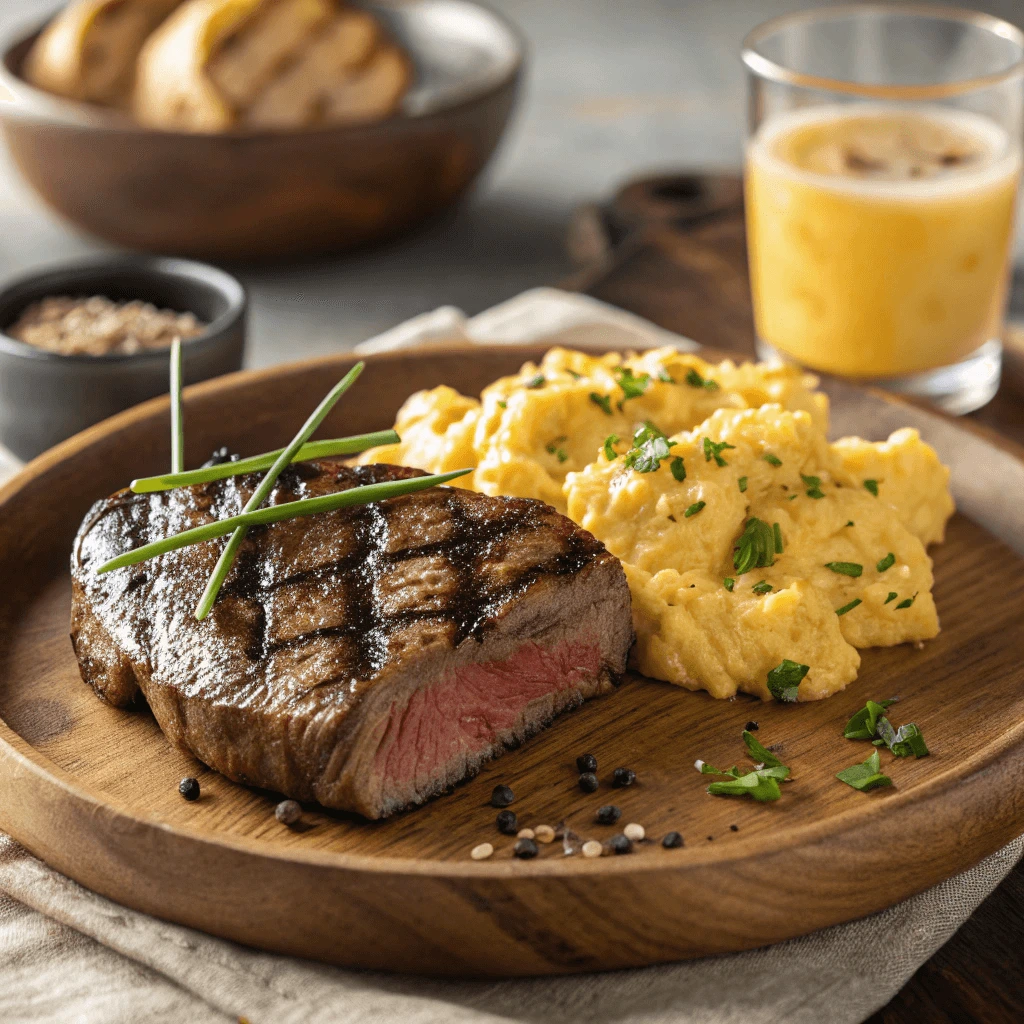
🍳 Scrambled Eggs
To make soft, fluffy scrambled eggs, whisk them with a pinch of salt and a splash of milk. Melt butter in a skillet over low heat, then pour in the eggs. Stir gently with a spatula, moving the eggs slowly until they form creamy curds. Remove them from heat slightly early—they’ll finish cooking on their own.
🔄 Other Egg Styles
Try over-easy eggs for a lightly flipped version with runny yolks, or poached eggs for a soft texture and clean look. If you’re meal prepping, hard-boiled eggs are easy to make ahead.
⏱️ Tips for Timing Steak and Eggs Together
Cooking steak and eggs at the same time may seem tricky, but with a few simple strategies, you can serve both hot and perfectly cooked.
🔥 Start with the Steak
Since steak usually takes longer to cook than eggs, begin by searing the steak first. Use a preheated cast iron skillet and cook the steak based on thickness and preferred doneness (about 3–4 minutes per side for medium-rare). Once cooked, let the steak rest on a warm plate for 5 minutes. This resting time keeps juices inside and gives you the perfect window to cook your eggs.
🍳 Cook Eggs During the Steak’s Rest
As your steak rests, wipe down the skillet or use a second pan to cook the eggs. Lower the heat slightly to avoid burning. This timing ensures your eggs are hot and fresh when the steak is ready to plate. Scrambled eggs, sunny side up, or over-easy styles all take just a few minutes, making them easy to finish right before serving.
🥄 Use Carryover Heat to Your Advantage
The steak will continue to cook slightly as it rests—known as carryover cooking. Plan for this by removing it from heat just before your target temperature. Meanwhile, your eggs will be ready in no time, keeping everything warm and well-timed.
✅ Final Assembly Tip
Place the steak on the plate first, then gently add the eggs. This creates a well-balanced presentation and keeps the eggs from sliding around. Add your sides immediately and serve while everything is still hot.
Flavor Enhancers and Simple Side Dishes
🧈 Using Fresh Herbs and Butter for Extra Flavor
Steak and eggs taste great on their own, but adding butter and fresh herbs brings out even more flavor. These simple ingredients turn a basic breakfast into something special.
Why Butter Works So Well
Butter adds richness and helps brown the steak and eggs. For the best flavor, use unsalted butter so you can control the salt level. Near the end of cooking, drop a tablespoon of butter into the skillet. It melts and coats the steak, giving it a golden crust and deep flavor.
Best Herbs to Use
Fresh herbs add both aroma and freshness. Rosemary and thyme go well with steak—they bring a woodsy, savory note. Parsley adds brightness, and chives pair perfectly with eggs. Add herbs near the end of cooking to keep their flavor strong without burning.
Simple Herb-Butter Basting
To add extra flavor, toss in a crushed garlic clove and fresh herbs with the butter. Tilt the pan slightly and spoon the melted butter over the steak a few times. This technique, called basting, helps your steak stay juicy and taste even better.
🥑 Healthy Sides
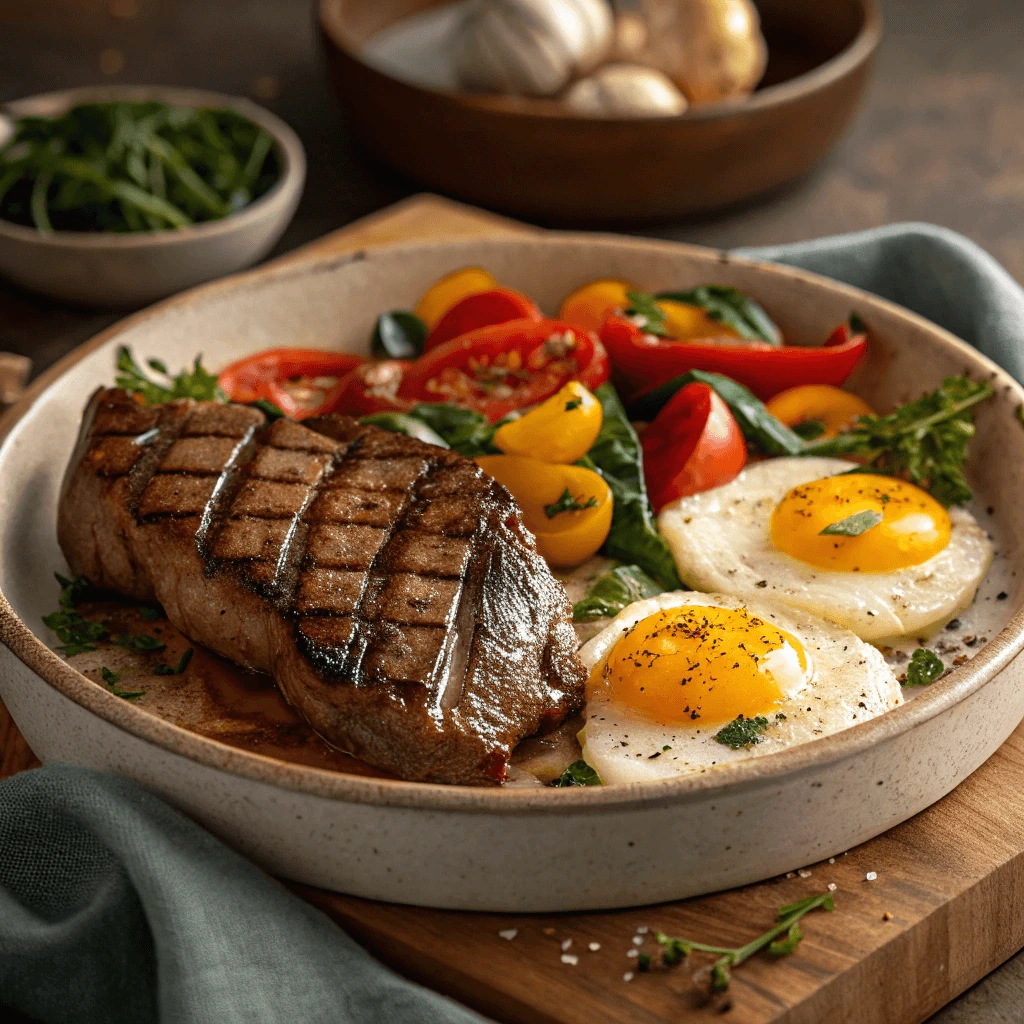
Pairing your steak and eggs with fresh, nutrient-rich sides adds flavor, texture, and balance to your breakfast plate. These light additions keep the meal satisfying without feeling too heavy, while also delivering key vitamins, fiber, and healthy fats.
🥑 Avocado: Creamy and Nutrient-Dense
Avocado is the perfect complement to steak and eggs. It’s rich in heart-healthy monounsaturated fats that help lower bad cholesterol and support brain function. One half of an avocado provides fiber, potassium, and a creamy texture that pairs beautifully with both eggs and steak.
You can serve it sliced, mashed with a pinch of salt and lemon, or even grilled lightly for added depth. Its natural creaminess balances the savory richness of your main dish without adding carbs.
🍅 Cherry Tomatoes: Bright and Juicy
Cherry tomatoes bring color and acidity to your plate. Their natural sweetness and slight tang help cut through the richness of the steak and eggs. Roasting them with olive oil and herbs boosts their flavor, while keeping them raw adds freshness.
They also provide vitamin C, antioxidants like lycopene, and hydration—making them a refreshing and nutritious choice.
🥬 Leafy Greens: Light and Cleansing
Greens like spinach, arugula, or kale add a cleansing contrast to a protein-rich meal. Lightly sauté them with garlic and olive oil, or toss them raw with lemon juice for a quick side salad.
These greens are rich in vitamins A, C, and K, plus minerals like iron and calcium. They support digestion and make your breakfast feel more balanced and nourishing.
🧂 Seasoning Basics
Simple seasoning can make a big difference in your steak and eggs. Salt, black pepper, and garlic create a delicious flavor base without overpowering the dish.
The Importance of Salt
Salt enhances the natural flavors of steak. Use coarse kosher or sea salt and sprinkle it generously on both sides before cooking. If you have time, season the steak 40 minutes to an hour ahead so the salt can tenderize the meat. For eggs, add a pinch of salt after cooking to brighten their taste.
Freshly Ground Black Pepper
Black pepper adds mild heat and aroma. Always use freshly ground pepper for the best flavor. Add pepper just before cooking or after salting the steak to prevent burning. Sprinkle pepper on eggs after cooking for maximum taste.
Garlic for Savory Depth
Fresh garlic adds richness when cooked with butter or oil. Crush or slice cloves and add them near the end of cooking to avoid bitterness. Garlic-infused butter adds great flavor when you baste the steak.
Together, these seasonings create a classic and tasty foundation for your steak and eggs breakfast.
Quick Tips for Making Steak and Eggs Easily
⏳ Meal Prep Ideas to Save Time in the Morning
Preparing steak and eggs in the morning can feel time-consuming, but with smart meal prep, you can enjoy a flavorful breakfast without the hassle. These ideas help you get ahead so your mornings stay smooth and stress-free.
🥩 Pre-Cook Steak in Advance
Cook your steak the night before and store it in the fridge. Slice it into portions so reheating becomes quick and easy. Use gentle reheating methods, like warming in a skillet or oven, to keep the steak juicy and tender. This prep saves you several minutes in the morning without sacrificing flavor.
🍳 Prepare Eggs for Quick Cooking
While eggs cook quickly, you can still prep to save time. Crack eggs into small containers or silicone muffin cups the night before, ready to scramble or bake. Alternatively, hard-boiled eggs can be made ahead and reheated or eaten cold for convenience.
🥑 Ready Your Sides in Advance
Wash and chop any sides like avocado, tomatoes, or greens ahead of time. Store them in airtight containers to maintain freshness. This makes assembling your plate fast and effortless.
🥄 Assemble a Breakfast Station
Set out all your cooking tools and ingredients the night before. Having everything within reach helps streamline your cooking process and reduces distractions.
✅ Use Time-Saving Appliances
Consider using kitchen gadgets like air fryers, slow cookers, or instant pots for hands-off cooking. These tools can cook steak or eggs with minimal supervision and free up your time for other morning tasks.
🍳 Tools That Make Cooking Steak and Eggs Easy
Having the right tools makes cooking steak and eggs simpler and more enjoyable. These essentials help you get great results without stress.
Cast Iron Skillet for Searing
A cast iron skillet holds heat evenly, making it perfect for searing steak and cooking eggs. It creates a nice crust on the steak while keeping it juicy inside. Plus, it’s durable and gets better with use.
Instant-Read Thermometer
An instant-read thermometer takes the guesswork out of cooking steak. It tells you the exact internal temperature so you can cook it just right. This tool also helps check if boiled or poached eggs are done.
Non-Stick Pan for Eggs
A non-stick pan makes cooking eggs easy, especially for scrambled or fried styles. It prevents sticking and speeds up cleanup.
Sharp Knife and Tongs
A sharp chef’s knife makes cutting steak and prep work safer and easier. Tongs help flip the steak without piercing it, so juices stay inside.
Using these tools saves time and improves your breakfast cooking. They help you cook steak and eggs perfectly every time.
⚠️ Common Mistakes to Avoid for Perfect Results
Avoiding common mistakes ensures your steak and eggs turn out delicious and perfectly cooked.
Let Steak Reach Room Temperature
Cooking cold steak can lead to uneven doneness and toughness. Let it sit at room temperature for 30 minutes before cooking to ensure even heat throughout.
Don’t Overcrowd the Pan
Crowding lowers the pan’s temperature, causing steaming instead of searing. Cook steak and eggs in batches if needed to keep the pan hot.
Use the Right Oil and Butter
Choose oils with high smoke points like avocado or canola for searing. Add butter near the end for flavor. Avoid burning fats that create bitter tastes.
Flip Steak Only Once
Flip the steak just once to develop a good crust and cook evenly. Constant flipping interrupts searing and can dry out the meat.
Always Rest Your Steak
Rest steak for at least 5 minutes after cooking to let juices redistribute. Cutting too soon causes dry meat.
Watch Your Eggs
Eggs cook quickly. Remove them from heat just before done to keep them tender and avoid rubbery texture.
Season Generously
Don’t skimp on salt and pepper. Proper seasoning enhances natural flavors and balances your meal.
in conclusion Steak and eggs make a classic, flavorful breakfast that’s both satisfying and simple to prepare. With the right cuts of steak, fresh eggs cooked to your liking, and thoughtful seasoning, you can enjoy a nutritious meal that fuels your day. Adding easy sides like avocado or greens boosts nutrition without extra fuss. Whether for a weekend brunch or a quick morning treat, this recipe delivers on taste and convenience. Try it today and savor the perfect balance of protein, flavor, and comfort.