Who doesn’t love the irresistible allure of a stack of fluffy, golden pancakes to kickstart the day? If you’re craving a breakfast that’s both comforting and satisfying, look no further than this Fluffy and Delicious CMS Pancake Breakfast recipe. Whether you’re cooking for yourself or treating the whole family, these pancakes promise to deliver the perfect balance of lightness and richness, making each bite a delightful experience. In this recipe, we’ll guide you through the process of creating the ultimate pancake batter, offer tips for achieving that cloud-like fluffiness, and suggest some creative toppings to take your breakfast to the next level. Get ready to make pancakes so delicious, you’ll want to enjoy them every morning!
Essential Ingredients for Fluffy CMS Pancakes
Key Ingredients for the Perfect Pancake Batter
Creating the perfect pancake batter requires the right balance of ingredients to achieve that fluffy, tender texture. Below, we’ll break down the essential ingredients needed for the ideal pancake batter, and explain how each one contributes to the final result.
1. Flour: The Foundation of the Batter
Flour is the backbone of any pancake recipe. It provides structure and creates the base for the batter. Most pancake recipes call for all-purpose flour, which offers a good balance of elasticity and tenderness. You can also experiment with whole wheat flour or gluten-free options for a different texture, but all-purpose flour remains the best choice for the fluffiest pancakes.
When measuring flour, make sure to spoon it into the measuring cup and level it off with a knife. This prevents the flour from being packed too tightly, which could lead to dense pancakes.
2. Baking Powder: The Secret to Fluffiness
Baking powder is a leavening agent that creates air pockets in the batter, giving your pancakes their signature fluff. This ingredient works by reacting with the liquid ingredients to release carbon dioxide gas, causing the batter to rise and expand as it cooks.
It’s crucial to use the correct amount of baking powder, as too much can result in a bitter taste, while too little will leave your pancakes flat. Always double-check the freshness of your baking powder before use; expired baking powder won’t work as effectively, resulting in pancakes that lack height.
3. Eggs: Binding and Moisture
Eggs are an essential ingredient for pancake batter as they help bind the dry ingredients together, ensuring a smooth and cohesive batter. They also provide moisture, which is key to achieving a soft texture. The fat in the egg yolks contributes to the rich flavor, while the proteins in the egg whites help stabilize the batter.
For fluffier pancakes, some recipes suggest separating the egg whites from the yolks, whipping the egg whites to stiff peaks, and folding them gently into the batter at the end. This trick helps to trap more air in the batter, enhancing the fluffiness.
4. Milk: The Liquid that Brings it All Together
Milk is the most common liquid used in pancake recipes and helps to achieve the right consistency for the batter. It hydrates the dry ingredients, allowing them to form a smooth, pourable batter. Whole milk is commonly used, but you can substitute it with almond milk, oat milk, or any other non-dairy milk for a vegan option.
The amount of milk you use can affect the texture of your pancakes. For thicker pancakes, use slightly less milk. For thinner, crepe-like pancakes, add more milk to loosen the batter.
5. Butter: For Rich Flavor and Softness
Melted butter adds richness and flavor to the pancake batter. It also makes the pancakes soft and tender. While some recipes use vegetable oil or other fats, butter remains the go-to for the classic pancake flavor.
To get the best results, melt the butter and let it cool slightly before adding it to the batter. This prevents the batter from becoming too greasy and ensures the butter mixes evenly.
6. Sugar: A Touch of Sweetness
Sugar isn’t just for sweetness; it also contributes to the browning of your pancakes. A small amount of sugar enhances the flavor and gives the pancakes a subtle caramelized crust. You can use regular granulated sugar, or try alternatives like coconut sugar or maple syrup for a unique flavor twist.
It’s important to use sugar in moderation. Too much sugar can cause the pancakes to be overly sweet or even lead to burnt edges when cooking.
7. Salt: Balancing Flavors
Salt is an often-overlooked ingredient in pancakes, but it plays a vital role in balancing the flavors. A pinch of salt helps to enhance the sweetness of the pancakes and brings out the flavors of the other ingredients. It also helps to control the texture, ensuring that the pancakes aren’t too dense or bland.
8. Vanilla Extract: For Depth of Flavor
Vanilla extract is the secret ingredient that adds depth to your pancake batter. The warm, aromatic flavor of vanilla enhances the overall taste of the pancakes without overpowering them. It’s a small touch that makes a big difference. If you want to experiment with flavors, you can also try almond extract or a dash of cinnamon for a unique twist.
Why Fresh Ingredients Matter for Pancakes
When it comes to making pancakes, using fresh ingredients can make all the difference in achieving the perfect texture, flavor, and overall quality. While pancake recipes might seem simple, the freshness of each ingredient directly influences the final outcome. Here, we’ll dive into why fresh ingredients are key to making fluffy, delicious pancakes and how they affect your batter.
1. Flour: Ensuring Quality and Texture
Flour may seem like a stable pantry item, but its freshness plays a crucial role in the texture and structure of your pancakes. Over time, flour can lose its potency due to exposure to air, moisture, and light, causing it to stale or even develop a rancid smell. Using fresh flour ensures that your pancakes have the right structure, as the proteins in fresh flour form the gluten necessary for a tender yet fluffy texture.
Additionally, fresh flour helps maintain consistency in the batter. Stale flour can lead to unpredictable results, whether it’s in the form of clumps, uneven textures, or pancakes that don’t rise as they should.
2. Eggs: Boosting Richness and Flavor
Eggs are another key ingredient in pancake batter, and using fresh eggs contributes to a lighter, fluffier batter. Fresh eggs provide a superior texture because the proteins in the egg whites are firmer, which helps to create the right structure for rising pancakes. The yolks of fresh eggs also contain higher levels of fat, contributing to a rich and tender pancake.
In addition to the texture benefits, fresh eggs have a more vibrant color and a better taste. The fresher the eggs, the richer the flavor, which can significantly elevate the overall pancake experience.
3. Baking Powder: Ensuring Proper Leavening
Baking powder is a leavening agent responsible for making your pancakes rise. Over time, baking powder can lose its effectiveness, especially if it’s been sitting in your pantry for a while. When baking powder loses potency, your pancakes may end up flat or dense instead of light and airy.
Using fresh baking powder ensures a consistent rise and a light, fluffy texture. It’s a good practice to test your baking powder for freshness by adding a teaspoon to warm water. If it bubbles vigorously, it’s still active and will work well in your pancakes.
4. Milk and Butter: Enhancing Moisture and Flavor
Milk and butter are both integral to creating moist and flavorful pancakes. While milk may not spoil as quickly as other ingredients, using fresh milk ensures that your pancakes won’t have any off-tastes that can sometimes accompany milk that’s past its prime. Fresh milk contributes to a smooth, creamy batter and helps in creating the perfect pancake consistency.
Similarly, fresh butter adds richness and flavor to the pancakes. Butter that’s too old may have a sour taste or an altered texture, affecting the overall taste and quality of the pancakes. Fresh butter gives pancakes a rich flavor while keeping them soft and tender.
5. Vanilla Extract: Amplifying Flavor
Vanilla extract, though a small ingredient in the grand scheme of pancake batter, can have a significant impact on the overall flavor profile. Fresh vanilla extract, made from high-quality beans, enhances the richness and aroma of the pancakes. Over time, vanilla extract can lose its potency or develop an off flavor. Using fresh, high-quality vanilla extract ensures that the sweet, aromatic flavor shines through, making your pancakes even more delicious.
6. The Importance of Freshness in Pancake Toppings
Even after the pancakes are cooked, the freshness of the toppings you choose will further elevate the breakfast. Fresh fruits, for instance, provide a burst of natural sweetness and a refreshing contrast to the warm, soft pancakes. The juiciness and flavor of fresh berries or sliced bananas will be far superior to their frozen or preserved counterparts.
If you prefer syrups, using freshly made or quality maple syrup enhances the overall flavor, giving your pancakes a natural sweetness without artificial additives. Fresh whipped cream, if you’re in the mood for indulgence, will also make a big difference in texture and taste, adding richness and a light, creamy touch to the pancakes.
Customizing Your Pancake Batter
Pancakes are a versatile breakfast dish that allows for endless customization. With a few simple adjustments to the basic pancake batter, you can create a variety of flavors and textures to suit your preferences or dietary needs. Whether you’re looking for a healthier version, a flavor twist, or a completely unique creation, customizing your pancake batter can transform an ordinary meal into something special. Let’s explore different ways you can personalize your pancake batter.
1. Adjusting the Texture: Fluffiness vs. Density
The texture of your pancakes can vary depending on the amount of liquid, the type of flour, and how you mix the ingredients. To make your pancakes fluffier, consider adding a bit more baking powder or even a small amount of baking soda. The extra leavening agents help the batter rise and create a lighter, airier pancake.
On the other hand, if you prefer denser pancakes, you can reduce the amount of leavening agents or substitute part of the liquid with a thicker ingredient like yogurt or buttermilk. Both ingredients will make your pancakes richer and denser, providing a heartier meal. If you’re looking for an even thicker pancake, you can try adding a bit of mashed bananas or pumpkin puree into the batter.
2. Incorporating Whole Grains and Alternative Flours
For a healthier or more flavorful twist, you can swap out regular all-purpose flour for whole wheat flour, almond flour, oat flour, or any other gluten-free flour options. Whole wheat flour adds a nutty flavor and boosts the fiber content of your pancakes, making them a more filling breakfast option.
If you want to go gluten-free, almond flour or rice flour is a great alternative. These flours give the pancakes a slightly different texture but can still produce light, tender pancakes. If using gluten-free flours, you may need to adjust the amount of liquid or include an egg or binding agent to help hold the batter together.
You can also experiment with adding a small portion of cornmeal or oat flour to the mix. This gives your pancakes a bit of a crunch and a unique flavor, creating a more interesting texture that contrasts with the soft, fluffy base.
3. Adding Flavor Variations
One of the best parts of customizing your pancake batter is adding different flavors to suit your taste. You can easily infuse your pancake batter with flavors like vanilla, cinnamon, or nutmeg. For a sweet, aromatic twist, simply add a teaspoon of vanilla extract or a pinch of cinnamon. You can even combine them for a classic flavor profile.
For more adventurous flavor profiles, consider adding cocoa powder to make chocolate pancakes, or stir in a tablespoon of peanut butter for a creamy, nutty flavor. If you’re craving something fruity, mix in mashed bananas, blueberries, or strawberries for a burst of sweetness in every bite. To elevate the flavor even further, add citrus zest—orange, lemon, or lime—to your pancake batter for a refreshing, tangy twist.
4. Incorporating Protein and Healthy Fats
To make your pancakes more filling and boost their nutritional value, you can add protein and healthy fats to your batter. Adding protein powder is an easy way to increase the protein content of your pancakes, making them perfect for a post-workout meal. You can also try incorporating Greek yogurt or cottage cheese into the batter to create a creamier, thicker texture while adding extra protein.
To include healthy fats, try adding a bit of chia seeds, flaxseeds, or hemp seeds to your batter. These seeds provide essential omega-3 fatty acids, fiber, and other nutrients. You can also use avocado instead of butter or oil to add healthy fats while making your pancakes creamier and more nutritious.
5. Sweet and Savory Add-ins
For those who enjoy experimenting with both sweet and savory pancake options, there’s a wealth of add-ins to consider. You can add chocolate chips, dried fruits, or nuts for sweetness and texture. Consider using chopped walnuts, pecans, or hazelnuts for an extra crunch in your pancakes. Dried cranberries or raisins provide a chewy contrast that pairs well with the fluffiness of pancakes.
If you’re in the mood for something savory, try adding shredded cheese, sautéed vegetables, or even cooked bacon (for non-vegetarians). A savory pancake topped with a poached egg or served with a side of avocado can easily become a delicious brunch option.
6. Making Dietary Adjustments
Customizing your pancake batter allows you to cater to specific dietary needs, making it easy to create gluten-free, dairy-free, or vegan-friendly pancakes. To make the batter dairy-free, simply replace milk with almond milk, coconut milk, or any other plant-based milk. You can also swap butter with coconut oil, olive oil, or a dairy-free spread.
For a vegan option, you can substitute eggs with flax eggs (made by mixing ground flaxseeds with water) or chia seeds. Many plant-based milk options can also replace regular milk in vegan pancakes, and using a non-dairy butter alternative works well for this version.
7. Texture and Sweetness from Add-ins
If you like extra texture in your pancakes, consider adding in some finely chopped nuts, shredded coconut, or a handful of oats. These ingredients will create little pockets of crunch or chew, making your pancakes more interesting to eat. You can also add sweetness naturally by mixing in mashed ripe bananas, applesauce, or grated carrots.
To enhance flavor and create some complexity in your pancakes, you can try mixing in herbs like mint or basil for a refreshing twist. Adding finely chopped fresh herbs or even a dash of chili powder can add depth and excitement to your batter, making it more flavorful and intriguing.
Step-by-Step Guide to Making CMS Pancake Batter
Mixing the Dry and Wet Ingredients Properly
One of the most important steps in making pancakes is properly mixing the dry and wet ingredients. The way you combine these ingredients can determine the texture, fluffiness, and overall success of your pancakes. The key is to maintain the balance between mixing the ingredients enough to incorporate them, but not overmixing, which can lead to tough pancakes. Here’s a step-by-step guide on how to mix the dry and wet ingredients properly.
1. Separate the Dry and Wet Ingredients
Before you start mixing, it’s essential to keep the dry and wet ingredients in separate bowls. This step ensures that each set of ingredients is properly combined before they are brought together. The dry ingredients typically include flour, baking powder, sugar, and any spices (like cinnamon or salt), while the wet ingredients usually consist of eggs, milk, and melted butter or oil. This separation allows you to evenly distribute the leavening agents (like baking powder) and prevents any clumping in your pancake batter.
2. Sifting the Dry Ingredients
While it’s optional, sifting the dry ingredients is an excellent technique for preventing lumps and ensuring an even texture in your pancakes. Sifting helps to incorporate air into the flour, resulting in lighter, fluffier pancakes. If you don’t have a sifter, you can use a fine mesh strainer or whisk the dry ingredients together vigorously to achieve a similar effect. Sifting especially helps when using whole wheat or gluten-free flours, as these can be denser and clump together more easily.
3. Whisking the Wet Ingredients
Before combining the wet ingredients with the dry ingredients, whisk them thoroughly. This step ensures that the eggs, milk, and melted butter are well integrated, and it prevents any lumps or pockets of unincorporated fat. When whisking, use a light hand to combine the ingredients without over-beating. Overmixing the wet ingredients can cause the proteins in the eggs to tighten, which may lead to tougher pancakes.
If you are using any add-ins like vanilla extract or honey, now is the time to mix them into the wet ingredients. Doing so ensures these ingredients are evenly distributed throughout the batter.
4. Combining the Wet and Dry Ingredients
Once both the dry and wet ingredients are prepared, it’s time to combine them. Pour the wet ingredients into the dry ingredients, and then stir gently with a wooden spoon or spatula. The key here is to mix just enough to incorporate the wet and dry ingredients. Avoid overmixing, as this can lead to pancakes that are dense and chewy rather than light and fluffy. The batter should remain slightly lumpy — this is normal and a sign that you’ve mixed it just enough.
If you overmix the batter, you’ll activate the gluten in the flour, resulting in pancakes that are tough instead of tender. Remember, lumps are okay! As long as most of the dry flour is absorbed, the batter is ready to go. If you notice any large pockets of dry flour, feel free to fold the mixture a couple of more times to ensure everything is fully incorporated.
5. Adjusting the Consistency of the Batter
The thickness of your pancake batter can vary based on the ingredients you use, as well as how much flour is incorporated. If the batter seems too thick (which may happen with certain flour types or in cold weather), add a little bit of milk, a tablespoon at a time, until you reach your desired consistency. Conversely, if the batter appears too thin, you can add a little more flour to thicken it up.
The perfect pancake batter should be smooth but still a little thick, with a consistency similar to heavy cream. It should fall slowly from the spoon when lifted but not pour out like water. If it’s too runny, your pancakes will spread too thin on the griddle; if it’s too thick, they’ll be too dense.
6. Resting the Batter (Optional)
For the fluffiest pancakes, allow your batter to rest for 5-10 minutes before cooking. During this rest period, the flour absorbs the liquid more fully, and the gluten relaxes, leading to a lighter texture. While this step is optional, it can make a noticeable difference in the final product.
7. Adding Flavor Variations During Mixing
This is also the perfect time to incorporate any flavor variations into the batter. You can add ingredients such as chocolate chips, berries, or nuts to create a unique flavor. If you plan on adding these ingredients, fold them into the batter gently after it’s been mixed, so they don’t break up or get overworked. For an even distribution, it’s best to coat any add-ins like fruit or chocolate with a little flour before folding them in.
8. Check for Lumps and Uneven Mixing
As you mix, it’s important to regularly check for any lumps of flour or unevenly distributed ingredients. However, be careful not to stir too much, as this can lead to tough pancakes. If you see any large lumps, use your spoon or spatula to break them apart gently.
9. What Happens If You Overmix the Batter?
Overmixing pancake batter can activate the gluten in the flour, resulting in chewy, dense pancakes. While a few lumps are perfectly fine, a smooth batter isn’t the goal when making pancakes. The texture of the pancakes will improve when you leave the batter slightly lumpy, so avoid the temptation to stir until the batter is completely smooth.
10. How to Fix Overmixed Batter
If you accidentally overmix your pancake batter, you can still salvage it! If the batter has become too thick or heavy, add a little extra milk to loosen it up and make it easier to pour. This helps compensate for the loss of air and lightness caused by overmixing. However, if the batter has become too tough, it’s often best to start fresh to achieve that perfect fluffy texture.
Achieving the Perfect Consistency for Pancakes
Getting the perfect pancake batter consistency is essential for light, fluffy pancakes. The batter should be thick enough to hold its shape but still pourable. Too thick, and the pancakes will be dense; too thin, and they’ll be too crispy and flat. Let’s look at the steps to help you get the consistency just right.
1. Understanding Pancake Batter Consistency
The ideal pancake batter should resemble thick cream. It should fall off a spoon slowly, in a ribbon-like motion, and hold a small mound before settling. If the batter is too thick, your pancakes may turn out dense. If it’s too thin, they may spread too much when cooking.
The consistency also affects how the batter spreads on the griddle. When you pour it, it should spread slowly but evenly. The pancake edges should hold their shape without running.
2. How to Adjust the Consistency
If your batter is too thick, add a little more liquid. One tablespoon at a time, stir in extra milk or water until the consistency loosens. On the other hand, if the batter is too runny, thicken it by adding more flour. Be sure to add the flour gradually to avoid over-thickening.
Once you adjust the consistency, check if it pours smoothly but still holds a bit of shape. This ensures the pancakes will cook properly and remain fluffy.
3. The Role of Leavening Agents in Consistency
Leavening agents, like baking powder or soda, help the pancakes rise and become light. However, the right consistency is essential for them to work effectively. Too thick a batter might not allow the leavening agents to fully activate, leading to dense pancakes.
Add the leavening agents carefully and avoid over-mixing the batter. Over-mixing can deactivate the agents, resulting in flat pancakes.
4. Resting the Batter for a Lighter Texture
Resting the batter for about 5-10 minutes allows the flour to absorb the liquid fully. This helps the texture become lighter and fluffier. While resting, the gluten relaxes, and the batter thickens slightly.
You don’t have to rest the batter for long, but giving it a short break can make a noticeable difference in texture.
5. Adjusting for Different Flours
The type of flour you use can affect the consistency. All-purpose flour works best for traditional pancakes, but if you switch to whole wheat or gluten-free flours, the batter may need more liquid. These flours absorb more moisture, so adjust accordingly.
Whole wheat flour will make the batter denser, so you may need to add extra liquid. Gluten-free flours might require slightly more liquid than regular flour, so monitor the batter’s thickness as you go.
6. Signs That Your Pancake Batter Is Ready
The best way to check pancake batter consistency is by lifting a spoonful. If the batter falls slowly from the spoon and holds a shape before smoothing out, you’re good to go. If it’s too runny or too thick, make adjustments.
You can also test it on the griddle. If the batter spreads too quickly, it’s too thin. If it stays in a mound and doesn’t spread, it’s too thick.
7. The Impact of Cooking Temperature
The right pan temperature is crucial for perfect pancakes. If the pan is too hot, the pancakes may cook too fast on the outside while staying raw inside. If it’s too cool, the batter will spread too much.
Preheat the griddle or pan over medium-low heat. Test the temperature by dropping a small amount of batter on the surface. If it sizzles gently, your pan is ready.
8. Experimenting with Consistency for Different Styles
Once you’ve mastered the basic pancake batter, try experimenting with different consistencies for various pancake styles. For fluffier pancakes, use a thicker batter with less liquid. For thinner, crispier pancakes, thin the batter with more liquid.
You can also adjust the consistency depending on the toppings you plan to add. A thicker batter works well with add-ins like chocolate chips or fruit, as it keeps the ingredients suspended instead of letting them sink to the bottom.
Avoiding Common Mistakes When Making Pancake Batter
Making the perfect pancake batter can be tricky, but knowing which mistakes to avoid can save you time and effort. Whether you’re a beginner or a pancake-making pro, there are a few common pitfalls that can prevent your pancakes from being as fluffy and delicious as you want them to be. Below, we explore the most frequent mistakes people make when preparing pancake batter and how you can avoid them.
1. Overmixing the Batter
One of the most common mistakes in pancake batter preparation is overmixing. When you combine the dry and wet ingredients, it’s tempting to mix everything thoroughly. However, this can lead to tough pancakes. The more you mix the batter, the more gluten develops, which can result in pancakes that are dense and chewy, rather than light and fluffy.
How to Avoid It: Mix the ingredients until just combined. It’s okay if there are a few lumps left in the batter. These lumps will disappear during cooking, and they won’t affect the final result. The key is to avoid stirring for too long.
2. Using Cold Ingredients
Another mistake that can affect your pancake batter is using cold ingredients, particularly eggs, milk, or butter. Cold ingredients don’t mix as well as room-temperature ones, which can lead to uneven batter and a less consistent texture. Cold milk, for example, can make the batter too thick and difficult to mix.
How to Avoid It: Make sure your ingredients are at room temperature before using them. Take the eggs, milk, and butter out of the fridge 20-30 minutes before you start making your pancakes. This small step will make a big difference in the smoothness and consistency of your batter.
3. Not Measuring Ingredients Properly
Baking is a science, and measuring ingredients properly is essential for the right pancake texture. Using too much flour, for example, can result in a batter that’s too thick and hard to pour. Conversely, using too little flour can cause the pancakes to be too thin or spread too much while cooking.
How to Avoid It: Use a kitchen scale for the most accurate measurements, or if you’re using measuring cups, be sure to spoon the flour into the cup and level it off with a knife. This ensures you’re not adding too much flour, which can throw off the batter’s consistency.
4. Not Resting the Batter
Many pancake recipes call for letting the batter rest for a few minutes. Skipping this step can lead to pancakes that don’t rise properly and have a heavy texture. When you rest the batter, the flour has time to fully hydrate, which helps the pancakes become fluffier.
How to Avoid It: Allow your batter to rest for 5-10 minutes before cooking. This will give the ingredients time to fully combine and the flour to absorb the liquids, resulting in lighter, fluffier pancakes.
5. Using Too Much Leavening Agent
Leavening agents like baking powder are essential for fluffy pancakes. However, using too much baking powder can give your pancakes an unpleasant, bitter taste. It can also cause the pancakes to rise too quickly, resulting in uneven texture.
How to Avoid It: Stick to the recommended amount of baking powder in your recipe. If you’re experimenting with ingredients, be careful not to overdo it. A teaspoon or two is generally enough to create fluffy pancakes without overpowering the flavor.
6. Skipping the Preheating Step
Many people skip preheating the pan or griddle when making pancakes, but this step is crucial for achieving the right texture and color. If the pan is too cool, the pancakes won’t cook evenly and may stick. If it’s too hot, they could burn before they fully cook.
How to Avoid It: Preheat your pan over medium heat for about 5 minutes. To test if it’s ready, drop a small amount of batter onto the pan. If it sizzles gently, you’re good to go. If it burns, lower the heat slightly. If the batter doesn’t sizzle, increase the heat a bit.
7. Using the Wrong Type of Flour
Not all flours are created equal when it comes to pancake batter. Some flours, like whole wheat flour, can make the batter too dense. On the other hand, self-raising flour contains baking powder, which can lead to pancakes that rise too quickly and become uneven.
How to Avoid It: Stick to all-purpose flour unless you’re specifically making whole wheat or gluten-free pancakes. All-purpose flour gives the perfect balance of fluffiness without affecting the texture too much. If you’re using a different flour, make sure to adjust your liquid ingredients to match the consistency you want.
8. Not Monitoring Pancake Size
Many people forget to control the size of their pancakes. If the batter is poured onto the pan in large, uneven amounts, it will cook unevenly. You’ll end up with some parts of the pancake overcooked and others undercooked.
How to Avoid It: Use a ladle or measuring cup to pour consistent amounts of batter onto the griddle. This will help ensure that each pancake is of equal size, which allows them to cook evenly.
9. Skipping the Butter on the Pan
Many recipes recommend using butter on the pan for flavor and texture, but skipping this step can lead to pancakes that stick to the pan or lack the rich, golden color. While oil can work, butter adds that irresistible flavor and crisp edge that everyone loves in pancakes.
How to Avoid It: Before pouring the batter onto the pan, lightly grease it with a small amount of butter. Make sure the pan is not too greasy, as this could cause the pancakes to cook unevenly. Just a thin layer of butter will give your pancakes the perfect texture and flavor.
10. Overcrowding the Pan
Another common mistake is overcrowding the griddle with too many pancakes at once. This can cause the pancakes to cook unevenly and may result in them sticking together or losing their shape.
How to Avoid It: Cook one or two pancakes at a time, depending on the size of your pan. This gives each pancake room to spread evenly, ensuring it cooks through without sticking to others.
Cooking Tips for Perfectly Fluffy Pancakes
Choosing the Right Cooking Tools for Pancakes
When it comes to making pancakes, having the right cooking tools can make all the difference. The quality of your cooking equipment can directly impact the texture, appearance, and overall success of your pancakes. From the pan you use to the utensils for flipping, each tool plays a role in creating a delicious breakfast. In this section, we’ll cover the essential tools you need and how to choose the right ones for the job.
1. Choosing the Right Pan for Pancakes
The pan you use plays a crucial role in achieving evenly cooked, golden-brown pancakes. While you might think any frying pan will do, there are certain characteristics that make a pan ideal for pancake cooking.
Material Matters: Cast iron skillets are a popular choice because they retain heat well and distribute it evenly. This results in pancakes that are crispy on the edges and soft on the inside. Non-stick pans are also a good option for pancakes, as they make flipping easier and minimize the need for excessive oil or butter. Stainless steel pans, however, may not be the best choice for pancakes because they tend to have hot spots that can lead to uneven cooking.
Size and Shape: The size of the pan affects how many pancakes you can cook at once. For a standard pancake recipe, a 10-inch to 12-inch skillet works well for making 1-2 pancakes at a time. If you plan on making multiple pancakes at once, you might want to invest in a larger griddle or a wide non-stick pan. The shape of the pan also influences pancake size, so a flat-bottomed skillet or griddle is ideal for ensuring your pancakes cook evenly.
Preheating the Pan: Before you start cooking, make sure the pan is preheated. A medium heat setting works best. Test the temperature by flicking a few drops of water onto the pan. If they sizzle and evaporate quickly, the pan is ready. If the water sits and doesn’t evaporate, the pan is too cold. If it splatters and evaporates immediately, the pan is too hot.
2. Flipping Tools: The Right Spatula
Flipping pancakes can be tricky, but the right spatula can make the process much easier. A spatula that is too small or too flimsy might not be able to support the pancake, causing it to break or crumble when you try to flip it. The key is to choose a spatula that is both sturdy and has the right shape.
Material of Spatula: A flexible, wide spatula made of silicone or plastic is ideal for flipping pancakes. These materials are gentle on your non-stick pans and won’t scratch the surface. Wooden spatulas are also a good choice as they won’t conduct heat, making them comfortable to use. Avoid metal spatulas as they can damage the non-stick coating of your pan.
Size of Spatula: The spatula should be large enough to support the pancake without it breaking in half. A spatula with a 3-4 inch width is generally a good size for standard pancakes. If you are making larger or smaller pancakes, choose a spatula that can accommodate the specific size of the pancake.
Flipping Technique: When flipping pancakes, use a quick, confident motion. Gently slide the spatula under the pancake, lift it, and flip it with a smooth wrist motion. Practice makes perfect! Try not to flip the pancake too early or too late. When the edges begin to set and small bubbles form in the center, it’s time to flip.
3. Measuring Tools for Perfect Pancakes
Accurate measurements are essential to ensure your pancake batter comes out just right. Using the right measuring cups and spoons will help you avoid under or overfilling your ingredients, which could affect the consistency of the batter and ultimately the texture of the pancakes.
Dry vs. Wet Measuring Cups: Be sure to use the appropriate measuring cups for your ingredients. Dry ingredients like flour should be measured with dry measuring cups, which allow you to level off the ingredient for accuracy. Wet ingredients like milk or water should be measured with liquid measuring cups, which typically have a spout for easy pouring and a clear scale for exact measurements.
Measuring Spoons: For small amounts of ingredients like baking powder or vanilla extract, a set of measuring spoons is a must. Always level off dry ingredients like baking powder or sugar for the most accurate measurement.
Why Accurate Measurements Matter: Proper measurements are especially important when making pancakes because the ratio of wet to dry ingredients will determine the consistency of the batter. Too much flour can make the batter too thick, resulting in dense pancakes. Too much milk can make the batter too runny, leading to pancakes that spread too much and lose their fluffiness.
4. Griddle or Electric Skillet: For Even Cooking
If you often cook pancakes in large batches, an electric griddle or skillet could be an excellent addition to your kitchen. These cooking tools provide a large, even cooking surface, allowing you to cook multiple pancakes at once without worrying about overcrowding or uneven heat distribution.
Temperature Control: Electric griddles and skillets often come with temperature control settings, making it easier to maintain the ideal cooking temperature throughout the pancake-making process. Look for a griddle with a non-stick surface for easy cleanup and even heat distribution. The ideal temperature for pancakes is around 350°F (175°C).
Large Cooking Surface: A standard electric griddle typically offers enough space to cook 4-6 pancakes at a time, which can save you time and effort if you’re making a big batch. The flat, even surface allows for consistent cooking and eliminates the need to constantly move pancakes around in a smaller pan.
5. Mixing Tools: Whisk and Bowl
To make the batter for your pancakes, you’ll need a large mixing bowl and a whisk to combine the dry and wet ingredients properly. The whisk ensures that all ingredients are thoroughly incorporated, while the bowl allows enough space for stirring without spilling.
Whisk Material: A stainless steel or silicone whisk is ideal for pancake batter. The flexible wires of a whisk help you to mix the batter smoothly without overmixing. Avoid using a spoon or fork, as these can lead to uneven mixing and lumps in the batter.
Bowl Size: Choose a bowl that’s large enough to allow for easy mixing and won’t cause the ingredients to spill over the sides. A mixing bowl that holds at least 4-6 cups is perfect for pancake batter.
The Right Heat Setting for Fluffy Pancakes
Achieving the perfect fluffy pancakes is as much about technique as it is about the right heat setting. Cooking pancakes at the proper temperature ensures that the outside gets a beautiful golden brown color, while the inside remains soft and airy. If the heat is too high, your pancakes might burn on the outside while staying raw in the middle. On the other hand, cooking on too low a heat may result in pancakes that are pale and dense. So, understanding how to control the heat can make a huge difference in the final result.
1. Preheating the Pan or Griddle
Before cooking your pancakes, it’s essential to properly preheat your pan or griddle. This ensures that the batter hits the cooking surface at the right temperature for optimal cooking. A hot surface helps pancakes rise evenly, creating that fluffy texture we all love.
How to Test if the Pan is Ready: You can check if the pan is preheated by flicking a small drop of water onto the surface. If the water sizzles and evaporates quickly, the pan is at the right temperature. If the water just sits there or doesn’t sizzle, the pan is too cool. If the water evaporates immediately with a loud sizzle, the pan is too hot. Ideally, your pan should be at a medium heat, around 350°F (175°C), which will give you the perfect texture and color.
2. The Ideal Heat Setting: Medium Heat
Medium heat is the sweet spot for making fluffy pancakes. It’s important to avoid cooking pancakes over high heat, which can cause them to cook unevenly. With high heat, the outside will cook too fast, while the inside will remain raw. Medium heat, however, allows the pancakes to cook through evenly without burning, helping you achieve the fluffy texture.
Why Medium Heat Works Best: Medium heat ensures that the pancakes cook slowly and evenly. It gives enough time for the batter to rise properly and form those fluffy bubbles inside without overcooking the surface. When the pancakes rise, they’ll have time to set on the inside and get that perfect golden-brown crust on the outside. Medium heat also helps the batter spread evenly across the surface of the pan, giving you a smooth, perfectly round pancake.
3. Adjusting the Heat During Cooking
While you want to start cooking pancakes over medium heat, sometimes adjustments are necessary. If your pancakes are browning too quickly, it may be a sign that the heat is too high. In this case, lower the heat slightly to avoid burning.
How to Adjust Heat for Even Cooking: Pancakes need consistent heat to cook properly. After cooking a few pancakes, you may notice that the pan starts to get too hot or cool down. If the pan is too hot, lower the heat by one or two settings. Conversely, if pancakes are taking too long to cook and they aren’t turning golden brown, you can increase the heat slightly. A good rule of thumb is to keep an eye on the cooking time—pancakes usually take about 2 to 3 minutes per side when the heat is just right.
4. Why Consistent Heat is Key
Fluffy pancakes come from consistent heat. Inconsistent heat can lead to uneven cooking, resulting in pancakes that are either overdone or underdone. Whether you’re cooking on a stovetop or griddle, keeping the temperature steady ensures that each pancake is cooked thoroughly and evenly, giving you the perfect rise and texture.
Using a Griddle vs. a Skillet: When using a griddle, it’s easier to maintain an even temperature across the entire surface. Griddles typically heat evenly, meaning you won’t have to adjust the heat as often. If you’re cooking on a skillet, however, it’s important to monitor the temperature carefully. Skillets can sometimes develop hot spots that lead to uneven cooking, so keep an eye on the pancakes and make adjustments as needed.
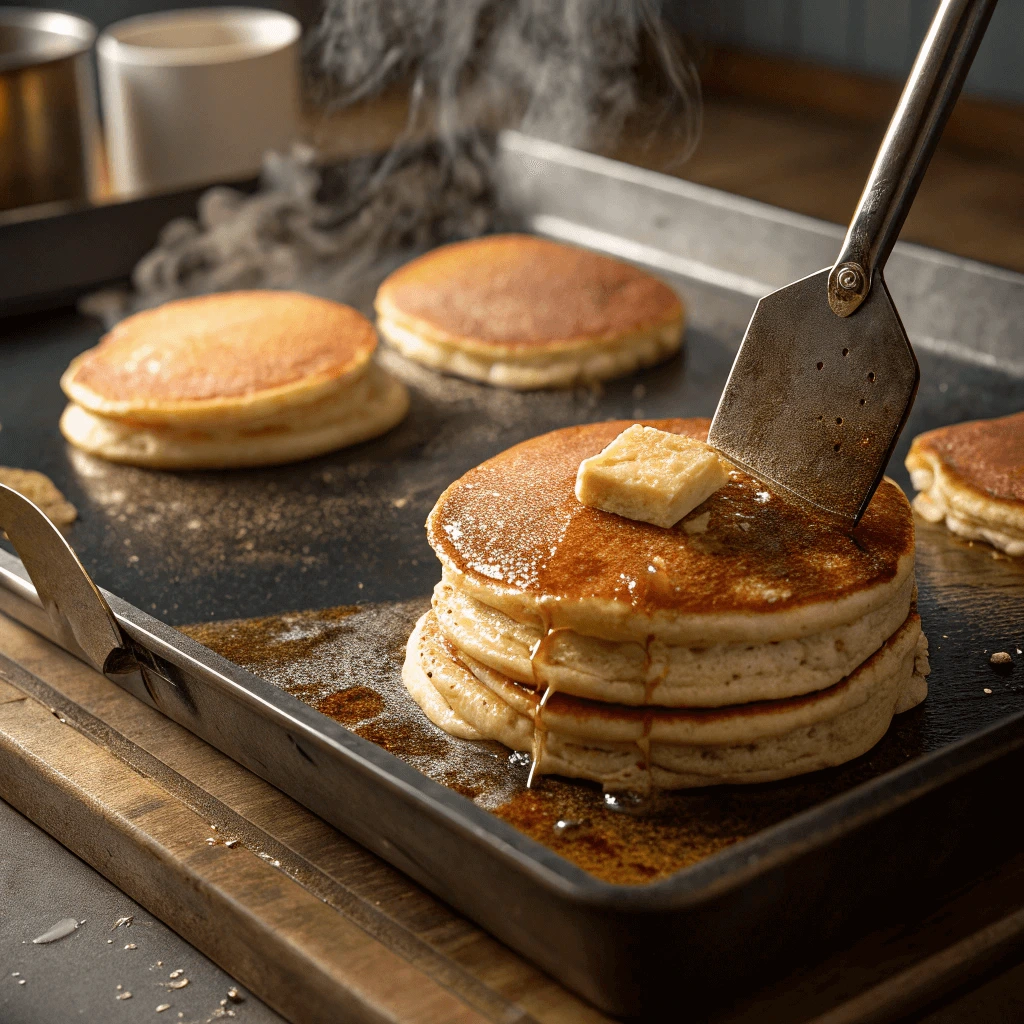
5. Signs Your Pancakes Are Ready to Flip
Knowing when to flip your pancakes is crucial for achieving that fluffy texture. The right heat setting will help you recognize the optimal moment to flip. There are a few signs you can look for to ensure your pancakes are cooked to perfection.
Bubbles and Set Edges: As the pancakes cook, you’ll start to see bubbles form on the surface. This is a sign that the batter is cooking and rising inside. When you see bubbles pop and the edges start to look set and dry, it’s time to flip. The surface of the pancake should no longer appear wet, and the edges should be golden brown.
Flipping with Confidence: Once you’ve determined that the pancake is ready to flip, do so gently but with confidence. Using a flat spatula, carefully slide it under the pancake and lift it. Give it a quick flip in one motion to prevent the pancake from falling apart. When you flip the pancake, you should see an evenly cooked, lightly browned surface.
Knowing When to Flip Your Pancakes
Knowing the right time to flip your pancakes is crucial for achieving the perfect texture and golden-brown color. Flip too early, and your pancakes might be undercooked and soggy. Flip too late, and they might burn or become too dry. So, how do you determine the perfect moment to flip your pancakes? Let’s explore the key signs that indicate it’s time to flip your pancakes and how to master the timing for the perfect pancake every time.
1. Look for Bubbles on the Surface
One of the most noticeable signs that your pancake is ready to be flipped is the appearance of bubbles on the surface of the batter. As the pancakes cook, steam rises from the batter, creating tiny bubbles that break through the surface. These bubbles are an indicator that the pancake has set on the bottom and is ready to flip.
Why Bubbles Matter: The bubbles you see form when the wet ingredients in the batter (like milk or buttermilk) interact with the leavening agents, such as baking powder or baking soda. These bubbles help the pancake rise and cook through. Once most of the bubbles have popped and the surface starts to look more solid, it’s a good time to flip.
Timing Tip: It typically takes 2-3 minutes for bubbles to form and pop on the pancake surface, depending on your cooking temperature. When the majority of the bubbles have popped, the pancake is ready to be flipped.
2. Check for Slight Firmness Around the Edges
Another telltale sign that it’s time to flip your pancakes is when the edges begin to set and firm up slightly. The center will still look a little wet, but the edges should hold their shape. This is a good indicator that the pancake is cooked through enough on the bottom to flip without falling apart.
Why the Edges Matter: As the pancake cooks, the batter at the edges begins to set and solidify faster than the middle. When you see the edges start to firm up and turn slightly golden, it’s usually a sign that the bottom is properly cooked and ready for flipping.
Timing Tip: Take a quick glance at the edges while the pancake is cooking. If you see the edges getting firm but the middle still looks a bit shiny or wet, don’t wait too long to flip it. You want to catch it just before it starts to burn.
3. The Pancake Should Be Lifting Easily
A pancake that’s ready to be flipped will lift easily from the pan with a spatula. If you find the spatula is sticking to the pancake or it feels like it’s still too raw, it might not be ready yet. At this point, it’s better to give the pancake a little more time.
Why It Should Lift Easily: As the pancake cooks, the batter solidifies and creates a structure that should allow the pancake to lift off the pan smoothly. If the pancake doesn’t lift easily, it might still be too soft in the center or the batter hasn’t fully set yet.
Timing Tip: Gently slide your spatula under the pancake to check if it lifts easily. If it resists or you notice the edges aren’t releasing from the pan, give it a little more time.
4. Look for Golden-Brown Color on the Bottom
The color of the pancake’s bottom is a key visual indicator of when to flip. A pancake that has been cooking for a while will develop a golden-brown hue on the bottom. This color is a sign that the pancake has been exposed to heat long enough for the Maillard reaction to occur—an important chemical process that creates a flavorful crust.
Why Color Matters: The Maillard reaction is responsible for the crispy, golden crust that makes pancakes so delicious. When you see a golden-brown color on the bottom of the pancake, it means that it’s not only cooked through but has developed a flavorful, slightly crisp exterior that enhances the overall taste.
Timing Tip: You want to wait until you see the pancake’s underside becoming golden-brown before flipping. If the bottom is still pale or light brown, it’s better to wait a little longer before flipping.
5. Don’t Rush the Flip—Give It Time
Patience is key when it comes to flipping pancakes. Rushing the flip can lead to undercooked centers, broken pancakes, or uneven cooking. It’s important to allow enough time for each side to cook properly. Don’t be tempted to flip too soon just because the pancake seems ready. If you give it a little extra time, you’ll end up with the perfect fluffy pancake.
Why Time Matters: If you try to flip your pancake too early, it won’t have enough time to cook through, leaving the middle raw or gooey. Giving the pancake a bit more time ensures that the texture stays fluffy and cooked to perfection without sacrificing flavor.
Timing Tip: Each side of the pancake typically needs 2-3 minutes to cook. Don’t rush the process—let each side cook fully to ensure the pancake turns out fluffy and golden on both sides.
6. Flip with Confidence
Once you’ve observed these signs, it’s time to flip your pancake. Use a sturdy spatula, and flip with a quick, confident motion. The goal is to keep the pancake intact while flipping it to the other side. If you wait for the perfect time to flip, it should be easy to execute the flip smoothly.
Why Confidence Matters: Flipping with confidence helps prevent mishaps, like pancakes splattering or breaking. If you hesitate or flip too gently, you might not get a clean flip, which can lead to a messy pancake experience.
Timing Tip: Don’t hesitate! Once you’ve made sure the pancake is ready to flip, do so with a smooth, swift motion. If you wait too long or flip too slowly, you risk overcooking the pancake on one side.
Classic and Creative Pancake Toppings
Traditional Toppings for CMS Pancakes
Pancakes are delicious on their own, but the right toppings can make them even better. Here are some classic toppings for your CMS pancakes that will enhance both flavor and texture.
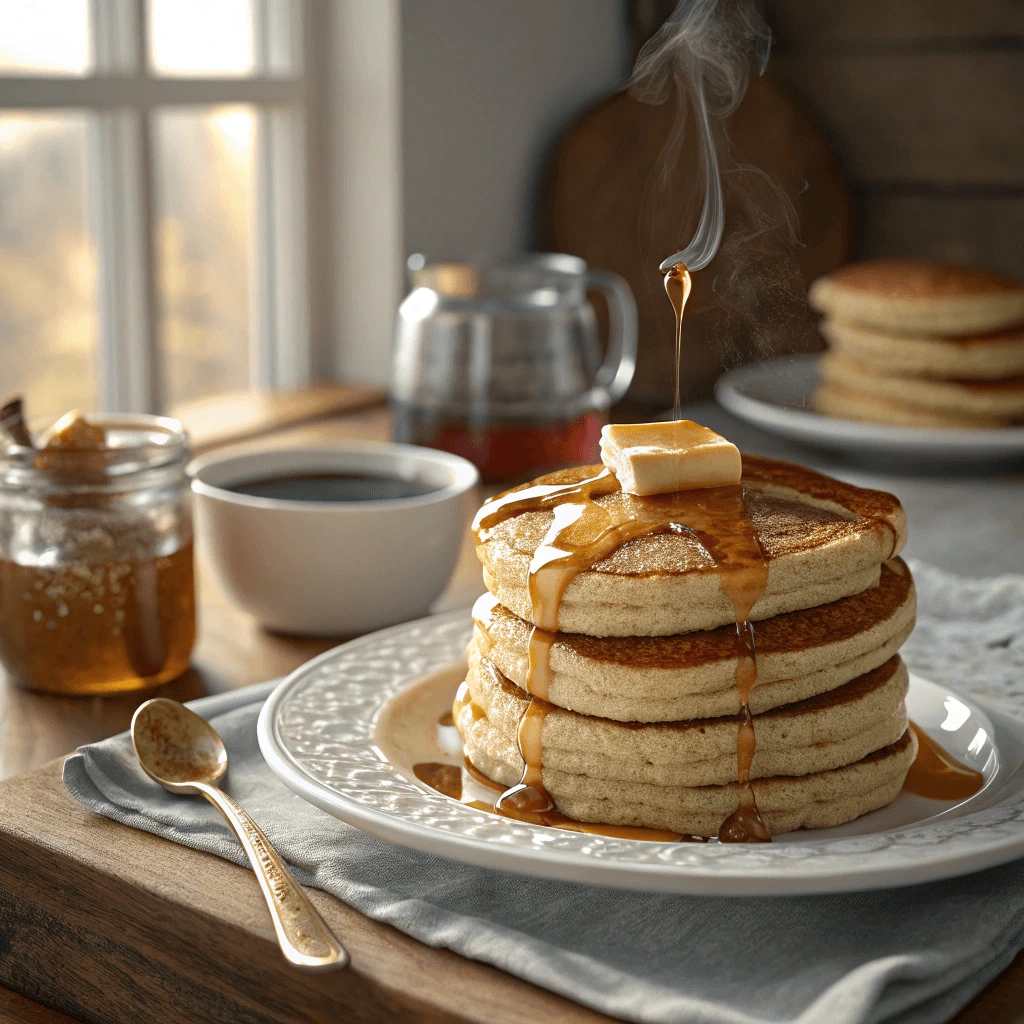
1. Butter and Maple Syrup
A classic choice, butter and maple syrup melt into the warm pancakes, adding sweetness and richness. The creamy butter contrasts perfectly with the sweet syrup.
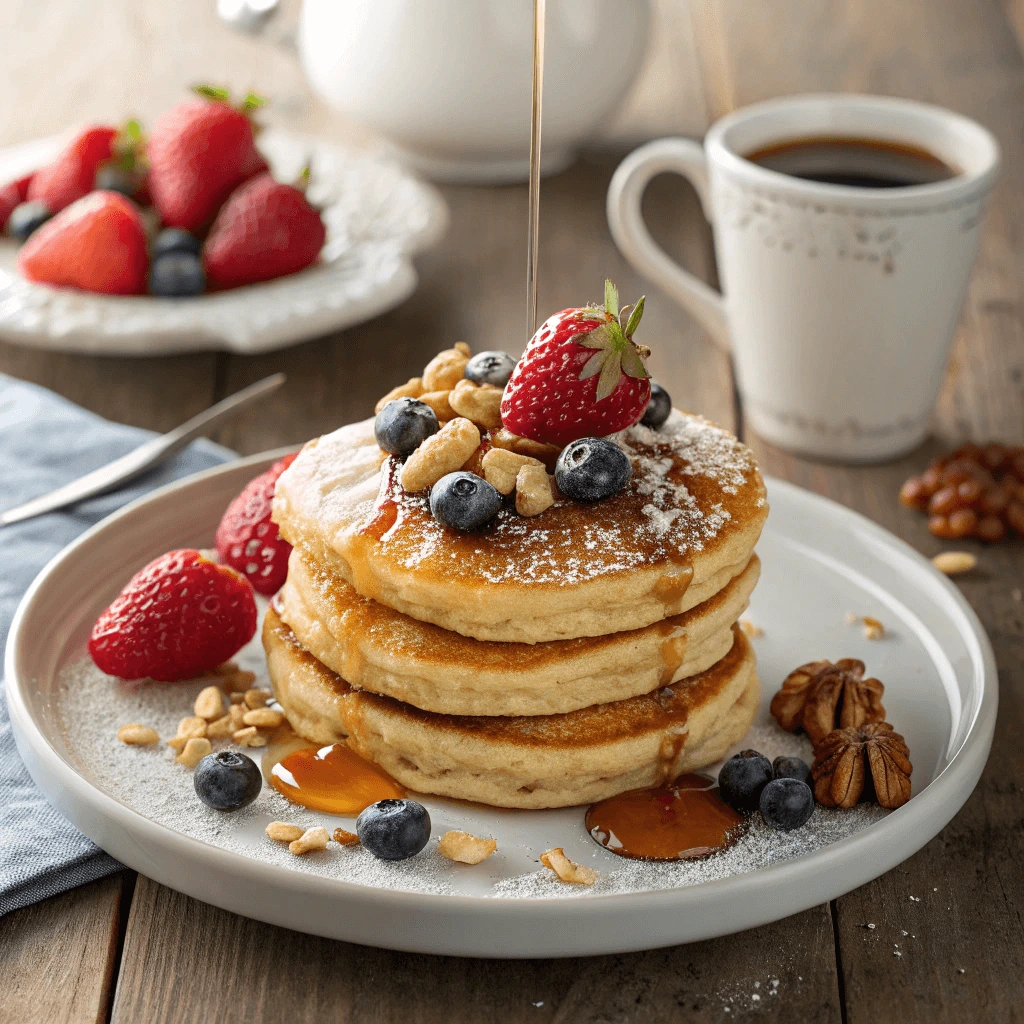
2. Fresh Berries
Berries like strawberries, blueberries, or raspberries add freshness and a burst of tartness to balance the sweetness of the pancakes. They also offer a colorful touch.
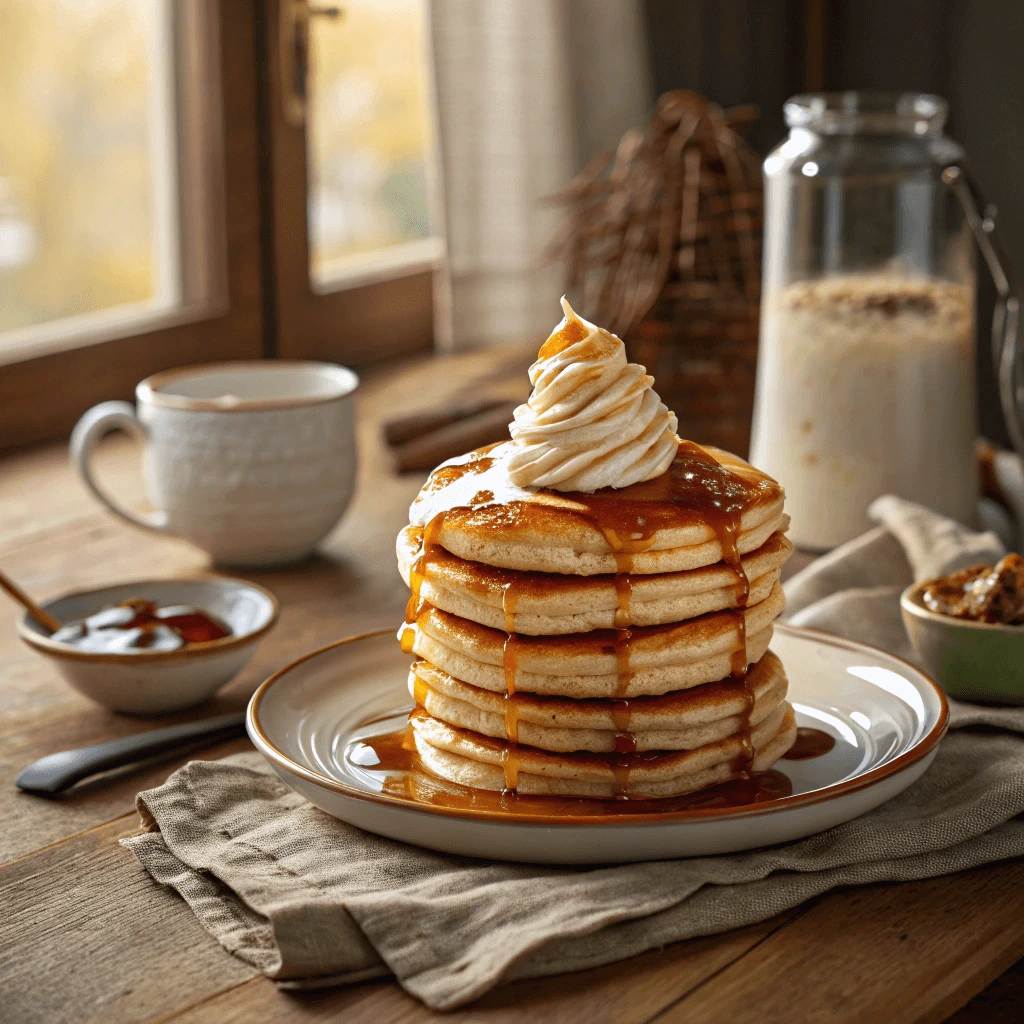
3. Whipped Cream
Whipped cream gives pancakes a light, airy texture and sweet flavor. It’s perfect for those looking to add a creamy element to their pancakes without overwhelming them.
4. Bananas and Nut Butter
Bananas bring natural sweetness, while nut butter (like peanut butter or almond butter) adds a rich, creamy texture and a touch of protein. This combo is perfect for a heartier breakfast.
5. Chocolate Chips
For a sweeter twist, sprinkle chocolate chips on your pancakes. They melt into the pancakes, creating gooey pockets of chocolate goodness.
6. Powdered Sugar
A simple dusting of powdered sugar adds just enough sweetness without overpowering other toppings. It’s a classic, elegant finish.
Fruit and Nut Toppings for Extra Flavor
Adding fruit and nuts to your pancakes not only enhances their flavor but also provides a satisfying crunch and natural sweetness. These toppings are the perfect way to bring an extra layer of nutrition to your breakfast while making it more indulgent.
1. Sliced Strawberries and Almonds
Fresh strawberries add a sweet, juicy element to your pancakes, while slivered almonds introduce a crisp texture. The combination of juicy fruit and crunchy nuts creates a delightful contrast, offering both freshness and richness.
2. Blueberries and Walnuts
Blueberries are packed with antioxidants, and when paired with the slightly bitter crunch of walnuts, they create a perfect balance of flavor. The sweetness of the berries blends seamlessly with the nutty, earthy flavor of the walnuts, making this topping a nutritious and delicious choice.
3. Bananas and Pecans
Bananas bring natural sweetness and creaminess, making them a classic choice for pancakes. Pecans, with their slightly buttery, nutty flavor, complement the bananas and create a hearty, satisfying topping. Together, they make a wholesome, flavorful pairing that’s perfect for those who prefer a balanced breakfast.
4. Mixed Berries and Chopped Hazelnuts
For an extra burst of flavor, try topping your pancakes with a mix of berries—such as raspberries, blackberries, and strawberries—and chopped hazelnuts. The tangy berries provide a refreshing contrast to the rich, slightly sweet hazelnuts. This combination is visually appealing and incredibly flavorful, making it a fantastic topping choice.
5. Apple Slices and Cinnamon Toasted Walnuts
Sauté some apple slices with cinnamon and a touch of honey, and pair them with toasted walnuts for a warm, spiced topping. The sweetness of the apples and the crunch of the walnuts, enhanced by the cinnamon, create a comforting and seasonal flavor profile, perfect for cooler months.
Savory Pancake Options
While pancakes are traditionally sweet, savory pancakes are gaining popularity as a delicious alternative for those who prefer a more complex, hearty breakfast. Savory pancakes combine the light, fluffy texture of classic pancakes with rich, bold flavors from a variety of savory ingredients. Whether you’re looking to satisfy your hunger with a more substantial meal or simply want to experiment with different tastes, savory pancakes offer plenty of exciting possibilities.
1. Cheese and Herb Pancakes
Cheese and herbs can turn your pancakes into a flavorful, savory dish. You can fold in shredded cheese, such as cheddar, mozzarella, or feta, directly into the batter to create a cheesy, melty interior. Fresh herbs like chives, parsley, or thyme complement the cheese, giving the pancakes an aromatic, herbal kick. Serve these with a dollop of sour cream or Greek yogurt for added creaminess and richness. The combination of cheese and herbs is perfect for those who crave something a little more savory to start their day.
2. Spinach and Mushroom Pancakes
Vegetarians and veggie-lovers will enjoy savory pancakes filled with spinach and mushrooms. The earthy, umami flavor of mushrooms, combined with the freshness of spinach, creates a delightful contrast when incorporated into pancake batter. To enhance the flavor, sauté the mushrooms and spinach before adding them to the batter, ensuring the vegetables are tender and flavorful. This combination provides a nutrient-packed, savory pancake option that’s perfect for those who want a healthy yet satisfying meal.
3. Smoked Salmon and Cream Cheese Pancakes
For a more elegant savory pancake option, try smoked salmon paired with cream cheese. The salty, delicate flavor of smoked salmon combined with the creamy richness of the cheese makes for a luxurious topping that perfectly complements the lightness of the pancakes. You can also add a sprinkle of capers, a squeeze of lemon juice, and fresh dill to elevate the dish. These pancakes are ideal for a special brunch or when you want to treat yourself to something indulgent yet savory.
4. Avocado and Salsa Pancakes
For a vibrant and fresh savory pancake option, top your pancakes with mashed avocado and salsa. The creamy, smooth texture of the avocado pairs perfectly with the zesty, tangy flavor of the salsa, making this dish light yet flavorful. Add a sprinkle of cheese or a fried egg on top to make the pancakes even heartier. This savory option is especially great for those who love the flavors of Mexican cuisine and want to enjoy them in a new and fun way.
How to Make Your Pancake Breakfast Special
Prepping Pancakes Ahead of Time
Prepping pancakes ahead of time can save you valuable time on busy mornings and ensure you enjoy a delicious breakfast without the stress. Here are a few ways you can make pancakes in advance:
1. Make the Batter the Night Before
Mix your dry and wet ingredients separately the night before and store the wet ingredients in an airtight container in the fridge. When ready to cook, simply combine the wet and dry ingredients. Avoid overmixing for fluffier pancakes.
2. Freeze Cooked Pancakes
After cooking, let pancakes cool on a wire rack. Stack them with parchment paper in between, then freeze in an airtight container for up to 2 months. Reheat in the microwave or toaster for a quick breakfast.
3. Refrigerate Pancakes for Quick Reheating
Cook pancakes ahead and store them in the fridge for 3-4 days. Reheat in the microwave or on a skillet. Cover them with a damp towel when microwaving to prevent dryness.
4. Batch Cook for Meal Prep
Make a large batch and store them in the fridge or freezer. Separate toppings like fruit, syrup, or whipped cream in containers to keep pancakes fresh.
With these simple prep methods, you’ll have delicious pancakes ready in minutes—perfect for a busy morning!
Keeping Your Pancakes Warm
When making pancakes for a group or preparing in advance, keeping them warm is essential to ensure everyone enjoys them at their best. Here are several effective ways to keep your pancakes warm until you’re ready to serve:
1. Use the Oven
One of the best ways to keep pancakes warm is by placing them in the oven. Preheat your oven to a low temperature, around 200°F (93°C). Place the pancakes on a baking sheet in a single layer, cover them with aluminum foil to retain moisture, and keep them in the oven until you’re ready to serve. This method ensures the pancakes stay warm without drying out.
2. Warming Drawer
If your oven has a warming drawer, use it to keep pancakes at the perfect temperature. Place them inside the drawer, again covered with foil, to maintain their softness and warmth. This method is especially useful if you’re cooking in batches.
3. Thermal Carriers
Thermal food carriers or insulated bags can also help keep pancakes warm. After cooking, stack your pancakes inside the insulated carrier. These bags maintain warmth for longer periods, making them perfect if you’re preparing pancakes in advance or serving them to a crowd.
4. Cover with a Clean Towel
For shorter periods, a clean kitchen towel can help keep pancakes warm. Stack your pancakes on a plate and cover them with the towel. The towel traps the heat, keeping your pancakes at a good temperature without making them soggy. Just be sure the towel is not too damp.
5. Serve Immediately with Warm Toppings
If you want to keep your pancakes at their best temperature, serve them immediately after cooking. Warm syrup, butter, and other toppings before serving to ensure that everything is hot. Using a small skillet or warming dish for syrup and butter can make the experience feel just like a freshly cooked meal.
By using these methods, you can keep your pancakes warm and enjoy a delicious, satisfying breakfast at any time!
Creative Add-ins to Try with Your Pancakes
Pancakes are versatile, and adding ingredients to the batter can elevate your breakfast. Here are some creative ideas:
1. Fruity Add-ins for Fresh Flavor
- Blueberries burst with sweetness when cooked in the batter.
- Bananas add creaminess and natural sweetness.
- Strawberries offer a tangy contrast when added fresh or chopped.
2. Nutty Add-ins for Crunch
- Walnuts bring a rich, nutty flavor.
- Almonds or almond butter add a smooth texture.
- Pecans offer a buttery, sweet crunch.
3. Decadent Chocolate Add-ins
- Chocolate chips melt beautifully into pancakes.
- Cocoa powder gives a subtle chocolate flavor.
- Nutella swirled into the batter creates creamy richness.
4. Spices for Added Warmth
- Cinnamon adds warmth and a mild sweetness.
- Vanilla extract enhances flavor with a sweet, smooth essence.
- Nutmeg and pumpkin spice bring a cozy fall-inspired flavor.
5. Savory Add-ins for a Twist
- Cheese like cheddar or mozzarella adds a savory touch.
- Spinach and feta make a Mediterranean-inspired pancake.
- Turkey sausage add a hearty, savory element.
These add-ins allow you to get creative and transform your pancakes into a breakfast everyone will enjoy!
Conclusion
Making the perfect CMS pancake breakfast at home is all about using the right ingredients, following proper techniques, and getting creative with your toppings. By selecting fresh ingredients and mixing them just right, you can ensure your pancakes come out fluffy and delicious every time. Remember to experiment with toppings—from traditional syrup to creative fruit, nuts, and even savory options—to make each batch uniquely your own.
Now that you have the steps, it’s time to gather your ingredients and make your own batch of scrumptious CMS pancakes. We’d love to hear how they turned out! Share your favorite variations or tips in the comments below and inspire others to create their perfect pancake breakfast. Enjoy!