Few things beat the smell of freshly baked onion bagels wafting through your kitchen. These homemade bagels are crispy on the outside and fluffy on the inside. The savory onion topping adds a bold, mouthwatering flavor to every bite.
You don’t need to be a pro to bake these. This recipe is beginner-friendly and uses simple ingredients you probably already have. Each step is easy to follow and brings you closer to bagels that taste just like they came from a bakery.
Say goodbye to store-bought versions loaded with preservatives. With this guide, you can make delicious onion bagels from scratch. They’re perfect for breakfast, brunch, or a quick snack any time of day. Let’s get started!
Why Onion Bagels Are the Perfect Savory Treat
What Makes Onion Bagels Special
Onion bagels stand out for their bold flavor, satisfying texture, and irresistible aroma. They bring a savory twist to the classic bagel and offer a unique experience for both casual eaters and bagel lovers.
A Bold, Savory Flavor
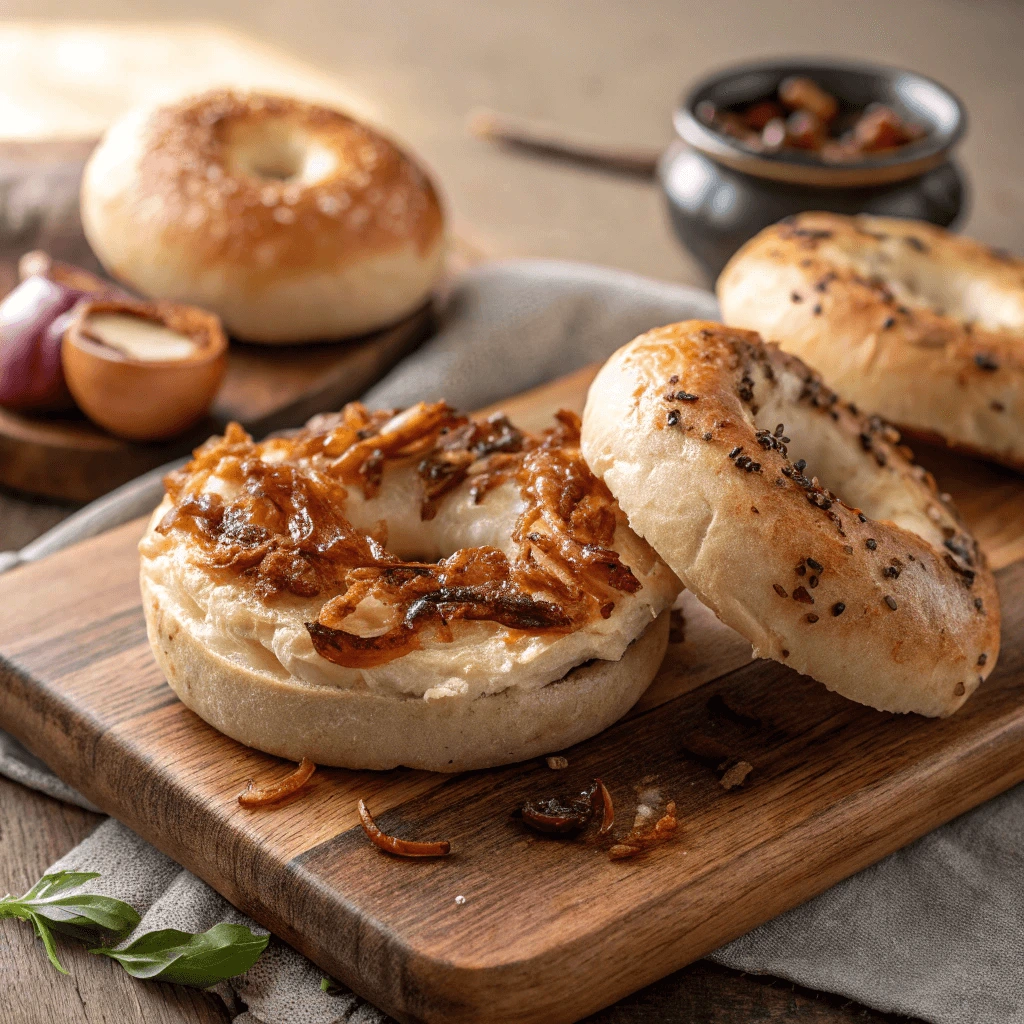
What sets onion bagels apart is their deep, caramelized onion taste. Whether you use fresh sautéed onions or dried minced ones, that savory punch enhances each bite. Unlike sweet or plain bagels, onion bagels provide a rich, umami flavor that pairs well with both simple spreads and hearty fillings.
Texture That Hits the Spot
Onion bagels offer a chewy interior with a slightly crisp crust. Boiling before baking creates the classic bagel bite that people love. When you top the dough with onions just before baking, they crisp up in the oven, adding a slight crunch that complements the softness inside.
The Aroma Everyone Loves
Few things smell as amazing as freshly baked onion bagels. The aroma fills your kitchen with a warm, savory scent that builds anticipation. It’s comforting and nostalgic for many, reminding them of local bakeries or weekend brunches.
Whether you’re eating them plain, toasted, or as the base for a sandwich, onion bagels deliver flavor and satisfaction in every bite. That’s what makes them truly special.
Onion Bagels vs. Other Types
Onion bagels hold a distinctive place in the world of bagels. Let’s compare them to other popular varieties and explore what makes each type unique.
Onion Bagels: Bold and Savory
Onion bagels bring a strong, savory flavor thanks to their signature topping. The toasted onions on top caramelize during baking, giving each bite a slightly sweet, smoky edge. This bagel works beautifully with both simple spreads and hearty fillings—think avocado, hummus, or egg salad.
Plain Bagels: A Neutral Canvas
Plain bagels provide a simple base with no added toppings or strong flavors. They’re soft, chewy, and versatile—perfect for those who prefer subtle flavors or want their toppings to take the spotlight. While plain bagels serve as a reliable choice, they lack the savory complexity that onion bagels offer.
Everything Bagels: Flavor Overload
Everything bagels combine multiple toppings like sesame seeds, garlic, onion, poppy seeds, and salt. They’re bold and aromatic, delivering a flavor punch in every bite. However, for some people, this mix can be overwhelming. If you love onion but want a less chaotic experience, onion bagels strike the right balance.
Sesame and Poppy Seed Bagels: Subtle and Nutty
Sesame and poppy seed bagels focus more on texture and a mild nutty taste. They’re less assertive in flavor compared to onion bagels, making them great for pairing with strong cheeses or sweet spreads. Onion bagels, on the other hand, already bring their own strong character to the table.
When to Enjoy Them
Onion bagels aren’t just for breakfast—they shine at every time of day. Their bold flavor and satisfying texture make them a great choice from early morning to late-night snacking.
Morning Boost: Breakfast with a Bite
Start your day with a warm, toasted onion bagel. The aroma alone can wake up your senses. Pair it with non-dairy cream cheese, a fried egg, or avocado slices for a quick and filling breakfast. If you’re in a rush, just spread some butter and go—it’s simple but satisfying.
Midday Cravings: A Hearty Lunch Option
Onion bagels make fantastic sandwiches. Their dense structure holds up well to layers of veggies, spreads, and proteins. Whether you stack it with grilled veggies, tofu scramble, or a chickpea salad mix, an onion bagel sandwich adds a flavorful twist to your lunch routine.
Anytime Snack: Warm and Comforting
Need a mid-afternoon snack or something savory in the evening? Toast an onion bagel and top it with hummus, vegan cheese, or even leftover roasted vegetables. It’s quick to prepare and satisfying enough to curb your hunger without a full meal.
Essential Ingredients for the Best Onion Bagels
Flour, Yeast, and Dough Basics
Mastering the foundation of your onion bagels starts with understanding how each ingredient shapes the final texture and flavor. The right combination of flour, yeast, and technique ensures your bagels turn out perfectly every time.
Choosing the Right Flour for Bagels
High-protein flour, especially bread flour, is ideal for bagel making. It creates a dense, chewy texture due to its high gluten content. If you use all-purpose flour, the bagels may turn out softer and lack the signature chewiness. Aim for flour with at least 12% protein to get the best results.
Activating the Yeast Properly
Yeast causes the dough to rise and gives bagels their light interior. Use either active dry yeast or instant yeast. If you’re using active dry yeast, dissolve it in warm water between 100–110°F (38–43°C) and add a pinch of sugar to help activate it. After 5 to 10 minutes, you should see bubbles forming—a sign your yeast is active and ready to go.
Mixing and Kneading for Structure
Once your ingredients are combined, knead the dough until it’s smooth and elastic. This step builds gluten, which helps the bagels hold their shape and gives them a satisfying bite. Kneading by hand takes about 10 minutes, while a stand mixer does the job in about 6 to 7 minutes. Let the dough rise in a warm environment until it doubles in size, which usually takes around an hour.
By selecting the right flour, properly activating your yeast, and thoroughly kneading your dough, you’ll create a solid base for fluffy, flavorful onion bagels. These steps lay the groundwork for bakery-quality results at home.
Choosing and Prepping the Onions
Onions are the heart of the flavor in onion bagels. How you select and prepare them can greatly affect the texture and overall taste of your bagels. There are several types of onions you can use, and each one contributes a slightly different flavor profile. Additionally, how you chop and prepare them before adding them to the dough makes a noticeable difference.
Types of Onions to Use
Yellow onions are the most commonly used in onion bagels because of their balance of sweetness and mild pungency. However, you can experiment with other varieties for different results. Red onions will give your bagels a sharper, more pungent flavor, while sweet onions like Vidalia lend a gentler taste. If you want a more caramelized, rich flavor, opt for yellow or sweet onions.
Fresh vs. Dehydrated Onions
You can choose between fresh onions or dehydrated onion flakes depending on your preference and convenience. Fresh onions will add moisture and a vibrant flavor, but they require proper preparation to avoid excess moisture in the dough. Dehydrated onions, on the other hand, can provide a more consistent, intense onion flavor and don’t introduce as much liquid into the dough. If you decide to use fresh onions, you’ll need to cook them briefly or chop them finely to avoid a watery dough.
Caramelizing the Onions for a Sweet Twist
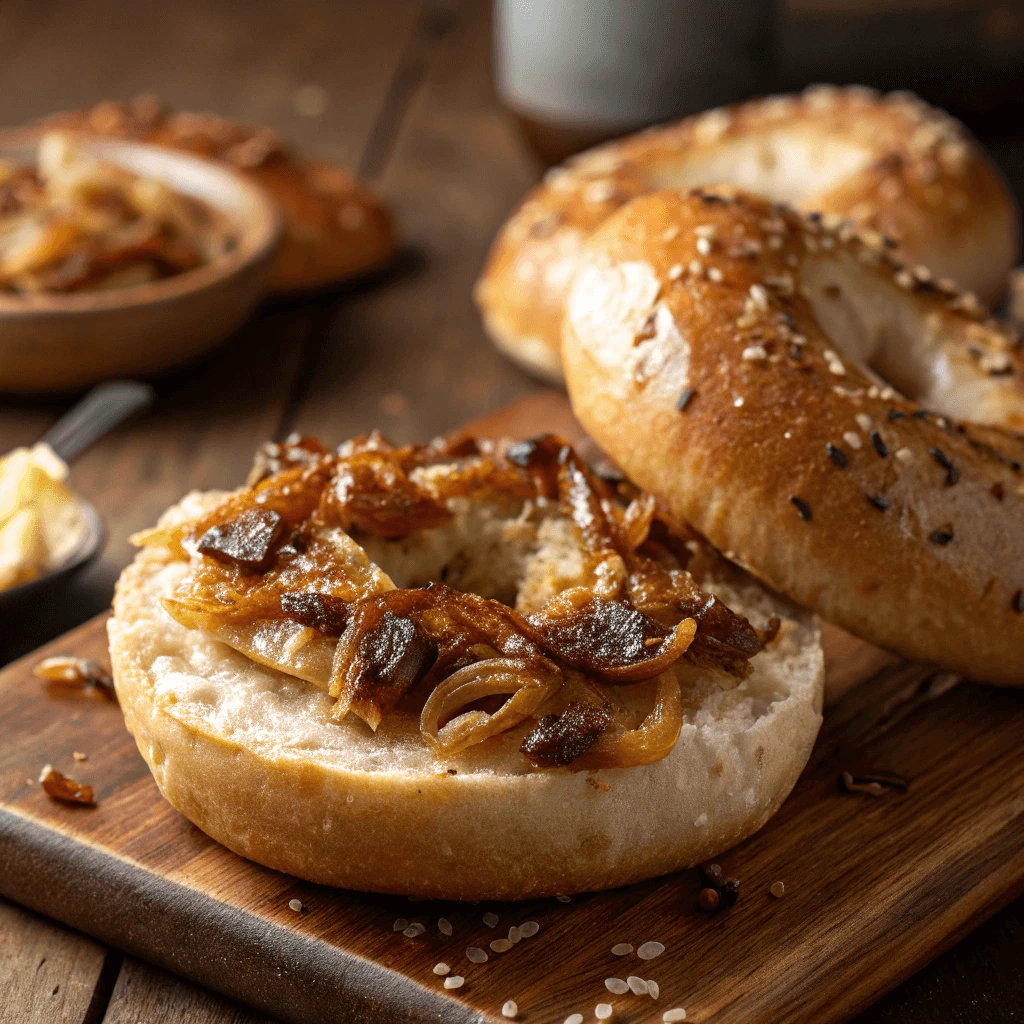
Caramelizing the onions before adding them to the dough creates a sweeter, more complex flavor. To do this, slice the onions thinly and cook them slowly over medium heat with a bit of oil or butter. The process may take 15 to 20 minutes, but the result is a beautifully browned, sweet-tasting onion with a rich flavor. Adding caramelized onions to your bagels creates an unforgettable taste, blending savory and sweet notes.
By carefully choosing the right type of onions, deciding whether to use fresh or dehydrated onions, and considering the option of caramelizing, you can elevate the flavor of your homemade onion bagels. Properly prepping your onions will also ensure your dough’s texture remains just right, with the perfect amount of onion flavor throughout the bagel.
Add-Ins and Toppings to Try
Onion bagels offer a delicious base for a variety of add-ins and toppings that can enhance both the flavor and texture. Whether you’re looking for savory or sweet options, there are many creative ways to customize your bagels and make them even more irresistible. Let’s explore some popular choices for add-ins and toppings that pair perfectly with homemade onion bagels.
Savory Add-Ins to Elevate Your Bagels
If you love bold, savory flavors, consider adding extra ingredients into the dough to give your onion bagels even more depth. Some great savory add-ins include:
- Cheese: Incorporating shredded cheese, such as cheddar or mozzarella, directly into the dough can create a delightful cheesy interior. The cheese melts into the bagel, adding richness and flavor that complements the onion topping beautifully.
- Garlic: For those who love a garlic-forward taste, minced garlic is a perfect addition. The garlic enhances the savory notes of the onion, and when combined with the right seasoning, it offers an irresistible aroma.
- Herbs: Fresh herbs like thyme, rosemary, or dill can be kneaded into the dough for a burst of aromatic flavor. These herbs add another layer of complexity and pair well with the onion’s natural sharpness.
- Seeds: Seeds like poppy seeds, sesame seeds, or even flaxseeds sprinkled on top can offer a delightful crunch and flavor contrast, giving your onion bagels a more artisan touch.
Sweet Toppings for a Twist
While savory toppings are the obvious choice, you can also go for sweet toppings to create a unique sweet-savory combination. Here are some sweet topping ideas to try:
- Honey: A drizzle of honey on a warm onion bagel adds a beautiful sweetness that contrasts perfectly with the savory onion flavor. The combination of sweet and salty can be quite addictive.
- Jam or Fruit Spread: Try pairing your onion bagels with a fruit jam, such as strawberry, apricot, or blueberry. The natural sweetness of the jam balances the rich, savory onion topping and provides a delightful surprise with each bite.
- Cream Cheese with Herbs: You can top your bagels with cream cheese mixed with fresh herbs, such as chives or parsley, to add creaminess and a hint of fresh flavor. This spread works perfectly with both savory and slightly sweet onion bagels.
Vegan-Friendly and Gluten-Free Options
For those with dietary preferences or restrictions, there are ways to make your onion bagels even more inclusive. Vegan and gluten-free add-ins and toppings can make these bagels suitable for anyone at the table:
- Non-Dairy Cheese: If you’re making vegan onion bagels, try using plant-based cheeses. Vegan mozzarella or cheddar can melt beautifully in the dough and give it that cheese flavor without using dairy.
- Vegan Spreads: For a rich and creamy topping, you can use non-dairy cream cheese or hummus. These spreads add texture and flavor that complement the savory onion base of the bagels.
- Gluten-Free Flour Blend: If you’re looking to make gluten-free onion bagels, use a gluten-free flour blend that includes xanthan gum to help bind the dough. Make sure the flour blend you choose is suitable for bread or bagel recipes for the best texture.
By experimenting with various savory, sweet, and dietary-friendly toppings, you can create the ultimate onion bagels that suit your taste and your guests’ preferences. Whether you’re crafting a classic savory bagel or a creative sweet-savory hybrid, the possibilities are endless.
Step-by-Step: How to Make Homemade Onion Bagels
Mixing and Kneading the Dough
Mixing and kneading the dough is a crucial step in making homemade onion bagels. This stage helps develop the bagel’s signature chewy texture and creates the perfect consistency for shaping. By following a few simple techniques, you can achieve the ideal dough that will yield soft, flavorful bagels with a golden crust. Let’s break down the process into manageable steps to ensure success every time.
Mixing the Dough
The first step in preparing the dough is mixing the dry and wet ingredients. Start by combining your flour, yeast, salt, and any other dry ingredients in a large mixing bowl. Use a whisk or spoon to evenly distribute the ingredients. Afterward, make a well in the center of the dry ingredients and pour in your warm water and a small amount of sugar (if your recipe calls for it). The sugar helps activate the yeast, encouraging it to bloom and begin its fermentation process.
Once the water and sugar are added, stir the ingredients together until they begin to form a rough dough. It may seem a bit sticky at first, but that’s okay. The key is to keep stirring until all the flour is absorbed. If needed, add a bit more water, one tablespoon at a time, until the dough starts to come together. If the dough becomes too sticky, you can add small amounts of flour until you achieve a shaggy texture.
Kneading for Texture
Once the dough has formed, it’s time to knead it. Kneading the dough is a process that develops the gluten, which helps to give the bagels their signature chewy texture. Start by turning the dough out onto a clean, floured surface. Begin by pressing the dough with the palms of your hands and then folding it over onto itself. Turn the dough slightly and repeat the process. Continue kneading for about 8 to 10 minutes, or until the dough becomes smooth, elastic, and slightly tacky to the touch.
If you’re new to kneading, think of it as a rhythm: press, fold, turn. During this process, you’ll start to feel the dough become more elastic. The dough should not be too sticky; it should have enough body to hold together but still be slightly tacky. If it sticks to your hands too much, dust a little more flour on the surface or on your hands. However, be careful not to add too much flour, as this can make the bagels dense.
Resting the Dough
Once your dough is kneaded to perfection, it’s important to let it rest. Resting allows the gluten to relax, making the dough easier to shape and helping to improve the bagels’ texture. Place the kneaded dough in a lightly oiled bowl and cover it with a damp cloth or plastic wrap. Allow the dough to rest in a warm, draft-free area for about an hour or until it has doubled in size. This resting period gives the yeast time to work, creating air pockets in the dough, which will result in light and airy bagels.
Common Mistakes to Avoid
While mixing and kneading the dough may seem straightforward, there are a few common mistakes to avoid. For one, it’s important not to rush the kneading process. Skipping this crucial step can lead to bagels that are dense and lack the desired chewiness. Another mistake to avoid is adding too much flour during kneading. Over-flouring the dough can make the bagels dry and dense, so use just enough flour to keep the dough manageable.
It’s also essential to let the dough rest for the recommended time. If you try to shape the dough too early, it might be tough and difficult to work with. Allowing the dough to rise ensures a better texture in the final bagel.
Shaping Bagels Like a Pro
Shaping bagels is a skill that, when done properly, can elevate your homemade bagels from average to professional-quality. Bagels are traditionally round, with a hole in the middle, and mastering this shape is essential for both the texture and appearance of your finished product. There are a few different methods to shape your bagels, but no matter which one you choose, the goal is to create a smooth, evenly shaped dough ball that maintains its integrity when boiled and baked.
Traditional Roll-and-Poke Method
The most traditional method for shaping bagels is the “roll-and-poke” technique. This method involves rolling the dough into a ball and then poking a hole in the center with your finger. Here’s how to do it step by step:
- Divide the Dough: After your dough has rested and risen, divide it into even portions. You can use a sharp knife or dough scraper to cut the dough into smaller pieces, typically around 4 to 6 ounces each for individual bagels.
- Form the Balls: Roll each portion of dough into a smooth ball by cupping it in your hands and rotating it gently. This will create a nice, taut surface on each ball.
- Poke the Hole: Press your finger through the center of each ball, making a hole about 1 to 2 inches in diameter. Be gentle while doing this—if you press too hard, the dough might deflate, and you will lose the necessary air pockets that help create a fluffy texture. After making the hole, widen it slightly by rotating the dough with your fingers. Make sure the hole is large enough, as it will shrink a little during boiling and baking.
- Smooth the Edges: Pinch and smooth out any rough or uneven edges around the hole to ensure the bagels look neat and uniform. This will also help the bagels bake more evenly.
Rope-and-Join Method
If you want to shape your bagels with a slightly more advanced technique, you can use the “rope-and-join” method. This technique results in a more uniform bagel shape with a tighter hole in the center. Here’s how to do it:
- Divide the Dough: Similar to the roll-and-poke method, start by dividing your dough into portions.
- Roll into a Rope: Roll each piece of dough into a long rope about 8-10 inches long. If you find that the dough is too sticky, dust it lightly with flour to make rolling easier.
- Form the Bagel Shape: Take each rope of dough and bring the ends together to form a circle. Pinch the ends tightly to seal the dough. Make sure the seam is fully sealed to avoid any gaps during boiling.
- Adjust the Hole: If the hole is too small, gently stretch it out with your fingers. You want the hole to be roughly the size of a golf ball, as it will shrink slightly when the bagel is boiled.
Tips for Perfect Bagel Shaping
No matter which shaping method you use, there are some tips to keep in mind to ensure your bagels turn out perfectly every time.
- Work with Well-Rested Dough: Ensure that the dough has risen properly and is soft and pliable. If the dough is too stiff, it will be difficult to shape, and you may end up with bagels that are tough or uneven.
- Be Gentle with the Dough: Avoid overworking the dough during the shaping process. Bagels are best when they are slightly airy, so don’t compress them too much. Gentle shaping will maintain the bubbles of air that yeast produces, resulting in a light, fluffy texture.
- Consistency is Key: Try to keep the size of your dough portions as consistent as possible. This will help your bagels bake evenly and look uniform. If you want to make smaller bagels for snacks or mini sandwiches, feel free to adjust the portion sizes, but aim for uniformity in each one.
- Rest After Shaping: After shaping your bagels, let them rest for 10 to 15 minutes before boiling. This rest period allows the dough to relax and makes it easier to handle. It also prevents the bagels from losing their shape during boiling.
Troubleshooting Bagel Shaping
Even experienced bakers may encounter some common problems while shaping bagels. Here are some troubleshooting tips:
- Hole Closing During Boiling: If you notice that the hole in the center of your bagel starts to close up while boiling, it may be due to overworking the dough during shaping. To fix this, make sure to widen the hole slightly before placing the bagels in the boiling water. You can also gently press on the hole with your finger to help maintain its size.
- Uneven Shapes: If your bagels aren’t as uniform as you’d like, don’t worry! With practice, you’ll improve. In the meantime, focus on making sure each dough ball is rolled into a smooth ball before shaping and use gentle, even pressure when forming the bagels.
Why Shaping Matters
Proper shaping is essential for achieving the perfect bagel. A well-shaped bagel will not only look more appealing, but it will also ensure even cooking. Bagels that are shaped unevenly may cook at different rates, resulting in a batch with some overcooked and some undercooked. By following the right shaping techniques, you’ll create bagels that are golden, chewy, and delicious.
Boiling Before Baking
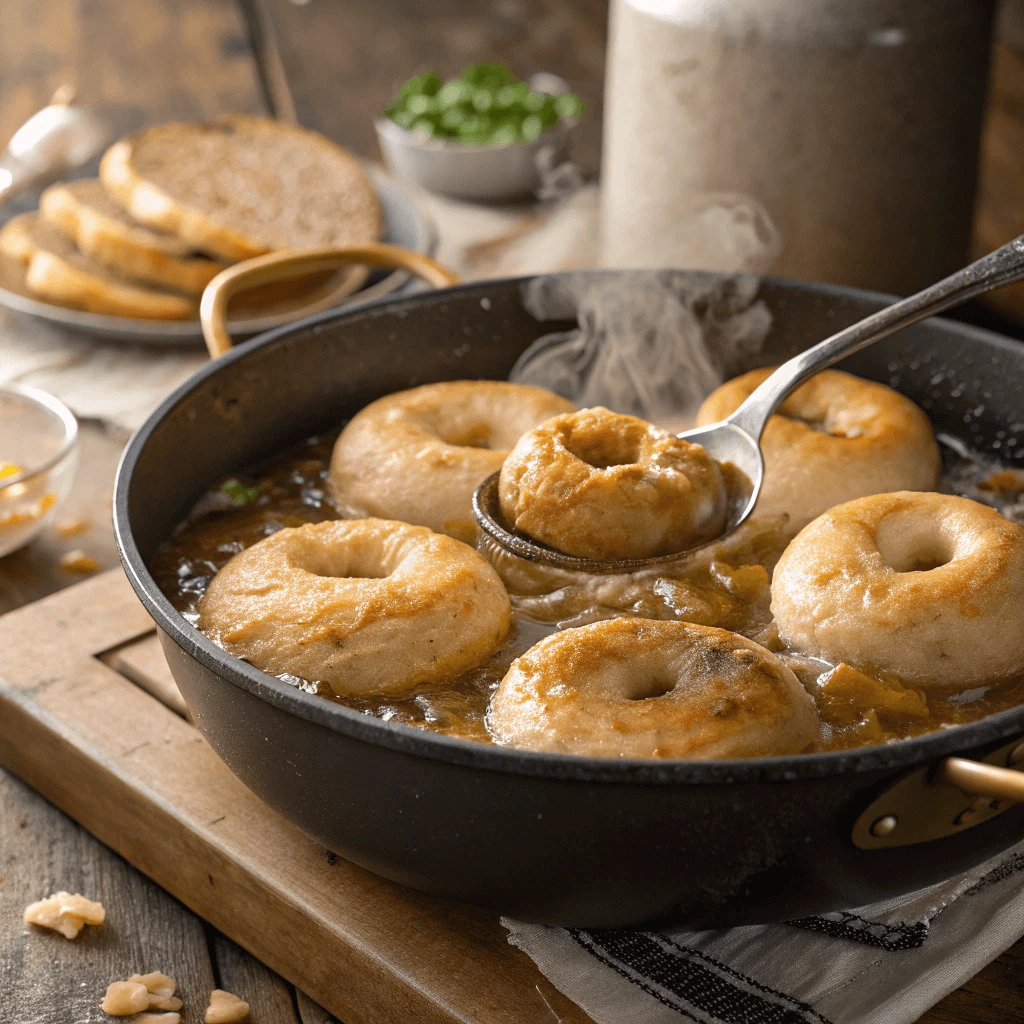
Boiling bagels before baking is a crucial step that sets them apart from regular bread. It’s the secret behind their chewy texture and signature shiny, golden crust. This method might seem unusual if you’re new to bagel-making, but it’s essential for achieving the traditional bagel texture that’s both soft and chewy on the inside, with a crisp, golden exterior. Let’s break down why boiling is so important and how to do it right.
Why Boiling is Essential
Boiling bagels helps create that distinctive chewy texture by forming a protective barrier on the outside of the dough. This barrier prevents the dough from expanding too much as it bakes, allowing the inside to stay soft and airy while the crust crisps up. Additionally, the short time spent boiling in water helps set the shape of the bagels and gives them that glossy, slightly sweet crust. Without boiling, bagels would lose much of their characteristic texture and could come out too soft or even too dense.
The science behind boiling has to do with the starches in the bagel dough. When bagels are submerged in hot water, the starches on the surface gelatinize, which forms a thick, shiny crust. This outer layer locks in moisture, which is crucial for keeping the bagels soft and chewy on the inside.
How to Boil Bagels Correctly
Boiling your bagels is straightforward, but there are a few tips to ensure the best results. Here’s the process:
- Prepare the Water: Start by bringing a large pot of water to a boil. You need enough water to submerge the bagels, so choose a wide pot. To help achieve that characteristic bagel texture, add about 1-2 tablespoons of baking soda or honey to the boiling water. The baking soda helps create an even more pronounced crust by raising the pH level of the water. Honey adds a slight sweetness and promotes the golden color of the bagels. Some people also add a pinch of salt for flavor.
- Boil One Bagel at a Time: Gently place the shaped bagels into the boiling water, one or two at a time. Be careful not to overcrowd the pot, as this can cause the bagels to stick together or cook unevenly. Boil the bagels for about 30 seconds on each side. If you like a chewier bagel, you can boil them a little longer (up to a minute per side).
- Don’t Skip This Step: It’s tempting to skip the boiling process, but resist the urge! While it may seem like an extra step, it’s essential for achieving that traditional chewy bagel texture. Skipping the boil will leave you with a soft, bread-like bagel that’s missing the characteristic crunch and bite.
Common Mistakes to Avoid
Boiling is a relatively simple step, but there are a few things to keep in mind to avoid mistakes that can affect your bagel’s texture.
- Boiling for Too Long: Over-boiling your bagels can make the crust too thick or tough. Stick to the recommended 30 seconds per side, or slightly more if you like a chewier texture.
- Not Using Enough Water: You need enough water to allow the bagels to float and move freely. If you don’t have enough water, the bagels might get stuck to the bottom or sides of the pot, which can affect their shape and texture.
- Under-Boiling: Under-boiling the bagels for too short a time will result in a bagel that’s too soft and bread-like. The key to a great bagel is boiling long enough to form a firm, shiny crust.
- Boiling Immediately After Shaping: Bagels need a brief resting period after shaping, ideally 10 to 15 minutes. If you boil them right away, they could lose their shape, and you might end up with misshapen or flat bagels. Resting helps the dough relax, making it easier to handle.
Boiling Time and Texture Control
The time you boil your bagels has a direct effect on their final texture. The longer you boil, the chewier the bagel will be. For traditional bagels, 30 seconds per side should give you the perfect balance of crispiness and chewiness. However, if you prefer a softer bagel, you can reduce the boiling time. On the other hand, for a more substantial crunch and chewy interior, extend the boil to 1 minute per side.
Don’t forget that the size of your bagels also affects boiling time. Smaller bagels will require less time in the water, so keep that in mind when adjusting for smaller portions.
Boiling and Topping Considerations
Once your bagels are boiled, they’re almost ready to bake! But before they go into the oven, it’s the perfect time to add any toppings. While the bagels are still wet from the boil, the toppings will stick better. If you’re making onion bagels, sprinkle a generous amount of chopped onions on top before baking. For a more classic touch, you can also add sesame seeds, poppy seeds, or even garlic flakes.
Adding toppings at this stage ensures they bake into the crust rather than falling off during the baking process. Be sure to apply your toppings gently, as too much pressure can cause the bagels to lose their shape.
Boiling and Baking: The Perfect Duo
Boiling your bagels before baking is the key to achieving the perfect bagel. The boil seals in the moisture and gives the bagels their chewy texture, while the baking process finishes off the crust, creating that signature golden-brown finish. Without this step, you would lose the iconic bagel texture that makes them so irresistible.
Remember, the boiling process is not to be rushed. By taking your time and following the right technique, you’ll have perfectly boiled bagels that are ready to bake into delicious, fluffy, and flavorful onion bagels.
Baking and Serving Your Onion Bagels
Baking to Perfection
Baking is the final step that transforms dough into perfect bagels. The key is to achieve a crispy, golden crust while maintaining a chewy interior. Here’s how to get it just right.
Oven Temperature
Bake your bagels at 425°F (220°C) for the best texture. A high heat ensures a crisp exterior and soft interior. Be sure to preheat your oven fully to avoid uneven baking.
Baking Stone vs. Baking Sheet
A baking stone provides even heat distribution and results in a crispier bottom crust. If you don’t have one, a baking sheet works just fine, though your bottom crust may not be as crispy.
Baking Time
Bagels typically take 15 to 20 minutes to bake. Keep an eye on them towards the end to ensure they don’t over-brown. Tap the bottom—if it sounds hollow, they’re done!
Getting a Glossy Crust
Brush the bagels with an egg wash before baking to get that shiny, golden finish. For an extra rich look, brush with melted butter after baking.
Cooling and Storing
Once baked, let the bagels cool on a wire rack for 10-15 minutes. Store any leftovers in a paper bag for a couple of days, or freeze them for longer storage.
With these tips, you’ll be able to bake perfectly crispy, chewy onion bagels every time!
When and How to Add Onions
Onions are the defining flavor of onion bagels, but timing and technique are essential to achieving the perfect result. Adding onions at the right stage ensures they become a delicious, flavorful topping without burning during baking.
Pre-Boiling vs. Post-Boiling: The Best Time to Add Onions
The key is to add onions at the right time to avoid them burning during the baking process. Most people prefer to add onions after boiling the bagels. This gives the bagels time to develop their chewy texture before the onions crisp up on top.
- Pre-boiling: Some bakers choose to incorporate onions directly into the dough before boiling. While this method infuses the bagels with flavor, the onions can lose their crispness and become softer.
- Post-boiling: For the most flavorful and crispy topping, wait until the bagels have been boiled and placed on the baking sheet before adding the onions. This way, they bake evenly and retain their texture.
How to Apply the Onions for the Best Coverage
When it’s time to add the onions, you can sprinkle them generously across the top of each bagel. Press the onions lightly into the dough so they stay in place while baking, but don’t overdo it—this can cause them to burn.
- If using fresh onions, chop them finely to prevent large pieces from burning.
- For dehydrated onions, rehydrate them briefly in water before using them. This ensures they have enough moisture to cook properly without drying out.
Avoiding Over-Browning
The key to success with onion bagels is to monitor the baking process closely. If you notice the onions starting to burn before the bagels are fully baked, you can cover the bagels with foil for a few minutes to protect them while the rest of the bagel continues to bake.
Adding onions at just the right time and using the right technique will help you achieve perfect, golden-brown bagels with a deliciously crispy onion topping.
Topping and Filling Ideas
Onion bagels are incredibly versatile when it comes to toppings and fillings. Whether you’re looking for a savory breakfast or a hearty lunch, the possibilities are endless. Here are some tasty ideas that will elevate your onion bagels to the next level.
Classic Cream Cheese
One of the most popular toppings for onion bagels is cream cheese. Its creamy texture complements the savory flavor of the onion bagel perfectly. You can keep it simple by spreading a generous amount of cream cheese on your bagel, or you can jazz it up by adding:
- Herbed cream cheese: Mix in fresh herbs like dill, chives, or parsley to add extra flavor.
- Flavored cream cheeses: Try options like garlic and onion, smoked salmon, or even spicy jalapeño for a unique twist.
Avocado and Veggies
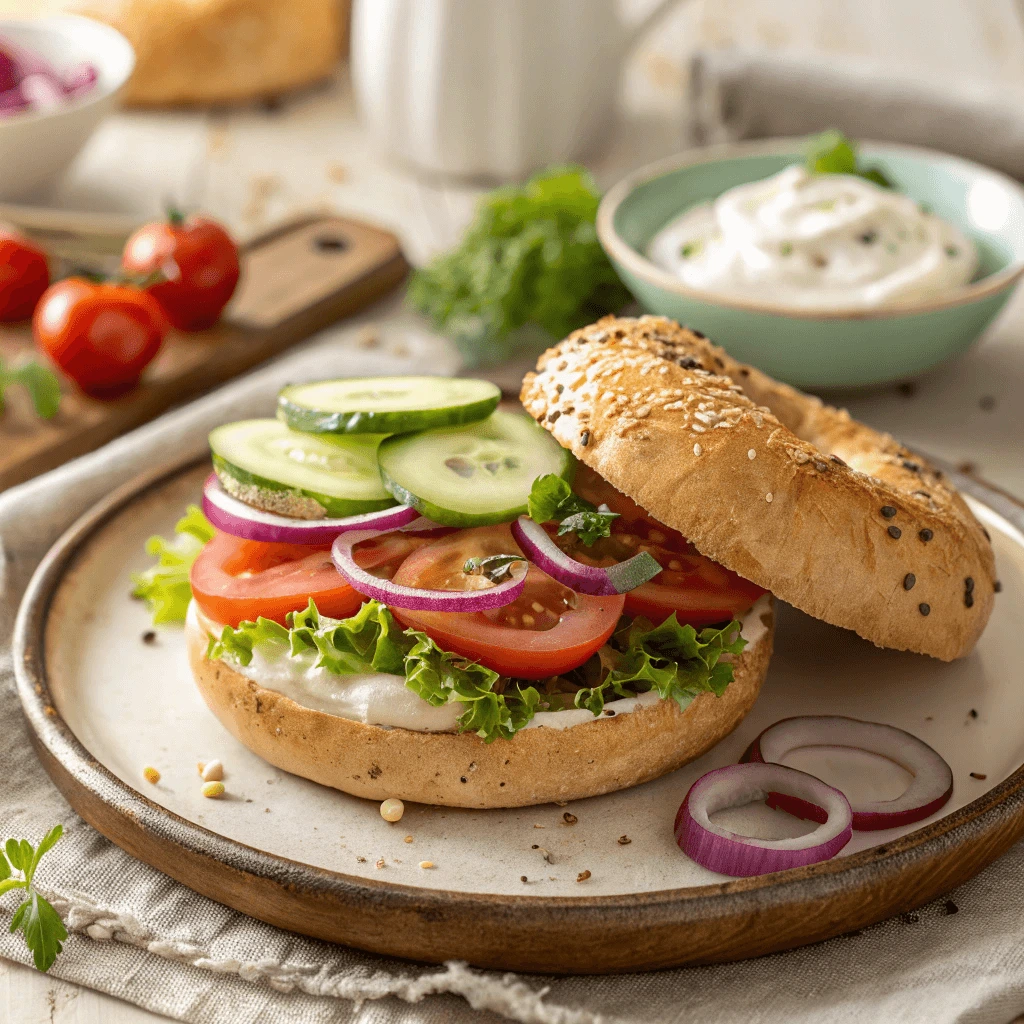
If you’re looking for something a bit lighter or vegan-friendly, avocado is a great choice. The creaminess of ripe avocado pairs wonderfully with the crunchy, savory onions. You can top your bagel with:
- Sliced avocado: Mash it or leave it sliced for a refreshing, creamy bite.
- Tomatoes and cucumbers: Add some thinly sliced vegetables like tomatoes or cucumbers for crunch and freshness.
Savory Protein Fillings
Onion bagels are also perfect for savory protein fillings. If you enjoy a more substantial sandwich, these toppings will keep you satisfied throughout the day. Here are some delicious options:
- Smoked salmon: Classic and flavorful, smoked salmon with a bit of cream cheese makes for an indulgent treat.
- Turkey or chicken breast: Thinly sliced deli meats like turkey or chicken can add a savory, protein-packed filling.
- Egg and cheese: Scrambled eggs and melted cheese are perfect for a breakfast-style bagel sandwich.
Sweet Toppings
For those who enjoy a sweeter option, consider adding sweet toppings that pair nicely with the savory bagel. These options bring out a different flavor profile:
- Honey or jam: A drizzle of honey or a spoonful of your favorite fruit jam adds a touch of sweetness to balance the savoriness of the onions.
- Cinnamon sugar: For a dessert-style twist, sprinkle a bit of cinnamon sugar on your bagel. This works particularly well if you’re making a sweeter bagel with a mild onion flavor.
Vegetarian and Vegan-Friendly Ideas
If you follow a vegetarian or vegan diet, there are plenty of toppings and fillings you can try to make your onion bagel filling and satisfying:
- Non-dairy cream cheese: For a vegan option, try plant-based cream cheese, which comes in a variety of flavors.
- Hummus: A spread of hummus adds both creaminess and protein to your bagel while keeping it plant-based.
- Grilled veggies: Consider grilled vegetables like zucchini, bell peppers, or mushrooms for a savory, hearty filling.
Adding Fresh Greens and Sauces
Fresh greens and flavorful sauces can take your bagel toppings to the next level. Here’s how to enhance your onion bagel with some extra crunch and zest:
- Lettuce or spinach: A few fresh leaves of leafy greens add a fresh element to your bagel.
- Mustard or aioli: A tangy mustard or creamy aioli can elevate the flavor of your bagel and balance out the richness of other fillings.
Onion bagels are incredibly versatile, and with the right toppings and fillings, you can create a breakfast, lunch, or snack that’s both flavorful and satisfying. Whether you prefer classic options like cream cheese or want to get creative with veggie toppings and protein, the choices are endless!
Storage, Freezing, and Creative Ways to Enjoy Leftovers
How to Store Fresh Bagels
Proper storage is key to keeping your homemade onion bagels fresh. Here’s how to store them for the best results:
Room Temperature Storage
For short-term storage (1-2 days), store your bagels in a paper bag at room temperature. Avoid plastic bags, as they trap moisture and can make bagels soggy. Keep them in a cool, dry place.
Refrigeration
For longer storage (3-5 days), wrap each bagel tightly in plastic wrap or foil and place them in an airtight container. Refrigeration can dry out bagels, so always reheat before eating to restore their freshness.
Freezing for Long-Term Storage
To keep bagels fresh for up to 3 months, wrap them individually in plastic wrap or foil, then place them in a freezer-safe bag. Label the bag with the date. When ready to eat, thaw at room temperature or reheat in an oven for the best texture.
Freezing for Later
Freezing onion bagels is a great way to preserve their freshness for weeks, ensuring that you can enjoy them at a later time without sacrificing flavor or texture. Here’s a simple guide to freezing your bagels properly:
1. Let the Bagels Cool Completely
Before freezing your bagels, let them cool completely. Freezing warm bagels can lead to condensation inside the packaging, which could make them soggy when thawed. Allow them to cool for at least 30 minutes after baking.
2. Wrap Each Bagel Individually
To prevent freezer burn and preserve the texture, wrap each bagel tightly in plastic wrap or aluminum foil. This helps protect the bagels from air exposure. Ensure there are no gaps in the wrapping.
3. Use a Freezer-Safe Bag or Container
Once wrapped, place the bagels in a freezer-safe resealable bag or an airtight container. This provides an extra layer of protection against moisture and ensures the bagels stay fresh. Squeeze out any excess air from the bag to prevent freezer burn.
4. Label and Date the Bag
It’s a good idea to label the bag or container with the date you froze the bagels. This way, you’ll know how long they’ve been in the freezer and can use them within the recommended timeframe (typically up to 3 months).
5. Thawing and Reheating
When you’re ready to enjoy your bagels, simply remove them from the freezer. You can let them thaw at room temperature for a few hours or microwave them for about 15-20 seconds to speed up the process. For a crispier finish, place them in a toaster or oven at 350°F (175°C) for 5-10 minutes.
Making Bagel Sandwiches and More
Onion bagels are a fantastic base for creating a variety of delicious sandwiches and snacks, and there are plenty of ways to enjoy them without using bacon, pork, or ham. Here are some great ideas to try:
Classic Breakfast Sandwich
Toast your onion bagel and fill it with scrambled eggs and a slice of cheese. For added freshness, include a handful of spinach or avocado. You can also throw in a few slices of tomato or mushrooms for extra flavor.
Vegan Bagel Sandwich
For a plant-based sandwich, spread vegan cream cheese on the toasted onion bagel and top with sliced cucumbers, tomatoes, and avocado. You can also add some roasted red peppers or arugula to give the sandwich more depth.
Smoked Salmon Bagel
Spread cream cheese on your onion bagel, then layer it with smoked salmon, red onion slices, and a few capers. A squeeze of lemon juice will bring everything together beautifully.
Sweet and Savory Option
Spread cream cheese on the bagel and add slices of apple or pear. Drizzle with a bit of honey or sprinkle some cinnamon for a sweet, savory combination that complements the onion flavor perfectly.
Onion bagels are incredibly versatile and can be enjoyed in so many ways, whether you’re craving a savory sandwich or something sweet and fresh. Feel free to get creative with your fillings and toppings for a meal that’s both satisfying and delicious!
Making homemade onion bagels is a rewarding experience that yields fluffy, flavorful bagels perfect for any meal. By choosing quality ingredients and following simple steps, you can easily create a delicious, aromatic treat. Whether enjoyed on their own or with your favorite toppings, these bagels will elevate your baking game. Enjoy the process and the results!