Looking for soft and tasty gluten-free hot dog buns you can make at home? You’ve come to the right place! These buns are perfect if you follow a gluten-free diet, have celiac disease, or just want a healthier option.
Many store-bought buns fall short. They can be dry, crumbly, or full of preservatives. When you bake them yourself, you get full control over the ingredients and better taste every time.
This recipe is not only gluten-free but also dairy-free. You can easily adjust it to be vegan or allergy-friendly. It’s simple, delicious, and made with wholesome ingredients.
Get ready to impress at your next cookout or weeknight dinner. These homemade buns will become a new favorite—even for those who aren’t gluten-free!
Why Go Gluten-Free with Hot Dog Buns?
Health Benefits of Gluten-Free Baking
Supports Digestive Health
For many people, consuming gluten can lead to bloating, cramping, and general digestive discomfort. Gluten-free baking helps reduce these issues, especially for individuals with gluten sensitivity or celiac disease. By using gluten-free flours like brown rice flour or almond flour, you can create baked goods that are gentler on the stomach and easier to digest.
Reduces Inflammation
Gluten is known to trigger inflammation in those with autoimmune conditions or chronic gut issues. Removing it from your diet often leads to noticeable improvements such as reduced joint pain, fewer headaches, and a better overall sense of well-being. Furthermore, gluten-free recipes typically use anti-inflammatory ingredients like oats, flaxseed, or chia, which support long-term health.
Encourages Whole Food Choices
One of the most rewarding aspects of gluten-free baking is how it encourages the use of whole, nutrient-dense ingredients. Instead of relying on processed white flour, you can use flours made from whole grains, nuts, or legumes. These alternatives are rich in fiber, healthy fats, and essential vitamins. As a result, gluten-free baking not only caters to dietary needs but also supports a healthier, more mindful lifestyle.
Ideal for Gluten Sensitivities and Celiac Disease
Understanding Gluten Sensitivity and Celiac Disease
Gluten sensitivity and celiac disease affect millions of people worldwide. While gluten sensitivity typically causes bloating, fatigue, and headaches, celiac disease is an autoimmune condition where the ingestion of gluten damages the small intestine. Even small amounts of gluten can trigger harmful symptoms and long-term health consequences for those with celiac disease. That’s why a strict gluten-free diet is not just a preference—it’s a necessity.
Why Homemade Buns Are Safer
When you bake your own gluten-free hot dog buns, you gain full control over every ingredient. Many store-bought buns labeled “gluten-free” may still contain traces of gluten due to cross-contamination during production. At home, however, you can avoid this risk by using certified gluten-free ingredients and dedicated kitchen tools. This makes homemade buns a safer and more reliable choice for people who are highly sensitive to gluten.
Better Taste and Texture Without Compromise
Many assume that gluten-free alternatives lack the taste or texture of traditional baked goods. Fortunately, with the right blend of gluten-free flours and binding agents like xanthan gum, you can create buns that are soft, fluffy, and absolutely delicious. By experimenting with homemade recipes, you’ll discover that you don’t have to sacrifice flavor to meet dietary needs—in fact, gluten-free baking often introduces exciting new flavors and textures to enjoy.
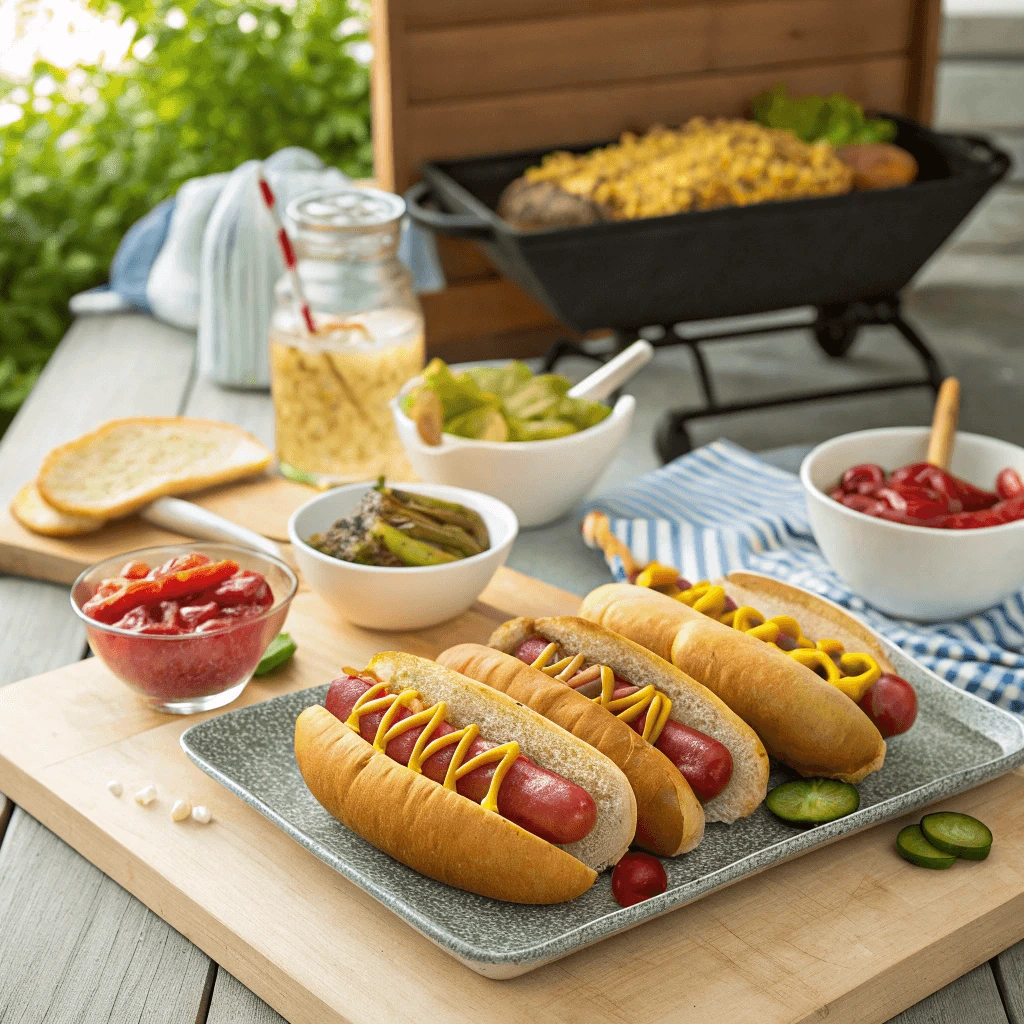
Great for Family Gatherings and Cookouts
Bring Everyone Together with Inclusive Food
Nothing brings people together like good food, especially during backyard cookouts or casual family get-togethers. When you offer gluten-free hot dog buns, you ensure that everyone—regardless of dietary needs—can join the fun without feeling left out. Whether someone in your family is gluten-intolerant or simply health-conscious, serving homemade gluten-free buns shows that you care about their needs.
Impress Guests with Homemade Quality
There’s something special about serving food you made from scratch. Homemade gluten-free buns stand out for their fresh flavor, soft texture, and the love that goes into making them. They’re not only delicious, but they also spark conversation and often lead to recipe requests. Your guests will appreciate the effort and thoughtfulness behind offering something both tasty and inclusive.
Customize for Any Occasion
These buns are highly versatile, making them perfect for a variety of themes and events. You can toast them slightly for a crispy exterior or keep them soft and warm straight from the oven. Add sesame seeds, herbs, or even a hint of sweetness to match the rest of your menu. Whether you’re grilling hot dogs, bratwursts, or plant-based sausages, these gluten-free buns pair beautifully with just about any filling.
Key Ingredients That Make the Difference
Choosing the Right Gluten-Free Flour Blend
Why Your Flour Blend Matters
Selecting the right gluten-free flour blend can make or break your hot dog bun recipe. Since gluten gives traditional dough its structure and elasticity, you need a thoughtful combination of gluten-free flours to replicate that texture. A well-balanced blend ensures your buns turn out soft, light, and perfectly chewy—not gritty or dense.
Key Ingredients to Look For
To achieve the ideal consistency, look for a blend that contains a mix of whole-grain and starch-based flours. Brown rice flour, sorghum flour, or millet flour offer structure and nutrients. On the other hand, tapioca starch, potato starch, or cornstarch lighten the blend and provide that soft, fluffy texture we all love in buns. For added moisture and richness, some blends include almond flour or coconut flour—just be mindful of nut allergies when serving guests.
Consider Pre-Made vs. Homemade Blends
You can either buy a pre-made all-purpose gluten-free flour blend or mix your own at home. Pre-packaged blends are convenient and often tested for consistency, making them a great option for beginners. However, if you prefer full control over ingredients and want to customize the flavor or texture, try making your own. Adjust the ratios depending on whether you want your buns denser, lighter, or more nutritious.
Pro Tip: Add a Binding Agent
No matter which flour blend you choose, don’t forget to include a binding agent like xanthan gum or psyllium husk. These ingredients mimic the elasticity of gluten and hold your dough together during proofing and baking. Without them, the dough can crumble or fall apart, leading to disappointing results.
The Role of Xanthan Gum and Psyllium Husk
Why You Need a Binding Agent
In gluten-free baking, binding agents like xanthan gum and psyllium husk play a crucial role in creating the right texture. Gluten is what gives traditional dough its elasticity, allowing it to rise and hold together. Since gluten is absent in gluten-free flours, these binding agents help to mimic that structure, preventing your buns from becoming crumbly or dry.
Xanthan Gum: A Popular Gluten-Free Binder
Xanthan gum is one of the most widely used ingredients in gluten-free baking. It’s a natural, plant-based polysaccharide that acts as a thickener and stabilizer. When you add xanthan gum to your dough, it forms a gel-like texture that holds moisture and gives the dough its stretch. This is crucial for maintaining softness and pliability, which helps create those perfectly fluffy buns.
Xanthan gum also contributes to better texture by preventing the dough from being too dense. It helps to trap air bubbles during rising, allowing the dough to expand. As a result, your buns will have a light and airy feel without collapsing.
Psyllium Husk: A Natural Fiber with Multiple Benefits
Psyllium husk is another fantastic option for binding gluten-free dough. Derived from the seeds of the Plantago plant, psyllium husk is a soluble fiber that absorbs water and swells to create a gel-like consistency. This property helps improve the elasticity of gluten-free dough, ensuring it doesn’t become crumbly or brittle.
In addition to its binding properties, psyllium husk adds moisture to your dough. This moisture retention helps keep your buns soft and fresh for longer. It also provides a slight chewiness, enhancing the overall texture and making it an excellent choice for hot dog buns.
How to Use Xanthan Gum and Psyllium Husk Together
Both xanthan gum and psyllium husk can be used together in gluten-free baking for maximum results. While xanthan gum provides elasticity and structure, psyllium husk adds moisture and texture. You can experiment with different ratios to see what works best for your recipe. A common starting point is one teaspoon of xanthan gum and one to two tablespoons of psyllium husk for every cup of gluten-free flour.
Pro Tip: The Importance of Hydration
Both xanthan gum and psyllium husk require adequate hydration to work effectively. When you add these ingredients to your dough, ensure that you’re using enough liquid to activate their binding properties. If the dough feels too dry or stiff, simply add a little more water or a liquid of your choice to adjust the consistency.
Boosting Flavor with Apple Cider Vinegar and Sweeteners
Apple Cider Vinegar: A Flavor Enhancer
Apple cider vinegar (ACV) is a secret ingredient in gluten-free baking, often used to enhance the flavor profile of your dough. While it’s typically associated with its tangy taste, it plays a larger role in improving the overall texture and rise of gluten-free buns.
When added to the dough, apple cider vinegar reacts with the baking soda or baking powder, helping the dough rise better. The acid in the vinegar boosts the leavening process, which can make your buns fluffier and lighter. Moreover, ACV can help to neutralize any bitter flavors from the gluten-free flours, improving the overall taste of your buns.
It’s important to note that the vinegar’s strong flavor will dissipate once the dough bakes. What remains is a subtle tanginess that enhances the taste of the buns without overpowering it. This flavor balance makes apple cider vinegar an essential ingredient in gluten-free recipes.
Sweeteners: Adding Subtle Sweetness Without Overpowering the Taste
Gluten-free hot dog buns need a touch of sweetness to complement the savory fillings they’ll hold. But, unlike traditional buns, you don’t want to use refined sugar or sweeteners that might interfere with the desired texture and health benefits. That’s where healthier alternatives come into play.
Natural Sweeteners Like Honey and Maple Syrup
Honey and maple syrup are excellent natural sweeteners that work well in gluten-free baking. They not only provide sweetness but also add moisture to your dough, which helps keep the buns soft and tender. Both honey and maple syrup contribute to a subtle, rounded sweetness that complements the mild tang of apple cider vinegar.
Honey also brings additional benefits such as antimicrobial properties and potential antioxidants, which make it a healthier alternative to white sugar. Meanwhile, maple syrup has a unique flavor that enhances the dough’s richness without being overpowering.
Sugar Alternatives: Agave Syrup and Coconut Sugar
If you’re looking for a more neutral sweetness or have dietary preferences like vegan or lower glycemic options, agave syrup and coconut sugar can be great choices. Agave syrup is a low-glycemic sweetener that dissolves easily in dough, giving it a smooth texture while still offering sweetness. It also helps prevent the dough from drying out.
Coconut sugar, on the other hand, adds a mild caramel-like flavor to the dough. It’s rich in minerals and is a less refined option compared to regular sugar, making it an appealing choice for those looking to avoid overly processed ingredients.
How to Use Apple Cider Vinegar and Sweeteners Together
When incorporating apple cider vinegar and sweeteners into your gluten-free hot dog buns, it’s important to balance them correctly. Typically, one to two tablespoons of apple cider vinegar will work well for every batch of dough, while sweeteners should be added in moderation—generally about two tablespoons of honey, maple syrup, or an equivalent amount of other sweeteners.
The combination of apple cider vinegar and sweeteners helps to balance the dough’s flavor profile. The vinegar’s acidity cuts through the natural sweetness of the sweeteners, creating a harmonious, well-rounded taste that complements the savory fillings in your buns.
Pro Tip: Experiment with Flavors
Feel free to experiment with different sweeteners and vinegars to find the flavor profile that works best for you. For example, if you prefer a more pronounced sweetness, increase the amount of honey or maple syrup slightly. If you enjoy a more tangy flavor, you can add a little extra apple cider vinegar. Just remember that small adjustments can go a long way in perfecting the flavor balance.
By using apple cider vinegar and a variety of sweeteners, you not only enhance the taste but also keep your buns soft, moist, and delicious, all while sticking to healthier, gluten-free ingredients.
Step-by-Step Gluten-Free Hot Dog Bun Recipe
Step 1: Mix and Prepare the Dough
Gather Your Ingredients
Before you begin mixing your dough, gather all the necessary ingredients. You’ll need a gluten-free flour blend, xanthan gum, yeast, sweetener, apple cider vinegar, and a few other essential ingredients like water and oil. Having everything prepared in advance ensures a smoother process, so you don’t have to stop midway to look for ingredients.
Combine Dry Ingredients First
Start by combining the dry ingredients in a large mixing bowl. In most gluten-free baking recipes, the dry ingredients form the foundation of your dough. This includes your gluten-free flour blend, xanthan gum, baking powder or yeast, and any salt or sweetener you plan to use. The flour blend is a crucial factor in determining the texture of your dough, so choose one that is suitable for yeast-based recipes.
Xanthan gum is a critical ingredient in gluten-free baking because it helps provide structure and elasticity to your dough. Without gluten, this binding agent ensures that your buns will hold together properly. Add 1 to 2 teaspoons of xanthan gum, depending on the consistency you prefer.
Mix the Wet Ingredients Separately
In a separate bowl, combine your wet ingredients. This includes warm water (around 110°F or 43°C), your choice of sweetener (honey, maple syrup, or agave syrup), and apple cider vinegar. The warmth of the water activates the yeast, ensuring it rises properly. The sweetener helps feed the yeast, while the apple cider vinegar adds flavor and helps with the leavening process.
Add the wet ingredients gradually to the dry ingredients. Stir slowly as you pour the liquid into the flour mixture. This allows the dry ingredients to absorb the wet ingredients evenly.
Knead the Dough for Consistency
Once all ingredients are combined, it’s time to knead the dough. Gluten-free dough doesn’t require the same vigorous kneading as traditional dough, but it still needs a little bit of attention. Use your hands to mix the dough until it becomes smooth and slightly tacky, but not overly sticky. If the dough is too dry, you can add a little more water, one tablespoon at a time. If it’s too sticky, add a small amount of gluten-free flour.
While kneading, focus on working the dough just enough to ensure all the ingredients are well-incorporated. Kneading helps to activate the xanthan gum, which will give your buns the right texture.
Let the Dough Rest Before Shaping
After kneading, cover the bowl with a clean kitchen towel or plastic wrap. Let the dough rest for at least 10 minutes. This resting period helps the dough hydrate fully, allowing the flour blend to absorb the liquids and form a smooth texture. The dough may not rise significantly at this stage, but allowing it to rest is still essential for consistency and flavor development.
Check the Consistency
Before you move on to shaping the dough, check the consistency. It should be slightly tacky but not stick to your fingers too much. If the dough feels too dry, add a tiny bit more water. If it’s too sticky, add more flour. A good dough consistency is key to achieving soft and fluffy gluten-free hot dog buns.
Step 2: Proofing for Softness
What is Proofing?
Proofing is a vital step in yeast-based baking. It refers to allowing the dough to rest and rise after it has been mixed. During this process, the yeast ferments the sugars in the dough and produces carbon dioxide, which causes the dough to expand. Proofing is especially important when making gluten-free hot dog buns, as it helps create the soft and airy texture we all love. Without proper proofing, the buns may turn out dense and heavy.
Why Proofing Matters in Gluten-Free Baking
In gluten-free baking, yeast plays a key role in creating structure and fluffiness in the dough. Unlike traditional doughs that rely on gluten for elasticity, gluten-free doughs need the help of yeast to rise properly. Proper proofing ensures that the yeast activates fully, producing gases that lighten the dough and give the buns their desired texture. Without sufficient proofing time, you might end up with buns that are dense and heavy, rather than light and fluffy.
How Long Should You Proof the Dough?
The ideal proofing time for gluten-free dough can vary, but typically, you’ll want to let the dough rest for about 45 minutes to 1 hour. During this time, the dough should rise and expand, becoming slightly puffed. The exact duration can depend on the temperature of your kitchen. Warmer environments generally speed up the proofing process, while cooler kitchens may require a longer wait. The dough should roughly double in size during proofing.
Tips for Effective Proofing
To create the best proofing environment, ensure that your dough is placed in a warm, draft-free area. A kitchen with a consistent, warm temperature (around 75°F or 24°C) is ideal. If your kitchen is too cold, you can proof the dough in the oven with just the light on or in a turned-off microwave with a cup of hot water inside to create warmth.
Another tip is to cover your dough with a damp kitchen towel or plastic wrap. This prevents it from drying out as it rests. Keeping the dough covered ensures the perfect consistency for your buns and encourages the yeast to do its work without any interference.
Signs Your Dough is Ready to Shape
After proofing, the dough should feel airy and soft to the touch. It should be slightly puffed up and show visible signs of expansion. Press your finger gently into the dough—if it leaves a small indent and doesn’t spring back immediately, it’s ready to shape. If the dough feels dense or compact, give it more time to proof.
Overproofing: What to Avoid
While proofing is important, overproofing can cause problems. If the dough rises too much and then deflates when you touch it, it has likely overproofed. This can result in buns that don’t rise properly during baking and can even cause them to collapse. To prevent overproofing, keep an eye on the dough during the rising process. Once it has doubled in size, it’s time to move on to the next step.
Step 3: Shaping and Baking to Perfection
Shaping the Dough for Hot Dog Buns
Shaping the dough is a critical step in ensuring your gluten-free hot dog buns bake evenly and hold their structure. Once your dough has proofed and has doubled in size, it’s time to divide it into portions and shape them. Start by lightly flouring your work surface with gluten-free flour to prevent the dough from sticking.
Take your dough and gently deflate it by pressing it down. Divide the dough into equal portions, usually around 6 to 8 pieces, depending on how large you want your buns. Roll each piece into a smooth ball, then elongate it into the shape of a hot dog bun. The ideal shape is slightly oval, not too round, with enough length to fit a hot dog sausage comfortably.
For a uniform shape, roll each portion gently and avoid overworking the dough, as it could become dense. Try to keep your rolls even in size, so they bake evenly. If you prefer a more rustic look, you can shape the buns by hand and leave them slightly irregular. Either way, shaping the dough properly ensures you get the perfect-sized buns for your hot dogs.
Placing the Shaped Dough on the Baking Sheet
Once you’ve shaped all your buns, place them on a baking sheet lined with parchment paper. Leave enough space between each bun to allow for expansion during baking. If you’re baking multiple rows, aim to leave about 1 to 2 inches of space between each bun to prevent them from sticking together.
You can choose to lightly brush the tops of the shaped dough with a bit of olive oil, melted butter, or a flaxseed mixture for added flavor and a golden finish. This step helps the buns develop a slightly crisp exterior while keeping the inside soft. It also gives them a lovely sheen after baking.
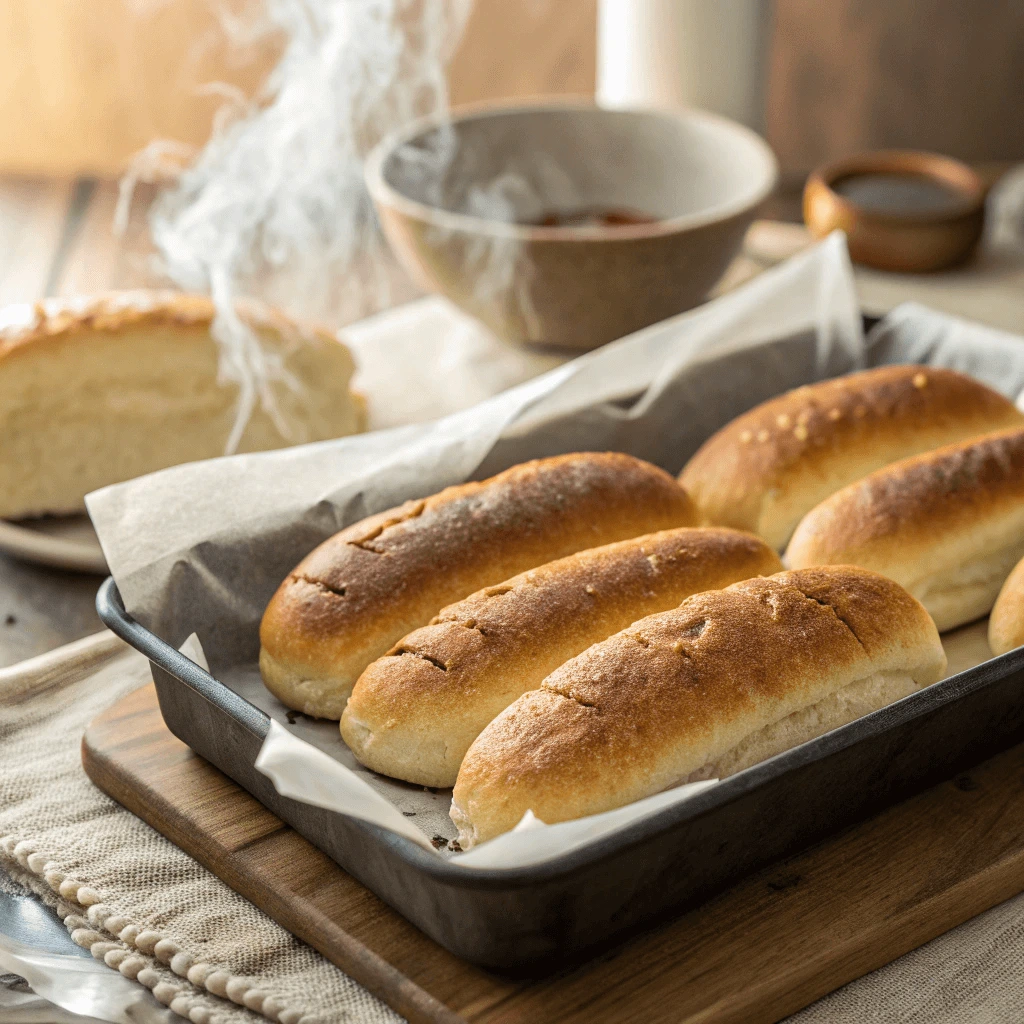
Baking Your Gluten-Free Hot Dog Buns
Preheat your oven to 375°F (190°C), ensuring that the heat is evenly distributed throughout the oven. A preheated oven will help your buns rise better and bake evenly. As you bake your buns, make sure to monitor them closely, as gluten-free dough can sometimes bake faster than traditional bread.
Place the shaped dough into the oven once it has reached the right temperature. Bake for about 20-25 minutes, but check the buns around the 15-minute mark to ensure they don’t over-brown. You’ll know they are done when the buns have a golden-brown color on top, and when tapped, they sound hollow. If you’re unsure, you can use a thermometer to check the internal temperature—it should read around 190°F (88°C) when fully baked.
Achieving the Perfect Texture: Tips for Success
The key to perfect gluten-free hot dog buns is achieving the right balance of texture—soft on the inside and slightly crisp on the outside. To do this, ensure your oven is at the right temperature and avoid opening the oven door too often, as this can cause the temperature to fluctuate and affect the rise of your buns.
After removing the buns from the oven, allow them to cool on a wire rack. This helps prevent them from becoming soggy as they cool, as the moisture can escape through the gaps in the rack. Let them rest for at least 10 minutes before cutting into them, as this allows the buns to firm up a little and maintain their structure when sliced.
Optional Step: Brushing with Butter or Oil
For an extra touch of flavor, you can brush the tops of the freshly baked buns with a small amount of melted butter or olive oil. This gives the buns a delicious, savory finish and enhances their texture. If you prefer a sweeter bun, you can also dust the tops with a light sprinkle of coconut sugar or drizzle with honey for added sweetness.
Expert Tips for Perfect Texture and Taste
How to Keep Buns Soft and Fluffy
Choosing the Right Flour Blend
The flour blend you use plays a significant role in the texture of your gluten-free hot dog buns. Not all gluten-free flours are created equal, and some can lead to dense or dry buns. To maintain a soft, fluffy texture, choose a high-quality gluten-free flour blend specifically designed for baking. These blends typically include a mix of rice flour, potato starch, and tapioca flour, which help provide structure and moisture.
Avoid using a flour blend that contains only one type of flour, as it may not offer the elasticity and tenderness you need. The combination of flours provides a balanced texture, ensuring your buns rise well and stay soft. Some premium gluten-free blends also contain added gums or starches that contribute to a light, airy texture.
Add Moisture-Rich Ingredients
To keep your buns soft, add ingredients that help retain moisture. Ingredients like yogurt, sour cream, or even applesauce can make your dough softer and more pliable. These ingredients contribute to a lighter texture and prevent the buns from becoming too dry after baking.
When mixing the dough, pay attention to the consistency. If the dough feels too stiff or dry, add small amounts of water or another moisture-rich ingredient until you achieve the right texture. The dough should be slightly tacky but not overly sticky.
Don’t Skip the Proofing Stage
Proofing is crucial for soft, fluffy buns. This step allows the dough to rise properly, giving the buns their light texture. During proofing, the yeast ferments the dough, producing carbon dioxide, which causes the dough to expand. The more the dough rises, the lighter and fluffier the final buns will be.
To proof your dough effectively, ensure the environment is warm enough for the yeast to activate. A temperature range of 75°F to 80°F (24°C to 27°C) is ideal. If your kitchen is cool, place the dough in an oven with the light on or cover it with a damp towel and place it in a warm spot. Allow the dough to rise until it has doubled in size, which typically takes 1 to 1.5 hours.
The Importance of Proper Baking Temperature
Baking at the correct temperature is key to preventing your buns from becoming too dry or dense. Preheat your oven to the recommended temperature—usually 375°F (190°C)—before placing the buns inside. If the oven is too cool, the buns might not rise properly. If it’s too hot, the outsides can brown too quickly while the insides remain undercooked.
It’s also important to bake your buns on the middle rack of the oven. This helps ensure an even distribution of heat, which allows the buns to rise uniformly and maintain their soft texture. If your oven tends to cook unevenly, rotate the baking sheet halfway through the cooking time for an even bake.
Cooling Your Buns Properly
Allow your freshly baked buns to cool on a wire rack rather than on the baking sheet. Cooling on a wire rack lets air circulate around the buns, preventing the bottoms from becoming soggy. However, you should not let them cool for too long, as this can cause them to become firm. After about 10 minutes, the buns will have cooled enough to slice and enjoy.
If you want to keep the buns soft for an extended period, consider storing them in an airtight container once they’ve cooled completely. This will help lock in moisture and preserve the freshness of the buns for a few days. You can also wrap the buns in a clean kitchen towel before placing them in the container for extra softness.
Optional: Add a Little Fat for Extra Softness
Adding a small amount of fat, such as melted butter, olive oil, or coconut oil, can also enhance the softness of your buns. The fat helps retain moisture and gives the buns a tender, rich texture. Brush the buns with melted butter or oil after they bake to add a soft, flavorful finish. This also contributes to a slight sheen on the surface of the buns, making them look even more appetizing.
Avoiding Dense or Crumbly Results
The Importance of Accurate Measurements
When baking gluten-free hot dog buns, one of the key factors in avoiding a dense or crumbly texture is ensuring accurate measurements. Gluten-free flours have different densities compared to wheat-based flours, so it’s essential to use the correct measuring techniques. Always use a kitchen scale for the most accurate measurements. If you’re using measuring cups, spoon the flour into the cup and level it off with a flat edge. Never pack the flour down, as this can lead to adding too much flour to your recipe, resulting in dry and dense buns.
Additionally, pay attention to the ratios in your flour blend. A good balance of different gluten-free flours and starches is vital. For example, if your flour blend has too much rice flour and not enough starches like potato or tapioca flour, your buns may come out heavier and denser.
Avoid Overmixing the Dough
Overmixing the dough can cause gluten-free hot dog buns to become dense or crumbly. When mixing, only combine the ingredients until just incorporated. Mixing the dough too much can activate the starches in the flour, leading to a dense texture.
For the best results, once the dough comes together, stop mixing and let the yeast do its work during the proofing stage. Gluten-free dough tends to be stickier than traditional wheat dough, so it’s natural for it to have a different consistency, but be careful not to overwork it.
Allow Proper Rest and Proofing Time
Proofing is essential for developing the right texture in gluten-free buns. Skipping or shortening the proofing time can result in dense buns that don’t rise properly. Allow your dough to proof for the recommended amount of time (usually 1 to 1.5 hours) in a warm, draft-free area. If you’re in a hurry, don’t rush this process; yeast needs time to ferment the dough, which creates bubbles and gives the buns their lightness.
Proofing the dough also allows the flour to fully absorb the liquid, making the dough easier to shape and work with. A rushed proofing stage might result in buns that are heavy or overly dense.
Using Gums and Binders Wisely
Many gluten-free recipes call for ingredients like xanthan gum, guar gum, or psyllium husk as binders. These ingredients help to provide structure and elasticity in the dough, mimicking the role of gluten. However, it’s important not to overdo them. Too much xanthan gum can make the dough tough, while too little can result in buns that crumble or fall apart.
Follow the recipe recommendations for gum usage carefully. Typically, 1/2 teaspoon per cup of gluten-free flour is sufficient. If you’re not sure which gum to use, start with xanthan gum, as it’s the most commonly used binder in gluten-free baking.
Incorporate Moisture-Rich Ingredients
One of the most common reasons gluten-free buns become dry and crumbly is a lack of moisture. Ingredients like yogurt, applesauce, or sour cream can add moisture to the dough, preventing it from becoming too dry. These ingredients also contribute to a more tender crumb texture, ensuring the buns stay soft and pliable.
If you find that your dough feels too dry during mixing, add more moisture a tablespoon at a time. Be cautious not to add too much, as excess moisture can make the dough too sticky and difficult to shape.
Proper Baking Time and Temperature
Overbaking or underbaking gluten-free hot dog buns can both lead to undesirable results. If your buns are too dark or overly crunchy on the outside, they may be too dry on the inside. Similarly, underbaking will cause them to be too soft or raw in the center.
Preheat your oven thoroughly before baking, and stick to the recommended baking time. Keep an eye on the buns as they bake, and check for doneness by tapping the top. If the buns sound hollow when tapped, they are done. It’s always a good idea to rotate the baking sheet halfway through the baking process to ensure even heat distribution.
Let the Buns Cool Properly
Once your buns are baked, allow them to cool on a wire rack to prevent them from becoming soggy. Don’t leave them sitting on a hot baking sheet, as the trapped steam will make the bottoms soft and soggy. Cooling them on a rack ensures that air circulates around them, keeping them light and fluffy.
Allow the buns to cool completely before slicing them. Cutting them while they’re still warm can cause the texture to be too gummy. Patience is key when it comes to the final steps.
Storage Tips to Keep Your Buns Fresh Longer
Why Proper Storage Is Key
Proper storage plays a crucial role in extending the shelf life of your gluten-free hot dog buns. These buns tend to dry out faster than traditional wheat-based buns due to the absence of gluten. Without the right storage methods, they can become stale, hard, or even moldy within a few days. By following the right storage tips, you can maintain their softness and flavor for longer periods.
Room Temperature Storage for Short-Term Freshness
If you plan to use your gluten-free hot dog buns within a few days, storing them at room temperature is a viable option. Place the buns in a resealable plastic bag or an airtight container to protect them from the air, which can cause them to dry out. To ensure they stay soft, you can wrap the buns in a clean kitchen towel before placing them in the bag. This helps retain moisture and prevents them from becoming too dry.
Keep the buns in a cool, dry spot away from direct sunlight or heat, as excessive warmth can cause them to dry out quickly. Check the buns daily for any signs of mold or staleness, and if they start to feel too firm, consider refreshing them.
Refrigerating for Extended Freshness
If you’re not planning to eat the buns within a few days, the refrigerator offers a better solution. Refrigerating gluten-free buns can help them stay fresh for up to a week, but it’s important to store them properly to avoid the buns becoming hard or dry.
Place the buns in a plastic bag or an airtight container before refrigerating them. You can also add a small piece of parchment paper or a slice of bread inside the bag to help maintain moisture levels. This simple trick keeps the buns from absorbing the odors of other foods in the fridge while keeping them soft.
To prevent your gluten-free buns from becoming too cold and stiff when refrigerated, warm them up before serving. You can quickly refresh them by wrapping them in a damp paper towel and microwaving them for 15–20 seconds, or by lightly toasting them.
Freezing for Long-Term Storage
Freezing is an excellent option for keeping your gluten-free hot dog buns fresh for a much longer time—up to three months or more. Properly freezing the buns ensures that they retain their taste and texture when defrosted.
Start by wrapping each bun tightly in plastic wrap or aluminum foil to protect them from freezer burn. Then place the wrapped buns in a freezer-safe resealable bag or airtight container. To make it easier to grab just one or two buns, consider separating the buns with pieces of parchment paper. This way, you don’t have to thaw the entire batch at once.
When you’re ready to enjoy the buns, remove the desired amount from the freezer. Let them thaw at room temperature for about 30 minutes, or speed up the process by microwaving them for 15 seconds per bun. For a crispy exterior, you can also toast them in a preheated oven for a few minutes.
How to Avoid Freezer Burn
One common problem when freezing gluten-free buns is freezer burn, which happens when the buns are exposed to air. This can cause the buns to become dry and lose their flavor. To prevent freezer burn, make sure that the buns are tightly wrapped and sealed in an airtight container or plastic bag before freezing.
For extra protection, you can wrap the buns in plastic wrap first and then place them in a zip-lock bag. This double-layer of protection minimizes the risk of air getting to the buns, ensuring they stay as fresh as possible during storage.
Reheating Tips for Optimal Taste and Texture
When it’s time to enjoy your stored gluten-free buns, reheating them correctly will help restore their freshness and texture. Whether you’re using refrigerated or frozen buns, reheating properly ensures they retain their soft and fluffy qualities.
For refrigerated buns, wrap them in a damp paper towel and microwave them for 10–15 seconds. For frozen buns, allow them to thaw at room temperature, and then reheat them in the oven for a few minutes to restore their original texture. If you prefer a crispy crust, you can toast the buns lightly after microwaving.
Signs Your Buns Are No Longer Fresh
Even with proper storage, gluten-free buns will eventually lose their freshness. To know when it’s time to discard them, check for these signs:
- Hardness: If the buns feel hard or excessively dry, they may have dried out too much to enjoy.
- Mold: Mold can grow quickly on gluten-free baked goods, especially if they’re stored in a humid environment. If you see any mold, discard the buns immediately.
- Off Smell: If the buns have an unusual or sour smell, they may have gone bad, and it’s best to throw them away.
Serving Ideas and Customizations
Topping Ideas for Every Diet
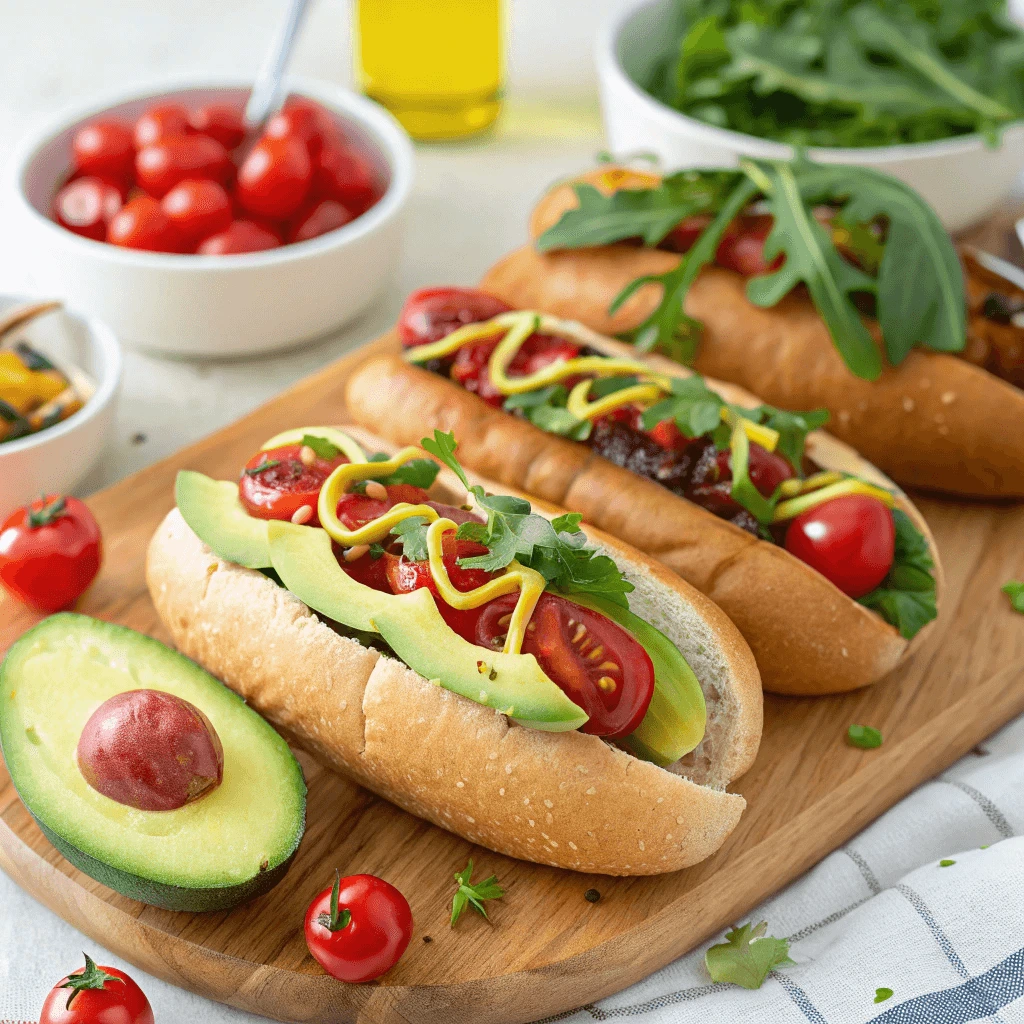
Vegan and Plant-Based Toppings
- Vegan Cheese: Cashew, soy, or coconut-based cheeses melt nicely on hot dogs.
- Guacamole or Avocado: Adds a creamy texture with a touch of lime for freshness.
- Grilled Veggies: Peppers, onions, and mushrooms give a smoky, savory flavor.
- Salsa: Fresh salsa with tomatoes, onions, and cilantro provides a zesty kick.
Gluten-Free and Low-Carb Toppings
- Cheese: Choose cheddar, mozzarella, or blue cheese for a rich topping.
- Coleslaw: Crunchy and creamy, made with shredded cabbage and carrots.
- Pickles or Jalapeños: Add crunch and a zesty bite to your hot dog.
- Hummus: Creamy and rich, a perfect alternative to mayo or mustard.
Meat-Free Protein Options
- Grilled Chicken: Chicken strips add a savory, lean protein topping.
- Pulled Beef or Turkey: Slow-cooked meats bring juicy, tender texture.
- Eggs: A fried or scrambled egg makes for a hearty, satisfying topping.
Sweet and Savory Combinations
Honey Mustard: A sweet and tangy sauce that pairs perfectly with savory flavors.
Caramelized Onions: Sweet onions add richness and depth.
Pineapple Salsa: Sweet and tangy, with fresh pineapple and cilantro.
Pair with Plant-Based or Turkey Sausages
Perfect Pairing with Plant-Based Sausages
Plant-based sausages provide a delicious and sustainable alternative to traditional meats. These sausages are often made from ingredients like soy, peas, or lentils, and they offer a hearty and satisfying bite. When paired with gluten-free hot dog buns, they create a flavorful meal that’s both filling and compassionate.
- Flavor Profile: Plant-based sausages come in a variety of flavors, from spicy to smoky. Many of them are seasoned with herbs and spices like garlic, paprika, or fennel, giving them a rich taste that complements your gluten-free buns.
- Texture: These sausages have a satisfying, firm texture that pairs perfectly with the soft and fluffy buns, creating an enjoyable contrast in each bite.
- Toppings: To enhance the flavor of plant-based sausages, top them with fresh vegetables, vegan cheese, or a drizzle of vegan mayo or mustard. These toppings add extra layers of flavor and keep the meal light and fresh.
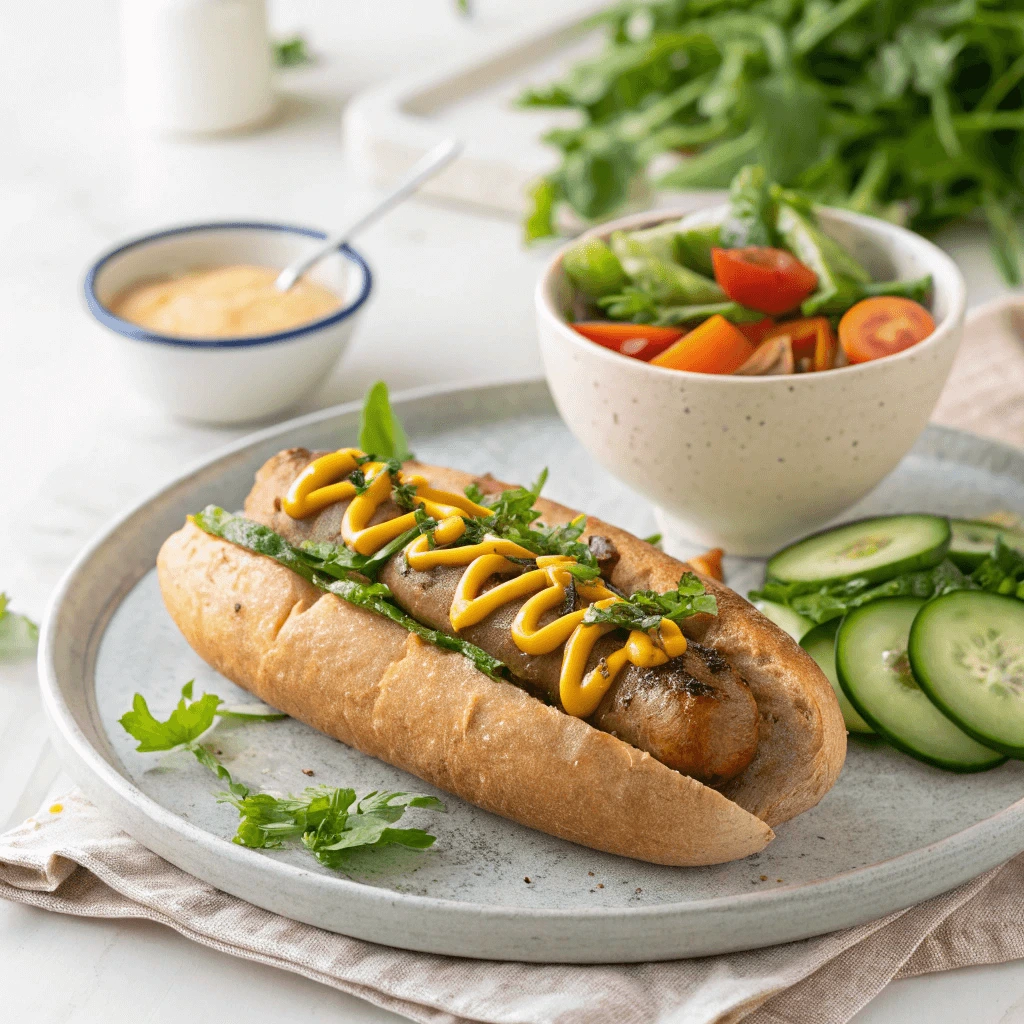
Turkey Sausages: A Leaner Option
For those who prefer a leaner meat option, turkey sausages make an excellent pairing with gluten-free hot dog buns. These sausages have a lighter texture and a mild flavor that works well with a wide variety of toppings.
- Lean and Protein-Rich: Turkey sausages are lower in fat than traditional pork or beef sausages, making them a healthier option while still providing ample protein. This makes them a great choice for those who want a balanced meal without compromising on taste.
- Flavor Flexibility: Turkey sausages often have a subtle flavor that can be easily enhanced with different seasonings and toppings. Whether you prefer savory, spicy, or sweet flavors, turkey sausages can be seasoned or dressed to suit any palate.
- Topping Suggestions: Try pairing turkey sausages with sautéed onions, tangy mustard, or a dollop of homemade cranberry sauce for a twist on a traditional favorite.
Versatility of Plant-Based and Turkey Sausages
Both plant-based and turkey sausages offer tremendous versatility, allowing you to create a meal that suits different dietary preferences and flavor profiles.
- Customization: With either plant-based or turkey sausages, the possibilities are endless. You can mix and match different toppings like grilled peppers, avocado, or pickles to personalize your hot dog.
- Family-Friendly: These sausages provide options for everyone at the table, whether they follow a plant-based diet or prefer leaner meats. They’re perfect for family gatherings where everyone can enjoy a delicious meal without dietary restrictions getting in the way.
- Healthy Alternatives: Both options are healthier alternatives to traditional sausages, offering lower fat and higher protein content. They are also a great source of vitamins and minerals when paired with a variety of colorful vegetables.
Pairing your gluten-free hot dog buns with plant-based or turkey sausages ensures that you have a meal that is both delicious and accommodating for different dietary needs. Whether you’re hosting a cookout or enjoying a family dinner, this combination delivers a satisfying and nutritious dish everyone will love.
Make It Your Own: Add Herbs or Seeds
Herbs: A Flavorful Twist
One of the simplest and most effective ways to elevate your gluten-free hot dog buns is by adding fresh herbs to the dough. Herbs not only enhance the flavor, but they also infuse the buns with natural aromas that make each bite more exciting.
- Popular Herbs to Add: Consider adding rosemary, thyme, or oregano for an earthy, savory taste. Fresh basil or parsley can also bring a refreshing touch. The key is to chop the herbs finely to ensure they distribute evenly throughout the dough, providing bursts of flavor in every bite.
- Herb Pairings: Think about pairing different herbs with your choice of toppings. For instance, rosemary complements the flavors of turkey sausages or grilled vegetables, while basil pairs beautifully with plant-based sausages or a drizzle of olive oil. The right herb choice can make your hot dog bun unique and tailored to your taste.
Seeds: Crunch and Nutrition
Incorporating seeds into your gluten-free hot dog buns not only adds an extra crunch but also boosts their nutritional profile. Seeds are packed with healthy fats, fiber, and protein, making them an excellent addition to your buns.
- Flaxseeds and Chia Seeds: These seeds are high in omega-3 fatty acids and fiber. Flaxseeds add a mild nutty flavor, while chia seeds give a subtle crunch. Both can enhance the texture of your buns and provide additional health benefits.
- Sunflower Seeds or Pumpkin Seeds: For a larger crunch, sunflower and pumpkin seeds are perfect additions. These seeds have a slightly sweet flavor that balances well with savory toppings. Sunflower seeds, in particular, are also rich in antioxidants, helping to support overall health.
- How to Add Seeds: You can incorporate seeds directly into the dough or sprinkle them on top of the buns before baking. If adding them to the dough, mix them in after you’ve prepared the dough to ensure they’re evenly distributed. For a more decorative look, sprinkle seeds on top of the buns and lightly press them into the dough with your hands. This adds visual appeal and a crunchy texture to the finished product.
Customization: Your Buns, Your Style
Adding herbs or seeds is just one way to make your gluten-free hot dog buns stand out. You can mix and match ingredients to create a bun that perfectly suits your taste and dietary needs.
- Experiment with Combinations: Feel free to experiment with different herb and seed combinations. A blend of thyme and sunflower seeds, or rosemary and flaxseeds, can create a unique flavor profile. You can also add a touch of garlic or onion powder to the dough for an extra kick.
- For Different Diets: If you’re following a vegan or plant-based diet, focus on seeds like chia or sunflower for added texture and nutrition. For those seeking gluten-free options that cater to low-carb diets, consider adding flaxseeds and chia seeds, which are lower in carbohydrates and higher in fiber.
- Boost the Texture and Flavor: The beauty of adding herbs or seeds to your hot dog buns lies in how you can customize the flavor and texture. Whether you prefer a herbaceous, savory note or a crunchy contrast, experimenting with these ingredients allows you to create a bun that reflects your personality and preferences.
Final Thoughts on Customizing Your Buns
By adding herbs and seeds to your gluten-free hot dog buns, you can take a simple recipe and make it truly your own. The possibilities are endless when it comes to customizing the flavor profile and texture of your buns. Not only will you enjoy a tastier bun, but you’ll also benefit from the added nutritional value of herbs and seeds. With so many options to choose from, you’ll never run out of ways to make your gluten-free hot dog buns more exciting!
In conclusion, this Healthy & Delicious Gluten-Free Hot Dog Buns Recipe offers a fantastic way to enjoy a classic favorite without gluten. Packed with flavor, texture, and customizable options, these buns are perfect for any diet and occasion. Whether you’re serving them at a cookout or enjoying a family meal, they will surely be a hit. Give the recipe a try and savor the delicious results!