There’s something irresistible about the rich, chocolatey crunch of homemade graham crackers. Whether you’re craving a sweet snack or looking for the perfect ingredient for desserts like s’mores or pie crusts, homemade chocolate graham crackers are the answer. Not only do they offer a fresh, customizable twist on a classic favorite, but they’re also surprisingly easy to make! With just a handful of simple ingredients and a quick recipe, you can have delicious, homemade chocolate graham crackers ready in no time. Say goodbye to store-bought versions and enjoy a treat that’s both satisfying and fun to bake!
Why Choose Homemade Chocolate Graham Crackers?
Control the Ingredients for a Healthier Snack
Making chocolate graham crackers at home gives you full control over the ingredients. You can choose healthier options and avoid unwanted additives found in many store-bought crackers.
Opt for Whole Grain Flours
Use whole wheat or other whole grain flours instead of refined white flour. Whole grains add fiber and nutrients, helping support digestion and providing lasting energy.
Choose Natural Sweeteners
Replace refined sugar with natural sweeteners like honey, maple syrup, or molasses. These alternatives offer sweetness plus beneficial minerals and antioxidants.
Skip Artificial Additives
Homemade crackers don’t need artificial flavors, colors, or preservatives. Avoiding these keeps your snack cleaner and healthier.
Freshness and Flavor Compared to Store-Bought Brands
Making chocolate graham crackers at home means you enjoy fresher snacks with richer flavors than most store-bought options. Store brands like Nabisco often contain preservatives and artificial ingredients that can dull the natural taste and texture.
Experience the Difference of Freshly Baked Crackers
When you bake chocolate graham crackers from scratch, you taste the full depth of fresh ingredients like cocoa powder, whole grain flour, and natural sweeteners. These flavors come alive right after baking and can’t be matched by pre-packaged crackers that sit on shelves for weeks or months.
Avoid Preservatives that Affect Taste
Store-bought crackers use preservatives to prolong shelf life, but these chemicals sometimes give off a stale or overly processed flavor. Homemade crackers don’t rely on preservatives, so you get a cleaner, more natural taste every time.
Customize the Flavor to Your Liking
Homemade recipes allow you to adjust sweetness, cocoa intensity, or spices to match your preferences. This customization creates a personalized flavor profile, unlike mass-produced crackers that must appeal to a broad audience.
Enjoy the crisp texture and rich chocolate taste that only freshly baked, homemade chocolate graham crackers can offer. Your homemade batch will likely become the new favorite snack in your kitchen.
Fun and Simple Baking Experience for Everyone
Baking homemade chocolate graham crackers offers a fun and easy activity that anyone can enjoy. Whether you’re cooking solo, baking with family, or hosting a kids’ baking day, this recipe fits all skill levels and brings joy to the kitchen.
Perfect for Family Bonding
Involving kids or family members in baking chocolate graham crackers creates memorable moments. Simple steps like mixing ingredients, rolling out dough, and cutting shapes let everyone participate and learn together. Kids especially love using cookie cutters to create fun shapes.
Easy to Follow for Beginners
This recipe uses straightforward ingredients and clear instructions. Even novice bakers can confidently prepare the dough and bake delicious crackers without stress or confusion. The process builds baking skills and boosts confidence.
Encourages Creativity
Homemade baking invites creativity. You can experiment with shapes, add toppings like sea salt or cinnamon, and adjust flavors to your taste. This freedom makes baking chocolate graham crackers more than just cooking—it becomes a playful experience.
Overall, baking chocolate graham crackers is a simple, rewarding activity that brings fun, creativity, and tasty results for everyone involved.
Essential Ingredients for Quick and Easy Homemade Chocolate Graham Crackers
Core Ingredients
When making homemade chocolate graham crackers, selecting quality core ingredients plays a vital role in achieving great taste and texture. The foundation of this recipe includes whole wheat flour, cocoa powder, and natural sweeteners.
Whole Wheat Flour for Nutty Flavor and Nutrition
Whole wheat flour adds a nutty, rich flavor to your crackers. Unlike refined white flour, it contains more fiber, vitamins, and minerals, making your snacks healthier and more satisfying. Using whole wheat flour also contributes to a slightly denser texture that balances perfectly with the chocolate flavor.
Unsweetened Cocoa Powder for Deep Chocolate Taste
Cocoa powder gives these graham crackers their signature chocolate flavor. Opt for unsweetened cocoa powder to avoid extra sugars and maintain control over sweetness. High-quality cocoa powder also adds antioxidants and enhances the richness of the crackers without overpowering the other ingredients.
Natural Sweeteners to Balance Flavors
Choosing natural sweeteners like honey, molasses, or maple syrup elevates the flavor while providing healthier alternatives to refined sugar. These sweeteners add moisture and subtle complexity to the crackers. Molasses, in particular, adds a traditional graham cracker warmth and depth that pairs wonderfully with cocoa.
Selecting the right core ingredients allows you to customize your homemade chocolate graham crackers for both taste and nutrition, resulting in a delicious, wholesome snack.
Flavor Enhancers and Leavening Agents Explained
To elevate your homemade chocolate graham crackers from good to great, it’s essential to understand how flavor enhancers and leavening agents work. These supporting ingredients round out the taste and texture of your crackers.
Vanilla Extract Adds Warmth and Depth
Vanilla extract brings a subtle, sweet aroma and deepens the chocolate flavor. Even in small amounts, it enhances the overall taste profile and makes your graham crackers smell as good as they taste. Always use pure vanilla extract if possible—it creates a more authentic and robust flavor than artificial alternatives.
Salt Balances Sweetness and Highlights Chocolate
A small pinch of salt goes a long way. It balances the sweetness from your chosen sweeteners and intensifies the cocoa’s natural bitterness. Salt also helps create a more complex flavor by enhancing the other ingredients rather than standing out on its own.
Baking Soda Creates Lightness and Crunch
Baking soda serves as a leavening agent that helps your dough rise slightly while baking. It reacts with the natural acids found in cocoa powder and sweeteners like molasses or honey. This reaction creates tiny bubbles in the dough, leading to a lighter, crispier texture in the finished crackers.
Understanding and properly using these key ingredients ensures your chocolate graham crackers are flavorful, well-balanced, and delightfully crunchy with every bite.
Kitchen Tools Needed
Having the right kitchen tools can make baking homemade chocolate graham crackers both easier and more enjoyable. These basic tools help you mix, roll, cut, and bake your crackers with precision and ease.
Rolling Pin for Even Thickness
A rolling pin plays a key role in shaping your dough. Roll the dough out evenly to ensure each cracker bakes uniformly. Aim for about 1/8-inch thickness to achieve the perfect crunch. If you don’t have a traditional rolling pin, a clean glass bottle can work in a pinch.
Cookie Cutters for Fun and Consistent Shapes
Use cookie cutters to cut the dough into uniform shapes. Traditional rectangles give your crackers a classic look, but fun shapes like stars or hearts can make the process more enjoyable—especially when baking with kids. Uniform sizing also ensures even baking.
Baking Sheet and Parchment Paper
A flat baking sheet lined with parchment paper prevents the crackers from sticking and promotes even browning. The parchment paper also makes cleanup easier and helps transfer the crackers to a cooling rack with minimal effort.
Airtight Storage Container
After baking, store your crackers in an airtight container to keep them fresh and crunchy. Choose a container that seals tightly to prevent moisture from softening the crackers.
Optional Tools for Extra Convenience
If you have a stand mixer or hand mixer, use it to mix your dough faster and more thoroughly. A cooling rack helps the crackers crisp up evenly after baking, and a pastry brush can come in handy for brushing off extra flour or adding a glaze if desired.
With just a few simple tools, you’ll set yourself up for a smooth, successful baking experience from start to finish.
Step-by-Step Guide: How to Make Homemade Chocolate Graham Crackers

Mixing and Preparing the Dough Quickly
Making chocolate graham cracker dough doesn’t have to take a lot of time. With a simple process and a few essential steps, you can prepare your dough efficiently while maintaining great flavor and texture.
Combine Dry Ingredients First
Start by whisking together the dry ingredients in a large mixing bowl. These typically include whole wheat flour, unsweetened cocoa powder, baking soda, and salt. Mixing the dry components thoroughly helps distribute the leavening agent evenly, which leads to consistent results when baking.
Blend Wet Ingredients Separately
In another bowl, mix the wet ingredients—such as honey or maple syrup, vanilla extract, and a bit of milk or oil. If you’re using a stand or hand mixer, you can achieve a smooth blend more quickly. Let the vanilla and sweetener fully integrate with the oil or milk before moving on to the next step.
Combine and Form the Dough
Gradually add the dry ingredients to the wet mixture while mixing on low speed. If mixing by hand, stir continuously to incorporate the flour slowly. A dough will start to form that’s soft but not sticky. If the mixture feels too dry, add a small splash of milk. If it’s too wet, sprinkle in a little more flour. Once the dough pulls away from the sides of the bowl, you’re ready to move on.
Let It Rest for Better Texture
Wrap the finished dough in parchment paper or plastic wrap and place it in the refrigerator for about 15–30 minutes. This rest period makes the dough easier to roll and helps the flavors meld together more fully.
Preparing the Dough for Rolling
To begin, chill your dough for at least 30 minutes before rolling. Cold dough is firmer and easier to handle, making it less likely to stick or tear. Once chilled, divide the dough into two portions. Place one portion between two sheets of parchment paper. This method eliminates the need for extra flour, which can dry out your crackers.
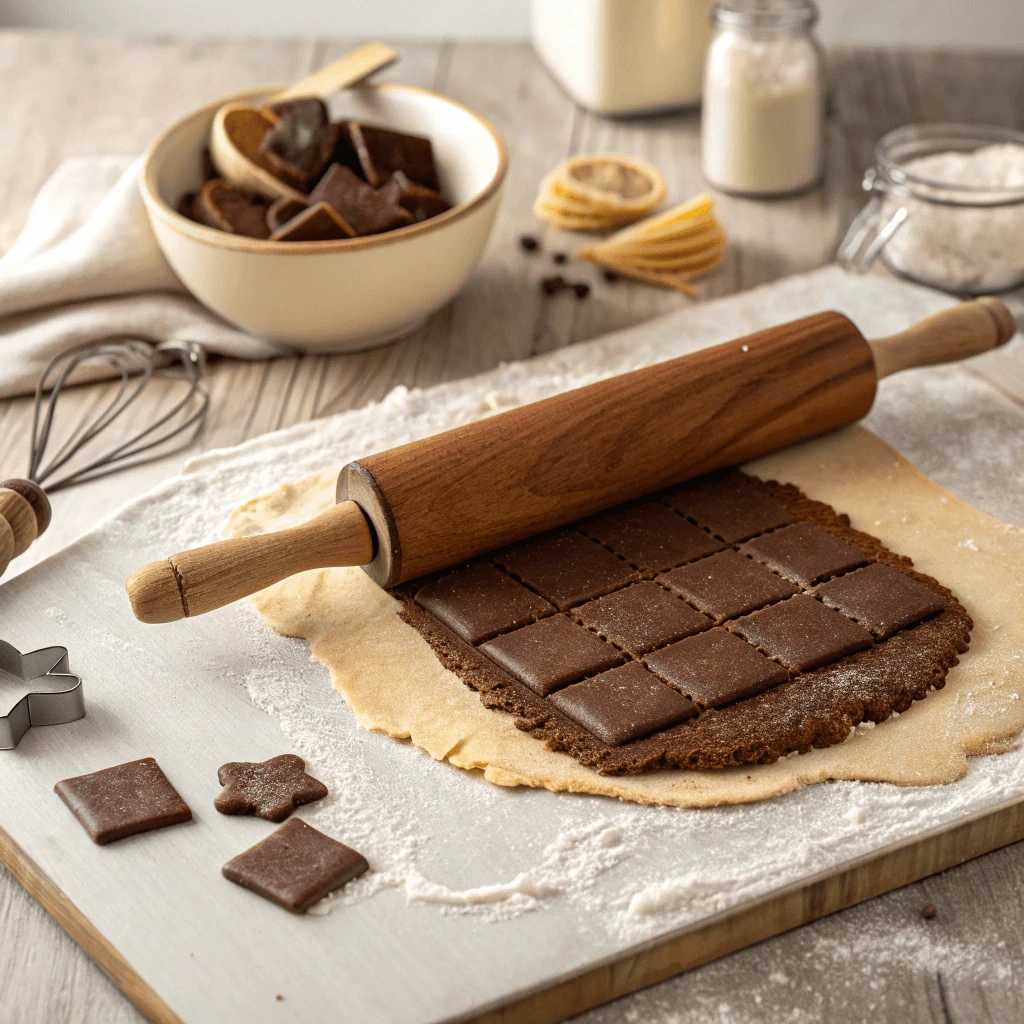
Rolling the Dough Evenly
Use a rolling pin to roll the dough to a consistent thickness of about 1/8 inch. Thin, even layers help ensure that the graham crackers bake uniformly and achieve the perfect crunch. If you notice any uneven spots, gently roll them out until they match the rest of the dough. If the dough softens too much while working, place it back in the refrigerator for a few minutes to firm up again.
Cutting and Shaping the Crackers
Now comes the fun part—cutting shapes! Traditional graham crackers are rectangular, but you can use cookie cutters for fun, creative designs. Whether you’re making heart-shaped snacks or mini stars, aim for consistent sizes so all crackers bake evenly. After cutting, use a fork to prick small holes across the surface of each cracker. These holes allow steam to escape during baking and help the crackers stay flat and crisp.
Baking Tips for the Best Texture
Carefully transfer the shaped dough to a parchment-lined baking sheet, spacing the crackers about an inch apart. Preheat your oven to 325°F (165°C). Bake the crackers for 12 to 15 minutes, rotating the baking sheet halfway through for even browning. The edges should feel firm and the tops slightly dry when done. Keep a close eye on them during the last few minutes to prevent over-baking.
Cooling for Maximum Crunch
Once baked, move the crackers to a wire rack immediately. Let them cool completely—this helps them firm up and reach their final crunchy texture. Avoid storing them while warm, as trapped heat can create unwanted moisture and softness. Once cool, store them in an airtight container to maintain their crispness.
Let the Crackers Cool Completely
Once your chocolate graham crackers come out of the oven, transfer them immediately to a wire cooling rack. This allows air to circulate freely around each cracker, preventing moisture buildup on the bottom. If you leave them on a hot baking tray, the residual heat can make the bottoms soggy. Aim to cool the crackers for at least 30 minutes, or until they reach room temperature and feel crisp to the touch.
Check for the Perfect Texture
After cooling, test one cracker by snapping it in half. A properly baked graham cracker will break cleanly with a satisfying crunch. If the texture feels too soft or chewy, place the crackers back in the oven for a few minutes at a low temperature—around 300°F (150°C)—to dry them out further. Keep a close eye on them during this step so they don’t burn.
Store Smartly to Lock In Crunch
Once completely cool, store your crackers in an airtight container. Choose a container that seals tightly to protect them from humidity. Add a small packet of food-safe silica gel or a piece of parchment paper to absorb any excess moisture if you’re storing them for more than a few days. Keep the container in a cool, dry pantry away from direct sunlight. Proper storage extends freshness for up to one week without compromising texture.
Freeze for Longer Shelf Life
If you want to enjoy your chocolate graham crackers beyond the week, freezing is a great option. Place cooled crackers in a freezer-safe zip-top bag or container, separating layers with parchment paper. This prevents them from sticking together. When you’re ready to eat, let them thaw at room temperature for 10–15 minutes, and they’ll be just as crisp as freshly baked.
Healthy Ingredient Alternatives for a Nutritious Twist
Why Natural Sweeteners Work Best
Using natural sweeteners in homemade chocolate graham crackers enhances both flavor and nutrition. Unlike refined sugar, ingredients like honey, maple syrup, and date syrup provide depth and subtle notes that pair beautifully with cocoa and whole wheat flour.
Honey – Classic and Moisture-Rich
Honey adds a warm, floral sweetness that balances the rich chocolate flavor. It also helps keep the crackers tender thanks to its natural moisture-retaining properties. For best results, use raw or organic honey, which also offers trace antioxidants.
Maple Syrup – Vegan and Smooth
Maple syrup is a great vegan substitute that brings a smooth, caramel-like flavor. It’s rich in minerals like manganese and zinc, and it blends easily into the dough. Use pure maple syrup, not commercial pancake syrups, to avoid added sugars.
Date Syrup – Earthy and Nutrient-Dense
Date syrup is made from whole dates and brings a deep, earthy sweetness. It’s also high in fiber and potassium, making it one of the most nutrient-rich sweeteners available. It works well in chocolate-based recipes and is a great choice for more wholesome baking.
Why Choose Alternative Flours?
Choosing the right flour is essential when baking homemade chocolate graham crackers. Whether you’re gluten-intolerant or simply looking to add more nutrition, using gluten-free or whole grain alternatives allows you to customize your crackers to fit your dietary needs.
Gluten-Free Options
Several gluten-free flours work well as substitutes for traditional whole wheat flour:
- Oat Flour: This soft, mild-flavored flour provides structure and fiber. It’s best when combined with a binding agent like xanthan gum or flaxseed meal.
- Almond Flour: Made from finely ground almonds, it adds a light, nutty flavor and moist texture. Because it lacks gluten, almond flour works best in combination with sturdier flours.
- Gluten-Free All-Purpose Blend: These blends, often made with rice flour, potato starch, and tapioca flour, are designed to mimic the texture of wheat flour. They’re ideal for keeping your graham crackers crisp without compromising taste.
Whole Grain Options
If you’re aiming for a more nutritious twist without avoiding gluten, try these whole grain alternatives:
- Whole Wheat Flour: This is the classic option for homemade graham crackers. It adds fiber and a subtle nutty flavor that complements chocolate perfectly.
- Spelt Flour: A less processed ancient grain, spelt offers a slightly sweet and mild taste. It’s not gluten-free but is often easier to digest than regular wheat.
- Rye Flour: While less common, rye adds a hearty depth to baked goods. Use it in combination with wheat or oat flour for a robust flavor profile.
Mixing for the Right Texture
To achieve the ideal graham cracker texture, experiment with flour combinations. For example, blending oat flour with a bit of almond flour and a gluten-free mix can result in crispy, flavorful crackers. Make sure to monitor the moisture level and adjust your liquids accordingly, as alternative flours absorb moisture differently.
Why Go Dairy-Free and Vegan?
Making chocolate graham crackers dairy-free and vegan isn’t just about dietary restrictions—it’s also about inclusivity and healthier baking. By swapping out traditional ingredients like butter, milk, and honey, you can create treats that everyone can enjoy without sacrificing flavor or texture.
Dairy-Free Substitutions
Eliminating dairy from your recipe is simple with these alternatives:
- Butter Alternatives: Use plant-based butters made from oils like avocado, coconut, or olive. You can also try solid coconut oil or vegan margarine for a similar texture and taste.
- Milk Substitutes: Replace dairy milk with unsweetened almond milk, soy milk, oat milk, or coconut milk. These alternatives blend well into the dough and provide moisture without altering the flavor too much.
Vegan Sweetener and Binder Options
Vegans avoid honey and eggs, but there are effective plant-based substitutes:
- Honey Replacements: Use maple syrup, agave nectar, or date syrup to keep the crackers naturally sweet while aligning with vegan diets.
- Egg Replacers: If your recipe calls for eggs as a binder (some variations do), you can substitute with flaxseed meal mixed with water, chia seed gel, or commercially available egg replacers like Bob’s Red Mill Egg Replacer.
Balancing Texture and Flavor
Swapping ingredients doesn’t mean compromising on crunch or taste. For instance, coconut oil provides structure similar to butter, and oat milk keeps the dough moist. Make sure to adjust dry ingredients slightly to account for any changes in consistency when using syrups or plant milks.
Serving Suggestions and Storage Tips for Homemade Chocolate Graham Crackers
Delicious Pairings for Homemade Chocolate Graham Crackers – S’mores, Yogurt, and Nut Butter
To elevate your homemade chocolate graham crackers, try pairing them with complementary ingredients that enhance flavor and texture. Whether you’re preparing a snack for kids or a more indulgent dessert, these creative combos are sure to please.
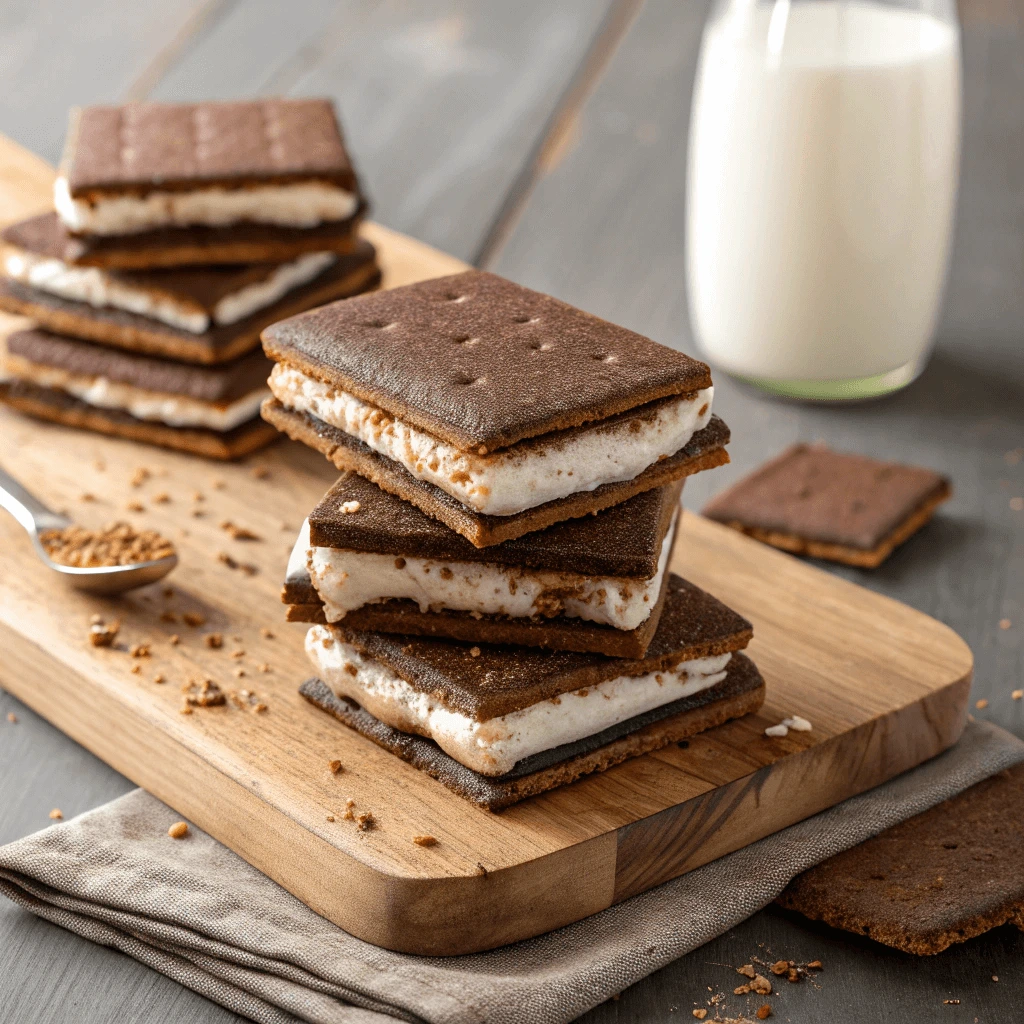
Make Classic or Creative S’mores
Nothing beats the nostalgia of a s’more, especially when made with rich, chocolate-flavored graham crackers. Roast marshmallows until golden and gooey, then sandwich them between your homemade crackers with a square of dark or milk chocolate. For a fun twist, try adding a spoonful of peanut butter, banana slices, or even a caramel drizzle to make gourmet-style s’mores at home.
Dip or Layer with Creamy Yogurt
For a lighter, protein-packed snack, serve your crackers with a side of Greek or dairy-free yogurt. Kids love dipping them, and adults can layer the crackers into parfaits for added crunch. Opt for vanilla, honey, or chocolate-flavored yogurt to complement the cocoa notes in the crackers. Sprinkle with berries or granola for an extra treat.
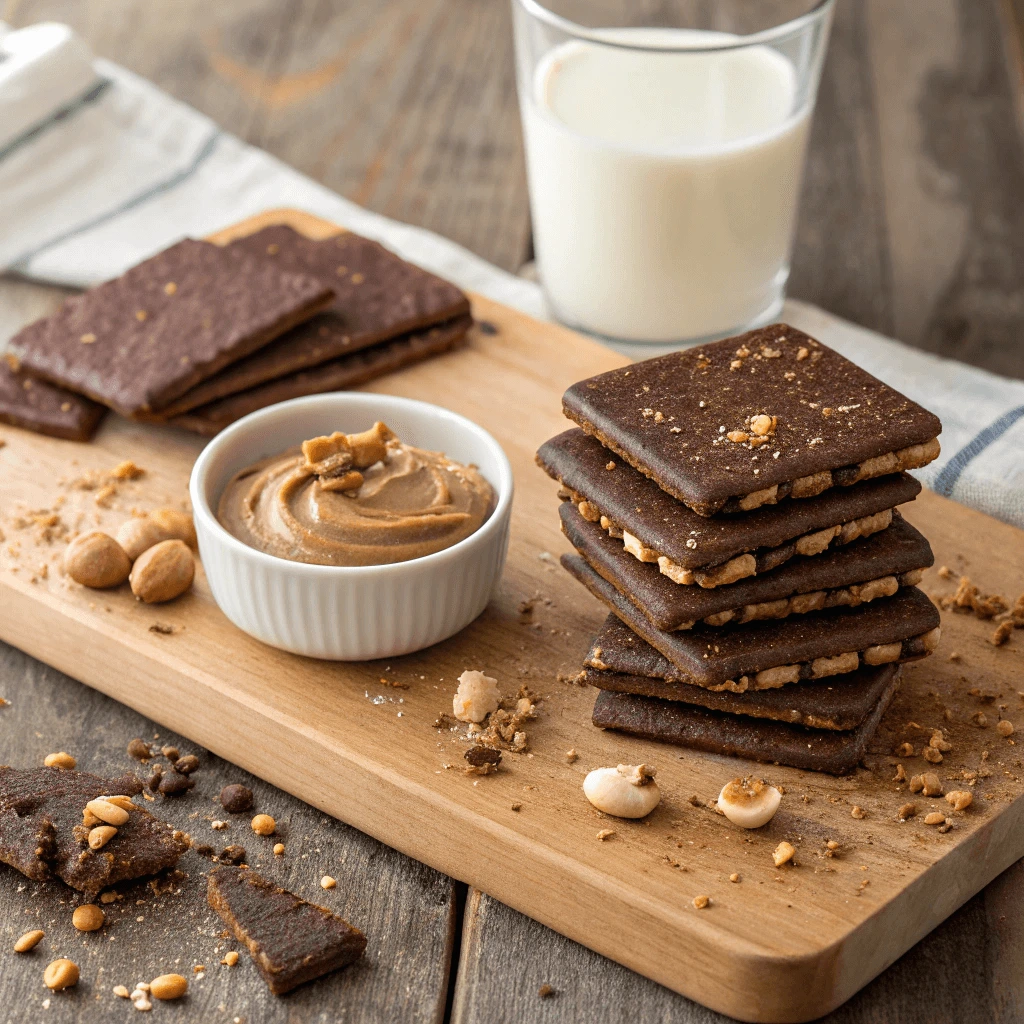
Spread on Nut Butters for a Power Snack
Almond butter, peanut butter, or cashew spread turns your chocolate graham crackers into an energy-boosting snack. This pairing works great as a post-workout bite or a mid-afternoon pick-me-up. Add sliced banana or chia seeds for a more nutritious combo. If you’re nut-free, sunflower seed butter offers a great alternative.
How to Store Homemade Chocolate Graham Crackers for Freshness
Preserving the crisp texture and rich chocolate flavor of your homemade graham crackers is key to enjoying them long after baking. Proper storage techniques will help maintain their freshness and keep them snack-ready anytime.
Use Airtight Containers
After cooling the crackers completely, place them in an airtight container. This prevents moisture from seeping in and softening the crackers. Choose containers with secure seals—glass jars, metal tins, or BPA-free plastic are all excellent options. Avoid storing them while still warm, as trapped steam can lead to sogginess.
Store at Room Temperature
Keep your airtight container in a cool, dry place away from direct sunlight or heat sources. A pantry or cupboard works well. When stored correctly at room temperature, your chocolate graham crackers will stay fresh for about 5 to 7 days. Make sure to reseal the container tightly after each use.
Freeze for Longer Shelf Life
If you plan to keep the crackers longer than a week, freezing is a great option. Place the crackers in a single layer on a baking sheet to freeze initially. Once frozen, transfer them to a freezer-safe zip-top bag or container with parchment paper between layers. Label the container with the date and enjoy them within 1 to 2 months. To serve, thaw at room temperature for 10–15 minutes or warm them briefly in the oven to restore their crunch.
Make-Ahead and Freezing Tips for Homemade Chocolate Graham Crackers
Planning ahead can save you time and make snack prep stress-free. Whether you want to prepare dough in advance or freeze finished crackers, this guide will help you enjoy homemade chocolate graham crackers whenever the craving strikes.
Prepare the Dough in Advance
You can mix and prepare the dough a day or two before baking. Once you’ve combined all the ingredients and formed a ball of dough, wrap it tightly in plastic wrap or place it in a reusable silicone bag. Store it in the refrigerator for up to 48 hours. When you’re ready to bake, let the dough rest at room temperature for 10–15 minutes to soften slightly before rolling and cutting.
Freeze the Dough for Later Use
For longer storage, freezing the dough is a convenient option. Divide the dough into smaller portions, flatten them into discs, and wrap each one securely in plastic wrap. Place the wrapped portions in a freezer-safe container or bag, and label them with the date. Frozen dough can be stored for up to 2 months. When needed, thaw it in the fridge overnight or on the counter for a few hours.
Store and Reheat Baked Crackers
If you’ve already baked your chocolate graham crackers, let them cool completely before freezing. Arrange them in a single layer on a baking sheet to pre-freeze, then transfer them to an airtight freezer bag or container with parchment paper between layers. When you’re ready for a quick snack, allow them to thaw at room temperature or place them in a warm oven for a few minutes to regain that satisfying crunch.
Conclusion
Making homemade chocolate graham crackers is a fun, quick, and rewarding way to enjoy a healthier snack. With just a few pantry staples and simple kitchen tools, you can create a batch of delicious crackers perfect for s’mores, snacking, or dessert pairings. Plus, you have full control over the ingredients, making them ideal for various dietary needs. Whether you’re baking with kids or preparing a make-ahead treat, this easy recipe guarantees crisp, chocolaty goodness every time. Give it a try and taste the homemade difference!