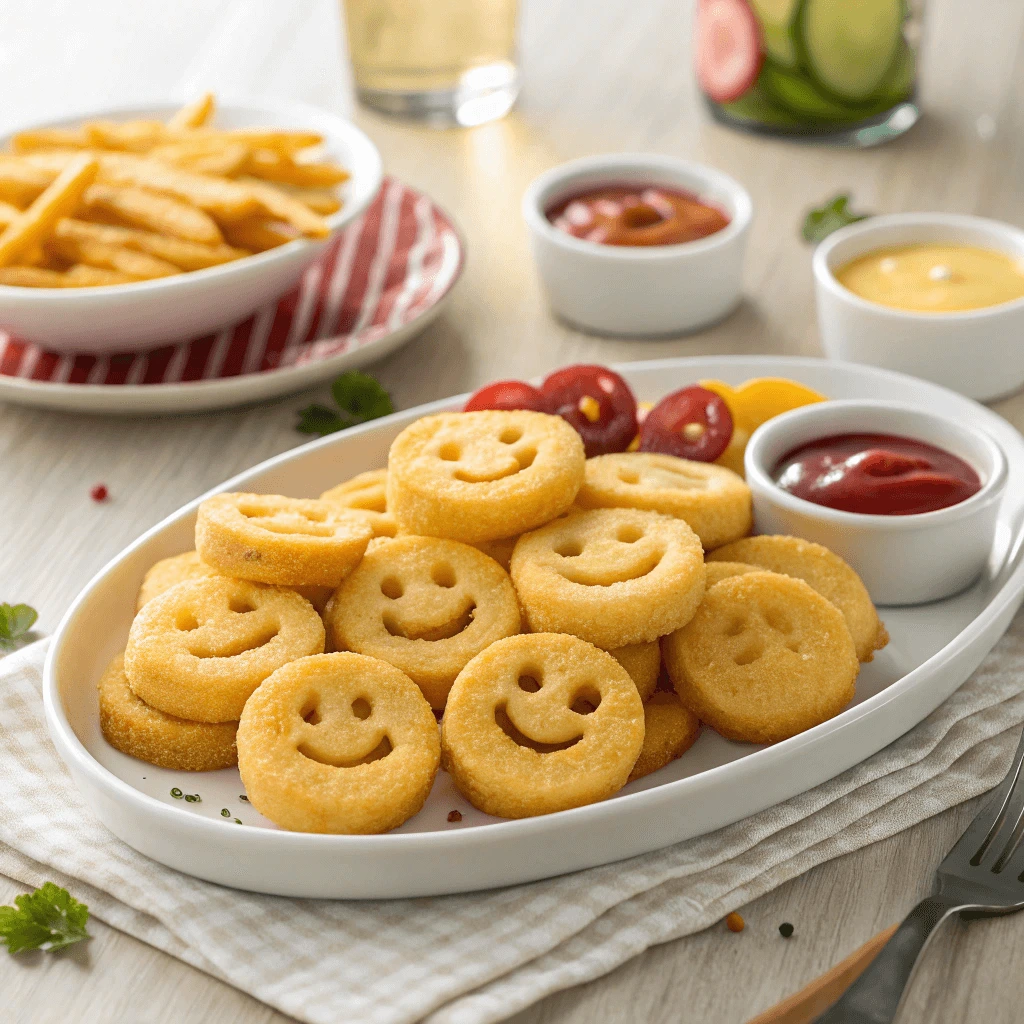
Craving a fun, crispy, and delicious snack that’s perfect for both kids and adults? Look no further than homemade smiley face fries! These adorable, golden-brown potato treats are easy to make and guarantee a satisfying crunch with every bite. Whether you’re air frying, baking, or deep frying, this recipe ensures that your smiley face fries turn out crispy and perfectly shaped every time. Ideal as a snack, side dish, or even a playful addition to any meal, smiley face fries offer a lighthearted twist on traditional fries. Plus, you can get creative with different seasonings and dipping sauces to elevate your snack experience. Ready to make your own smiley face fries at home? Let’s dive into this simple and fun recipe!
The Basics of Making Homemade Smiley Face Fries
Choosing the Right Potatoes for Smiley Face Fries
When it comes to making the perfect homemade smiley face fries, selecting the right type of potato is crucial for achieving that perfect balance of crispy exterior and fluffy interior. While many varieties of potatoes are available, not all of them are ideal for creating the best fries. Let’s take a closer look at the best potato choices, their characteristics, and how to select the right one for your smiley face fries.
1. Starchy Potatoes: A Top Choice for Crispy Fries
Starchy potatoes, like Russet potatoes, are the most popular choice when making smiley face fries. These potatoes are known for their high starch content, which results in a light and crispy texture when cooked. Russets are perfect for fries because they become crisp on the outside while remaining soft and fluffy on the inside. If you’re looking to get that golden-brown, crunchy texture that’s essential for smiley face fries, Russets are your best bet.
2. Waxy Potatoes: A Better Choice for Creamy Texture
Waxy potatoes, such as Red Bliss or Yukon Gold, have less starch than starchy potatoes, which makes them less ideal for achieving the super crispy exterior. However, waxy potatoes have a higher moisture content and a creamier texture. If you prefer a smoother, softer interior for your smiley face fries, you might want to try using waxy potatoes. Keep in mind, though, that they may not achieve the same crunch as starchy potatoes. For a hybrid option, you can use a mix of both starchy and waxy potatoes, combining the benefits of each.
3. Tips for Choosing Potatoes
When selecting potatoes for your smiley face fries, consider the following factors to ensure you’re getting the best batch:
- Look for firm potatoes: Avoid potatoes with soft spots, bruises, or any signs of sprouting. Choose potatoes that are firm to the touch and free from blemishes for the best texture.
- Opt for medium to large potatoes: Since you’re making smiley face fries, it’s important to have enough potato to shape into the iconic smiley faces. Medium to large potatoes provide ample size for creating these fun fries.
- Freshness matters: Fresh potatoes will provide a better taste and texture compared to older, starchier potatoes. Make sure to buy your potatoes from a trusted store or supplier for the best quality.
Tools and Equipment You’ll Need
To make the perfect homemade smiley face fries, having the right tools and equipment is essential. These tools ensure that your fries turn out crispy, evenly cooked, and fun to shape. Here is a breakdown of the equipment you’ll need to create these delicious treats, from the essential kitchen gadgets to the helpful accessories that make the process easier.
1. Cutting Tools for Shaping the Fries
One of the most crucial steps in making smiley face fries is cutting the potatoes into the right shape. To achieve the classic smiley face look, you need precise, easy-to-use tools.
- Cookie Cutter or Smiley Face Mold: If you want perfectly shaped smiley faces, a smiley face cookie cutter or mold is your best option. These tools are designed to make precise, uniform shapes, and they can quickly carve out the faces from your potato slices. If you don’t have a smiley face mold, you can also use a regular round cookie cutter and a small knife to carve out the eyes and mouth.
- Sharp Knife or Paring Knife: If you’re creating the shapes by hand, a sharp knife or paring knife is essential for carefully cutting around the edges of the smiley faces. Ensure the knife is well-sharpened to achieve smooth cuts without squishing the potatoes.
2. Cooking Equipment for Perfect Fries
Once your smiley face fries are cut and shaped, it’s time to cook them to perfection. The right cooking equipment will ensure that your fries turn out crispy on the outside and tender on the inside.
- Deep Fryer: A deep fryer is one of the most common tools used for frying smiley face fries. With adjustable temperature controls, it allows you to fry the fries at the optimal temperature for a golden, crispy texture. Additionally, a deep fryer helps maintain consistent heat, making the frying process more efficient and even.
- Air Fryer: For a healthier version of smiley face fries, you can use an air fryer. This tool circulates hot air around the fries, creating a crispy texture similar to deep-frying but with less oil. An air fryer is easy to use and can cut down on the cooking time. It’s also perfect for making a smaller batch of fries if you’re cooking for fewer people.
- Oven: If you prefer baking over frying, the oven is another great option. A baking sheet lined with parchment paper will help prevent the fries from sticking while allowing for even heat distribution. If you’re aiming for the crispiest fries, use a cooling rack on top of the baking sheet to elevate the fries, allowing air to circulate and crispen them on all sides.
3. Essential Accessories for Cooking and Serving
To complete your homemade smiley face fries experience, a few additional accessories can make the process easier and more enjoyable.
- Tongs or Slotted Spoon: When frying, you’ll need a pair of tongs or a slotted spoon to remove the fries from the hot oil. These tools help you safely handle the fries and allow excess oil to drain off.
- Cooling Rack: After frying or baking your fries, place them on a cooling rack to allow air circulation, which keeps them crispy. A cooling rack is especially useful if you’ve baked the fries in the oven, as it prevents them from becoming soggy.
- Serving Dish or Plate: Finally, have a serving dish or plate ready for your golden smiley face fries. A large platter is great for serving multiple people, while smaller individual plates are perfect for personal servings. Garnish with a sprinkle of seasoning or a dipping sauce to complete the dish.
Essential Ingredients for Smiley Face Fries
Making homemade smiley face fries involves a few simple yet crucial ingredients. These ingredients combine to create the crispy, golden fries that are sure to delight your family and friends. By choosing the right ingredients and preparing them correctly, you can ensure your fries have the perfect texture and flavor every time. Here’s a breakdown of the essential ingredients you’ll need to make smiley face fries, along with tips for selecting the best options.
1. Potatoes: The Base of Your Fries
The foundation of any fry is the potato. For smiley face fries, you want to select the right type of potato that will give you the best texture and flavor.
- Russet Potatoes: Russets are the most popular choice for fries because they have a high starch content, which helps create a crispy exterior and soft interior. They are perfect for deep-frying or baking, as they crisp up nicely while retaining their fluffy interior. The starch content in russet potatoes allows the fries to hold their shape well when cut into smiley faces.
- Yukon Gold Potatoes: If you prefer a slightly sweeter flavor and a creamier texture, Yukon Gold potatoes are a great alternative. They have a waxy texture and slightly lower starch content, making them a good option for baking, though they may not achieve quite as crispy an exterior as russets.
- Red Potatoes: Although red potatoes have less starch, they still work well for making smiley face fries. They are waxy, which means they hold together well during cooking. However, you may notice they have a slightly different texture compared to russet potatoes.
When selecting your potatoes, choose those that are firm and free of blemishes. Look for potatoes that are relatively large, as this will give you more space to cut out your smiley faces.
2. Oil for Frying
Frying your smiley face fries requires the right kind of oil to achieve that golden, crispy texture. The oil you choose plays a big role in the final result, so it’s important to pick one with a high smoke point and neutral flavor.
- Vegetable Oil: Vegetable oil is a go-to for frying because of its high smoke point and mild flavor. It allows your fries to cook at the right temperature without overpowering their taste.
- Canola Oil: Like vegetable oil, canola oil has a high smoke point and neutral flavor, making it another great option for deep-frying smiley face fries. It is also lower in saturated fat, which may be a consideration for those who want a healthier alternative.
- Peanut Oil: Peanut oil is another good choice for frying because of its high smoke point and slightly nutty flavor. It’s often used in professional kitchens for frying, as it creates a crispy texture while imparting a subtle richness to the fries.
When frying, make sure the oil is heated to around 350°F (175°C). This ensures that the fries cook quickly, resulting in a crispy outside and tender inside.
3. Seasonings and Flavors
Seasoning your smiley face fries is an essential step to enhance their flavor and bring out the best in your dish. The right seasonings can elevate the taste and add complexity, making the fries even more irresistible.
- Salt: Salt is the most basic yet crucial seasoning for fries. It enhances the natural flavor of the potatoes and helps balance out the richness of the oil. It’s best to season your fries immediately after frying, while they’re still hot, so the salt sticks.
- Pepper: A dash of freshly ground black pepper adds a mild heat and complements the salt. It gives the fries a subtle kick without overpowering the flavor.
- Garlic Powder: Garlic powder brings a savory, slightly earthy taste to the fries. It’s a great option if you’re looking to add more depth to the flavor profile of your fries. You can also use garlic salt for an extra burst of flavor.
- Paprika: For a smoky, slightly sweet flavor, paprika is an excellent choice. It adds a beautiful red hue to the fries and complements the other seasonings. You can use sweet paprika for a mild flavor or smoked paprika for a more intense smoky taste.
- Parmesan Cheese: If you want to take your fries to the next level, grated Parmesan cheese adds a salty, umami-packed kick. This is particularly great if you’re serving the fries as part of a larger meal.
You can adjust the seasoning quantities to taste, and don’t hesitate to experiment with other spices or herbs like thyme, rosemary, or cayenne pepper to create your own unique flavor profile.
Step-by-Step Guide to Making Crispy Smiley Face Fries
Preparing the Potatoes
Preparing the potatoes properly is a crucial step in making crispy and delicious homemade smiley face fries. Whether you’re frying, baking, or air frying your fries, the way you handle your potatoes will greatly impact their final texture and taste. Follow these key steps to get the best results every time.
1. Peeling the Potatoes
While some recipes may allow for unpeeled fries, peeling the potatoes for smiley face fries is the best choice for a smooth texture. The skin can sometimes become tough during frying or baking, which might affect the overall texture of the fries.
- Using a Vegetable Peeler: A vegetable peeler is the most efficient tool to remove the skin from the potatoes. Hold the potato firmly and gently peel in a downward motion to ensure you remove the skin in long, even strips. Make sure to peel the entire potato, leaving no skin behind.
- Leaving the Skin (Optional): Some people prefer to leave the skin on, especially if they’re using waxy potatoes like Yukon Gold. The skin can add a rustic, earthy flavor to the fries and provide extra crunch. However, for smiley face fries, peeling is typically the best option to maintain the desired smoothness.
2. Cutting the Potatoes into Fries
Once your potatoes are peeled, the next step is to cut them into fries. To make smiley face fries, you’ll need to use a cookie cutter or a specialized smiley face fry mold. But before you reach that step, you must cut the potatoes into even pieces that are the right thickness for your mold or cutter.
- Slicing Evenly: Begin by slicing the potato into long strips, about ½ inch thick. The consistency in the size of each fry will ensure that they cook evenly, giving you the perfect texture. Be sure to keep your cuts uniform to avoid uneven cooking.
- Using a Mandoline Slicer: If you want perfectly uniform slices, a mandoline slicer is a great tool to ensure evenness. Set the slicer to the desired thickness and carefully slide the potatoes across the blade to get uniform cuts. This tool will help you save time and make consistent cuts, which is key for making fries that cook evenly.
3. Cutting the Smiley Faces
After you have your potato slices prepared, it’s time to shape them into smiley faces. This part requires a bit of creativity and precision, but it’s worth the effort for the fun shape!
- Using a Cookie Cutter: The easiest way to cut smiley face shapes is by using a cookie cutter that has a smiley face design. These cutters are often made of metal or plastic and can cut the potatoes into perfect smiley shapes in seconds. Press the cutter firmly into the potato slice, and twist to remove the shape.
- Making Your Own Shapes: If you don’t have a smiley face cutter, you can create your own by cutting the potato slices into small rounds and using a knife to carve out the facial features. This method is more time-consuming but allows for a personalized touch.
4. Soaking the Potatoes
Soaking the potatoes is an essential step to ensure they turn out crispy. Soaking helps remove excess starch from the potatoes, preventing them from sticking together and helping them achieve a golden, crispy exterior when fried or baked.
- Soak for 30 Minutes: Place the cut potatoes in a large bowl of cold water and let them soak for at least 30 minutes. This will give the starch time to dissolve. For the best results, you can soak them for up to an hour.
- Drying Thoroughly: After soaking, it’s important to dry the potatoes thoroughly before cooking them. Use a clean kitchen towel or paper towels to blot off the water. Any moisture left on the potatoes can cause them to steam rather than crisp up during cooking, which can result in soggy fries.
5. Prepping for Cooking
Once the potatoes are cut, soaked, and dried, they’re ready to be cooked. You can choose from several cooking methods, depending on the type of texture you want to achieve.
- Frying: For the crispiest smiley face fries, frying is the go-to method. Heat the oil to about 350°F (175°C) and fry the smiley face fries in batches for 3-4 minutes, or until they are golden brown. Be sure not to overcrowd the frying pan, as this can lower the oil temperature and result in soggy fries.
- Baking: If you prefer a healthier option, baking is a great alternative. Preheat the oven to 425°F (220°C), and spread the fries in a single layer on a baking sheet. Bake for 20-25 minutes, flipping them halfway through, until they are crispy and golden.
- Air Frying: Air frying offers a balanced approach, giving you crispy fries with less oil. Preheat your air fryer to 400°F (200°C), and cook the fries for 12-15 minutes, shaking the basket halfway through for even cooking.
6. Seasoning After Cooking
Once your smiley face fries are cooked, it’s time to season them. While the fries are still hot, sprinkle them with your favorite seasonings. This is the best time to add salt and other spices since they’ll stick better to the crispy surface of the fries.
Cooking Methods: Air Frying, Baking, and Deep Frying
When it comes to cooking homemade smiley face fries, the method you choose can make a huge difference in the final texture and taste. Each method offers its own unique benefits, whether you’re looking for a crispy crunch, a healthier option, or that classic deep-fried taste. Let’s explore the three most popular cooking methods—air frying, baking, and deep frying—so you can decide which one works best for you.
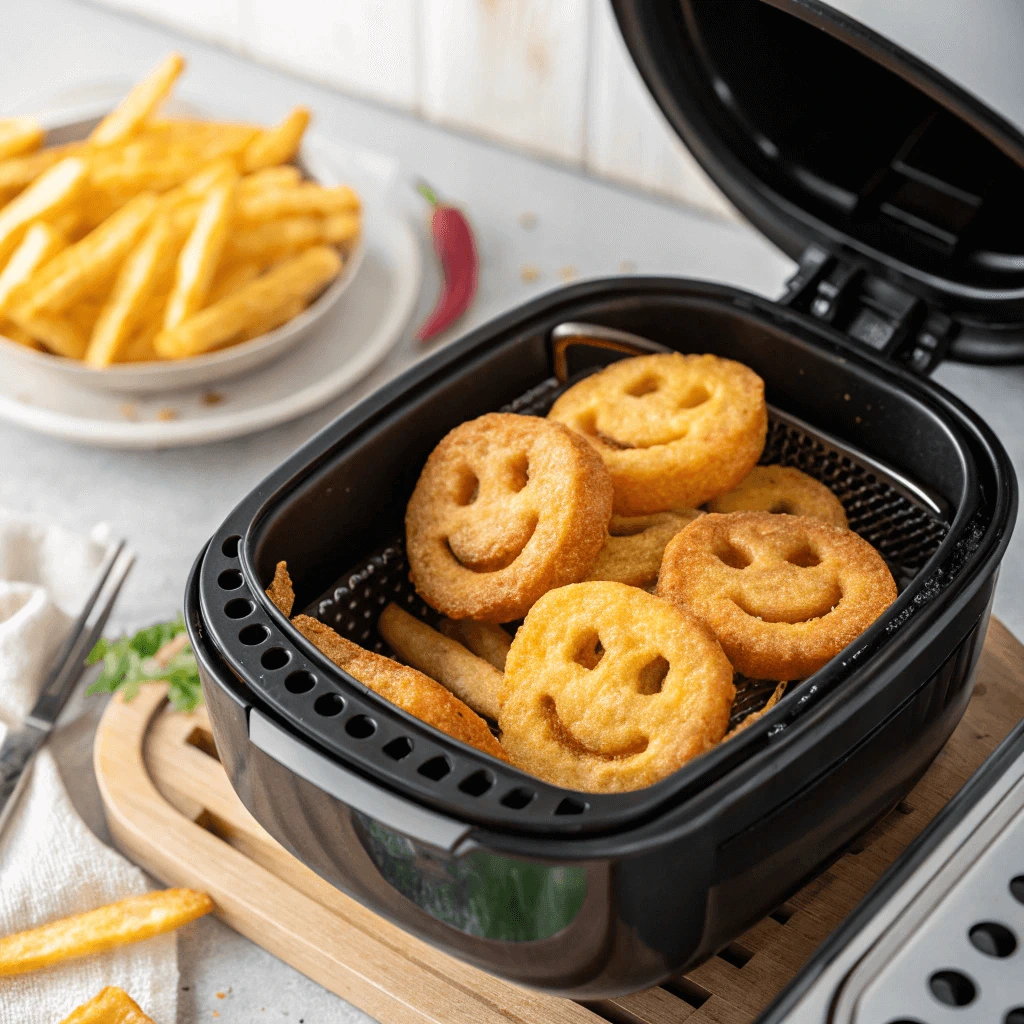
1. Air Frying Smiley Face Fries
Air frying has become a favorite method for many who want crispy fries without all the oil. This method circulates hot air around the fries, creating a crispy, golden texture similar to deep frying but with significantly less oil. It’s the perfect choice for those who are looking to reduce calories while still enjoying a crunchy snack.
- Preheating the Air Fryer: Before you place your smiley face fries in the basket, be sure to preheat the air fryer to around 400°F (200°C). This ensures that the fries start cooking immediately and achieve that perfect crispness.
- Cooking Time and Temperature: Once the air fryer is preheated, arrange your smiley face fries in a single layer in the basket. Cook them for about 12-15 minutes, shaking the basket halfway through to ensure even cooking. You can adjust the time based on the thickness of your fries or your desired crispiness.
- Why Choose Air Frying?: Air frying is a great option if you’re looking for a healthier version of smiley face fries. This method uses minimal to no oil, making it a low-fat option while still delivering the crispy crunch that everyone loves. Plus, air frying is quicker than baking, and the results are usually just as good as deep-frying in terms of texture.
2. Baking Smiley Face Fries
Baking is another healthier method for cooking smiley face fries. While it may not deliver the same level of crispiness as air frying or deep frying, baking can still produce a delicious, slightly softer fry with a golden-brown exterior. This method is also perfect for making a large batch of fries since you can spread them out on a baking sheet and cook them all at once.
- Preparing the Fries for Baking: After prepping your smiley face fries, lightly coat them with a thin layer of olive oil or cooking spray. This will help them crisp up in the oven. You can also season them with salt, pepper, or any of your favorite seasonings before baking.
- Baking Temperature: Preheat your oven to 425°F (220°C). This high temperature ensures the fries cook quickly and get crispy without drying out. Spread the smiley face fries in a single layer on a baking sheet to prevent them from sticking together.
- Baking Time: Bake the fries for 20-25 minutes, flipping them halfway through to ensure an even golden-brown finish. If you like extra crispy fries, you can bake them for a few minutes longer, but keep an eye on them to avoid overcooking.
- Why Choose Baking?: Baking is an excellent choice for those who want a healthier, less greasy option. You can control the amount of oil you use, and since baking is a hands-off method, it’s perfect for making large batches of fries. While they may not be as crispy as deep-fried or air-fried fries, baked smiley face fries can still be quite tasty.
3. Deep Frying Smiley Face Fries
Deep frying is the traditional method for making smiley face fries. This cooking method ensures the fries have a crispy, golden exterior and a soft, fluffy interior. Deep frying gives the fries that classic texture and flavor that many people associate with fast food.
- Preheating the Oil: Heat the oil to around 350°F (175°C) in a deep fryer or a large pot. It’s important to use enough oil to fully submerge the fries so they cook evenly. You can use vegetable oil, canola oil, or peanut oil, as these oils have high smoke points and are great for frying.
- Frying Time: Fry the smiley face fries in batches, ensuring that the fries have enough room to float freely in the oil. Fry them for about 3-4 minutes or until they are golden brown and crispy. Avoid overcrowding the fryer, as this can cause the oil temperature to drop and result in soggy fries.
- Draining the Oil: After frying, use a slotted spoon or tongs to remove the fries from the oil. Place them on a paper towel-lined plate to drain any excess oil. This step helps keep the fries crispy.
- Why Choose Deep Frying?: Deep frying is the method of choice for those who want the crispiest, crunchiest fries. This method ensures that the fries are evenly cooked on all sides and gives them that irresistible golden-brown color. While deep frying is the least healthy option, it’s perfect for when you want indulgent, restaurant-style fries.
Which Cooking Method Should You Choose?
Each cooking method has its own advantages, depending on your preferences and priorities.
- Air Frying: Best for a healthier, low-fat option with a crispy exterior. It’s quick, easy, and requires minimal oil.
- Baking: Ideal for a healthier, hands-off method that is great for making large batches. The fries are less greasy but still flavorful.
- Deep Frying: Perfect for those who want the classic, crispy texture and taste that only deep frying can provide. However, it’s higher in calories and oil.
Ultimately, the choice between air frying, baking, or deep frying comes down to what you’re looking for in your fries. Each method offers a unique experience, so feel free to experiment with them to see which one you like best.
Achieving the Perfect Golden-Brown Crunch
When making homemade smiley face fries, the ultimate goal is to achieve that irresistible golden-brown crunch. The exterior should be crisp, while the inside remains soft and fluffy, offering the perfect balance of textures. Several factors contribute to this ideal outcome, including the right cooking method, preparation techniques, and the right timing. Let’s break down the steps that will help you achieve that perfect crispy finish every time.
1. Choosing the Right Oil
The type of oil you use plays a critical role in achieving the perfect golden-brown crunch. Different oils have different smoke points, which is the temperature at which the oil starts to break down and burn. For crispiness, it’s essential to use oils with a high smoke point, such as vegetable oil, canola oil, or peanut oil. These oils allow you to cook your fries at a higher temperature, which is key to creating that crispy exterior.
- Oil Quantity: Whether you’re air frying, baking, or deep frying, make sure you use the right amount of oil. For deep frying, fully submerge the fries in oil to allow for even cooking. For air frying and baking, lightly coat the fries with oil or use cooking spray to ensure a crispy surface.
2. Temperature Control
The temperature at which you cook the fries is crucial for getting that golden-brown crunch. Cooking at the right temperature ensures that the outside crisps up while the inside stays tender. If the temperature is too low, the fries will absorb more oil and become soggy. If it’s too high, the fries may burn before they cook through.
- Air Frying and Baking: Preheat your air fryer or oven to the recommended temperature. For air frying, 400°F (200°C) works well. For baking, a temperature of 425°F (220°C) is ideal. These temperatures allow the fries to crisp up without overcooking.
- Deep Frying: If deep frying, aim for a temperature of around 350°F (175°C). This ensures the fries cook evenly and get that crispy, golden exterior without being greasy.
3. Avoid Overcrowding
Whether you’re air frying, baking, or deep frying, make sure not to overcrowd the cooking surface. When fries are crowded together, they don’t have enough space to cook evenly, and the steam from the potatoes can cause them to become soggy instead of crispy. This is especially important when air frying and deep frying, as both methods rely on hot air or oil circulating around the fries.
- Air Fryer: When air frying, arrange the fries in a single layer in the basket. If you need to cook a larger batch, consider doing it in two or more rounds.
- Baking: Spread the fries evenly on the baking sheet, leaving enough room between them for air to circulate. Use a parchment paper-lined sheet to prevent sticking.
- Deep Frying: Fry the fries in batches, making sure they have enough space to float freely in the oil. Overcrowding the fryer can cause the fries to cook unevenly and result in a greasy texture.
4. Timing and Monitoring
Proper cooking time is essential for achieving that crispy, golden-brown finish. If the fries are left in the oven, fryer, or air fryer for too long, they can become overcooked and too hard. Conversely, undercooking them will leave you with soft, limp fries instead of a crisp, golden exterior.
- Air Frying: Typically, air frying smiley face fries takes around 12-15 minutes, but it’s important to check the fries halfway through. Shake the basket to ensure even cooking, and check for that golden-brown color.
- Baking: Bake for 20-25 minutes, flipping the fries halfway through to ensure even crisping. If you want extra crispiness, bake for a few more minutes, but keep an eye on them to prevent burning.
- Deep Frying: Fry the smiley face fries for about 3-4 minutes until they reach a golden-brown color. If the fries start to brown too quickly, lower the heat slightly to prevent burning.
5. Seasoning for the Perfect Crunch
Once your smiley face fries are cooked to golden perfection, seasoning them adds another layer of flavor that enhances their crispy texture. While the fries are still hot, season them with salt, pepper, and any other seasonings you desire. For extra flavor, try adding garlic powder, paprika, or Parmesan cheese. Be sure to season immediately after cooking to allow the seasoning to stick while the fries are still crispy.
- Flavor Variations: If you like a little extra kick, you can add chili powder, cayenne pepper, or crushed red pepper flakes for a spicy finish. For a more savory option, try adding a sprinkle of Italian seasoning or some fresh herbs like rosemary or thyme.
6. Letting the Fries Rest
After cooking, let the smiley face fries rest for a minute or two before serving. This brief resting time allows the fries to firm up and ensures that the crispy exterior holds its shape. It also prevents the fries from being too hot to handle and gives the oil time to drain, leaving you with a crispier texture.
Seasoning and Flavoring Smiley Face Fries
Classic Seasoning Options
When it comes to homemade smiley face fries, the seasoning you use can elevate the flavor to a whole new level. While the fries themselves are delicious on their own, adding the right seasonings brings out their natural taste and adds an extra layer of savory goodness. Classic seasonings not only enhance the fries’ crunch but also complement their fluffy interior. Let’s dive into some classic seasoning options that can make your smiley face fries the star of your meal.
1. Salt and Pepper: The Timeless Duo
You can never go wrong with the basic seasoning of salt and pepper. This combination works perfectly for all kinds of fries, and it’s especially effective with smiley face fries because it enhances their natural flavor without overpowering it. Salt gives a savory edge, while freshly cracked black pepper adds a mild heat and depth of flavor.
- How to Apply: As soon as the fries come out of the oven, air fryer, or fryer, toss them in a generous amount of salt and freshly cracked black pepper. This ensures the seasoning sticks while the fries are still warm and crispy.
2. Garlic Powder and Onion Powder: Bold and Flavorful
For a more robust and savory flavor, garlic powder and onion powder are fantastic additions to your smiley face fries. Garlic powder brings a rich, slightly nutty flavor, while onion powder adds a subtle sweetness. Together, they create a savory, comforting seasoning mix that pairs perfectly with the crispy texture of fries.
- How to Apply: After cooking, toss the fries in a mix of garlic powder, onion powder, salt, and pepper to taste. If you like extra flavor, you can even sprinkle some garlic salt and onion salt for an added punch.
3. Paprika: Smoky and Sweet
Paprika is another classic seasoning that adds color and depth to your fries. Whether you opt for sweet, smoked, or hot paprika, this spice adds a gentle smokiness that pairs well with the crispy texture of smiley face fries. Smoked paprika, in particular, adds a wonderful depth of flavor, making it ideal for those who enjoy a smoky finish.
- How to Apply: Sprinkle paprika over the fries as soon as they’re finished cooking, allowing the heat of the fries to activate the flavor. You can use sweet paprika for a mild flavor or smoked paprika for a more intense, smoky taste.
4. Parmesan Cheese: Rich and Nutty
For a cheesy twist, adding grated Parmesan cheese to your smiley face fries can give them a rich, nutty flavor. Parmesan’s sharp taste enhances the flavor of the fries while its coarse texture provides a nice contrast to the crispy exterior. It’s the perfect seasoning for those who love a cheesy snack.
- How to Apply: Immediately after cooking, sprinkle freshly grated Parmesan cheese over the fries while they’re still hot. The cheese will melt slightly and cling to the fries, giving them a deliciously savory finish.
5. Italian Seasoning: A Medley of Herbs
Italian seasoning is a classic blend of herbs like basil, oregano, rosemary, thyme, and marjoram. This seasoning mix adds a fragrant, herby flavor to your fries, transporting them straight to Italy. Italian seasoning works especially well if you want a Mediterranean twist to your smiley face fries.
- How to Apply: Sprinkle a generous amount of Italian seasoning over your hot fries for a burst of herbaceous flavor. If you want to elevate the flavor, drizzle a bit of olive oil over the fries before adding the seasoning to enhance the aromatic herbs.
6. Cajun Seasoning: Bold and Spicy
For those who enjoy a little heat, Cajun seasoning is a great choice. This bold blend of spices typically includes paprika, cayenne pepper, garlic powder, onion powder, and thyme, creating a fiery and flavorful experience. Cajun seasoning adds heat and a touch of smokiness to your smiley face fries, making them perfect for those who like their snacks with a kick.
- How to Apply: Toss the fries in Cajun seasoning immediately after cooking, ensuring each fry is coated evenly. If you prefer a spicier version, adjust the amount of cayenne pepper according to your heat tolerance.
7. Fresh Herbs: Bright and Aromatic
Fresh herbs can bring a vibrant, fresh flavor to your fries. Parsley, rosemary, thyme, and chives are all excellent options for adding a burst of freshness to your smiley face fries. These herbs complement the crispiness of the fries and provide a bright, aromatic contrast to their rich texture.
- How to Apply: Chop fresh herbs finely and sprinkle them over the fries right after cooking. You can mix herbs like rosemary and thyme for a more robust flavor or opt for a simple sprinkle of fresh parsley for a refreshing touch.
8. Vinegar and Sea Salt: A Tangy Twist
For a unique and tangy twist, consider seasoning your smiley face fries with malt vinegar and sea salt. This combination is a nod to the classic fish-and-chips pairing. The tangy vinegar adds a zesty kick that contrasts beautifully with the crispiness of the fries, while the coarse sea salt enhances the overall flavor.
- How to Apply: Drizzle a small amount of malt vinegar over the fries and immediately sprinkle with sea salt. This combination gives your fries a sharp, tangy finish that is both refreshing and flavorful.
9. Ranch or Chipotle Seasoning: Creamy and Spicy
For a creamy and spicy seasoning option, try ranch seasoning or chipotle seasoning. Ranch seasoning offers a creamy, herby flavor, while chipotle seasoning adds a smoky, spicy kick. Both options work well as seasonings or can even be used as dips to complement your smiley face fries.
- How to Apply: You can either sprinkle ranch or chipotle seasoning directly over the fries after cooking or mix the seasoning into a dipping sauce for an extra layer of flavor.
Cheesy and Spicy Flavor Ideas
Adding a cheesy or spicy twist to your homemade smiley face fries can take them from simple to sensational. Whether you love the creamy, indulgent taste of melted cheese or the bold kick of fiery spices, there are plenty of ways to infuse your fries with extra flavor. Below, we explore different options to make your smiley face fries irresistibly cheesy, delightfully spicy, or even a perfect combination of both!
1. Classic Cheesy Options
Cheese is one of the best ways to enhance the taste of smiley face fries. The creamy, salty, and slightly tangy flavors of different cheeses blend beautifully with the crispy texture of the fries.
- Parmesan Cheese: Grated Parmesan adds a rich, nutty, and slightly salty taste to your fries. Since it has a dry texture, it clings well to freshly fried or baked fries without making them soggy.
- How to Apply: Sprinkle finely grated Parmesan over the fries immediately after cooking while they are still warm. For an extra burst of flavor, mix the Parmesan with a little garlic powder and parsley.
- Cheddar Cheese: If you prefer a gooey, melty topping, cheddar cheese is an excellent choice. It brings a sharp, tangy flavor that pairs wonderfully with the crispy fries.
- How to Apply: Melt shredded cheddar in the microwave or over low heat, then drizzle it over the fries. Alternatively, you can place the fries on a baking sheet, sprinkle cheese on top, and broil them for a minute until the cheese melts.
- Mozzarella Cheese: For a stretchy, mild cheese pull, mozzarella is the way to go. It doesn’t overpower the fries but adds a delightful creaminess.
- How to Apply: Sprinkle shredded mozzarella over hot fries and bake or broil for a minute to achieve a gooey texture. Serve immediately for maximum cheesiness.
2. Spicy Twists for an Extra Kick
If you love bold flavors, adding spice to your smiley face fries can bring heat and excitement to every bite. There are multiple ways to add a spicy kick, ranging from seasonings to sauces.
- Cayenne Pepper: A small dash of cayenne pepper adds a moderate level of heat without being too overwhelming.
- How to Apply: Mix cayenne pepper with salt and sprinkle it over the fries while they are still hot. Adjust the amount based on your spice tolerance.
- Chili Powder: For a smoky, earthy spice, chili powder is an excellent choice. It gives the fries a well-rounded heat and depth of flavor.
- How to Apply: Toss the fries in chili powder along with garlic powder and a pinch of paprika for a well-balanced seasoning.
- Sriracha or Hot Sauce: Liquid hot sauces like Sriracha, Tabasco, or buffalo sauce can coat the fries in a bold and spicy glaze.
- How to Apply: Drizzle hot sauce over cooked fries or mix it with a little melted butter for a smoother coating. Serve with a cooling dip like ranch or sour cream.
3. Best Cheesy-Spicy Combinations
For those who love both cheese and spice, combining these flavors creates a perfect balance of creamy and fiery. Here are some top ways to achieve this mouthwatering combo:
- Spicy Nacho Fries:
- Coat fries with melted cheddar cheese and sprinkle with jalapeño slices or crushed red pepper flakes.
- Serve with a side of salsa or spicy queso dip.
- Buffalo Ranch Fries:
- Toss smiley face fries in buffalo sauce, then drizzle with ranch dressing.
- Sprinkle with crumbled blue cheese for an extra flavor boost.
- Chili Cheese Fries:
- Top fries with a layer of spicy chili and a generous handful of shredded cheese.
- Melt the cheese in the oven or microwave before serving.
- Jalapeño Cheddar Fries:
- Sprinkle fries with shredded cheddar and bake until melted.
- Top with fresh or pickled jalapeño slices for a zesty kick.
Healthy Seasoning Alternatives
If you’re looking to enjoy smiley face fries with a healthier twist, choosing the right seasonings can make a big difference. Many traditional fry seasonings contain high amounts of salt, artificial flavor enhancers, or added sugars, which can take away from their nutritional value. However, there are plenty of natural and wholesome alternatives that can bring out the best flavors without unnecessary additives. Below, we explore different healthy seasoning options that add taste without compromising on health.
1. Natural Herb-Based Seasonings
Fresh and dried herbs can add layers of flavor to your smiley face fries while keeping them light and nutritious. Herbs are packed with antioxidants, vitamins, and minerals that enhance both the taste and health benefits of your dish.
- Garlic and Herb Mix: A simple blend of garlic powder, onion powder, and dried oregano adds a savory depth to fries without extra salt or artificial flavors.
- How to Apply: Toss the hot fries in a mix of these herbs for an aromatic touch. You can also add a small amount of olive oil to help the seasonings stick.
- Rosemary and Thyme: These herbs bring a fresh, slightly earthy flavor that pairs well with crispy fries. Rosemary is known for its antioxidant properties, while thyme provides subtle citrusy notes.
- How to Apply: Finely chop fresh rosemary and thyme, then sprinkle them over warm fries. For extra flavor, lightly crush the herbs with a mortar and pestle before applying.
- Basil and Parsley: These two herbs add a mild, slightly sweet flavor that enhances the natural taste of potatoes without overpowering them.
- How to Apply: Use fresh basil or parsley, finely chopped, as a garnish after the fries have been cooked. You can also mix them with a touch of lemon zest for extra brightness.
2. Low-Sodium and Salt-Free Alternatives
Reducing salt doesn’t mean sacrificing flavor. There are plenty of natural alternatives that provide the same satisfaction without the health concerns associated with high sodium intake.
- Lemon Zest: The bright, citrusy tang of lemon zest enhances the fries’ natural flavors while keeping them light and refreshing.
- How to Apply: Grate a small amount of lemon zest and mix it with a dash of black pepper or garlic powder before sprinkling it over the fries.
- Smoked Paprika: This spice offers a smoky, slightly sweet flavor without adding any sodium. It provides a subtle depth that mimics the taste of traditional seasoned fries.
- How to Apply: Dust the fries with a light coating of smoked paprika while they’re still warm for maximum absorption.
- Nutritional Yeast: This is a great alternative for those looking to replace cheese with a healthy, dairy-free option. Nutritional yeast has a natural umami flavor that resembles cheese but contains essential vitamins, including B12.
- How to Apply: Sprinkle nutritional yeast over freshly cooked fries for a cheesy, nutty taste without the added fat or sodium.
3. Spice-Based Healthy Seasonings
Spices add bold flavors and provide a variety of health benefits, such as boosting metabolism and aiding digestion. Below are a few great choices for seasoning your fries the healthy way.
- Turmeric and Black Pepper: Turmeric is known for its anti-inflammatory properties, while black pepper enhances its absorption in the body. This combination adds warmth and a slightly earthy taste.
- How to Apply: Lightly coat fries with olive oil, then toss them in a mixture of turmeric and black pepper before air frying or baking.
- Cinnamon and Nutmeg: While these are often associated with sweet dishes, a light dusting of cinnamon and nutmeg can add a unique warmth and mild sweetness to fries without added sugar.
- How to Apply: Mix a pinch of both spices and sprinkle them over the fries after cooking for a subtle yet flavorful touch.
- Cumin and Coriander: These two spices create a mildly spicy, citrusy flavor that works well for those who enjoy a more complex taste without excessive heat.
- How to Apply: Blend ground cumin and coriander, then dust the fries lightly before serving. Pair with a healthy yogurt dip for an extra layer of flavor.
Dipping Sauces to Pair with Smiley Face Fries
Classic Dipping Sauces
Dipping sauces add an extra layer of flavor to smiley face fries, making them even more enjoyable. Here are some classic favorites:
- Ketchup – A timeless choice with the perfect balance of sweetness and tang. Try adding smoked paprika or balsamic vinegar for a twist.
- Mayonnaise – Rich and creamy, it pairs well with garlic, lemon, or hot sauce for variety. A healthier alternative is homemade mayo with olive oil.
- Honey Mustard – A sweet and tangy option that can be spiced up with Dijon mustard or cayenne pepper. Mixing with Greek yogurt creates a lighter version.
- Barbecue Sauce – Smoky and slightly sweet, it works great with chipotle powder or a hint of pineapple juice. Homemade versions can reduce processed sugars.
- Ranch Dressing – Cool and herby, perfect with fresh dill or a touch of sriracha for spice. Opt for Greek yogurt instead of mayo for a healthier dip.
These classic dips enhance the crispy goodness of smiley face fries—mix and match to find your favorite!
Creative Dipping Sauce Ideas
Dipping sauces can take smiley face fries to the next level by adding exciting flavors and unique combinations. If you’re looking to move beyond traditional ketchup and mayonnaise, try these creative and flavorful options:
1. Spicy and Bold Sauces
For those who enjoy a little heat, these sauces bring a fiery kick to your crispy fries:
- Sriracha Mayo – A creamy yet spicy blend of mayonnaise and sriracha sauce. Add a squeeze of lime for extra zest.
- Buffalo Ranch – A tangy combination of buffalo sauce and ranch dressing, perfect for spice lovers.
- Chipotle Lime Dip – A smoky and zesty mix of pureed chipotle peppers, Greek yogurt, and fresh lime juice.
2. Sweet and Savory Dips
Balancing sweet and savory flavors creates a delicious contrast:
- Honey Garlic Yogurt – A mix of Greek yogurt, honey, and minced garlic for a creamy yet slightly sweet dipping sauce.
- Maple Dijon Sauce – A smooth combination of Dijon mustard and pure maple syrup, offering a sweet tangy taste.
- Coconut Curry Sauce – A rich blend of coconut milk, curry powder, and a hint of brown sugar for an exotic touch.
3. Herb-Infused and Creamy Options
Fresh herbs and creamy bases add depth to your dipping sauces:
Feta Garlic Dip – A blend of crumbled feta cheese, olive oil, and roasted garlic for a rich and savory flavor.
Avocado Lime Dip – Mashed avocado, lime juice, and a dash of salt create a smooth and refreshing dip.
Herbed Yogurt Sauce – Greek yogurt mixed with fresh dill, parsley, and a hint of lemon for a light and tangy option.
Healthy Dipping Sauce Options
If you want to enjoy smiley face fries without the guilt, choosing healthier dipping sauces can make a big difference. By using fresh ingredients, yogurt-based alternatives, and natural seasonings, you can create flavorful dips that enhance your fries without adding excessive fat, sugar, or sodium.
1. Yogurt-Based Dips
Greek yogurt is a great substitute for mayonnaise and heavy creams, providing a creamy texture with added protein and probiotics. Try these healthy options:
- Garlic Herb Yogurt Dip – Mix Greek yogurt with fresh garlic, lemon juice, and finely chopped parsley for a light yet flavorful sauce.
- Cucumber Dill Yogurt Sauce – Blend Greek yogurt with grated cucumber, fresh dill, and a splash of vinegar for a refreshing dip.
- Spicy Yogurt Sauce – Stir in sriracha or a pinch of cayenne pepper to Greek yogurt for a creamy yet mildly spicy dip.
2. Avocado-Based Dips
Avocado is packed with healthy fats, fiber, and essential nutrients. Its creamy texture makes it a great base for dips:
- Avocado Lime Dip – Mash ripe avocado and mix it with lime juice, salt, and a touch of garlic for a simple yet tasty option.
- Guacamole Lite – Combine mashed avocado with diced tomatoes, onions, cilantro, and a squeeze of lime for a fresh, chunky dip.
- Avocado Hummus – Blend chickpeas, avocado, lemon juice, and olive oil for a protein-packed, nutrient-dense dip.
- 3. Hummus Variations
- Hummus is an excellent plant-based dip that pairs well with crispy fries while offering fiber and protein. Try these creative flavors:
- Classic Hummus – Blend chickpeas, tahini, lemon juice, and olive oil for a simple and healthy dip.
- Roasted Red Pepper Hummus – Add roasted red peppers and smoked paprika for a slightly sweet and smoky flavor.
- Spicy Cilantro Hummus – Mix in fresh cilantro, lime juice, and a pinch of cayenne for a zesty twist.
Smiley Face Fries for Special Occasions
Fun for Kids’ Parties
Smiley face fries are a fantastic addition to any kids’ party. Their cheerful shape and crispy texture make them an instant hit among little ones. To make your party even more exciting, consider creative ways to serve them and pair them with fun activities.
1. Themed Serving Ideas
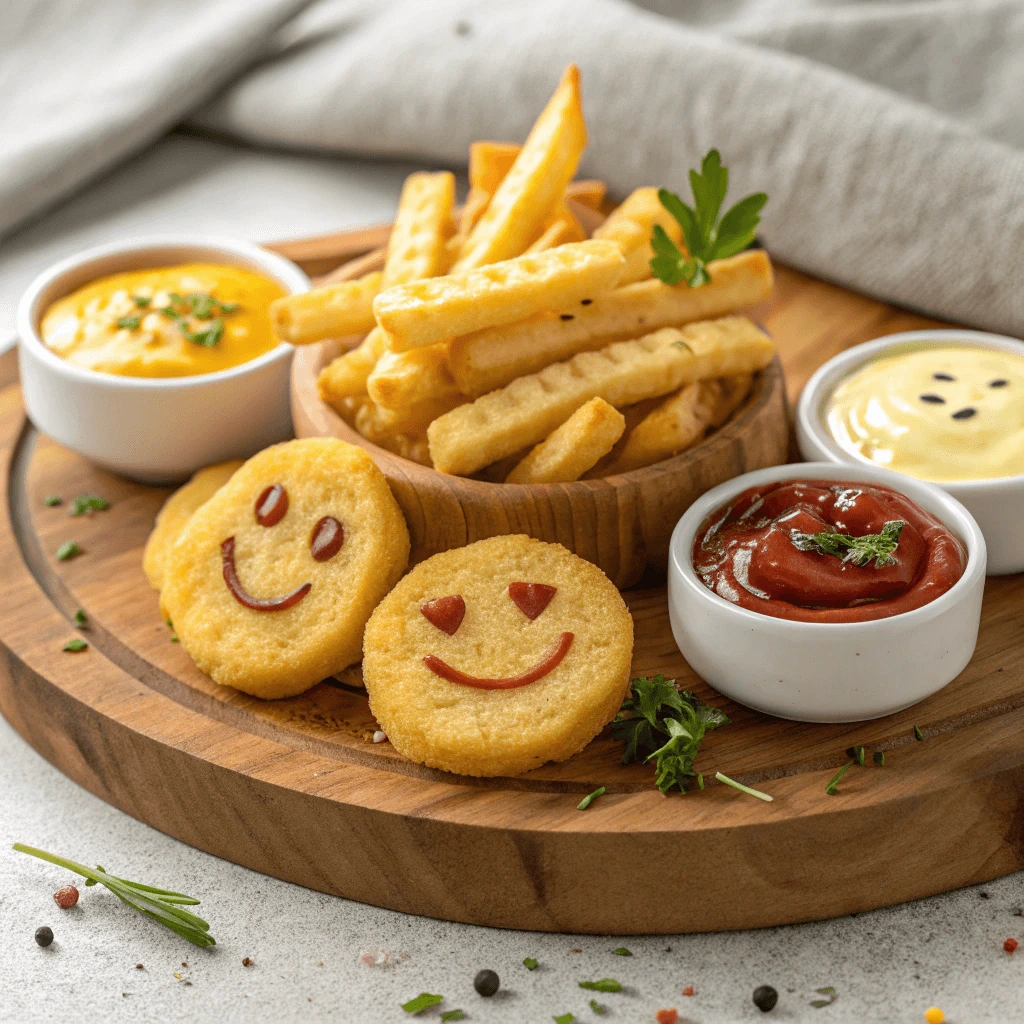
- Dipping Station – Set up a colorful dipping station with a variety of sauces like ketchup, cheese dip, and honey mustard. Let kids mix and match their favorites.
- Food Faces – Arrange smiley fries with other ingredients like cherry tomatoes, olives, and cucumber slices to create edible characters on plates.
- Mini Snack Boxes – Serve fries in small paper cups or themed boxes for easy grabbing and less mess.
2. Interactive Food Activities
- DIY Fries Platter – Let kids decorate their own plates with toppings like shredded cheese, mild salsa, or yogurt-based dips.
- “Guess the Sauce” Game – Have a blindfolded taste test where kids guess different dipping sauces for fun.
- Build-A-Meal Challenge – Pair smiley fries with sliders, nuggets, or veggie sticks and let kids create their perfect party plate.
3. Healthy and Tasty Variations
- Baked Instead of Fried – Offer oven-baked smiley fries as a healthier alternative while keeping the crispiness intact.
- Sweet Potato Smiley Fries – Use sweet potatoes for a slightly sweeter and nutrient-rich version of the classic fries.
- Veggie-Packed Dips – Include homemade guacamole, hummus, or yogurt-based dips to balance out the meal.
Adding Smiley Face Fries to Family Meals
Smiley face fries aren’t just a fun snack for kids—they can also be a creative and tasty addition to family meals. Whether you’re serving them alongside a main course or incorporating them into a themed dinner night, these crispy fries can bring a bit of joy to the table while keeping mealtime exciting for everyone.
1. Perfect Side Dish for Classic Meals
Smiley face fries pair well with many traditional meals, making them a great alternative to regular fries or mashed potatoes. Try serving them with:
- Grilled Chicken and Vegetables – A balanced meal with a fun twist. Serve grilled chicken, roasted veggies, and smiley fries for a nutritious yet kid-friendly dinner.
- Burgers and Sandwiches – Swap out standard fries for smiley face fries to make burger night extra special.
- Eggs and Breakfast Plates – Serve them alongside scrambled eggs, avocado, or a breakfast sandwich for a playful brunch.
2. Creative Family-Themed Meals
- Taco Night Twist – Instead of tortilla chips, serve smiley fries with toppings like melted cheese, seasoned ground turkey, and salsa.
- Pizza Fries – Sprinkle smiley fries with mozzarella cheese, oregano, and marinara sauce for a fun pizza-inspired side dish.
- Movie Night Snack Board – Create a snack platter with smiley fries, popcorn, mozzarella sticks, and fruit for a fun and interactive dinner.
3. Healthier Meal Ideas
For a more balanced approach, you can easily make smiley face fries a part of a nutritious meal:
- Protein-Packed Pairings – Serve them with grilled fish, turkey patties, or a plant-based protein like lentil patties.
- Veggie-Loaded Platters – Combine smiley fries with roasted carrots, zucchini sticks, or a fresh side salad for a colorful and wholesome meal.
- Oven-Baked for Less Oil – Instead of deep-frying, bake them in the oven or use an air fryer to keep them crispy with less oil.
Serving Smiley Face Fries at Holiday Gatherings
Smiley face fries are a delightful addition to any holiday gathering, bringing a touch of fun and nostalgia to the table. Their crispy texture and playful shape make them a hit with both kids and adults. Whether you’re serving them as a festive appetizer, a creative side dish, or part of a themed party platter, these fries can elevate your holiday meals with ease.
1. Festive Appetizers and Starters
Kick off your holiday celebration with smiley face fries as a fun and easy-to-eat appetizer.
- Cheese and Dipping Platter – Arrange smiley fries with an assortment of cheeses, fruit, and flavorful dips like honey mustard, garlic aioli, or spicy ketchup.
- Mini Sliders with Smiley Fries – Serve bite-sized turkey or chicken sliders alongside smiley fries for a simple yet crowd-pleasing starter.
2. Themed Side Dish for Holiday Dinners
Smiley face fries can be a great alternative to traditional side dishes, adding a touch of whimsy to the table.
- Thanksgiving Spread – Serve them alongside roasted turkey, cranberry sauce, and a side of seasoned green beans for a fun twist on a classic meal.
- New Year’s Eve Party Platter – Mix them with sweet potato fries, onion rings, and vegetable sticks for a colorful and satisfying snack board.
3. Kid-Friendly Holiday Meal Ideas
The holidays are all about making mealtime special for the whole family. Smiley face fries are a fantastic way to keep kids engaged and excited about their meals.
- Santa-Themed Plates – Arrange smiley fries on the plate with a small pile of ketchup as Santa’s hat and shredded cheese as a beard.
- Easter Brunch Addition – Serve smiley fries alongside scrambled eggs, fruit, and whole-grain toast for a well-balanced holiday breakfast.
- Halloween Party Snacks – Use smiley fries as “pumpkin faces” and serve them with orange-colored dips like roasted red pepper hummus or cheddar cheese sauce.
Conclusion
Smiley face fries are the perfect combination of fun, flavor, and ease. Their versatility makes them a great addition to any meal, whether you’re enjoying them as a snack, serving them at a holiday gathering, or making them a fun part of a family dinner. They’re easy to make, crispy, and sure to bring smiles to the table, no matter the occasion.
With various cooking methods like air frying, baking, or deep frying, and endless seasoning and dipping sauce options, there’s always a way to make them your own. Don’t be afraid to get creative and experiment with different flavors to match your taste.
Have you tried making homemade smiley face fries? Share your favorite cooking method and dipping sauce in the comments below!