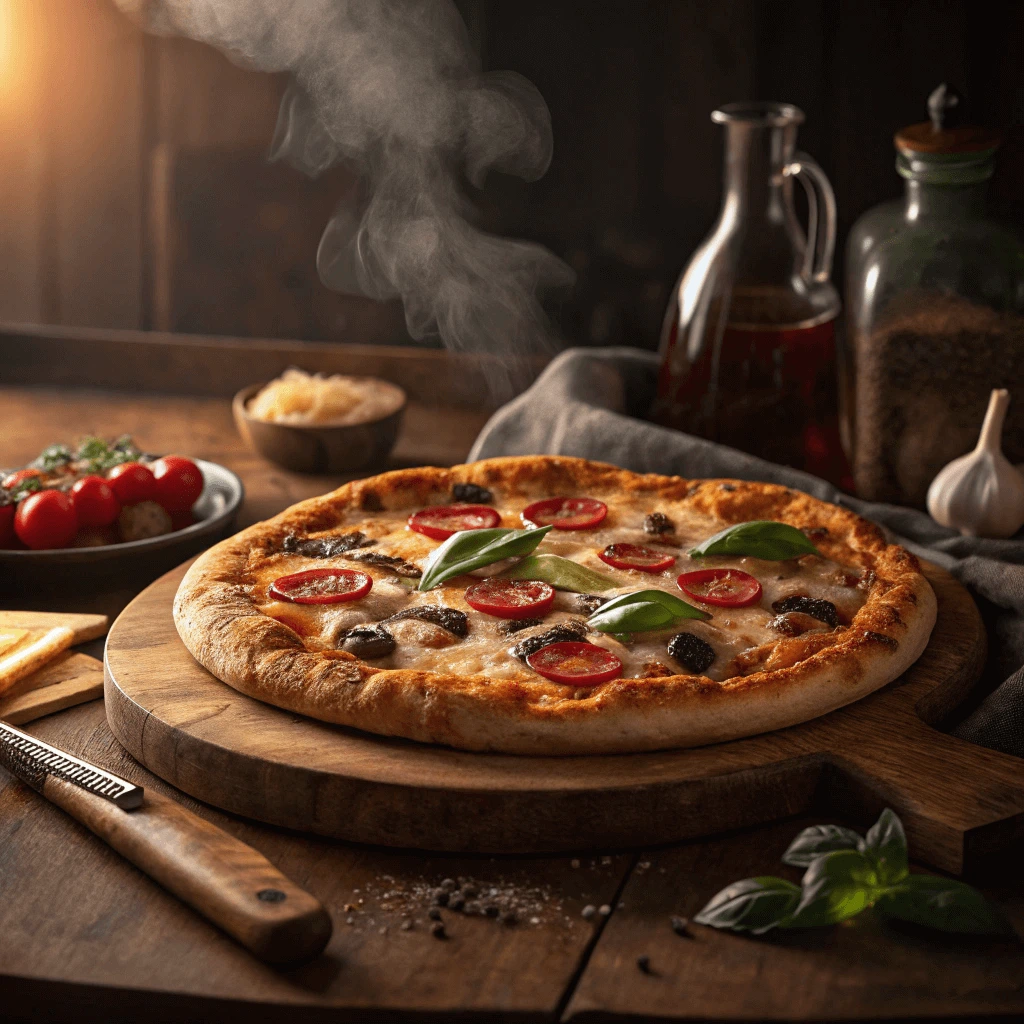
Learning how to cook a 14 inch pizza at home can turn a basic delicious, restaurant-quality experience. From picking the right dough to choosing fresh toppings and setting the perfect oven temperature, every detail matters. This guide will show you how to cook a 14 inch pizza that’s crispy on the outside, soft inside, and evenly baked every time. Whether you prefer thin crust or thick, classic or healthy, mastering these simple techniques will upgrade your pizza nights. Let’s get started on creating the perfect 14 inch pizza from scratch—step by step.
Understanding the Basics of Cooking a 14 Inch Pizza
Choosing the Right Pizza Dough for Your 14 Inch Pizza
Selecting the right dough is essential to cooking a perfect 14 inch pizza. The dough determines the crust’s texture, flavor, and how well it holds toppings. Let’s explore the main types of pizza dough and how to prepare them for best results.
Popular Types of Pizza Dough
There are several dough styles to consider:
- Neapolitan Dough: Soft and chewy with a slightly puffy edge. It needs high hydration and a longer fermentation time to develop flavor.
- New York-Style Dough: Thicker and chewier, often with some oil added. It has a crispy outside but stays soft inside.
- Thin Crust Dough: Rolled very thin and baked quickly at high heat for a crisp, cracker-like crust.
- Whole Wheat Dough: A healthier option with more fiber and a nutty taste. Mixing it with regular flour helps keep it light.
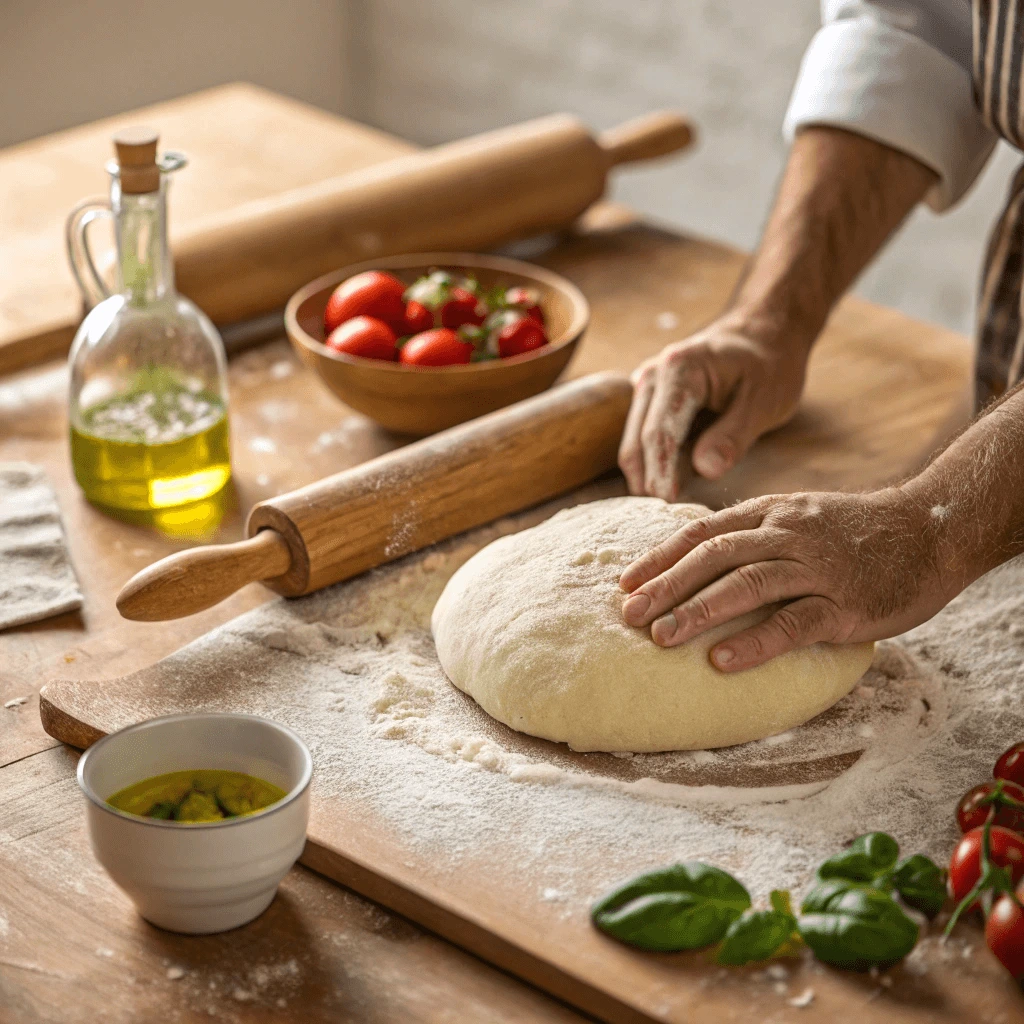
Preparing Dough for a 14 Inch Pizza
Before stretching your dough, let it rest at room temperature for about 30 minutes. This makes it easier to stretch without tearing. Stretch the dough by hand, working from the center outwards. This method keeps air bubbles intact, creating a light crust.
Avoid using a rolling pin if you want a better texture. Lightly flour your hands and surface, but don’t overdo it—too much flour dries the dough and makes the crust tough.
Tips for Handling Your Dough
Consider refrigerating the dough for 1-3 days (cold fermentation) to enhance flavor and elasticity.
Keep your dough hydrated but not sticky; mist with water if needed.
Don’t overwork the dough to avoid a tough crust.
Essential Pizza Toppings and Sauce Combinations
Choosing the right toppings and sauce plays a big role in making a 14 inch pizza delicious. The balance between sauce, cheese, and toppings ensures every bite tastes perfect. Let’s explore popular sauce options and topping combinations to inspire your pizza creation.
Classic Pizza Sauces
The sauce forms the flavor base for your pizza. Here are some popular choices:
- Traditional Tomato Sauce: Made from crushed tomatoes, garlic, olive oil, and herbs like basil and oregano. This sauce delivers a fresh, tangy flavor that pairs well with most toppings.
- White Garlic Sauce: A creamy blend of butter, garlic, and cheese. This sauce works great with vegetables, chicken, or seafood toppings.
- Pesto Sauce: Made from fresh basil, garlic, pine nuts, Parmesan cheese, and olive oil. Pesto adds a fragrant, nutty flavor and pairs well with lighter toppings like mozzarella and cherry tomatoes.
Popular Topping Combinations
When choosing toppings, aim for a balance of flavors and textures:
- Margherita Style: Tomato sauce, fresh mozzarella, basil leaves, and a drizzle of olive oil. This simple combination highlights fresh, high-quality ingredients.
- Veggie Delight: Tomato or white garlic sauce topped with mushrooms, bell peppers, onions, olives, and spinach. This combo adds a colorful, healthy touch.
- Meat Lovers: Tomato sauce topped with grilled chicken, turkey sausage, smoked turkey breast, and lean ground beef. These hearty proteins add rich flavor and satisfy meat lovers without using pork products.
- White Pizza: White garlic sauce, mozzarella, ricotta, and spinach, sometimes topped with grilled chicken for extra protein.
Tips for Applying Toppings
Apply your sauce evenly but avoid using too much. Excess sauce can make the crust soggy. When adding toppings, spread them out to allow even cooking. Layer heavier toppings like sausage first, then lighter ones like spinach or fresh basil last, so they don’t burn.
Keep cheese coverage moderate to help toppings stick and to avoid an overly greasy pizza.
Tools and Equipment Needed
Having the right tools makes cooking a 14 inch pizza easier and helps you get a crispy, evenly cooked crust.
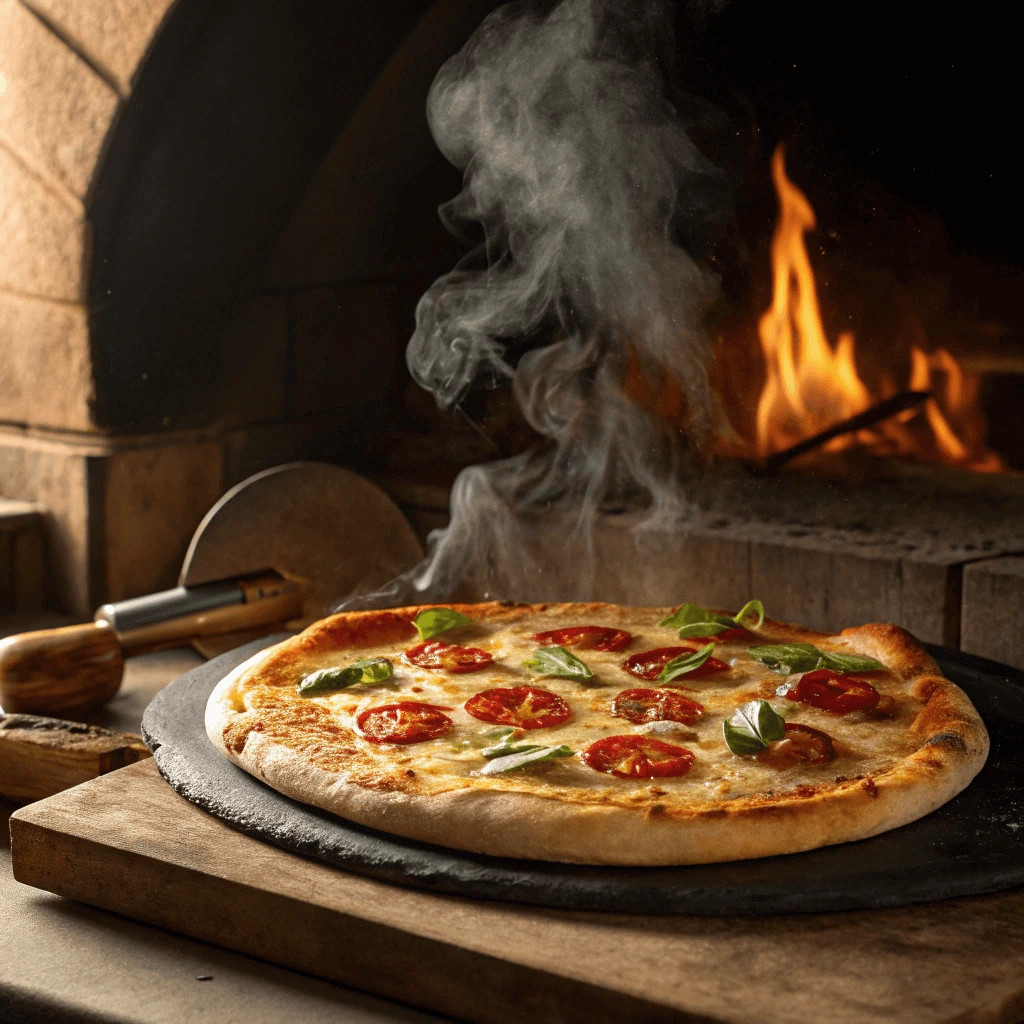
Pizza Stone for Crispy Crust
A pizza stone absorbs heat and spreads it evenly, helping the crust cook perfectly. Preheat your stone in the oven for at least 30 minutes before placing the pizza on it. This gives you a crispy bottom crust like a traditional pizza oven.
Pizza Peel for Easy Handling
Use a pizza peel—a flat, shovel-like tool—to transfer your pizza onto the hot stone and take it out safely. Dust the peel with flour or cornmeal to stop the dough from sticking. Slide the pizza gently on and off the peel.
Oven Settings Matter
Set your oven to the highest temperature it can reach, usually between 450°F and 500°F. Place the pizza stone or tray in the lower part of the oven for even cooking. Avoid opening the oven door too often to keep the heat steady. If your oven has a convection setting, use it to cook the pizza evenly.
Step-by-Step Guide to Cooking a 14 Inch Pizza Perfectly
Preparing and Preheating Your Oven and Pizza Stone
Properly preparing and preheating your oven and pizza stone is crucial to cooking a perfect 14 inch pizza. These steps ensure your pizza cooks evenly and develops that desirable crispy crust.
Why Preheating Matters
Preheating your oven and pizza stone allows the stone to absorb heat thoroughly. When you place your pizza on a hot stone, the crust begins to cook immediately, preventing sogginess and promoting a crunchy bottom. Skipping or rushing this step can lead to uneven cooking and a doughy crust.
How to Preheat Your Oven and Stone
Start by placing your pizza stone on the middle or lower rack of your cold oven. This position helps the stone get consistent heat. Turn your oven on to its highest temperature setting—usually between 450°F and 500°F. Let the stone heat for at least 30 minutes. If your oven takes longer to reach temperature, consider adding extra time to the stone’s preheating.
Avoid placing the stone directly on a heating element or open flame, as this can cause cracking.
Preparing Your Oven for Baking
While the stone heats, remove any racks you won’t use to allow better air circulation. If you don’t have a pizza stone, use an inverted baking sheet instead; preheat it the same way.
Make sure your oven is clean and free of crumbs or spills to avoid burning smells during cooking. When your oven and stone reach the right temperature, they’re ready for your pizza.
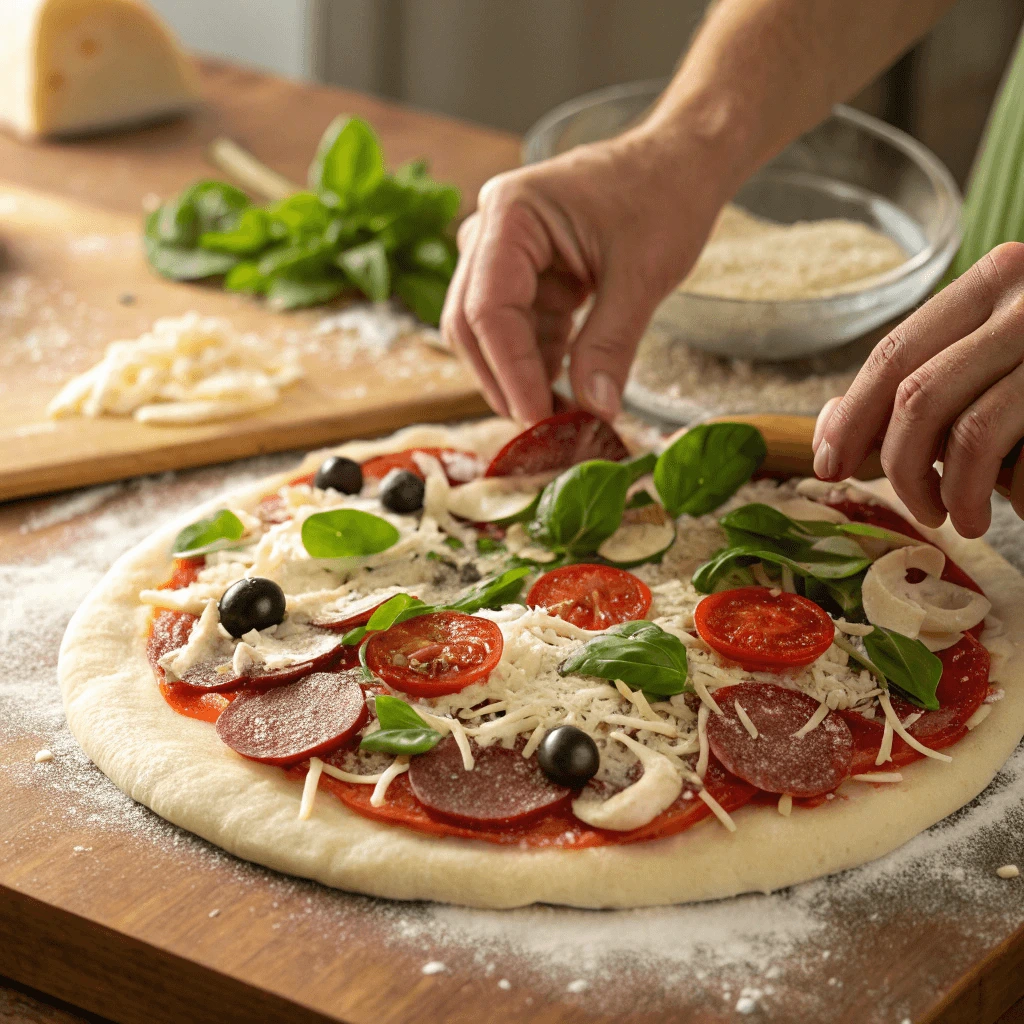
How to Assemble Your Pizza for Even Cooking
Assembling your 14 inch pizza correctly ensures that it cooks evenly, with a perfectly balanced crust, sauce, cheese, and toppings. Careful layering and distribution make a big difference in how your pizza turns out.
Start with an Even Layer of Sauce
Spread your pizza sauce evenly over the dough, leaving about a half-inch border around the edges. Avoid applying too much sauce, as excess moisture can make the crust soggy and prevent it from cooking properly. Use the back of a spoon or a small ladle to distribute the sauce in a thin, uniform layer.
Distribute Cheese Uniformly
Next, sprinkle your cheese evenly over the sauce. Whether you use shredded mozzarella, fresh mozzarella slices, or a blend of cheeses, aim for consistent coverage without piling it too thickly in any area. This balance helps the cheese melt evenly and supports the toppings without weighing the pizza down.
Layer Toppings Thoughtfully
Add your toppings in a way that promotes even cooking:
- Place heavier or thicker toppings, like grilled chicken or sausage, closer to the center. These areas receive more heat and need more time to cook through.
- Scatter lighter toppings, such as fresh vegetables or leafy greens, near the edges, where the heat is slightly less intense.
- Avoid overcrowding the pizza. Overloading with toppings traps moisture and slows cooking, leading to a soggy crust.
Final Touches for Balance
Finish your pizza with a light drizzle of olive oil or sprinkle of herbs if desired. These final touches enhance flavor without adding moisture that might affect cooking.
Ideal Cooking Time and Temperature for a 14 Inch Pizza
Getting the right bake on your 14 inch pizza depends on oven temperature and timing. Follow these simple tips to achieve a crispy crust and evenly cooked toppings.
Best Temperature Range
Set your oven to a high temperature—between 450°F and 475°F. This range helps the crust cook fast and evenly without drying out. If you’re using a pizza stone, preheat it in the oven for at least 30 minutes before baking.
Average Cooking Time
A 14 inch pizza typically needs 10 to 15 minutes to bake fully. Check it around the 8-minute mark. Look for golden crust edges and bubbling cheese to know it’s nearly done.
Adjust Based on Crust and Oven
- Thicker crust? Add a few extra minutes.
- Thin crust? Bake on the shorter end.
- Using convection? Lower the time slightly since hot air circulates faster.
Rotate the pizza halfway through to prevent uneven baking, especially if your oven has hot spots.
Tips for Achieving the Perfect Pizza Crust
How to Get a Crispy Thin Crust vs. a Soft Thick Crust
Whether you crave a crispy bite or a chewy, pillowy base, the texture of your 14 inch pizza crust depends on how you prepare, handle, and bake your dough. Let’s explore how to achieve both styles.
For a Crispy Thin Crust
To get a thin, crispy crust:
- Use less dough: Roll out your dough thinly to reduce thickness.
- Skip the edge rise: Avoid forming a thick crust border.
- Preheat your stone: A hot pizza stone or baking steel helps crisp the bottom quickly.
- Bake at a high temp: Set your oven to 475°F or higher.
- Go light on toppings: Too many toppings add moisture and prevent crisping.
Rolling the dough evenly and baking directly on a hot surface gives you that satisfying crunch.
For a Soft, Thick Crust
To achieve a soft and fluffy texture:
- Use more dough: Keep the base slightly thicker and allow the edge to puff up.
- Let it rise longer: Proof the dough after shaping to develop a light texture.
- Lower the temp slightly: Bake at 425°F–450°F to allow the inside to cook without over-crisping the outside.
- Use a pan: Baking in a deep-dish or cast iron pan helps trap moisture and keep the crust tender.
Brush the crust with olive oil or melted butter before baking for a soft, golden finish.
Avoiding Common Pizza Crust Mistakes
Even a great pizza recipe can fall short if the crust doesn’t bake correctly. Avoiding common mistakes can help you achieve a consistent, delicious result every time you bake a 14 inch pizza.
Don’t Overload the Dough
Too many toppings or too much sauce can weigh down the dough and make the crust soggy. Use sauce and cheese sparingly, and spread toppings evenly. Stick to a balanced ratio to let the dough bake fully and develop a nice texture.
Let the Dough Rest Before Stretching
Stretching cold dough can cause tears or uneven shaping. Let your dough rest at room temperature for 30–60 minutes before handling it. This relaxes the gluten and makes the dough more flexible, so you can shape it easily without it springing back.
Preheat Properly
Skipping preheating or using a cold stone can lead to a pale, undercooked crust. Always preheat your oven and pizza stone for at least 30 minutes. A hot surface helps the crust cook from the bottom up, giving it a crisp finish and preventing raw spots.
Avoid Underbaking or Overbaking
Watch your pizza as it bakes. Pulling it out too soon may leave the middle doughy, while overbaking can dry out the crust. Use visual cues: look for golden-brown edges, bubbly cheese, and a firm base before removing it from the oven.
Using a Pizza Peel and Baking Sheet Effectively
Handling your pizza properly before and during baking ensures it cooks evenly and doesn’t stick. Knowing how to use a pizza peel or baking sheet the right way can make the process much smoother.
Using a Pizza Peel
A pizza peel helps you transfer your pizza onto a hot stone or steel with ease:
- Dust the peel with flour or cornmeal to prevent sticking.
- Build your pizza quickly on the peel to keep the dough from sticking.
- Give it a quick shake before sliding to make sure it moves freely.
- Use a swift motion to slide it into the oven without folding or tearing the dough.
Using a Baking Sheet
If you don’t have a peel or stone, a baking sheet works too:
Use parchment paper if you want an easier release and quicker cleanup.
Flip it upside down to create a flat surface, like a pizza stone.
Preheat the sheet in the oven to help the crust crisp on the bottom.
How to Bake Pizza Evenly for the Best Results
How to Rotate Your Pizza for Uniform Cooking
Even in high-quality ovens, hot spots can cause your pizza to cook unevenly. Rotating your pizza during baking helps ensure every part—crust, cheese, and toppings—cooks evenly.
Why Rotation Matters
Most home ovens don’t distribute heat evenly. One side may bake faster than the other, causing the crust to burn or the cheese to bubble unevenly. Rotating the pizza balances exposure to heat and promotes consistent browning and texture.
When to Rotate
Timing is important. Wait until the crust starts to set—usually about 5 to 7 minutes into baking—before you rotate. If you rotate too early, the dough might still be soft and difficult to move.
- Thin crust pizzas may need just one rotation halfway through.
- Thicker crust pizzas might benefit from two rotations at equal intervals.
Keep an eye on the edges and cheese. If one side is browning faster, it’s time to turn the pizza.
How to Rotate Properly
Use a pizza peel, spatula, or tongs to gently lift and turn the pizza. A quarter or half turn is usually enough. If you’re using a baking sheet, remove it briefly, rotate the pan, and return it to the oven.
Be quick to avoid losing too much heat. Open the oven door carefully and shut it as soon as the turn is complete.
Using a Cooking Thermometer to Check Doneness
A cooking thermometer is one of the best tools to make sure your 14 inch pizza is fully cooked—especially when baking thicker crusts or using heavier toppings.
Why Use a Thermometer?
Visual cues like golden crust and bubbling cheese help, but they don’t always tell the whole story. A thermometer allows you to check the internal temperature of the crust and toppings, ensuring the pizza cooks thoroughly without burning the edges.
Target Temperature for Pizza
To confirm your pizza is done:
- Check the center of the crust (not just the toppings).
- Look for a temperature of around 200°F (93°C) at the center of the base.
- Cheese and toppings should reach at least 165°F (74°C) for safe and satisfying results.
This ensures the dough is cooked through, not doughy, and the toppings are hot and safe to eat.
How to Check Safely
Use an instant-read digital thermometer for the best accuracy:
- Insert the probe into the center of the pizza, right through the crust.
- Avoid touching the pan or stone with the tip to prevent false readings.
- Check quickly so the oven doesn’t lose too much heat.
If the temperature is low, let the pizza bake another minute or two, then check again.
Oven Settings and Adjustments for Different Pizza Types
Not all pizzas bake the same way. The type of pizza you’re making—thin crust, thick crust, or stuffed—requires different oven temperatures and adjustments for the best results.
Thin Crust Pizza: High Heat, Fast Bake
Thin crust pizzas cook best in very hot ovens. Set your oven between 475°F and 500°F (245–260°C) to quickly crisp the bottom while melting the cheese evenly.
- Use a pizza stone or steel for extra heat from below.
- Limit toppings to avoid sogginess.
- Bake for 8 to 10 minutes, rotating halfway for even cooking.
The high temperature produces a crisp, airy bite without drying out the dough.
Thick Crust or Pan Pizza: Lower Temp, Longer Time
Thicker dough needs more time to bake through without burning the top. Set your oven to 425°F to 450°F (218–232°C).
- Use a heavy-duty pan or cast iron skillet.
- Grease the pan lightly to get a golden, soft edge.
- Bake for 15 to 20 minutes, checking the center for doneness.
Preheating the pan can also help create a crispy bottom while keeping the inside soft and fluffy.
Stuffed or Deep-Dish Pizza: Steady Heat, Careful Monitoring
Stuffed and deep-dish pizzas have dense layers and need even, moderate heat to prevent burning the outside before the inside cooks.
- Set the oven to 400°F to 425°F (204–218°C).
- Bake for 25 to 30 minutes or more, depending on thickness.
- Cover with foil midway if the top browns too quickly.
Always check the internal temperature or use a knife to ensure the center is fully baked before removing it from the oven.
Healthy Alternatives for a Better Pizza Experience
Using Whole Wheat or Cauliflower Pizza Dough
If you’re looking for healthier or gluten-free alternatives, whole wheat and cauliflower pizza dough offer great flavor and nutrition. Each type brings a unique texture and cooking requirement, so knowing how to handle them is key.
Benefits of Whole Wheat Dough
Whole wheat dough adds a nutty flavor and boosts fiber content. It’s a heartier option and keeps you feeling full longer.
- Use warm water and a touch of honey to help activate the yeast and balance the earthiness.
- Allow longer rising time because whole wheat flour absorbs more water and rises more slowly.
- Bake at 450°F (232°C) for 10–14 minutes. Thinner crusts cook faster and crisper.
You’ll get a chewy, golden crust with a deeper flavor than regular white dough.
Tips for Cauliflower Pizza Dough
Cauliflower crust is a popular low-carb, gluten-free option. It takes a bit more preparation, but the results are worth it.
- Start with riced cauliflower, then steam and squeeze out as much moisture as possible.
- Mix with eggs, cheese, and seasonings to bind the dough.
- Prebake the crust at 425°F (218°C) for 15–20 minutes before adding toppings.
Once firm and golden, add your toppings and return to the oven until everything melts and browns. This helps avoid sogginess and gives the crust structure.
Choosing the Right Option
Both whole wheat and cauliflower doughs offer tasty alternatives to traditional pizza crust. Choose whole wheat when you want a hearty, fiber-rich slice. Go for cauliflower when you’re avoiding gluten or watching your carbs.
Low-Fat Cheese and Vegan Cheese Options
Choosing the right cheese for your 14-inch pizza doesn’t mean you have to compromise on flavor or texture. Whether you’re reducing fat or avoiding dairy, there are delicious cheese alternatives that melt well and taste great.
Benefits of Low-Fat Cheese
Low-fat cheese helps reduce overall calories and saturated fat, making your pizza a bit lighter while still satisfying.
- Look for part-skim mozzarella or reduced-fat provolone. These melt well and still provide that stretchy, gooey texture.
- Blend with stronger cheeses like Parmesan or Romano to add flavor without using too much.
- Use moderation—you can still get rich, cheesy flavor with less cheese by spreading it evenly over the surface.
Low-fat options work well in both traditional and thin-crust pizzas and don’t overpower other toppings.
Popular Vegan Cheese Choices
Vegan cheese has improved a lot in recent years. It’s now easier to find brands that melt, stretch, and taste closer to the real thing.
- Look for cashew-based or almond-based cheeses for a creamy texture and nutty flavor.
- Try coconut oil-based vegan mozzarella for better melting and browning.
- Use shredded vegan blends that are labeled as “melting” or “pizza-style” for best results.
Many vegan cheeses are also soy- and gluten-free, making them suitable for a variety of dietary needs.
Tips for Melting Success
Whether you’re using low-fat or vegan cheese:
- Add it closer to the end of baking if you’re worried about over-browning or dryness.
- Cover your pizza with foil halfway through baking to protect delicate cheese types while still allowing the crust to crisp.
- Use a hot oven (450°F or higher) to help melt and bubble the cheese more effectively.
Fresh and Nutritious Toppings: Veggies and Lean Proteins
If you’re serious about learning how to cook a 14 inch pizza that’s both delicious and healthy, your toppings matter just as much as your dough and technique. Choosing fresh vegetables and lean proteins not only enhances flavor but also turns your pizza into a balanced, nutrient-rich meal.
Why Veggies Matter When Learning How to Cook a 14 Inch Pizza
One important tip in mastering how to cook a 14 inch pizza is selecting vegetables that roast well and add both texture and taste. Bell peppers, onions, mushrooms, spinach, and cherry tomatoes all cook beautifully in a hot oven. They also provide vitamins, antioxidants, and fiber—making them ideal toppings.
To prevent a soggy crust when figuring out how to cook a 14 inch pizza properly, avoid watery vegetables like raw zucchini or fresh tomatoes without seeding them first. Lightly pat your veggies dry before layering them on.
Lean Protein Options That Complement Your Pizza
Another tip in how to cook a 14 inch pizza with a healthier spin is choosing lean proteins. Grilled chicken breast, turkey sausage, and marinated tofu are all great options. These proteins cook quickly and add richness without excess fat. For plant-based pizza lovers, black beans or chickpeas offer protein and texture.
Be sure to pre-cook proteins before topping your pizza. This step is essential when learning how to cook a 14 inch pizza that’s evenly cooked all the way through.
Balanced Topping Strategy for Perfect Results
Understanding how to cook a 14 inch pizza includes knowing how to balance toppings. Spread them evenly and avoid overloading your crust. Too many heavy ingredients can make your pizza cook unevenly and leave the center underdone. Keep your toppings light, colorful, and nutrient-dense for the best results.
Conclusion
Now that you know how to cook a 14 inch pizza perfectly every time, you can enjoy fresh, delicious results right from your own oven. From choosing the right dough and toppings to using the proper tools and baking techniques, every step plays a role in achieving that perfect bite. Whether you prefer a thin, crispy crust or a thick, chewy base, practice makes all the difference. Keep experimenting, trust the process, and soon, you’ll master how to cook a 14 inch pizza like a pro.