If you’re craving a delicious homemade treat, learning how to make chocolate graham crackers from scratch is the perfect solution. These sweet and crunchy crackers are a twist on the classic graham cracker, enhanced with rich cocoa flavor. Whether you’re enjoying them on their own, using them in desserts, or creating fun snacks like chocolate graham sandwiches, making them from scratch is easy and rewarding. With just a few simple ingredients, you can elevate your snack game and enjoy a homemade treat that’s far more satisfying than store-bought versions!
Why Make Chocolate Graham Crackers from Scratch?
Control the Ingredients for a Healthier Snack
Making chocolate graham crackers from scratch gives you the power to choose every ingredient. This means you can avoid additives, reduce sugar, and boost nutrition—all while keeping the flavor delicious.
Ditch the Additives
Store-bought crackers often include preservatives, emulsifiers, and artificial flavors. When you bake at home, you skip all that and use real ingredients like whole wheat flour, cocoa powder, and natural leaveners like baking soda.
Use Better Sweeteners
Instead of refined white sugar, try honey, maple syrup, or coconut sugar. These options offer natural sweetness and a touch of extra flavor without the crash that comes from processed sugar.
Pick Nutritious Fats and Flours
Trade out vegetable oil and white flour for healthier choices. Coconut oil, olive oil, and whole grain flours give your crackers more fiber and healthy fats. You can even go gluten-free with almond or oat flour.
With just a few smart swaps, your homemade crackers become a better-for-you snack that tastes great and supports a healthier lifestyle.
Fresher and Tastier Than Store-Bought Brands
Homemade chocolate graham crackers deliver a taste and texture that store-bought brands can’t match. By baking them yourself, you enjoy a fresher product that’s free from the artificial flavors and preservatives found in many packaged options.
Enjoy the Rich Flavor of Real Ingredients
When you make your own crackers, you use high-quality ingredients like unsweetened cocoa powder, whole wheat flour, and natural sweeteners. These give your crackers a deep, chocolatey flavor and a satisfying crunch. In contrast, many commercial brands use artificial chocolate flavoring and overly processed flour, which can leave a bland aftertaste.
Experience Better Texture and Aroma
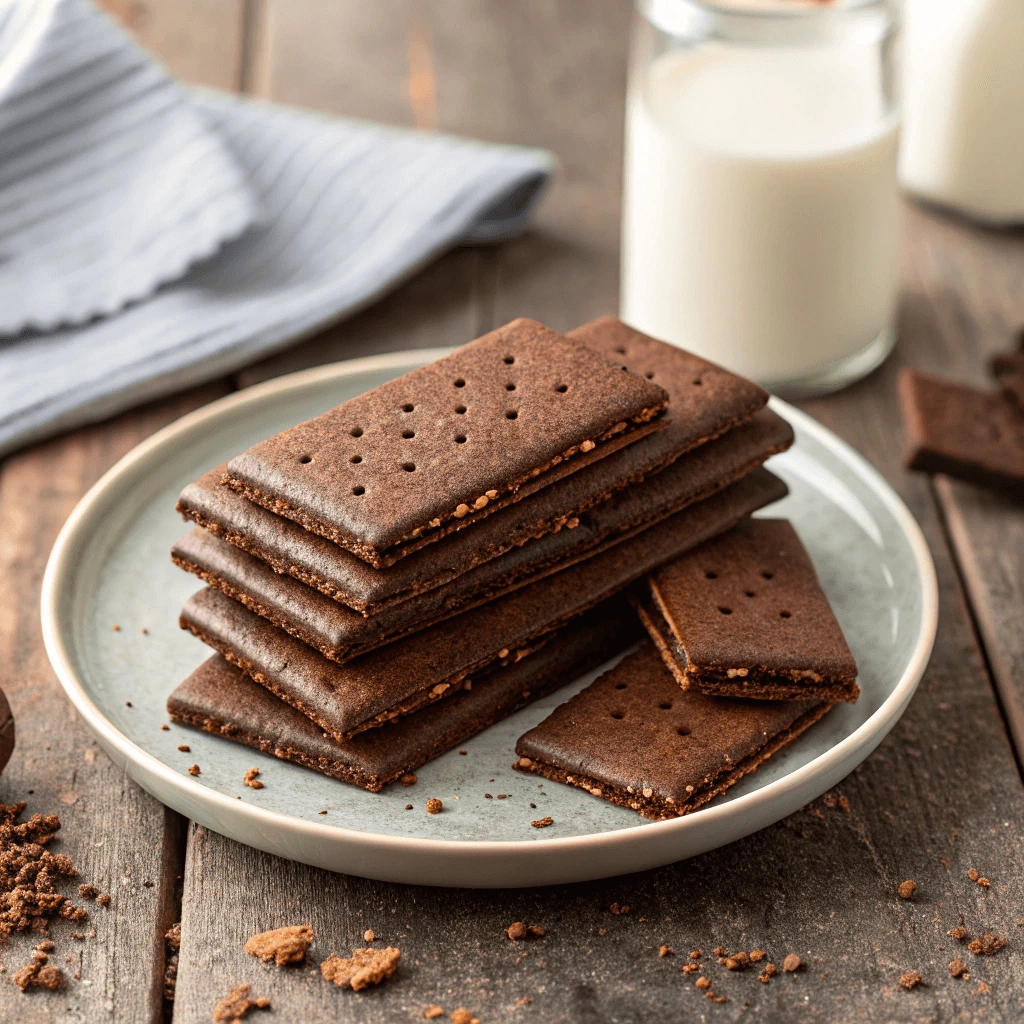
Freshly baked crackers offer a crisp texture with a hint of softness in the center—something that packaged snacks rarely provide. Your kitchen fills with the warm, inviting smell of cocoa and honey, making the baking experience just as enjoyable as eating the final result.
Customize to Match Your Taste
Store-bought options offer little flexibility. When you bake at home, you can tweak the recipe to match your preferences—make them crispier, chewier, more chocolatey, or lightly sweetened. You control the baking time, thickness, and even the shape.
Homemade chocolate graham crackers not only taste better, but they also feel more rewarding. You know exactly what’s inside, and every bite reflects your own kitchen’s care and creativity.
Fun and Easy to Bake Chocolate Graham Crackers from Scratch with Kids
Baking chocolate graham crackers at home isn’t just about creating a tasty treat—it’s also a great way to spend quality time with your kids. The steps are simple, the ingredients are safe, and the process encourages creativity and learning.
Turn Baking into a Hands-On Activity
Kids love getting their hands messy, and mixing dough gives them the perfect excuse. Let them measure ingredients, stir the cocoa into the flour, or press the dough with a rolling pin. These tasks improve their motor skills and give them a sense of accomplishment.
Let Them Shape and Decorate
Once you roll out the dough, kids can help cut out fun shapes using cookie cutters. Hearts, stars, or animal shapes add excitement to the baking process. You can even let them poke holes in the crackers with a fork or sprinkle on a little cinnamon or coconut sugar before baking.
Teach Healthy Eating Through Play
When kids bake their own snacks, they become more aware of the ingredients in their food. Use this time to introduce healthier options—like whole wheat flour or coconut oil—and explain why they’re better choices. You’re not just baking; you’re building healthy habits in a fun, hands-on way.
Baking chocolate graham crackers with your children turns a simple recipe into a joyful, educational experience. It’s a memory-maker that ends with a sweet, crunchy reward.
Ingredients You’ll Need for Chocolate Graham Crackers from Scratch
Core Ingredients
The flavor and texture of chocolate graham crackers depend heavily on just a few essential ingredients. By selecting high-quality flour, cocoa powder, and sweeteners, you can ensure your homemade crackers turn out delicious, nutritious, and perfectly balanced.
Choose the Right Flour for Texture and Nutrition
Whole wheat flour gives graham crackers their classic hearty texture and nutty taste. It also adds fiber and nutrients that refined white flour lacks. If you want a lighter texture, you can mix whole wheat flour with all-purpose flour or use graham flour for a more traditional feel. Oat flour or almond flour also work well if you’re looking for a gluten-free option with added health benefits.
Use Quality Cocoa Powder for Rich Flavor
Cocoa powder brings the deep, chocolatey flavor that makes these crackers stand out. Choose unsweetened cocoa powder for the best results, as it allows you to control the sweetness separately. For a more intense chocolate flavor, try Dutch-processed cocoa. It’s smoother and less acidic, which can complement the sweetness and balance the overall taste.
Pick a Natural Sweetener That Fits Your Taste
Instead of using refined white sugar, reach for natural sweeteners like honey, maple syrup, or coconut sugar. These not only add sweetness but also bring subtle flavors that enhance the crackers. Honey creates a slightly chewy texture, while maple syrup adds warmth and depth. Coconut sugar offers a lower glycemic option that still tastes rich and satisfying
Flavor Enhancers and Leavening Agents
While the base ingredients provide structure and sweetness, flavor enhancers and leavening agents bring your chocolate graham crackers to life. These supporting ingredients may seem small, but they make a big impact on the final taste, texture, and aroma.
Add Vanilla Extract for Depth
Vanilla extract enhances the flavor of cocoa and adds a warm, sweet note that makes your crackers more complex and satisfying. Even though you only need a teaspoon, this ingredient works behind the scenes to round out the bold chocolate flavor. Always use pure vanilla extract rather than imitation to achieve the best results.
Don’t Skip the Salt
A pinch of salt might seem unnecessary in a sweet snack, but it’s essential. Salt balances the sweetness, sharpens the chocolate flavor, and prevents your crackers from tasting flat. You don’t need much—just 1/4 to 1/2 teaspoon—but that small amount makes a noticeable difference.
Use Baking Soda for Lightness and Crunch
Baking soda acts as the leavening agent in your chocolate graham crackers. It reacts with the acid in ingredients like honey or cocoa to create small air pockets, which give the crackers their light, crisp texture. Without it, the dough may turn out too dense or chewy.
Equipment Checklist – What You’ll Need
Before you begin making your chocolate graham crackers, gather the tools that will make the process smooth, efficient, and enjoyable. Having the right equipment on hand ensures consistent results and a stress-free baking experience.
Mixing Tools for the Dough
Start with a large mixing bowl to combine your dry and wet ingredients. A sturdy whisk works well for dry ingredients like flour, cocoa powder, and baking soda, while a wooden spoon or rubber spatula helps blend the wet ingredients. If you prefer speed and convenience, use a stand mixer or hand mixer with a paddle attachment to save time and reduce effort.
Rolling and Shaping Tools
Once your dough comes together, you’ll need a rolling pin to flatten it evenly. Aim for about 1/8 to 1/4 inch thickness for crisp crackers. Use parchment paper or a lightly floured surface to prevent sticking. For shaping, cookie cutters allow you to make fun, uniform pieces, while a knife or pizza cutter works perfectly for traditional square or rectangular graham cracker shapes.
Baking and Cooling Essentials
Line a baking sheet with parchment paper or a silicone baking mat to prevent sticking and promote even baking. A fork or skewer helps you poke small holes in the dough, which allows steam to escape and gives your crackers a classic look. Once baked, transfer the crackers to a wire rack to cool completely—this step helps preserve their crisp texture.
Step-by-Step Guide on How to Make Chocolate Graham Crackers
Preparing and Mixing the Dough
Getting the dough right is key to delicious, crisp chocolate graham crackers. With a few simple steps, you can create a dough that’s easy to handle and bakes beautifully.
Mix the Dry Ingredients
Start by combining whole wheat flour, cocoa powder, baking soda, and a pinch of salt in a mixing bowl. Whisk everything together to evenly distribute the ingredients and prevent clumps.
Stir the Wet Ingredients
In a separate bowl, mix melted coconut oil or butter, honey (or maple syrup), milk, and vanilla extract. Stir until smooth and fully combined.
Bring It All Together
Slowly pour the wet ingredients into the dry mixture. Stir with a spatula or spoon until a dough forms. Use your hands to knead gently until the dough is soft and workable. If it’s too sticky, add a little flour. If it’s too dry, add a splash of milk. Chill the dough for 30 minutes before rolling it out—this makes shaping easier and improves the texture.
This simple dough comes together quickly and sets the foundation for flavorful, homemade crackers.
Rolling, Cutting, and Shaping the Crackers
Once your dough has chilled, it’s time to roll it out and form your crackers. This step brings creativity and precision together, helping you achieve that classic graham cracker look and texture.
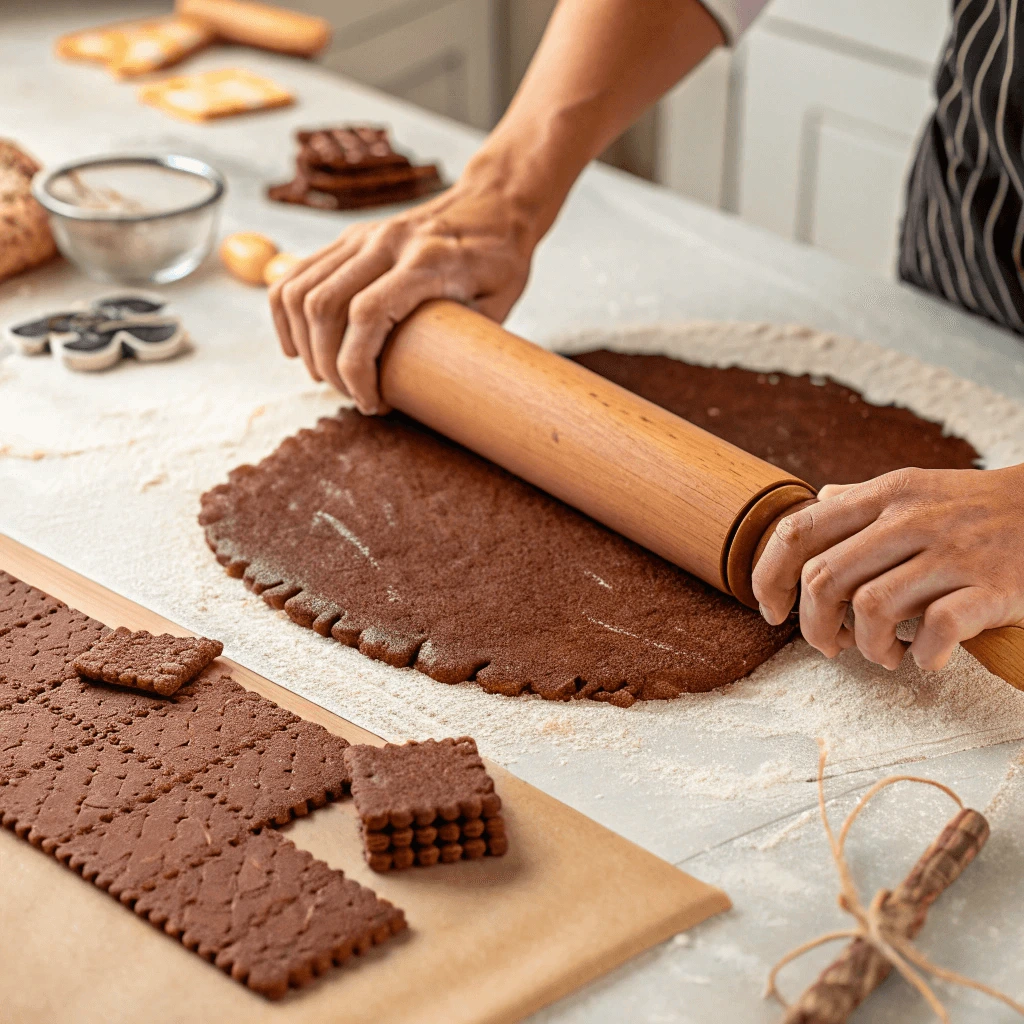
Roll Out the Dough Evenly
Place the dough on a lightly floured surface or between two sheets of parchment paper. Use a rolling pin to flatten it to about 1/8 to 1/4 inch thick. Thinner dough gives you a crisper cracker, while slightly thicker dough results in a chewier texture. Be sure to roll it evenly to prevent uneven baking.
Cut Into Shapes
Use a knife, pizza cutter, or cookie cutters to shape your crackers. Traditional graham crackers are usually rectangles or squares, but you can make fun shapes for kids or special occasions. Keep the pieces similar in size to ensure they bake evenly.
Add the Finishing Touches
Use a fork or skewer to poke small holes across the surface of each cracker. This helps steam escape during baking and gives the crackers their classic appearance. If you’d like, sprinkle a little cinnamon, sea salt, or coconut sugar on top before baking for added flavor and texture.
Taking time with this step gives your chocolate graham crackers a polished look and satisfying crunch. Plus, it’s a fun part of the process—especially if you’re baking with kids or experimenting with different designs.
Baking and Cooling Tips for the Perfect Crunch
The right baking and cooling techniques make the difference between soft and crunchy chocolate graham crackers. Follow these tips to get that ideal crisp texture every time.
Preheat the Oven for Even Results
Always preheat your oven to the recommended temperature—usually 325°F (160°C). A fully heated oven ensures the crackers bake evenly from the start. Cold ovens can cause uneven texture or soggy spots.
Bake Until Edges Are Firm
Place your shaped dough pieces on a parchment-lined baking sheet. Leave a little space between each one to allow for airflow. Bake for 12–15 minutes, depending on thickness. Watch for slightly darkened edges and a firm surface—those signs tell you the crackers are ready. Avoid overbaking, as they can become too hard or bitter.
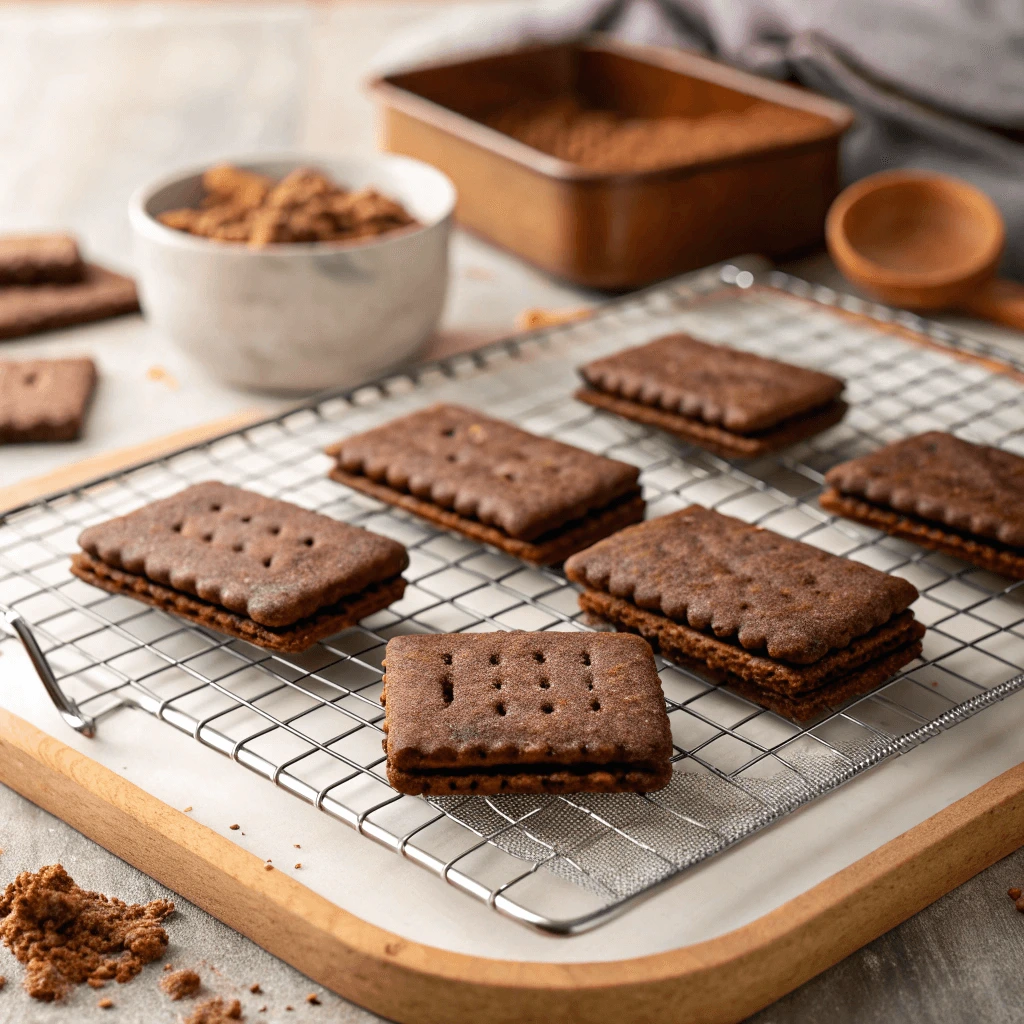
Cool Completely on a Wire Rack
Once the crackers finish baking, remove them from the oven and place them on a wire rack. Letting them cool completely is crucial. As they cool, they firm up and develop that perfect crunch. If you leave them on the hot pan, steam may soften them.
Taking care during this final stage ensures your chocolate graham crackers have the perfect bite—crisp, light, and satisfying. Proper baking and cooling bring all your efforts together in a delicious finish.
Healthy Ingredient Alternatives for Guilt-Free Snacking
Natural Sweeteners You Can Use
Choosing natural sweeteners allows you to enjoy delicious chocolate graham crackers without relying on refined sugar. These options add flavor and moisture while offering better nutritional value.
Honey Adds Richness and Moisture
Honey is one of the most popular natural sweeteners in baking. It brings a deep, floral sweetness and helps create a chewy texture. Since it’s a liquid, honey also keeps your dough soft and easy to work with. Use raw or organic honey for the best flavor and quality.
Maple Syrup Offers a Warm, Earthy Taste
Maple syrup not only sweetens but also enhances the flavor of cocoa with its rich, caramel-like notes. It blends easily into dough and works well in vegan recipes. Choose pure maple syrup—avoid artificial versions, which contain added sugars and preservatives.
Coconut Sugar Provides a Low-Glycemic Option
Coconut sugar has a mild, brown-sugar flavor and a lower glycemic index than white sugar. It comes in granulated form, so it won’t add extra moisture, making it a great 1:1 swap for regular sugar. It also contains small amounts of minerals like potassium and zinc, adding a slight nutritional edge.
Using natural sweeteners gives your chocolate graham crackers a wholesome taste and texture. Whether you want a bold flavor or a more subtle sweetness, these alternatives let you customize the recipe to match your dietary needs and preferences.
Whole Grain and Gluten-Free Flour Options
Choosing the right flour can boost the nutritional value of your chocolate graham crackers and make them suitable for gluten-sensitive or health-conscious eaters. Here are some versatile flour options to consider.
Whole Wheat Flour for Added Fiber
Whole wheat flour is a classic choice for healthier baking. It retains the bran and germ of the wheat grain, providing more fiber, protein, and nutrients than refined flour. It also gives the crackers a nutty, hearty flavor. If the texture feels too dense, try mixing it with a small portion of all-purpose or spelt flour for balance.
Oat Flour for a Mild, Gluten-Free Option
Oat flour offers a light texture and slightly sweet flavor that pairs beautifully with cocoa. It’s naturally gluten-free (when certified) and easy to make at home by grinding rolled oats in a blender. This flour absorbs moisture well, so adjust liquids in your dough if needed to avoid dryness.
Almond Flour for Richness and Healthy Fats
Almond flour adds a soft, slightly chewy texture and a rich, buttery taste. It’s low in carbs, high in protein, and packed with healthy fats. Since it doesn’t contain gluten, combine it with a binder like ground flaxseed or chia seeds for better structure.
These flour options let you customize your recipe for flavor, texture, and dietary needs. Whether you’re going for whole grain goodness or gluten-free simplicity, you can still achieve delicious, homemade chocolate graham crackers.
Dairy-Free and Vegan Substitutions for Chocolate Graham Crackers from Scratch
Making your chocolate graham crackers dairy-free and vegan is simple when you know the right ingredients to use. These plant-based swaps maintain flavor and texture without compromising on quality.
Swap Butter with Plant-Based Alternatives
Instead of butter, use coconut oil, vegan butter, or even avocado oil. Coconut oil adds a slight sweetness and richness, while vegan butter mimics the texture and flavor of traditional butter. Choose unsalted versions to control the overall taste of the crackers.
Use Non-Dairy Milk for Smooth Mixing
Replace dairy milk with almond milk, oat milk, or soy milk. These plant-based options blend easily into the dough and provide moisture without changing the recipe’s outcome. Unsweetened varieties work best, especially if you’re already using natural sweeteners.
Replace Honey with Vegan Sweeteners
Honey is not considered vegan, but maple syrup, agave nectar, and date syrup are great alternatives. They provide the same sticky consistency and sweetness that help bind the dough and enhance flavor.
Serving Ideas and Storage Tips for Homemade Chocolate Graham Crackers
Pairing Suggestions for Chocolate Graham Crackers: S’mores, Yogurt, or Nut Butter
Once your homemade chocolate graham crackers are baked to perfection, enjoy them in a variety of delicious ways. These simple pairings turn your wholesome treat into a fun snack or satisfying dessert.
Build Better-For-You S’mores
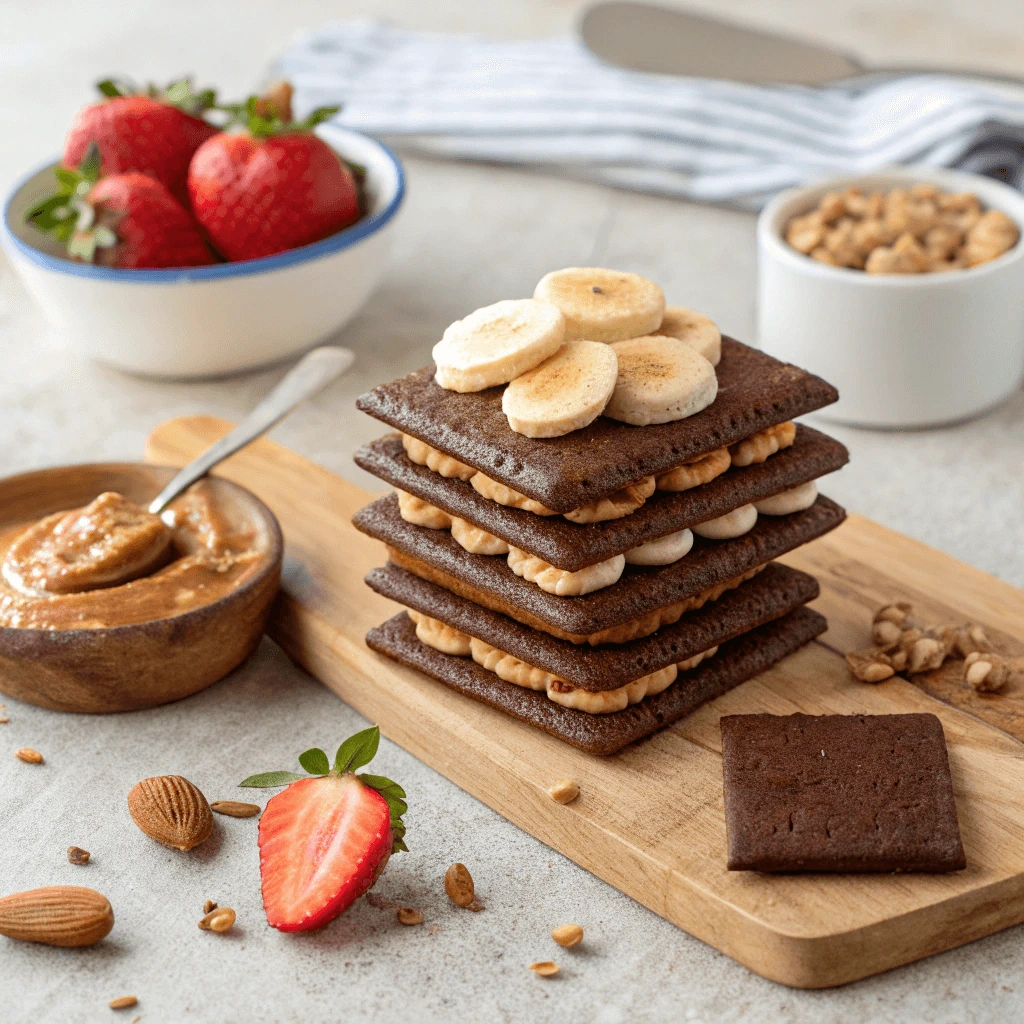
For a healthier twist on a classic, layer your chocolate graham crackers with dark chocolate squares and marshmallows—opt for vegan or low-sugar versions if desired. Toast the marshmallows for a gooey center and gently press everything together. This combo delivers a nostalgic campfire favorite with a cleaner ingredient list.
Serve with Yogurt and Fruit
Break the crackers into chunks and sprinkle them over a bowl of Greek yogurt or plant-based yogurt. Add sliced berries, banana, or a drizzle of honey to create a balanced and protein-rich snack or breakfast. The crunch of the graham crackers pairs perfectly with the creaminess of the yogurt and the natural sweetness of fruit.
Spread with Nut Butter for a Quick Snack
Top your crackers with almond butter, peanut butter, or cashew spread for a quick, energy-boosting treat. Add banana slices or a light sprinkle of chia seeds for extra flavor and nutrients. This option is especially great for kids’ lunchboxes or a post-workout bite.
These easy pairing ideas make your homemade chocolate graham crackers even more versatile and enjoyable. Whether you’re indulging in a classic treat or reaching for a nutritious snack, these options offer something for everyone.
How to Store Chocolate Graham Crackers from Scratch for Freshness
Proper storage is essential if you want to enjoy your homemade chocolate graham crackers at their peak flavor and texture. Follow these tips to keep them fresh and crunchy for days—or even weeks.
Use an Airtight Container
Once the crackers have completely cooled, place them in an airtight container. Choose a container with a tight-sealing lid to keep moisture out and preserve their crisp texture. Glass jars, metal tins, or BPA-free plastic containers work well.
Store at Room Temperature
Keep the container in a cool, dry place, such as a pantry or cupboard. Avoid storing them near the stove, dishwasher, or other heat sources, which can introduce moisture or change the texture. When properly stored, your crackers should stay fresh for up to 7–10 days.
Freeze for Longer Storage
If you want to keep your chocolate graham crackers beyond a week, freeze them. First, place the crackers in a single layer on a baking sheet and freeze for an hour. Then transfer them to a freezer-safe bag or container, removing as much air as possible. When you’re ready to eat, let them thaw at room temperature for 10–15 minutes. They’ll regain their crispiness without needing to be reheated.
Make-Ahead and Freezing Tips for Homemade Chocolate Graham Crackers
Preparing your chocolate graham crackers in advance can save time and ensure you always have a tasty snack ready. Here’s how to make and freeze your crackers for the best results.
Prepare the Dough Ahead of Time
You can mix the dough up to 2 days before baking. After preparing, wrap it tightly in plastic wrap or store it in an airtight container in the refrigerator. Chilling the dough not only keeps it fresh but also improves its texture, making it easier to roll out when you’re ready.
Freeze Unbaked Dough for Convenience
If you want to freeze the dough for longer storage, shape it into a disk, wrap it well, and place it in a freezer-safe bag. When ready to bake, thaw the dough overnight in the refrigerator. This method lets you bake fresh crackers whenever you want without starting from scratch.
Freeze Baked Crackers for Longer Storage
After baking and cooling completely, lay your crackers in a single layer on a baking sheet and freeze them for about an hour. Then transfer them to a sealed freezer-safe container or bag, removing as much air as possible to prevent freezer burn. Frozen crackers maintain their crispness and flavor for up to 3 months.
Thaw and Refresh Your Crackers
To enjoy frozen crackers, remove them from the freezer and let them thaw at room temperature for 10-15 minutes. If you want to refresh their crispness, pop them in a preheated oven at 300°F (150°C) for 5 minutes. This quick step restores the perfect crunch.
Using these make-ahead and freezing tips lets you enjoy fresh-tasting chocolate graham crackers anytime without the fuss of starting from scratch. It’s a great way to keep your kitchen stocked with wholesome snacks!
Conclusion
Making chocolate graham crackers from scratch is a rewarding and delicious project that lets you enjoy a wholesome, customizable treat. By using quality ingredients and simple techniques, you can create crackers that are fresher, tastier, and healthier than store-bought versions. Whether you prefer whole grain flours, natural sweeteners, or dairy-free options, this recipe adapts easily to your needs. Plus, homemade crackers pair perfectly with s’mores, yogurt, or nut butter. With these tips and tricks, you’ll have perfect chocolate graham crackers to enjoy anytime.