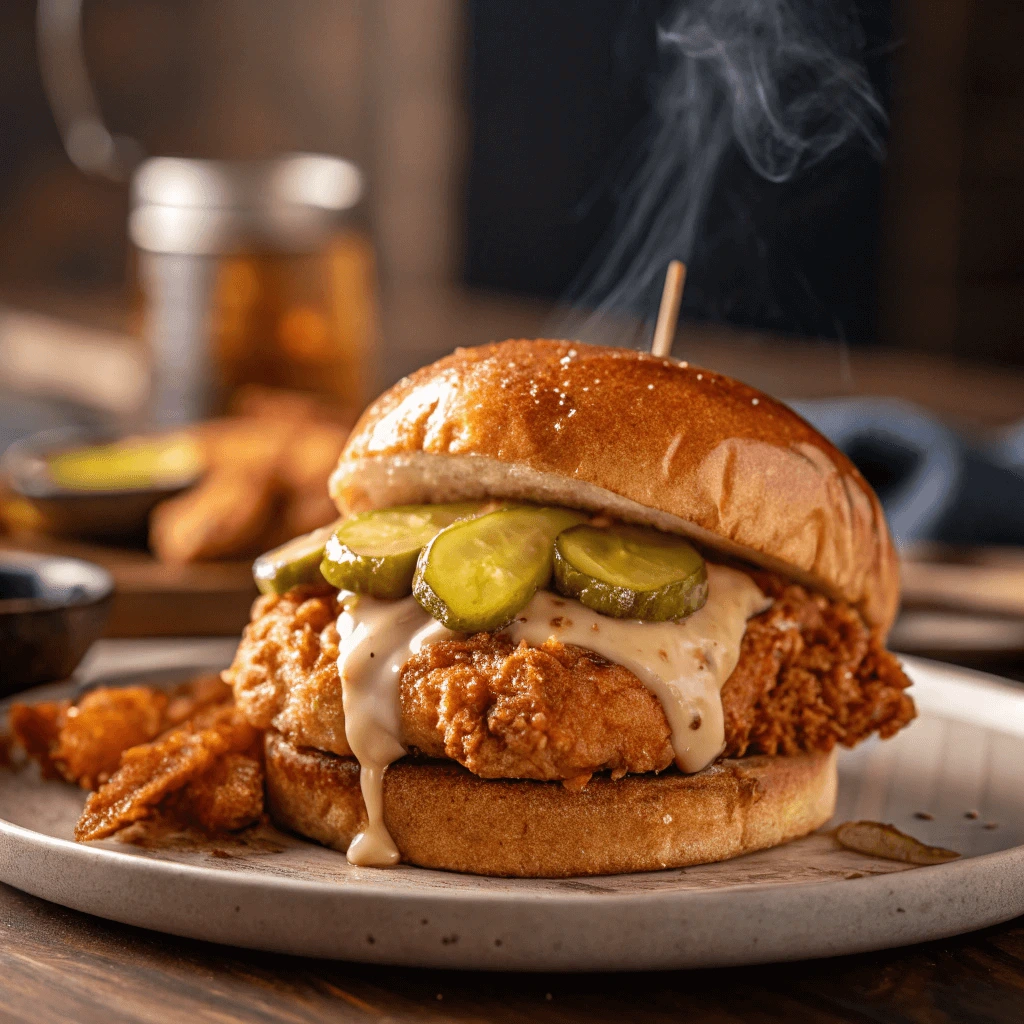
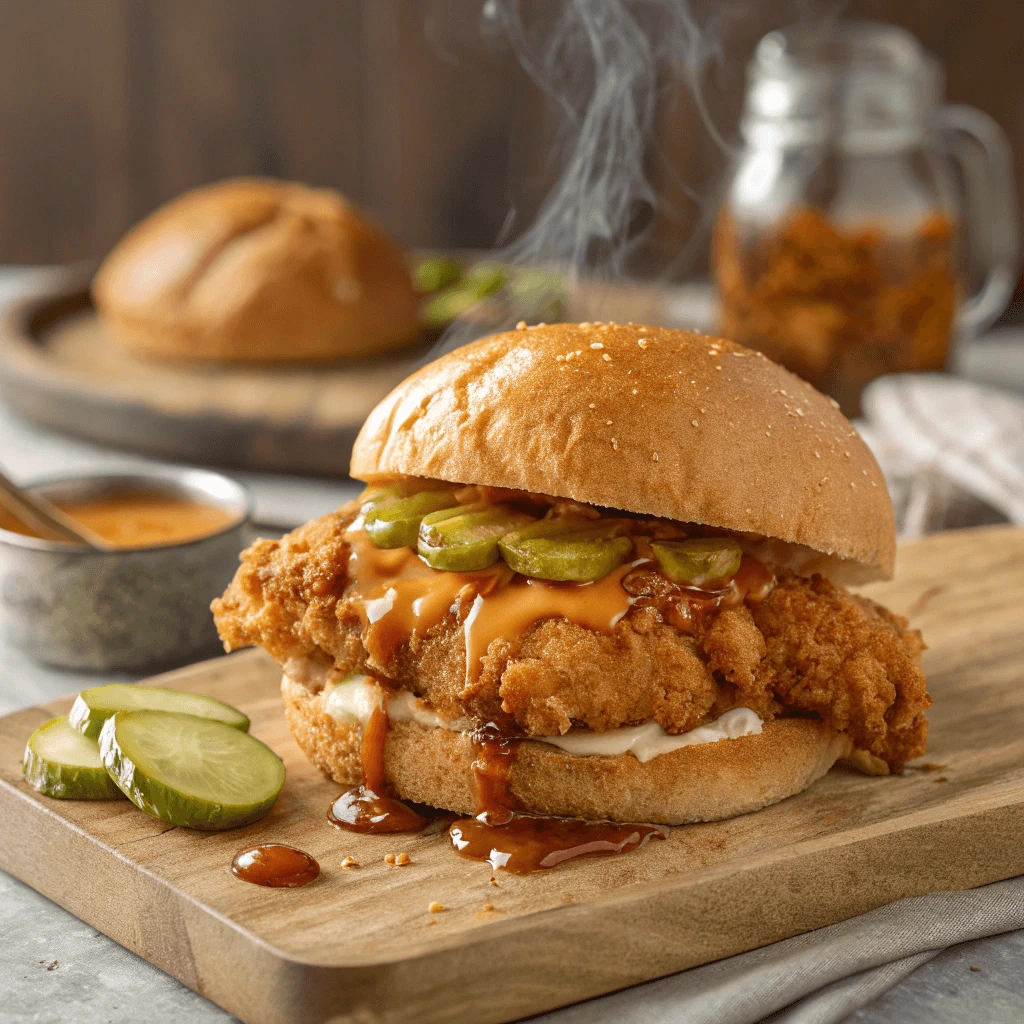
If you love the perfect balance of sweet, spicy, and crispy, then a Hot Honey Chicken Sandwich is about to become your new favorite meal. This mouthwatering sandwich features crispy fried chicken coated in a sticky hot honey glaze, all nestled between a soft, buttery brioche bun with crunchy pickles and creamy sauce.
While many restaurants serve their version of this sandwich, nothing beats making it fresh at home—where you can control the heat, sweetness, and crispiness to suit your taste. Whether you deep-fry, bake, or air-fry your chicken, this guide will walk you through the steps to achieve the ultimate homemade hot honey chicken sandwich.
Get ready to impress your family and friends with a restaurant-quality sandwich that’s easy to make and packed with flavor. Let’s dive in!
What Makes a Hot Honey Chicken Sandwich So Delicious?
The Perfect Balance of Sweet and Spicy
The Hot Honey Chicken Sandwich stands out because of its unique contrast of flavors. The combination of crispy, savory fried chicken with sticky, spicy-sweet honey sauce creates an irresistible bite every time. Achieving the perfect balance between heat and sweetness is key to making this sandwich a true flavor experience.
How Hot Honey Elevates the Flavor
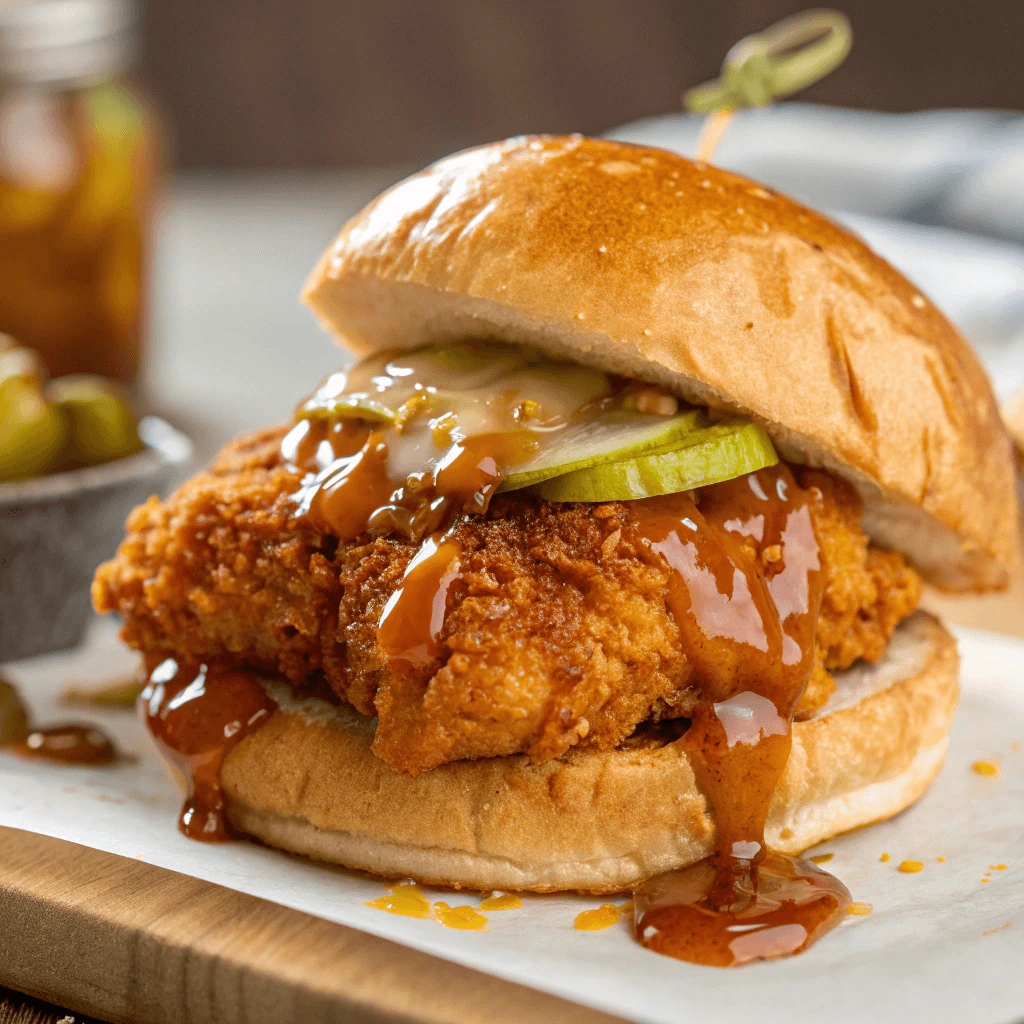
Hot honey isn’t just regular honey with spice—it’s a game-changer for fried chicken. The natural sweetness of honey helps balance the heat from spices like cayenne pepper, red pepper flakes, and paprika. This contrast enhances the richness of the crispy chicken while adding a subtle, lingering warmth. When drizzled over the fried chicken, the sticky glaze clings to every crispy edge, making each bite better than the last.
Choosing the Right Spice Level
Not everyone enjoys the same level of heat, so adjusting the spice in both the hot honey sauce and the chicken seasoning is important. If you prefer a milder flavor, reduce the cayenne and red pepper flakes. For a bolder kick, increase the spices or add hot sauce to the honey mixture. The key is to create a heat level that enhances the overall taste rather than overpowering it.
Why Crunch Matters in the Flavor Contrast
The crunchy texture of the fried chicken plays a big role in balancing the smooth, sticky glaze. A well-seasoned flour coating combined with a buttermilk marinade ensures a light, crispy crust that doesn’t turn soggy when covered in hot honey. The contrast between the crispy chicken, soft brioche bun, and sticky glaze makes every bite a satisfying experience.
Crispy Fried Chicken Texture
A Hot Honey Chicken Sandwich wouldn’t be complete without perfectly crispy fried chicken. The crunchy golden crust provides the ideal contrast to the soft brioche bun and sticky hot honey glaze. Achieving this texture requires the right techniques, from marinating the chicken to using the best frying method.
The Role of Buttermilk in Tenderizing Chicken
Soaking chicken in buttermilk before frying is a game-changer. The natural acidity in buttermilk breaks down proteins in the chicken, making it juicy and tender. Additionally, the thick consistency of buttermilk helps the flour coating stick better, resulting in a crispy, textured crust. For the best results, let the chicken marinate for at least one hour, but overnight soaking enhances the flavor even more.
How to Create a Crispy, Flavorful Coating
A well-seasoned flour mixture ensures the chicken develops a crunchy, golden crust. Combining all-purpose flour, cornstarch, and spices like paprika, garlic powder, and cayenne pepper adds depth to the coating. Cornstarch is the secret ingredient that makes the crust extra crispy by reducing moisture absorption.
For the perfect coating, follow these steps:
- Remove the chicken from the buttermilk marinade and let the excess drip off.
- Dredge it in the seasoned flour mixture, pressing the coating firmly onto the chicken.
- Let the coated chicken rest for 10 minutes before frying. This allows the coating to adhere better, preventing it from falling off during cooking.
The Best Frying Techniques for Maximum Crunch
To achieve crispy, golden-brown chicken, use hot oil at 350°F (175°C). If the oil is too cool, the chicken will absorb excess oil and become greasy. If it’s too hot, the crust will burn before the inside cooks through.
- Deep-frying produces the crispiest chicken because it cooks evenly in hot oil.
- Shallow frying works well if you use enough oil to cover at least half of the chicken.
- Air frying provides a healthier alternative while still delivering a crunchy exterior. Lightly spraying the coated chicken with oil before air frying improves the texture.
By following these steps, you’ll create crispy, well-seasoned chicken that holds up perfectly against the sticky hot honey glaze, making every bite of your Hot Honey Chicken Sandwich irresistibly delicious!
Choosing the Right Bun and Toppings
A Hot Honey Chicken Sandwich isn’t just about crispy fried chicken and spicy-sweet honey—it’s also about the bun and toppings that bring everything together. The right combination enhances the flavors, textures, and overall experience of the sandwich. Choosing a soft, slightly sweet bun and the perfect toppings creates a harmonious balance with the crispy chicken and sticky glaze.
The Best Bun for a Hot Honey Chicken Sandwich
The bun plays a crucial role in holding everything together while adding its own flavor and texture. A soft, buttery bun works best because it complements the crunchy chicken and absorbs the hot honey glaze without becoming soggy.
- Brioche Bun – This is the top choice for a Hot Honey Chicken Sandwich. Its buttery, slightly sweet flavor pairs perfectly with the spicy-sweet chicken.
- Potato Bun – Known for its soft, fluffy texture, a potato bun provides a mild sweetness that enhances the hot honey glaze.
- Sesame Seed Bun – If you prefer a bit of texture, a sesame seed bun adds a nutty crunch that pairs well with the crispy chicken.
Toasting the bun before assembling the sandwich improves its sturdiness and flavor. Lightly butter each side and toast it on a skillet for a golden, slightly crispy surface. This step prevents the bun from getting too soggy when it soaks up the hot honey.
Toppings That Elevate the Flavor
The toppings you choose can enhance or balance the heat and sweetness of the sandwich. The best toppings add crunch, creaminess, or acidity to contrast the crispy chicken and sticky honey glaze.
- Pickles – Their tangy crunch cuts through the sweet and spicy flavors, adding a refreshing contrast.
- Coleslaw – A cool, creamy slaw made with shredded cabbage, carrots, and a light dressing brings freshness and crunch.
- Lettuce and Tomato – Crisp lettuce and juicy tomato slices add a light, refreshing layer without overpowering the other ingredients.
The Perfect Sauce for Extra Flavor
A well-chosen sauce enhances the sandwich by adding an extra layer of flavor and moisture.
- Garlic Aioli – A creamy, garlicky sauce that complements the spicy hot honey glaze.
- Spicy Mayo – A mix of mayonnaise and hot sauce creates a rich, slightly spicy spread that adds extra heat.
- Classic Ranch – If you prefer a cooling contrast, ranch dressing helps balance the heat from the hot honey.
By choosing the right bun, toppings, and sauce, you’ll build a Hot Honey Chicken Sandwich that’s flavorful, balanced, and completely satisfying with every bite!
Ingredients You Need for a Hot Honey Chicken Sandwich
For the Crispy Chicken
The crispy chicken is the heart of a Hot Honey Chicken Sandwich. Its golden-brown crust, juicy interior, and perfectly seasoned coating create an irresistible bite. To achieve the best results, every step—from marinating the chicken to frying it—must be done with care. Using the right techniques ensures a crunchy exterior that holds up against the sticky hot honey glaze without turning soggy.
Choosing the Right Cut of Chicken
The best sandwiches start with the right cut of chicken. Boneless, skinless chicken thighs and chicken breasts are both great options, but they offer different textures and flavors.
- Chicken Thighs – These are juicier and more flavorful due to their slightly higher fat content. They stay tender even after frying.
- Chicken Breasts – These provide a leaner option with a firmer texture. To keep them juicy, pound them to an even thickness before marinating.
No matter which cut you choose, ensuring uniform thickness helps the chicken cook evenly and thoroughly.
The Importance of a Buttermilk Marinade
A buttermilk marinade isn’t just for flavor—it’s the secret to tender, juicy chicken. Buttermilk contains mild acids that break down proteins, which results in a softer, more flavorful bite. Additionally, the thick consistency helps the coating stick better during the breading process.
To make the best buttermilk marinade:
- Combine buttermilk, salt, black pepper, garlic powder, and a dash of hot sauce in a bowl.
- Submerge the chicken pieces and let them marinate for at least one hour. Overnight marination deepens the flavor and tenderness.
- Before coating, remove excess buttermilk to prevent the breading from becoming clumpy.
Creating the Ultimate Crispy Coating
The perfect crispy coating requires a well-seasoned flour mixture that sticks firmly to the chicken. A combination of all-purpose flour, cornstarch, and spices enhances the crunch and flavor.
- Flour – Forms the base of the coating and creates a crispy crust.
- Cornstarch – Helps the coating become extra light and crispy by reducing moisture absorption.
- Seasonings – A mix of paprika, garlic powder, onion powder, cayenne pepper, and black pepper ensures bold, well-balanced flavor in every bite.
Dredging Process for Maximum Crispiness:
- Remove the chicken from the buttermilk, letting the excess drip off.
- Dredge it in the seasoned flour mixture, pressing firmly to ensure an even coating.
- Let the coated chicken rest for 10 minutes before frying to help the breading adhere better.
Frying Techniques for a Golden, Crispy Crust
Frying at the right temperature is essential for achieving a crispy, non-greasy crust. The oil should be heated to 350°F (175°C) before adding the chicken.
- Deep-Frying – This method cooks the chicken evenly and quickly, giving it the crispiest texture.
- Shallow-Frying – If deep-frying isn’t an option, ensure the oil covers at least half of the chicken and flip it halfway through.
- Air Frying – For a lighter option, spray the breaded chicken lightly with oil and cook at 375°F (190°C) for 15–18 minutes, flipping halfway.
After frying, place the chicken on a wire rack instead of paper towels. This prevents steam from making the crust soggy.
By following these steps, you’ll create crispy, well-seasoned chicken that holds up perfectly to the hot honey glaze, making every bite of your sandwich absolutely delicious!
For the Hot Honey Sauce
The hot honey sauce is what sets this sandwich apart, giving it an irresistible sweet, spicy, and sticky glaze that perfectly complements the crispy fried chicken. A well-balanced sauce enhances the flavor profile, creating a mouthwatering contrast between sweet honey and fiery heat.
Choosing the Right Honey
The type of honey you use plays a crucial role in determining the final flavor. Since honey provides the base of the sauce, selecting a high-quality variety ensures a rich, smooth consistency.
- Raw Honey – This option retains natural enzymes and floral notes, adding depth to the sauce.
- Clover Honey – A mild, widely available honey that allows the spicy flavors to shine.
- Wildflower Honey – Offers a more complex, slightly herbal taste that pairs well with heat.
If you prefer a thicker sauce, opt for unfiltered honey, which tends to have a richer texture.
Selecting the Best Heat Source
To balance the sweetness of the honey, the sauce needs a spicy kick. The level of heat depends on your choice of chili peppers or hot sauce.
- Red Pepper Flakes – A classic choice that adds a mild, lingering heat.
- Cayenne Pepper – Provides a deeper, more intense spiciness that blends well with honey.
- Hot Sauce – A liquid heat source like sriracha, Louisiana hot sauce, or Tabasco adds extra tang and depth.
- Fresh Chili Peppers – Finely chopped jalapeños or habaneros create a bolder, more complex spice profile.
For a smoky touch, consider adding a dash of smoked paprika or chipotle powder.
How to Make the Perfect Hot Honey Sauce
A well-balanced hot honey sauce requires the right ratio of sweetness, heat, and acidity. The acidity cuts through the richness and prevents the sauce from becoming too overwhelmingly sweet.
Ingredients:
- ½ cup honey
- 1 tablespoon butter (for a silky finish)
- 1 teaspoon red pepper flakes or cayenne pepper
- 1 teaspoon hot sauce (adjust to taste)
- 1 teaspoon apple cider vinegar or lemon juice (adds acidity)
- ½ teaspoon smoked paprika (optional for depth)
- Pinch of salt
Steps to Prepare the Sauce:
- In a small saucepan, heat the honey over low to medium heat, stirring frequently to prevent burning.
- Add the butter, allowing it to melt and blend with the honey for a smooth texture.
- Stir in the red pepper flakes, cayenne, or hot sauce, adjusting the amount based on your preferred spice level.
- Add the apple cider vinegar or lemon juice to balance the sweetness.
- Sprinkle in the smoked paprika and salt, stirring continuously until the sauce is well combined.
- Simmer the sauce for 1–2 minutes, allowing the flavors to meld together.
Once the sauce reaches your desired consistency, remove it from heat and let it cool slightly before drizzling it over the crispy chicken.
Tips for Using Hot Honey Sauce
- Coat the Chicken Immediately – For a glossy finish, brush or drizzle the hot honey over the freshly fried chicken while it’s still warm.
- Use as a Dipping Sauce – If you prefer a lighter glaze, serve the hot honey sauce on the side for dipping.
- Store for Later – Leftover sauce can be kept in an airtight container at room temperature for up to a week. If it thickens, warm it slightly before use.
By mastering the perfect blend of sweet and spicy, this homemade hot honey sauce elevates your chicken sandwich to a restaurant-quality meal. Every bite delivers crispy, juicy chicken coated in a sticky, flavorful glaze—a combination that’s simply irresistible!
For Assembling the Sandwich
Now that the crispy fried chicken and hot honey sauce are ready, it’s time to assemble the perfect hot honey chicken sandwich. The way you build the sandwich affects its texture, flavor balance, and overall eating experience. Follow these steps to ensure every bite is crispy, juicy, and packed with sweet-heat goodness.
Toasting the Bun for Maximum Flavor
A well-toasted bun provides a sturdy base for the sandwich while enhancing its flavor. Toasting also prevents the bread from getting soggy when it absorbs the hot honey sauce.
Steps to Toast the Bun:
- Heat a small amount of butter or oil in a pan over medium heat.
- Place the cut sides of the bun onto the pan and toast them for 1–2 minutes, or until they turn golden brown.
- Remove the buns from the heat and set them aside on a clean plate.
Lightly buttering the toasted buns before assembly adds richness and helps balance the spiciness of the sauce.
Layering for the Best Texture and Flavor
The order in which you stack the ingredients impacts the overall bite. Each layer should enhance both taste and texture.
Step-by-Step Assembly:
- Spread the Sauce – Apply a generous layer of hot honey sauce to both the top and bottom buns for consistent flavor throughout the sandwich.
- Add the Crispy Chicken – Place the fried chicken cutlet directly onto the bottom bun. Ensure it is centered so that every bite includes a juicy, crunchy bite.
- Drizzle Extra Sauce – For a bolder taste, drizzle additional hot honey sauce over the chicken.
- Add Toppings – Layer fresh pickles, lettuce, or coleslaw for a refreshing crunch that balances the heat.
- Top with the Bun – Gently press the top bun onto the sandwich, securing all the layers together.
Serving and Final Touches
To make the experience even better, consider the best way to serve your sandwich:
- Secure with a Toothpick – If your sandwich is loaded with toppings, use a toothpick or sandwich skewer to hold everything together.
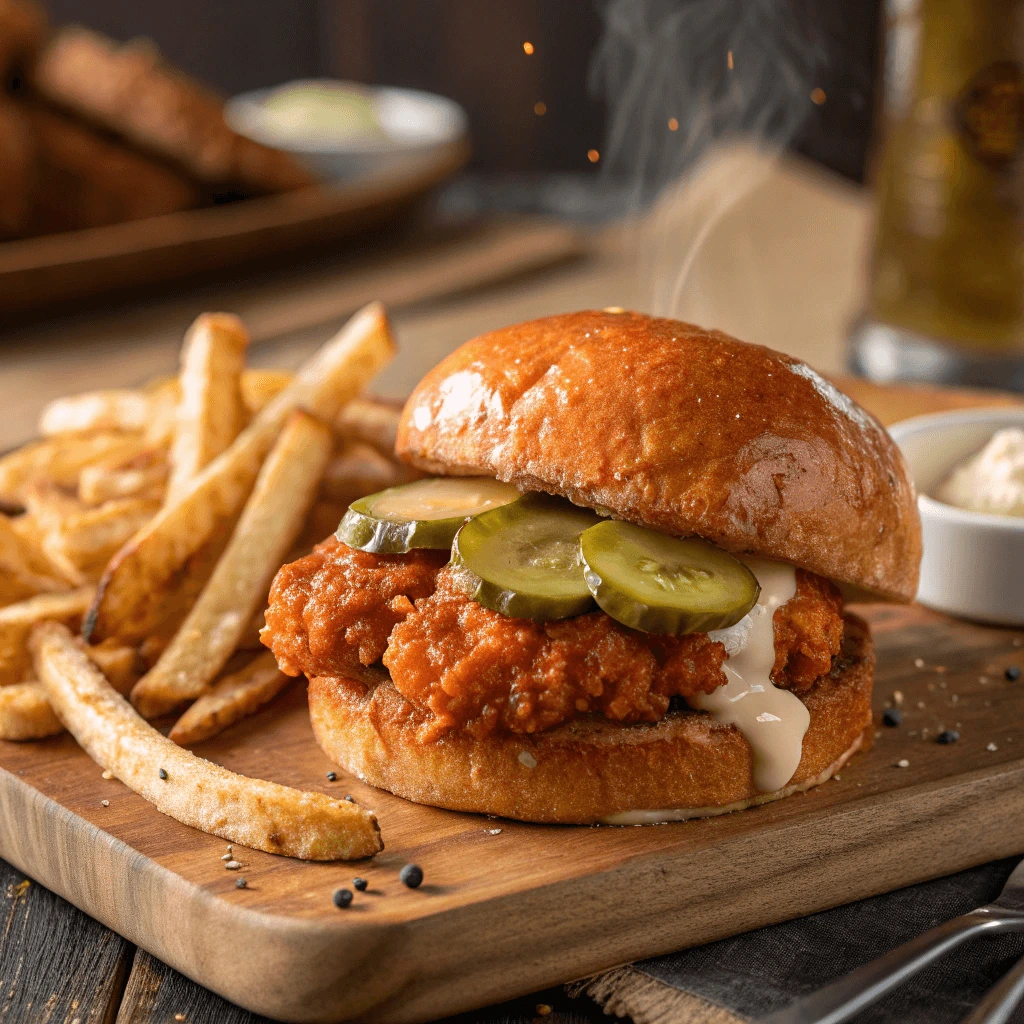
- Serve with a Side Dish – Pair with fries, sweet potato wedges, or a fresh salad for a complete meal.
- Wrap for On-the-Go Eating – If serving later, wrap the sandwich in parchment paper to maintain its structure.
By carefully assembling each layer, you create a hot honey chicken sandwich that is crispy, saucy, and irresistibly flavorful. Enjoy every bite of this sweet and spicy masterpiece!
Step-by-Step Instructions to Make the Best Hot Honey Chicken Sandwich
Step 1: Marinate the Chicken
Marinating the chicken is a critical step to ensuring a flavorful, juicy, and tender piece of meat. It allows the spices, seasonings, and moisture to penetrate the chicken, infusing it with rich flavor while ensuring it stays moist during cooking. By marinating the chicken properly, you set the foundation for a delicious hot honey chicken sandwich.
Why Marinate?
The marinade works in several ways to enhance the chicken:
- Flavor Infusion – The chicken absorbs the flavors of the marinade, making each bite rich and flavorful.
- Moisture Retention – Marinating helps the chicken retain moisture, preventing it from drying out when frying.
- Tenderizing – Acids like lemon juice or buttermilk in the marinade break down the proteins, resulting in a tender, juicy chicken cutlet.
Ingredients for the Chicken Marinade
A good marinade balances acidity, fat, and spices. Here’s what you’ll need to create the perfect marinade:
- Buttermilk or Yogurt – The acidity helps tenderize the chicken and adds a slight tang to the flavor.
- Garlic and Onion Powder – These aromatics impart a savory, well-rounded flavor.
- Paprika – Adds a subtle smokiness and a rich red color.
- Hot Sauce or Chili Powder – A small amount of heat can be added to complement the spicy sauce later.
- Salt and Pepper – These basic seasonings enhance the overall flavor.
- Lemon Juice or Vinegar – Adds acidity to help tenderize the chicken.
- Honey (optional) – A touch of honey can bring a hint of sweetness to balance the seasoning.
How Long to Marinate the Chicken
The longer you allow the chicken to marinate, the more the flavors will develop and the more tender the chicken will become. For the best results:
- Minimum Marination Time – At least 30 minutes to an hour in the refrigerator.
- Ideal Marination Time – 4–6 hours allows the chicken to soak up the full depth of flavor.
- Maximum Marination Time – Up to 12 hours if you’re preparing in advance, but avoid marinating overnight as the chicken could become overly tender.
How to Marinate the Chicken
- Prepare the Marinade – In a bowl, combine buttermilk, lemon juice, garlic, onion powder, paprika, hot sauce, salt, and pepper. Whisk until everything is well blended.
- Coat the Chicken – Place the chicken breasts or thighs in the marinade, ensuring they are completely submerged. If using chicken thighs, make sure to trim any excess fat for the best texture.
- Seal and Refrigerate – Cover the bowl with plastic wrap or transfer the chicken and marinade into a zip-top bag. Place it in the refrigerator to marinate for at least 30 minutes or up to 6 hours.
- Shake Off Excess Marinade – When you’re ready to fry, remove the chicken from the marinade and let any excess liquid drip off. This will help the breading stick better during the frying process.
Tips for the Perfect Marinade
- Don’t Overmarinate – While it’s tempting to leave the chicken to marinate for a long time, be mindful of the time. Too long in an acidic marinade can result in overly soft or mushy chicken.
- Room Temperature – Let the marinated chicken sit at room temperature for about 10 minutes before cooking. This ensures that it cooks evenly.
- Double the Marinade – If you’re preparing a large batch of chicken, you might want to make a double batch of marinade. This ensures even coating for all the pieces.
By marinating the chicken, you set the stage for a flavorful and moist fried chicken cutlet that will shine in your hot honey chicken sandwich. The marinade not only enhances the chicken’s flavor but also helps lock in moisture, ensuring a crispy, juicy bite with every mouthful.
Step 2: Coat and Fry the Chicken
Coating and frying the chicken are crucial steps in achieving the crispy texture and golden-brown exterior that make your hot honey chicken sandwich irresistible. Properly frying the chicken ensures that the breading remains crunchy and flavorful, while the inside stays juicy and tender. Let’s break down the steps to coating and frying the chicken to perfection.
Preparing the Breading Station
The key to a crispy fried chicken is in the breading process. You’ll need a dry mixture for dredging and a wet marinade to make the breading stick. Here’s what you’ll need to prepare:
- Flour – All-purpose flour is the base of the breading. You’ll coat the chicken in flour to create a foundation for the other dry ingredients.
- Cornstarch – Adding cornstarch to the flour will make the coating extra crispy.
- Seasonings – Season the flour with spices like garlic powder, onion powder, paprika, salt, and pepper to add flavor. For extra heat, you can also include cayenne pepper or chili powder.
- Egg Wash – Whisk eggs with a splash of milk or water to create the wet mixture that helps the dry flour mixture stick to the chicken.
Coating the Chicken
Once your breading station is set, follow these steps to coat the chicken evenly:
- Dredge in Flour – First, coat the marinated chicken in the flour-cornstarch mixture. Ensure the chicken is fully covered. Gently shake off the excess to prevent clumping.
- Dip in Egg Wash – After the flour coating, dip the chicken into the egg wash. Make sure the egg mixture covers the entire chicken, adding a layer of moisture to hold the breading.
- Coat with Flour Again – Finally, dip the chicken back into the flour mixture for a second coating. This double-coating technique results in extra crispiness. Press lightly to make sure the breading sticks well.
Frying the Chicken
Frying is where the magic happens, transforming the breaded chicken into a crispy, golden masterpiece. Proper frying technique is essential to avoid sogginess and ensure an even cook.
Frying Tips:
- Heat the Oil Properly – Use a deep frying pan or Dutch oven and fill it with about 1-2 inches of oil (vegetable oil, canola oil, or peanut oil works well). Heat the oil to 350–375°F (175–190°C). This ensures that the chicken fries quickly, creating a crispy exterior while keeping the inside juicy. Use a thermometer to monitor the temperature and maintain it throughout frying.
- Don’t Overcrowd the Pan – Fry the chicken in batches to avoid overcrowding, which can cause the oil temperature to drop. Frying a few pieces at a time will ensure a crispier texture.
- Cook Until Golden Brown – Fry the chicken for about 4–5 minutes per side, depending on the thickness of the chicken. The coating should turn a golden-brown color. The internal temperature of the chicken should reach 165°F (74°C) to ensure it’s cooked through.
Draining the Chicken
After frying, it’s important to let the chicken rest and drain off any excess oil. This helps maintain the crispiness of the breading.
- Place on a Cooling Rack – Set the fried chicken on a cooling rack placed over a baking sheet. This allows air to circulate around the chicken, preventing it from becoming soggy.
- Avoid Paper Towels – While it may seem tempting, avoid placing the chicken directly on paper towels, as it can trap moisture and soften the coating.
Perfecting the Frying Process
For extra crispy results, consider these tips:
- Double Frying – For an ultra-crispy chicken texture, consider frying the chicken twice. Fry it at a lower temperature (around 325°F) for the first round, then increase the temperature for the second round of frying. This creates an even crispier exterior.
- Resting Time – Let the chicken rest for a minute or two after frying to allow the juices to redistribute.
By following these steps, you’ll create crispy, crunchy chicken that provides the perfect bite every time. The golden-brown exterior will give you a satisfying crunch, while the juicy interior ensures your hot honey chicken sandwich is both delicious and satisfying.
Step 3: Make the Hot Honey Sauce
The hot honey sauce is the star of the show when it comes to a hot honey chicken sandwich. It brings together the perfect balance of sweet, spicy, and tangy flavors that elevate the crispy chicken to new heights. Making the sauce from scratch is simple and requires just a few ingredients that combine seamlessly for a delicious finish. Let’s break down the process of creating this flavor-packed sauce.
Ingredients for the Hot Honey Sauce
Before you begin making the sauce, gather the following ingredients:
- Honey – The foundation of the sauce, honey provides the natural sweetness that contrasts beautifully with the heat.
- Hot Sauce – Use your favorite hot sauce or a combination of hot sauces to create the spicy kick. A tangy, vinegary hot sauce like Frank’s RedHot works great, or you can go for something with more heat like Sriracha for a stronger flavor.
- Butter – Butter adds richness and helps smooth out the sauce while adding a bit of creaminess.
- Vinegar – A splash of vinegar will balance out the sauce, adding a tangy component that complements the sweetness of the honey.
- Garlic Powder (optional) – A pinch of garlic powder adds an earthy depth to the sauce, enhancing the overall flavor profile.
Steps to Make the Hot Honey Sauce
- Combine Honey and Hot Sauce – Start by adding honey and hot sauce to a saucepan over medium heat. Use a ratio of 3 parts honey to 1 part hot sauce to achieve a balanced sweetness-to-heat ratio. If you prefer a spicier sauce, feel free to adjust the amount of hot sauce to your liking.
- Add Butter and Vinegar – As the honey and hot sauce mixture heats up, add a tablespoon of butter. Stir until the butter is fully melted and combined with the sauce. The butter will help create a silky smooth texture and reduce the intensity of the heat. Add a teaspoon of vinegar to give the sauce a slight tang that will cut through the sweetness of the honey. This vinegar addition creates a well-rounded sauce that is not too one-dimensional.
- Simmer and Thicken – Allow the sauce to simmer on low heat for about 5–7 minutes. Stir occasionally to ensure that everything is properly combined. The sauce will thicken slightly as it simmers. If you want it to be thicker, you can cook it a bit longer, but be careful not to burn it.
- Season to Taste – Once the sauce has thickened to your desired consistency, taste it and adjust the seasoning. Add a pinch of garlic powder or a dash of salt to enhance the flavors further. If the sauce is too sweet, you can add a bit more vinegar to balance it out.
Adjusting the Heat Level
One of the best things about making your own hot honey sauce is that you can adjust the heat level to your preference. If you like it spicier, increase the amount of hot sauce, or opt for a hotter variety of hot sauce. If you want to tone down the heat, reduce the hot sauce and add a little more honey. Experiment with different types of hot sauces to find the perfect flavor combination. For a milder version, you could even use sweet chili sauce for a hint of sweetness without overwhelming heat.
Consistency and Texture
The texture of your hot honey sauce should be slightly thicker than a typical honey drizzle but not so thick that it becomes hard to pour. You want the sauce to easily coat the chicken, providing a glossy finish that sticks but doesn’t drip excessively. If the sauce is too thick, you can thin it with a small amount of water or more vinegar to adjust it to the perfect consistency.
Serving the Sauce
Once your hot honey sauce is ready, it’s time to assemble the sandwich. Drizzle the sauce generously over the crispy fried chicken just before assembling the sandwich, or you can also serve it as a dipping sauce on the side. The sauce will enhance the crispy texture of the chicken and create the perfect combination of sweet, spicy, and tangy flavors with each bite.
By making your own hot honey sauce, you ensure the freshest, most flavorful addition to your hot honey chicken sandwich. The sauce can also be stored in an airtight container in the refrigerator for up to a week, so you can enjoy it on other dishes like fried chicken, grilled shrimp, or even roasted vegetables.
Tips and Variations for the Perfect Hot Honey Chicken Sandwich
Baking or Air Frying Option
If you prefer a lighter version of the classic hot honey chicken sandwich, or if you’re looking to avoid deep-frying, baking or air frying are excellent alternatives. These methods can produce crispy, flavorful chicken without the excess oil, making your sandwich a healthier choice while maintaining the great taste you love. Let’s explore these two options and how to get the best results.
Baking the Chicken
Baking chicken breasts or chicken thighs is a simple and healthy method to achieve that crispy coating without deep frying. This method results in a crispy outside and a juicy inside, all while keeping the chicken lean.
How to Bake the Chicken:
- Preheat the Oven – Set your oven to 425°F (220°C). The high heat will allow the chicken to cook quickly and develop a crispy exterior.
- Prepare the Chicken – Coat the chicken in the same batter or breading you would use for frying. Be sure to press the breading gently onto the chicken to ensure a good, even coating. This will help it crisp up nicely when baked.
- Use a Wire Rack – For the best results, place the chicken on a wire rack set on a baking sheet. This allows air to circulate around the chicken and helps it crisp evenly on all sides. If you don’t have a wire rack, you can place the chicken directly on a baking sheet, but be sure to flip it halfway through cooking.
- Bake – Place the chicken in the oven and bake for 20-25 minutes, or until the chicken reaches an internal temperature of 165°F (74°C). Keep an eye on the chicken toward the end to ensure the coating doesn’t burn. The chicken should look golden and crispy when done.
- Optional – For an extra crispy finish, you can broil the chicken for an additional 2-3 minutes at the end of the cooking time. This step helps give the chicken an irresistible crunch.
Air Frying the Chicken
Air frying is a fantastic option for those who want crispy chicken without the added fat of deep frying. The air fryer uses hot circulating air to mimic the effect of frying, resulting in a crispy exterior and juicy interior. The best part? It requires only a small amount of oil, if any at all, making it a healthier alternative.
How to Air Fry the Chicken:
- Preheat the Air Fryer – Set your air fryer to 375°F (190°C) and preheat for about 3-5 minutes. This ensures that the chicken will cook evenly and quickly once it’s inside.
- Prepare the Chicken – Similar to baking, coat the chicken with your desired breading or batter. To keep it healthier, you can use just a light spray of cooking oil on the chicken and in the air fryer basket. This small amount of oil helps the chicken crisp up without soaking in excess oil.
- Arrange the Chicken in the Basket – Place the chicken in the air fryer basket in a single layer. Avoid overcrowding the basket so that the air can circulate properly around the chicken. If you’re cooking multiple pieces, you may need to do it in batches.
- Air Fry – Cook the chicken for about 10-12 minutes, flipping the pieces halfway through. The exact time may vary depending on the thickness of the chicken and the model of your air fryer. Check the internal temperature, which should reach 165°F (74°C).
- Finish and Serve – Once the chicken is golden brown and crispy, remove it from the air fryer. Allow it to rest for a couple of minutes before assembling the sandwich. The air fryer’s quick cooking method helps retain the juiciness of the chicken while giving it that perfect crunch.
Benefits of Baking or Air Frying
- Less Oil, Less Guilt – Both methods require less oil compared to traditional frying, which means you get a crispy result without the extra calories and fat.
- Healthier Option – Baking and air frying preserve the chicken’s flavor while reducing its calorie content. This makes it a great option for those who want a lighter, healthier version of the hot honey chicken sandwich.
- Convenience – Air frying, in particular, is known for its speed and ease. You can have a crispy chicken sandwich in under 20 minutes, perfect for a quick weeknight dinner.
- Consistent Results – Both methods provide reliable, consistent results every time, making it easier to perfect your sandwich without the worry of the chicken becoming greasy or soggy.
How to Adjust the Flavor
If you’re baking or air frying, you can still maintain that delicious crispy texture and flavorful breading. Here are a few tips to enhance the flavor while using these methods:
- Season the Breading – For extra flavor, season your breadcrumbs or batter with your favorite spices. Garlic powder, smoked paprika, or cayenne pepper can add a punch of flavor without needing to fry.
- Brush with Hot Honey Sauce – Just like the deep-fried version, you can drizzle the hot honey sauce over the baked or air-fried chicken for that signature sweet and spicy flavor. Make sure the chicken is still hot so the sauce glazes beautifully.
Which Method is Right for You?
- Baking is perfect if you prefer a more hands-off approach and want to make multiple sandwiches at once. It’s also ideal if you want to cook larger pieces of chicken, like bone-in breasts.
- Air frying is faster and provides an even crispier result, making it ideal for smaller portions or if you’re in a rush. It’s also great for those who want to keep the amount of oil used to a minimum.
Both methods are excellent alternatives to deep frying and still result in crispy, juicy chicken that’s perfect for your hot honey chicken sandwich. By choosing either baking or air frying, you can enjoy the same great flavor with a healthier twist!
Adding Extra Heat
If you’re someone who enjoys a little extra kick to your food, the hot honey chicken sandwich is the perfect dish to experiment with heat. While the signature hot honey sauce already balances the sweet and spicy flavors, there are several creative ways you can amp up the heat for a more fiery experience. From infusing more chili peppers into your sauce to layering spicy condiments on your sandwich, adding heat is all about finding the right balance that suits your taste. Let’s explore some of the best ways to boost the heat in your hot honey chicken sandwich.
Spicy Hot Honey Sauce
The simplest and most effective way to add more heat to your hot honey chicken sandwich is by adjusting the hot honey sauce itself. The beauty of this sauce is that it’s versatile, and you can easily customize the level of spiciness to your liking.
- Increase the Chili Flakes – To take the spice level up a notch, consider adding more red pepper flakes or even some crushed dried chilies. These will enhance the heat and give the sauce a deeper, more complex flavor.
- Use Fresh Hot Peppers – For an even bolder kick, incorporate finely chopped fresh jalapeños, serrano peppers, or even habaneros into the honey sauce. Fresh peppers can infuse the sauce with an intense, direct heat, which will increase its potency.
- Add Hot Sauce – If you prefer a more liquid heat rather than using solid peppers or flakes, a few dashes of your favorite hot sauce can work wonders. Sauces like Sriracha, Tabasco, or Cholula can elevate the heat without sacrificing the flavor of the honey. Just be cautious, as hot sauces vary in intensity, so start with a small amount and taste-test as you go.
- Smoked Chili Powder – If you enjoy a smoky flavor with your spice, consider adding a teaspoon of smoked paprika or chipotle powder to your hot honey sauce. These ingredients not only intensify the heat but also introduce a smoky depth that pairs perfectly with the crispy chicken.
Spicy Condiments for the Sandwich
Another great way to add heat to your hot honey chicken sandwich is by layering spicy condiments directly on the sandwich. These condiments complement the hot honey sauce while offering an additional dimension of flavor and heat.
- Spicy Mayo or Aioli – Combine mayonnaise with hot sauce or a chili paste, like harissa or sriracha, to create a creamy, spicy spread. This will smoothly contrast the crispy chicken while adding a rich layer of heat. The creaminess of the mayo helps balance out the spiciness, making the sandwich flavorful without overwhelming your taste buds.
- Pickled Jalapeños – For a zesty and crunchy addition, consider adding pickled jalapeños or other pickled hot peppers to your sandwich. These will bring an acidic kick that cuts through the sweetness of the honey sauce while adding a sharp, spicy bite.
- Spicy Mustard – If you like the tang of mustard but want to turn up the heat, spicy mustard varieties such as Dijon or English mustard can add a sharp, vinegary heat to your sandwich. Combine it with your hot honey sauce for a delightful mix of sweetness and acidity.
Heat from the Chicken Breading
Believe it or not, the breading on the fried chicken can also contribute to the heat of your sandwich. By incorporating spicy ingredients into the breading, you can ensure that the heat comes through in every bite.
- Spicy Seasonings in the Flour – When preparing the chicken, mix cayenne pepper, paprika, or chili powder into the flour used for coating. This will ensure the chicken is spicy from the inside out, giving a kick with every bite of crispy chicken. The breading not only adds texture but also intensifies the heat as it cooks.
- Hot Pepper Powder – You can also add a small amount of hot pepper powder, such as cayenne or ghost pepper, directly into the breading. Be cautious with these powders, as they can be extremely potent. A little goes a long way, so start with just a pinch to avoid overwhelming the flavors.
- Chili Oil for Frying – For a unique twist, try frying your chicken in a bit of chili oil. This can infuse the chicken with additional heat as it fries, giving it a subtle yet persistent spiciness that will carry through the whole sandwich. You can find chili oil at most grocery stores or easily make it at home by infusing oil with dried chilies.
Adding Extra Heat to the Overall Sandwich
In addition to customizing the sauce and breading, there are a few other strategies you can use to boost the overall heat of your sandwich without altering the core components.
- Layering Spicy Ingredients – For an extra fiery kick, consider layering spicy ingredients throughout the sandwich. For example, you can add fresh chilies under the crispy chicken or layered under the pickles for added heat. This ensures that every bite of the sandwich packs a punch.
- Infuse the Pickles – If you’re using pickles on your sandwich, try infusing them with heat. You can make your own spicy pickles by soaking them in a brine with chili flakes, hot pepper slices, and a bit of garlic. The spicy brine will infuse the pickles with heat, making each bite a flavorful, spicy experience.
- Serve with a Side of Heat – If you want to give your guests an option for customizing their own sandwich, you could serve a small side of extra hot sauce or sliced fresh chilies. This allows anyone who wants to dial up the heat to add more of their preferred spice level, making the sandwich more adaptable to different heat preferences.
How to Find the Right Balance
While adding extra heat is fun, it’s essential to maintain balance in the flavors. You don’t want the heat to overwhelm the sweet honey sauce or the crispy texture of the chicken. As you adjust the heat levels, remember that it’s easier to add more heat than to take it away, so always start small and taste-test as you go. The goal is to create a delicious balance between the sweetness of the honey and the kick of spice, ensuring that both flavors shine without either overpowering the other.
Incorporating heat into your hot honey chicken sandwich can elevate the flavors and add a thrilling element to each bite. Whether you prefer a mild heat or a more fiery sandwich, there are plenty of ways to adjust the spiciness to your preference.
Best Side Dishes to Serve With a Hot Honey Chicken Sandwich
When you’re serving a hot honey chicken sandwich, you’ll want to pair it with sides that complement the bold, spicy, and sweet flavors of the sandwich. The right side dishes can balance out the heat, enhance the flavors, and make the meal more satisfying. Whether you’re looking for something light, refreshing, or indulgent, there are plenty of delicious options to serve alongside your hot honey chicken sandwich. Let’s explore some of the best side dishes that perfectly pair with this flavorful sandwich.
1. Crispy Fries or Sweet Potato Fries
A classic side dish for any sandwich is crispy fries. Their golden, crunchy texture pairs beautifully with the juicy, crispy chicken in your sandwich. Regular fries offer a neutral, salty contrast to the sweetness of the hot honey sauce. Seasoned fries with a sprinkle of paprika, garlic powder, or cayenne pepper can even add an extra layer of flavor.
If you’re looking to mix things up, sweet potato fries are a great alternative. Their natural sweetness complements the honey in the sauce while their slight tang adds a nice contrast to the heat. Whether you bake or fry them, sweet potato fries will add a hearty yet slightly sweet element to the meal.
2. Coleslaw
Coleslaw is another fantastic side to serve with a hot honey chicken sandwich. The crunchy texture of the cabbage and the creamy dressing provide a nice contrast to the sandwich’s crispy fried chicken. The refreshing tang of the coleslaw helps cool down the heat of the sandwich while adding some crunch and freshness.
For an extra twist, you can make a spicy coleslaw by adding some finely chopped jalapeños or chili flakes to the slaw dressing. This will bring a touch of heat to balance the sweetness of the hot honey sauce. You can even swap the traditional mayo-based dressing with a vinegar-based dressing for a lighter, more tangy slaw.
3. Pickles or Pickled Vegetables
Since the hot honey chicken sandwich has a sweet and spicy flavor profile, a side of pickles or pickled vegetables can offer the perfect balance of acidity and crunch. Pickles cut through the richness of the fried chicken, providing a sharp contrast to the sweetness of the honey sauce. Dill pickles are a classic choice, but you could also experiment with bread-and-butter pickles, which have a slightly sweet and tangy taste.
Additionally, pickled vegetables like carrots, onions, or cucumbers can add extra texture and flavor to your meal. They are light, refreshing, and provide a unique acidity that complements the spicy elements of the sandwich. Consider making a simple quick pickle by soaking vegetables in a vinegar and sugar mixture for a few hours or overnight.
4. Mac and Cheese
If you’re craving something creamy and indulgent, mac and cheese is the perfect side dish to serve with your hot honey chicken sandwich. The rich, cheesy goodness of mac and cheese pairs wonderfully with the crispy chicken and hot honey sauce. It adds comfort and fullness to the meal while balancing the heat of the sandwich.
You can keep it classic with a creamy cheddar mac and cheese or add extra flavor by mixing in jalapeños, or a bit of smoked paprika for an additional smoky kick. If you prefer a lighter version, you could go for a baked mac and cheese made with less cheese or incorporate cauliflower for a lower-carb alternative.
5. Grilled Vegetables
For a healthier and more vibrant side dish, consider serving grilled vegetables with your hot honey chicken sandwich. Vegetables like zucchini, bell peppers, asparagus, and eggplant grill up nicely, bringing out their natural sweetness and smokiness.
Grilled vegetables not only add color and texture to your meal but also balance out the richness of the fried chicken. You can season them with olive oil, salt, and pepper, and add a sprinkle of herbs like thyme or rosemary for extra flavor. The smokiness of the grill complements the spicy heat of the sandwich and provides a delicious contrast to the sweetness of the honey sauce.
6. Corn on the Cob
Corn on the cob is a perfect summer side dish that pairs nicely with your hot honey chicken sandwich. The sweet, juicy kernels provide a refreshing contrast to the spicy heat of the sandwich. You can grill the corn for an extra layer of flavor, brushing it with a bit of butter and sprinkling it with chili powder or paprika for a smoky twist.
For a fun variation, you can make Mexican street corn (elote) by slathering the corn with mayo, lime, and a sprinkle of cotija cheese and chili powder. The tanginess from the lime and the creaminess of the mayo will complement the spiciness of the chicken while adding some zest.
7. Garlic Bread
If you want a comforting, indulgent side to serve with your hot honey chicken sandwich, garlic bread is a great option. The buttery, garlicky flavors of the bread pair well with the sweet and spicy elements of the sandwich. Whether you opt for classic garlic bread or garlic knots, the rich, savory taste will make each bite even more satisfying.
You can also experiment with a spicy garlic bread by adding chili flakes or jalapeño slices to the mix. This can provide an additional layer of heat that will complement the spiciness of the chicken and sauce.
8. Potato Salad
Another great side to serve with your hot honey chicken sandwich is potato salad. This dish brings a creamy, savory element that works well with the sweet and spicy flavor profile of the sandwich. You can prepare a classic potato salad with mayo, mustard, and pickles, or get creative by adding in hard-boiled eggs, herbs like dill and chives.
The creaminess of the potato salad contrasts nicely with the crispy texture of the chicken, and the acidity from the pickles in the salad enhances the flavor of the honey sauce. If you prefer a lighter version, try a vinaigrette-based potato salad instead of a mayo-based one for a fresh and tangy contrast.
9. Salad with Spicy Dressing
If you’re craving something light and fresh, a simple side salad with spicy dressing can be an excellent complement to your hot honey chicken sandwich. Use mixed greens, arugula, or spinach as your base and add sliced cucumbers, tomatoes, and red onions for a refreshing crunch.
Toss the salad with a spicy vinaigrette made from olive oil, apple cider vinegar, honey, and a touch of Sriracha or hot sauce for an added kick. The coolness of the salad will help cool down the heat of the sandwich while offering a satisfying contrast in textures.
Frequently Asked Questions (FAQs)
Can I Make Hot Honey Sauce Ahead of Time?
Making hot honey sauce in advance is a great way to save time while enhancing the flavor. When prepared ahead, the sweet and spicy flavors have time to meld, resulting in a richer taste. You can make the sauce and store it in the refrigerator for up to one to two weeks in an airtight container.
How to Store Hot Honey Sauce
Store the sauce in an airtight container in the refrigerator for up to one to two weeks. For longer storage, freeze it in ice cube trays or freezer-safe containers for up to three months.
Reheating Hot Honey Sauce
To reheat, simply warm the sauce on the stove over low heat. If it’s too thick, add a little water or vinegar to reach the desired consistency. For frozen sauce, thaw it overnight in the fridge or microwave in short intervals.
Adjusting the Flavor
If the sauce isn’t as sweet or spicy as you’d like after storing, it’s easy to adjust by reheating and adding more honey, hot sauce, or spices to achieve the perfect balance.
Making the sauce ahead of time allows you to enjoy this delicious blend of sweetness and heat with minimal effort when you’re ready to serve!
What’s the Best Way to Keep Fried Chicken Crispy?
Maintaining the crispy texture of fried chicken is key to a perfect hot honey chicken sandwich. Here are some effective strategies to ensure your fried chicken stays crispy, even after cooking.
1. Drain on a Wire Rack
After frying the chicken, place it on a wire rack rather than directly on paper towels. A wire rack allows air to circulate around the chicken, preventing moisture from building up and making the breading soggy. Make sure the rack is set over a baking sheet to catch any drips.
2. Avoid Overcrowding the Pan
When frying, don’t overcrowd the pan with chicken pieces. Too many pieces at once can lower the oil temperature, leading to soggy and unevenly fried chicken. Fry the chicken in batches to maintain the right frying temperature and achieve a crispy crust.
3. Use the Right Oil Temperature
Maintaining the right oil temperature is crucial. If the oil is too cool, the chicken will absorb too much oil and become greasy. If the oil is too hot, the breading might burn before the chicken is fully cooked. Aim for an oil temperature between 350°F and 375°F (175°C to 190°C). Use a thermometer to ensure accuracy.
4. Let Chicken Rest Briefly After Frying
After frying, let the chicken rest for a few minutes before serving. This brief resting period helps the breading to firm up, maintaining its crispiness. However, don’t let the chicken sit for too long, as the heat will start to soften the coating.
5. Keep the Chicken Warm in the Oven
If you need to keep fried chicken crispy for a longer time, place it in a warm oven. Preheat your oven to 200°F (93°C) and place the wire rack with the fried chicken inside. The low heat will keep the chicken warm without compromising its crispiness. Just be sure not to leave it for too long, or it may dry out.
6. Reheat Correctly
If you need to reheat fried chicken, use the oven or air fryer instead of the microwave. Microwaving chicken can cause the breading to become soggy. For the oven, reheat at 375°F (190°C) for about 10 minutes, and for the air fryer, heat at the same temperature for around 5-7 minutes for optimal crispiness.
By following these methods, you can ensure that your fried chicken stays crispy and delicious, adding that perfect texture to your hot honey chicken sandwich.
Can I Use Chicken Thighs Instead of Chicken Breasts?
Yes, you can absolutely use chicken thighs instead of chicken breasts in a hot honey chicken sandwich. Both cuts of chicken bring their unique benefits, and the choice between them ultimately depends on the flavor and texture you’re looking for.
Why Choose Chicken Thighs?
Chicken thighs are a popular choice for many sandwich recipes because of their rich, flavorful meat. Thighs contain more fat than breasts, which makes them juicier and more tender. This fat helps keep the meat moist during frying, resulting in a more succulent bite compared to chicken breasts, which can sometimes dry out if overcooked.
Texture and Flavor
Chicken thighs have a richer flavor and a slightly darker color due to the extra fat. They hold up well to the bold, spicy flavors of the hot honey sauce. The crispy skin on a fried chicken thigh can be even more satisfying than on chicken breasts, especially if you’re frying the chicken with the skin on.
Cooking Time and Considerations
One thing to keep in mind when using chicken thighs is that they may require slightly longer cooking times compared to chicken breasts, as the meat is thicker. However, because thighs have more fat, they are forgiving if cooked a bit longer, as they won’t dry out like chicken breasts might. To ensure even cooking, make sure to cook the thighs thoroughly until they reach an internal temperature of 165°F (74°C).
Skin-On or Skinless?
You can use either skin-on or skinless chicken thighs in your sandwich. Skin-on thighs provide an extra level of crispiness when fried, giving your hot honey chicken sandwich a delightful crunch. If you prefer a leaner option, you can opt for skinless thighs, which will still be juicy but with less fat.
How to Prepare Chicken Thighs
To prepare chicken thighs for frying, you’ll need to follow a similar process as you would with chicken breasts. Marinate the thighs for extra flavor, then coat them in seasoned flour before frying. If you’re cooking with the skin on, be sure to pat the skin dry to avoid excess moisture, which could cause the breading to become soggy.
Final Thoughts
Using chicken thighs in your hot honey chicken sandwich can result in a juicier and more flavorful sandwich overall. The additional fat ensures that the chicken stays tender while frying, and the rich, savory taste pairs perfectly with the sweet and spicy hot honey sauce. If you enjoy a more indulgent and moist chicken sandwich, chicken thighs are an excellent alternative to chicken breasts.
Conclusion
Making the perfect Hot Honey Chicken Sandwich at home is a straightforward yet rewarding process. By following these key steps, you can create a crispy, tender fried chicken, topped with the perfect balance of sweet and spicy hot honey sauce, all served on a soft bun with your favorite toppings.
Here’s a quick recap of the process:
- Marinate the chicken to infuse it with flavor.
- Coat and fry the chicken to achieve that golden, crispy texture.
- Make the hot honey sauce, balancing the sweetness and heat for the perfect finish.
- Assemble the sandwich with your choice of bun and toppings, making sure everything is fresh and flavorful.
This hot honey chicken sandwich is a treat for the taste buds, and it’s an ideal dish for any occasion. Whether you enjoy it for a family dinner, a casual lunch, or a party, it’s sure to impress.
We’d love to hear about your experience! Try the recipe, and don’t forget to leave a comment below sharing your thoughts, or share your creation on social media. Tag us to show off your delicious hot honey chicken sandwiches—let’s spread the love for this irresistible dish!