If you’re gluten free diet, finding the perfect hot dog bun can be tough. Traditional buns are made with wheat flour, which means they’re not an option. But don’t worry! You can make delicious, soft, and fluffy gluten-free hot dog buns at home.
Making these buns from scratch ensures they’re both gluten-free and full of flavor. Whether you’re hosting a BBQ or enjoying a quick meal, these buns will elevate your dish. In this guide, we’ll walk you through the ingredients, step-by-step instructions, and tips to make the best gluten-free buns. Let’s get started!
The Best Gluten Free Flour for Hot Dog Buns
What is Gluten-Free Flour?
Gluten-free flour is an essential ingredient for anyone avoiding gluten. Unlike traditional wheat flour, which contains gluten, gluten-free flour comes from a variety of grains, nuts, seeds, and starches. These flours are the foundation of many gluten-free recipes, including bread, cakes, cookies, and hot dog buns. Understanding gluten-free flour will help you achieve the best results when baking without gluten.
Types of Gluten-Free Flour
Many types of gluten-free flour exist, each with unique characteristics. Below are some of the most commonly used options:
- Rice Flour: Rice flour is one of the most popular gluten-free flours. It has a light, neutral flavor, making it a versatile choice for a wide range of baked goods.
- Almond Flour: Made from finely ground almonds, almond flour has a slightly sweet flavor and a denser texture. It is perfect for recipes that require moisture and richness.
- Tapioca Starch (or Tapioca Flour): Tapioca starch comes from the cassava root. It adds chewiness to baked goods, which helps gluten-free hot dog buns stay soft and fluffy.
- Sorghum Flour: Sorghum flour has a mild, slightly sweet flavor. It provides structure and is often combined with other gluten-free flours for better results.
- Chickpea Flour: Chickpea flour, made from ground chickpeas, has a distinct earthy flavor. It is great for savory baked goods and can also add a unique taste to various recipes.
Why Gluten-Free Flour is Essential in Gluten-Free Baking
Gluten-free flour lacks the elasticity that gluten provides in traditional wheat flour. Therefore, it’s essential to use a combination of gluten-free flours to achieve the right texture. For instance, mixing rice flour, sorghum flour, and tapioca starch helps replicate the structure that gluten typically offers. This is particularly important when making hot dog buns, as you want them to be soft yet sturdy.
Moreover, gluten-free baking often requires binding agents such as xanthan gum or guar gum. These ingredients mimic the elasticity of gluten and help hold the dough together. Without them, the dough may crumble, causing your baked goods to fall apart. So, make sure to add them to your recipe for the best texture.
Choosing the Right Gluten-Free Flour for Your Recipe
When selecting gluten-free flour, consider the recipe you are making. Different flours work better in certain dishes. For example, rice flour is perfect for light, airy cakes, while almond flour is better suited for dense, moist recipes like cookies. When it comes to making gluten-free hot dog buns, a blend of tapioca starch, sorghum flour, and rice flour is ideal. This combination creates the perfect balance of fluffiness and structure, giving your buns the right texture and hold.
Top Gluten-Free Flour Brands
Choosing the right gluten-free flour is key to achieving great results in your baking. Below are some of the best gluten-free flour brands that consistently deliver high-quality products.
1. Bob’s Red Mill
Bob’s Red Mill offers a Gluten-Free All-Purpose Baking Flour that is a popular choice among gluten-free bakers. Made with rice flour, potato starch, and tapioca flour, it creates light, fluffy baked goods.
- Why Choose Bob’s Red Mill?
Their products are certified gluten-free and processed in a dedicated gluten-free facility, ensuring no cross-contamination.
2. King Arthur Flour
King Arthur’s Gluten-Free All-Purpose Flour mimics the texture of traditional wheat flour. It provides excellent results in cakes, muffins, and other baked goods.
- Why Choose King Arthur Flour?
Known for their commitment to quality, King Arthur’s gluten-free flour consistently delivers soft, moist results.
3. Better Batter
Better Batter’s All-Purpose Gluten-Free Flour works well in a variety of recipes, from cakes to pizza dough. It’s versatile and provides excellent texture.
- Why Choose Better Batter?
Made from high-quality grains and starches, Better Batter ensures a reliable, gluten-free option for your baking needs.
4. Cup4Cup
Cup4Cup’s Gluten-Free All-Purpose Flour is ideal for replicating the texture of traditional flour, making it perfect for light cakes and pastries.
- Why Choose Cup4Cup?
It mimics wheat flour’s texture but contains dairy, making it unsuitable for dairy-free diets.
5. Pamela’s Products
Pamela’s Gluten-Free All-Purpose Flour is perfect for creating soft, fluffy baked goods with a slight chewiness. It works well for a variety of recipes.
- Why Choose Pamela’s?
Pamela’s has built a strong reputation for offering reliable gluten-free products.
6. Anthony’s Goods
Anthony’s Gluten-Free All-Purpose Flour is a great option for soft, tender baked goods. It’s organic and non-GMO.
Why Choose Anthony’s Goods?
Anthony’s focuses on organic, non-GMO ingredients, making it a great choice for health-conscious bakers.
Choosing the Right Blend for Soft, Fluffy Buns
When making gluten-free hot dog buns, one of the most important factors is choosing the right flour blend. Without the elasticity and structure that gluten provides, it’s crucial to use the correct combination of gluten-free flours and starches to achieve the perfect texture. The goal is to create buns that are soft, fluffy, and capable of holding up to your favorite fillings without falling apart. Below, we’ll explore the best flour combinations and additional tips to get that ideal bun texture.
Essential Gluten-Free Flours for Soft Buns
To create soft, fluffy buns, you need to use a combination of gluten-free flours that mimic the texture and structure of traditional wheat flour. Here are the key types of flour to include in your blend:
- Rice Flour: Rice flour is a staple in gluten-free baking due to its light and neutral flavor. It is a great base flour for buns and helps provide a soft crumb. However, on its own, it may not offer enough structure, so it’s best used in combination with other flours.
- Sorghum Flour: Sorghum flour adds body to your buns while providing a slightly sweet flavor. It is an excellent choice to help create a sturdy structure without making the dough too dense. It also adds a slightly chewy texture, which is ideal for buns.
- Tapioca Starch (or Flour): Tapioca starch plays a key role in creating that soft and airy texture you’re aiming for. It helps to bind the dough together while also contributing to the fluffiness of the buns. Moreover, tapioca starch creates a chewy, elastic quality that is essential for gluten-free baking.
Binding Agents for the Right Texture
In addition to your choice of flours, binding agents like xanthan gum or guar gum are necessary to provide structure to gluten-free dough. These ingredients act as a replacement for the gluten found in traditional wheat flour. Without them, your buns may be too crumbly or fall apart easily. Here’s why they matter:
- Xanthan Gum: This is one of the most commonly used binding agents in gluten-free baking. It helps the dough retain moisture, and it also gives the buns a chewy, cohesive texture. Use about 1 teaspoon of xanthan gum per cup of gluten-free flour for optimal results.
- Guar Gum: Guar gum is another option to replace gluten’s elasticity. It works similarly to xanthan gum but may provide a slightly softer texture. Both gums are essential to ensure your dough holds together properly while baking.
Balancing Flours and Starches
The right ratio of flours and starches will ensure that your gluten-free hot dog buns are soft and fluffy. A typical blend might include around 40-50% starches (like tapioca starch or potato starch) and 50-60% gluten-free flours (like rice flour, sorghum flour, or almond flour). The starches will provide lightness and moisture, while the flours will contribute structure and flavor.
Adjusting the Blend for Different Results
Depending on your preferences, you can adjust the flour blend to suit the desired texture. If you prefer denser buns, increase the amount of almond flour or sorghum flour in the blend. For a lighter texture, try using more rice flour and tapioca starch. Remember, experimenting with different ratios can help you find the perfect blend that meets your needs for softness and fluffiness.
Essential Ingredients for Perfect Gluten Free Hot Dog Buns
Yeast and How It Helps the Dough Rise for Perfect Gluten Free Hot Dog Buns
Yeast is an essential ingredient in baking, especially when making gluten-free hot dog buns. It serves as the leavening agent, which means it helps the dough rise and become airy. Understanding how yeast works will help you achieve the perfect texture in your buns. Below, we’ll discuss the role of yeast, how to activate it properly, and tips for using yeast in gluten-free baking.
What Is Yeast and How Does It Work?
Yeast is a microorganism that ferments sugars in the dough. This fermentation process produces carbon dioxide, which causes the dough to rise. When you mix yeast with flour and other ingredients, it creates air bubbles that expand as the dough rises. These air bubbles make the dough light and fluffy, providing that desirable soft texture in gluten-free buns.
In gluten-free baking, yeast works in the same way as it does in traditional baking. However, the lack of gluten in the dough can make it trickier to achieve the same rise. Therefore, yeast needs the right conditions to thrive in gluten-free dough.
How to Activate Yeast for Maximum Rise
For yeast to work effectively, you need to activate it properly. Here’s how to do it:
- Proofing Yeast: Proofing is the process of activating dry yeast by dissolving it in warm water with a bit of sugar. This creates an environment where the yeast can begin to feed and grow. To proof yeast, add it to warm water (about 100–110°F or 37–43°C) along with a pinch of sugar. Wait for about 5–10 minutes until it becomes frothy and bubbly. If the mixture doesn’t foam, the yeast might be old or the water might have been too hot, killing the yeast. In this case, start with fresh yeast.
- Activating Fresh Yeast: If you’re using fresh yeast instead of dry yeast, you’ll need to crumble it into warm water just as you would with dry yeast. This activates the yeast and prepares it for the fermentation process. Fresh yeast usually doesn’t require proofing, but activating it ensures better results.
The Importance of Yeast in Gluten-Free Dough
In gluten-free baking, yeast becomes even more crucial. Since there is no gluten to provide the dough with its structure and elasticity, yeast plays a larger role in ensuring the dough rises properly. The gas produced by yeast helps the dough hold its shape and gives it a light, airy texture.
Without the proper amount of yeast or the right activation process, gluten-free dough can turn out dense and heavy. Additionally, the absence of gluten means that the dough lacks the natural “stretch” that helps it rise evenly. This is why it’s important to use the correct amount of yeast and to activate it properly before adding it to your dough.
How Much Yeast Should You Use?
When making gluten-free hot dog buns, the amount of yeast you use is important for the dough’s rise. Typically, you’ll need about 1 tablespoon of active dry yeast for every 3 cups of gluten-free flour. However, some recipes may call for more or less, depending on the desired rise and texture.
Keep in mind that yeast is sensitive to temperature. If the dough is too cold, the yeast will not be able to work effectively. Conversely, if the dough gets too hot, the yeast may die off. This makes controlling the dough’s temperature a crucial factor in achieving perfect, soft buns.
Troubleshooting Yeast Issues in Gluten-Free Baking
Sometimes, yeast doesn’t work as expected, leading to dense or flat buns. Here are a few potential problems and how to solve them:
- Yeast Doesn’t Foam: This could be due to expired yeast or water that was too hot or too cold. Always make sure to proof the yeast first to check if it’s still active.
- Dough Doesn’t Rise: If your dough doesn’t rise after the first proofing period, it may need a warmer environment. Place the dough in a warm spot, such as an oven with the light on, to encourage the yeast to grow. If the dough still doesn’t rise, you may need to add a bit more yeast and give it more time.
- Dough Becomes Too Sticky or Too Dry: The right balance of flour and liquid is essential in gluten-free baking. Too much liquid can create a sticky dough, while too little can result in a dry, crumbly dough. Experimenting with different flour blends can help you achieve the perfect dough consistency.
The Role of Xanthan Gum in Binding for Perfect Gluten Free Hot Dog Buns
Xanthan gum plays a vital role in gluten-free baking. Since gluten is absent in gluten-free flours, xanthan gum is used to mimic the binding and structure-building properties that gluten typically provides. This allows your gluten-free hot dog buns to hold together properly, resulting in a soft yet sturdy texture. Let’s take a closer look at how xanthan gum works in binding, why it’s essential, and how to use it effectively in your recipe.
What Is Xanthan Gum?
Xanthan gum is a natural polysaccharide that is produced through fermentation. The process involves fermenting sugar with a bacteria called Xanthomonas campestris. The resulting substance is a thickening and binding agent commonly used in gluten-free baking. Xanthan gum has the unique ability to mimic the properties of gluten, making it indispensable in gluten-free recipes.
In addition to its ability to bind ingredients together, xanthan gum can help retain moisture in gluten-free baked goods, preventing them from becoming dry or crumbly. This is particularly important in gluten-free buns, which are more prone to falling apart than their gluten-containing counterparts.
How Xanthan Gum Helps Gluten-Free Dough
Without gluten, gluten-free dough tends to lack elasticity and structure. Xanthan gum steps in to fill this gap by providing the dough with cohesion, which helps it retain its shape during baking. Here’s how it works:
- Moisture Retention: Xanthan gum is hygroscopic, meaning it attracts and retains moisture. This property is crucial for keeping gluten-free dough moist and preventing it from drying out, which could lead to crumbly, fragile buns.
- Elasticity and Stretch: When mixed into dough, xanthan gum helps create the stretchiness that gluten would normally provide. Although it doesn’t replicate gluten perfectly, it comes close by giving the dough the necessary elasticity for a soft, chewy texture.
- Improved Texture: Without xanthan gum, gluten-free dough can often turn out dense and crumbly. The addition of xanthan gum enhances the texture by making the dough more pliable and smooth, allowing for a more uniform rise and a better crumb structure.
How Much Xanthan Gum Should You Use?
The right amount of xanthan gum in your recipe is essential for the dough’s success. Using too little xanthan gum may result in a dough that is too soft and falls apart, while too much can make the dough too thick and gummy.
As a general rule, use 1/2 teaspoon of xanthan gum per cup of gluten-free flour for most baking recipes. For gluten-free buns, this amount should be sufficient to provide the necessary structure and elasticity. However, some recipes may call for slightly more or less depending on the specific flour blend used. Always follow the measurements in the recipe for the best results.
Tips for Using Xanthan Gum in Gluten-Free Baking
To achieve the best results with xanthan gum in your gluten-free hot dog buns, consider these helpful tips:
- Mix Evenly: Xanthan gum should be evenly distributed throughout the dry ingredients before adding any liquids. This helps ensure that the gum binds all the ingredients properly and prevents any clumps from forming in the dough.
- Combine with Other Gums or Binders: In some recipes, you may find that using xanthan gum in combination with other binding agents like guar gum or psyllium husk can improve the dough’s texture even further. These additional binders can provide a softer, more flexible dough that’s easier to handle.
- Adjust Based on Flour Blend: Depending on your gluten-free flour blend, you may need to adjust the amount of xanthan gum used. For example, flour blends that are naturally stickier or more absorbent may require less xanthan gum. On the other hand, drier flours may need slightly more to ensure proper binding.
Potential Substitutes for Xanthan Gum
While xanthan gum is a common ingredient in gluten-free baking, it’s not the only option. Some people may prefer alternatives due to allergies, availability, or personal preferences. Here are a few substitutes you can try:
- Guar Gum: Guar gum is a popular substitute for xanthan gum. It’s derived from the guar bean and works similarly by improving the texture and moisture retention in gluten-free dough. If using guar gum, you may need to adjust the amount, as it tends to be slightly more potent than xanthan gum. Use 1/2 to 1 teaspoon per cup of flour.
- Psyllium Husk: Psyllium husk is another natural binder that can replace xanthan gum. It helps absorb moisture and provides structure, which is essential for gluten-free buns. It’s often used in combination with other gums for a more flexible texture. Use 1 to 2 teaspoons of psyllium husk per cup of flour.
- Chia or Flaxseed Meal: While these options are not direct substitutes for xanthan gum, they can act as binding agents in some gluten-free recipes. They work by absorbing moisture and creating a gel-like texture. If using chia or flaxseed meal, substitute 1 tablespoon per cup of flour for a mild binding effect.
Other Key Ingredients: Apple Cider Vinegar & Sweeteners
When making gluten-free hot dog buns, every ingredient plays a critical role in achieving the perfect texture, flavor, and structure. Two often overlooked ingredients are apple cider vinegar and sweeteners. These ingredients not only enhance the overall taste of your buns but also contribute to the dough’s rise, moisture retention, and texture. Let’s explore the roles of apple cider vinegar and sweeteners in gluten-free baking and how to use them effectively.
Apple Cider Vinegar: The Secret Ingredient for Tender Buns
Apple cider vinegar is a versatile ingredient that serves multiple purposes in gluten-free baking. Its primary role is to help balance the pH of the dough, which in turn improves the texture of the buns. Here’s how apple cider vinegar works:
- Improving Dough Structure: The acidity in apple cider vinegar can enhance the elasticity of gluten-free dough, helping it rise more effectively. It reacts with baking soda or baking powder, creating carbon dioxide bubbles that help lift the dough and make it airy. Without this acid, gluten-free dough can often end up dense or too heavy.
- Tenderizing the Dough: Apple cider vinegar can also help soften the dough, making the buns more tender and less prone to becoming dry or crumbly. This is particularly important in gluten-free baking, where maintaining moisture is crucial to creating a soft texture.
- Flavor Balance: While apple cider vinegar is acidic, its flavor is mild and not overpowering. It adds a subtle tang that helps balance the richness of other ingredients, ensuring the buns aren’t too sweet or bland. The acidity also helps in neutralizing any bitterness from certain gluten-free flours, like rice flour or sorghum flour.
When using apple cider vinegar in your recipe, typically, 1 tablespoon is sufficient for every 2 cups of gluten-free flour. This amount will provide the necessary lift and tenderness without impacting the flavor of the buns.
Sweeteners: Adding Flavor and Enhancing Texture
Sweeteners are another key ingredient in gluten-free hot dog buns. While you may not think of sweeteners as essential in savory recipes like buns, they play an important role in both flavor and texture. In gluten-free baking, sweeteners can help improve the dough’s moisture, promote browning, and enhance flavor. Here’s a closer look at the role of sweeteners in gluten-free baking:
- Enhancing the Dough’s Moisture: Sweeteners like honey, maple syrup, or coconut sugar not only add sweetness but also retain moisture, which is vital for gluten-free buns. They help the dough stay hydrated, preventing it from drying out or becoming too crumbly. As a result, the buns will have a soft and moist texture, ideal for holding hot dogs.
- Promoting Browning: In gluten-free baking, achieving a golden-brown color can be challenging because gluten-free dough doesn’t brown in the same way as wheat-based dough. Sweeteners like honey or maple syrup help encourage caramelization and browning during baking. This results in buns with a crisp, golden crust that’s visually appealing.
- Balancing Flavor: Even though gluten-free buns are typically savory, a touch of sweetness can help balance the flavors and enhance the overall taste. Honey or maple syrup add natural sweetness without overpowering the dough, while coconut sugar offers a deeper, molasses-like flavor. The right amount of sweetener creates a more complex and well-rounded flavor profile.
Choosing the Right Sweeteners for Gluten-Free Hot Dog Buns
While there are various types of sweeteners available, it’s important to choose the right one for your gluten-free hot dog buns. Here are some popular options:
- Honey: Honey is a natural sweetener that works well in gluten-free baking. It adds a mild sweetness and helps retain moisture, giving your buns a tender texture. Use 1-2 tablespoons per batch for a balanced sweetness. Keep in mind that honey is also hygroscopic, meaning it draws moisture from the air, so it helps keep your buns fresh longer.
- Maple Syrup: Maple syrup is another excellent option, adding sweetness along with a rich flavor. It also helps with browning, giving the buns a beautiful golden color. Use 1 tablespoon per batch for subtle sweetness. Maple syrup has a lower glycemic index than honey, making it a popular choice for those looking for a healthier alternative.
- Coconut Sugar: If you prefer a more complex, caramel-like flavor, coconut sugar is an ideal choice. It’s less sweet than regular sugar and has a slight molasses flavor that pairs well with savory buns. Use 1-2 tablespoons per batch for a hint of sweetness without overpowering the taste. Coconut sugar also contains trace amounts of minerals like iron and zinc, adding a nutritional boost.
- Stevia or Monk Fruit: For a sugar-free option, you can use stevia or monk fruit sweeteners. These are excellent for those following a low-carb or keto diet. However, keep in mind that these sweeteners are much sweeter than traditional sugar, so use them sparingly—typically just 1 teaspoon for every tablespoon of sugar.
Tips for Using Apple Cider Vinegar and Sweeteners in Your Gluten-Free Hot Dog Buns
To make sure these ingredients work effectively in your buns, here are some helpful tips:
- Don’t Overuse Apple Cider Vinegar: While apple cider vinegar is beneficial for the dough, too much can cause a sour taste. Stick to the recommended amount to avoid overpowering the flavor.
- Use Liquid Sweeteners Sparingly: If you’re using liquid sweeteners like honey or maple syrup, reduce the other liquids in the recipe slightly to maintain the right dough consistency. This ensures the dough doesn’t become too runny.
- Experiment with Blends: Try using a combination of sweeteners for a more complex flavor. For instance, mixing honey and coconut sugar can give the buns both sweetness and depth of flavor.
Step-by-Step Guide to Making Gluten Free Hot Dog Buns
Step 1: Prepare Your Dough for Gluten Free Hot Dog Buns
The first step in making perfect gluten-free hot dog buns is preparing the dough. This is a crucial stage that sets the foundation for the texture and rise of your buns. You’ll need to ensure that your dough has the right consistency and hydration to achieve the soft and fluffy buns you desire. In this section, we will walk you through the process, from mixing the ingredients to kneading the dough, with helpful tips to avoid common mistakes.
1. Gather Your Ingredients
Before you start, make sure you have all your ingredients ready and measured out. Having everything prepared in advance ensures a smoother process and helps you avoid mistakes. Here’s a quick rundown of the key ingredients you’ll need to make gluten-free hot dog bun dough:
- Gluten-free flour blend (Make sure you choose one with a good combination of flours like rice, potato, and tapioca.)
- Yeast (Active dry yeast or instant yeast will work perfectly for this recipe.)
- Water (Warm water activates the yeast, so make sure it’s not too hot or cold.)
- Apple cider vinegar (This helps with the dough’s rise and texture.)
- Sweeteners (Honey, maple syrup, or coconut sugar can be used.)
- Salt (This enhances the flavor and helps balance the dough.)
- Xanthan gum (A key ingredient to provide structure and prevent crumbliness.)
Ensure that the yeast you’re using is fresh. Expired yeast will not activate and will leave your buns flat and dense.
2. Activate the Yeast
The yeast is essential for making your buns rise. To ensure that the yeast activates properly, warm the water to about 110°F (43°C). If the water is too hot, it can kill the yeast; if it’s too cold, the yeast won’t activate. Add the sweetener (honey or maple syrup) to the water to help the yeast grow. Stir the mixture and let it sit for about 5-10 minutes until it becomes frothy. If the mixture doesn’t froth, your yeast may be old or the water temperature might have been incorrect.
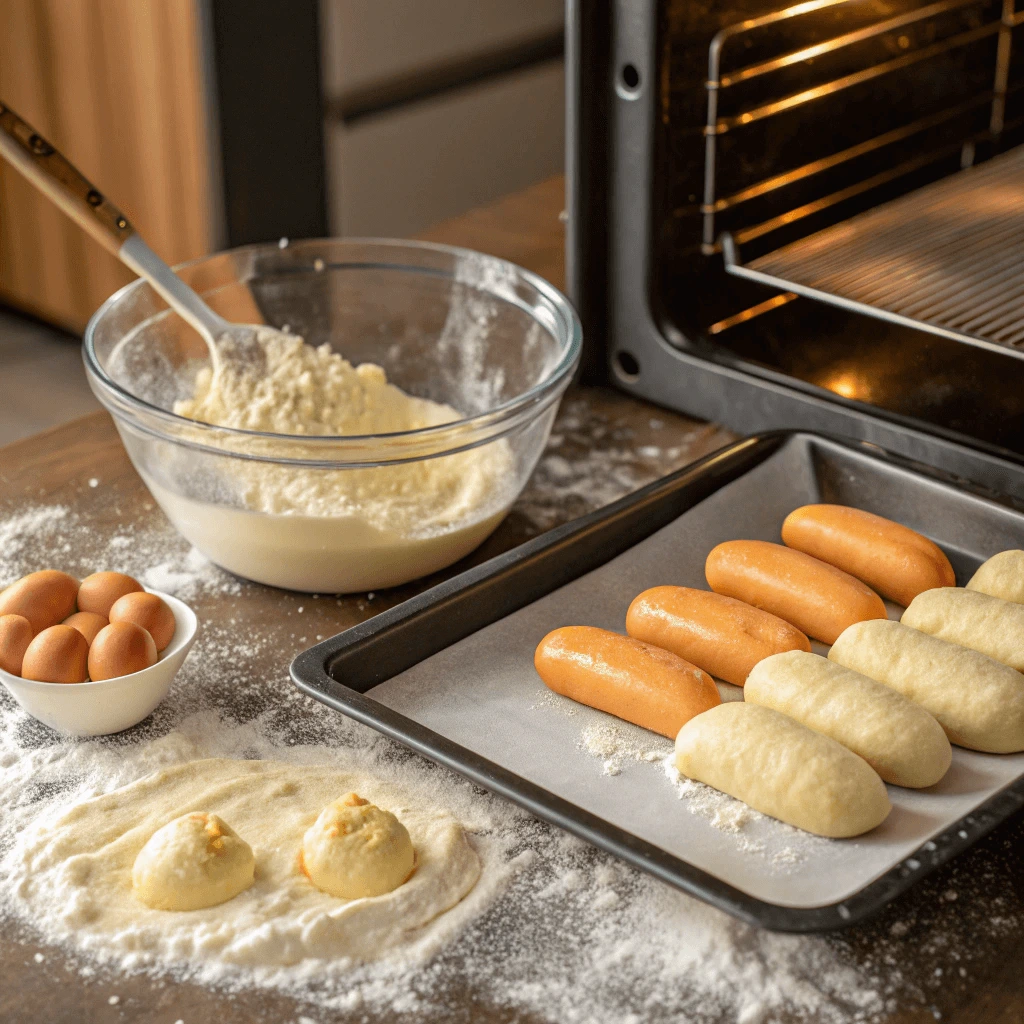
3. Mix the Dry Ingredients
While the yeast is activating, mix all your dry ingredients in a separate bowl. This includes the gluten-free flour blend, salt, and xanthan gum. Mixing the dry ingredients thoroughly helps distribute the xanthan gum evenly, which is essential for creating a good dough structure. The xanthan gum acts as a binder, helping the dough hold together and giving the buns their chewy, soft texture.
4. Combine Wet and Dry Ingredients
Once the yeast mixture is frothy, pour it into the dry ingredients. Add the apple cider vinegar at this stage as well, as it helps activate the yeast further and contributes to the dough’s lightness. Using a stand mixer with a dough hook or a hand mixer, start combining the wet and dry ingredients. The dough should be thick and sticky, similar to a batter more than a typical bread dough.
If the dough feels too dry, add a tablespoon of water at a time until you reach the right consistency. On the other hand, if the dough feels too runny, sprinkle in a little extra gluten-free flour until it thickens up. Gluten-free dough is often wetter than wheat-based dough, so it’s normal for it to be a bit sticky. Avoid over-mixing, as it can lead to a tough texture.
5. Let the Dough Rest
After mixing, cover the bowl with a clean kitchen towel or plastic wrap and let the dough rest for 10-15 minutes. This resting period allows the flour to hydrate fully and gives the yeast a chance to start working. During this time, the dough will become a little smoother and easier to handle.
6. Knead the Dough
Kneading gluten-free dough differs from traditional dough. Since there’s no gluten to develop, you won’t need to knead the dough for as long as you would with wheat-based dough. However, you still need to give it a quick knead to ensure it’s smooth and well-combined. If you’re using a stand mixer, knead on low speed for 3-5 minutes. If you’re kneading by hand, use a light touch and gently fold the dough over itself until it becomes cohesive and smooth.
If your hands are sticking to the dough, lightly oil them or dust them with gluten-free flour. Be sure not to overwork the dough, as this can make it dense and tough. The goal is just to ensure that all ingredients are fully incorporated and that the dough has a smooth texture.
7. Shape the Dough
Once your dough is well mixed and slightly rested, it’s time to shape it into buns. Since gluten-free dough doesn’t have the elasticity that traditional dough has, it may be harder to shape. To avoid frustration, lightly grease your hands and divide the dough into equal portions. Roll each portion into a cylinder or oval shape, similar to the shape of a hot dog bun. Don’t worry if they’re not perfectly uniform—gluten-free dough can be a little more challenging to handle, but that’s okay.
8. Second Rise (Optional)
For softer buns, you can let the shaped dough rise for another 20-30 minutes. This optional second rise gives the yeast more time to work, resulting in a fluffier, airier texture. However, if you’re in a rush, you can skip this step and proceed directly to baking. The dough will still rise in the oven but may not be as light and fluffy.
Step 2: Proofing the Dough
Proofing the dough is an essential step in making perfect gluten-free hot dog buns. It’s during this process that the yeast works to produce gas, allowing the dough to rise and develop the soft, airy texture you desire in your buns. Understanding the proofing process is crucial to achieving a light, fluffy result, as improper proofing can lead to dense and heavy buns. Let’s dive into the key aspects of proofing gluten-free dough.
1. What Is Proofing?
Proofing is the process of allowing dough to rest after mixing. During this time, the yeast ferments the dough, producing carbon dioxide gas that makes the dough rise. For gluten-free dough, proofing is especially important because it helps the dough develop structure and texture, since it lacks the gluten network that gives wheat dough its elasticity.
When proofing, the yeast ferments the sugars in the dough, creating air pockets that contribute to the fluffy texture of the buns. The warmth of the environment also helps to activate the yeast, encouraging a good rise. However, the process of proofing must be done correctly to avoid overproofing or underproofing, both of which can negatively affect your buns.
2. How Long Should You Proof the Dough?
For most gluten-free hot dog bun recipes, the dough should be proofed for about 1 hour. However, the exact time may vary depending on the temperature of your kitchen and the specific ingredients used. The dough should double in size during this period. If you’re working in a cooler environment, proofing may take a little longer, while in a warmer kitchen, it might happen more quickly.
3. Finding the Right Temperature for Proofing
The ideal temperature for proofing dough is around 75-85°F (24-29°C). This temperature range allows the yeast to be active without being too hot. If the temperature is too high, it could kill the yeast, while too low of a temperature will cause the yeast to be sluggish and ineffective.
If you don’t have a warm kitchen, you can create a proofing environment by placing your bowl of dough in an oven with the light on. The heat from the light creates a slightly warmer atmosphere without being too hot. Alternatively, you can place the dough in a warm area of your house, like near a radiator or under a warm towel.
4. Covering the Dough During Proofing
To prevent the dough from drying out during the proofing process, it’s essential to cover it. You can use a clean kitchen towel, plastic wrap, or a damp cloth to cover the bowl. This will help trap moisture and keep the dough from forming a dry skin on top.
Avoid using tight covers that might restrict the dough’s ability to expand. A loose cover allows the dough to breathe while still protecting it from drying out.
5. How to Check if the Dough Is Ready
After proofing, it’s important to check whether your dough is ready to be shaped. The dough should have doubled in size, and you should be able to gently press your finger into the dough, leaving a small indentation. If the dough springs back quickly, it needs more time to proof. If it holds the indentation, it’s ready for the next step.
One important thing to note is that gluten-free dough may not rise as dramatically as wheat-based dough. This doesn’t mean the yeast isn’t working—it simply means that the lack of gluten limits the dough’s ability to stretch and rise. However, with the right conditions and proofing time, you’ll still achieve a light and fluffy texture.
6. What Happens If You Overproof the Dough?
Overproofing occurs when dough is left to rise for too long. This can result in a dough that is overly airy and weak. The yeast consumes all the sugars too quickly, causing the dough to collapse when baked. The result will be buns that are flat and dense, with an undesirable texture.
If you notice that the dough is rising too quickly or has overproofed, you can gently punch it down and let it rise again for a shorter period of time. This can help redistribute the yeast and gases, giving the dough a second chance to rise properly.
7. What Happens If You Underproof the Dough?
Underproofing happens when the dough has not had enough time to rise. This can lead to buns that are dense and heavy. The yeast has not had enough time to work, and the dough has not developed the necessary air pockets.
If you find that your dough hasn’t risen as much as expected, you can let it proof for a little longer. Just be sure not to let it proof too long, as overproofing can occur if left unattended for too long.
Step 3: Shaping and Baking
Once your gluten-free dough has proofed and doubled in size, it’s time to shape it into the perfect hot dog buns and get them into the oven. Shaping the dough correctly is essential for achieving a consistent and appealing bun shape. Once shaped, the baking process will bring the dough to life, creating a beautifully golden crust and a soft, fluffy interior. Let’s break down the key steps involved in shaping and baking your gluten-free hot dog buns.
1. Shaping the Dough for Hot Dog Buns
Shaping gluten-free dough can feel different from working with traditional wheat dough due to its delicate texture. Because gluten-free dough lacks the elasticity provided by gluten, it’s often softer and stickier. However, with a little care, you can shape it into perfectly sized buns for your hot dogs.
- Divide the Dough: Start by dividing the dough into equal portions based on the size of the buns you want. For standard-sized hot dog buns, divide the dough into 6 to 8 portions. Each portion should be around the size of a golf ball.
- Shape the Buns: Wet your hands slightly to prevent the dough from sticking as you roll it. Gently roll each portion into a log shape. The length should match the size of your hot dog sausages. Try to make the logs as even as possible so they bake uniformly. You can also gently flatten each log to achieve a more traditional bun shape if desired.
- Arrange the Buns on a Baking Tray: Place the shaped dough logs onto a parchment-lined baking sheet, spacing them out evenly. Leave enough room for the buns to expand slightly as they bake. Optionally, you can brush a little olive oil or melted butter on the tops of the buns for added shine and a golden finish.
2. Second Proofing: Giving the Buns Time to Rise
Before you bake your buns, it’s essential to let them undergo a second proofing. This allows the dough to rise a bit more, ensuring they become fluffy and light once baked. Here’s how to do it:
- Cover and Let Rise: After shaping the dough, loosely cover the buns with a clean kitchen towel or plastic wrap. Allow them to rise for an additional 30 minutes to 1 hour, depending on the temperature in your kitchen. The dough should puff up and fill in the gaps between the buns.
- Avoid Overproofing: Be mindful not to let the dough rise for too long during the second proofing. Overproofing can cause the dough to collapse during baking, leading to flatter, denser buns. Aim for a light, airy rise without the dough becoming too puffy.
3. Preheating the Oven: Creating the Perfect Baking Environment
While the buns are proofing, it’s a good idea to preheat your oven so it’s ready when your buns are. Preheating ensures the dough starts baking immediately when placed inside, which helps form a nice, even rise.
- Set the Temperature: Preheat your oven to 375°F (190°C). This temperature is ideal for baking gluten-free buns, providing enough heat to cook them through while giving them a crisp, golden exterior.
- Use a Baking Stone or Sheet: If you have a baking stone, you can use it for more even heat distribution. Otherwise, a standard baking sheet will work just fine. Just make sure to line it with parchment paper to prevent the buns from sticking.
4. Baking the Buns to Golden Perfection
Now that your buns have risen and the oven is preheated, it’s time to bake. The baking process is where the dough transforms into the soft, golden buns you’re aiming for.
- Place the Buns in the Oven: Carefully place the tray of buns into the preheated oven. Be sure to position the tray in the center of the oven for even baking.
- Bake for 20-25 Minutes: Bake the buns for about 20 to 25 minutes, checking halfway through to ensure they’re baking evenly. You’ll know they’re done when they are golden brown on top and sound hollow when tapped lightly on the bottom.
- Optional: Add a Final Touch: For a shiny finish, you can brush the tops of the buns with a little melted butter or olive oil right before the final few minutes of baking.
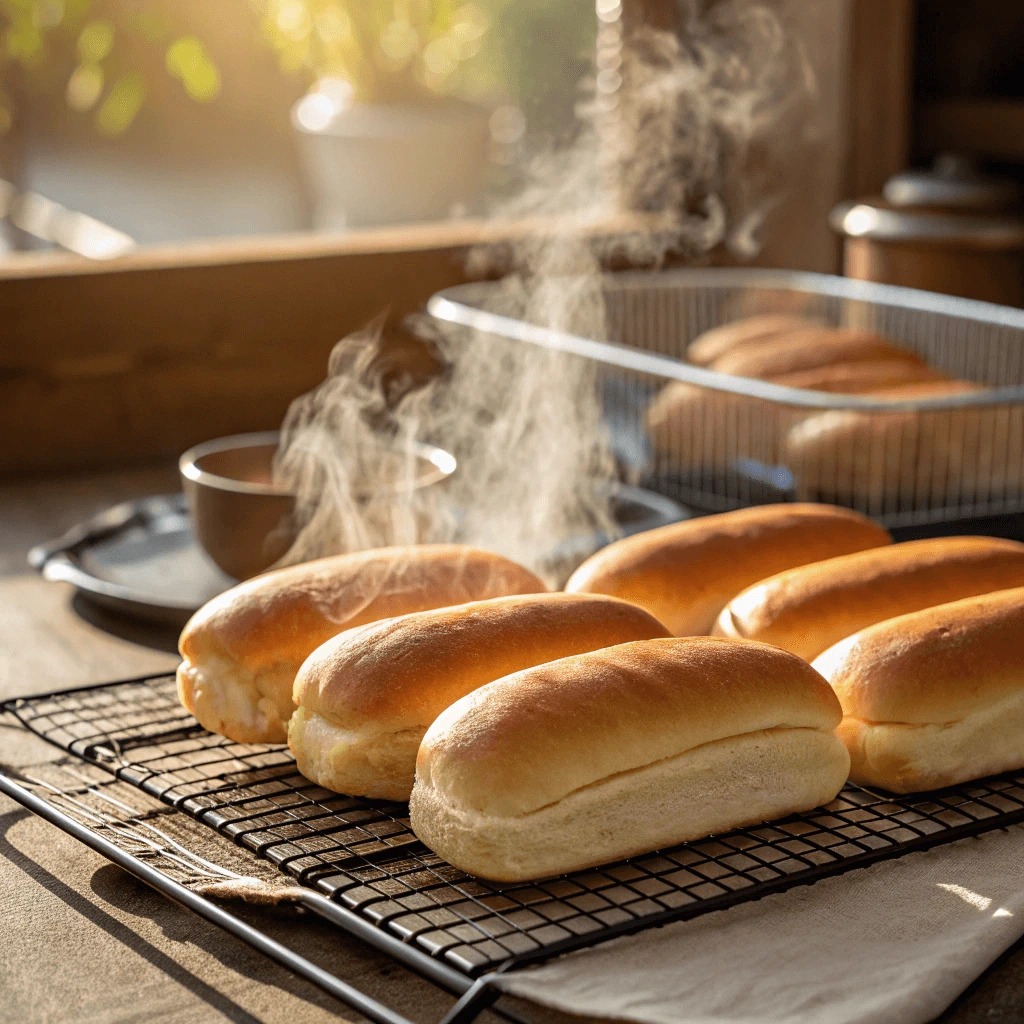
5. Cooling the Buns
Once your gluten-free hot dog buns are baked to a perfect golden brown, take them out of the oven.
- Cool on a Rack: Transfer the buns to a wire cooling rack to cool slightly before slicing. This will help them maintain their shape and prevent them from becoming soggy. Let them cool for at least 15 to 20 minutes.
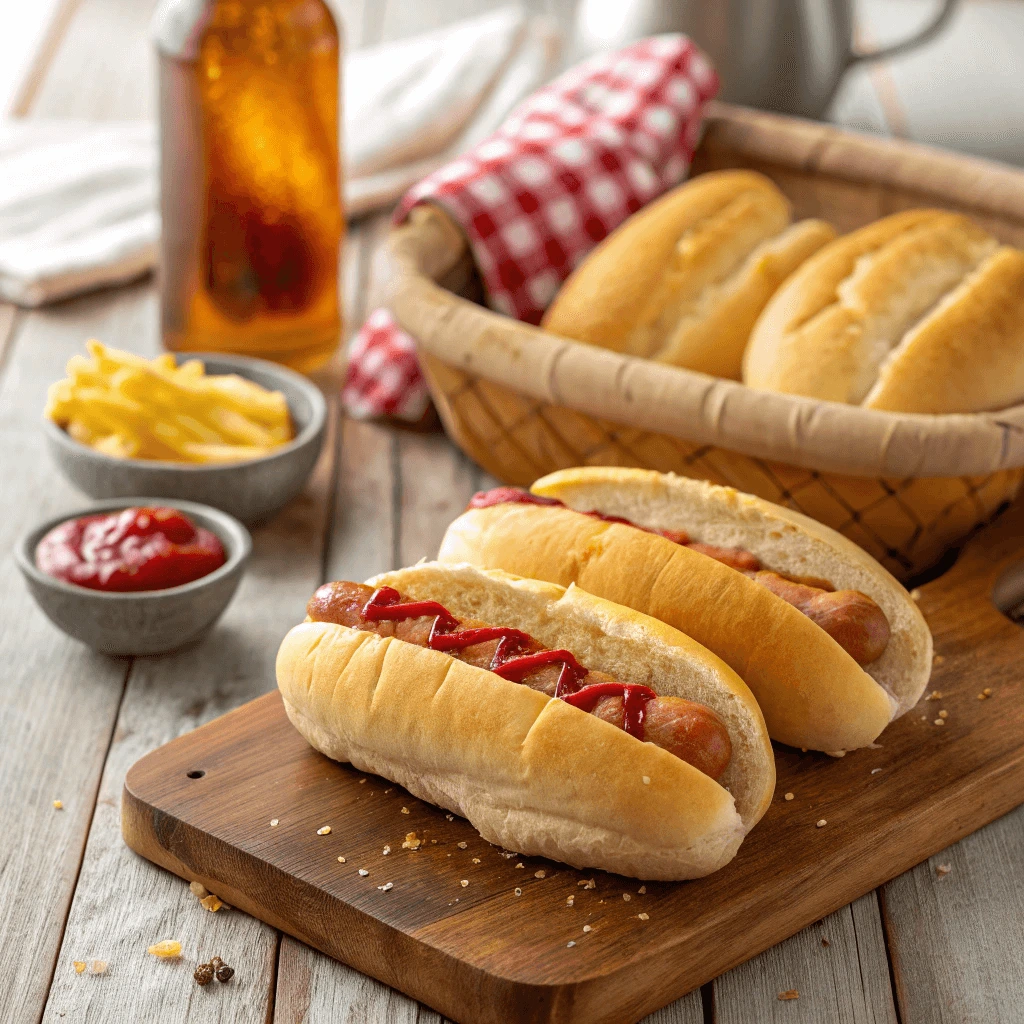
- Serve Fresh: Once cooled, slice the buns lengthwise, fill them with your favorite hot dog or sausage, and enjoy. Freshly baked gluten-free buns are best enjoyed the same day but can also be stored for later use.
Tips for Perfecting Gluten Free Hot Dog Buns
Achieving Soft, Fluffy Texture
Achieving the perfect soft and fluffy texture for your gluten-free hot dog buns requires a few key ingredients and techniques. Let’s break down what you need to do to ensure your buns turn out light and airy every time.
1. Choosing the Right Flour Blend
The flour blend you choose is essential for creating a light, fluffy texture. Look for blends that include rice flour, tapioca flour, and starches like potato or cornstarch. These ingredients help create a soft, tender bun. Avoid overly dense blends to prevent heavy, hard buns.
2. The Role of Yeast
Yeast is vital for giving your dough its lightness. Activating the yeast with warm water and a bit of sugar helps the dough rise. Don’t overwork the dough—just mix it until combined to prevent a tough texture. Yeast fermentation will give the dough its airy quality.
3. Managing Dough Moisture
Gluten-free dough tends to be drier, so adding the right amount of liquid is crucial. Use a combination of water, milk, or dairy-free alternatives, along with oil or butter to keep the dough soft. Too much flour can make the dough dry, so add flour gradually and aim for a soft, slightly sticky consistency.
4. Proofing the Dough
Let the dough rise in a warm place until it doubles in size. This allows the yeast to work and the dough to become lighter. Avoid overproofing, as it can lead to dense buns. Give the dough ample time, but don’t let it rest for too long.
5. Baking Tips
Bake your buns at 375°F (190°C) for a golden, fluffy finish. If you’re worried about dryness, add a pan of water in the oven to create steam. This will help the buns stay soft as they bake.
Preventing Dense or Crumbly Buns
To avoid dense or crumbly gluten-free buns, follow these key tips for a light and fluffy result.
1. Choose the Right Flour Blend
A balanced flour blend is essential. Opt for lighter flours like tapioca or potato starch to prevent heavy, crumbly buns.
2. Don’t Overmix the Dough
Mix the dough just until combined. Overmixing can make the buns dense and tough.
3. Add Enough Liquid
Gluten-free dough needs sufficient moisture. Ensure the dough is soft and slightly sticky for the best texture.
4. Use the Right Amount of Xanthan Gum
Too much xanthan gum can make the dough dense. Stick to the recipe’s recommended amount to maintain a light texture.
5. Proof the Dough Properly
Let the dough rise until it doubles in size, but avoid over-proofing to prevent crumbliness.
6. Bake with Steam
Add a pan of hot water to the oven to create steam. This keeps the buns moist and prevents them from drying out.
How to Store and Keep Your Buns Fresh
Once your gluten-free hot dog buns are baked, you’ll want to store them properly to maintain their softness and freshness. Storing them correctly helps prevent them from becoming dry or stale. Here are some key tips on how to keep your buns fresh for longer.
1. Let the Buns Cool Completely
Before storing your buns, let them cool completely on a wire rack. If you store them while they’re still warm, condensation will build up inside the storage container, which can make the buns soggy. Allowing them to cool fully prevents this issue and helps maintain the desired texture.
2. Use an Airtight Container
For optimal freshness, store your gluten-free buns in an airtight container. This keeps moisture in, preventing the buns from drying out too quickly. You can also use a resealable plastic bag for short-term storage. Just ensure the bag is sealed tightly to keep air out.
3. Store at Room Temperature for Short-Term Use
If you plan to eat the buns within a few days, store them at room temperature in an airtight container or bag. This will keep the buns soft for about 2-3 days. Avoid leaving them out in a warm, humid environment, as this can cause them to mold more quickly.
4. Refrigerate for Longer Freshness
For longer storage, you can refrigerate the buns. Place them in a resealable plastic bag or airtight container to prevent them from drying out. They will stay fresh in the refrigerator for about a week. Just be aware that refrigeration can slightly alter the texture, making them a bit firmer than when they were freshly baked.
5. Freezing for Extended Storage
If you want to keep your gluten-free buns for an extended period, freezing is the best option. Wrap each bun individually in plastic wrap or aluminum foil to prevent freezer burn, then place them in a freezer-safe bag or container. To thaw, simply remove them from the freezer and let them sit at room temperature for a few hours or warm them in the oven.
6. Reheat for Freshness
To refresh leftover buns, heat them in the oven or toaster. For a crisp outer texture, wrap them in foil and heat them at 350°F (175°C) for about 10-15 minutes. If you’re in a hurry, you can microwave them for 15-20 seconds. Reheating brings back their soft, fluffy texture, making them almost as good as fresh!
Gluten Free Hot Dog Buns for Every Occasion
Perfect for BBQs and Grilling
Gluten-free hot dog buns are the perfect addition to any BBQ or grilling session. Their light, soft texture complements a variety of grilled meats and vegetables, making them a versatile choice for outdoor dining. Here’s how you can elevate your BBQ experience by using these homemade buns.
1. Ideal for Grilled Meats
Whether you’re grilling sausages, burgers, or chicken, gluten-free buns hold up perfectly, providing a sturdy base to enjoy your grilled delights. They absorb the flavors from your toppings without becoming soggy, making them a great companion for juicy grilled sausages or your favorite hot dogs. By choosing the right ingredients and baking them with care, these buns ensure your BBQ creations stay delicious and satisfying.
2. Toast Them for Extra Flavor
For an even better BBQ experience, try toasting your gluten-free buns before serving. Simply butter the cut sides and place them on the grill for a few minutes until golden brown and slightly crispy. This step adds a layer of flavor and texture that enhances the overall experience. The crispy exterior contrasts beautifully with the soft interior, making each bite more enjoyable. Toasting also helps the buns stay intact when holding heavier toppings or sauces.
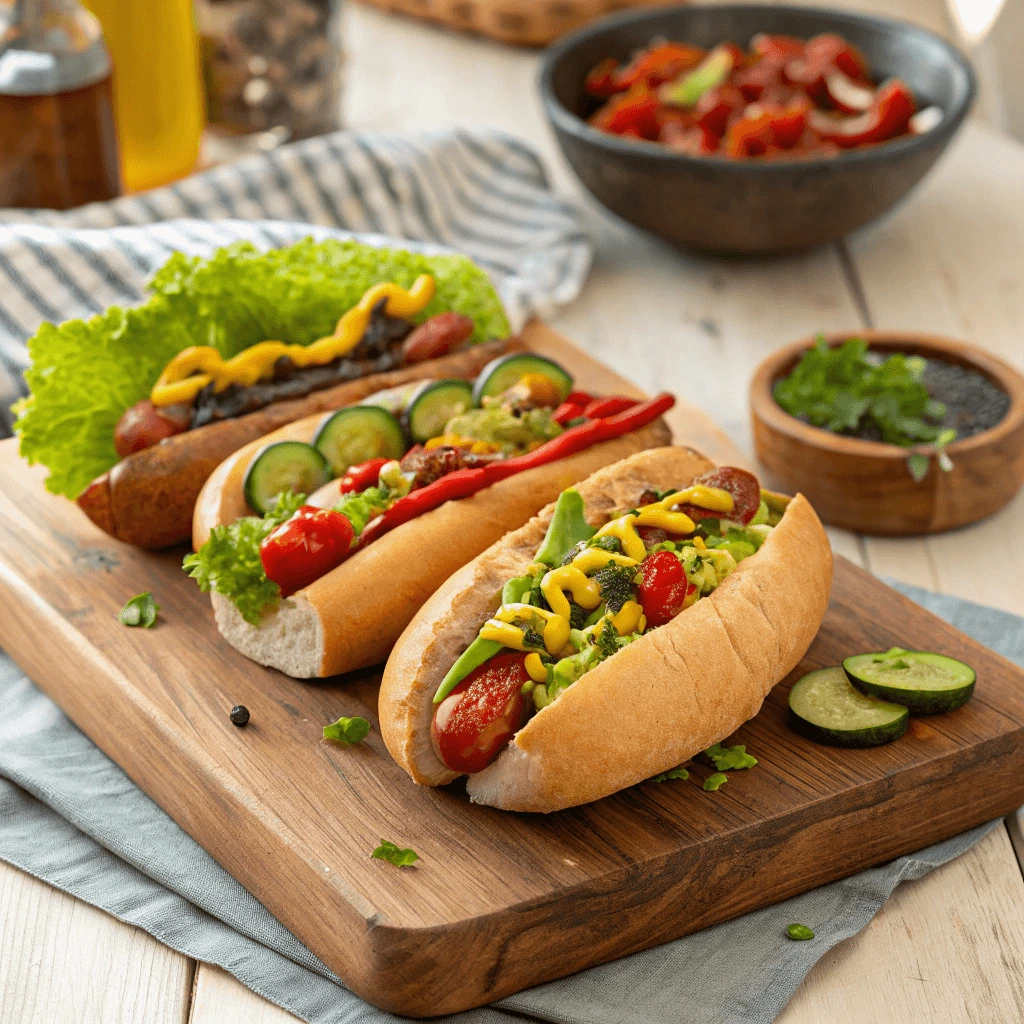
3. Customize with Toppings
One of the best parts of BBQs and grilling is the opportunity to load up your buns with a variety of delicious toppings. From traditional mustard and ketchup to gourmet toppings like caramelized onions, grilled peppers, or avocado, gluten-free buns are versatile enough to hold any of your favorite BBQ toppings. Whether you’re serving a classic hot dog or a gourmet sausage, these buns provide the perfect foundation for creativity.
4. A Gluten-Free Option for All
Grilling often means catering to diverse dietary needs, and gluten-free hot dog buns offer a delicious and inclusive option. At your next BBQ, your gluten-free friends and family can enjoy all the same tasty bites without missing out on the fun. By serving these buns alongside regular buns, everyone can enjoy the BBQ spread, ensuring no one is left out.
5. Pair with Grilled Vegetables
Gluten-free buns don’t have to be just for meats. They’re also a great match for grilled vegetables. Grill portobello mushrooms, zucchini, and bell peppers, and pile them onto your buns for a light, vegetarian BBQ option. The buns’ soft texture pairs wonderfully with the smokiness of grilled veggies, creating a wholesome, satisfying meal.
A Celiac-Friendly Option for Family Gatherings
Family gatherings are all about sharing great food, creating memories, and ensuring that everyone can enjoy the meal together. If you have someone in the family with celiac disease or a gluten sensitivity, it can be challenging to find dishes that everyone can safely enjoy. Thankfully, gluten-free hot dog buns offer a delicious and celiac-friendly option that makes your gatherings more inclusive. Here’s why these homemade buns are perfect for any family get-together.
1. Safe for Everyone with Celiac Disease
Celiac disease is an autoimmune disorder where consuming gluten can cause severe damage to the small intestine. Traditional buns contain wheat, which makes them off-limits for people with celiac disease. Gluten-free hot dog buns, made with the right flours and ingredients, allow everyone to join in the meal without concern. These buns provide a safe, gluten-free alternative, giving peace of mind to both the person with celiac disease and their loved ones.
2. No Compromise on Taste or Texture
One of the biggest concerns when making gluten-free versions of baked goods is sacrificing taste and texture. However, gluten-free hot dog buns do not compromise on flavor. They are soft, fluffy, and just as enjoyable as their gluten-filled counterparts. By using the right combination of gluten-free flours and ingredients, you can create buns that are just as delicious, ensuring that no one feels like they’re missing out during the family gathering.
3. Versatile for All Dietary Needs
In addition to being celiac-friendly, gluten-free hot dog buns can cater to other dietary preferences and restrictions. They can be easily customized for dairy-free, egg-free, or vegan diets by substituting ingredients as needed. This makes them an ideal choice for a family gathering where people may have different dietary needs. You can prepare one batch of buns that meets everyone’s requirements, allowing all guests to enjoy a meal together without the need for separate dishes.
4. Easy to Make in Bulk
Making homemade gluten-free hot dog buns in bulk is not only cost-effective but also simple. Preparing them ahead of time means you don’t have to worry about last-minute baking. When you have a large group to feed, having a big batch of gluten-free buns on hand ensures that you have enough for everyone, including those with dietary restrictions. You can bake the buns the day before or freeze them for later use, saving you time while still offering a fresh, delicious option for your gathering.
5. Showing Thoughtfulness for Your Guests
Offering gluten-free options at family gatherings demonstrates thoughtfulness and care for your guests. By providing a celiac-friendly alternative, you show that you’ve considered everyone’s needs, ensuring everyone feels welcome and included. This small but important gesture can make your gathering feel more special for those who have to be cautious about their diet due to health reasons.
Vegan-Friendly and Customizable Toppings
One of the best features of homemade gluten-free hot dog buns is their versatility when it comes to toppings. Not only can you create the perfect vegan-friendly meal, but you can also customize your toppings to suit different dietary preferences, including those of your vegan and vegetarian guests. Here’s how you can make the most out of these buns, turning them into delicious, inclusive meals for everyone at the table.
1. Plant-Based Protein Options
For a vegan hot dog experience, start by choosing plant-based protein alternatives to replace traditional hot dogs. Vegan sausages or grilled veggie dogs are excellent choices, providing a similar texture and flavor while being completely free of animal products. Many brands offer delicious plant-based sausages made from soy, pea protein, or other plant ingredients, so you’ll have plenty of options to explore. Pair these protein alternatives with your gluten-free buns for a hearty, satisfying meal that’s both vegan-friendly and full of flavor.
2. Tasty Vegan Condiments
Vegan condiments are the perfect way to top your gluten-free buns. There are so many tasty options to choose from, including mustard, ketchup, guacamole, and even vegan mayo. Experiment with different sauces to create a variety of flavors that complement your plant-based protein choice. Don’t forget about adding flavor-packed toppings like sautéed onions, bell peppers, and pickles, which add texture and zing to your hot dog. Vegan-friendly chili and BBQ sauce can also be used to amp up the taste while keeping the meal fully plant-based.
3. Fresh and Crunchy Veggies
For an extra crunch and vibrant color, pile on fresh veggies as toppings. Thinly sliced cucumbers, shredded lettuce, tomatoes, and radishes add freshness, while giving your buns a healthy boost. You can also grill some vegetables like mushrooms, zucchini, and eggplant to add a smoky flavor to your hot dog. The combination of fresh and grilled veggies will keep your meal balanced, light, and full of nutrients, making it the perfect vegan-friendly option for your next family BBQ or gathering.
4. Creative Flavor Combinations
One of the joys of creating your own vegan-friendly toppings is the freedom to experiment with unique flavor combinations. You can create fusion-style hot dogs by adding Asian-inspired toppings like teriyaki sauce, avocado, or pickled ginger. If you’re in the mood for something spicy, top your buns with hot sauce, jalapeños, or a tangy sriracha mayo. The possibilities are endless when it comes to combining different condiments, vegetables, and seasonings. The best part? You can create a hot dog that suits each guest’s tastes, making your gathering feel inclusive and customized.
5. Make it a DIY Topping Bar
For a fun and interactive way to serve your gluten-free buns, consider setting up a DIY topping bar at your next event. This allows your guests to get creative and customize their hot dogs however they like. Offer a wide variety of toppings such as sautéed onions, pickles, vegan cheese, fresh herbs, and various sauces. By providing diverse options, you ensure that every guest, whether vegan, vegetarian, or carnivore, will have something they enjoy.
Conclusion:
Making your own gluten-free hot dog buns from scratch offers numerous benefits: fresh, fluffy buns that are free of preservatives and fully customizable to your taste. Whether you’re enjoying a vegan-friendly BBQ or simply craving a soft, homemade bun, this recipe has you covered. Plus, you can experiment with different flavors, toppings, and fillings, making each meal unique.
I encourage you to try this recipe, explore new flavor combinations, and have fun with your culinary creations! Don’t forget to share your results or ask any questions you may have in the comments section—I’d love to hear from you and help you along the way!