Introduction
Making the perfect ice cream cup recipe at home is easier than you might think. With just a few ingredients and creative toppings, you can create a delicious, customizable frozen treat. Whether you’re preparing a fun dessert for a party, a healthier snack, or just indulging in a sweet craving, this ice cream cup recipe offers endless possibilities to suit every taste.
Why Ice Cream Cups Are the Ideal Frozen Dessert
Perfect for Portion Control and Snacking
Homemade ice cream cups shine when it comes to smart snacking and mindful eating. Their individual size allows you to enjoy a sweet treat without going overboard. Instead of scooping from a large container, which often leads to overeating, these cups help you enjoy just the right amount every time.
Manage Your Dessert Intake
With pre-portioned servings, it becomes easier to stick to health goals. You don’t have to worry about measuring or second-guessing how much you’ve eaten. This is especially helpful for those tracking calories or reducing sugar intake.
Snack Smarter at Any Time of Day
These ice cream cups work perfectly as midday pick-me-ups or post-dinner desserts. You can make them with protein-rich or nutrient-dense ingredients like Greek yogurt, almond butter, or fruit purées. As a result, they satisfy cravings while giving your body something beneficial.
Kid-Friendly and Parent-Approved
Parents love these cups because they eliminate mess and simplify snack time. Kids enjoy the fun shape and flavor, and adults appreciate the built-in portion control. You can even customize each cup with toppings like chopped nuts, granola, or fresh fruit to cater to different tastes and dietary needs.
Customizable for All Diets and Occasions
One of the best things about making your own ice cream cups is how easily you can adapt them. Whether you’re planning for a holiday gathering, serving picky eaters, or following a special diet, there’s always a way to tailor your recipe.
Easily Adapted to Dietary Needs
Homemade ice cream cups fit into almost any lifestyle. For a dairy-free version, swap out regular milk or cream with coconut milk, almond milk, or oat milk. If you’re following a keto plan, use low-carb sweeteners like erythritol or monk fruit. Need a vegan option? Choose plant-based yogurts and skip the honey in favor of maple syrup or date syrup.
Flavor Options to Suit Every Craving
The flavor combinations are nearly endless. Go fruity with blended mango, banana, or strawberries, or create a rich treat with cacao, peanut butter, or espresso. Mix in extras like chopped nuts, granola, or dark chocolate chips to enhance texture and taste. Because you’re making them in individual cups, it’s easy to create different varieties in the same batch.
Ideal for Parties, Celebrations, or Meal Prep
Ice cream cups are a crowd-pleaser at birthdays, barbecues, and casual get-togethers. You can dress them up with colorful layers and toppings to match any occasion. At the same time, they’re perfect for simple weekly meal prep—just keep a few in the freezer for when you need a quick, satisfying dessert.
With so many ingredient options and serving styles, these treats truly work for anyone and any event. That’s what makes them such a staple in any freezer.
Great for Summer, Parties, and Weeknight Treats
Ice cream cups aren’t just a dessert—they’re a fun and practical solution for many occasions. Whether it’s a hot summer day, a weekend celebration, or a casual after-dinner craving, these treats are always a hit.
Cool and Refreshing for Hot Summer Days
During the warmer months, few things feel as satisfying as a cold, creamy snack. Ice cream cups offer a refreshing escape from the heat without the need for heavy prep work. Because they’re stored in the freezer, you can grab one anytime for a quick cooldown. Using fresh fruits like berries, mango, or pineapple makes them even more hydrating and flavorful.
Perfect for Entertaining Guests
Planning a party or gathering? Ice cream cups make dessert service effortless. Instead of scooping and serving while your guests wait, simply prepare the cups in advance. You can even offer a variety of flavors and toppings so everyone gets exactly what they love. Their single-serve format also means no mess and less cleanup, which is ideal for hosts.
Quick and Easy Weeknight Desserts
Sometimes, after a long day, you just want a sweet treat without the hassle. Ice cream cups shine in these moments. Because they’re already portioned and stored in the freezer, they save you time while still satisfying your cravings. Even better, you can batch-make them over the weekend and enjoy them all week long. Add ingredients like dark chocolate chips, a swirl of nut butter, or crunchy granola for variety.
With their versatility, convenience, and refreshing appeal, ice cream cups belong in every home freezer—ready to serve joy in just a few bites.
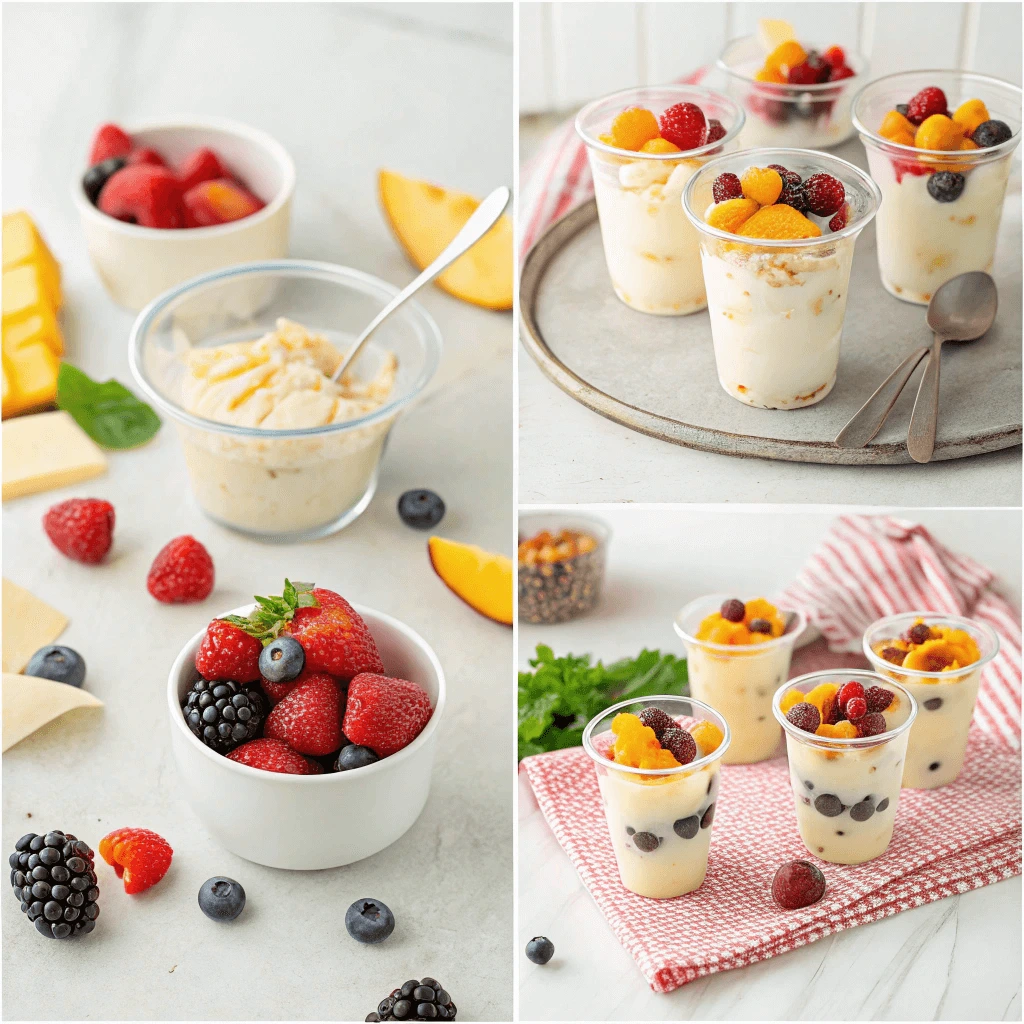
Essential Ingredients for a Delicious Ice Cream Cup Recipe
Creamy Bases: Greek Yogurt, Frozen Bananas, or Coconut Milk
The base you choose for your ice cream cups plays a major role in their flavor, texture, and nutritional value. Each creamy option brings something unique to the table, allowing you to tailor your treats to your dietary preferences and taste preferences.
Greek Yogurt: High-Protein and Tangy
Greek yogurt offers a thick, velvety texture that mimics traditional ice cream. It’s packed with protein, calcium, and probiotics, making it a smart choice for those looking to balance indulgence with nutrition. Because of its natural tartness, Greek yogurt pairs beautifully with sweet ingredients like honey, berries, or vanilla. To keep things dairy-free, opt for plant-based Greek-style yogurts made from almond, coconut, or cashew milk.
Frozen Bananas: Naturally Sweet and Creamy
Frozen bananas are a favorite among health-conscious dessert lovers. When blended, they transform into a smooth, creamy consistency without needing any added dairy or sugar. Since bananas are naturally sweet, they eliminate the need for extra sweeteners in many recipes. Simply slice and freeze ripe bananas, then blend them with your favorite mix-ins like peanut butter, cacao powder, or strawberries for a delicious “nice cream” base.
Coconut Milk: Rich and Dairy-Free
For those following a vegan or dairy-free diet, full-fat coconut milk is a luxurious option. It delivers a rich, creamy texture and subtle tropical flavor that works well with fruits like mango, pineapple, and lime. You can also use coconut cream for an even thicker consistency. Make sure to refrigerate the coconut milk before using to help it whip better and improve its texture.
Sweeteners to Skip the Sugar Crash
Using natural sweeteners in your ice cream cups helps you enjoy dessert without the dreaded sugar crash. These alternatives offer not only a gentler effect on blood sugar but also added nutrients, flavor complexity, and dietary flexibility.
Honey: Nature’s Classic Sweetener
Honey adds floral notes and a silky texture to your ice cream cups. Unlike refined sugar, honey contains small amounts of antioxidants and trace minerals, making it a healthier option. Choose raw or local honey when possible for the best quality and flavor. Keep in mind that honey is not vegan, so use alternatives for plant-based diets.
Maple Syrup: A Rich, Plant-Based Choice
Maple syrup delivers a bold, caramel-like flavor that pairs especially well with creamy bases like Greek yogurt or coconut milk. This plant-based sweetener contains antioxidants and minerals such as manganese and zinc. Since it blends smoothly with other ingredients, it’s perfect for no-churn or blender-based recipes.
Medjool Dates: Whole-Food Sweetness
Medjool dates are a fiber-rich, whole-food sweetener packed with natural sugars, potassium, and antioxidants. They blend easily into frozen banana or coconut milk bases, creating a thick and naturally sweet dessert without any added sugar. To use them, soak the dates in warm water for 10 minutes, then blend them with your other ingredients.
Stevia and Monk Fruit: Zero-Calorie Alternatives
For a sugar-free option, stevia and monk fruit offer sweetness without affecting blood sugar. Both are plant-derived and work well in small amounts. Because they can have an aftertaste, it’s best to combine them with fruit or creamy ingredients that balance their flavor.
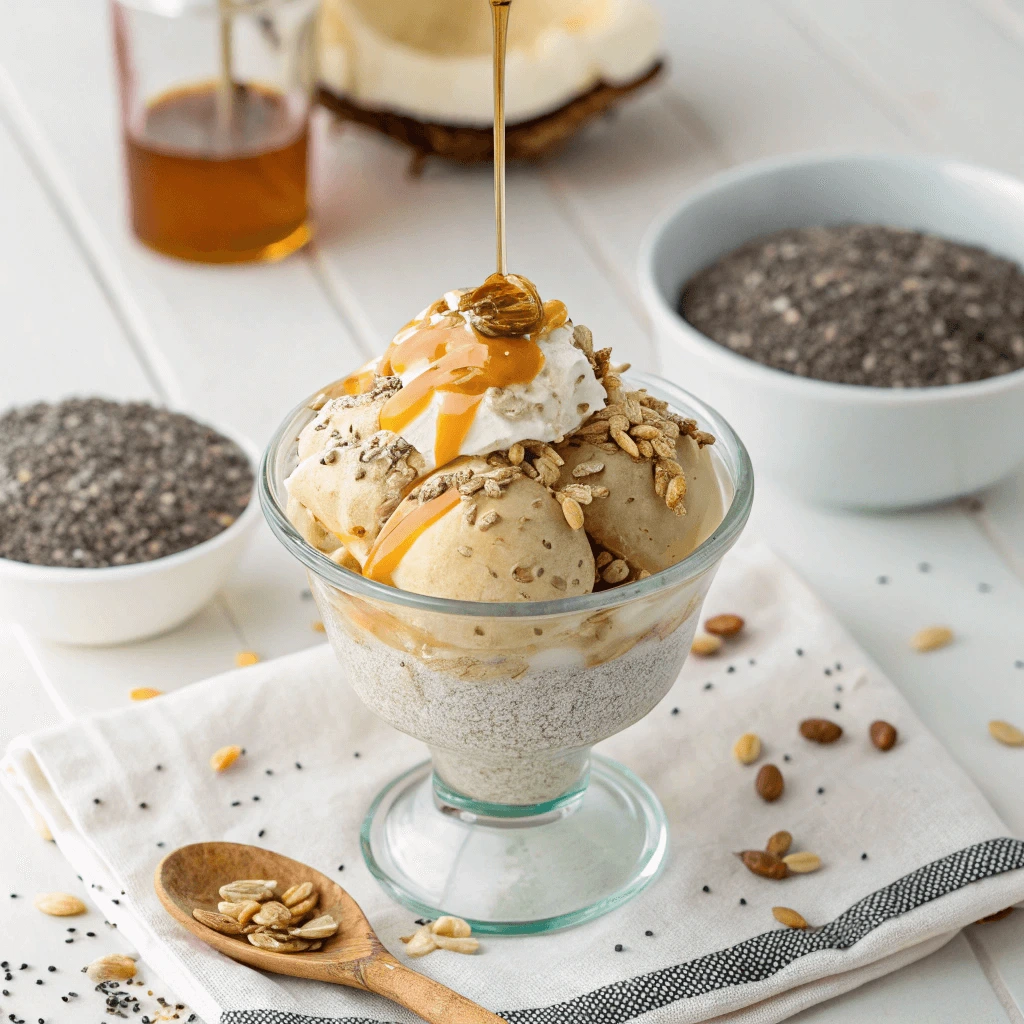
Superfood Add-Ins for a Nutrient Boost
Elevate your ice cream cups from a fun treat to a functional snack with nutrient-dense superfood ingredients. These natural boosters not only enhance flavor and texture but also support your health with fiber, antioxidants, healthy fats, and plant-based protein.
Chia Seeds: Small Seeds, Big Benefits
Chia seeds are tiny powerhouses packed with omega-3 fatty acids, fiber, and protein. When added to ice cream cups, they absorb moisture and form a gel-like texture that adds thickness and creaminess. Mix them directly into your yogurt base or sprinkle them on top before freezing for a subtle crunch and extra nutrients.
Nut Butters: Rich Flavor and Healthy Fats
Almond butter, peanut butter, or cashew butter introduces creaminess, protein, and healthy fats. Stir them into your banana or coconut milk base for a rich, satisfying texture. For added indulgence, swirl a spoonful on top before freezing. Just make sure to choose natural, unsweetened varieties to keep your dessert clean and wholesome.
Cacao Nibs and Powder: Chocolate with a Health Kick
Cacao nibs and cacao powder provide a chocolatey flavor without added sugar. Cacao is rich in antioxidants like flavonoids, which may support heart health and mood. Use nibs for texture or add powder to the base for a chocolate version that’s actually good for you. They pair especially well with bananas and dates.
Berries, Goji or Acai: Antioxidant-Rich Additions
Boost your cup’s color and nutrition with superberries like blueberries, goji berries, or a spoonful of acai purée. These vibrant ingredients are loaded with antioxidants that help fight inflammation and support immune function. Blend them into your base or layer them with granola and yogurt for a parfait-style dessert.
Mix, Match, and Maximize Your Benefits
Experiment with combinations like banana base + cacao nibs + almond butter, or Greek yogurt + chia seeds + blueberries. With superfood add-ins, your ice cream cup transforms into more than just dessert—it becomes a nourishing, energizing treat you can feel great about eating.
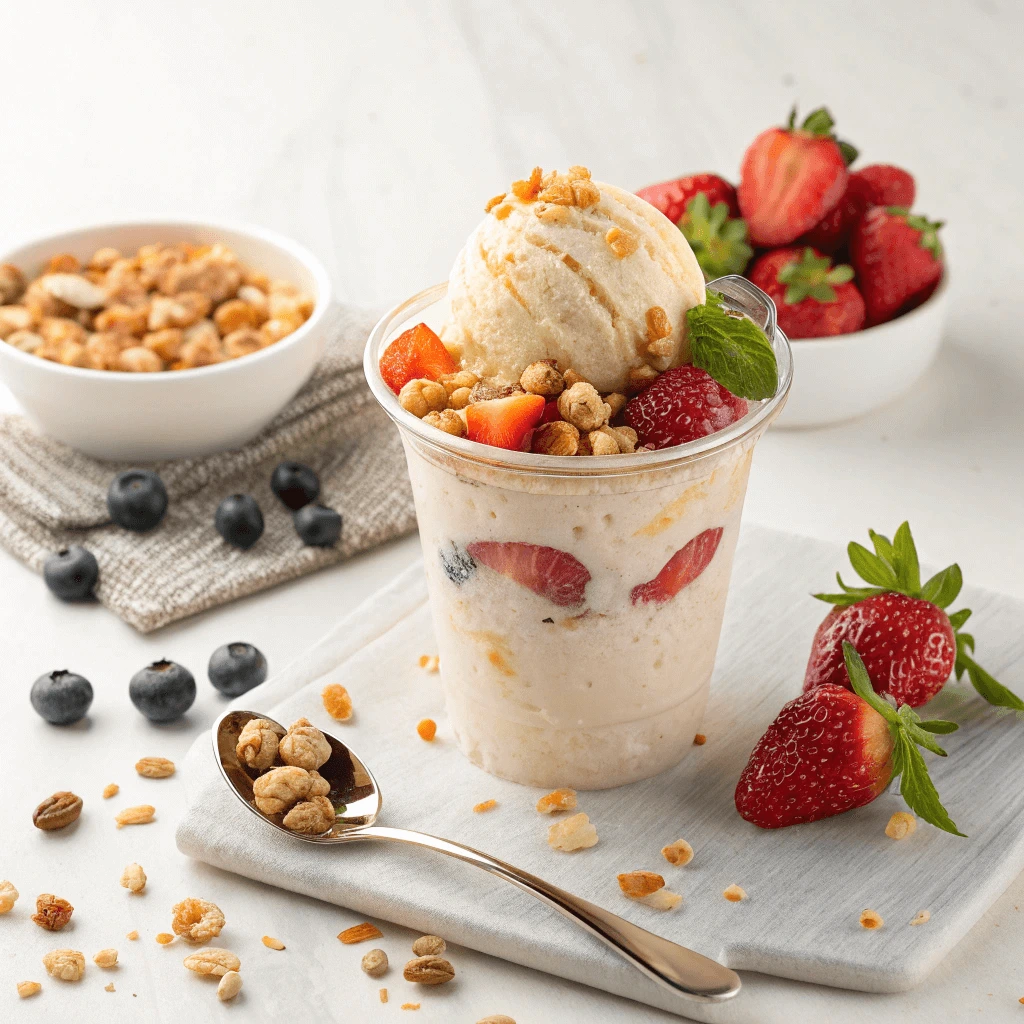
Step-by-Step Guide: Making Ice Cream Cups at Home
Blend Your Base Until Smooth and Creamy
To create the perfect ice cream cup, blending your base to a smooth and creamy texture is key. Whether you’re using frozen bananas, Greek yogurt, or coconut milk, it’s important to achieve the right consistency.
Choose the Right Ingredients
Frozen bananas, Greek yogurt, and coconut milk are all great options for a creamy base. Bananas add natural sweetness, while yogurt offers creaminess and protein. Coconut milk provides a dairy-free alternative with a rich texture.
Use a High-Powered Blender
A high-powered blender or food processor is essential for achieving a smooth consistency. If you’re using a regular blender, cut the frozen ingredients into smaller pieces to help with blending.
Blend in Small Batches
If you’re making a large batch, blend in small portions to ensure everything mixes evenly. This helps avoid uneven textures.
Scrape the Sides
Stop blending periodically and scrape down the sides of the blender. This ensures that all ingredients are mixed properly, resulting in a smooth texture.
Adjust Consistency
If your mixture is too thick, add a little liquid, like almond milk, until it reaches the right consistency. If it’s too runny, add more frozen ingredients to thicken it up.
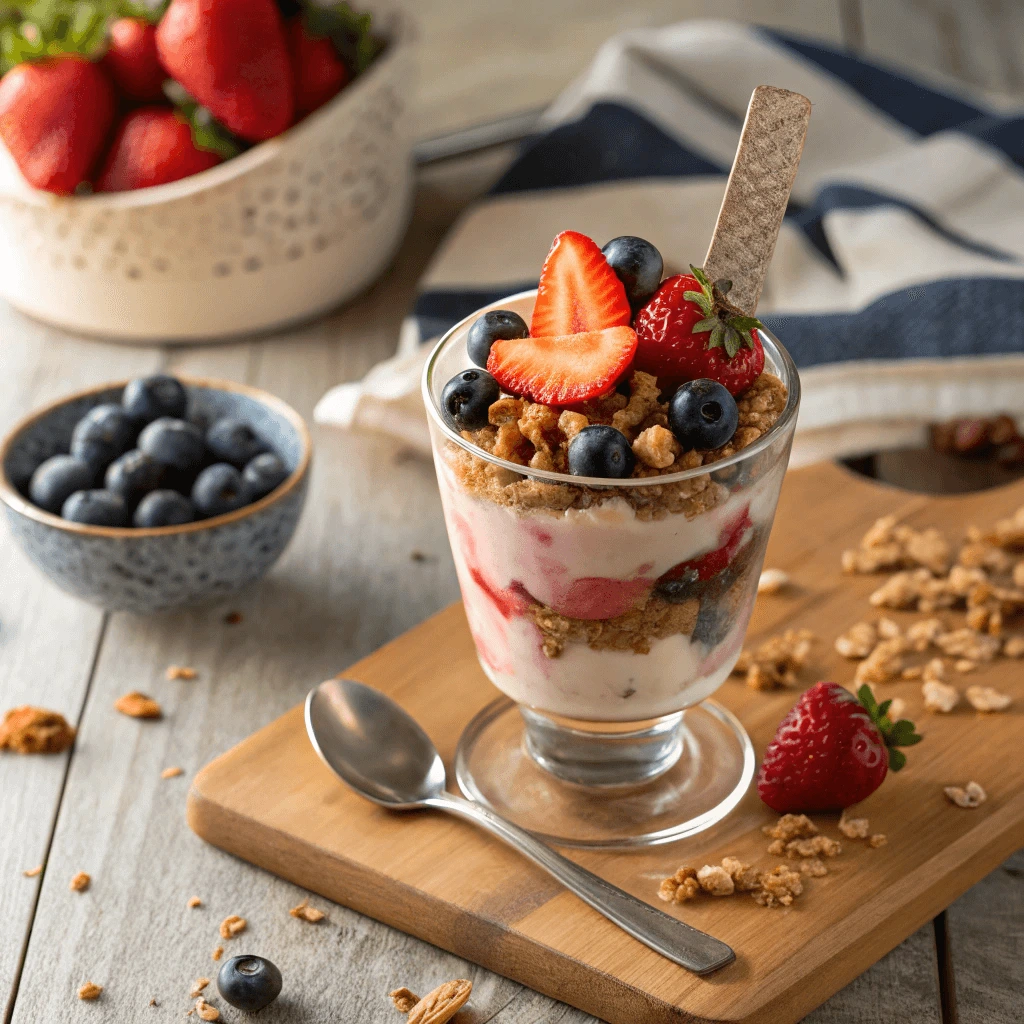
Layer with Toppings Like Berries, Granola, and Coconut
Adding toppings to your ice cream cups is a fun way to enhance both flavor and texture. Toppings like fresh berries, crunchy granola, and shredded coconut not only boost the dessert’s appeal but also contribute to its nutritional value.
Fresh Berries
Berries such as strawberries, blueberries, and raspberries offer a sweet and tart contrast to the creamy base. They are also packed with antioxidants, making them a healthy addition. You can mix them in with the ice cream or layer them on top for a vibrant look.
Granola for Crunch
Granola adds a satisfying crunch that pairs well with the smooth texture of the ice cream. Look for options with oats, nuts, and seeds for extra fiber and healthy fats. Granola provides a delicious contrast to the creaminess while offering a wholesome touch.
Shredded Coconut
For a tropical twist, top your ice cream cups with shredded coconut. Its natural sweetness complements the base, and its texture adds a pleasant chewiness. Unsweetened coconut provides a mild flavor, while sweetened coconut adds extra richness.
Layering Tips
When layering, aim for a balance between the creamy base and the toppings. Start with a layer of ice cream, followed by your chosen toppings, and repeat as desired. This will give you a balanced and flavorful treat in every bite.
Freeze in Silicone Molds for Easy Pop-Out Treats
Using silicone molds to freeze your ice cream cups makes serving them a breeze. These molds provide a non-stick surface that helps the frozen treats pop out effortlessly, leaving you with perfectly shaped cups.
Benefits of Silicone Molds
Silicone molds are flexible and durable. They allow you to easily remove the ice cream cups by gently pressing the bottom of the mold, unlike rigid plastic or metal molds that may require extra tools. Plus, silicone molds are reusable and maintain their non-stick properties over time.
Easy Handling and Storage
Silicone molds are lightweight, making them easy to handle. You can bend or twist them slightly to release the treats without damaging them. They’re also compact and easy to store, taking up less space in your kitchen or freezer.
Custom Shapes and Sizes
Silicone molds come in various shapes, so you can get creative with your ice cream cups. Whether you want classic round shapes or fun designs like hearts or stars, silicone molds can help you make visually appealing treats for any occasion.
How to Use Silicone Molds
Fill the molds about three-quarters full, as the ice cream may expand while freezing. Smooth the tops for an even surface, and press in any toppings, such as fruit or granola. After freezing, simply pop the ice cream cups out and serve.
Using silicone molds ensures easy removal and perfectly shaped ice cream cups every time.
Fun and Healthy Ice Cream Cup Variations to Try
Chocolate Banana Protein Ice Cream Cup
Chocolate Banana Protein Cups are a delicious, protein-packed treat that combines the natural sweetness of bananas with the richness of chocolate. They offer a healthy way to indulge in a satisfying snack or dessert that helps fuel your body.
Why They’re a Great Choice
These protein cups are perfect for those looking for a snack that is both delicious and nutritious. The combination of ripe bananas, plant-based protein, and chocolate provides a balance of sweetness and health benefits. They are ideal as a post-workout snack, a midday boost, or even a dessert option when you need something sweet without the guilt.
Key Ingredients
- Ripe Bananas: Serve as the base, providing natural sweetness, fiber, and a creamy texture.
- Plant-Based Protein: Adds a protein boost to help keep you full and satisfied.
- Cacao Powder: Offers a rich chocolate flavor and antioxidants.
- Nut Butter: Enhances the creaminess and adds healthy fats.
How to Make Them
Mash the bananas until smooth, then mix in the protein powder, cacao powder, and nut butter. Spoon the mixture into molds and freeze for a few hours. Once set, enjoy your chocolatey, protein-packed snack!
Benefits of Protein
Adding protein to these cups boosts their nutritional value, helping with muscle recovery and keeping you full longer. It’s the perfect way to enjoy a sweet treat that also supports your fitness goals.
These cups are not just a healthy snack but also a convenient and delicious option that fits into a variety of diets.
Vegan Coconut Mango Ice Cream Cup
Vegan Coconut Mango Cups offer a tropical, dairy-free dessert that blends the creamy texture of coconut with the sweet, tangy flavor of mango. This treat is ideal for those on vegan or dairy-free diets, providing a healthy and refreshing dessert option. With a few simple ingredients, these cups offer a delicious and nutritious way to satisfy your sweet cravings.
Key Ingredients
- Coconut Milk: The base of these cups, giving them a rich, creamy texture while keeping them dairy-free.
- Mango: Offers a vibrant, tropical flavor along with a good dose of vitamins and antioxidants.
- Maple Syrup or Agave: Natural sweeteners that avoid refined sugars.
- Shredded Coconut: Adds texture and enhances the coconut flavor in every bite.
How to Make Vegan Coconut Mango Cups
To make these cups, blend coconut milk and mango in a food processor until smooth. Sweeten with maple syrup or agave to taste, and add a dash of vanilla for extra flavor. Pour into molds and top with shredded coconut. Freeze for a few hours, and you’ll have a creamy, dairy-free treat ready to serve!
Why You’ll Love Them
These cups combine the richness of coconut with the bright flavor of mango, creating a refreshing and satisfying dessert. They are easy to make and perfect for hot days, parties, or as a healthy snack option. Whether you follow a vegan diet or not, these cups are a delicious way to indulge without the guilt.
Berry Yogurt Granola Ice Cream Cup
Berry Yogurt Granola Cups are a delightful, healthy treat that combines creamy yogurt, fresh berries, and crunchy granola. They are perfect for breakfast, snacks, or as a light dessert, offering a satisfying balance of textures and flavors. These cups are easy to prepare and can be customized with your favorite fruits and toppings, making them a versatile option for any occasion.
Key Ingredients
- Greek Yogurt: This creamy base provides protein and probiotics that support digestive health.
- Fresh Berries: Blueberries, strawberries, and raspberries offer a burst of antioxidants and a sweet, tangy flavor.
- Granola: Adds a satisfying crunch and provides additional fiber and whole grains.
- Honey or Maple Syrup: For those who prefer a bit more sweetness, a drizzle of honey or maple syrup works wonderfully.
How to Make Berry Yogurt Granola Cups
Start by layering granola at the bottom of muffin tins. Then, add a generous layer of Greek yogurt on top, followed by a handful of fresh berries. If you like your cups a bit sweeter, drizzle honey or maple syrup on top. Chill the cups in the fridge for an hour to set before serving.
Why You’ll Love These Cups
Not only are these cups customizable to your tastes, but they are also packed with nutrients. The creamy yogurt provides a smooth texture, while the berries burst with freshness. Additionally, the granola offers the perfect crunch, making these cups a delightful combination of flavors. They are ideal for meal prepping and can be stored in the fridge for easy grab-and-go snacks.
Health Benefits
- Probiotics: Greek yogurt supports gut health, improving digestion and boosting immunity.
- Antioxidants: The berries help fight oxidative stress, promoting overall well-being.
- Fiber: Granola is rich in fiber, which aids in digestion and helps you feel fuller longer.
Berry Yogurt Granola Cups are not just a delicious snack—they’re a nutritious, easy-to-make treat that can be enjoyed by everyone!
Storage, Serving, and Make-Ahead Tips for Ice Cream Cup
How to Prevent Freezer Burn and Maintain Freshness in Ice Cream Cup
Freezer burn can ruin your homemade ice cream cups, leaving them dry and flavorless. To keep your treats fresh, it’s important to store them properly. Here are some simple steps to prevent freezer burn and maintain the creamy texture of your ice cream cups.
Use Airtight Containers or Wraps
Store your ice cream cups in airtight containers or tightly wrap them in plastic wrap. This prevents exposure to air, which is the main cause of freezer burn. The wrap or container helps keep moisture in and air out.
Use Silicone Molds for Easy Removal
Silicone molds make freezing and removing your ice cream cups easier. After freezing, pop them out and place them in a sealed container for extra protection. This minimizes the risk of freezer burn caused by handling.
Add a Layer of Plastic Wrap or Wax Paper
Cover the top of your ice cream cups with a layer of plastic wrap or wax paper before sealing them. This layer prevents ice crystals from forming on the surface, which can contribute to freezer burn.
Label and Date Your Containers
Label your containers with the date to keep track of when they were made. For best results, consume your ice cream cups within 1–2 weeks to ensure optimal freshness.
When to Serve Ice Cream Cup for the Best Texture
To achieve the perfect texture for your ice cream cups, timing is key. You want them to be firm but easy to scoop, with a smooth, creamy consistency. Here’s how to serve them at just the right moment:
Let the Ice Cream Cups Sit for a Few Minutes
Once you remove your ice cream cups from the freezer, allow them to sit at room temperature for about 5-10 minutes. This slight thawing softens the treat just enough for an ideal texture, making it easier to scoop.
Avoid Over-Thawing
Be cautious not to let your ice cream cups thaw too long. If they sit out for too long, they can become too soft and lose their creamy texture. Keep an eye on the clock, and serve them once they are soft but not runny.
Serve Immediately for Optimal Texture
After allowing them to soften for a few minutes, serve the ice cream cups right away. At this point, they will be easy to eat but still hold their shape, giving you the perfect balance of firmness and creaminess.
Batch-Freezing Ice Cream Cup for Easy Weekday Snacks
Batch-freezing your ice cream cups is a smart way to have healthy, delicious snacks ready when you need them. By preparing multiple cups in advance, you can save time and avoid unhealthy alternatives during busy weekdays.
1. Make Multiple Servings at Once
Prepare several ice cream cups in one session, so you have a variety of flavors ready for the week. This will give you more options without extra effort on busy days.
2. Use Airtight Containers or Silicone Molds
Store your ice cream cups in airtight containers or silicone molds to prevent freezer burn and maintain freshness. These options help the cups stay intact and easy to remove when needed.
3. Label and Date for Easy Organization
Label each container with the date of preparation to keep track of their freshness. This ensures you enjoy your treats at their best quality.
4. Thaw for Quick Enjoyment
When you’re ready for a snack, take a cup out of the freezer and let it thaw for a few minutes. This makes the texture perfect without losing creaminess.
With batch-freezing, you can make sure that healthy treats are always available, saving you time and helping you stick to your goals.
Conclusion
Making the perfect ice cream cup at home is simple, fun, and customizable to fit any taste or dietary need. By using wholesome ingredients like Greek yogurt, frozen bananas, or coconut milk, you can create creamy, delicious cups that are both healthy and satisfying. Experiment with natural sweeteners and nutrient-packed add-ins to boost flavor and nutrition. Whether for a snack, party, or weeknight treat, homemade ice cream cups offer a refreshing and guilt-free way to enjoy frozen treats anytime!