
Who doesn’t love the taste of fresh, bakery-style treats? But if you follow a gluten-free diet, finding baked goods that are both delicious and satisfying can be a challenge. The good news? You don’t need to visit a specialty bakery to enjoy your favorite treats! With the right ingredients, tools, and techniques, you can recreate gluten-free bakery favorites in your own kitchen.
In this guide, we’ll walk you through the essential ingredients, must-have baking tools, and expert tips to ensure your gluten-free treats turn out soft, fluffy, and full of flavor. Whether you’re craving cookies, muffins, or artisanal bread, you’ll learn how to achieve bakery-quality results without gluten. Let’s get baking! 🍪✨
Understanding Gluten-Free Baking Basics
What is Gluten-Free Baking?
What is Gluten?
Gluten is a protein found mainly in wheat, barley, and rye. It helps dough stretch and hold its shape, giving baked goods a chewy texture. In traditional baking, gluten traps air bubbles, helping bread and pastries rise nicely.
Why Choose Gluten-Free Baking?
People avoid gluten for various reasons, including celiac disease, gluten intolerance, or personal health choices. When gluten is removed from recipes, it affects the texture and structure of baked goods. This means gluten-free baking requires special ingredients and techniques to replace gluten’s role.
Challenges in Gluten-Free Baking
Without gluten, dough tends to be less elastic and can crumble easily. To fix this, gluten-free bakers use alternative flours like almond flour or coconut flour combined with binding agents like xanthan gum. These help give the dough strength and improve texture.
Benefits of Baking Gluten-Free at Home
Homemade gluten-free treats let you control every ingredient and avoid hidden gluten found in some store products. Plus, you can customize recipes to suit your taste and dietary needs. With the right knowledge, gluten-free baking can be just as rewarding as traditional baking.
Essential Gluten-Free Baking Ingredients
Gluten-Free Flours
Gluten-free baking relies on alternative flours like almond flour, coconut flour, and tapioca starch. Almond flour adds moisture and a nutty flavor. Coconut flour absorbs a lot of liquid, so you need less of it. Tapioca starch helps create a chewy texture and adds elasticity.
Binders That Hold It Together
Since gluten provides structure in regular baking, gluten-free recipes need binders such as xanthan gum or guar gum. These help the dough hold together and prevent crumbling. Use them sparingly to avoid a gummy texture.
Leavening Agents for Rise
Baking powder and baking soda help your treats rise and become fluffy. Make sure to use gluten-free baking powder. Fresh leavening agents give the best results.
Sweeteners and Flavor Boosters
Honey, maple syrup, vanilla extract, and spices like cinnamon add flavor and moisture. These ingredients also help mask any strong flavors from gluten-free flours.
Tips for Successful Gluten-Free Baking at Home
Choose the Right Flour Blend
Using the right gluten-free flour blend makes a big difference. Many blends combine rice flour, tapioca starch, and potato starch to give a balanced texture. You might need to try a few brands or mixes to find what works best for your favorite recipes.
Measure Ingredients Accurately
Precise measurements help avoid common problems like dry or dense baked goods. Using a kitchen scale to weigh your flours and other ingredients ensures consistent results. Avoid guessing or swapping ingredients without adjusting amounts, especially with flours and liquids.
Use Binders to Improve Texture
Since gluten acts as a binder, adding xanthan gum or guar gum helps give structure to your baked goods. Typically, a quarter teaspoon per cup of flour works well. Without these, your treats might crumble or fall apart easily.
Avoid Overmixing
Mix your batter just until ingredients come together. Overmixing can make gluten-free treats tough or dense because it affects the texture differently than in traditional baking.
Watch Baking Times Closely
Gluten-free baked goods can bake faster or slower than regular ones. Check your items a few minutes before the recipe’s suggested time and adjust as needed. Using an oven thermometer can help maintain the right temperature.
Top Gluten-Free Flour Alternatives for Bakery Treats
Almond Flour and Coconut Flour
What is Almond Flour?
Almond flour is made by finely grinding blanched almonds. It has a rich, nutty flavor and a moist texture that works well in many gluten-free baked goods. Bakers often choose almond flour for cakes, cookies, and muffins because it adds tenderness and depth of flavor. Almond flour also provides healthy fats and protein, making your treats more nutritious.
Baking with Almond Flour
When you bake with almond flour, expect your baked goods to be denser and moister than those made with traditional wheat flour. Almond flour doesn’t absorb liquid as much, so you may need to reduce the amount of added liquid in your recipe. It also doesn’t provide the elasticity gluten does, so pairing it with binders like xanthan gum improves texture and structure.
What is Coconut Flour?
Coconut flour comes from dried coconut meat that’s been ground into a fine powder. It has a mild coconut flavor and is very high in fiber. Coconut flour absorbs much more liquid than other flours, so recipes require more eggs or liquid to prevent dryness and crumbly textures.
Baking with Coconut Flour
Because of its high absorbency, coconut flour behaves differently in baking. Use about ¼ to ⅓ cup of coconut flour for every 1 cup of wheat flour replaced, and increase the eggs or liquid accordingly. Coconut flour works great in cakes, pancakes, and quick breads, adding a subtle coconut flavor and a light crumb.
Combining Almond and Coconut Flours
Many gluten-free bakers combine almond and coconut flours to balance moisture and texture. Almond flour provides richness, while coconut flour adds structure and fiber. Using both together often creates tender, flavorful treats that hold together well.
Tapioca Starch and Other Gluten-Free Starches
What is Tapioca Starch?
Tapioca starch, also called tapioca flour, is extracted from the cassava root. It has a fine, powdery texture and is flavorless, making it a versatile ingredient in gluten-free baking. Bakers often use tapioca starch to improve the chewiness and elasticity of baked goods, qualities that gluten usually provides.
How Tapioca Starch Works in Baking
Tapioca starch helps bind ingredients together and retain moisture. It creates a light, chewy texture in breads, muffins, and cookies. Because it thickens quickly, it also works well in fillings and sauces. However, using too much tapioca starch can cause your baked goods to become gummy or overly sticky, so it’s important to balance it with other flours.
Other Common Gluten-Free Starches
Besides tapioca starch, other popular gluten-free starches include potato starch, arrowroot powder, and corn starch. Each starch has unique properties:
- Potato starch adds moisture and creates a tender crumb in cakes and breads.
- Arrowroot powder acts as a thickener and gives baked goods a light, fluffy texture.
- Corn starch improves tenderness and helps bind ingredients.
Using Starches Together for Best Results
Many gluten-free flour blends combine tapioca starch with potato starch and other starches to achieve the right balance of moisture, texture, and structure. Using starches together helps mimic the elasticity and lightness that gluten provides. Experimenting with starch ratios can help you perfect your favorite gluten-free recipes.
Tips for Working with Gluten-Free Starches
Measure starches carefully and avoid overusing them to prevent gummy textures. Also, mix starches well with other flours for an even texture. Using fresh, high-quality starches ensures better baking results.
Using Xanthan Gum and Other Binders
Why Binders Matter in Gluten-Free Baking
Gluten provides structure and elasticity in traditional baking, so gluten-free recipes need binders to fill this role. Binders help hold ingredients together, improve texture, and prevent crumbling. Without binders, gluten-free baked goods often turn out dry, crumbly, or fragile.
What is Xanthan Gum?
Xanthan gum is a popular binder made by fermenting sugar with a specific bacteria. It appears as a fine, white powder and works by thickening the batter and creating elasticity similar to gluten. Bakers add xanthan gum in small amounts—usually about ¼ teaspoon per cup of gluten-free flour—to improve dough strength.
How to Use Xanthan Gum Effectively
Add xanthan gum to your dry ingredients and mix thoroughly to distribute it evenly. Using too much xanthan gum can make baked goods gummy or heavy, so start with small quantities and adjust based on your recipe’s needs. For recipes without xanthan gum, you can experiment with other binders like guar gum or psyllium husk.
Alternative Binders to Consider
Guar gum, derived from guar beans, works similarly to xanthan gum and can be used as a one-to-one substitute. Psyllium husk powder is another excellent binder that adds fiber and improves moisture retention. It works especially well in bread recipes by creating a stretchy dough. Chia seeds and flaxseeds, when mixed with water, form gels that can also act as natural binders in gluten-free baking.
Tips for Choosing and Using Binders
Select a binder based on your recipe and texture preferences. Some binders add moisture, while others provide stretch. Always measure carefully and mix binders evenly with your dry ingredients. Testing small batches will help you find the right amount and type of binder for your favorite gluten-free treats.
Easy Gluten-Free Recipes to Try at Home
Gluten-Free Bread and Muffins
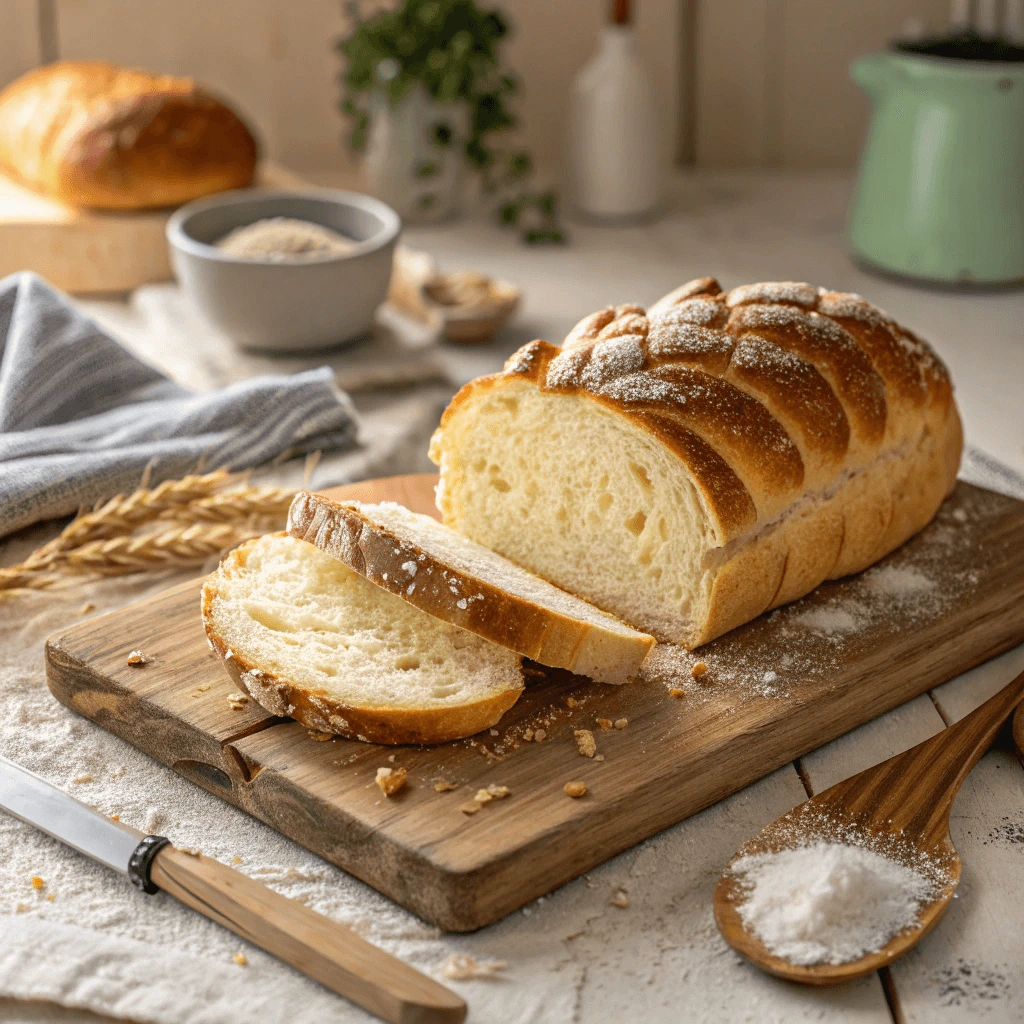
Understanding Gluten-Free Bread
Gluten-free bread differs from traditional bread mainly because it lacks gluten, which gives dough its elasticity and chewiness. To mimic these qualities, bakers rely on special flour blends and binders like xanthan gum or psyllium husk. These ingredients help create a soft crumb and hold the bread together. Gluten-free bread usually has a denser texture, but with the right techniques, you can achieve a light and fluffy result.
Tips for Baking Gluten-Free Bread
Start with a trusted gluten-free flour blend designed for bread baking. Make sure to add binders to improve structure and texture. Mixing the dough thoroughly but gently helps develop the right consistency without overworking it. Because gluten-free bread batter tends to be more like a thick batter than a traditional dough, use a loaf pan to shape it. Allow the bread to rise longer than usual; gluten-free yeast doughs often need extra time to develop volume.
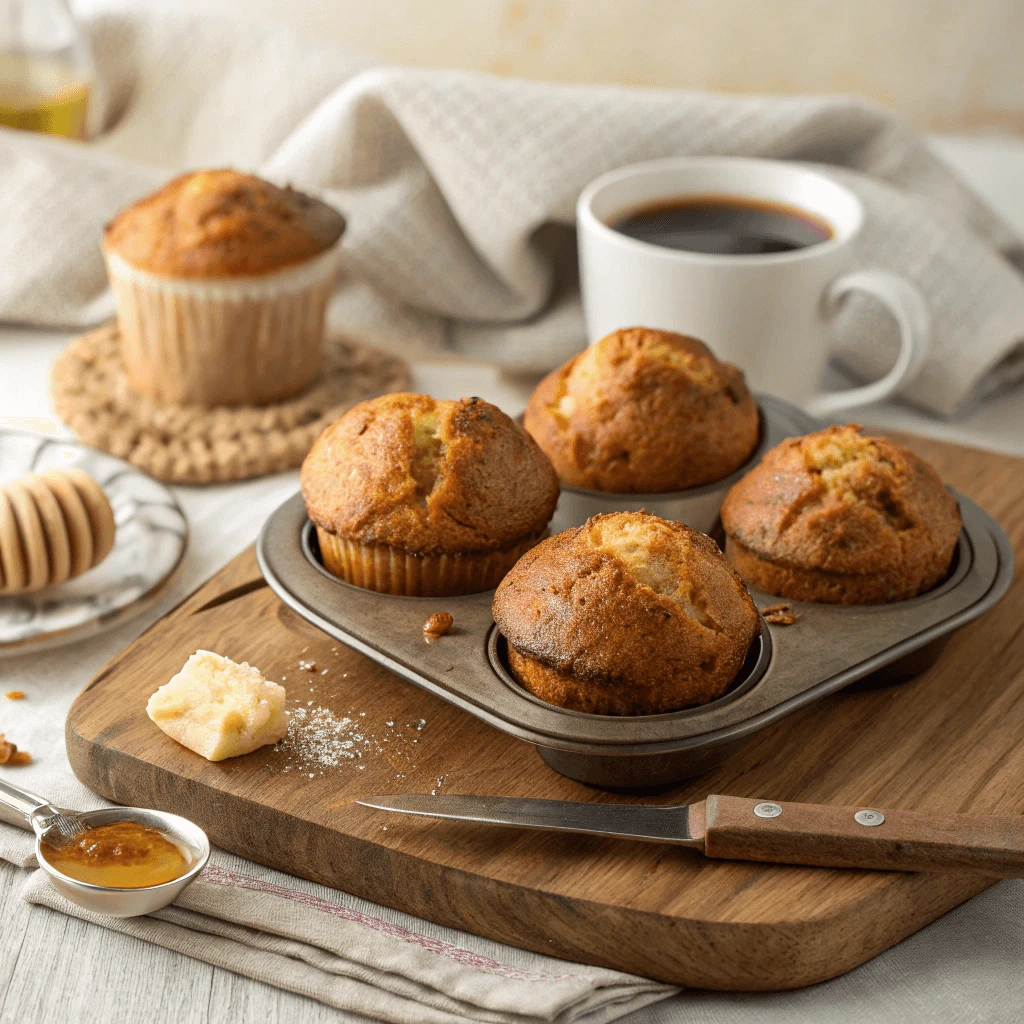
Baking Gluten-Free Muffins
Gluten-free muffins are usually easier to make than bread because their batter is more forgiving. Use almond or coconut flour combined with a gluten-free flour blend for the best texture. Adding extra moisture through ingredients like applesauce, yogurt, or mashed bananas keeps muffins tender. Avoid overmixing the batter to prevent dense muffins.
Flavor and Texture Tips
Incorporate fruits, nuts, or spices to enhance flavor and add moisture. Experiment with different flour combinations to find the texture you prefer. For example, almond flour adds richness, while tapioca starch improves chewiness.
Delicious Gluten-Free Cookies and Cupcakes
Baking Gluten-Free Cookies
Gluten-free cookies can be just as tasty and satisfying as traditional ones. Start with a gluten-free flour blend that offers a balanced texture. Almond flour and coconut flour are great choices to add moisture and flavor. Adding binders like xanthan gum or guar gum helps the cookies hold together and prevents crumbling. Mix your dough until ingredients just come together to avoid tough cookies. For extra flavor and texture, add mix-ins like chocolate chips, nuts, or dried fruit.
Tips for Perfect Gluten-Free Cupcakes
Gluten-free cupcakes require a light and tender crumb, which can be achieved by using the right flour blend and sufficient moisture. Use ingredients such as yogurt, applesauce, or oil to keep the cupcakes moist. Be careful not to overmix the batter to prevent dense cupcakes. Adding a bit of xanthan gum improves the structure and elasticity. Bake cupcakes at the recommended temperature, but start checking a few minutes earlier since gluten-free treats can bake faster.
Flavor Variations and Enhancements
Experiment with different flavors by incorporating spices like cinnamon, nutmeg, or vanilla extract. Fresh fruit puree or zest adds brightness and moisture to cupcakes. For cookies, consider adding a pinch of sea salt to balance sweetness or use espresso powder to enhance chocolate flavors.
Decorating Gluten-Free Cupcakes
Frost your cupcakes with your favorite gluten-free frosting, such as buttercream or cream cheese frosting. Ensure the frosting ingredients are also gluten-free by checking labels carefully. Add sprinkles or other toppings for a festive touch.
Homemade Pastries and Scones—Gluten-Free Style
Understanding Gluten-Free Pastries
Pastries rely heavily on gluten to create their flaky, tender layers. Without gluten, achieving that delicate texture requires using the right combination of gluten-free flours and fats. Almond flour and tapioca starch are often combined to give pastries a light, crumbly texture. Using cold butter or shortening helps create flaky layers by coating flour particles and preventing them from absorbing too much moisture.
Tips for Making Gluten-Free Pastry Dough
Work quickly when mixing dough to keep the butter cold and create flakiness. Avoid overmixing, which can cause the dough to become dense and tough. Use a food processor or pastry cutter to blend ingredients evenly, then chill the dough before rolling it out. Rolling between two sheets of parchment paper prevents sticking and makes handling easier.
Baking Gluten-Free Scones
Gluten-free scones can be tender and crumbly without falling apart when you use the right flour mix and binders. Incorporate almond flour or coconut flour with a gluten-free flour blend for the best texture. Add enough liquid ingredients, such as milk or yogurt, to keep scones moist. Handle the dough gently and avoid overworking it to maintain a light crumb.
Flavor Ideas for Pastries and Scones
Add fresh or dried fruits, nuts, and spices like cinnamon or nutmeg to enhance flavor. For savory pastries, try herbs, cheese, or cooked vegetables. Experiment with different sweeteners like honey or maple syrup for a unique taste.
Essential Tools and Equipment for Gluten-Free Baking
Must-Have Kitchen Tools
Measuring Tools for Accuracy
Accurate measurements are essential in gluten-free baking. Invest in a good digital kitchen scale to weigh your ingredients precisely. Measuring cups and spoons are helpful, but weighing ingredients reduces errors and improves consistency. Use separate measuring tools for dry and wet ingredients to avoid contamination.
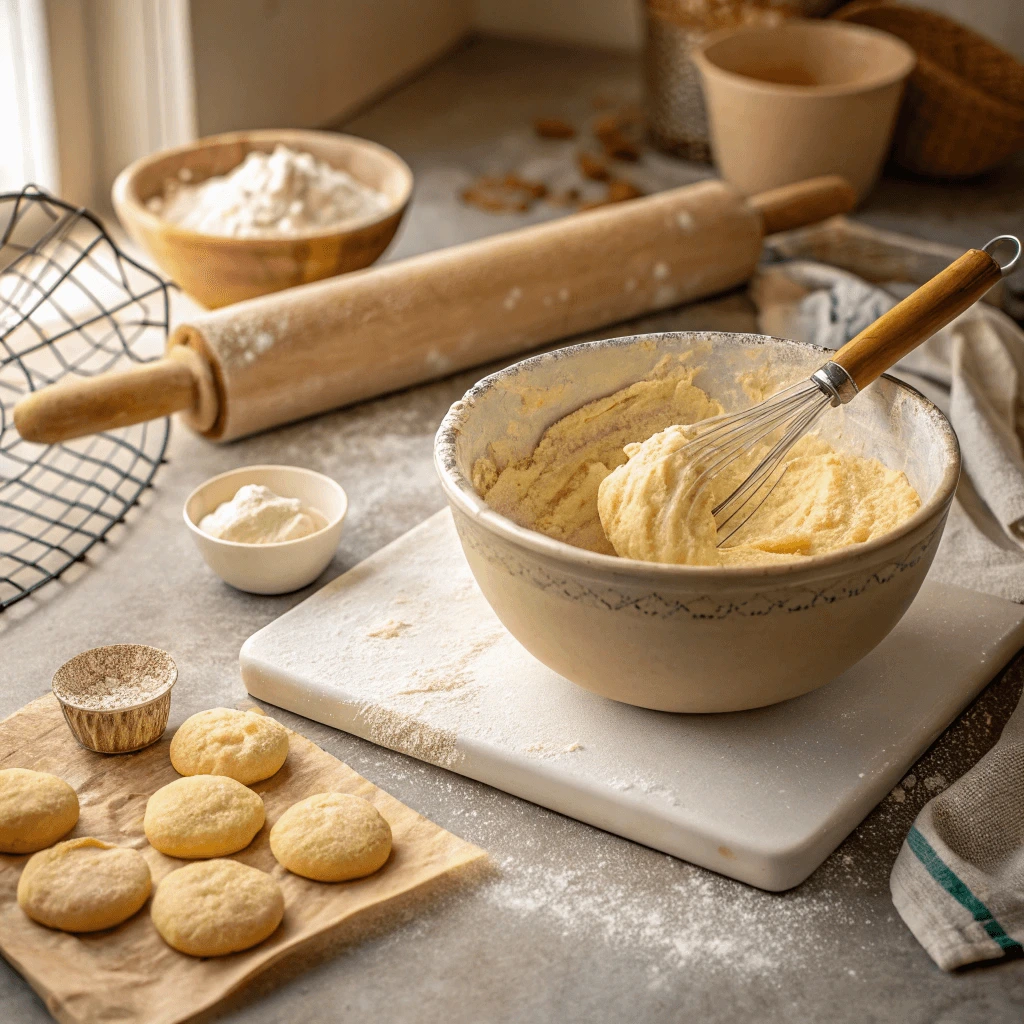
Mixing Equipment
A stand mixer or hand mixer makes mixing gluten-free batters and doughs easier and more consistent. These tools help blend ingredients thoroughly without overworking the batter. For smaller batches, a sturdy mixing bowl and whisk can work well too. Silicone spatulas are perfect for scraping every bit of batter from bowls.
Baking Pans and Sheets
Use non-stick or parchment-lined baking pans and sheets to prevent sticking and make cleanup easier. For bread and muffins, loaf pans and muffin tins designed with non-stick surfaces help shape your treats perfectly. Silicone baking mats also offer a reusable, eco-friendly alternative to parchment paper.
Tools for Dough Handling and Shaping
Rolling pins are crucial for evenly rolling out gluten-free dough, especially for pastries and cookies. Consider using a rolling pin with adjustable thickness rings for uniform results. Pastry cutters and bench scrapers help you cut dough cleanly and portion it precisely. Silicone baking mats or parchment paper prevent sticking during rolling.
Oven Thermometer and Timer
Ovens can vary in temperature, so an oven thermometer helps ensure your oven heats to the right temperature for gluten-free baking. Timers keep track of baking times to prevent over- or under-baking your treats.
How to Measure Gluten-Free Ingredients Accurately
Why Accurate Measurement Matters
Gluten-free baking relies heavily on precise ingredient ratios to achieve the right texture and flavor. Unlike traditional baking, gluten-free recipes often require a careful balance between flours, starches, and liquids. Measuring ingredients accurately helps prevent common issues such as dryness, crumbliness, or gummy textures.
Using a Kitchen Scale
A digital kitchen scale provides the most accurate way to measure gluten-free flours and starches. Weighing ingredients eliminates the inconsistencies that come from scooping or spooning flours into measuring cups. Always zero out the scale before adding each ingredient to ensure precision.
Proper Techniques for Measuring Dry Ingredients
If you don’t have a scale, use the spoon-and-level method for measuring dry ingredients. Lightly spoon the flour into the measuring cup without packing it down. Then, use the flat edge of a knife to level off the excess. Avoid scooping directly from the bag, as this compacts the flour and leads to using too much.
Measuring Liquids Correctly
Use clear liquid measuring cups placed on a flat surface to check liquid levels at eye level. This method prevents over- or under-pouring. For small amounts, use measuring spoons to maintain accuracy.
Tips for Consistency
Always use the same measuring tools and methods to maintain consistency across your recipes. Store your gluten-free flours in airtight containers to prevent moisture changes, which can affect weight and volume. Check ingredient freshness regularly, as old or clumpy flours can alter your measurements.
Keeping Your Baking Space Gluten-Free
Why Maintaining a Gluten-Free Baking Space Matters
Cross-contamination can easily occur in kitchens where gluten and gluten-free ingredients coexist. Even tiny amounts of gluten can trigger reactions for people with celiac disease or gluten sensitivity. Keeping your baking space strictly gluten-free ensures safety and the best results for your homemade treats.
Cleaning and Organizing Your Kitchen
Start by thoroughly cleaning all surfaces, utensils, and appliances before baking. Use hot, soapy water to remove any gluten residue. Store gluten-free ingredients separately from gluten-containing ones, ideally in sealed containers and designated areas. Label containers clearly to avoid confusion.
Using Separate Tools and Equipment
Designate specific mixing bowls, baking pans, and utensils exclusively for gluten-free baking. This practice prevents accidental gluten exposure. Consider color-coding your gluten-free tools or using a dedicated set to make identification easier.
Managing Flour and Ingredient Storage
Flour dust can easily spread and contaminate other ingredients. Always scoop gluten-free flour carefully, avoiding spills. Store your flours in airtight containers to minimize airborne particles. Clean up any spills immediately using a damp cloth rather than sweeping, which can spread flour dust.
Baking Practices to Prevent Cross-Contamination
When baking gluten-free, avoid sharing appliances like toasters or grills with gluten-containing foods. If sharing is necessary, clean equipment thoroughly between uses. Use parchment paper or silicone mats on baking sheets to create a barrier between your baked goods and surfaces that may have gluten residues.
Troubleshooting and Enhancing Your Gluten-Free Bakery Treats
Common Baking Problems and How to Fix Them
Problem 1: Dry or Crumbly Texture
Gluten-free baked goods often turn out dry or crumbly because they lack gluten’s binding properties. To fix this, add more moisture by incorporating ingredients like applesauce, yogurt, or mashed bananas. Using binders such as xanthan gum or psyllium husk can improve the structure and help hold your baked goods together.
Problem 2: Dense or Heavy Baked Goods
Sometimes gluten-free treats become dense or heavy. This issue arises when the flour blend is too heavy or the batter is overmixed. To avoid this, use a balanced gluten-free flour blend that includes lighter starches like tapioca or arrowroot. Mix the batter gently and only until ingredients are combined to maintain a light texture.
Problem 3: Baked Goods Don’t Rise Properly
Gluten-free doughs and batters often struggle to rise because gluten provides elasticity and traps air. To encourage rising, make sure your baking powder or baking soda is fresh. Adding extra eggs or using psyllium husk powder can also help create a better rise. Allow your dough extra time to rest and rise if needed.
Problem 4: Gummy or Sticky Texture
A gummy or sticky texture can occur when you use too much xanthan gum or add too much liquid. Adjust the amount of binder you use and measure liquids carefully. Sometimes, letting baked goods cool completely before cutting improves their texture.
Problem 5: Cracking or Dry Edges
Cracks or dry edges happen when the oven temperature is too high or baking time is too long. Use an oven thermometer to ensure accurate temperature and check your baked goods a few minutes before the recipe’s suggested time. Covering with foil during baking can prevent excessive browning.
Healthy Sweeteners and Flavor Enhancers
Choosing Natural Sweeteners
Many gluten-free bakers prefer natural sweeteners to reduce refined sugar intake. Options like honey, maple syrup, and coconut sugar add sweetness along with subtle flavors. These sweeteners also provide some nutrients and antioxidants that refined sugar lacks. When substituting, remember that liquid sweeteners like honey or maple syrup add moisture, so adjust other liquids in your recipe accordingly.
Using Fruit-Based Sweeteners
Pureed fruits such as mashed bananas, applesauce, or dates can sweeten your baked goods naturally while adding moisture and fiber. These ingredients help keep gluten-free treats tender and moist. Using fruit purees also enhances the nutritional profile by adding vitamins and antioxidants.
Incorporating Spices and Extracts
Spices like cinnamon, nutmeg, and ginger provide warm, rich flavors without extra calories or sugar. Vanilla, almond, and citrus extracts enhance sweetness and add depth to your recipes. Adding a pinch of sea salt balances sweetness and brings out other flavors in your baked goods.
Experimenting with Alternative Sugars
Some bakers use less common sweeteners like date sugar, stevia, or monk fruit extract for lower-calorie options. These alternatives vary in sweetness and texture, so experiment with small batches to find the right balance. Keep in mind that some substitutes may affect the texture or rise of your baked goods.
Where to Find Quality Gluten-Free Baking Ingredients and Brands for Your Gluten-Free Bakery
Shopping at Specialty Gluten-Free Bakery Stores
Specialty gluten-free bakery stores provide an excellent place to find high-quality baking ingredients specifically designed for a gluten-free bakery. These stores often stock unique flours, starches, and binders essential for creating delicious gluten-free bakery treats. Staff at these stores usually have extensive knowledge about gluten-free bakery needs and can recommend the best products for your recipes.
Finding Ingredients at Major Grocery Chains for Gluten-Free Bakery Needs
Many major grocery chains now dedicate sections to gluten-free bakery products and ingredients. When shopping for your gluten-free bakery, look for certified gluten-free labels on flours, baking mixes, and sweeteners. Trusted brands like Bob’s Red Mill, King Arthur Flour, and Cup4Cup offer excellent gluten-free bakery ingredients that ensure consistent results for your baked goods.
Exploring Online Retailers for Gluten-Free Bakery Ingredients
Online retailers offer a convenient way to source ingredients needed for your gluten-free bakery. Websites such as Amazon and Thrive Market provide a wide range of gluten-free bakery flours, sweeteners, and specialty items shipped directly to your door. Customer reviews on these platforms can help you find the best gluten-free bakery brands to meet your baking goals.
Supporting Local Health Food Stores and Co-ops for Gluten-Free Bakery Supplies
Local health food stores and food co-ops often stock gluten-free bakery ingredients from small and artisanal producers. These sources can supply organic and non-GMO options, which many gluten-free bakery enthusiasts prefer. Building connections with local store staff can help you discover new gluten-free bakery products and brands you might not find elsewhere.
Tips for Choosing the Best Ingredients for Your Gluten-Free Bakery
Always check product labels to confirm items are certified gluten-free for your gluten-free bakery. Opt for fresh, high-quality ingredients without fillers or artificial additives to maintain the best taste and texture. Testing different brands can help your gluten-free bakery identify which products work best in your recipes.
Conclusion
Recreating your favorite gluten-free bakery treats at home is easier than you might think. With the right ingredients, tools, and techniques, you can enjoy delicious, safe, and fresh baked goods anytime. Understanding essential gluten-free flours, binders, and sweeteners helps you achieve great texture and flavor. Keep your baking space clean and organized to avoid cross-contamination. By following simple tips and sourcing quality ingredients, you’ll confidently bring the taste of your favorite gluten-free bakery treats right into your kitchen. Happy baking!