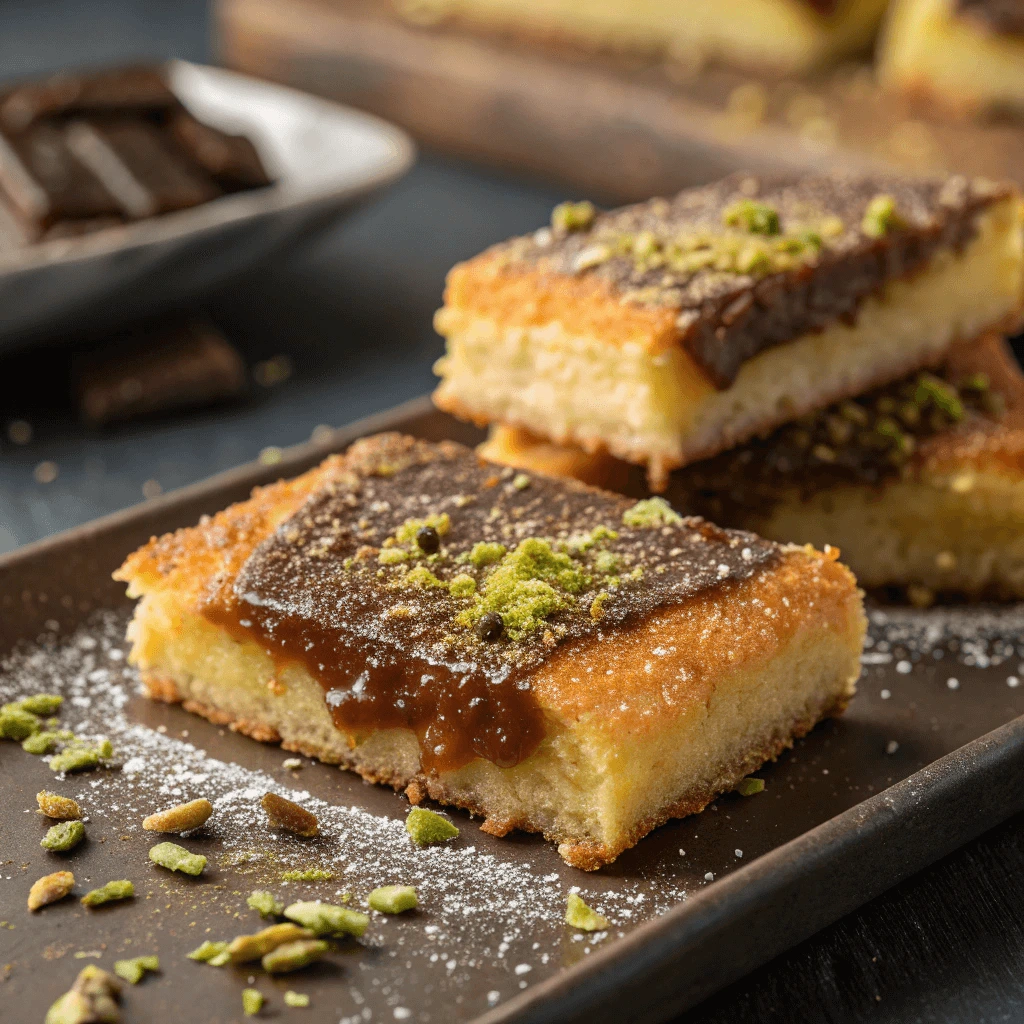
If you’re looking to indulge in a dessert that’s a perfect balance of textures and flavors, then the Knafeh chocolate Bar is your ultimate treat. This recipe takes the beloved, traditional Middle Eastern dessert—known for its crispy semolina crust and creamy cheese filling—and adds a rich twist of chocolate. The result is a delightful fusion of crunch, creaminess, and chocolatey goodness that’s sure to satisfy any sweet tooth. Whether you’re a fan of classic Knafeh or just in the mood for something new, these Knafeh Chocolate Bars offer a fun and modern take on a timeless favorite.
In this recipe, you’ll learn how to create a golden, crispy semolina base, layered with a smooth, creamy filling, and finished off with decadent chocolate. And of course, we’ll top it all with a sprinkle of pistachios for that perfect crunch. Ready to discover the secrets behind this irresistible dessert? Let’s dive in!
What Makes This Knafeh Chocolate Bar Recipe Unique?
A Fusion of Middle Eastern Tradition and Chocolate Indulgence
The Knafeh Chocolate Bar Recipe is a delicious blend of cultural tradition and modern flair, bringing together the familiar flavors of the Middle East with the richness of chocolate.
A Taste of Heritage
Traditional knafeh has long held a special place in Middle Eastern cuisine. Made with shredded kataifi or semolina and layered with soft white cheese, it’s baked until golden and topped with a sweet, floral syrup. This comforting dessert represents hospitality and celebration across countries like Palestine, Lebanon, and Jordan.
A Modern Chocolate Twist
By adding chocolate to the mix, dessert lovers have turned knafeh into something entirely new. The chocolate not only enhances the creamy texture but also balances the sweetness of the syrup. Whether you use dark, milk, or even white chocolate, each version adds its own depth of flavor to this crispy, creamy base.
Bridging Two Worlds
This version of knafeh doesn’t replace tradition—it reinvents it. The result is a dessert that satisfies both those who crave comfort food and those looking for something creative and indulgent. The Knafeh Chocolate Bar Recipe is more than just a sweet—it’s a cultural connection made even more delightful with chocolate.
Flavor and Texture Breakdown
The Knafeh Chocolate Bar Recipe stands out because of its irresistible contrast of textures and its complex, layered flavors. Each bite delivers a blend of tradition and creativity that keeps you coming back for more.
Crispy and Buttery Base
The base of the dessert, made with toasted kataifi or semolina, provides a golden crunch. When lightly coated in butter or a healthy oil alternative like coconut oil, the strands toast evenly and develop a rich, nutty flavor. This layer serves as the structural foundation, adding satisfying texture and a buttery aroma.
Creamy Chocolate Middle
The center features melted chocolate—dark, milk, or white—depending on your preference. When layered with plant-based or low-fat cheeses like ricotta or mozzarella, the chocolate melds into a velvety, gooey filling. This layer offers a luscious counterbalance to the crispy base, giving the dessert its signature creaminess.
Sweet and Aromatic Finish
A drizzle of honey, rosewater syrup, or date syrup finishes the dessert with just the right amount of sweetness. These toppings add floral or fruity notes, enhancing the flavor profile without overwhelming the dish. Crushed pistachios or a sprinkle of cinnamon can bring in extra complexity and texture.
Together, these layers create a dessert that’s both familiar and fresh. The crunch, the creaminess, and the subtle aromatic touches work in harmony to make the Knafeh Chocolate Bar Recipe a truly unique culinary experience.
Healthy Ingredient Alternatives for Classic Taste
You can make the classic Knafeh Chocolate Bar Recipe healthier without losing its delicious flavor. Simple ingredient swaps bring more nutrition and balance to this beloved dessert.
Whole Wheat Semolina Instead of Refined
Use whole wheat semolina in place of refined semolina. It adds more fiber and nutrients while keeping the crunchy texture you expect from knafeh.
Healthier Fats Replace Butter
Swap butter with coconut oil or avocado oil. These oils provide richness but contain healthier fats that support heart health.
Light or Plant-Based Cheese Choices
Replace traditional cheeses like Akawi with part-skim mozzarella or ricotta to reduce fat and sodium. For dairy-free options, use almond or soy-based cheeses that melt well and maintain creaminess.
These healthy alternatives keep the essence of the Knafeh Chocolate Bar Recipe intact, making it easier to enjoy as part of a balanced diet.
Ingredients You’ll Need for the Perfect Knafeh Chocolate Bar
Traditional Ingredients Explained
To truly appreciate the Knafeh Chocolate Bar Recipe, it helps to understand the traditional ingredients that form its foundation. Each component plays a vital role in delivering the dessert’s signature taste and texture.
Semolina: The Crunchy Base
Semolina, a coarse wheat flour, creates the crunchy, golden crust essential to knafeh. Bakers toast the semolina to develop its nutty aroma and crisp texture. This ingredient provides a sturdy base that contrasts beautifully with the creamy layers above.
Kataifi (Shredded Phyllo Dough)
Kataifi, also called shredded phyllo dough, adds delicate strands that bake into a light, crispy layer. It complements the semolina by offering an airy texture that enhances the dessert’s crunch. Using kataifi preserves the traditional knafeh experience.
Akawi or Nabulsi Cheese: The Creamy Heart
Akawi and Nabulsi cheeses are soft, mild, and slightly salty, making them perfect for knafeh. These cheeses melt smoothly, creating the luscious creamy layer that balances the crispy crust. Their unique flavor profile sets knafeh apart from other desserts.
Sugar Syrup: The Sweet Finish
A fragrant sugar syrup, often infused with rosewater or orange blossom, drenches the baked knafeh. This syrup soaks into the layers, adding sweetness and moisture that elevate the dessert’s richness. It binds all the textures together for a harmonious taste.
Understanding these traditional ingredients reveals why knafeh holds a special place in Middle Eastern cuisine. Each element contributes distinct flavors and textures, combining into a dessert that’s both simple and extraordinary.
Choosing the Right Chocolate for This Dessert
Selecting the perfect chocolate is essential when making a Knafeh Chocolate Bar. The chocolate you choose influences the flavor, texture, and overall experience of this unique fusion dessert.
Dark Chocolate: Rich and Intense
Dark chocolate offers a bold, slightly bitter flavor that balances the sweetness of the sugar syrup and the creamy cheese layer. It melts smoothly, creating a luxurious layer that contrasts with the crunchy semolina base. Opt for high-quality dark chocolate with at least 70% cocoa content for a deep, satisfying taste.
Milk Chocolate: Creamy and Sweet
Milk chocolate adds a sweeter, creamier element to the dessert. Its milder flavor appeals to those who prefer a less intense chocolate experience. Milk chocolate blends well with the salty notes of Akawi or Nabulsi cheese, creating a harmonious balance of flavors.
White Chocolate: Sweet and Smooth
White chocolate provides a sweet, buttery flavor that complements the traditional knafeh ingredients without overpowering them. Its creamy texture melts beautifully, adding an indulgent layer of sweetness. Using white chocolate can create a lighter, more delicate version of the classic dessert.
Flavor Infusions and Add-Ins
To elevate the chocolate layer, consider infusing it with subtle spices like cardamom or cinnamon. These spices add warmth and complexity, enhancing the Middle Eastern roots of knafeh. Alternatively, mixing in crushed nuts such as pistachios or almonds adds a delightful crunch.
Choosing the right chocolate ultimately depends on your flavor preferences and how you want to balance sweetness with the classic knafeh textures. Experimenting with different types allows you to customize this dessert and make the Knafeh Chocolate Bar truly your own.
Nutritious Swaps for Guilt-Free Enjoyment
You can make the Knafeh Chocolate Bar healthier without losing its delicious taste. Simple ingredient swaps add nutrition and reduce guilt.
Use Whole Wheat Semolina Instead of Refined
Whole wheat semolina adds more fiber and nutrients than refined semolina. It also gives a slightly nuttier flavor while keeping the classic texture.
Replace Butter with Coconut Oil
Coconut oil crisps the base like butter but contains healthier fats. It adds a subtle aroma that pairs well with chocolate.
Choose Low-Fat or Plant-Based Cheese
Swapping traditional cheese for low-fat or plant-based versions cuts down on fat and calories. These options still keep the creamy texture that’s essential to knafeh.
Pick Unsweetened Dark Chocolate
Using unsweetened dark chocolate lowers sugar content and boosts antioxidants. It adds rich flavor without extra sweetness.
Swap Sugar Syrup for Natural Sweeteners
Honey or date syrup can replace sugar syrup for a natural sweetness with added health benefits.
Use Greek Yogurt Instead of Heavy Cream
Greek yogurt lightens the creamy layer by reducing fat and increasing protein.
These easy swaps let you enjoy the Knafeh Chocolate Bar with less guilt while keeping its signature flavors and textures.
Step-by-Step Knafeh Chocolate Bar Recipe Guide
Crafting the Crunchy Knafeh Base
The crunchy base forms the essential foundation of the Knafeh Chocolate Bar. To achieve the perfect crisp texture, you need to pay close attention to both ingredient choices and preparation techniques.
Selecting the Right Ingredients
First, start by choosing semolina or kataifi dough, which are traditional elements in knafeh. Semolina offers a coarse, grainy texture that toasts well, whereas kataifi provides delicate, shredded layers that crisp beautifully. Alternatively, for a healthier option, you can consider using whole wheat semolina or substitute butter with coconut oil.
Toasting for Texture and Flavor
Next, toast the semolina or kataifi dough in a dry pan over medium heat until it turns a rich golden brown. Toasting not only enhances the nutty flavor but also creates the crispiness that contrasts wonderfully with the creamy chocolate layer. Be sure to stir frequently to prevent burning and to ensure even browning throughout.
Binding the Base
After toasting, combine the base with melted butter or a healthier fat alternative like coconut oil. Mix thoroughly so the fat coats every grain or strand evenly. This step is crucial because it helps the base bind together during baking, allowing the dessert to hold its shape while maintaining its crunchy texture.
Pressing and Baking
Then, press the mixture firmly into your baking dish to create an even layer. Baking it briefly helps the base set and become even crispier. However, keep a close eye on the oven to avoid over-baking, which could cause the base to dry out.
Creating a Luscious Chocolate Layer
The chocolate layer transforms the traditional knafeh into a rich, indulgent dessert. To achieve the perfect balance of smoothness and flavor, follow these key steps carefully.
Choosing and Melting the Chocolate
Begin by selecting high-quality chocolate. Dark chocolate adds intense flavor and a slight bitterness that complements the sweet base, while milk chocolate offers a creamier, sweeter taste. White chocolate provides a delicate sweetness that pairs well with aromatic spices if you want a more unique twist. Once chosen, chop the chocolate into small pieces for even melting. Use a double boiler or microwave in short bursts, stirring frequently to avoid burning and ensure a silky texture.
Preparing the Creamy Filling
While melting the chocolate, prepare the creamy base by combining ingredients like cream cheese, mascarpone, or a plant-based alternative. Whip these ingredients until smooth and airy. For a healthier option, you can substitute heavy cream with Greek yogurt or coconut cream, which still offers richness without the extra calories.
Combining Chocolate and Cream
Gradually fold the melted chocolate into the creamy mixture. Stir gently but thoroughly to incorporate the chocolate evenly without deflating the cream’s lightness. This step ensures a luscious, velvety texture that melts delightfully in every bite.
Layering and Setting
After preparing the chocolate cream, spread it evenly over the crunchy knafeh base. Smooth the surface using a spatula for an even finish. Refrigerate the dessert for at least two hours to allow the chocolate layer to set firmly. Chilling helps develop the texture and enhances the flavors as they meld together.
Better-for-You Prep Tips
Preparing a healthier version of the knafeh chocolate bar does not mean sacrificing flavor. With a few simple swaps and mindful techniques, you can enjoy this dessert guilt-free.
Use Healthier Fats
Instead of traditional butter, try using coconut oil or avocado oil. These oils offer healthy fats that support heart health and add a subtle, pleasant flavor. Coconut oil also helps achieve that crispy texture in the knafeh base.
Reduce Added Sugars
Cut down on sugar by replacing traditional sugar syrup with natural sweeteners like honey, maple syrup, or date syrup. These alternatives provide sweetness along with extra nutrients and antioxidants. Adjust the amount to your preference to keep the dessert light yet flavorful.
Incorporate Nutritious Add-Ins
Add crushed nuts such as pistachios or almonds to the knafeh base or sprinkle them on top. Nuts add a delightful crunch and provide protein, healthy fats, and fiber. Additionally, mixing in chia seeds or flaxseeds boosts the dessert’s nutritional value without overpowering the taste.
Opt for Lower-Fat Dairy or Plant-Based Alternatives
Use low-fat cheese or plant-based cheese substitutes to reduce saturated fat content. Greek yogurt can replace heavy cream in the chocolate layer to maintain creaminess while adding probiotics and protein.
Serving Ideas and Creative Flavor Variations for Knafeh Chocolate Bar
Traditional Middle Eastern Touches for the Knafeh Chocolate Bar
Adding authentic Middle Eastern elements to the knafeh chocolate bar elevates its flavor and connects it to its cultural roots. These touches enrich the dessert’s taste and appearance, making it a unique fusion experience.
The Role of Rosewater and Orange Blossom Water
Rosewater and orange blossom water are classic aromatic ingredients widely used in Middle Eastern desserts. They infuse the knafeh chocolate bar with delicate floral notes that balance the richness of the chocolate and the crispiness of the base. Adding just a few drops during the preparation creates an elegant, fragrant layer that enhances the overall flavor profile.
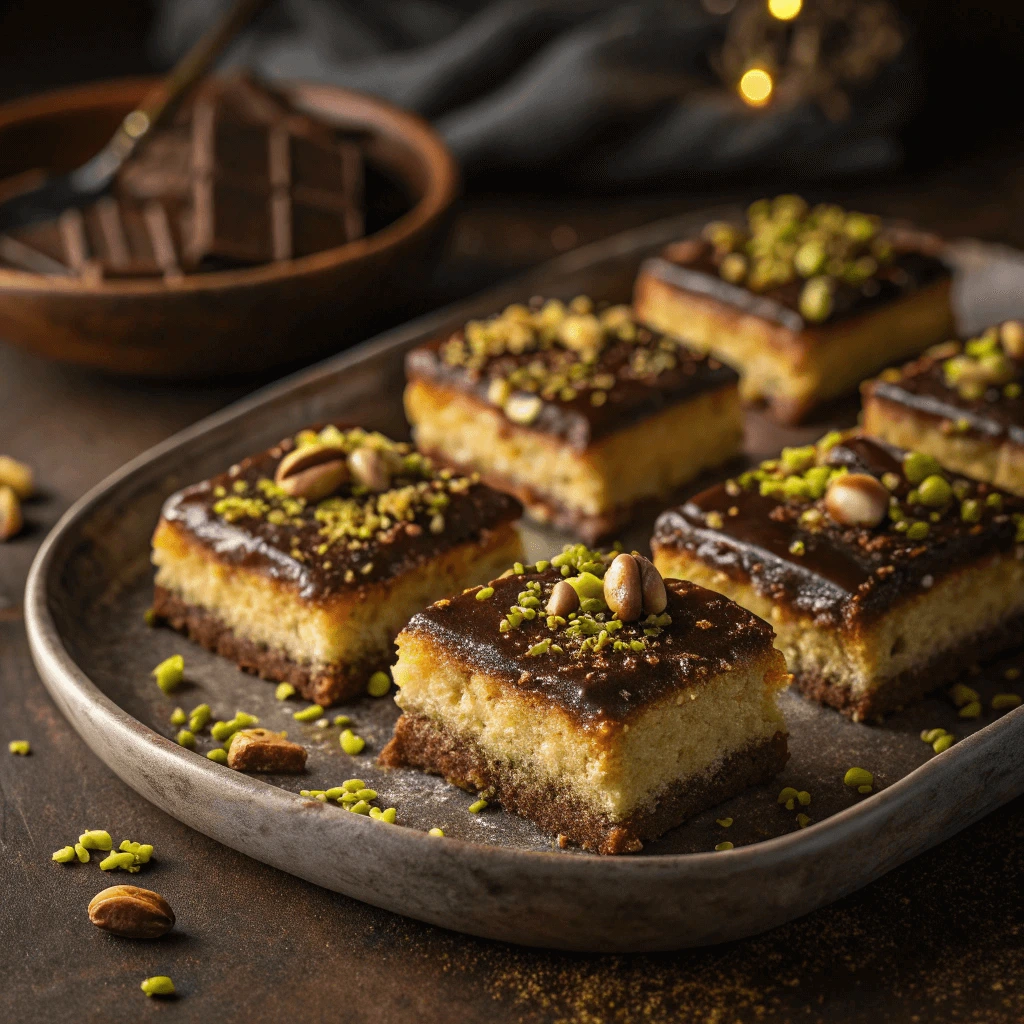
Crushed Pistachios for Texture and Color
Pistachios serve as a traditional garnish, providing a vibrant green color contrast to the golden knafeh and dark chocolate layers. They add a satisfying crunch and subtle nuttiness that complements the creamy textures. Sprinkling crushed pistachios on top not only improves the visual appeal but also boosts the nutritional value with healthy fats and protein.
A Sprinkle of Ground Cardamom or Cinnamon
Spices such as cardamom and cinnamon have long featured in Middle Eastern sweets. Incorporating a pinch of these warming spices into the knafeh chocolate bar adds depth and complexity to the flavor. These spices blend well with chocolate, creating an inviting aroma that evokes the essence of traditional desserts while enhancing the modern twist.
Final Touches with Sesame Seeds or Honey Drizzle
For an extra authentic finish, sprinkle toasted sesame seeds over the dessert. Their mild nuttiness pairs well with the other flavors. Alternatively, drizzle a light layer of honey or date syrup on top to add natural sweetness and a glossy finish, tying all the elements together harmoniously.
Chocolate-Forward Innovations to Elevate Your Knafeh Chocolate Bar
Adding chocolate to knafeh creates an exciting modern twist that appeals to chocolate lovers everywhere. This innovation allows you to explore new flavors and textures while keeping the traditional essence intact.
Choosing Your Chocolate
Start by selecting the right chocolate. Dark chocolate offers a bold, slightly bitter contrast to the sweetness of knafeh, enhancing its richness. Milk chocolate provides a creamy, sweeter flavor that many enjoy, while white chocolate adds a smooth, delicate vanilla note. Picking the right chocolate lets you customize your dessert perfectly.
Creative Layering Ideas
Next, think about how to layer the chocolate. Pouring melted chocolate over the crunchy knafeh base adds a glossy finish and rich flavor. For more indulgence, try adding a creamy ganache or mousse layer between knafeh layers. This creates a luscious, melt-in-your-mouth texture that elevates the dessert.
Infusing Flavors into Chocolate
To make your dessert truly unique, infuse your chocolate with complementary flavors. Spices like cardamom or cinnamon add warmth and depth, reflecting Middle Eastern influences. You can also add rosewater or orange zest to brighten the chocolate’s taste, making every bite more aromatic and delightful.
These chocolate-forward innovations transform the classic knafeh chocolate bar into a delicious fusion of tradition and modern indulgence.
Healthy Flavor Add-Ins for Knafeh Chocolate Bar Variations
Adding healthy flavor boosters to your Knafeh Chocolate Bar Recipe not only enhances taste but also increases its nutritional value. These simple additions create a delicious treat that supports a balanced lifestyle.
Boost with Seeds
Start by sprinkling chia seeds or flaxseeds onto your knafeh. These tiny seeds pack a punch with omega-3 fatty acids, fiber, and antioxidants. They add a subtle crunch and nutty flavor that complements both the creamy cheese and rich chocolate layers perfectly.
Natural Sweeteners and Spices
Replace refined sugars by incorporating natural sweeteners such as honey or date syrup. These alternatives provide a richer, more complex sweetness and contain vitamins and minerals missing in processed sugars. Additionally, add natural extracts like vanilla or cinnamon to intensify flavor. Cinnamon offers anti-inflammatory properties and a warm, comforting aroma that balances the chocolate’s richness.
Fresh and Dried Fruits
Top your knafeh bars with fresh berries or dried fruits like raisins or chopped dates. Berries bring vibrant color and antioxidants, while dried fruits provide chewy sweetness and texture. Both choices contribute vitamins, fiber, and natural sugars, making your dessert more wholesome without sacrificing flavor.
Nutty Additions for Texture
Consider adding crushed pistachios or almonds on top. These nuts bring healthy fats, protein, and a satisfying crunch. They also give a nod to traditional Middle Eastern garnishes, enriching the dessert’s authenticity and nutritional profile.
Why You’ll Love This Knafeh Chocolate Bar Recipe
A Dessert That Balances Texture and Taste
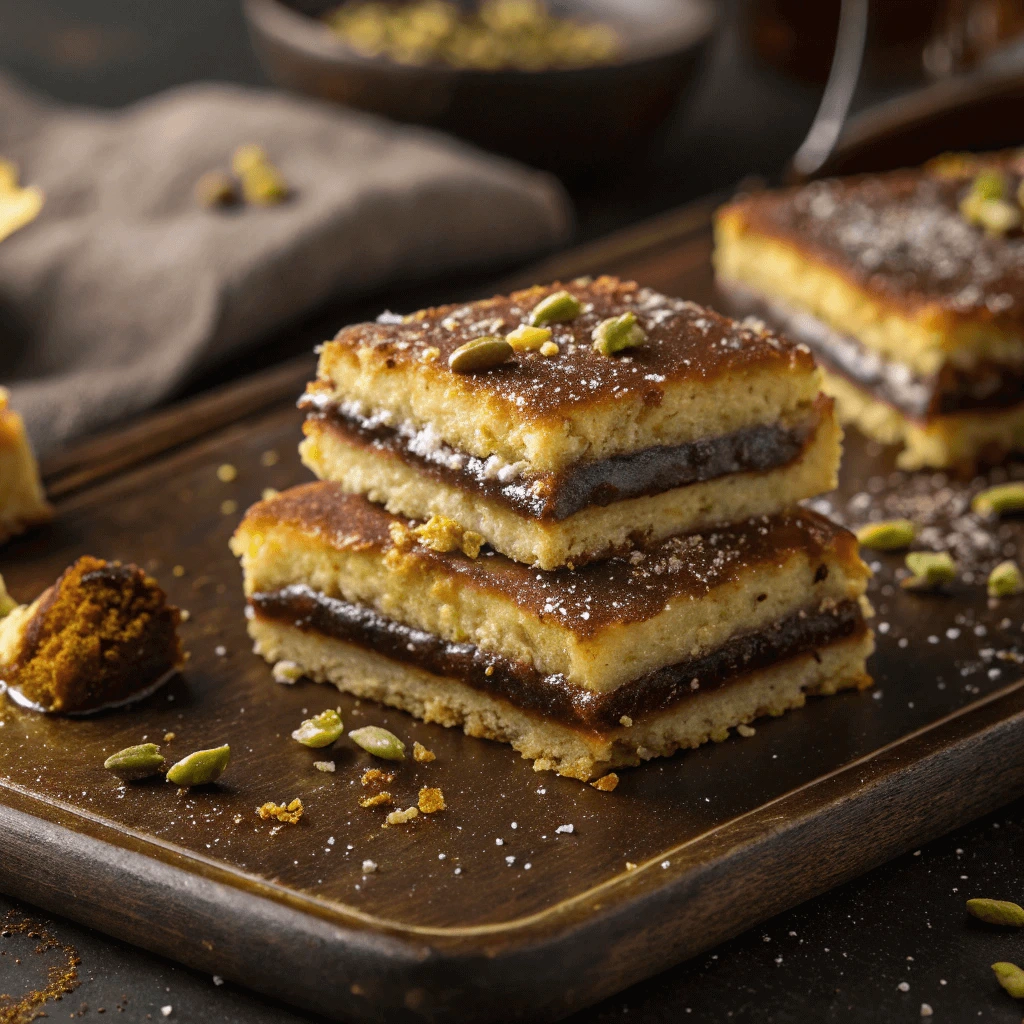
The Knafeh Chocolate Bar Recipe stands out because it masterfully combines contrasting textures and flavors to create a truly satisfying dessert experience. Achieving the right balance between crunch and creaminess enhances every bite, making this dessert irresistible.
The Crunch Factor
The base layer offers a crispy texture, typically made from toasted semolina or kataifi dough. This crunch provides a delightful contrast to the smooth chocolate topping. When toasted correctly, the base adds a golden crispness that holds the dessert together while giving a pleasant bite. The crunch awakens your senses and prevents the dessert from feeling too heavy.
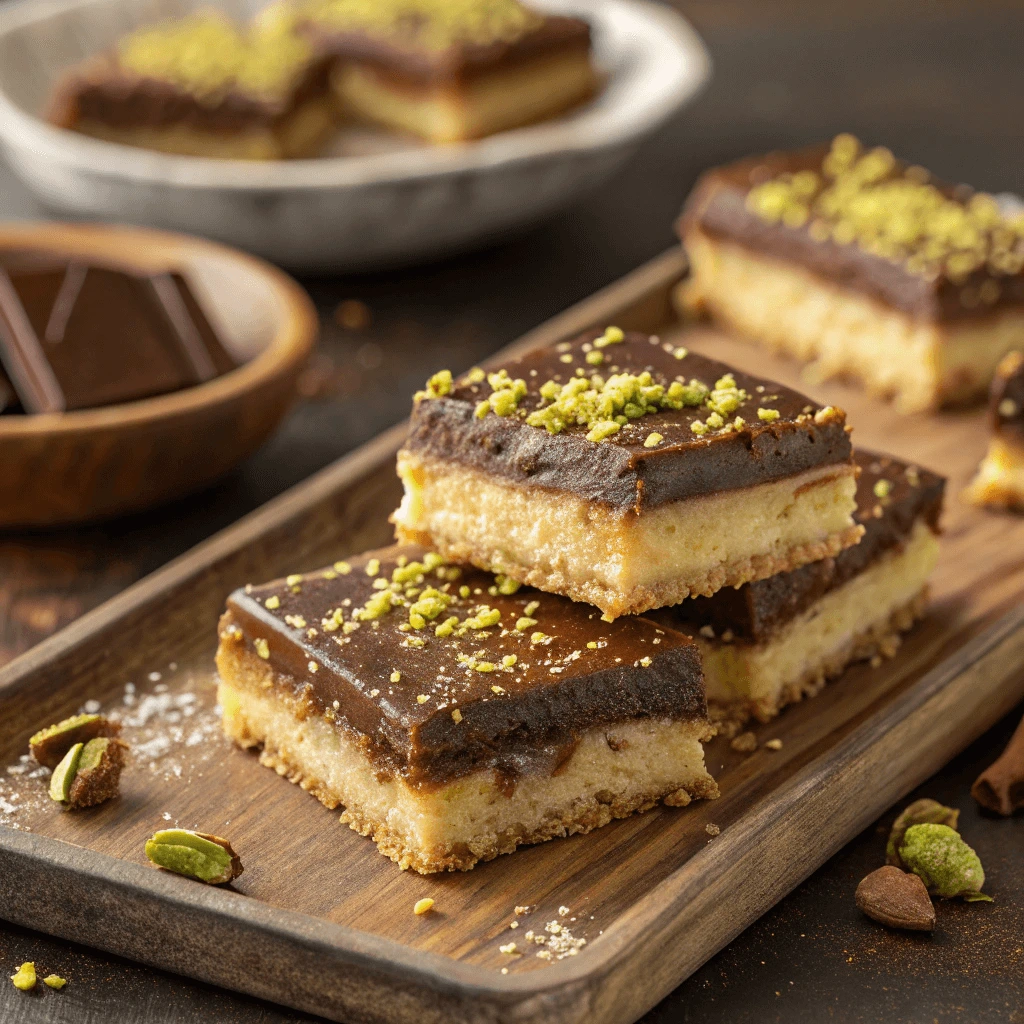
Creamy and Smooth Layers
In contrast, the chocolate layer adds a luscious creaminess. Whether you use rich dark chocolate or a milder milk chocolate, this layer melts smoothly on the tongue. The creamy cheese beneath the chocolate enhances this silky texture, creating a rich mouthfeel. This softness balances the crunchy base, making each forkful a harmonious blend of textures.
Flavor Harmony
Beyond texture, the dessert combines sweet and slightly savory flavors. The sweetness from the chocolate and syrup pairs beautifully with the mild saltiness of the cheese. This balance ensures the dessert never tastes overly sweet or dull. Instead, it delights the palate with layers of complexity in every bite.
Why Texture and Taste Matter
By skillfully blending crunchy and creamy elements alongside complementary flavors, the Knafeh Chocolate Bar Recipe elevates a classic dessert to a new level. This thoughtful balance not only appeals to traditional lovers of knafeh but also attracts modern dessert enthusiasts looking for richness with a satisfying bite.
Embracing Cultural Tradition with a Modern Knafeh Chocolate Bar Twist
The Knafeh Chocolate Bar Recipe beautifully bridges the gap between rich cultural heritage and contemporary dessert trends. This dessert honors the centuries-old tradition of knafeh while introducing modern flavors and textures that appeal to today’s taste buds.
Honoring Middle Eastern Heritage
Knafeh holds a cherished place in Middle Eastern cuisine, especially in countries like Palestine, Lebanon, and Jordan. Traditionally, it features layers of crispy kataifi or semolina dough paired with sweet cheese and drenched in fragrant sugar syrup. This classic dessert reflects the region’s love for bold, sweet flavors and intricate textures. By embracing these foundational elements, the recipe pays homage to an age-old culinary art.
Introducing Chocolate for a New Dimension
Adding chocolate to knafeh brings a fresh and indulgent twist. The smooth, rich chocolate layer complements the traditional crunchy base and creamy cheese perfectly. This fusion respects the original dish’s spirit but enhances it with a flavor that resonates globally. Chocolate appeals to a wider audience, making the dessert both familiar and exciting.
Combining Old and New Techniques
While the dessert remains rooted in tradition, the preparation methods often incorporate modern culinary techniques. For example, using coconut oil instead of butter or experimenting with healthier sweeteners aligns the recipe with contemporary health trends. These thoughtful adaptations keep the essence of knafeh intact while making it more accessible and appealing to health-conscious individuals.
Celebrating Culinary Evolution
The Knafeh Chocolate Bar Recipe shows how cultural dishes evolve without losing their identity. This modern adaptation demonstrates creativity and respect for tradition, inviting everyone to enjoy a timeless dessert reinvented for the present day. The combination of cultural pride and innovative flavors ensures this dessert will continue to delight for generations.
Adaptable for Health-Conscious Diets with Knafeh Chocolate Bar Options
The Knafeh Chocolate Bar Recipe offers a delicious way to enjoy a classic dessert while supporting a health-conscious lifestyle. By making simple ingredient swaps and practicing mindful preparation, you can indulge without compromising your wellness goals.
Gluten-Free and Dairy-Free Options
Many people today follow gluten-free or dairy-free diets for various health reasons. Fortunately, the Knafeh Chocolate Bar Recipe easily adapts to these needs. You can substitute traditional semolina or kataifi dough with gluten-free alternatives such as almond flour or gluten-free phyllo. For the cheese layer, plant-based cheeses made from nuts or soy provide a creamy texture while keeping the dessert dairy-free. These swaps maintain the authentic taste and texture without triggering sensitivities.
Reducing Added Sugars
Controlling sugar intake plays a big role in many health-conscious diets. Instead of the classic sugar syrup, you can use natural sweeteners like honey, date syrup, or maple syrup in moderation. These alternatives provide sweetness with additional nutrients and a lower glycemic impact. Additionally, using unsweetened dark chocolate not only reduces sugar but also increases antioxidant content, adding a nutritional boost to the dessert.
Healthy Fats and Portion Control
Replacing butter with healthier fats such as coconut oil or avocado oil enhances the recipe’s nutritional profile. These fats contain medium-chain triglycerides (MCTs) that support metabolism and provide lasting energy. Moreover, controlling portion sizes helps balance indulgence with health. Serving smaller slices allows you to enjoy the rich flavors while keeping calorie intake in check.
Incorporating Nutrient-Rich Add-Ins
Adding nuts like pistachios or almonds not only enhances texture but also contributes healthy fats, protein, and fiber. You can also sprinkle seeds such as chia or flaxseeds for an extra boost of omega-3 fatty acids and antioxidants. Fresh berries or dried fruits add natural sweetness and vitamins, making each bite more wholesome.
Conclusion
The Knafeh Chocolate Bar Recipe perfectly blends crispy, creamy, and chocolatey textures, creating a delightful dessert that honors Middle Eastern tradition while adding a modern twist. Whether you stick to classic ingredients or try healthier alternatives, this recipe offers versatility for all tastes and lifestyles. Its rich flavors and satisfying crunch make it a memorable treat for any occasion. Give this Knafeh Chocolate Bar a try and enjoy a sweet fusion that balances indulgence with cultural heritage beautifully.