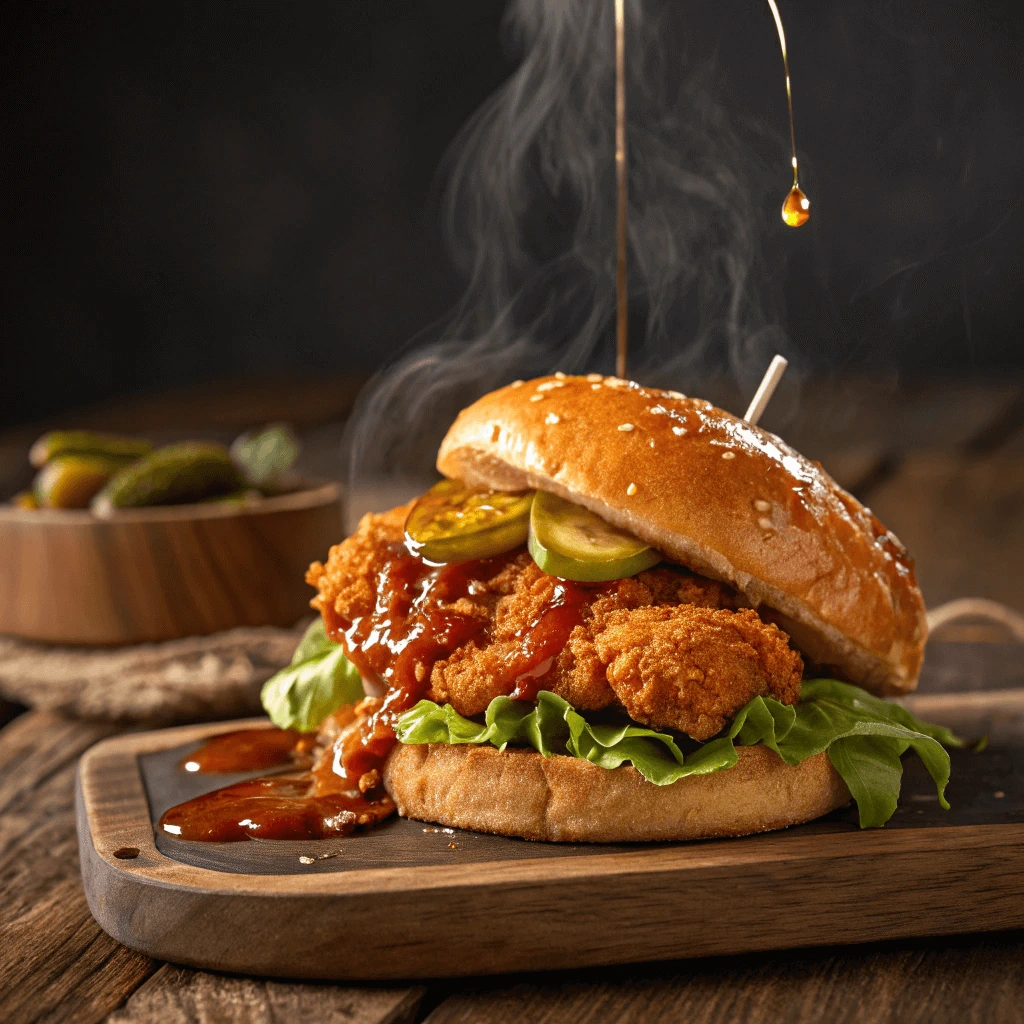
Craving a crispy, sweet, and spicy sandwich that’s better than takeout? This Hot Honey Chicken Sandwich is the perfect balance of crunch, heat, and sweetness—all made in just 30 minutes!
With juicy fried (or air-fried) chicken, a buttery toasted bun, and a drizzle of homemade hot honey, this sandwich delivers bold flavors in every bite. Whether you’re making it for a quick lunch, a weeknight dinner, or a crowd-pleasing meal, this recipe is fast, easy, and absolutely delicious.
Even better? You can adjust the spice level, swap out ingredients, or choose a healthier cooking method like baking or air frying. Ready to make the best Hot Honey Chicken Sandwich at home? Let’s get started!
What You’ll Need to Make a Hot Honey Chicken Sandwich
Essential Ingredients for the Best Flavor
The secret to a truly mouthwatering Hot Honey Chicken Sandwich lies in using high-quality ingredients that enhance both the taste and texture. Each component plays a crucial role in creating the perfect balance of crispy, juicy, sweet, and spicy.
1. Choosing the Best Chicken
For the best results, opt for boneless, skinless chicken breasts or thighs.
- Chicken breasts provide a leaner option with a mild flavor, making them ideal for absorbing marinades.
- Chicken thighs are naturally juicier and more flavorful due to their higher fat content.
2. The Perfect Breading for Maximum Crunch
A crispy, well-seasoned coating makes all the difference. Here’s what you need:
- Flour: All-purpose flour helps create a sturdy base for the breading.
- Cornstarch: Adds extra crispiness by creating a light, airy texture.
- Seasonings: Paprika, garlic powder, onion powder, salt, and black pepper infuse the breading with bold flavor.
- Egg and Buttermilk Mixture: This ensures the coating sticks to the chicken and stays crispy after frying.
3. The Hot Honey Sauce: Sweet Meets Spicy
The hot honey drizzle is what gives this sandwich its signature flavor. You’ll need:
- Honey: Provides natural sweetness and a sticky, glossy texture.
- Hot Sauce: Adds the right amount of heat to balance the sweetness.
- Butter: Helps smooth out the sauce for a rich, velvety finish.
- Cayenne Pepper or Red Pepper Flakes: Adjust to your spice preference for an extra kick.
4. The Right Bun for the Perfect Bite
A soft yet sturdy bun is essential for holding everything together. Consider:
- Brioche Buns: Buttery and slightly sweet, they complement the hot honey sauce perfectly.
- Potato Buns: Soft, fluffy, and absorbent enough to hold all the flavors.
- Toasted Buns: Light toasting prevents sogginess and adds a delicious crunch.
5. Toppings to Elevate the Flavor
Adding fresh toppings enhances both the texture and taste of your sandwich:
- Pickles: Their tangy crunch balances the richness of the fried chicken.
- Coleslaw: A cool, creamy element that adds a refreshing contrast.
- Lettuce & Tomato: Freshness that keeps the sandwich light and balanced.
By choosing the right ingredients and preparing them thoughtfully, you’ll achieve the ultimate hot honey chicken sandwich—one that’s crispy, juicy, spicy, and downright irresistible!
Kitchen Tools for Quick and Easy Cooking
Making a Hot Honey Chicken Sandwich in just 30 minutes is easier when you have the right kitchen tools. The right equipment not only speeds up the cooking process but also ensures your chicken is crispy, juicy, and perfectly coated in hot honey sauce.
1. Essential Cooking Tools for Preparing the Chicken
To prepare the chicken efficiently, you’ll need a few key tools:
- Sharp Chef’s Knife: A high-quality knife helps you slice the chicken evenly, ensuring it cooks at the same rate.
- Cutting Board: Use a sturdy, non-slip cutting board to safely trim and prep the chicken.
- Meat Mallet or Rolling Pin: If using chicken breasts, pounding them to an even thickness ensures uniform cooking.
2. Tools for Breading and Coating
A crispy, well-seasoned coating is the key to the best sandwich. These tools help make the breading process smoother:
- Mixing Bowls: You’ll need at least two—one for the egg and buttermilk mixture and another for the seasoned flour mixture.
- Tongs: Tongs allow you to handle the chicken without getting your hands messy. They also help prevent excessive breading loss.
- Baking Sheet with a Wire Rack: After coating the chicken, place it on a wire rack set over a baking sheet to prevent sogginess before frying.
3. Frying Equipment for a Perfectly Crispy Finish
Whether you’re deep-frying or using an air fryer, the right tools make all the difference:
- Cast Iron Skillet or Deep Fryer: A heavy-bottomed skillet (such as cast iron) ensures even frying and maintains the oil temperature. A deep fryer is a great option for hassle-free cooking.
- Oil Thermometer: Keeping the oil at the right temperature (around 350°F/175°C) ensures a golden, crispy crust without absorbing excess oil.
- Slotted Spoon or Spider Strainer: Helps you safely remove the chicken from the hot oil while draining excess grease.
- Paper Towels or Wire Rack: After frying, let the chicken rest on a wire rack or paper towels to keep it crisp.
4. Tools for Making the Hot Honey Sauce
The hot honey sauce brings everything together with its sweet and spicy flavor. These tools make the process quick and simple:
- Small Saucepan: A non-stick or stainless steel saucepan works best for melting butter and mixing the sauce evenly.
- Silicone Whisk or Spoon: Helps blend the honey, hot sauce, and butter smoothly without burning.
- Pastry Brush (Optional): For an even coating, use a brush to apply the hot honey sauce over the crispy chicken.
5. Tools for Assembling the Sandwich
Once the chicken is cooked, assembling the sandwich quickly ensures it stays hot and crispy. Keep these tools handy:
- Toaster or Skillet: Lightly toasting the buns in a toaster or on a skillet enhances their texture and prevents sogginess.
- Butter Knife: Useful for spreading butter or mayo on the buns for extra flavor.
- Serving Plates: Use large plates or baskets lined with parchment paper for an appetizing presentation.
Having these kitchen tools on hand makes it easy to cook your Hot Honey Chicken Sandwich quickly and efficiently while ensuring the best possible flavor and texture. With the right setup, you’ll have a restaurant-quality sandwich in no time!
Choosing the Right Buns and Toppings
The bread and toppings you choose can make or break your Hot Honey Chicken Sandwich. The right bun provides structure and enhances the overall texture, while the toppings add layers of flavor and freshness. Let’s explore the best options to build a sandwich that’s crispy, sweet, spicy, and absolutely mouthwatering.
1. Best Buns for the Ultimate Sandwich
A good bun should be soft yet sturdy, able to hold up to the crispy fried chicken and flavorful hot honey sauce without falling apart. Here are some top choices:
- Brioche Buns – These slightly sweet, buttery buns are a classic choice. Their light and fluffy texture balances the bold flavors of the spicy honey sauce.
- Potato Buns – Known for their softness and slight chewiness, potato buns soak up the sauce without getting soggy.
- Toasted Sesame Buns – A sturdy option with a nutty flavor from sesame seeds. Toasting them enhances their crunch and structure.
- Hawaiian Rolls – If you want a hint of sweetness, Hawaiian rolls make an excellent choice, complementing the hot honey glaze beautifully.
💡 Pro Tip: Lightly toast the buns in a skillet or toaster with a little butter for extra flavor and a crisp exterior.
2. Must-Have Toppings for Extra Flavor and Texture
While the crispy fried chicken and hot honey sauce are the stars, the right toppings add contrast and freshness. Consider these delicious options:
Crunchy & Fresh Additions
- Crisp Lettuce – Romaine or iceberg lettuce provides a refreshing crunch, balancing the heat from the honey sauce.
- Pickles – Tangy and crunchy, pickles enhance the sandwich with a zesty bite. Dill pickles work best, but spicy or bread-and-butter pickles add a fun twist.
- Coleslaw – A creamy or vinegar-based slaw adds texture and cools down the heat while complementing the honey’s sweetness.
Creamy & Savory Enhancements
- Mayo or Garlic Aioli – Spreading a layer of mayo or aioli on the bun creates a rich, smooth contrast to the crispy chicken.
- Ranch or Blue Cheese Dressing – For an extra creamy, tangy element, drizzle some ranch or blue cheese dressing over the chicken.
- Melted Cheese – A slice of cheddar, pepper jack, or gouda takes the sandwich to another level of indulgence.
Sweet & Spicy Extras
- Jalapeño Slices – If you love heat, fresh or pickled jalapeños add an extra kick.
- Honey Drizzle – A little extra honey enhances the sweet-spicy contrast.
- Caramelized Onions – These add a subtle sweetness and depth of flavor.
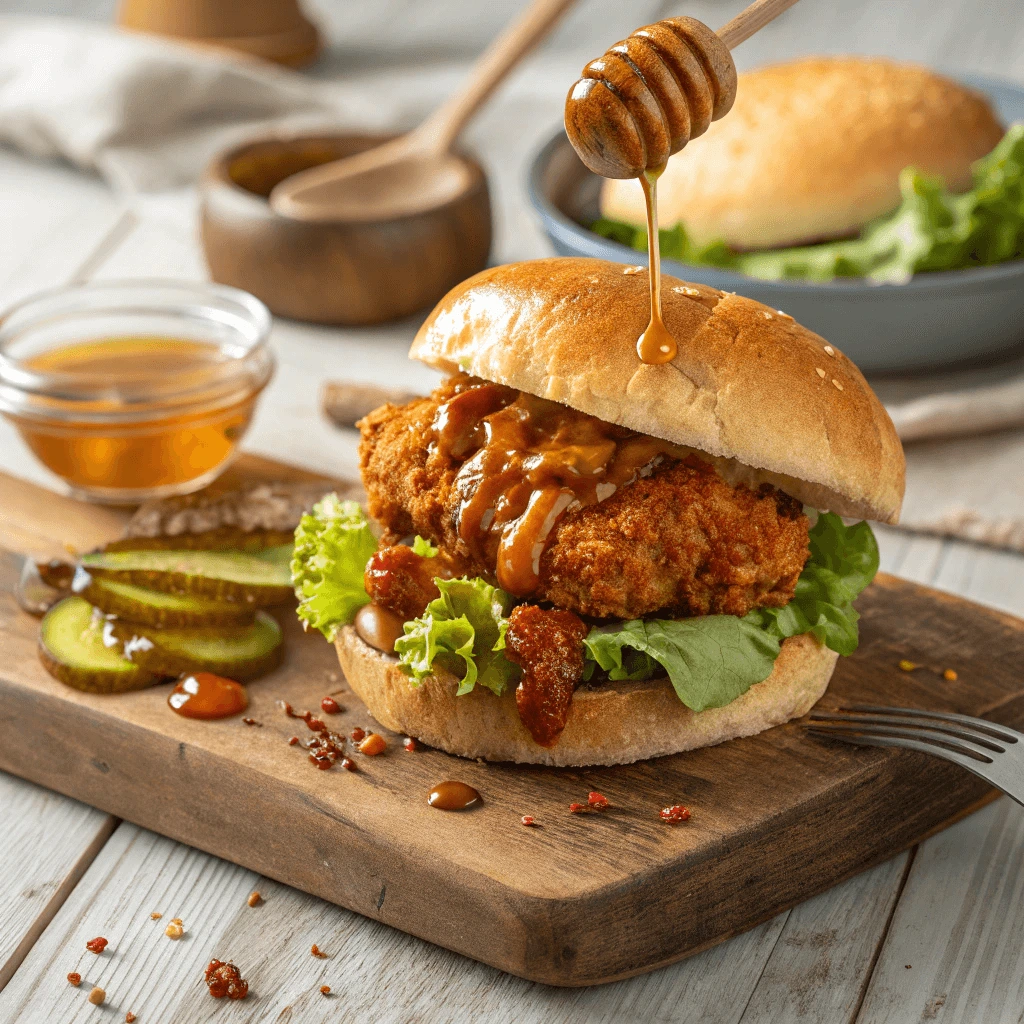
3. How to Assemble the Perfect Sandwich
Now that you have your ideal bun and toppings, it’s time to put it all together for the best bite:
- Toast the Bun – Butter and toast each side for a golden, slightly crisp texture.
- Spread the Sauce – Add a layer of mayo, garlic aioli, or ranch to the bottom bun for extra moisture.
- Place the Crispy Chicken – Lay the freshly fried or baked hot honey chicken on top of the sauce.
- Drizzle Extra Honey Sauce – Spoon a bit more hot honey sauce over the chicken for even more flavor.
- Add Toppings – Layer on pickles, lettuce, coleslaw, or cheese as desired.
- Finish with the Top Bun – Lightly press down and serve immediately.
By choosing the best buns and toppings, you can create a well-balanced sandwich that’s crispy, spicy, sweet, and absolutely irresistible. Customize it to your liking and enjoy every bite!
Step-by-Step Guide: How to Make Hot Honey Chicken in 30 Minutes
Step 1: Prepping the Chicken
The key to a perfect Hot Honey Chicken Sandwich lies in properly preparing the chicken. Choosing the right cut, seasoning it well, and setting up a coating station will ensure the best texture and flavor. To achieve crispy, juicy results, follow these essential steps before frying.
1. Selecting the Best Chicken Cut
For the ultimate sandwich experience, choosing the right type of chicken is crucial.
- Chicken Breasts are a popular choice because they provide a large surface area and a lean, mild taste. Slicing them in half horizontally allows for quicker and more even cooking.
- Chicken Thighs, however, offer extra juiciness and a richer flavor due to their higher fat content. If you prefer a more tender and flavorful bite, opt for boneless, skinless thighs.
💡 Pro Tip: Pound the chicken to ½ inch thickness for uniform cooking and better texture.
2. Seasoning for Maximum Flavor
A well-seasoned base enhances the overall taste of the sandwich. Before cooking, generously coat the chicken with a blend of spices that will add depth and heat.
Dry Seasoning Mix:
- Salt & Black Pepper – Enhances natural flavors and creates balance.
- Garlic Powder & Onion Powder – Adds richness and savory notes.
- Paprika (or Smoked Paprika) – Infuses warmth and subtle smokiness.
- Cayenne Pepper (Optional) – Brings extra heat for those who love spice.
Marinade for Extra Juiciness:
For a more tender bite, marinate the chicken in buttermilk for at least 30 minutes or up to two hours. This step locks in moisture and enhances the texture.
- 1 cup buttermilk – Softens the meat while keeping it juicy.
- 1 teaspoon hot sauce – Infuses a slight kick for added flavor.
- 1 teaspoon salt – Helps season the chicken from within.
💡 Shortcut: If you’re short on time, coat the chicken with the dry seasoning mix and let it rest for 10 minutes before dredging.
3. Setting Up the Coating Station
A crunchy, well-seasoned crust is what makes this sandwich irresistible. To create the perfect crispy exterior, prepare a three-step dredging station:
Step 1: Dry Coating (Base Layer)
- In a large bowl, combine flour, cornstarch, and seasoning.
- Adding cornstarch ensures a light and crispy crust.
Step 2: Egg Wash (Binding Layer)
- Whisk together eggs and buttermilk until smooth.
- This step helps the coating adhere firmly to the chicken.
Step 3: Final Coating (Crunchy Layer)
- Dip the chicken back into the seasoned flour mixture.
- Gently press the breading onto the surface to create a textured, crispy crust.
💡 Pro Tip: Let the coated chicken rest on a wire rack for 10 minutes before frying. This step prevents the breading from falling off while cooking.
Step 2: Cooking Methods for Crispy Chicken
To achieve that perfect crispy exterior and juicy interior, the cooking method plays a crucial role. There are several methods to cook chicken, but we will focus on the most effective techniques for achieving crispiness and flavor. Below are three popular methods for frying chicken that will elevate your Hot Honey Chicken Sandwich.
1. Traditional Deep Frying
Deep frying remains one of the best methods to achieve a golden, crunchy exterior with a juicy interior. The high heat cooks the chicken quickly, locking in moisture while crisping the coating. Here’s how to do it:
- Heat the Oil: Start by heating a large pot or deep fryer with vegetable oil or peanut oil. The oil should reach about 350°F (175°C) to ensure the chicken cooks properly. A thermometer can help maintain the ideal temperature.
- Fry in Batches: Carefully lower the chicken into the hot oil, ensuring not to overcrowd the pan. Overcrowding reduces the oil temperature and can lead to soggy chicken. Fry the chicken for 4-5 minutes per side or until the internal temperature reaches 165°F (75°C).
- Drain Excess Oil: After frying, remove the chicken and place it on a wire rack to drain excess oil. This prevents the chicken from becoming soggy and maintains its crispiness.
💡 Pro Tip: Keep the fried chicken warm in a low-temperature oven (around 200°F) while you finish frying the rest of the chicken.
2. Pan-Frying for a Crispy Crust
Pan-frying is a slightly healthier option than deep frying, yet it still yields an incredibly crispy and delicious crust. Here’s how to achieve crispy chicken in a skillet:
- Choose the Right Pan: Use a cast-iron skillet or non-stick frying pan for even heat distribution. These pans help achieve a crispy exterior without sticking to the surface.
- Heat the Oil: Pour enough oil into the pan to coat the bottom (about 1/2 inch). Heat it on medium-high until the oil shimmers but doesn’t smoke. The oil temperature should be around 350°F.
- Fry the Chicken: Add the chicken pieces one by one to the pan. Fry them for 3-4 minutes per side until they turn golden brown and crisp. Use tongs to turn the chicken gently to avoid disturbing the breading.
- Rest the Chicken: Once done, transfer the chicken to a plate lined with paper towels. This helps absorb any excess oil while keeping the chicken crispy.
💡 Pro Tip: Keep the pan at a steady temperature. If the oil gets too hot, it can burn the crust; too cool, and the chicken will absorb more oil.
3. Air Frying for a Healthier Option
If you’re looking for a healthier alternative that still delivers crispy results, the air fryer is the perfect choice. The air fryer uses hot air circulation to cook the chicken, creating a crispy crust with little to no oil. Here’s how to do it:
- Preheat the Air Fryer: Set the air fryer to 375°F (190°C). Let it preheat for about 3-5 minutes.
- Prepare the Chicken: Lightly spray the air fryer basket with cooking spray to prevent sticking. Arrange the breaded chicken pieces in a single layer, making sure they don’t overlap. This allows the air to circulate and ensures even cooking.
- Cook the Chicken: Air fry the chicken for 10-12 minutes, flipping halfway through the cooking time. The chicken should be crispy on the outside and cooked through on the inside.
💡 Pro Tip: For an extra crispy crust, lightly spray the top of the chicken with cooking spray before air frying. This helps achieve that golden, crunchy finish.
Step 3: Making and Applying Hot Honey Sauce
The Hot Honey Sauce is what truly sets this sandwich apart from others. It’s a perfect blend of sweet, spicy, and savory flavors that coat the crispy chicken, creating a mouthwatering combination. Follow these simple steps to make the sauce and apply it to your chicken for that perfect kick.
1. Gather the Ingredients for the Hot Honey Sauce
The key to a great Hot Honey Sauce is using high-quality ingredients that balance the heat with sweetness. Here’s what you’ll need:
- Honey: Use pure, unprocessed honey for a rich sweetness. The natural sweetness of honey is crucial to the sauce’s base, and it complements the spice perfectly.
- Hot Sauce: Choose a hot sauce that has a balance of heat and flavor. Sriracha or Frank’s RedHot are both great options. You want heat that isn’t overwhelming, but it should definitely give the sauce a noticeable kick.
- Apple Cider Vinegar: A dash of apple cider vinegar adds a tangy note that cuts through the sweetness and helps balance the overall flavor of the sauce.
- Garlic Powder (Optional): A small pinch of garlic powder adds depth to the flavor profile, making the sauce even more savory.
- Butter (Optional): For extra richness, melt a little butter into the sauce. It enhances the texture and adds a smooth, buttery finish.
2. Combine the Ingredients for the Perfect Sauce
Once you have all your ingredients, it’s time to make the sauce. Here’s how you can create the perfect Hot Honey Sauce:
- Start by Heating the Honey: Pour about 1/2 cup of honey into a saucepan. Heat it over medium-low heat, allowing it to warm up, but make sure it doesn’t come to a boil.
- Add Hot Sauce and Vinegar: Once the honey is warm, stir in 2-3 tablespoons of hot sauce and 1 tablespoon of apple cider vinegar. The vinegar adds a tangy contrast that balances the sweetness of the honey. Stir the mixture well to ensure everything is evenly incorporated.
- Optional Additions: If you’re using garlic powder or butter, add them at this point. Stir in 1/2 teaspoon of garlic powder for savory depth, or add 1 tablespoon of melted butter for a smoother texture.
- Simmer for Flavor: Allow the sauce to simmer for about 2-3 minutes, stirring occasionally. This helps the flavors meld together. You’ll notice the sauce thickening slightly, which is perfect for coating your crispy chicken.
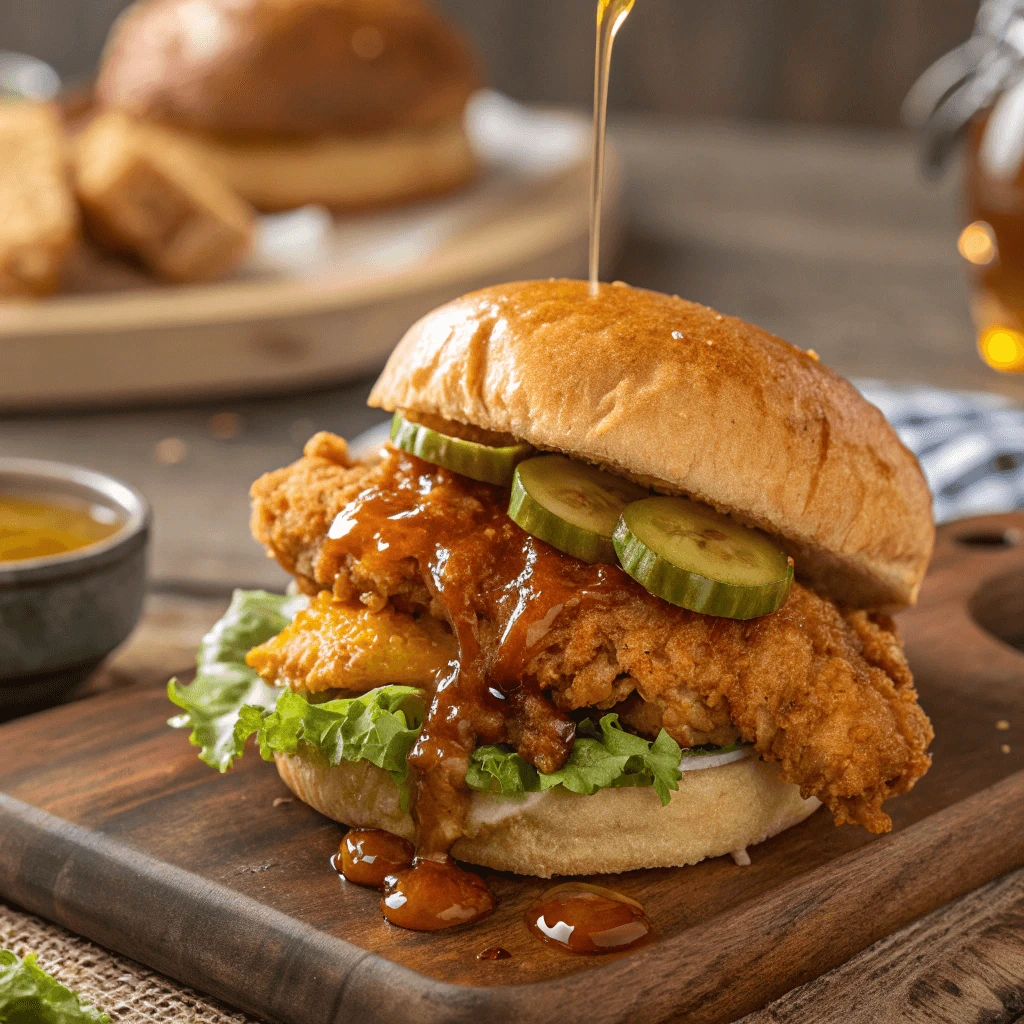
3. Apply the Hot Honey Sauce to Your Chicken
Once your sauce is ready, it’s time to coat the chicken. Here’s how to apply the sauce for maximum flavor:
- Coat the Chicken While It’s Hot: For the best flavor and texture, apply the sauce as soon as the chicken comes out of the frying pan or air fryer. The crispy coating will soak up the sauce, and the heat from the chicken will help the sauce stick better.
- Use a Brush or Drizzle: There are two popular ways to apply the sauce: brushing or drizzling. If you prefer a more controlled application, use a basting brush to coat each piece of chicken with a generous layer of hot honey sauce. Alternatively, you can simply drizzle the sauce directly over the chicken for a more rustic feel.
- Don’t Overdo It: You want the chicken to be coated evenly with the sauce, but be careful not to drown it. The goal is a thin layer of sauce that complements the chicken, not one that makes it soggy. The sauce should enhance the flavor, not overpower it.
- Let It Rest: After applying the sauce, allow the chicken to rest for a minute or two before assembling your sandwich. This gives the sauce time to set, preventing it from running off the chicken when you bite into the sandwich.
Pro Tip: Customize the Spice Level
The beauty of Hot Honey Sauce is its versatility. You can easily adjust the level of heat to match your taste. Here are some ways to do so:
- More Heat: Add extra hot sauce or even a pinch of cayenne pepper to give the sauce more of a kick.
- Less Heat: If you prefer a milder sauce, reduce the amount of hot sauce or even add a bit more honey to sweeten the mix.
By adjusting the spice level, you can create a sauce that perfectly complements your palate. Whether you like it mild or extra spicy, Hot Honey Sauce is a great way to customize your sandwich and make it your own.
Pro Tips for the Ultimate Hot Honey Chicken Sandwich
How to Keep Fried Chicken Crispy
Crispy fried chicken is a classic comfort food that’s loved by many. However, maintaining that crispy crunch after frying can sometimes be a challenge. Whether you’re making fried chicken at home or serving it at a gathering, the right techniques will help keep your fried chicken crispy and delicious from start to finish. Here are some essential tips to ensure that your fried chicken remains crispy for as long as possible.
1. Use the Right Coating for Maximum Crunch
The coating on fried chicken is what gives it that irresistible crunch. Choosing the right ingredients and applying them correctly is essential to maintaining the crispiness.
- Flour and Cornstarch Mixture: To create a crispy, golden crust, combine all-purpose flour with cornstarch. The cornstarch will help the flour stick to the chicken and create a lighter, crispier texture. You can also add a bit of baking powder to help puff up the crust as it fries.
- Double Dipping: For an extra crispy coating, try double dipping the chicken. After dipping the chicken in your wet batter (such as buttermilk), coat it in the dry flour mixture. Repeat the process one more time before frying. This second layer adds more crunch and ensures the coating stays intact during cooking.
- Seasoning: Make sure your coating is well-seasoned with salt, pepper, and any other spices you like. A flavorful coating not only enhances the crunch but also gives the fried chicken its delicious taste.
2. Maintain the Right Frying Temperature
The temperature of your frying oil plays a significant role in achieving and maintaining crispy fried chicken. If the oil is too hot, the chicken will burn on the outside while staying raw on the inside. If the oil is too cold, the coating will become soggy as the chicken cooks.
- Ideal Temperature: Aim to fry your chicken at a temperature between 350°F and 375°F (175°C to 190°C). This range ensures that the chicken cooks quickly, sealing in moisture while crisping up the coating.
- Use a Thermometer: To avoid guessing, use a candy or deep-frying thermometer to monitor the oil temperature. This ensures you maintain the right heat throughout the frying process.
- Fry in Small Batches: Don’t overcrowd the frying pan or deep fryer. If you add too many pieces of chicken at once, the temperature of the oil will drop, leading to soggy chicken. Fry your chicken in small batches to maintain the right temperature.
3. Drain and Rest the Chicken After Frying
After frying, it’s crucial to drain and rest your chicken properly to keep the coating crispy.
- Drain Excess Oil: Immediately after removing the chicken from the oil, place it on a cooling rack set over a baking sheet. This allows the excess oil to drain off, preventing the chicken from sitting in the oil and becoming soggy.
- Avoid Paper Towels: While you might be tempted to use paper towels, it’s best to use a cooling rack instead. Paper towels trap moisture, which can make the coating lose its crispness.
- Rest the Chicken: Let the fried chicken rest on the rack for a few minutes. This helps set the coating and prevents moisture from building up on the surface. The longer you let it rest, the crisper the coating will stay.
4. Keep the Chicken Warm Without Losing Crispiness
If you’re preparing fried chicken ahead of time or need to keep it warm for serving, there are ways to maintain the crispy texture without reheating it in a microwave, which can make it soggy.
- Use an Oven: Preheat your oven to 200°F (90°C) and place the fried chicken on a cooling rack. Put the rack in the oven to keep the chicken warm while ensuring the coating stays crispy. The cooling rack allows air to circulate around the chicken, keeping the crust from becoming soggy.
- Avoid Covered Containers: When storing fried chicken, avoid covering it with plastic wrap or foil. Instead, place it in a container with a lid that allows some air circulation to prevent moisture from building up. This helps maintain crispiness.
5. Reheat Fried Chicken for Optimal Crispiness
If you need to reheat your fried chicken, using the right method is key to maintaining that crunchy texture.
- Oven or Air Fryer: The best way to reheat fried chicken is in the oven or air fryer. Set your oven to 375°F (190°C) and heat the chicken for 10-15 minutes, turning it halfway through to ensure it crisps evenly. An air fryer works well too, as it circulates hot air around the chicken, keeping the coating crispy.
- Avoid the Microwave: The microwave will make the coating soggy, as it heats the chicken with moisture. If you have no other option, use a microwave-safe rack to let air circulate around the chicken while it reheats, but it’s best to use the oven or air fryer for the best results.
Final Thoughts: Achieving Perfectly Crispy Fried Chicken
Keeping fried chicken crispy doesn’t have to be difficult. By using the right coating, maintaining the ideal frying temperature, and draining and resting the chicken properly, you can enjoy a deliciously crispy fried chicken every time. And if you need to keep it warm or reheat it, the oven and air fryer are your best friends. With these tips, your fried chicken will stay crunchy and delicious, from the first bite to the last!
Can I Make Hot Honey Sauce Ahead of Time?
Making hot honey sauce ahead of time is not only possible but also highly recommended for saving time and enhancing the flavor. This sweet and spicy sauce can elevate many dishes, from fried chicken to roasted vegetables, and prepping it in advance can simplify your cooking process, especially when you’re in a time crunch. Here’s how to make hot honey sauce ahead of time and store it for maximum flavor and convenience.
1. Why Make Hot Honey Sauce in Advance?
Making your hot honey sauce ahead of time offers a number of benefits that will improve both your cooking experience and the final dish.
- Convenience: Preparing the sauce in advance frees up time during meal prep. Instead of scrambling to make the sauce while cooking your dish, you can focus on other steps, like frying chicken or preparing sides. Having the sauce ready means less stress and a smoother cooking process.
- Flavor Development: Like many sauces, hot honey sauce benefits from time to let the flavors meld together. Making it ahead allows the sweetness of the honey to blend with the heat from the chili flakes or hot sauce, giving the sauce a deeper, more robust flavor that improves with sitting time.
- Versatility: Making extra hot honey sauce in advance means you’ll have leftovers to use for future meals. You can drizzle it on pizza, roasted vegetables, grilled meats, or even use it as a dip for appetizers.
2. How to Make Hot Honey Sauce Ahead of Time
Making hot honey sauce is quick and easy, and it’s simple to prepare ahead of time.
- Ingredients: To make the sauce, you’ll need honey, hot sauce (such as sriracha or your favorite spicy sauce), red chili flakes, and a few optional flavor boosters like garlic powder or lemon juice. You can adjust the amount of heat and sweetness depending on your preference.
- Cooking Process: Combine all the ingredients in a small saucepan over medium heat. Stir the mixture until it comes to a simmer. Allow it to cook for a few minutes to ensure the flavors blend together. Remove it from the heat and let it cool before storing.
- Storage: Once cooled, pour the sauce into an airtight container. Glass jars or plastic squeeze bottles work well for storage. Store the sauce in the refrigerator for up to two weeks. The flavors will continue to develop and mature, making it even better with time.
3. How to Store Hot Honey Sauce Properly
Proper storage of your hot honey sauce is crucial for maintaining its freshness and extending its shelf life.
- Airtight Containers: Store the sauce in an airtight container or jar. This helps prevent the sauce from absorbing moisture from the air, which can dilute its flavor and consistency. A well-sealed container also ensures the sauce stays free from contaminants and maintains its vibrant flavor.
- Refrigeration: Hot honey sauce should always be stored in the refrigerator. The cold temperature helps preserve the honey and prevents spoilage, especially since honey can ferment or crystallize if left at room temperature for extended periods.
- Avoid Freezing: Freezing hot honey sauce is not recommended because it can cause the texture to change. Honey may crystallize and become grainy when frozen, which will impact the sauce’s smoothness once thawed. For the best results, store the sauce in the fridge and consume it within two weeks.
4. How to Reheat Hot Honey Sauce
When it’s time to use your stored hot honey sauce, you may need to reheat it to bring it back to its perfect consistency.
- Stovetop Method: To reheat the sauce, simply place it in a saucepan over low heat. Stir occasionally to ensure the sauce heats evenly without burning. It should only take a few minutes to return to its desired temperature.
- Microwave Method: You can also reheat the sauce in the microwave by transferring it to a microwave-safe dish. Heat it in 20-30 second intervals, stirring in between, until it reaches the desired warmth. Be careful not to overheat it, as the honey can bubble up and overflow.
- Consistency Adjustment: If the sauce becomes too thick after being refrigerated, you can add a small splash of water or additional hot sauce to thin it out to your desired consistency.
5. Customizing Your Hot Honey Sauce
One of the best things about hot honey sauce is how customizable it is. Making the sauce ahead of time gives you the opportunity to tweak the recipe to suit your tastes.
- Adjusting the Spice Level: If you like it hotter, add more chili flakes or a dash of cayenne pepper. For a milder sauce, reduce the amount of hot sauce or chili flakes. You can even experiment with different types of hot sauce to find the right balance of heat and flavor.
- Sweetness Balance: You can control the sweetness of the sauce by adjusting the amount of honey. If you prefer a less sweet sauce, reduce the honey, or substitute part of it with maple syrup or agave nectar for a different twist.
- Flavor Variations: Consider adding garlic powder, onion powder, or smoked paprika to enhance the flavor profile. A squeeze of lemon juice or a tablespoon of apple cider vinegar can add a tangy kick to the sauce, while fresh herbs like cilantro can bring a unique freshness.
Final Thoughts: The Benefits of Making Hot Honey Sauce Ahead of Time
Making hot honey sauce ahead of time is a game-changer for busy home cooks or anyone looking to elevate their meals with minimal effort. With just a few simple ingredients, you can create a delicious, versatile sauce that can be used in a variety of dishes. By preparing the sauce in advance, you allow the flavors to deepen and meld together, saving time on the day of serving and ensuring that your hot honey sauce is always ready when you need it. Whether you’re making it for a fried chicken sandwich or as a dipping sauce, this simple strategy will keep you one step ahead in the kitchen.
Can I Use Chicken Thighs Instead of Breasts?
If you’re wondering whether you can use chicken thighs instead of chicken breasts for your hot honey chicken sandwich, the answer is yes! While chicken breasts are often the go-to choice for chicken sandwiches, chicken thighs offer their own unique benefits that can elevate the flavor and texture of your dish. Let’s explore the differences and advantages of using chicken thighs instead of breasts.
1. Flavor Profile: Richer and Juicier
One of the biggest differences between chicken thighs and chicken breasts is the flavor. Chicken thighs are dark meat, which naturally has a richer, more intense flavor compared to the milder taste of chicken breasts.
- Tender and Juicy: The higher fat content in chicken thighs helps keep them moist during cooking, making them more forgiving and less likely to dry out. If you’re frying or grilling the chicken, the thighs will stay juicy and tender even if you cook them a bit longer. This makes chicken thighs a great option if you want a juicy sandwich that won’t dry out.
- Richer Flavor: The natural fattiness of chicken thighs imparts a richer, more savory taste. If you enjoy deeper flavors in your sandwich, thighs are an excellent choice. The extra fat provides a wonderful contrast to the sweet heat of the hot honey sauce.
2. Cooking Time and Method
While chicken breasts cook quickly, chicken thighs may take a little longer, depending on the cooking method you choose. However, this is hardly a drawback because thighs can handle longer cooking times without drying out.
- Frying Chicken Thighs: When frying chicken thighs, they tend to remain juicier than chicken breasts because of their higher fat content. As a result, you can fry them to a crispy golden brown without worrying about them becoming too dry. Simply ensure they are cooked through by checking their internal temperature, which should reach 165°F (75°C).
- Grilling or Baking: If you’re grilling or baking the chicken thighs, you’ll likely need a bit more time than chicken breasts, but they’ll still come out moist and flavorful. Since thighs have more fat, they can withstand higher heat without becoming overcooked or losing moisture.
3. Nutritional Differences: Fat Content
Chicken thighs are higher in fat than chicken breasts, which might be a concern if you’re watching your calorie intake. However, the fat in thighs is not all bad—it’s part of what gives them their juicy texture and rich flavor.
- Higher Fat: Chicken thighs contain more saturated fat than chicken breasts, but it’s the fat that contributes to their moistness and enhanced flavor. If you’re not too concerned about fat intake, thighs are a great option for a more indulgent sandwich experience.
- Leaner Alternative: If you prefer leaner meat but still want to enjoy the flavor of chicken thighs, you can opt for boneless, skinless chicken thighs. This will cut down on the fat while still giving you the juiciness and flavor that dark meat provides.
4. Price and Availability: Budget-Friendly Option
Another reason why chicken thighs are a great alternative to breasts is their cost. Chicken thighs are generally less expensive than chicken breasts, making them a more budget-friendly option for those looking to save money without sacrificing flavor.
- Affordable: Chicken thighs offer an excellent balance between cost and quality, especially if you’re cooking for a larger group. Because they are less expensive per pound, you can serve more sandwiches for the same price as using chicken breasts.
- Widely Available: Chicken thighs are commonly found in most grocery stores, making them easily accessible for your sandwich recipe. If you can’t find thighs, bone-in, skin-on thighs work as well. Just be sure to remove the skin before cooking if you want to avoid extra grease.
5. Customization and Versatility
Chicken thighs are incredibly versatile and can be customized in a variety of ways to suit your tastes. You can adjust the seasoning and marinade to create a flavor profile that complements the hot honey sauce perfectly.
- Flavor Enhancements: Since chicken thighs have a stronger flavor than chicken breasts, they pair well with bolder seasonings. Consider using a spicy rub, garlic, or herbs like thyme and rosemary to boost the flavor of the chicken before cooking.
- Better Texture for Sauces: Chicken thighs also hold up well when drenched in sauces like hot honey. The natural richness of the meat allows it to absorb the sauce without becoming soggy or losing its texture, giving you a satisfying bite every time.
Final Thoughts: Chicken Thighs vs. Breasts for Hot Honey Chicken Sandwiches
Using chicken thighs instead of chicken breasts for your hot honey chicken sandwich can be a fantastic choice. The juicy, rich flavor and tender texture of thighs will provide a delicious contrast to the spicy-sweet hot honey sauce, making your sandwich extra indulgent. While thighs may take a little longer to cook, their moisture and flavor more than make up for it.
Whether you’re looking to save money or experiment with a richer taste, chicken thighs are a versatile and flavorful alternative to chicken breasts. Ultimately, it all comes down to your personal preference. So go ahead and give chicken thighs a try in your next hot honey chicken sandwich—you won’t be disappointed!
Perfect Side Dishes and Drinks to Serve With It
Best Side Dishes for a Full Meal
When you’re making a hot honey chicken sandwich, it’s essential to pair it with the right side dishes to create a well-rounded and satisfying meal. The sweetness and spiciness of the hot honey sauce on the chicken call for sides that complement the bold flavors without overpowering them. Below are some delicious and easy-to-make side dishes that will turn your hot honey chicken sandwich into a complete feast.
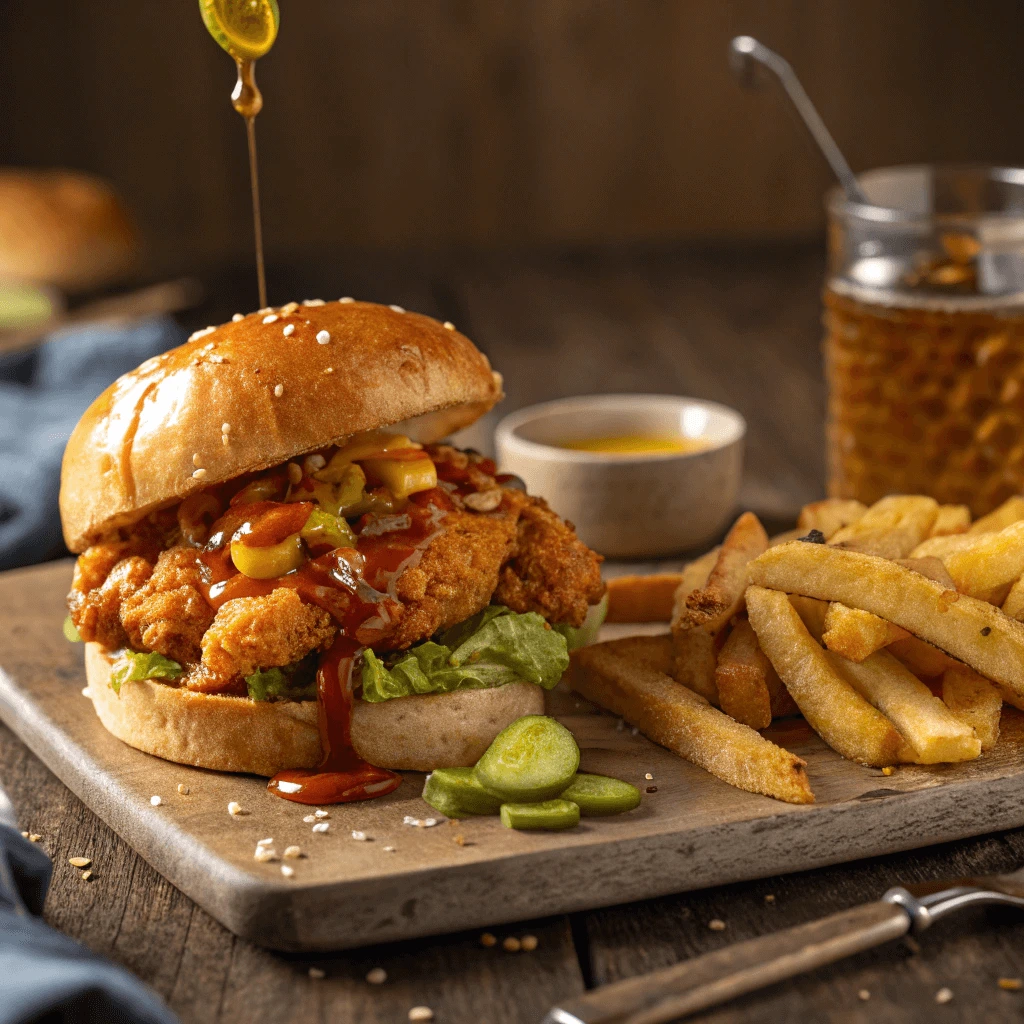
1. Crispy French Fries
Crispy French fries are a classic choice to serve alongside any sandwich, and they pair especially well with hot honey chicken sandwiches. The crunchiness of the fries contrasts nicely with the juicy, crispy chicken, and their neutral flavor helps balance the heat and sweetness of the sauce.
- Why They’re Perfect: Fries are simple to prepare, and you can customize them with various seasonings to suit your preferences. Try sprinkling them with garlic powder, paprika, or fresh herbs like rosemary for added flavor.
- How to Serve: Serve the fries with a dipping sauce on the side, such as ketchup, mayo, or a creamy ranch dressing. These condiments will further complement the chicken’s sweetness and spice, creating a satisfying and indulgent meal.
2. Coleslaw for Crunch and Creaminess
A fresh, crunchy coleslaw makes an excellent side dish for your hot honey chicken sandwich. The cool, creamy texture of the slaw balances the heat from the sauce while adding a refreshing crunch that contrasts beautifully with the tender chicken.
- Types of Slaw to Consider: You can go with a classic cabbage slaw, or mix things up by adding carrots, radishes, or apples for extra crunch and sweetness. A vinegar-based slaw can provide a tangy contrast to the honey, while a creamy mayo-based slaw adds richness.
- Serving Tip: For a more gourmet touch, top your hot honey chicken sandwich with a small scoop of coleslaw. The combination of crunchy slaw and crispy chicken will take your sandwich to the next level.
3. Sweet Potato Fries or Wedges
Sweet potato fries or sweet potato wedges are a healthier alternative to traditional French fries and provide a deliciously sweet complement to the spiciness of the hot honey chicken. Their slightly sweet flavor enhances the taste of the chicken, while the crispy exterior adds texture to the meal.
- Why Sweet Potatoes Work: Sweet potatoes naturally pair well with spicy dishes, so they’re a perfect match for hot honey chicken. The caramelized sweetness of the fries or wedges balances the sauce’s heat, creating a harmonious flavor profile.
- How to Serve: Try baking sweet potato fries or wedges with a bit of olive oil and seasoning. If you want to elevate the dish, top the fries with a sprinkle of cinnamon or brown sugar to bring out their natural sweetness.
4. Pickled Vegetables for a Tangy Kick
Pickled vegetables, such as pickles, onions, and jalapeños, can add a tangy, crunchy contrast to the rich, spicy hot honey chicken. The acidity of the pickles cuts through the sweetness of the honey sauce, making each bite feel fresh and balanced.
- Types of Pickled Vegetables: Traditional dill pickles are always a favorite, but you can also try pickled red onions for an extra layer of flavor. If you like heat, pickled jalapeños can add a spicy kick to your meal.
- Serving Tip: Place a few pickled veggies on the side of your sandwich, or serve them as a standalone side dish. Their tangy crunch will complement the hot honey chicken perfectly, giving your meal extra depth.
5. Roasted Vegetables for a Savory Side
Roasted vegetables, such as broccoli, brussels sprouts, and carrots, make a savory and nutritious side dish for your hot honey chicken sandwich. Roasting brings out the natural sweetness in vegetables, which pairs well with the spicy and sweet elements of the hot honey sauce.
- Vegetable Combinations: You can roast a medley of vegetables for a colorful, nutrient-packed side. Try pairing sweet potatoes, cauliflower, and zucchini for a balanced and flavorful vegetable mix.
- How to Prepare: Simply toss your vegetables with olive oil, garlic, and your favorite spices. Roast them in the oven until they are golden brown and slightly crispy on the edges. The result will be a satisfying side dish that balances out the richness of the chicken.
6. Simple Green Salad
If you’re looking for a lighter side dish, a fresh green salad is the perfect choice to accompany your hot honey chicken sandwich. The crispness of the lettuce, combined with a tangy dressing, will offer a refreshing contrast to the heat of the chicken.
- Salad Variations: You can make a simple mixed green salad with lettuce, spinach, or arugula. Add some tomatoes, cucumber, and avocado for extra flavor and creaminess. A light vinaigrette or lemon dressing will bring everything together.
- Why It Works: The lightness of the salad complements the richness of the sandwich without overwhelming your palate. Plus, the freshness helps balance out the heat from the hot honey sauce.
Final Thoughts on Side Dishes for Hot Honey Chicken Sandwiches
Pairing your hot honey chicken sandwich with the right side dishes is key to making a complete and satisfying meal. Whether you go for the classic combo of fries and coleslaw or opt for something healthier like sweet potato fries or roasted vegetables, the right sides will perfectly complement the bold flavors of the sandwich. Don’t forget to customize the sides based on your preferences—there’s no wrong way to enjoy your hot honey chicken sandwich!
Beverage Pairings for the Perfect Bite
When enjoying a hot honey chicken sandwich, the right beverage can enhance the flavors of the dish, creating a harmonious balance between spicy, sweet, and savory. Whether you’re craving something refreshing to cut through the richness or a drink with enough character to match the bold flavors of your sandwich, there are plenty of options to choose from. Here are some fantastic beverage pairings that complement the flavors of the hot honey chicken sandwich and elevate your dining experience.
1. Iced Tea for a Refreshing Balance
Iced tea is one of the best choices when pairing beverages with spicy dishes like the hot honey chicken sandwich. Its light and crisp nature offers a cooling contrast to the heat of the sandwich, while its subtle bitterness balances the sweetness of the honey.
- Sweetened or Unsweetened? Depending on your preference, you can opt for sweetened iced tea to enhance the sweetness of the hot honey sauce or choose unsweetened iced tea for a more neutral base that lets the flavors of the sandwich shine.
- Flavored Iced Teas: If you want to add a twist, try peach, lemon, or mint iced tea. The fruity notes will amplify the sweet and spicy contrast, and the mint will provide an extra level of refreshment.
2. Lemonade to Complement the Sweet and Spicy Kick
A glass of fresh lemonade is another perfect beverage to enjoy with your hot honey chicken sandwich. The tartness of the lemon contrasts wonderfully with the sweet and spicy flavors of the sandwich, and the drink’s acidity cuts through the richness of the chicken.
- Why Lemonade Works: The tangy citrus flavor balances the heat, while its refreshing quality cools down your palate. You can either squeeze fresh lemon or use a store-bought variety—just make sure to adjust the sweetness to your taste.
- Add a Twist: To give your lemonade a creative spin, consider infusing it with herbs like basil or mint, or mix in some ginger for an extra zing that complements the spiciness of the sandwich.
3. Sparkling Water for a Light, Crisp Option
If you prefer something light and effervescent, sparkling water is an excellent pairing. It’s a neutral beverage that cleanses your palate between bites and refreshes your senses without overpowering the flavors of the hot honey chicken sandwich.
- Plain vs. Flavored Sparkling Water: You can go for plain sparkling water or try a flavored variety, such as lemon, lime, or berry. The slight hint of flavor will add depth without clashing with the bold sandwich flavors.
- Perfect for Spicy Foods: Carbonated drinks like sparkling water are known for their ability to help with spicy food, as they flush out the heat while providing a refreshing bite. This is especially helpful when you’re enjoying a sandwich with a hot honey sauce that can be spicy!
4. Classic Soda for a Sweet and Fizzy Option
A classic soda, such as cola or ginger ale, can be an ideal beverage to accompany your hot honey chicken sandwich. The fizziness of soda refreshes the palate, and the sugar enhances the sweetness of the hot honey sauce, creating a well-rounded flavor experience.
- Best Soda Choices: Choose a cola for a familiar, sweet flavor that complements the richness of the sandwich, or go for ginger ale for its spiciness and sweetness, which will complement the heat from the chicken and add a bit of zest.
- How Soda Enhances the Meal: The sweet, fizzy nature of soda balances the spicy heat and the rich chicken, making it an easy, accessible beverage choice that pairs perfectly with the indulgence of a sandwich.
5. Iced Coffee for a Bold, Unexpected Pairing
For those who enjoy a bolder drink, iced coffee offers a unique pairing with your hot honey chicken sandwich. The richness of coffee complements the savory flavor of the chicken, and the cold temperature provides a refreshing contrast to the warmth of the sandwich.
- Why Iced Coffee Works: The slight bitterness of coffee balances the sweetness of the honey sauce while adding a depth of flavor to the meal. You can adjust the strength of the coffee to suit your taste, whether you prefer a strong brew or a lighter option.
- Add a Flavor Boost: If you like a touch of sweetness, you can add a splash of milk, cream, or sugar to your iced coffee. A little vanilla or cinnamon can also add an extra layer of flavor that complements the spicy chicken.
How to Store and Reheat Leftovers
No matter how delicious your hot honey chicken sandwich is, sometimes you may have a few leftovers. Fortunately, you can store and reheat the sandwich easily, allowing you to enjoy it all over again without compromising flavor or texture. Properly storing and reheating your leftovers ensures that you can enjoy the sandwich as much as you did the first time!
1. Storing Leftovers: Keep It Fresh
To keep your hot honey chicken sandwich leftovers fresh, it’s important to store them correctly. Follow these steps to ensure your sandwich maintains its flavor and texture:
- Separate Components: If possible, separate the sandwich into its individual components—chicken, buns, and toppings. This helps prevent the bread from getting soggy and keeps the chicken crispy. Store each component in an airtight container or wrap them tightly in foil or plastic wrap.
- Refrigerate Quickly: To maintain freshness, refrigerate the components within 2 hours of cooking. The sooner you store the leftovers, the better the flavor and texture will be when you reheat them. Ensure that your fridge is set to 40°F (4°C) to keep the leftovers safe from bacterial growth.
- Store Sauce Separately: If you have any leftover hot honey sauce, store it separately in a small airtight container. This helps prevent the sauce from soaking into the bread and maintains its consistency when reheating.
2. How Long Will Leftovers Last?
Leftovers of your hot honey chicken sandwich can typically be stored in the fridge for up to 3 days. After this time, the chicken may lose its crispiness, and the bread may become soggy. For the best quality, try to enjoy the leftovers within the first 2 days.
If you don’t plan to eat the leftovers within a few days, you can freeze them for later use.
- Freezing Leftovers: Wrap the components tightly in plastic wrap or foil and place them in a freezer-safe container or bag. Leftover chicken can be stored for up to 3 months in the freezer, but the bread will lose some of its texture once frozen.
3. Reheating Leftovers: Getting the Crispiness Back
When reheating your hot honey chicken sandwich leftovers, your goal is to restore as much of the sandwich’s crispy, delicious texture as possible. Here are a few techniques to ensure the sandwich tastes just as good as when it was first made:
- Reheat the Chicken in the Oven or Air Fryer: The oven or air fryer are your best bets for reheating leftover chicken and keeping it crispy. Preheat your oven to 375°F (190°C) and place the chicken on a baking sheet. Reheat for 10–12 minutes, flipping halfway through for even heat distribution. If you’re using an air fryer, preheat it to 375°F (190°C) and cook the chicken for about 5–6 minutes, checking to make sure it’s heated all the way through.
- Toast the Buns: To refresh the buns and avoid sogginess, toast them lightly in a skillet or under the broiler for a few minutes. This will crisp them up and bring back some of the texture they lost while stored.
- Warm the Sauce: For the hot honey sauce, heat it gently in the microwave or on the stovetop. Be sure to stir it occasionally to prevent overheating and to restore the consistency. Once warmed, drizzle it over your sandwich right before serving.
4. Reheat the Whole Sandwich: A Quick and Tasty Option
If you’re in a rush and prefer to reheat the entire sandwich, you can wrap it in foil and place it in the oven at 350°F (175°C) for about 10 minutes. The foil will trap the heat, ensuring the sandwich stays moist, while the outside remains somewhat crispy. For extra crispiness, uncover the sandwich for the last few minutes of reheating.
5. Reheating Tips to Avoid Overcooking
While reheating is a great way to enjoy leftovers, there are a few things to keep in mind to avoid overcooking or drying out the chicken:
- Check the Temperature: Always use a meat thermometer to check the temperature of the chicken. It should reach an internal temperature of 165°F (74°C) to ensure it’s safe to eat.
- Don’t Overheat the Sauce: If you’re reheating the hot honey sauce, heat it slowly to avoid altering its flavor. Stir frequently to prevent burning or scorching.
- Be Mindful of the Bread: The bread can become overly crispy or dry if overcooked. Be sure to check the texture often while reheating, especially if you’re using a microwave, as it can make the bread soggy quickly.
Conclusion: A Quick and Flavorful Hot Honey Chicken Sandwich
Making a Hot Honey Chicken Sandwich at home doesn’t have to be complicated or time-consuming. With just a few simple steps, you can create a delicious and crispy sandwich in just 30 minutes. From prepping the chicken to making the sweet and spicy sauce, each step is designed to bring out the perfect balance of flavors. Don’t forget to toast your buns and load up on your favorite toppings to make the sandwich truly your own.
Feel free to adjust the spice level of the hot honey sauce and add any extras that will elevate your sandwich—whether it’s pickles, lettuce, or a sprinkle of cheese. The beauty of this recipe lies in its versatility.
We’d love to see how you make your version of the Hot Honey Chicken Sandwich! Share your creation on social media and tag us, or leave a comment below with your thoughts and customizations. Happy cooking!