Baking can be both fun and rewarding, but it’s often challenging. With the right technique, you can create perfect dough every time. This foolproof rising recipe takes the guesswork out of the process. Whether you’re making bread, pizza, or another treat, this simple recipe ensures a light, fluffy, and delicious result.
By following a few easy steps and using the right ingredients, you’ll enjoy smooth dough that’s easy to work with. Perfect for beginners and experienced bakers alike, this guide will help you master your baking skills. Get ready to create dough that’s sure to impress!
The Science Behind a Foolproof Rising Recipe
What Is Dough Rising and Why Does It Matter?
Dough rising is the key process that transforms simple ingredients into fluffy, airy bread and crusts. Without it, baked goods would turn out dense and heavy. Let’s break it down so you can understand why it matters and how to master it.
The Role of Yeast and Fermentation
Yeast, a living organism, feeds on sugars in the dough and produces carbon dioxide (CO₂) and alcohol as byproducts. The CO₂ gets trapped in the dough’s gluten structure, causing it to expand and rise. This is what gives your bread its light, airy texture. Alcohol adds flavor and evaporates during baking.
Why Time and Temperature Matter
Warm temperatures (ideally between 75°F and 85°F) activate yeast faster, while colder conditions slow it down. Too much heat can kill the yeast. Give your dough enough time to ferment—usually one to two hours—to allow proper rise and flavor development. Rushing this step results in poor structure and bland taste.
Dough Structure: Gluten Development
As you knead the dough, gluten strands form and stretch. This network of gluten traps the gas produced by yeast. Without strong gluten development, the dough won’t rise properly or hold its shape during baking. Always knead until the dough feels smooth and elastic.
Why Rising Impacts Final Texture
A well-risen dough leads to soft interiors and a crispy crust. Under-risen dough bakes into flat, chewy bread, while over-proofed dough collapses and becomes gummy. Rising isn’t just a step—it’s what separates homemade success from a disappointing loaf.
The Role of Yeast in Perfect Dough
Understanding how yeast works is essential for achieving dough that rises consistently and bakes up soft, airy, and flavorful. Whether you’re baking bread, rolls, or pizza crusts, yeast plays a central role in turning basic ingredients into a satisfying finished product.
What Yeast Does in Dough
Yeast is a living organism. When you mix it with warm water and a small amount of sugar or flour, it begins to feed. As it digests these nutrients, it produces carbon dioxide. This gas creates air bubbles inside the dough, which cause it to rise. Without this natural leavening process, your dough would stay flat and dense.
How Yeast Enhances Texture and Flavor
The carbon dioxide gas produced by yeast gives the dough its volume, but fermentation also adds flavor. A slow rise, especially in cooler temperatures, allows more time for flavor to develop. This results in bread or pizza crust that tastes rich and slightly tangy, with a better chew and aroma.
Choosing the Right Yeast for the Job
You can find different types of yeast at the store: active dry, instant, and fresh. Active dry yeast needs to be dissolved in warm water before using, while instant yeast can be mixed directly with flour. Choose the type that fits your recipe and comfort level. For beginners, instant yeast offers a fast and simple option.
Healthy Ingredient Alternative: Use Whole Wheat Flour for a Nutritional Boost
Switching from all-purpose flour to whole wheat flour is a great way to make your dough healthier. Whole wheat flour is packed with fiber, vitamins, and minerals because it includes the entire wheat grain — the bran, germ, and endosperm.
Why choose whole wheat flour?
It naturally contains more nutrients than refined white flour. The added fiber helps with digestion and keeps you feeling full longer. It also adds a slightly nutty flavor that complements most bread and pizza recipes.
How to use it in your dough:
Because whole wheat flour absorbs more water, using it in place of all-purpose flour can make your dough denser or drier. To fix this, start by replacing just 25% to 50% of the white flour. You’ll still boost the nutrition without affecting the texture too much.
Tips for better results:
- Add a little extra water to keep the dough soft.
- Let the dough rest longer to absorb moisture fully.
- Mix it with all-purpose or bread flour to maintain a light, airy rise.
Whole wheat flour makes your dough more wholesome, and with just a few small tweaks, it bakes up just as beautifully.
Step-by-Step Instructions for Preparing Foolproof Dough
Activating Your Yeast the Right Way
Getting the yeast activation step right is crucial for achieving a light, airy, and well-risen dough. Yeast needs just the right environment to thrive, and when handled properly, it lays the foundation for a successful rise every time.
Start with the Right Temperature
Use warm water between 100°F and 110°F (37°C to 43°C) — this range wakes the yeast without killing it. Water that’s too hot can damage the yeast, and water that’s too cold may not activate it effectively. A kitchen thermometer helps, but you can also test it by touch — it should feel warm but not hot.
Feed the Yeast Properly
To help the yeast activate quickly, add a small amount of sugar or honey to the water before mixing in the yeast. This simple ingredient acts as food for the yeast and encourages it to start bubbling. Let the mixture sit for about 5–10 minutes. You’ll know it’s working when foam or bubbles form on the surface — that’s proof your yeast is alive and active.
Mixing It Into Your Dough
Once the yeast is bubbly, you can mix it into your flour and other ingredients. This step brings everything together, but it’s important to work quickly. Active yeast begins fermenting right away, so the sooner it joins the dough, the better the rise.
How Long to Knead and When to Stop
Kneading is a crucial step in making any dough-based recipe, especially if you want your bread or pizza crust to turn out light, airy, and chewy. Learning how long to knead—and knowing when to stop—can make or break your no-fail rising recipe.
Why Kneading Matters
Kneading activates the gluten in your flour, which gives the dough structure and strength. As you knead, the dough becomes more elastic and stretchy, allowing it to trap air bubbles created by yeast. This process gives your bread a better rise and a softer texture.
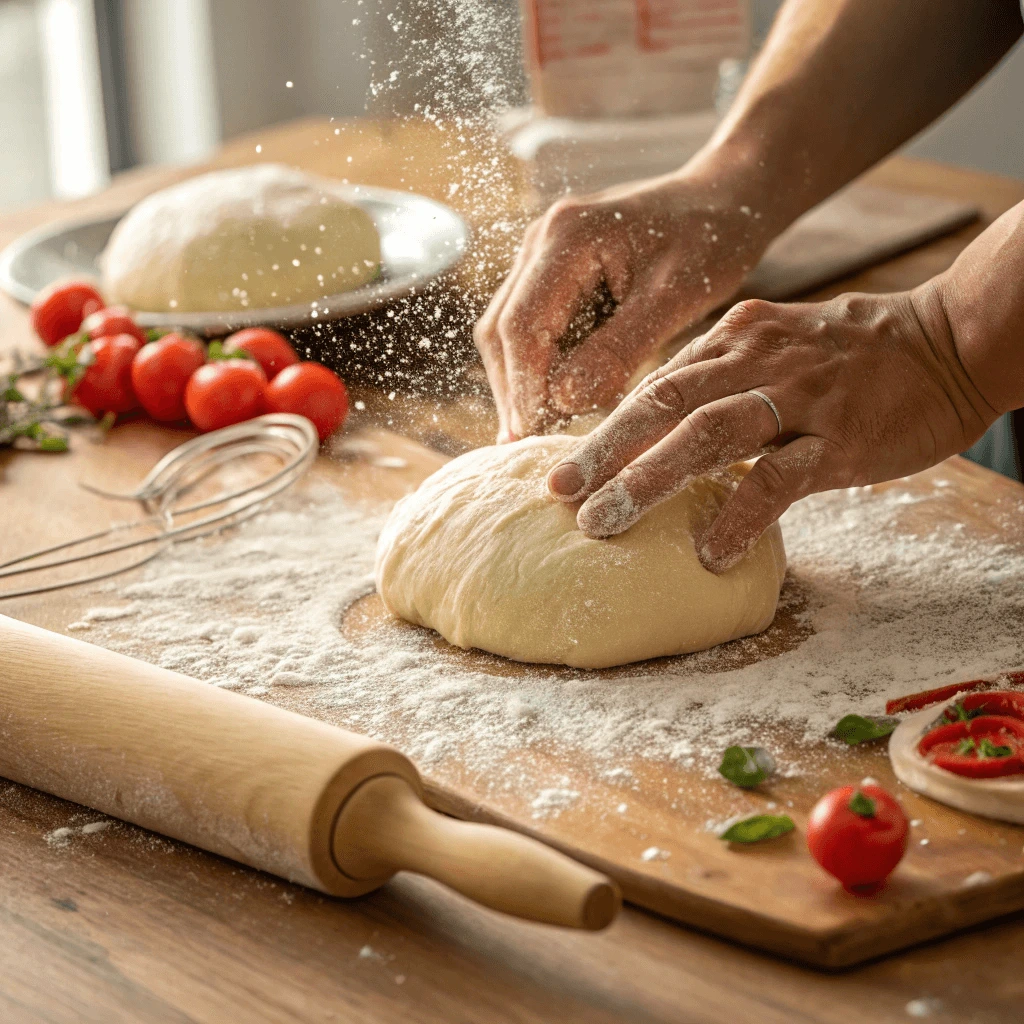
Hand-Kneading vs. Using a Mixer
When kneading by hand, aim for 8 to 10 minutes. Use the push, fold, and turn method until the dough becomes smooth and slightly springy. If you prefer using a stand mixer with a dough hook, reduce the time to about 5 to 6 minutes on medium speed. Stop occasionally to scrape down the sides and check the consistency.
How to Tell When to Stop Kneading
You’ll know the dough is ready when it feels soft and elastic but not sticky. Try the windowpane test: stretch a small piece of dough between your fingers. If it forms a thin, translucent sheet without tearing, the gluten is well-developed. Another sign is the poke test—if the dough bounces back when gently pressed, it’s good to go.
Healthy Ingredient Alternative: Swap Refined Sugar with Honey or Applesauce
Refined sugar helps activate yeast and adds sweetness to dough, but it offers little nutritional value. If you want a healthier no-fail rising recipe, try replacing refined sugar with natural alternatives like honey or unsweetened applesauce. These options add flavor and nutrients without sacrificing dough quality.
Why Choose Natural Sweeteners?
Honey and applesauce not only provide sugar for the yeast but also deliver extra benefits. Honey contains antioxidants and has mild antibacterial effects, while applesauce adds fiber and vitamin C. Both improve the nutrition of your baked goods while keeping them delicious.
Using Honey in Dough
Honey blends well with dough and adds a gentle floral sweetness. Use honey in place of sugar at a 1:1 ratio, but reduce the liquid in your recipe a little since honey has more moisture. Honey works great for breads and rolls that benefit from a soft texture and a golden crust.
Baking with Applesauce
Unsweetened applesauce makes a great sugar substitute and helps keep dough moist. Replace 1 cup of sugar with about ¾ cup of applesauce and reduce other liquids slightly. Applesauce adds softness to the dough and pairs well with whole wheat or high-fiber recipes.
Balancing Flavor and Texture
Each alternative has a distinct taste. Honey gives a sweeter, richer flavor, while applesauce offers mild sweetness with extra moisture. Choose the one that fits your recipe best. Using these swaps will help you bake healthier bread and pizza dough without losing that perfect rise and texture.
Tips for Shaping and Baking Like a Pro
How to Shape Dough for Pizza, Rolls, and Loaves
Shaping dough correctly is key to great bread, pizza, or rolls. Each type requires a slightly different technique to get the best texture and look.
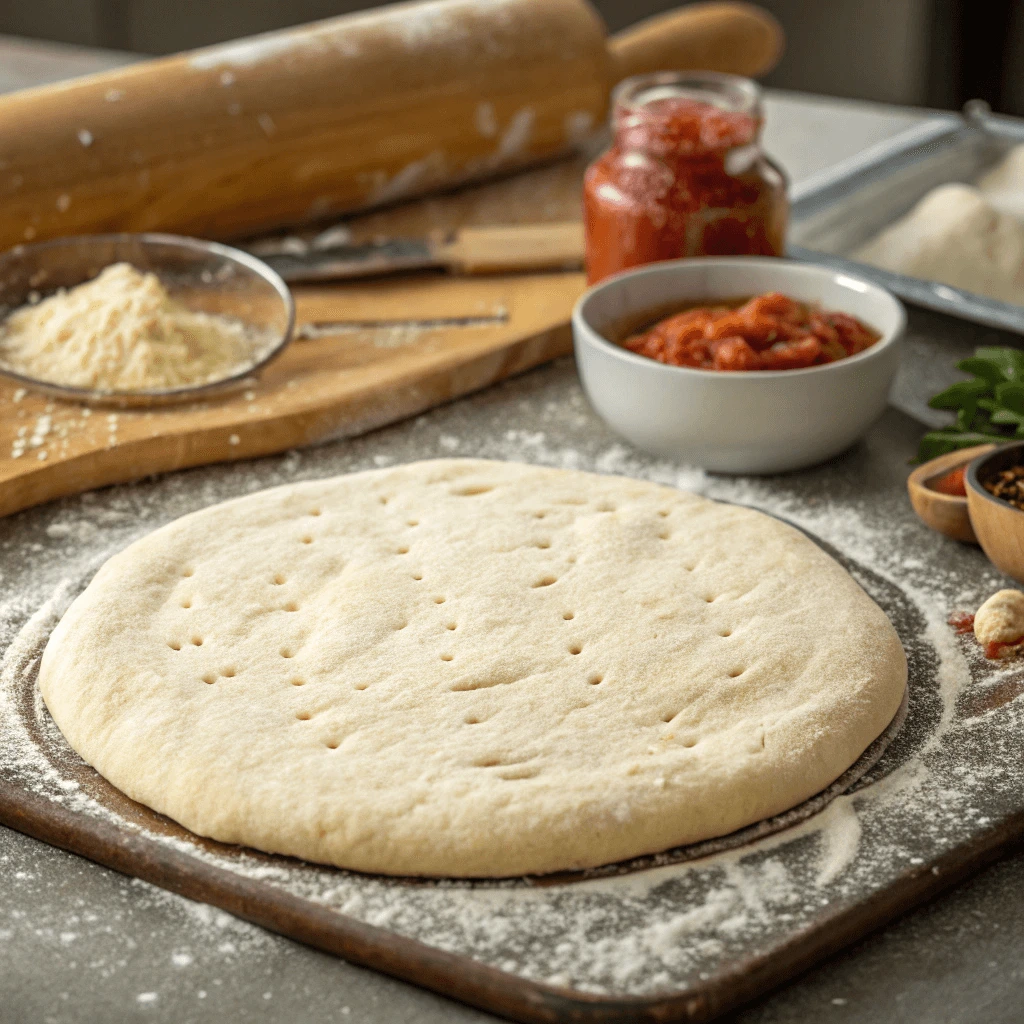
Shaping Pizza Dough
Gently press the dough with your fingers, starting from the center and moving outward. Use your knuckles to stretch it while lifting it in the air if you can. Keep the edges thicker to form a nice crust. Avoid rolling pins because they can flatten the dough too much.
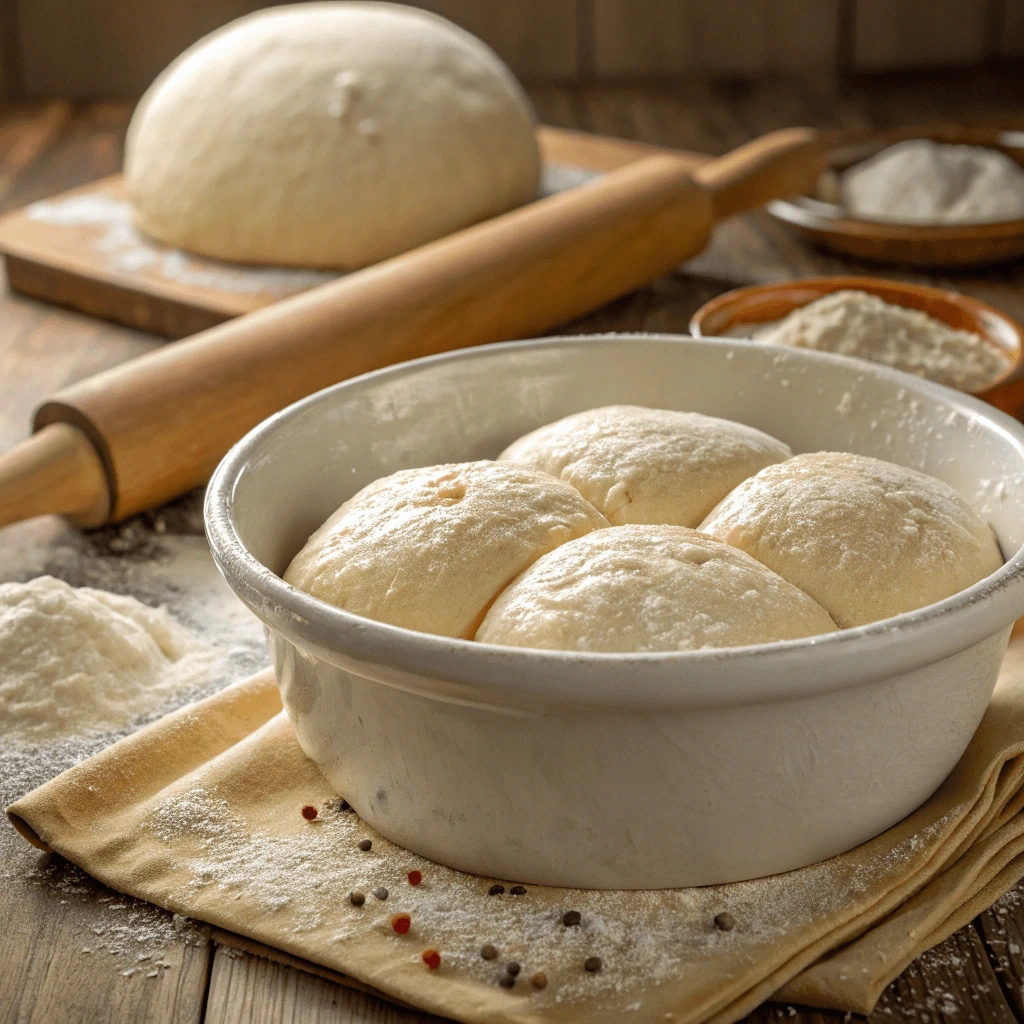
Forming Rolls
Divide the dough into equal parts. Shape each piece into a smooth ball by tucking the edges underneath. This creates tension on the surface, helping the rolls rise evenly and stay fluffy.
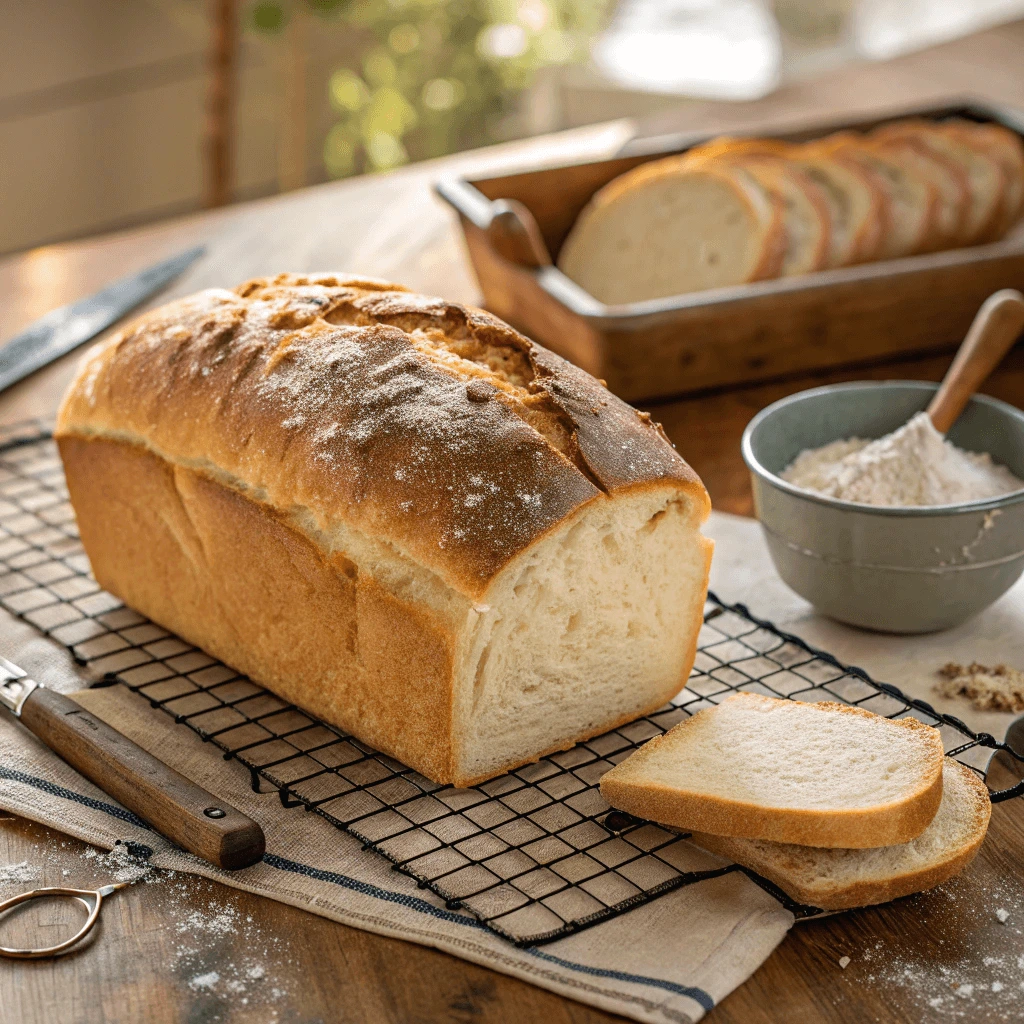
Making Bread Loaves
Flatten the dough into a rectangle. Fold the sides in, then roll it tightly from one end to the other. Pinch the seam closed and place the loaf seam-side down on your baking pan.
Oven Temperature and Placement for Even Baking
Getting the oven temperature right and placing your dough correctly are crucial for a perfectly baked loaf, pizza, or rolls. Both affect how evenly your dough cooks and how the crust develops.
Choosing the Right Oven Temperature
Most bread and pizza recipes bake best between 375°F and 450°F (190°C to 230°C). Higher temperatures help form a crispy crust and create a good oven spring—the final rise during baking. Lower temperatures can result in a softer crust but may lead to longer baking times. Always preheat your oven fully before placing the dough inside to ensure consistent heat.
Ideal Oven Rack Position
Place your baking tray or stone in the middle rack for even heat circulation. This position prevents the bottom from burning while ensuring the top cooks properly. If you use a pizza stone, place it on the middle or lower rack to allow heat to radiate evenly.
Using Baking Stones or Steel
Baking stones and steels absorb and hold heat well. They provide steady, intense heat from below, which helps develop a crunchy crust. Preheat the stone or steel for at least 30 minutes before baking. Place your dough directly on these surfaces for best results.
Avoid Overcrowding the Oven
Make sure to leave space between your baking trays or pans to allow hot air to circulate freely. Crowding can cause uneven baking, resulting in some parts being undercooked or overcooked.
Final Tips
Avoid opening the oven door frequently during baking. Every time you open it, heat escapes and lowers the temperature, which can affect how your dough rises and bakes. Use the oven light and window to check on your bread or pizza instead.
Healthy Ingredient Alternative: Add Ground Flaxseeds for Texture and Fiber
Adding ground flaxseeds to your dough is an excellent way to boost nutrition and improve texture. Flaxseeds provide essential nutrients while contributing to the dough’s moisture and structure.
Why Choose Ground Flaxseeds?
Ground flaxseeds are rich in fiber, omega-3 fatty acids, and antioxidants. These nutrients promote digestive health and support heart wellness. Whole flaxseeds can pass through the digestive system undigested, so grinding them ensures your body absorbs their full benefits.
How Flaxseeds Improve Dough Texture
When you add ground flaxseeds to your dough, they absorb water and form a gel-like substance. This helps keep the dough moist and tender, resulting in a softer crumb. The added fiber also creates a slightly denser but pleasantly chewy texture.
How to Incorporate Ground Flaxseeds
Replace up to 10-15% of your flour with ground flaxseeds for the best results. For example, if your recipe calls for 2 cups of flour, try using about 1 3/4 cups flour and 1/4 cup ground flaxseeds. Make sure to mix them evenly into the dry ingredients before adding liquids.
Tips for Baking with Flaxseeds
Because flaxseeds absorb more moisture, you may need to slightly increase the water or liquid in your recipe. Start by adding a tablespoon more liquid and adjust as needed. Also, ground flaxseeds have a mild nutty flavor that complements many types of bread and pizza dough.
Storing Ground Flaxseeds
Store ground flaxseeds in an airtight container in the refrigerator or freezer to prevent them from going rancid. Use fresh ground flaxseeds within a few weeks for the best taste and nutrition.
Troubleshooting Your Foolproof Rising Recipe Dough
Why Isn’t My Dough Rising in My Foolproof Rising Recipe?
When your dough doesn’t rise, it usually means the yeast isn’t working properly. Let’s look at common reasons and how to fix them.
Check Your Yeast
Yeast is a living ingredient. If your yeast is old or stored incorrectly, it can lose its power. To test, mix yeast with warm water and a little sugar. If it bubbles within 10 minutes, it’s active. If not, use fresh yeast.
Use the Right Water Temperature
Water that’s too hot kills yeast. Water that’s too cold slows it down. Use water around 105°F to 110°F to wake up the yeast.
Keep Dough Warm
Yeast works best in a warm, draft-free spot. Place your dough in a warm place covered with a towel or plastic wrap. A temperature between 75°F and 85°F helps dough rise well.
Don’t Over-Knead or Under-Knead
Kneading builds gluten, which traps the gas yeast produces. Knead until the dough feels smooth and elastic. Too little kneading means weak dough; too much breaks it down.
Watch Salt and Sugar Amounts
Salt can slow yeast if you add too much. Sugar feeds yeast but too much can dry it out. Follow your recipe’s measurements for the best rise.
Be Patient
Dough needs time. Let it rise until it doubles in size. Don’t rush this step for best texture and flavor.
How to Fix Sticky, Dry, or Dense Dough in Your Foolproof Rising Recipe
Sometimes dough can feel sticky, dry, or dense. Each issue has an easy fix to help you get the perfect texture.
Fix Sticky Dough
Sticky dough usually means it has too much water. Sprinkle a little flour on your hands and work surface, then knead the dough gently. Add flour gradually—too much at once can dry it out.
Fix Dry Dough
Dry dough feels rough or cracks when you shape it. Add a teaspoon of water at a time and knead until the dough becomes smooth and elastic. Warm water helps the dough absorb moisture better.
Fix Dense Dough
Dense dough can happen if the yeast didn’t activate or the dough didn’t rise enough. Make sure to proof the yeast properly and give the dough time to double in size. Avoid over-kneading, which can make dough heavy.
Adjust Ingredients Carefully
Check your ingredient measurements. Too much flour or too little water can cause problems. Balancing ingredients correctly keeps dough texture just right.
Healthy Ingredient Alternative: Use Olive Oil Instead of Butter
Replacing butter with olive oil in your dough recipes can boost both flavor and nutrition. Olive oil offers many benefits that help create moist, tender, and healthier baked goods.
Benefits of Olive Oil in Dough
Olive oil contains healthy fats known as monounsaturated fats. These fats support heart health and reduce bad cholesterol levels. Unlike butter, olive oil does not contain dairy, making it a great option for those who are lactose intolerant or prefer dairy-free baking. Olive oil also adds a subtle fruity flavor that complements breads and pizzas beautifully.
How Olive Oil Affects Dough Texture
Using olive oil in place of butter keeps the dough moist and soft. Olive oil blends smoothly into the flour, helping develop a tender crumb. Dough made with olive oil tends to rise well and bake into a lighter texture. It also prevents the dough from drying out during baking, which helps bread stay fresh longer.
Tips for Substituting Olive Oil for Butter
When swapping olive oil for butter, use about ¾ the amount of oil as the butter called for in the recipe. For example, if a recipe needs 1 cup of butter, use ¾ cup of olive oil. Because olive oil is liquid at room temperature, reduce other liquids slightly to maintain dough consistency. Choose extra virgin olive oil for the best flavor and quality.
Flavor Variations with Olive Oil
Olive oil pairs well with herbs like rosemary, thyme, or basil. Adding these herbs enhances aroma and taste, creating a more complex flavor profile. You can also drizzle olive oil on top of baked bread or pizza crust before baking for a golden, crispy finish.
Storage, Serving Suggestions, and Final Tips for Your Foolproof Rising Recipe
How to Store Dough for Future Use with Your Foolproof Rising Recipe
Storing dough correctly helps you save time and enjoy fresh baked goods whenever you want. Whether you plan to use it soon or later, proper storage keeps your dough fresh and ready.
Refrigerate Dough for Up to 2 Days
Place your dough in a lightly oiled bowl and cover it tightly with plastic wrap or a damp towel. Refrigerate it for up to 48 hours. Cold temperatures slow the yeast, preventing the dough from rising too fast. When you’re ready to bake, let the dough sit at room temperature until it doubles in size.
Freeze Dough for Longer Storage
For longer storage, wrap your dough tightly in plastic wrap and place it in a freezer bag or airtight container. Frozen dough lasts about three months. To use, thaw it overnight in the fridge. Then, bring it to room temperature and let it rise before baking.
Keep Dough Moist and Fresh
To avoid drying out, always cover dough well and lightly oil the storage container. Label your dough with the date so you can use it while fresh. Check for any strange smells or colors before baking—discard dough if it looks or smells off.
Creative Serving Ideas for Fresh Bread and Pizza from Your Foolproof Rising Recipe
Serving fresh bread and pizza in exciting ways can elevate your meal and delight your guests. Try these creative ideas to add flavor, texture, and visual appeal.
Flavorful Dipping Oils and Spreads
Enhance fresh bread by offering a variety of dipping oils. Mix extra virgin olive oil with crushed garlic, chili flakes, or fresh herbs like rosemary and basil. For a creamy touch, serve spreads like whipped ricotta, hummus, or flavored butter alongside the bread. These simple additions bring rich flavors that complement warm, crusty bread.
Garnish Your Pizza for a Gourmet Touch
Add fresh toppings after baking to boost flavor and texture. Sprinkle fresh arugula, basil leaves, or baby spinach on your pizza. Drizzle with a balsamic glaze or a little extra olive oil for brightness. You can also add shaved Parmesan or crumbled feta cheese for an extra savory punch.
Turn Leftovers into New Dishes
Transform leftover bread and pizza into delicious new meals. Use stale bread to make crunchy croutons or bread pudding. Reheat leftover pizza with extra cheese and fresh veggies to create a tasty casserole. These ideas reduce waste while keeping your meals interesting.
Healthy Ingredient Alternative: Flavor with Fresh Herbs Like Basil or Rosemary
Adding fresh herbs like basil or rosemary is an easy way to boost flavor in your Foolproof Rising Recipe dough. These herbs give your bread or pizza a fresh, aromatic taste that complements the simple ingredients in this recipe. Plus, herbs add antioxidants and nutrients, making your baked goods healthier.
Why Use Fresh Herbs in Your Foolproof Rising Recipe?
Fresh herbs brighten the flavor and aroma of your dough without extra calories or artificial additives. When you mix basil or rosemary into your Foolproof Rising Recipe, the herbs release natural oils that infuse the dough, making every bite flavorful and fresh.
How to Add Basil and Rosemary to Your Foolproof Rising Recipe
Chop herbs finely and fold them into the dough during mixing for an even flavor. You can also sprinkle fresh leaves on top before baking to get a more pronounced herbal aroma. Either way, the herbs work well with the mild, yeasty base of your Foolproof Rising Recipe dough.
Tips for Using Herbs in Your Foolproof Rising Recipe
Use herbs sparingly to avoid overpowering the dough. Basil pairs great with tomato-based toppings, while rosemary adds depth to plain or garlic-flavored breads. Fresh herbs also combine nicely with other healthy ingredient alternatives in your Foolproof Rising Recipe to create tasty, wholesome results.
Conclusion
Master the art of baking with this Foolproof Rising Recipe and enjoy perfect dough every time. Whether you’re making bread, rolls, or pizza crust, this recipe guarantees a reliable rise and delicious texture. By understanding key techniques like yeast activation, kneading, and ingredient substitutions, you can customize your dough to suit your taste and dietary needs. With these simple steps, you’ll gain confidence and impress your family and friends with fresh, homemade baked goods. Start baking today with this Foolproof Rising Recipe for consistent success!