Want the crisp, flaky layers of phyllo dough without the gluten? You’re in the right place. Making gluten free phyllo dough may sound tricky, but it’s easier than you think. With the right flour blend, techniques, and a little patience, you can create dough that’s light, flexible, and delicious. Whether you’re baking baklava or assembling spanakopita, this guide will walk you through the tips and tricks to perfect your gluten-free dough from scratch.
Understanding Gluten Free Phyllo Dough

What Makes Phyllo Dough Gluten Free?
Traditional phyllo dough uses wheat flour, which contains gluten. To make a gluten free version, you need to carefully select alternative ingredients and follow special techniques to mimic the stretchy, elastic quality of gluten.
Choosing the Right Gluten Free Flour
Gluten free flours lack the elasticity that wheat flour naturally provides. To compensate, you can use a blend of flours such as rice flour, tapioca starch, and potato starch. These ingredients work together to create a flexible dough that can be rolled thin without tearing.
A good rule of thumb: use a premade gluten free flour mix or experiment with your own blend. Just make sure it includes both starches (for softness) and structure-builders (like sorghum or millet flour).
Adding Binders for Stretch and Strength
Without gluten, the dough needs help holding together. That’s where binders like xanthan gum or psyllium husk come in. These ingredients add stretch and pliability to the dough. They also prevent it from crumbling when you roll or layer it.
Use binders sparingly. A small amount goes a long way, and too much can make the dough rubbery.
Balancing Moisture
Moisture plays a key role in gluten free phyllo dough. Too little water and the dough becomes dry and cracks. Too much, and it turns sticky and hard to handle. You should add water slowly while mixing, watching the texture as you go. A soft, smooth dough that’s slightly tacky is ideal.
Why Traditional Phyllo Doesn’t Work for Gluten-Free Diets
Traditional phyllo dough is known for its paper-thin layers and crisp texture, but it relies heavily on gluten to achieve these qualities. When following a gluten-free diet, this dough becomes problematic. Let’s break down the reasons why.
The Role of Gluten in Phyllo Dough
Gluten gives traditional phyllo dough its stretchiness and elasticity. It allows the dough to roll out incredibly thin without tearing. As you stack and layer it, the gluten helps it maintain structure and hold together during baking. Without gluten, the dough loses its flexibility and breaks apart easily.
Hidden Gluten Sources
Besides wheat flour, traditional phyllo dough may also include other gluten-containing ingredients. Some commercial brands dust the sheets with wheat starch or flour to prevent sticking. This makes them unsuitable for those with celiac disease or gluten sensitivity—even if they contain only trace amounts.
If you’re avoiding gluten for medical reasons, always check the ingredient list. Even small amounts of gluten can cause reactions in sensitive individuals.
Digestive Challenges and Dietary Restrictions
For many people with gluten intolerance, eating traditional phyllo leads to digestive discomfort, inflammation, and fatigue. Celiac disease sufferers face more severe risks, including long-term damage to the small intestine. That’s why switching to a certified gluten-free alternative isn’t just a lifestyle choice—it’s a necessity.
Benefits of Making Your Own Gluten-Free Phyllo
Making your own gluten-free phyllo dough offers a variety of advantages, from better control over ingredients to improved flavor and texture. If you’ve ever tried store-bought gluten-free phyllo, you know that it doesn’t always measure up to its gluten-filled counterpart. Here’s why making your own dough can take your baking to the next level.
Full Control Over Ingredients
One of the biggest advantages of making gluten-free phyllo from scratch is that you control what goes into it. Many store-bought gluten-free options contain preservatives, artificial flavors, or other additives to maintain texture and shelf life. By making your own dough, you ensure it’s free of unwanted chemicals and allergens. You can also choose the best gluten-free flours and binders that meet your dietary preferences or needs.
This is especially important for those who need to avoid certain ingredients like dairy, soy, or refined sugars. Customizing the dough recipe gives you the flexibility to accommodate your health and taste preferences.
Better Flavor and Texture
Store-bought gluten-free phyllo can often taste bland or have a crumbly texture, which is far from the crisp, delicate layers you expect from traditional phyllo dough. When you make it yourself, you can experiment with different gluten-free flour blends to achieve the flavor and texture you desire.
Homemade gluten-free phyllo dough also has the potential to be much more flavorful, especially when you choose higher-quality ingredients like almond flour, coconut flour, or rice flour. You can also adjust the fat content to make the dough more buttery or flaky, depending on your recipe.
Cost-Effectiveness
Buying gluten-free phyllo dough can be expensive, especially if you need to purchase special gluten-free flour blends. Making it at home can save you money in the long run. While the initial investment in gluten-free flours and binders might seem high, these ingredients are versatile and can be used for many different recipes. Once you have the basics on hand, you’ll be able to make multiple batches of phyllo dough for a fraction of the cost of pre-made versions.
Freshness and Customization
Homemade phyllo dough is always fresher than store-bought options. You can use it the same day you make it or freeze it for later use. This level of freshness adds to the quality of the final dish, whether you’re making baklava, spanakopita, or savory pastries.
You also have the freedom to customize your dough’s thickness and texture. If you prefer thinner layers, you can roll the dough out as much as you need. If you’re looking for a bit more chew, you can adjust the moisture content or use different flour combinations to get the right consistency.
A Sense of Accomplishment
Lastly, there’s a certain satisfaction that comes with making gluten-free phyllo dough from scratch. Not only will you have a delicious, homemade dough to work with, but you’ll also gain valuable baking skills. Mastering this art can be a rewarding experience that boosts your confidence in the kitchen.
Choosing the Right Ingredients
Best Gluten-Free Flours to Use
When making gluten-free phyllo dough, choosing the right flour is crucial to achieving the perfect texture and flavor. Since gluten-free flours behave differently than wheat-based flours, it’s important to understand the properties of each flour type to ensure a successful result. Here are the best gluten-free flours to use for your phyllo dough.
1. Rice Flour
Rice flour is one of the most common and versatile gluten-free flours. It has a neutral flavor and fine texture, making it a great base for gluten-free phyllo dough. When used alone, rice flour can be a bit too powdery, but when combined with other flours, it helps create a soft and slightly chewy texture.
It is often the primary ingredient in gluten-free flour blends because it absorbs moisture well, contributing to the dough’s elasticity. Rice flour works well for flaky dough, which is essential in creating the thin, delicate layers of phyllo.
2. Tapioca Flour (or Tapioca Starch)
Tapioca flour is another essential ingredient in gluten-free phyllo dough. Derived from the cassava root, it’s known for its ability to provide structure and elasticity to doughs and batters. Tapioca flour helps bind the ingredients together, preventing the dough from becoming too crumbly.
When added to phyllo dough, tapioca flour gives it a chewy, slightly stretchy texture that mimics the elasticity of traditional gluten-filled phyllo. It also helps create the thin layers we expect from phyllo dough while keeping the dough from breaking apart.
3. Almond Flour
Almond flour is made from finely ground almonds and adds a subtle nutty flavor to the dough. It contributes to a rich, tender texture, but it’s important to use it in moderation when making gluten-free phyllo dough. Almond flour doesn’t absorb moisture as well as other gluten-free flours, so you might need to adjust the moisture content of the dough when incorporating it.
Almond flour is often used in combination with other gluten-free flours to balance texture and moisture levels. It works best when paired with rice flour or tapioca flour to maintain the right consistency for phyllo dough.
4. Sorghum Flour
Sorghum flour is a gluten-free flour that’s high in protein and fiber, making it a great option for creating structure in your phyllo dough. It has a mild, slightly sweet flavor and works well in combination with other gluten-free flours to provide a more authentic texture. Sorghum flour also helps with the dough’s elasticity, which is essential when stretching phyllo dough to thin layers.
When using sorghum flour, be sure to balance it with other flours like rice or tapioca to avoid a dense texture. Sorghum flour adds depth to the flavor of your gluten-free phyllo dough, making it a favorite choice for savory recipes like spanakopita.
5. Chickpea Flour
Chickpea flour, or gram flour, is made from ground chickpeas and offers a slightly earthy flavor. This flour is high in protein, which helps provide structure and stability to gluten-free doughs. Chickpea flour also contributes to the dough’s elasticity, making it easier to stretch out thin layers without tearing.
Since chickpea flour can have a strong flavor, it’s best used in combination with other gluten-free flours to balance out the taste and texture. Chickpea flour works well when making gluten-free phyllo dough for savory dishes, especially those with bold flavors like spinach and feta.
6. Gluten-Free All-Purpose Flour Blend
If you’re looking for a convenient option, gluten-free all-purpose flour blends are a great choice. These blends are typically made from a combination of rice flour, tapioca flour, and potato starch, among other gluten-free ingredients. Many pre-made blends also include xanthan gum or guar gum to help bind the dough together and improve its texture.
Using a gluten-free all-purpose flour blend can simplify the process of making gluten-free phyllo dough, as it’s already formulated to replicate the texture of wheat flour. Just keep in mind that the quality of different flour blends can vary, so it’s essential to choose a high-quality blend designed specifically for baking.
Binding Agents: Xanthan Gum & Psyllium Husk
When making gluten-free phyllo dough, binding agents play a critical role in giving the dough its structure and elasticity. Since gluten provides structure in traditional dough, it’s essential to find gluten-free alternatives that can mimic these properties. Xanthan gum and psyllium husk are two popular ingredients used to improve the texture and workability of gluten-free dough. Let’s explore how each of these binding agents can help you achieve the perfect phyllo dough.
1. Xanthan Gum: The Key to Elasticity and Structure
Xanthan gum is one of the most widely used binding agents in gluten-free baking. It is a natural polysaccharide produced through fermentation. This ingredient has a unique ability to hold moisture and create elasticity, which makes it essential for gluten-free phyllo dough.
When you incorporate xanthan gum into your gluten-free phyllo dough, it helps bind the flour together, preventing the dough from crumbling. It also improves the dough’s stretchability, allowing you to roll out thin, delicate layers without breaking apart. This makes xanthan gum an excellent choice for phyllo dough, where the dough must be pliable and stretchable to form the desired thin layers.
Additionally, xanthan gum gives the dough a chewy texture that mimics the feel of traditional gluten-based dough. The amount of xanthan gum you use will depend on the specific recipe, but a general rule is to use about 1 teaspoon per cup of flour. Using too much xanthan gum, however, can lead to a gummy texture, so be careful not to overdo it.
2. Psyllium Husk: Adding Fiber and Moisture Retention
Psyllium husk is another excellent binding agent that helps improve the texture and consistency of gluten-free phyllo dough. Derived from the seeds of the Plantago plant, psyllium husk is a fiber-rich ingredient that absorbs water and forms a gel-like substance when mixed with liquid. This gel provides structure to the dough and helps it stay pliable.
The benefits of psyllium husk go beyond just binding the dough. It also helps retain moisture, which is essential in gluten-free doughs that tend to dry out more quickly than their wheat-based counterparts. Psyllium husk keeps your phyllo dough soft, preventing it from becoming brittle during preparation and baking.
Because psyllium husk forms a more flexible, elastic dough than some other binders, it is especially beneficial when making phyllo dough. It helps create dough that can be stretched thin, just like traditional phyllo, without the risk of tearing or cracking. Psyllium husk also imparts a subtle texture to the dough, making it slightly chewy but still light and crispy when baked.
3. Using Xanthan Gum and Psyllium Husk Together
Many gluten-free bakers choose to combine xanthan gum and psyllium husk to achieve the best results. While xanthan gum provides elasticity and structure, psyllium husk enhances moisture retention and contributes to a more flexible dough. Together, these two ingredients can help you create phyllo dough that closely resembles the texture and consistency of traditional gluten-based phyllo.
When using both of these binding agents, it’s important to balance the quantities. Typically, a combination of ½ teaspoon of xanthan gum and 1 tablespoon of psyllium husk per cup of gluten-free flour is a good starting point. Adjust the measurements based on the dough’s consistency, as different flour blends may require slight modifications.
By using both xanthan gum and psyllium husk in your gluten-free phyllo dough, you ensure that the dough is not only stretchable and pliable but also holds together well during the rolling process. This combination helps you avoid the frustration of crumbly dough and delivers a more authentic result.
Fats and Liquids That Improve Texture
The right fats and liquids are crucial in gluten-free phyllo dough as they determine the texture, pliability, and overall result of the dough. Since gluten is absent in gluten-free recipes, these ingredients play an even more significant role in creating dough that is both easy to work with and bakes into the desired flaky layers. Let’s dive into the key fats and liquids that will give your gluten-free phyllo dough the perfect texture.
1. Importance of Fats in Gluten-Free Dough
Fats are essential in any dough, but they become especially critical in gluten-free phyllo dough. They provide moisture, softness, and allow the dough to stretch properly, helping create those characteristic layers of phyllo dough. The type of fat you use will influence the texture and flavor of the dough. Let’s take a look at the best fats to use:
Olive Oil: Olive oil is one of the most commonly used fats in gluten-free phyllo dough. It helps keep the dough soft and easy to work with, allowing you to roll it out thin without it tearing. The mild flavor also complements both savory and sweet phyllo dishes, making it a versatile option.
Butter (or Dairy-Free Butter): Butter offers richness and creates a slightly flakier, more delicate texture. If you’re not avoiding dairy, butter is an excellent choice. For dairy-free options, margarine or a vegan butter substitute can be used to mimic the same effect while still keeping the dough tender.
Coconut Oil: For those on dairy-free or vegan diets, coconut oil is a fantastic option. It imparts a subtle coconut flavor and gives the dough a smooth, workable texture. It’s a great substitute for butter and keeps the dough pliable and crisp after baking.
Vegetable Oils (Sunflower, Canola): Neutral-flavored vegetable oils are another good option for creating gluten-free phyllo dough. These oils help hydrate the dough without adding any strong flavors, allowing other ingredients to shine through.
2. Liquids That Hydrate and Bind the Dough
In addition to fats, liquids are also critical to the success of gluten-free phyllo dough. They help bind the ingredients together and provide the necessary hydration for the flour to form a dough that is smooth and easy to handle.
Water: Water is the basic liquid used to hydrate the dough. It’s important to add water gradually, as too much can make the dough sticky, while too little will result in a dry, crumbly texture. Always aim for a soft, smooth dough consistency before you stop adding water.
Eggs: Eggs serve as both a binder and a source of moisture in gluten-free dough. They help the dough stick together, and the proteins in eggs give the dough a better structure, allowing it to stretch thin without breaking. For those avoiding eggs, flax eggs or aquafaba can serve as good substitutes.
Apple Cider Vinegar: This might seem like an odd addition, but apple cider vinegar helps improve the dough’s elasticity and texture. It prevents the dough from becoming too tough and adds a subtle lightness that’s essential for creating delicate layers.
Plant-Based Milks: Dairy-free milks, such as almond, oat, or rice milk, can replace regular milk for those with dietary restrictions. These liquids hydrate the dough without changing its texture significantly. They help maintain the softness of the dough, making it easier to roll.
3. Balancing Fats and Liquids for the Right Texture
The key to creating perfect gluten-free phyllo dough is balancing the right amount of fats and liquids. Too much of either can ruin the texture, making it too greasy or too dry to handle. The goal is to create dough that is slightly tacky but not sticky, with enough moisture for pliability, but without becoming a soggy mess.
Start by adding fats and liquids slowly. Gradually incorporate them until the dough is soft and workable. If your dough feels too dry or crumbly, you may need to add a bit more liquid. If it’s too sticky, incorporate a bit more flour until the dough reaches the desired consistency.
It’s important to note that the type of fat and liquid you choose will affect the texture differently. For example, butter will give a richer, flakier result, while oils like olive oil or coconut oil will create a softer dough. The key is to experiment and find the right combination that works best for your recipe and preferences.
Step-by-Step Guide to Making Gluten-Free Phyllo Dough
Mixing and Kneading the Dough
The process of mixing and kneading the dough is critical in achieving the perfect gluten-free phyllo dough texture. Since gluten is absent, it’s essential to incorporate ingredients carefully and knead the dough just right to achieve the right consistency. Here’s how to do it step by step.
1. Mixing the Ingredients
The first step in making gluten-free phyllo dough is to combine the dry ingredients thoroughly. This includes your choice of gluten-free flours, starches, and any binding agents you might be using. Mixing these dry ingredients ensures an even distribution, which is vital for consistent dough texture.
Step 1: Start by adding the gluten-free flour (or flour blend) and starch (like cornstarch or potato starch) into a large mixing bowl. Stir them together with a whisk or spoon until fully combined. This will ensure that there are no pockets of starch or flour, which could lead to uneven dough.
Step 2: Once the dry ingredients are thoroughly mixed, it’s time to add the binding agents (such as xanthan gum or psyllium husk) if needed. These agents help provide structure to the dough. Mix them evenly into the dry ingredients to ensure they activate properly once you add the wet ingredients.
2. Incorporating the Wet Ingredients
Now it’s time to add the wet ingredients, including oils, eggs, water, or any plant-based alternatives. Slowly add these liquids into the dry mix, stirring gently as you go. It’s important to add them gradually to avoid the dough becoming too wet. This step requires some patience.
Step 1: Begin by adding the oil or melted butter to the dry ingredients. This helps bind the flour and starch together, while also contributing to a soft, flexible dough. Mix well until the oil is fully incorporated into the flour blend.
Step 2: Next, add the eggs (or egg substitutes). Eggs help bind the dough and improve its elasticity. If you’re using flax eggs or aquafaba, make sure they’re mixed thoroughly to ensure consistency.
Step 3: Add water slowly while stirring. The dough should begin to come together but remain slightly sticky. You can use your hands to help incorporate the water and make the dough cohesive. Add more water if the dough seems too dry, but avoid adding too much at once.
3. Kneading the Dough
Once you have a consistent dough, it’s time to knead it. This is where you’ll activate the ingredients and develop the right texture. Kneading the dough helps break down the flour particles, allowing the dough to become more pliable and stretchable. However, gluten-free dough doesn’t require as much kneading as traditional phyllo dough. Overworking it could lead to a dense texture, so be gentle.
Step 1: Lightly flour your work surface with gluten-free flour to prevent the dough from sticking. Take your dough and turn it onto the floured surface. Gently knead it for about 5-10 minutes. Kneading should be a light process, where you press the dough and fold it back on itself, repeating the motion until the dough becomes smooth and elastic.
Step 2: During the kneading process, pay attention to the dough’s texture. If it feels sticky or too wet, dust it with more gluten-free flour. On the other hand, if the dough feels dry and crumbly, you can add a little more water, just a few drops at a time.
Step 3: Knead until the dough is smooth and no longer sticky. The dough should feel soft and pliable but not too wet or too dry. Be sure to test it for elasticity. Gluten-free dough doesn’t stretch quite the same way as traditional dough, but it should still hold together well.
4. Resting the Dough
Resting the dough is an essential step that shouldn’t be skipped. It allows the dough to relax, making it easier to roll out later. Without resting, the dough can be too tight and may shrink as you try to roll it out, making it more difficult to achieve those delicate, thin layers.
Step 1: Once kneaded, cover the dough with a clean kitchen towel or plastic wrap. Let it rest for at least 30 minutes at room temperature. This allows the dough to absorb the moisture properly and softens it, which helps improve its texture when rolled out.
Step 2: If you need to rest the dough for longer than 30 minutes, you can place it in the refrigerator for up to 2 hours. However, if you chill the dough, let it come back to room temperature before you begin rolling it out.
5. Tips for Success
- Use a Light Touch: When mixing and kneading gluten-free dough, always use a light touch. Overworking the dough can make it tough, as it lacks the gluten that would usually provide structure.
- Monitor the Consistency: The dough should be slightly tacky but not sticky. If it’s too dry, add a little more liquid. If it’s too sticky, dust it with flour. Finding the right balance is key.
- Resting is Crucial: Don’t rush the resting process. It may seem like an unnecessary step, but it’s critical to achieving the perfect texture for gluten-free phyllo dough.
Resting and Rolling Techniques
The steps of resting and rolling your gluten-free phyllo dough are essential for achieving that delicate, thin, and flaky texture that makes phyllo dough so appealing. Let’s break down the process with helpful techniques to ensure that your dough rolls out just right.
1. Resting the Dough: Why It’s Important
Resting the dough is a crucial step when making gluten-free phyllo dough. Just as with traditional dough, allowing the dough to rest gives the ingredients time to fully hydrate and relax. This softens the dough and makes it more manageable, which ultimately helps you roll it out into thin, even layers.
Step 1: After kneading, cover the dough with a clean kitchen towel or wrap it in plastic wrap. Let it rest at room temperature for at least 30 minutes. During this time, the moisture in the dough will be absorbed evenly, helping to prevent cracking when you roll it out.
Step 2: If you’re not planning to use the dough immediately, you can refrigerate it for up to two hours. However, always let it come back to room temperature before rolling, as cold dough is harder to stretch.
Tip: The longer you let the dough rest, the more pliable it will become. Don’t rush this step!
2. Preparing Your Workspace for Rolling
Before you begin rolling, make sure your workspace is well-prepared. The right setup will help you roll the dough evenly without making a mess or causing it to tear.
Step 1: Lightly dust your countertop or work surface with gluten-free flour. Be sure to use a gluten-free flour blend that’s appropriate for dough, such as rice flour, to prevent sticking.
Step 2: Keep some extra gluten-free flour nearby to dust the dough and your rolling pin as you go. This will prevent the dough from sticking to your hands or tools while you work.
Step 3: Have a rolling pin that’s easy to handle, ideally one that has a smooth, non-stick surface. You might also want to use a silicone baking mat to help with the rolling process, as it keeps the dough from sticking to the countertop.
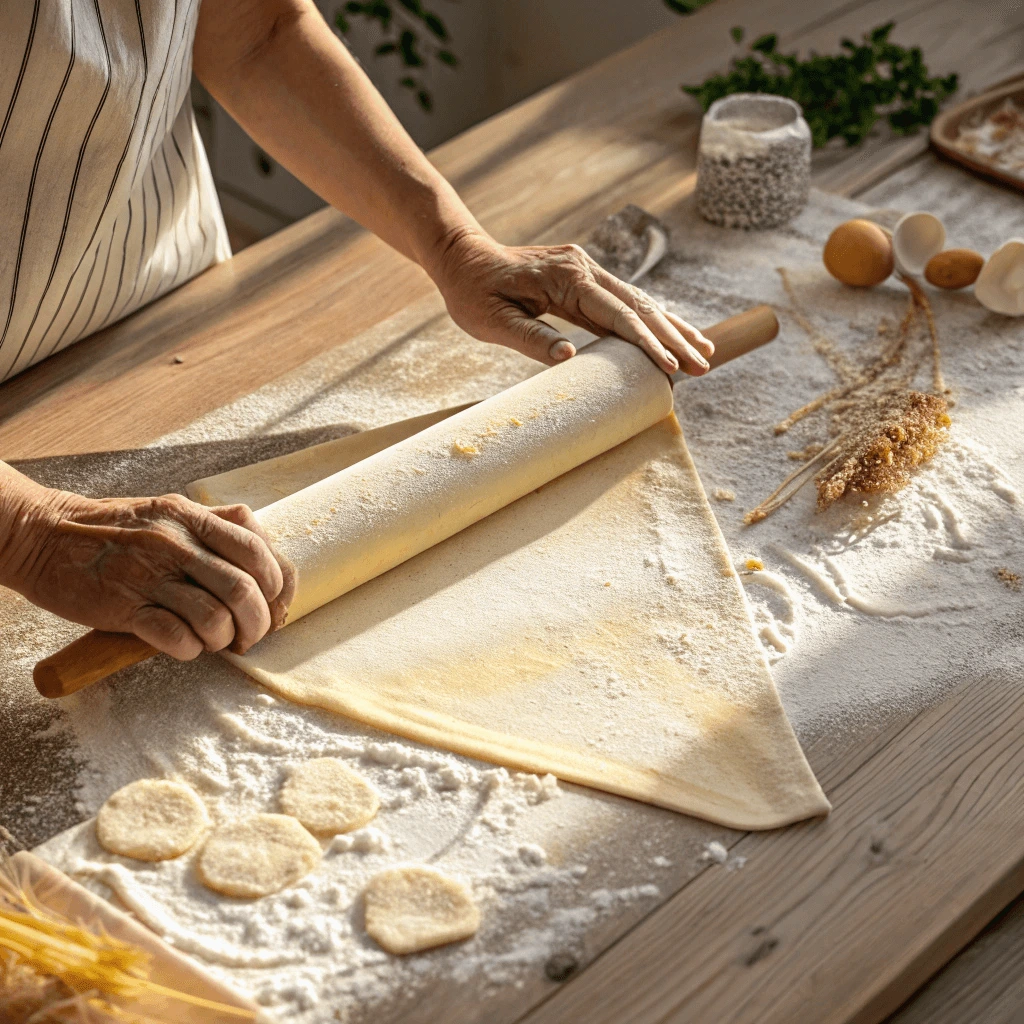
3. Rolling the Dough: Thin, Even Layers
When rolling gluten-free phyllo dough, the key is to keep the layers thin and even. Gluten-free dough is more delicate than traditional phyllo dough, so it requires a lighter touch. Here’s how to roll it out without tearing it.
Step 1: Start by taking a portion of your dough and shaping it into a ball. Flatten it slightly with your hands to create a rough disc shape before you begin rolling.
Step 2: Begin rolling from the center of the dough outwards. Use light, even pressure to stretch the dough. Try to rotate the dough as you roll to ensure even thickness. If you find that the dough is sticking to your rolling pin or countertop, sprinkle a small amount of flour on top or beneath it.
Step 3: Don’t worry if your dough isn’t perfectly circular. Gluten-free phyllo dough may tear or crack more easily than regular dough, but that’s okay. You can patch up the tears by pressing the edges together gently.
Step 4: Continue rolling until the dough is as thin as possible. Aim for the dough to be almost translucent. The thinner it is, the crispier and flakier the phyllo will be when baked.
Tip: If you find the dough too sticky or difficult to roll out, you can gently fold it over itself and let it rest for a few more minutes. The dough may soften and become easier to work with after resting.
4. Using Multiple Layers for Perfect Results
In traditional phyllo dough recipes, multiple layers are stacked together to create a flaky, crispy texture. You can achieve this same effect with gluten-free phyllo dough, though it might take a little extra effort.
Step 1: Once you’ve rolled out the dough into a thin sheet, transfer it to a baking sheet lined with parchment paper or a silicone baking mat. You can brush the layer lightly with melted butter or oil to help achieve a golden, crispy texture.
Step 2: If you want extra layers, you can continue rolling out additional sheets of dough and layering them on top. Make sure to brush each layer with butter or oil before adding the next sheet to avoid them sticking together.
Step 3: Repeat this process for as many layers as desired. Keep in mind that the more layers you create, the flakier your final result will be. However, make sure not to overdo it, as too many layers can make the dough too heavy.
Tip: If you plan to freeze your gluten-free phyllo dough, you can layer it with parchment paper in between each sheet. This helps prevent the layers from sticking together when frozen.
5. Handling Tears and Imperfections
Since gluten-free dough lacks the elasticity that gluten-based dough has, it is more prone to tearing. However, don’t let this discourage you! You can easily repair most tears and imperfections by following these steps.
Step 1: If a piece of dough tears, simply take a small piece of dough from a different section and patch the tear by pressing the edges together. The dough should adhere easily, especially after resting.
Step 2: If the dough is too fragile to handle, try gently rolling it from the edges toward the center to help smooth out imperfections.
Tip: If you notice several tears or cracks, consider making smaller batches of dough to work with at a time. This makes it easier to manage and reduces the risk of tearing.
Layering and Storing Your Dough
Once you’ve successfully rolled out your gluten-free phyllo dough, the next essential steps are layering and storing the dough. These steps ensure that your dough remains fresh and ready for use while also helping maintain its texture and integrity. Let’s break down how to properly layer and store your dough for the best results.
1. Layering Your Phyllo Dough
Layering the dough is crucial to achieving the classic flaky texture associated with phyllo pastries. When you stack the dough, each layer should be separated to ensure they don’t stick together and to maintain their crispness when baked.
Step 1: After rolling out the dough into a thin sheet, place it on a flat surface such as a baking sheet lined with parchment paper or a silicone baking mat.
Step 2: Lightly brush the top of the sheet with melted butter, oil, or a gluten-free fat of your choice. This will help the dough layers stay separate, adding to the crispiness and flakiness during baking.
Step 3: Once you’ve finished rolling out a sheet, carefully place another sheet on top, following the same procedure of brushing the top with fat. Keep stacking layers as needed, depending on the recipe you’re making.
Step 4: If the dough layers are too large for your intended dish, you can trim them to fit the shape of your baking pan. It’s important to make sure the layers are even and slightly overlapping to avoid any large gaps.
Tip: To avoid any potential sticking or difficulty when peeling layers apart later, consider layering between sheets of parchment paper. This creates an easy-to-peel surface for your dough, especially when you are working with multiple layers.
2. How to Store Phyllo Dough
Properly storing your gluten-free phyllo dough is key to keeping it fresh and ready for use in the future. If you don’t plan to use all your dough right away, follow these steps to ensure it stays in good condition.
Step 1: Once you’ve layered the dough and completed the rolling process, cover the stacked layers with a clean, damp cloth or plastic wrap. Make sure the dough is fully covered to prevent it from drying out.
Step 2: If you are not planning to use the dough within a few hours, storing it in the refrigerator is your best option. Wrap the dough in plastic wrap or place it in an airtight container. You can refrigerate the dough for up to two days without affecting its quality.
Step 3: For longer-term storage, freezing your gluten-free phyllo dough is the most effective method. To freeze, first stack the layers with a piece of parchment paper between each sheet. Then, wrap the entire stack tightly in plastic wrap, followed by a layer of aluminum foil. You can freeze the dough for up to one month.
Tip: If you’re freezing the dough, it’s a good idea to freeze smaller portions of dough. This way, you can defrost only the amount you need for each recipe, ensuring that the rest remains sealed and fresh.
3. Defrosting Phyllo Dough
When you’re ready to use the dough after storing it, defrosting it properly ensures it won’t become too sticky or difficult to work with.
Step 1: If you’ve frozen the dough, remove it from the freezer and place it in the refrigerator to defrost overnight. Let it thaw slowly to prevent any moisture from making the dough soggy.
Step 2: Once the dough is completely defrosted, take it out of the fridge and let it rest at room temperature for 10 to 15 minutes before rolling it out. This will allow the dough to soften slightly, making it easier to handle.
Tip: Avoid defrosting the dough at room temperature directly from the freezer, as this can cause the dough to become too sticky. The gradual thawing process helps maintain its integrity.
4. Handling Imperfections After Storing
Storing gluten-free dough can sometimes result in minor imperfections like cracks or tears. However, these are usually easy to fix, and the dough will still perform well in your recipe.
Step 1: If you notice cracks or tears after defrosting or storing, don’t panic! Simply press the dough back together gently. Gluten-free dough is much more fragile than its gluten-containing counterparts, but it’s usually forgiving when it comes to minor repairs.
Step 2: If the dough is too stiff or cracked, lightly dust it with flour and let it rest for 10 minutes. This resting period helps the dough become more pliable and easier to roll out without tearing.
Tip: If you’ve used parchment paper to separate layers, you can often lift the dough directly from the paper and place it into your dish without causing any damage.
5. Final Tips for Storing and Layering
- Consistency is Key: Try to keep the thickness of each layer as even as possible. This ensures even baking and crispiness when the dough is baked.
- Don’t Rush the Resting Periods: Allow the dough to rest during both the rolling and storing stages to keep it manageable and easy to handle. This will also help the dough maintain its structure when baked.
By properly layering and storing your gluten-free phyllo dough, you ensure that it will remain in great condition for whenever you need it. Whether you choose to refrigerate or freeze the dough, these techniques preserve its delicate texture, ensuring that your future gluten-free phyllo creations come out flaky and crisp every time.
Common Mistakes and How to Avoid Them
Not Using the Right Flour Blend
Choosing the right flour blend is crucial when making gluten-free phyllo dough. Using the wrong blend can lead to issues like fragile, sticky, or dense dough that doesn’t roll properly.
1. Why Flour Blend Matters
Gluten is the key to the elasticity and texture in traditional phyllo dough. Without it, gluten-free flour blends need to replicate this structure. A proper blend ensures the dough stretches, holds layers, and remains crispy after baking.
2. Common Flour Blends
- Rice Flour Blend: Light and neutral-tasting, it’s often paired with starches like potato or tapioca flour to add elasticity.
- Tapioca and Potato Starch Blends: These starches help create a stretchy dough, perfect for thin layers of phyllo.
- Sorghum Flour Blend: Sorghum flour adds chewiness and works well with rice flour and starches for better dough structure.
3. What Happens Without the Right Blend?
Using an unsuitable flour blend leads to:
- Crumbly Dough: Almond or coconut flour alone may not provide enough structure.
- Tough or Dense Dough: Without proper starch content, the dough may become stiff and hard to roll thin.
- Sticky Dough: Excessive moisture can make the dough unmanageable.
4. Tips for Getting It Right
- Use Starches: Starches like potato or tapioca are key for elasticity.
- Pre-made Blends: Ready-to-use gluten-free flour blends often provide balanced results.
- Adjust Liquids and Flours: Pay attention to consistency—add liquid if too dry, or flour if too sticky.
5. Conclusion
Choosing the right flour blend is essential for achieving perfect gluten-free phyllo dough. Experiment with different combinations or use pre-made blends to ensure your dough has the right texture and structure for delicious, crispy layers.
Overworking or Under-Resting the Dough
When making gluten-free phyllo dough, the way you handle the dough is critical. Both overworking and under-resting the dough can cause issues that affect the texture and final result.
1. What Happens When You Overwork the Dough?
Overworking the dough leads to a few key problems:
- Toughness: The dough becomes too firm and difficult to roll thin. The flour proteins will bind too much, which can result in tough dough instead of delicate, flaky layers.
- Loss of Elasticity: Gluten-free dough lacks the gluten network that helps regular dough stretch, so working it too much can make it less pliable. It may crack or tear easily when rolled out.
- Sticky Texture: If you overwork it, the dough can become sticky and hard to manage. This may require adding more flour, which can change the intended texture of the dough.
2. Why Resting Is Essential
Resting the dough is a crucial step in making phyllo dough. During rest time:
- Moisture Absorption: The flour absorbs liquid evenly, helping the dough become more pliable and less sticky.
- Relaxing the Dough: Resting allows the dough to relax and settle, making it easier to roll out without cracking.
- Improved Texture: The starches and binding agents like psyllium husk or xanthan gum in gluten-free dough benefit from a resting period, which improves the final dough’s texture, stretchability, and elasticity.
3. Consequences of Under-Resting the Dough
If you don’t let the dough rest enough, it can lead to:
- Dough Shrinkage: As you roll it out, the dough might shrink back, making it difficult to get it thin and even.
- Cracking: The dough may crack or break because the gluten-free flour hasn’t had time to absorb enough moisture to relax properly.
- Inconsistent Layers: Without proper resting, the dough might not layer evenly, affecting the texture of the final baked product.
4. How to Avoid These Issues
- Don’t Rush the Process: Allow the dough to rest for at least 30 minutes to an hour. This resting period helps it soften and stretch easily.
- Use a Light Hand: Handle the dough gently and don’t overwork it. The goal is to mix and knead just enough to incorporate the ingredients without overdoing it.
- Keep It Covered: Always cover the dough while it rests to prevent it from drying out.
5. Conclusion
Finding the balance between overworking and under-resting the dough is crucial for success. By letting the dough rest sufficiently and handling it gently, you’ll ensure a smoother texture, fewer cracks, and a better overall result. Proper rest leads to delicate, thin layers that make gluten-free phyllo dough just as delicious and flaky as its traditional counterpart.
Letting the Dough Dry Out Too Fast
When making gluten-free phyllo dough, one of the biggest challenges is maintaining the right moisture level throughout the process. If the dough dries out too quickly, it will become brittle, difficult to roll, and prone to cracking. Here’s why it’s important to control the drying process and some tips on how to do it effectively.
1. The Importance of Maintaining Moisture
Phyllo dough needs to remain pliable to be stretched thin without cracking. If the dough loses moisture too quickly, it becomes difficult to work with and will break when you try to roll or layer it. The gluten-free flours and binding agents in the dough are sensitive to moisture changes, so keeping the dough adequately hydrated throughout the process is key to achieving a smooth, elastic texture.
2. What Causes the Dough to Dry Out?
Several factors contribute to the dough drying out too quickly:
- Exposure to Air: Leaving dough uncovered or exposed to air for long periods allows it to lose moisture rapidly.
- Warm Environments: While a warm environment can sometimes help dough rise, it can also speed up the drying process if the dough is left out for too long.
- Inadequate Covering: Not covering the dough with a damp cloth or plastic wrap causes the surface to dry out before you have a chance to work with it.
3. Signs the Dough Has Dried Out
You can tell the dough is drying out if you notice the following:
- Cracking Edges: When you try to roll it out, the dough will crack or break along the edges.
- Tough Texture: The dough will feel tough and unyielding, making it difficult to stretch.
- Flaky Crumbs: The dough may crumble or break apart as you attempt to layer it, which will affect the final texture of your baked goods.
4. How to Prevent Dough from Drying Out Too Fast
- Cover with a Damp Cloth: While resting the dough, cover it with a damp cloth to trap moisture and prevent it from drying out.
- Use Plastic Wrap or Parchment Paper: For longer resting times, wrap the dough tightly in plastic wrap or parchment paper to keep the moisture in.
- Work in Small Portions: If you’re working with a large batch, divide the dough into smaller sections. Only work with one portion at a time, keeping the rest covered to prevent them from drying out.
- Control Temperature: Avoid working in overly warm or dry environments. A slightly cool, humid space is ideal for phyllo dough preparation.
5. Handling Dry Dough
If you notice that the dough has dried out too much, there are a few ways to salvage it:
- Moisten It Gently: Lightly spritz the dough with water or lightly brush it with a dampened pastry brush to reintroduce moisture. Be careful not to oversaturate it.
- Knead It Again: If the dough feels tough, try kneading it briefly with a small amount of extra moisture until it becomes soft again.
6. Conclusion
Letting your dough dry out too fast can lead to frustrating results and spoil the texture of your gluten-free phyllo dough. Always take precautions to cover the dough properly and work in a controlled environment. By keeping it moisturized and ensuring you handle it carefully, you can prevent dryness and achieve perfectly thin, flaky layers every time.
Delicious Recipes Using Gluten-Free Phyllo Dough
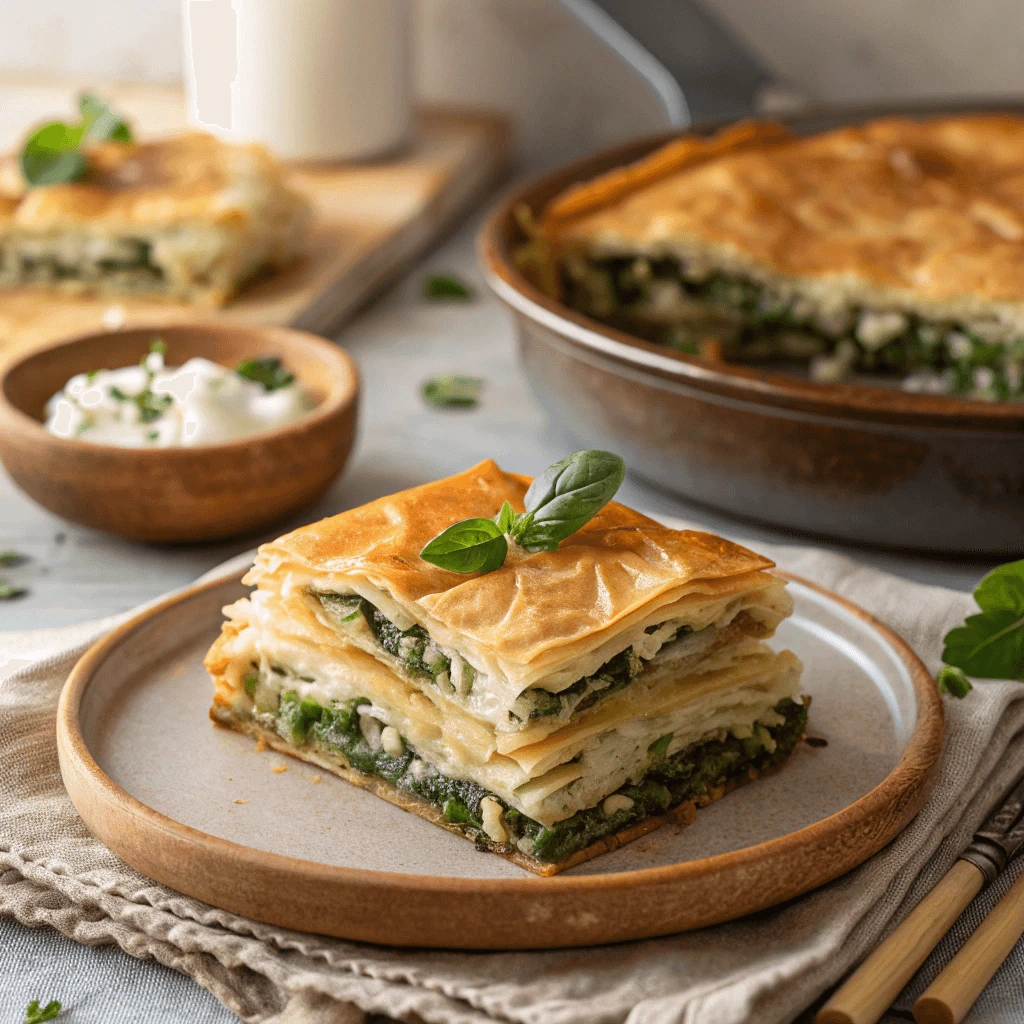
Spanakopita with a Gluten-Free Twist
Spanakopita is a Greek pastry traditionally made with phyllo dough, but making a gluten-free version is easy with a few adjustments. You can still enjoy this flaky, savory pie filled with spinach and feta without worrying about gluten.
1. Use Gluten-Free Phyllo Dough
The key to a successful gluten-free spanakopita is the dough. Make or buy gluten-free phyllo dough that mimics the texture of traditional dough. Handle it carefully to avoid drying out, and layer it well to achieve that perfect crispiness when baked.
2. Prepare the Spinach Filling
For the filling, combine sautéed spinach, crumbled feta cheese, sautéed onions, and fresh herbs. Drain the spinach well to avoid excess moisture. You can add a beaten egg to bind the filling together and help it set during baking.
3. Assemble the Spanakopita
Layer the gluten-free phyllo dough in your baking dish, brushing each layer with oil or melted butter. Spread the spinach mixture evenly on top and cover with more dough layers. Seal the edges to keep the filling inside.
4. Bake and Serve
Bake your spanakopita at 375°F (190°C) for 30-40 minutes until golden brown and crispy. Let it cool slightly before slicing. Serve warm for the best texture and flavor.
Gluten-Free Apple Strudel
Apple strudel is a classic dessert that can be enjoyed gluten-free with a little creativity. The delicious combination of apples, cinnamon, and sugar wrapped in thin layers of dough can still shine without the gluten. Here’s how to make a gluten-free version of this beloved treat.
1. Prepare the Gluten-Free Dough
The most important element of apple strudel is the dough. Gluten-free dough tends to be more fragile than traditional dough, so it’s essential to use the right flour blend and handle it with care. Make sure to roll it thin, as this is what gives strudel its signature crispness.
Use a blend of gluten-free flours such as rice flour, potato starch, and tapioca flour. Adding a binding agent like xanthan gum or psyllium husk helps the dough hold together and remain elastic, making it easier to roll and stretch.
2. Make the Apple Filling
For the filling, peel, core, and slice fresh apples. Opt for tart varieties like Granny Smith for the best balance of flavor and texture. Sauté the apples with butter, cinnamon, sugar, and a dash of lemon juice to enhance the flavors. Once cooked, allow the filling to cool before spreading it on the dough. This helps prevent the dough from becoming soggy.
You can also add raisins, walnuts, or other dried fruits to the filling for added flavor and texture. If you like, add a touch of vanilla extract or ground cloves for an extra layer of complexity.
3. Assemble the Strudel
Once your dough and filling are ready, it’s time to assemble the strudel. Roll out the gluten-free dough on a well-floured surface. Since gluten-free dough is delicate, be gentle as you stretch it into a thin sheet. You can use a rolling pin or your hands to gently stretch the dough, aiming for an even thickness.
Spread the apple filling evenly across the dough, leaving space at the edges. Carefully fold in the sides and roll the dough tightly around the filling. Brush the strudel with butter or oil to help it achieve a golden brown finish when baked.
4. Baking the Strudel
Place your assembled strudel on a baking sheet lined with parchment paper. Bake at 375°F (190°C) for 35-40 minutes, or until the strudel is golden and crispy. During the baking process, the dough will become flaky, and the apples will soften into a deliciously sweet filling.
5. Serving the Strudel
Allow the strudel to cool slightly before slicing. Serve warm, dusted with powdered sugar for a classic touch. Pair with vanilla ice cream or whipped cream for a truly indulgent dessert experience.
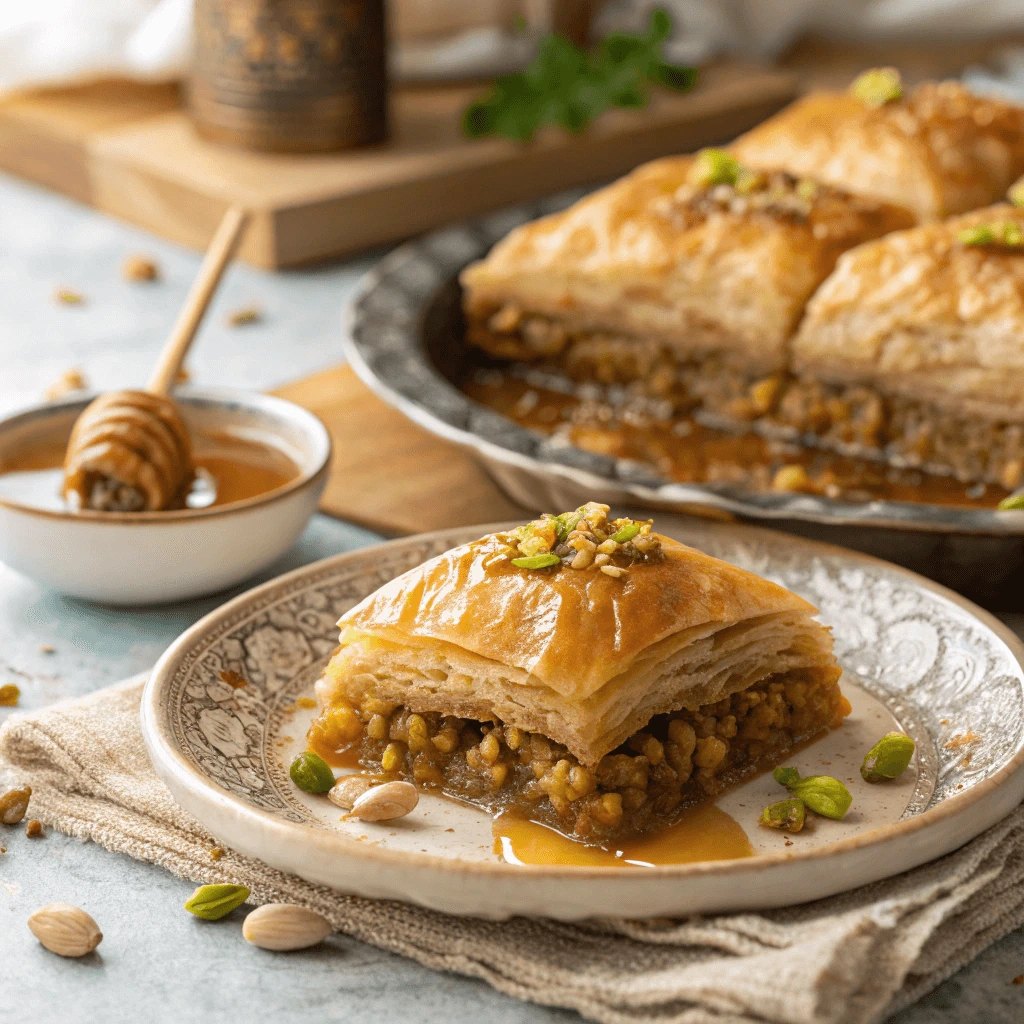
Homemade Baklava Made Gluten-Free
Baklava is a beloved dessert that combines crispy layers of phyllo dough with a sweet, nutty filling. The good news is that you can enjoy a gluten-free version of this traditional pastry without compromising on flavor or texture. Follow these steps to make homemade gluten-free baklava that will impress anyone.
1. Using Gluten-Free Phyllo Dough
To make baklava gluten-free, you need to start with the right dough. Traditional phyllo dough contains gluten, but you can use a gluten-free phyllo dough substitute. You can either make your own gluten-free phyllo dough or purchase a pre-made version from specialty stores or online. Ensure the dough is rolled out thinly to maintain the signature crispness of baklava.
2. Choosing the Right Nut Filling
A key component of baklava is the nut filling. Typically, baklava contains a mixture of pistachios, walnuts, or almonds. For the gluten-free version, these nuts work perfectly as they provide crunch and flavor without any gluten. Chop the nuts finely, then combine them with sugar, cinnamon, and a little bit of lemon zest for added zest.
3. Layering and Assembling the Baklava
Start by brushing a baking dish with melted butter or a dairy-free alternative if you prefer. Lay down the first sheet of gluten-free phyllo dough and brush it with butter. Continue layering and buttering each sheet, stacking about 8–10 layers for the base. Then, sprinkle a portion of the nut mixture on top. Repeat the process with the phyllo dough and nut mixture until the dish is filled. Finish by layering several more sheets of dough on top.
4. Cutting and Baking the Baklava
Before baking, carefully cut the baklava into squares or diamonds. This step ensures that the syrup soaks into each piece after baking. Bake the assembled baklava in a preheated oven at 350°F (175°C) for 45-50 minutes, or until the dough is golden and crisp. The layers should separate easily and become flaky.
5. Sweet Syrup to Finish
To make the classic syrup that soaks into the baklava, combine honey, sugar, water, and a bit of lemon juice in a saucepan. Simmer the mixture until it thickens, then pour it over the freshly baked baklava. Let the baklava sit for at least 2 hours to allow the syrup to soak in and the flavors to meld.
6. Serving and Enjoying
Once the baklava has cooled and absorbed the syrup, it is ready to serve. The gluten-free version should have the same sweet, nutty crunch as traditional baklava, with a perfectly crisp texture. Serve it as a dessert for any occasion and enjoy the rich flavors of this delightful treat.
In conclusion, mastering the art of gluten-free phyllo dough opens up a world of delicious possibilities, from baklava to spanakopita. By understanding the importance of the right flour blends, binding agents, and proper technique, you can create crispy, flaky, and flavorful gluten-free pastries that rival the traditional version. With these tips and tricks, you’ll be able to enjoy gluten-free phyllo dough in all your favorite recipes, ensuring every bite is just as satisfying.