Baking the perfect perfect dough doesn’t have to be hard. With the right recipe, you can create delicious bread, pizza, and more with ease. Our No-Fail Rising Recipe ensures success every time, helping you achieve soft, fluffy dough. Whether you’re a beginner or experienced baker, this simple method eliminates guesswork.. With just a few ingredients and a little patience, you’ll bake like a pro and enjoy perfect dough for any dish.
Understanding the Basics of a No-Fail Rising Recipe for Perfect Dough
What Makes a Dough “No-Fail”?
A no-fail dough recipe gives you consistent results every time. It’s simple, reliable, and perfect for beginners. Let’s break down the key reasons why it works so well.
Balanced Ingredients
Using the right ratio of flour, water, yeast, and salt makes a big difference. Bread flour works best because it has more protein, which helps build structure. If you use all-purpose flour, your dough may still rise well but won’t be as chewy.
Active Yeast That Works
Always check your yeast before adding it to your dough. Mix it with warm water (about 110°F) and a little sugar. If it starts to bubble within 5–10 minutes, your yeast is alive and ready to go. Dead yeast won’t rise your dough, no matter how perfect the other ingredients are.
Warm, Draft-Free Rising Spot
Dough rises best in a cozy place. A cold kitchen will slow things down. Try placing your dough near a sunny window or inside a turned-off oven with the oven light on. Cover it with a clean towel to keep the warmth in and drafts out.
Key Ingredients You Need for Success
To make perfect dough every time, start with the right ingredients. Each one plays a key role in how your dough rises, stretches, and bakes.
Flour is the foundation. Bread flour works best because it has more protein, giving the dough better structure and chew. All-purpose flour also works and gives a slightly softer texture.
Yeast is what makes the dough rise. Use active dry or instant yeast. Active dry yeast needs to be dissolved in warm water first, while instant yeast can be added directly to the dry mix.
Water activates the yeast and brings the dough together. It should feel warm to the touch—not too hot, or it may kill the yeast.
Olive oil adds softness and flavor. It helps the dough stay moist and tender, especially useful for pizza and flatbreads.
Salt boosts flavor and keeps the yeast in check. Add it after the yeast is activated to avoid slowing the rise.
With these basic ingredients in the right balance, you’ll get dough that’s smooth, easy to work with, and bakes beautifully every time.
Healthy Ingredient Alternative
Switching to whole wheat flour is a simple and smart way to boost your dough’s nutritional value without sacrificing taste. Whole wheat flour retains the bran and germ, offering more fiber, protein, and essential nutrients than refined white flour.
Why Choose Whole Wheat Flour?
Whole wheat flour supports digestion and helps you feel full longer. It’s less processed and contains complex carbohydrates that release energy more slowly—making your homemade bread or pizza more satisfying and wholesome.
Texture and Taste Tips
Whole wheat flour has a nutty, earthy flavor and produces a slightly denser dough. If you’re new to baking with it, try using half whole wheat and half all-purpose flour to keep a light texture while still improving the fiber content. This blend works especially well in pizza crusts and sandwich loaves.
Adjusting for Moisture and Rise
Because whole wheat absorbs more water, you should add 1–2 extra tablespoons of liquid to your dough. Let the dough rest for 10 minutes before kneading—this helps soften the bran and improves elasticity. Be sure to give it enough rising time; whole wheat dough takes a bit longer but yields a rich, hearty result.
Step-by-Step Guide to Achieve the No-Fail Rising Recipe Dough Rise
How to Activate Yeast for Consistent Results
Activating yeast correctly is key to getting your dough to rise perfectly every time. Follow these steps to ensure your yeast is alive and ready to work.
Choose the Right Water Temperature
Start by measuring warm water between 100°F and 110°F (38°C to 43°C). Yeast thrives in this temperature range. If the water feels lukewarm or too hot, adjust accordingly. Avoid using water hotter than 120°F as it can kill the yeast, stopping the rising process before it starts.
Add Sugar to Wake Up the Yeast
Yeast feeds on sugar to grow and produce gas that makes dough rise. Stir 1 teaspoon of sugar or honey into the warm water before adding the yeast. This gives the yeast an energy boost and speeds up activation.
Sprinkle Yeast and Wait for Foam
Evenly sprinkle the yeast over the surface of the water. Do not stir it in immediately. Let it rest for about 5 to 10 minutes without disturbing. Active yeast will start to bubble and form a frothy foam layer on top. This foam signals that the yeast is alive and producing carbon dioxide.
What If You Don’t See Foam?
If the yeast does not foam after 10 minutes, it might be inactive or the water temperature was incorrect. Discard the mixture and try again with fresh yeast and properly warmed water. Using expired yeast can lead to poor rising.
Use the Activated Yeast Quickly
Once the yeast foams, stir it gently to combine and add it to your dry ingredients right away. Using the yeast immediately maximizes its activity and helps your dough rise well during the first proofing stage.
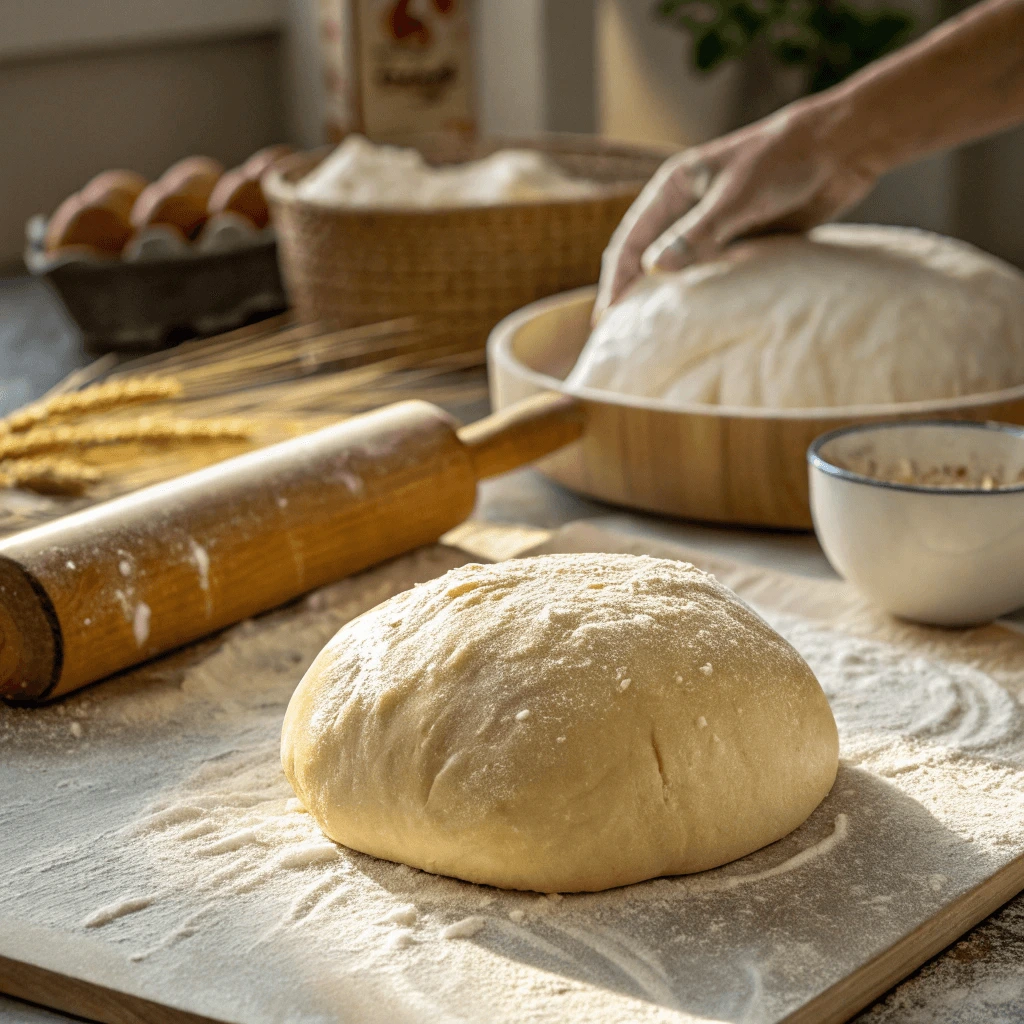
Kneading Tips: By Hand or with a Dough Hook
Kneading develops the gluten in your dough, which gives bread its chewy texture and structure. You can knead dough by hand or use a dough hook on your mixer, depending on your preference and equipment.
Kneading by Hand
To knead dough by hand, lightly flour your work surface and push the dough away from you using the heels of your hands. Fold the dough back over itself and repeat this process rhythmically for about 8 to 10 minutes. You’ll notice the dough becoming smoother and more elastic as the gluten develops. If the dough feels sticky, sprinkle a small amount of flour, but avoid adding too much to keep the bread light.
Using a Dough Hook
If you prefer a quicker method, attach the dough hook to your stand mixer. Place the dough in the mixing bowl and knead on a low to medium speed for 6 to 8 minutes. The dough hook efficiently stretches and folds the dough, building gluten without tiring your hands. Stop occasionally to check the dough’s consistency—it should be soft, elastic, and slightly tacky, not sticky.
How to Tell When Kneading is Done
Regardless of the method, your dough is ready when it passes the “windowpane test.” Take a small piece and gently stretch it; if it forms a thin, translucent membrane without tearing, you’ve developed enough gluten. Proper kneading ensures your dough will trap gases during rising, resulting in a light and airy loaf.
Healthy Ingredient Alternative
Whole wheat flour offers more nutrients and fiber than all-purpose flour. It contains the entire grain, including bran and germ, which adds a nutty flavor and denser texture to your bread and dough.
Benefits of Whole Wheat Flour
Using whole wheat flour boosts fiber intake and adds vitamins like iron and magnesium. This makes your baked goods healthier and more filling.
How to Substitute
Start by replacing half of the all-purpose flour with whole wheat flour. This balance keeps your dough soft while adding nutrition. You can increase the amount as you get used to the texture.
Adjusting Your Recipe
Whole wheat flour soaks up more water, so add a tablespoon or two extra to your dough. You might also need to knead a little longer for the best texture.
Using whole wheat flour is a simple way to make your baking healthier without losing flavor or structure.
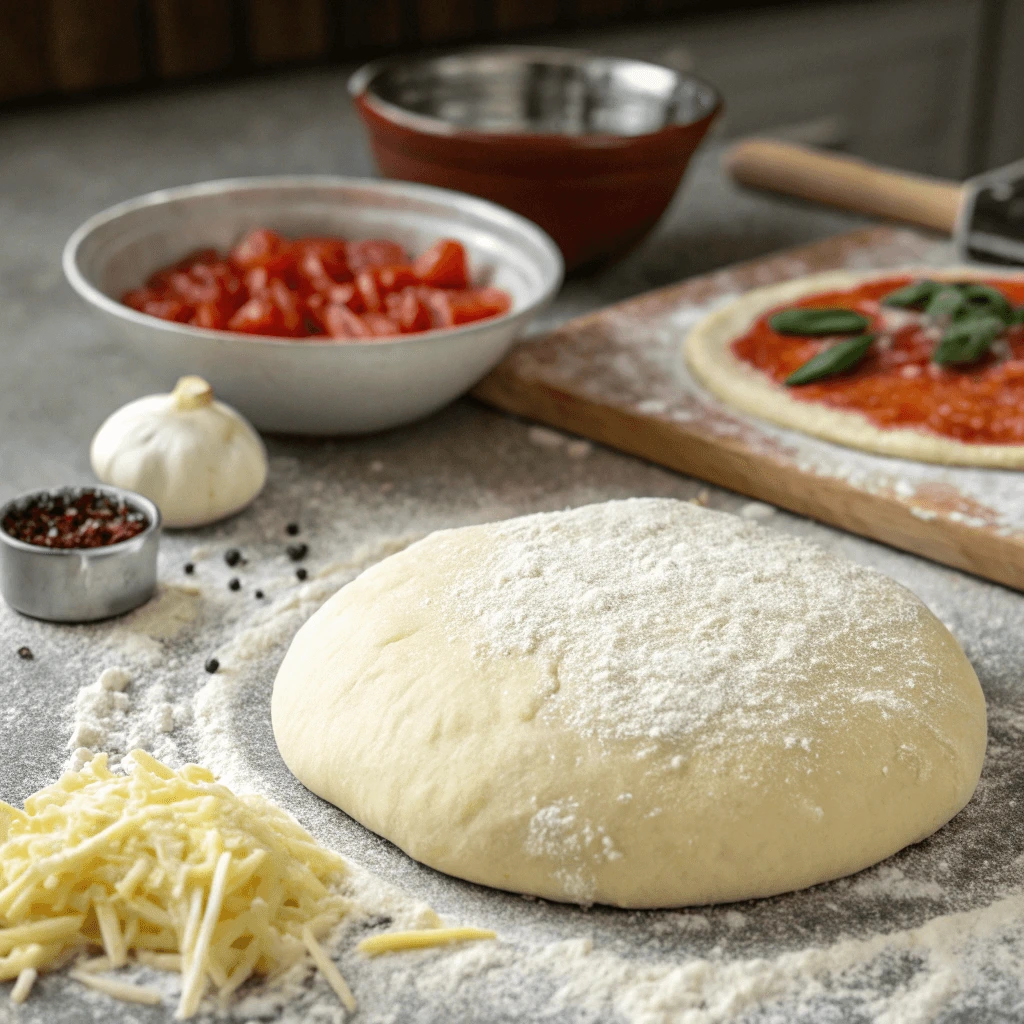
Versatile Uses: From Bread Loaves to Pizza Crusts
Shaping the Dough for Bread, Rolls, or Pizza
Shaping your dough properly ensures your bread, rolls, or pizza turn out with the perfect texture and rise. This step sets the foundation for a beautiful final product.
Preparing the Dough
After the first rise, gently press down the dough to release built-up gas. Flour your work surface lightly to prevent sticking but avoid adding too much flour, which can dry out the dough.
Shaping Bread Loaves
Press the dough into a rectangle and fold it like a letter. Roll it tightly from one end to the other, creating tension on the surface. Pinch the seams to seal and tuck the ends underneath. Place the loaf seam-side down in your pan to help it hold its shape while baking.
Forming Rolls
Divide the dough into even pieces. Shape each piece into a smooth ball by pulling the edges underneath itself. This technique creates tension on the surface, helping rolls rise evenly and develop a soft, rounded top.
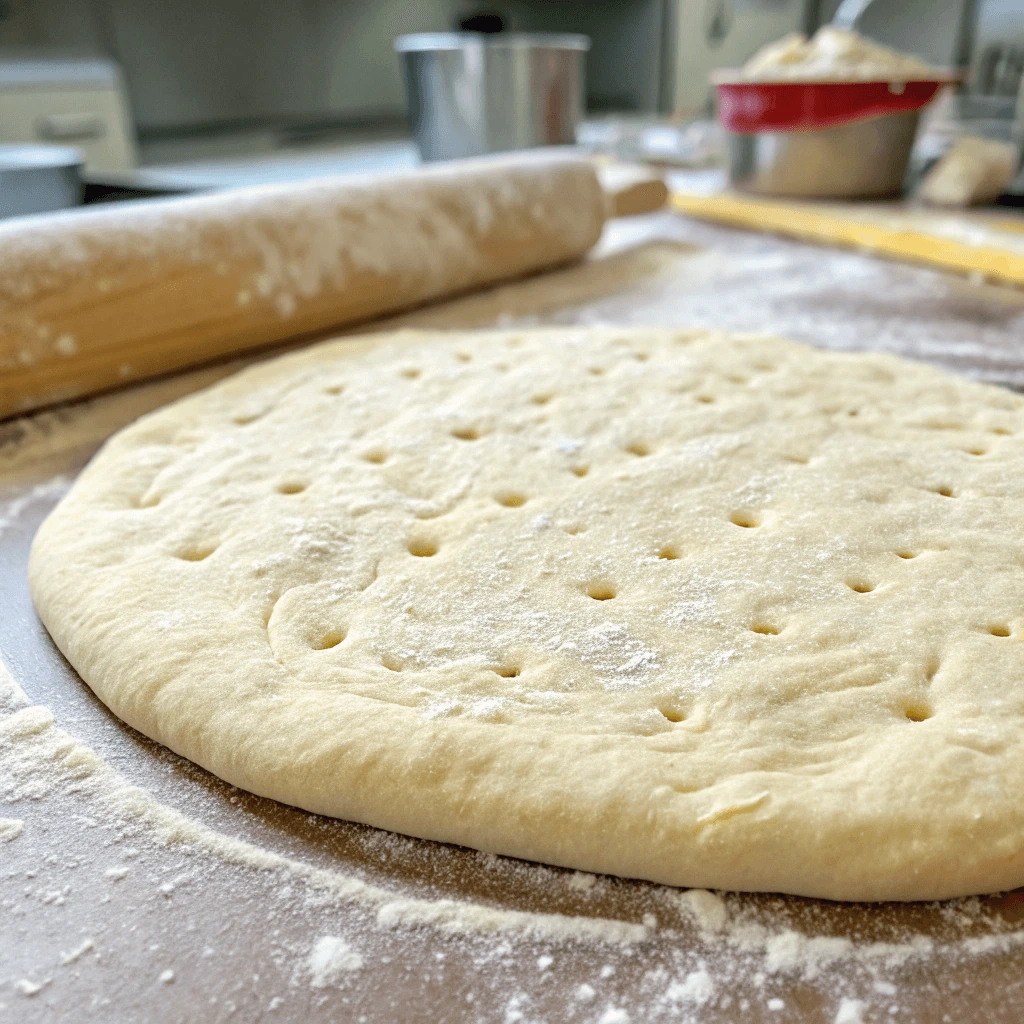
Stretching Pizza Dough
Start by flattening the dough ball with your hands. Stretch it outward gently, using your knuckles to avoid tearing. Keep the edges thicker for the crust while thinning the center for a perfect pizza base.
Handling Tips
Work with floured hands and be gentle to keep the air bubbles inside the dough intact. This helps produce light, airy bread or pizza with great texture.
Mastering these shaping methods will help you bake professional-quality bread, rolls, and pizza every time.
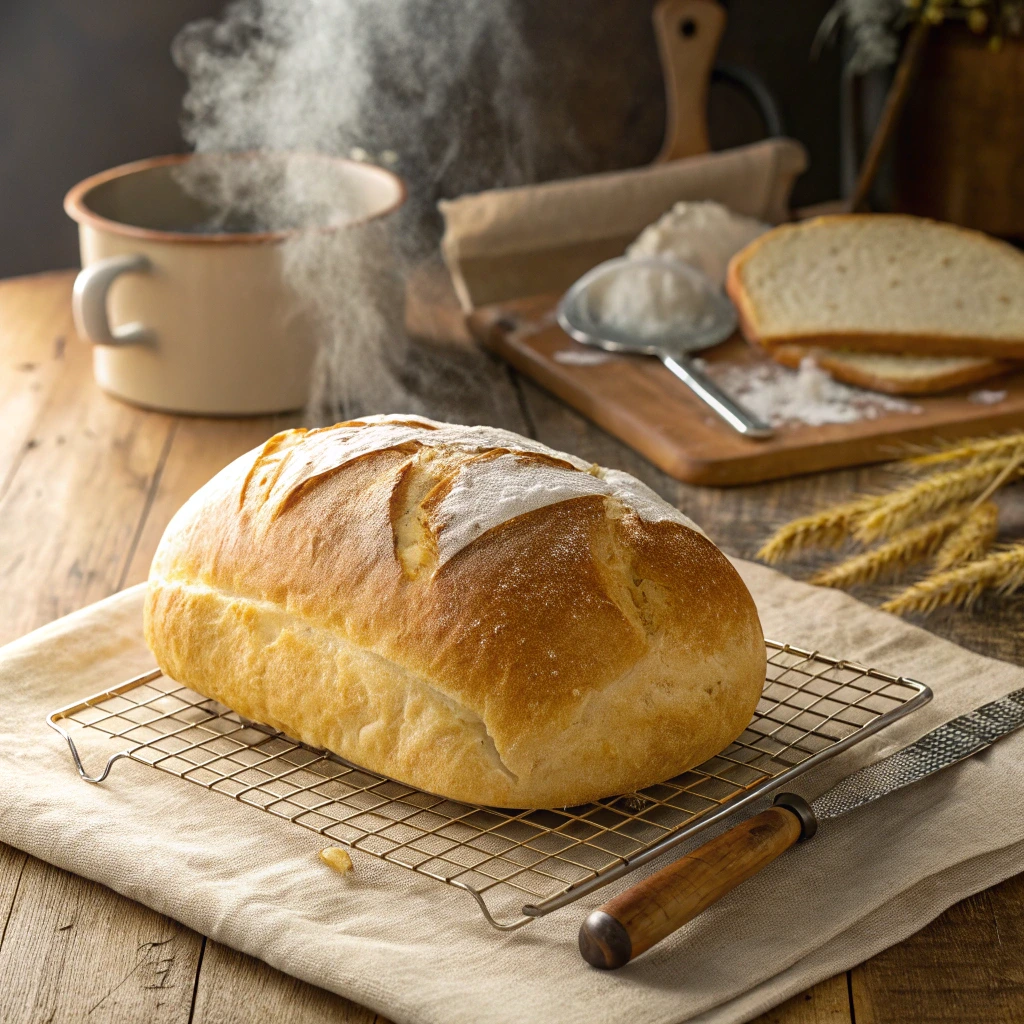
Baking Techniques for a Perfect Finish
Baking dough the right way creates a beautiful crust and soft inside. Follow these key techniques to get consistent, delicious results.
Preheat Your Oven Fully
Always heat your oven to the right temperature before baking. A hot oven helps the dough rise quickly and form a crisp crust.
Add Steam for Crunchy Crusts
Create steam in the oven by placing a tray of hot water or spraying water inside. Steam keeps the dough surface moist at first, allowing it to expand and develop a shiny crust.
Watch Baking Time and Temperature
Keep an eye on your bake. If the crust browns too fast, lower the temperature or cover the bread loosely with foil. Use a thermometer to check the bread’s internal temperature—it’s done at around 190-210°F (88-99°C).
Rotate for Even Baking
Turn your baking tray halfway through to avoid uneven cooking or burning, especially if your oven has hot spots.
Cool Bread Properly
Let bread cool on a wire rack to release steam and keep the crust crisp. Don’t slice it too soon—waiting improves texture.
Using these baking tips will help you achieve perfect bread, rolls, or pizza every time.
Healthy Ingredient Alternative: Add Ground Flaxseeds for Extra Fiber
Adding ground flaxseeds to your dough boosts its nutritional value without changing the taste much. Flaxseeds provide extra fiber, omega-3 fatty acids, and antioxidants, making your homemade bread, rolls, or pizza healthier.
Why Choose Ground Flaxseeds?
Whole flaxseeds pass through the digestive system mostly undigested, so grinding them helps your body absorb their nutrients better. Ground flaxseeds blend well into dough and add a subtle nutty flavor.
How to Add Flaxseeds to Your Dough
Start by replacing about 2 to 4 tablespoons of flour with ground flaxseeds in your recipe. Mix the flaxseeds evenly with the dry ingredients before adding wet ones. This ensures even distribution throughout the dough.
Benefits of Flaxseeds in Baking
Flaxseeds add fiber, which helps digestion and keeps you feeling full longer. The omega-3 fatty acids support heart health. Including flaxseeds can also improve the texture of your bread, making it slightly denser and more satisfying.
Tips for Using Flaxseeds
Store ground flaxseeds in an airtight container in the fridge or freezer to keep them fresh. Use them within a few weeks for the best flavor and nutrition. If you want a stronger flax flavor, increase the amount gradually in your recipes.
Incorporating ground flaxseeds into your baking is an easy way to make your dough healthier without sacrificing taste or texture.
Troubleshooting Your No-Fail Rising Recipe Dough Issues (and How to Fix Them)
Why Isn’t My No-Fail Rising Recipe Dough Rising?
If your dough isn’t rising, it usually means the yeast isn’t working properly. Let’s explore the most common reasons and how to fix them.
Check Yeast Freshness
Yeast loses its power over time. Always check the expiration date. To test yeast, dissolve it in warm water with a pinch of sugar. If it bubbles within 5–10 minutes, it’s active.
Use the Right Water Temperature
Water that’s too hot kills yeast; water that’s too cold slows it down. Aim for 100–110°F (37–43°C) to activate yeast properly.
Measure Ingredients Carefully
Too much salt or sugar can harm yeast. Salt should never directly touch yeast when mixing. Follow the recipe’s ingredient amounts exactly.
Provide Warm, Draft-Free Rising Space
Place your dough in a warm area around 75–85°F (24–29°C). Avoid cold spots or drafts that slow the rise.
Allow Enough Time to Rise
Give your dough time to double in size. Don’t rush the process—patience yields fluffier bread.
Adjust Dough Moisture
Dry dough can prevent rising. If it feels stiff, add a little more water for better yeast activity and dough stretchiness.
Sticky, Dry, or Dense Dough in Your No-Fail Rising Recipe? Adjust Like a Pro
Getting the right dough texture takes practice. Here’s how to fix common dough issues like stickiness, dryness, and density.
Fixing Sticky Dough
Sticky dough usually means too much water. Sprinkle a little flour while kneading until the dough feels soft but not sticky. Don’t add too much flour to avoid dryness.
Repairing Dry Dough
Dry dough cracks or feels crumbly. Add water a teaspoon at a time and knead well to soften it. Avoid adding too much liquid too fast.
Avoiding Dense Dough
Dense dough often comes from under-kneading or insufficient rising. Knead longer to develop gluten, and let the dough rise fully in a warm spot to get fluffy bread.
Keep testing your dough with your hands. Aim for a slightly tacky but stretchy feel for the best results.
Healthy Ingredient Alternative: Swap Butter with Olive Oil in Your No-Fail Rising Recipe
Swapping butter for olive oil in your dough recipes can boost nutrition and improve texture. Olive oil offers heart-healthy fats and adds a subtle flavor that enhances bread, pizza, and rolls.
Why Choose Olive Oil?
Olive oil contains monounsaturated fats, which support heart health and reduce inflammation. Unlike butter, olive oil contains no cholesterol and fewer saturated fats. This swap makes your baked goods healthier without sacrificing taste.
How Olive Oil Affects Dough
Using olive oil instead of butter creates a softer, more tender crumb. It also helps the dough retain moisture longer, keeping bread fresh. Olive oil can improve the dough’s elasticity, making it easier to handle and shape.
How to Swap Butter with Olive Oil
Use about ¾ of the amount of olive oil compared to butter. For example, if your recipe calls for 1 cup of butter, use ¾ cup of olive oil. Because olive oil is liquid at room temperature, it blends smoothly into dough. Mix it in during the wet ingredients step.
Tips for Best Results
Choose extra virgin olive oil for the best flavor and health benefits. Avoid strong-flavored olive oils if you want a milder taste in your bread. Store olive oil in a cool, dark place to keep it fresh.
Storing and Serving Tips for Your No-Fail Rising Recipe Creations
How to Store Dough from Your No-Fail Rising Recipe for Later Use
Storing dough correctly helps you save time and enjoy fresh bread or pizza whenever you want. Follow these tips to keep your dough ready for baking later.
Refrigerating Dough
If you plan to use the dough within 24 to 48 hours, store it in the refrigerator. Place the dough in a lightly oiled bowl and cover it tightly with plastic wrap or a damp cloth. This prevents the dough from drying out. The cold temperature slows down yeast activity, allowing the dough to rest and develop flavor.
Freezing Dough
For longer storage, freeze the dough. After the first rise, punch it down and shape it into a ball or portion it into smaller pieces. Wrap each piece tightly in plastic wrap and then place it in a freezer bag. Label the bag with the date. Frozen dough can last up to 3 months.
Thawing and Using Stored Dough
To thaw frozen dough, move it from the freezer to the refrigerator overnight. Before baking, let the dough come to room temperature and complete its final rise. This step activates the yeast again, ensuring a perfect rise and texture.
Tips to Avoid Common Storage Issues
Always keep dough covered to prevent it from drying out or forming a crust. Avoid storing dough at room temperature for too long, as it can over-ferment and lose its rising power. Proper storage helps maintain dough quality and guarantees delicious results every time.
Best Ways to Serve Fresh Bread and Pizza Made with Your No-Fail Rising Recipe
Serving your freshly baked bread and pizza properly can enhance their flavor and texture. Whether you enjoy them plain or with toppings, these tips will help you make the most of your homemade creations.
Serving Fresh Bread
Fresh bread tastes best when served slightly warm. You can warm slices in the oven for a few minutes or toast them lightly. This process brings out the bread’s aroma and gives it a pleasant crusty texture. Pair your bread with quality butter, olive oil, or a flavorful spread like hummus or pesto.
Creative Toppings for Bread
Add variety by topping bread with fresh ingredients. Try bruschetta with diced tomatoes, basil, and garlic, or avocado and a sprinkle of sea salt. For a sweet option, spread some honey or jam. These simple additions turn plain bread into an exciting snack or appetizer.
Serving Fresh Pizza
Serve pizza straight from the oven to enjoy its crispy crust and melty cheese. Let it cool for a minute or two so the toppings set and don’t slide off. Slice it into manageable pieces to make eating easier. Fresh basil leaves or a drizzle of extra virgin olive oil can add a finishing touch.
Pairing Pizza with Sides
Complement your pizza with fresh salads, roasted vegetables, or garlic bread. These sides add color, texture, and nutrition to your meal. For drinks, try sparkling water, light beer, or a chilled glass of wine to balance the flavors.
Storing Leftovers for Best Taste
If you have leftovers, store them in an airtight container and refrigerate promptly. Reheat pizza in a hot oven or skillet to keep the crust crispy. Avoid microwaving, which can make the dough soggy.
Healthy Ingredient Alternative
When following a No-Fail Rising Recipe, adding fresh herbs like basil or rosemary can elevate your dough’s flavor without complicating the process. Fresh herbs are a simple way to enhance your bread or pizza crust with natural tastes that complement the rising and baking perfectly.
Why Fresh Herbs Matter in a No-Fail Rising Recipe
In any No-Fail Rising Recipe, flavor balance is key. Fresh basil and rosemary introduce vibrant notes that boost the overall taste without adding artificial ingredients. Using these herbs helps maintain the integrity of your dough while enriching the flavor profile, ensuring your bread rises beautifully and tastes delicious.
How to Add Herbs in Your No-Fail Rising Recipe
Incorporate finely chopped basil or rosemary directly into your dough during kneading. This method spreads the herb flavor throughout, supporting your No-Fail Rising Recipe by blending taste with texture. For an extra touch, sprinkle fresh herbs on top of the dough before baking to enhance aroma and appearance.
Experimenting with Herbs in Your No-Fail Rising Recipe
Try substituting or combining basil and rosemary with thyme, oregano, or parsley to customize your No-Fail Rising Recipe. Each herb adds a unique flavor that pairs well with different types of bread or pizza. For instance, rosemary complements rustic breads, while oregano works great with pizza dough.
Tips to Maximize Herb Flavor in Your No-Fail Rising Recipe
Always use fresh herbs in your No-Fail Rising Recipe for the best flavor. Rinse and dry herbs before chopping to avoid extra moisture, which can affect dough texture. Add herbs gradually to prevent overpowering the dough, maintaining the balance critical to a No-Fail Rising Recipe.
Adding fresh herbs like basil or rosemary to your No-Fail Rising Recipe is an easy way to boost flavor and create aromatic, tasty bread and pizza that will impress every time.
Conclusion
Mastering a No-Fail Rising Recipe ensures you create perfect dough every time, whether for bread, pizza, or other baked goods. By understanding key ingredients, proper yeast activation, and essential techniques, you’ll avoid common mistakes and enjoy consistent, fluffy results. Incorporating healthy ingredient alternatives and flavor enhancers like fresh herbs elevates your baking without added complexity. With practice and these tips, you’ll bake like a pro, impressing family and friends with delicious, perfectly risen creations. Embrace this recipe and watch your baking confidence soar!