Looking for quick, delicious dinners that don’t leave a pile of dishes behind? One-pan chicken breast recipes are the perfect solution for busy weeknights. With just a skillet or sheet pan, you can create flavorful, balanced meals packed with lean protein and fresh veggies—all in under 30 minutes. Whether you’re cooking for your family or meal prepping for the week, these simple recipes save time without sacrificing taste. Get ready to enjoy easy cleanup, juicy chicken, and satisfying dinners, all from one pan.
Why One-Pan Chicken Breast Recipes Are Perfect for Weeknights
Save Time with Quick Prep and Cleanup
Busy weeknights call for meals that are fast, simple, and stress-free. One-pan chicken breast recipes check all the boxes—minimal prep, easy cooking, and hardly any cleanup.
Simple Ingredients, Fast Assembly
You don’t need fancy tools or complicated ingredients. Just grab boneless, skinless chicken breasts, your favorite vegetables, and some basic seasonings. Slice everything evenly, toss them with olive oil and herbs, and place them all on one sheet pan or skillet. You’ll spend less time chopping and more time relaxing.
Cook Everything Together
Because one-pan recipes cook the chicken and sides simultaneously, there’s no need to juggle multiple pots. This not only speeds up cooking but also ensures everything finishes at the same time. It’s a time-saver and a game-changer for busy cooks.
Easy Cleanup = Less Stress
With just one pan to wash, you’ll cut your post-dinner cleanup in half. Use parchment paper or foil to line your baking sheet for even quicker clean-up. No more piles of dirty dishes taking over your sink!
Nutritious and Balanced Meals in One Dish
One-pan chicken breast recipes don’t just save time—they also support healthy eating. By combining lean protein, fiber-rich vegetables, and healthy fats in one dish, you create a meal that fuels your body and satisfies your appetite.
A Complete Meal in Every Bite
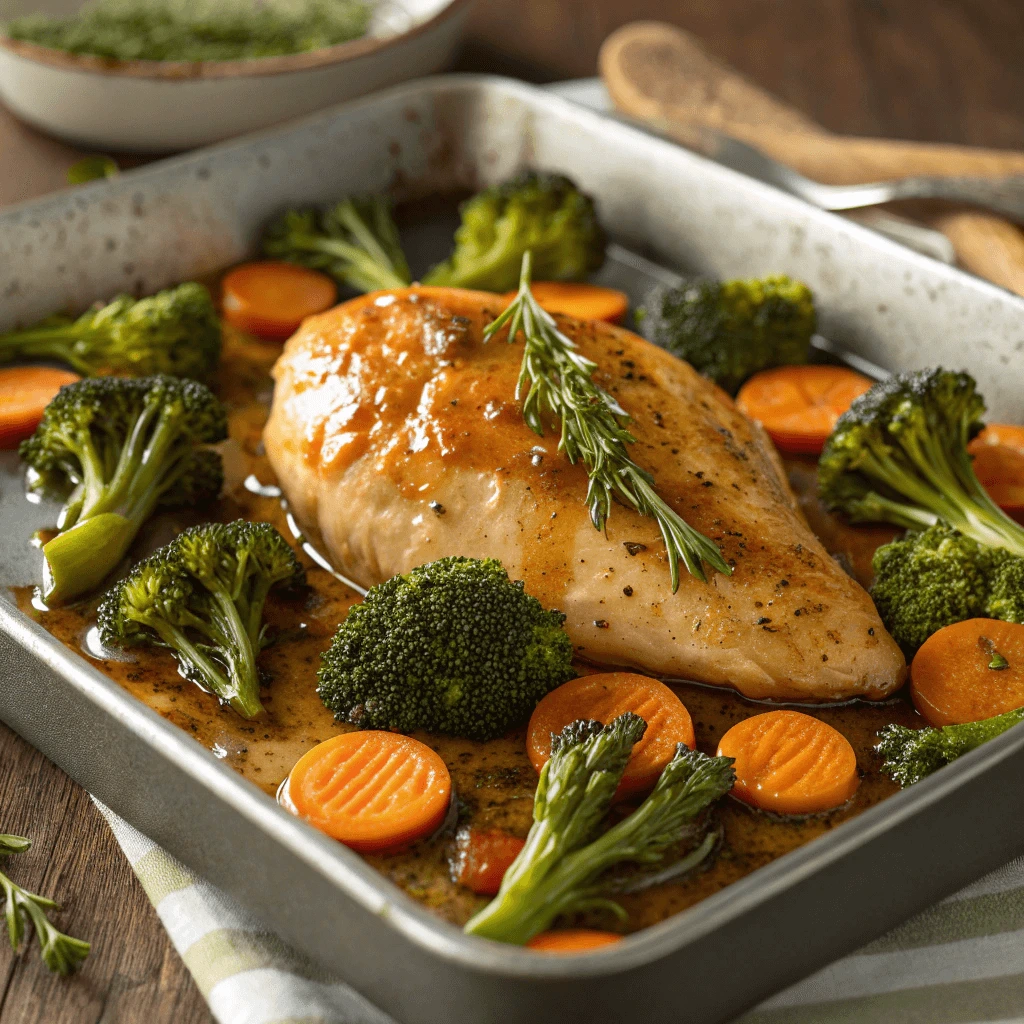
Chicken breast is a great source of high-quality protein, which helps build muscle and keeps you full longer. Pair it with colorful vegetables like broccoli, bell peppers, zucchini, or carrots, and you’ll get essential vitamins, antioxidants, and fiber in the same pan. Add olive oil or a handful of nuts for healthy fats that boost heart health and flavor.
Portion-Friendly and Balanced
With everything baking together, it’s easy to serve balanced portions. You can see exactly how much protein, vegetables, and carbs each serving contains. This makes one-pan meals ideal for those watching their macros or practicing mindful eating.
Ideal for Busy Healthy Lifestyles
You don’t have to sacrifice nutrition for convenience. One-pan meals allow you to eat well even on your busiest nights. Whether you’re meal prepping or feeding your family, this approach keeps dinner simple, nutritious, and satisfying.
Family-Friendly Dinners Everyone Will Love
One-pan chicken breast recipes are a hit with kids and adults alike. They’re easy to customize, quick to cook, and packed with flavors the whole family will enjoy.
Mild Flavors That Please Everyone
Chicken breast has a neutral flavor, making it the perfect base for family meals. You can season it simply with garlic, olive oil, and herbs—or add a mild sauce like honey mustard or BBQ for extra flavor. Because the seasoning isn’t too bold, even picky eaters are likely to dig in without complaints.
Easy to Customize by Preference
You can adapt one-pan chicken dinners to fit everyone’s tastes. Add potatoes or rice for those who prefer carbs, or include extra vegetables like carrots, zucchini, or broccoli for a more nutrient-rich plate. Each family member can have something they enjoy—all cooked together in one pan.
Less Time Cooking, More Time Together
Since everything cooks in one dish, you’ll spend less time in the kitchen and more time with your loved ones. These meals are perfect for busy parents who want to serve something homemade without spending hours preparing it.
Essential Ingredients for One-Pan Chicken Dinners
Choosing the Right Cut: Boneless Skinless Chicken Breasts
Boneless skinless chicken breasts are a go-to choice for one-pan meals, and for good reason. They’re lean, cook quickly, and absorb flavor easily—perfect for busy weeknights.
Why Boneless and Skinless Works Best
This cut eliminates extra prep time. There’s no need to remove bones or skin, so you can season and cook right away. Plus, it’s healthier—lower in fat and calories—making it ideal for balanced family meals.
Even Cooking for Reliable Results
Uniform size means even cooking, which is crucial for one-pan recipes where everything cooks together. Thick breasts can be sliced in half horizontally or pounded to even thickness. Doing this helps the chicken cook faster and prevents dry spots.
Flavorful and Adaptable
Chicken breast takes on the flavor of whatever you add—herbs, spices, marinades, or sauces. Whether you’re using lemon-garlic, honey mustard, or Mediterranean seasoning, the meat absorbs it well without overpowering your veggies.
Ideal for Quick, Healthy Meals
Because it’s high in protein and low in fat, chicken breast fits most dietary needs. It’s perfect for those tracking calories, avoiding red meat, or prepping high-protein dinners.
Must-Have Veggies for Roasting Together
Adding vegetables to your one-pan chicken breast recipes makes the meal more flavorful, colorful, and nutritious. The key is choosing veggies that roast well and cook at a similar rate as the chicken.
Root Vegetables for Heartiness
Root vegetables like potatoes, carrots, and sweet potatoes are classic roasting companions. They add natural sweetness and satisfying texture. Cut them into small, uniform chunks to ensure they cook through while the chicken bakes.
Quick-Cooking Vegetables for Freshness
Vegetables such as zucchini, bell peppers, and cherry tomatoes roast quickly and add vibrant color to your dish. Add these in the last 10–15 minutes of cooking to prevent over-softening. Their moisture helps keep the chicken juicy, while their flavor brightens the whole pan.
Cruciferous Veggies for Extra Nutrients
Broccoli, cauliflower, and Brussels sprouts hold up well in the oven and bring extra fiber and crunch. Toss them with olive oil, garlic, and a pinch of sea salt before roasting. These veggies also caramelize beautifully, adding richness and depth to the meal.
Flavor Boosters: Herbs, Spices, and Marinades
The right herbs, spices, and marinades can transform your one-pan chicken breast recipes from simple to sensational. With just a few pantry staples and fresh aromatics, you can create rich, bold flavor without complicating your cooking process.
Use Fresh Herbs for Brightness
Fresh herbs like rosemary, thyme, parsley, or cilantro instantly elevate your dish. Add them near the end of cooking or sprinkle them over the pan just before serving. These herbs not only add aroma but also provide a burst of freshness that balances the richness of roasted chicken and vegetables.
Spices Add Depth and Warmth
Dry spices build layers of flavor. Try smoked paprika for a slightly sweet, earthy note, or cumin for a warm, savory undertone. Garlic powder, onion powder, chili flakes, and black pepper all pair well with chicken breast and roast vegetables. Mix your spices with olive oil to help them stick and cook evenly across the dish.
Marinades for Moisture and Flavor
Marinate your chicken breast before baking to tenderize the meat and add bold flavor. Combine ingredients like olive oil, lemon juice, mustard, soy sauce, or balsamic vinegar with your favorite herbs and spices. Let the chicken sit for at least 30 minutes—or overnight if possible—for deeper penetration. A simple garlic-herb marinade or honey mustard blend can make your one-pan chicken recipe both juicy and unforgettable.
3 Easy One-Pan Chicken Breast Recipes to Try
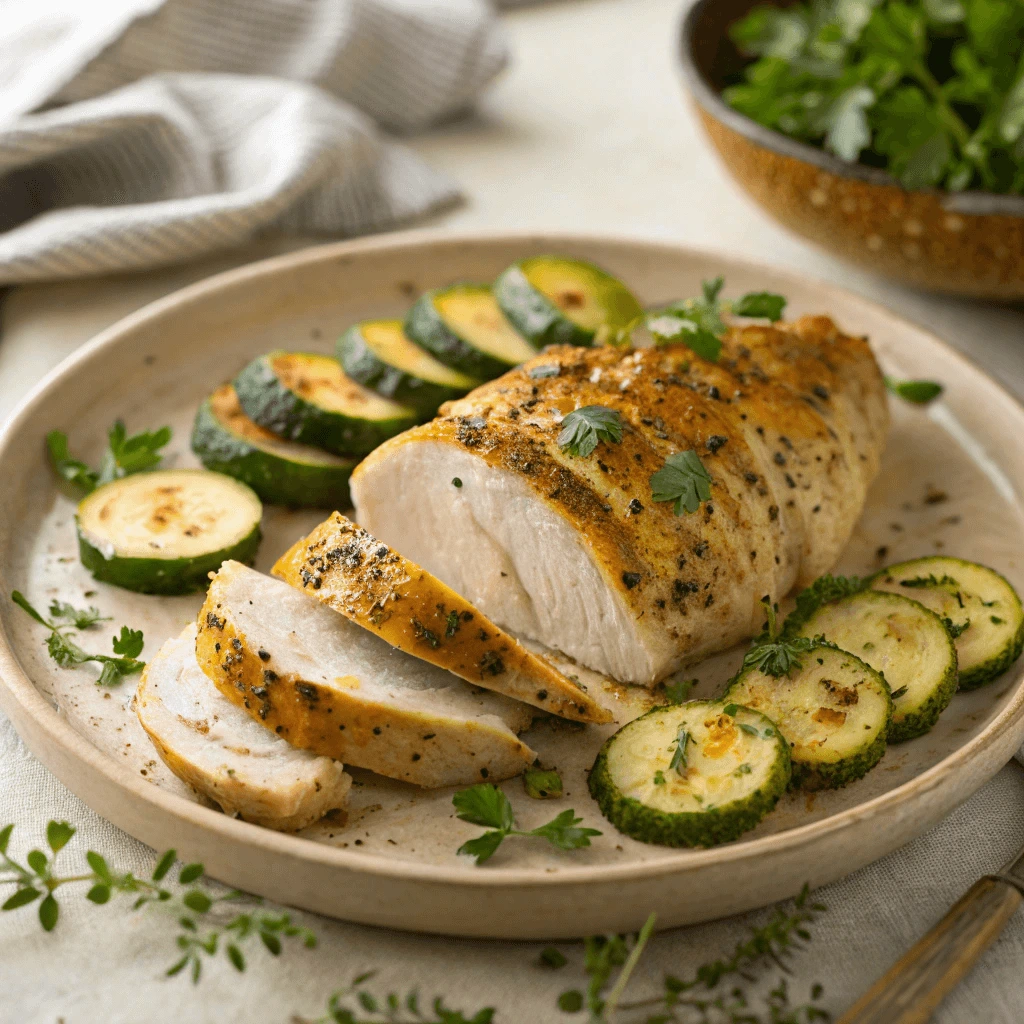
Garlic Herb Chicken with Roasted Veggies
Garlic herb chicken with roasted veggies is a classic one-pan chicken breast recipe that delivers big flavor with minimal effort. It’s quick, customizable, and ideal for weeknights.
Ingredients You’ll Need
To make this recipe, gather the following:
- 2 boneless, skinless chicken breasts
- 2 cups chopped veggies (like zucchini, bell peppers, and red onions)
- 3 tablespoons olive oil
- 3 garlic cloves, minced
- 1 teaspoon dried Italian herbs (or a mix of rosemary, thyme, and oregano)
- Salt and pepper to taste
- Optional: lemon wedges or fresh parsley for garnish
Step-by-Step Instructions
- Preheat your oven to 400°F (200°C).
- Prepare the vegetables by chopping them into even pieces. Spread them across a lined baking sheet.
- Season the chicken breasts with olive oil, garlic, herbs, salt, and pepper. Rub the mixture evenly over the meat.
- Place the chicken on the baking sheet among the veggies, making sure not to overcrowd the pan.
- Roast everything for 22–25 minutes, or until the chicken reaches an internal temperature of 165°F (74°C). Stir the veggies halfway through for even roasting.
- Remove from the oven, rest the chicken for 5 minutes, then slice and serve with the roasted vegetables.
Why This Dish Works
This recipe checks all the boxes: it’s nutritious, flavorful, and incredibly easy. Garlic and herbs infuse the chicken with warmth and aroma, while the veggies add color and texture. Since everything cooks together, the flavors blend beautifully, and cleanup takes just minutes.
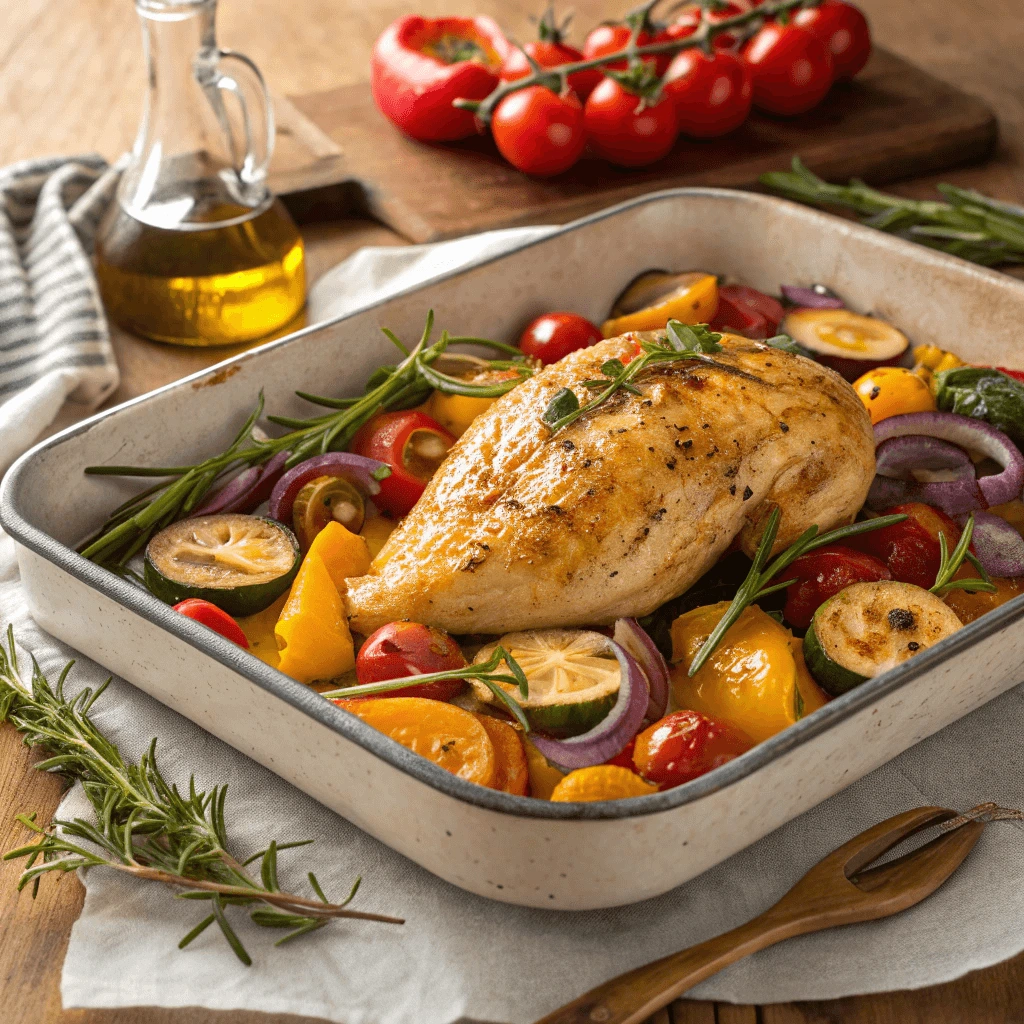
Mediterranean Chicken with Tomatoes and Olives
Mediterranean chicken with tomatoes and olives is a vibrant, flavorful one-pan chicken breast recipe that’s perfect for busy weeknights. This dish combines tender chicken breasts with juicy tomatoes, briny olives, and fragrant herbs, offering a healthy meal full of bold tastes.
Ingredients That Make It Special
This recipe uses simple yet delicious ingredients that come together effortlessly. Boneless skinless chicken breasts form the protein base, while cherry tomatoes and Kalamata olives add brightness and a salty punch. Garlic and onion create a savory foundation, complemented by fresh herbs like oregano and parsley. A drizzle of olive oil brings it all together with rich, smooth flavor.
Step-by-Step Cooking Instructions
Start by preheating your oven to 400°F (200°C). Lightly coat a baking dish or sheet pan with olive oil. Arrange the chicken breasts evenly and season them with salt, pepper, and dried oregano. Scatter halved cherry tomatoes, pitted olives, and sliced onions around the chicken. Mince garlic and sprinkle it over the top. Finish by drizzling olive oil over everything to encourage caramelization and flavor melding.
Bake the dish for about 25 minutes or until the chicken reaches an internal temperature of 165°F (74°C). Halfway through cooking, gently toss the vegetables to promote even roasting and flavor distribution.
Why This Recipe Works
The combination of sweet tomatoes and tangy olives creates a wonderful balance that elevates simple chicken breasts. Olive oil keeps the chicken moist and juicy throughout the baking process. Fresh herbs brighten the dish with aromatic notes that transport your taste buds to the Mediterranean coast. Plus, cooking everything in one pan saves time and makes cleanup easier.
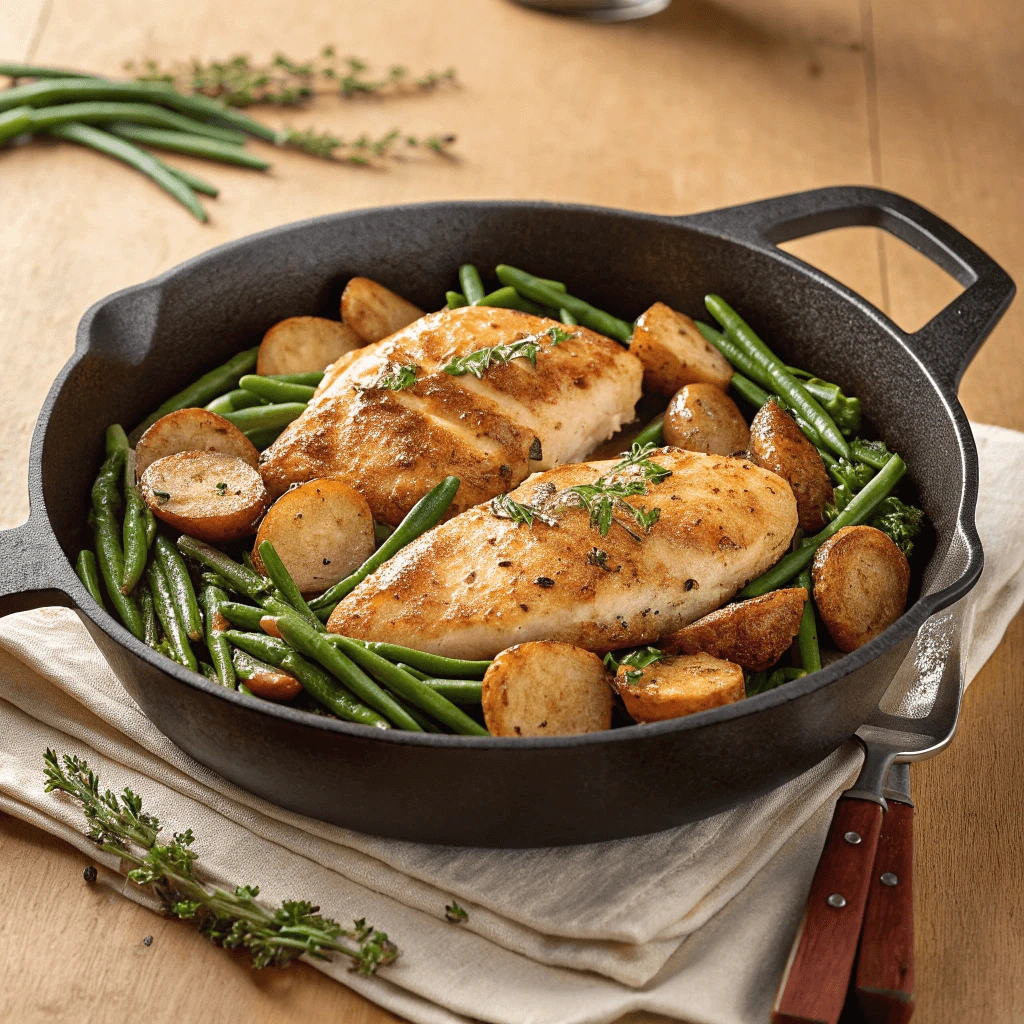
Honey Mustard Chicken with Green Beans and Potatoes
This honey mustard chicken with green beans and potatoes is a flavorful one-pan chicken breast recipe that combines sweet, tangy, and savory elements for a satisfying weeknight meal. The combination of tender chicken, crisp green beans, and roasted potatoes creates a balanced dish that’s both nutritious and easy to prepare.
Ingredients and Preparation
Start by gathering boneless skinless chicken breasts, fresh green beans, and baby potatoes. Slice the potatoes into halves or quarters for even cooking, and trim the ends off the green beans. Prepare a simple honey mustard sauce using Dijon mustard, honey, olive oil, garlic, salt, and pepper. Whisk the ingredients together until smooth.
Marinate and Arrange
Coat the chicken breasts evenly with half of the honey mustard sauce, reserving the rest for drizzling later. Place the potatoes and green beans in a large mixing bowl, toss them with olive oil, salt, and pepper, then arrange them around the chicken on a lined baking sheet or roasting pan. Pour the remaining sauce over the vegetables to add extra flavor.
Baking and Cooking Tips
Bake the chicken, green beans, and potatoes at 400°F (200°C) for about 25 to 30 minutes. Check the chicken’s internal temperature to ensure it reaches 165°F (74°C) for safe consumption. Stir the vegetables halfway through baking to promote even roasting and caramelization. If your green beans tend to cook faster, add them to the pan about 10 minutes after the potatoes and chicken have started baking.
Serving Suggestions
Once cooked, let the chicken rest for a few minutes to lock in juices. Serve the chicken breasts alongside the roasted green beans and potatoes, drizzling any extra honey mustard sauce over the top. This meal pairs well with a simple side salad or crusty bread for a complete dinner.
Tips to Keep Chicken Juicy and Flavorful in One-Pan Meals
Use a Meat Thermometer for Perfect Doneness
Achieving juicy, perfectly cooked chicken breast can be tricky, but using a meat thermometer takes the guesswork out of the process. This simple tool ensures your chicken reaches the ideal internal temperature for safety and flavor every time.
Why Accurate Temperature Matters
Chicken breast needs to be cooked to an internal temperature of 165°F (74°C) to be safe to eat. Undercooking puts you at risk of foodborne illnesses, while overcooking leads to dry, tough meat. A meat thermometer provides an accurate reading, so you avoid both issues and consistently enjoy moist, tender chicken.
Choosing the Right Meat Thermometer
Several types of meat thermometers exist, including digital instant-read, dial, and probe thermometers. Digital instant-read thermometers are popular for their speed and accuracy, giving results within seconds. Probe thermometers with alarms allow you to monitor temperature while the chicken cooks, preventing overcooking.
How to Use a Meat Thermometer Properly
Insert the thermometer into the thickest part of the chicken breast without touching bone or the pan. Bone conducts heat differently and can give false readings. Check the temperature toward the end of your cooking time. If the temperature hasn’t reached 165°F (74°C), continue baking and recheck every few minutes.
Tips for Consistent Results
- Let the chicken rest for 5 minutes after cooking; carryover heat will raise the temperature slightly.
- Clean your thermometer probe with hot, soapy water before and after each use to ensure food safety.
- Use a timer along with the thermometer to keep track of cooking progress.
Sear Before Baking for Extra Flavor
Searing chicken breast before baking adds rich flavor and locks in moisture, making your one-pan chicken breast recipes even more delicious. This simple step creates a golden crust that enhances both texture and taste.
What Is Searing and Why It Matters
Searing involves cooking the chicken breast quickly over high heat to brown the surface. This process triggers the Maillard reaction, which develops complex flavors and a beautiful color. Without searing, baked chicken can turn out pale and less flavorful.
How to Properly Sear Chicken Breast
Start by patting the chicken breasts dry with paper towels to remove excess moisture. Moisture on the surface can cause steaming instead of browning. Next, season the chicken with salt, pepper, and your favorite spices or herbs.
Heat a skillet over medium-high heat and add a small amount of oil with a high smoke point, such as avocado or canola oil. Once the oil shimmers, place the chicken breasts in the pan without crowding them. Avoid moving the chicken too soon—let it sear undisturbed for about 2 to 3 minutes on each side until a golden-brown crust forms.
Transitioning from Searing to Baking
After searing, transfer the chicken breasts to a baking dish or leave them in an oven-safe skillet. Finish cooking in a preheated oven at around 375°F (190°C) until the internal temperature reaches 165°F (74°C). This two-step cooking method ensures juicy, flavorful chicken with a crispy exterior.
Don’t Overcrowd the Pan
One of the most common mistakes when preparing one-pan chicken breast recipes is overcrowding the pan. Giving each ingredient enough space is crucial to ensure even cooking, proper browning, and maximum flavor.
Why Space Matters in Cooking
When you overcrowd the pan, the ingredients release moisture, creating steam instead of roasting. This moisture prevents the chicken and vegetables from developing that desirable golden crust. Instead, they tend to steam and become soggy. Leaving adequate space allows hot air to circulate around the food, promoting caramelization and even cooking.
How to Properly Arrange Ingredients
Arrange chicken breasts and vegetables in a single layer with enough space between each piece. Ideally, you want at least a half-inch gap around each item. If the pan is too crowded, consider cooking in batches or using a larger pan. This simple step ensures that every piece gets the heat it needs to brown beautifully and cook evenly.
The Impact on Cooking Time and Texture
Overcrowding can increase cooking time because the ingredients will steam rather than roast. As a result, you might find your chicken breast less juicy and your veggies limp rather than crisp-tender. To achieve that perfect texture, keep the pan from becoming too crowded.
Tips for Avoiding Overcrowding
If you have a lot of ingredients, split them between two pans or cook in batches. Using a rimmed baking sheet or large skillet can provide more surface area for roasting. Also, cutting vegetables into uniform pieces helps them cook evenly and reduces overcrowding.
How to Store and Reheat One-Pan Chicken Dishes
Safe Storage for Leftovers
Properly storing leftover chicken breast ensures it stays fresh, safe to eat, and delicious for your next meal. Follow these guidelines to maximize the shelf life and quality of your cooked chicken.
Cool Leftovers Promptly
After cooking, allow your chicken breast to cool at room temperature for no more than two hours. Cooling it quickly prevents bacteria growth. To speed up the process, you can cut the chicken into smaller pieces and spread them out on a plate or shallow container.
Use Airtight Containers
Transfer the cooled chicken breasts to airtight containers or resealable bags. Removing as much air as possible helps prevent spoilage and freezer burn if you plan to freeze leftovers. Clear containers also allow you to easily see what’s inside and monitor freshness.
Refrigerate Within Two Hours
Place your leftovers in the refrigerator within two hours of cooking. Maintain your fridge temperature at or below 40°F (4°C) to keep chicken safe. Store leftovers on a shelf rather than the door, as the door experiences temperature fluctuations.
Label and Date Your Leftovers
Label containers with the date you stored the chicken. This practice helps you keep track of how long the food has been in the fridge or freezer. Generally, cooked chicken lasts up to four days in the fridge and up to four months in the freezer.
Avoid Cross-Contamination
Keep leftover chicken separate from raw foods to avoid cross-contamination. Always use clean utensils when handling leftovers and reheat only the portion you plan to eat.
Best Reheating Methods to Retain Moisture
Leftover chicken breast can taste just as juicy and flavorful the next day—if you reheat it correctly. The key is to preserve moisture while ensuring it’s heated evenly and safely.
Reheat in the Oven for Even Warmth
The oven is one of the best ways to reheat chicken breast without drying it out. Preheat your oven to 325°F (160°C). Place the chicken in an oven-safe dish and add a few tablespoons of broth, water, or olive oil to help it stay moist. Cover the dish with foil to trap the steam and heat for 10–15 minutes, depending on thickness. Always check that the internal temperature reaches 165°F (74°C) before serving.
Use the Stovetop for Quick, Juicy Results
For faster results, reheat your chicken breast on the stovetop. Slice it into smaller pieces to shorten the cooking time. Heat a nonstick skillet over medium-low heat, then add a small amount of oil or broth. Stir occasionally and cover the pan with a lid to keep the moisture in. Within 5–8 minutes, your chicken should be warm and juicy again.
Microwave with Steam Protection
Microwaving is the quickest option, but it also dries chicken out the fastest if you’re not careful. To retain moisture, slice the chicken, place it in a microwave-safe dish, and add a splash of broth or water. Cover it with a microwave-safe lid or a damp paper towel. Heat on medium power in 30-second intervals, stirring or flipping between each round, until fully warmed.
Don’t Skip Resting Time
Let the chicken sit for a minute or two after reheating. Resting allows the juices to redistribute, making each bite tender and flavorful.
Make-Ahead Meal Prep Ideas
Planning meals ahead with one-pan chicken breast recipes can save you time, reduce food waste, and help you eat healthier all week. With just a bit of organization, you can enjoy ready-to-go meals without stress.
Batch Cook Your Chicken and Veggies
Start by roasting multiple chicken breasts in a large batch, using your favorite seasoning or marinade. While the oven is hot, toss in vegetables like carrots, broccoli, or sweet potatoes on a separate tray or alongside the chicken if space allows. Cook everything at once to maximize your prep time. Once cooled, slice or cube the chicken and divide it into portions.
Portion and Store for Grab-and-Go Meals
Use reusable glass or BPA-free plastic containers with compartments to store your meals. Add a serving of chicken, a portion of vegetables, and a grain like rice or quinoa if desired. Keep everything well-labeled with the date. These meal boxes store well in the fridge for 3–4 days and reheat beautifully in the microwave or oven.
Freeze Extra Portions for Later
If you won’t eat all the meals within a few days, freeze some for later. Place cooked chicken breast and vegetables in freezer-safe containers or bags. Lay the bags flat to save space and freeze in single-meal portions. Thaw overnight in the refrigerator or reheat directly from frozen using the oven.
Flavor Variety Keeps It Interesting
To avoid mealtime boredom, season each batch differently. Try lemon herb for one set, honey mustard for another, and Mediterranean flavors for a third. Switching up the spices and sauces keeps your meals exciting while sticking to one basic cooking method.
Conclusion
One-pan chicken breast recipes are a lifesaver for busy weeknights. They offer quick prep, easy cleanup, and balanced, flavorful meals with minimal effort. Whether you’re cooking garlic herb chicken, honey mustard, or a Mediterranean favorite, these simple dishes help you eat well without spending hours in the kitchen. Plus, they’re perfect for meal prep and family-friendly dinners. Try a few of these recipes and enjoy the convenience of delicious, home-cooked meals—all from a single pan. Your weeknights just got a whole lot easier!