
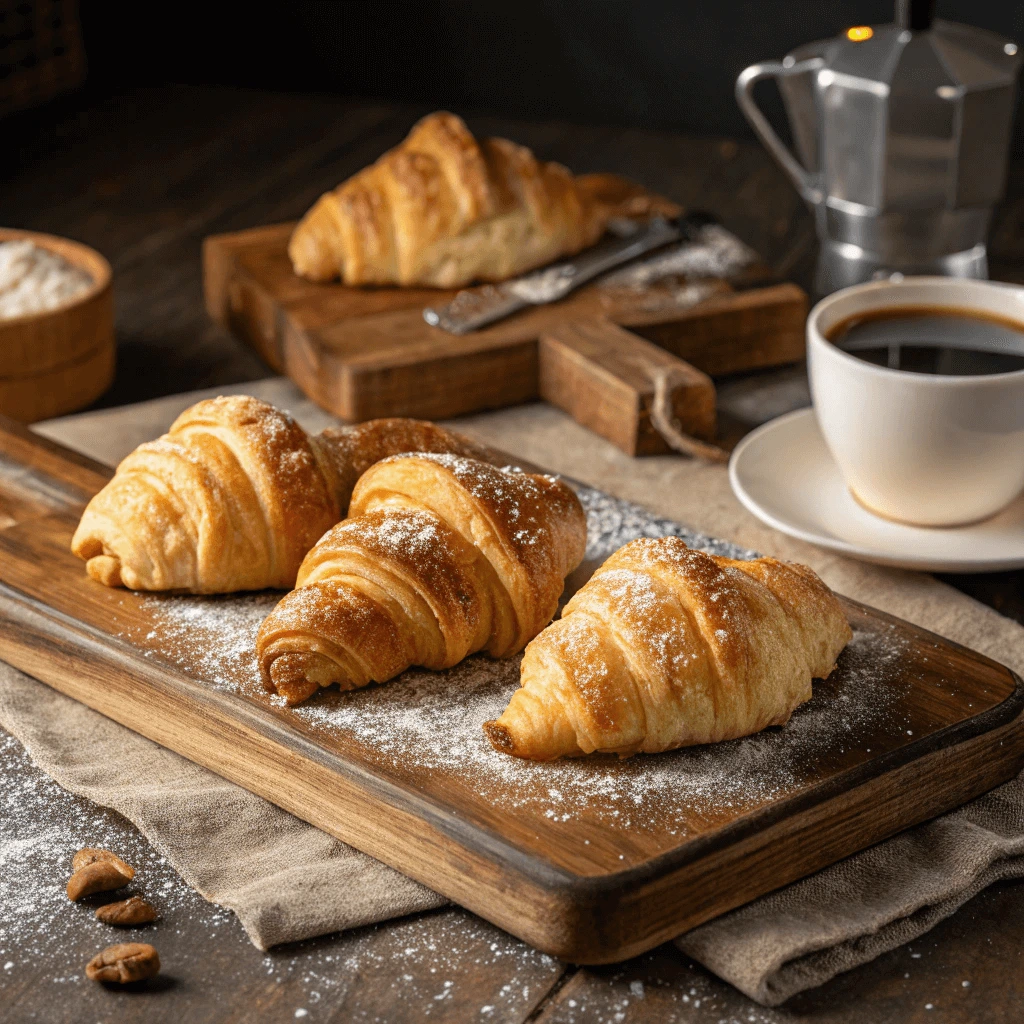
Craving fresh , flaky mini croissants but don’t have the time or skills to make them from scratch? You’re in luck! With this quick and easy mini croissants recipe, you can create delicious croissants in no time using store-bought dough. Whether you’re a beginner baker or simply looking for a fast way to enjoy this classic pastry, store-bought dough provides a convenient shortcut without sacrificing that signature flaky texture.
These mini croissants are perfect for breakfast, snacks, or even special occasions. You can customize them with your favorite fillings, whether sweet or savory, to suit any taste. So, if you’re looking for a stress-free and satisfying way to enjoy freshly baked mini croissants, grab some store-bought dough and let’s get started!
Why Store-Bought Dough is a Game Changer for Mini Croissants
Save Time with Ready-to-Bake Dough
When it comes to baking, we all want the best of both worlds—delicious results and a short amount of time spent in the kitchen. Ready-to-bake dough, especially for mini croissants, offers just that. By using store-bought dough, you skip the complex steps of making dough from scratch, such as measuring ingredients, kneading, and waiting for dough to rise. This significantly reduces preparation time, giving you more time to enjoy the baking process or focus on other tasks.
The Convenience Factor
Store-bought dough is a game-changer, especially for those with busy schedules. It comes pre-rolled and often with the perfect texture and layers that you would expect from croissants, all ready for you to shape and bake. Not only does this save time, but it also removes the stress that comes with managing the dough’s consistency and making sure it rises correctly. Instead of worrying about how the dough will turn out, you can focus on what matters most—shaping your croissants and choosing fun fillings.
Available in Various Types
Ready-to-bake dough is available in different variations to suit your needs. You can find croissant dough, puff pastry, or crescent roll dough—each offering its unique texture and flavor profile. If you prefer a more buttery croissant, traditional croissant dough will give you the classic results. If you need something even quicker, crescent roll dough works well for soft, slightly sweeter mini croissants.
Ideal for Last-Minute Baking
Ready-to-bake dough comes in handy for last-minute occasions or when you need a quick breakfast or snack. If you have unexpected guests or just want a treat without much fuss, store-bought dough will save you time without compromising on taste. Simply roll it out, add any fillings of your choice, bake it for a few minutes, and voilà—you have warm, fresh mini croissants ready to be served.
Perfect Flakiness with Minimal Effort
Achieving perfectly flaky mini croissants is often seen as a challenge. However, you can create that flaky texture with minimal effort by using store-bought dough. The dough already does much of the hard work for you.
The Magic of Layers
Croissants get their flakiness from the layers of butter and dough. This process, known as lamination, requires folding and rolling the dough multiple times. With store-bought dough, you avoid all of these steps. The dough comes pre-laminated, with butter layers already embedded. All you need to do is shape the dough. When you bake it, the layers will puff up and create the flaky texture you want.
Less Time, Same Quality
Traditional croissant dough takes hours to prepare. But store-bought dough eliminates this waiting time. It saves you from all the labor-intensive steps. You can focus on shaping the mini croissants and adding fillings. When baked, they will still have that perfect golden crust and airy interior.
Butter and Steam Create Flakiness
Butter plays a big role in the flakiness of croissants. Store-bought dough already contains plenty of butter. As the dough bakes, the butter melts and produces steam. This steam causes the dough to rise, creating the flaky layers. You get the same result as with homemade dough but in much less time.
Perfect for Beginners
If you’re a beginner, making croissants from scratch can feel intimidating. Ready-to-bake dough removes the challenge. It provides an easy way to create delicious, flaky mini croissants. Even if you’ve never baked before, you’ll be able to enjoy homemade croissants with minimal effort.
Cost-Effective Without Sacrificing Taste
Making mini croissants at home with store-bought dough is not only easy, but it is also budget-friendly. While homemade croissants can be expensive and require a lot of ingredients, using pre-made dough gives you a cost-effective solution without compromising on flavor or texture.
Budget-Friendly Option
Store-bought dough is an affordable alternative to making croissant dough from scratch. Traditional croissant recipes require butter, flour, yeast, and other ingredients, which can add up quickly. By opting for store-bought dough, you skip the hefty grocery list and save money. You can still enjoy fresh, homemade croissants at a fraction of the cost.
No Compromise on Taste
While store-bought dough is convenient and inexpensive, it still delivers that signature flaky and buttery taste that makes croissants so irresistible. Many brands of ready-made dough use high-quality ingredients to ensure the flavor doesn’t suffer. In fact, with a few simple tricks, such as adding extra butter or filling the croissants with delicious ingredients, you can elevate the taste to match homemade croissants.
Perfect for Entertaining on a Budget
If you’re planning a gathering or brunch and need to feed a crowd, store-bought dough offers a cost-effective way to serve fresh, impressive mini croissants. With minimal effort, you can make a large batch of croissants that look and taste like they came from a bakery, but without the high price tag. You can even customize the fillings based on what you have at home, making this an easy option for any occasion.
Stretch Your Ingredients
When you make mini croissants using store-bought dough, you stretch your ingredients further. You can create multiple batches with a small investment, making it ideal for large family gatherings or events. The dough can be cut into various shapes, and you can create different flavors by simply changing the fillings, ensuring you make the most of your resources.
Enjoy Homemade Flavor Without Breaking the Bank
Store-bought dough gives you the best of both worlds: homemade flavor at a budget-friendly price. Whether you’re looking to enjoy a treat for yourself or need to prepare a dish for a large group, using ready-made dough makes it easy to enjoy delicious mini croissants without spending a fortune. With the right technique, you can elevate your croissants and make them taste just as good as the ones from an expensive bakery.
Easy Steps to Make Quick Mini Croissants
Preparing the Dough for Mini Croissants
Preparing the dough is the first crucial step in making delicious mini croissants from store-bought dough. While this process is straightforward, a few key tips will help you achieve the perfect texture and flavor. Whether you’re using puff pastry or croissant dough, follow these simple steps to ensure a great outcome.
Thawing the Dough
Before you begin shaping your croissants, make sure the dough is properly thawed. Most store-bought croissant dough comes frozen, and it needs time to defrost. Simply take the dough out of the freezer and place it in the refrigerator overnight or at room temperature for a few hours, depending on the brand. Be sure not to rush this process, as improperly thawed dough can affect the texture of your mini croissants.
Tip: If you’re in a hurry, you can speed up the thawing process by microwaving the dough on a low power setting for short intervals. Just be cautious to avoid overheating or partially cooking the dough.
Unrolling and Preparing the Dough
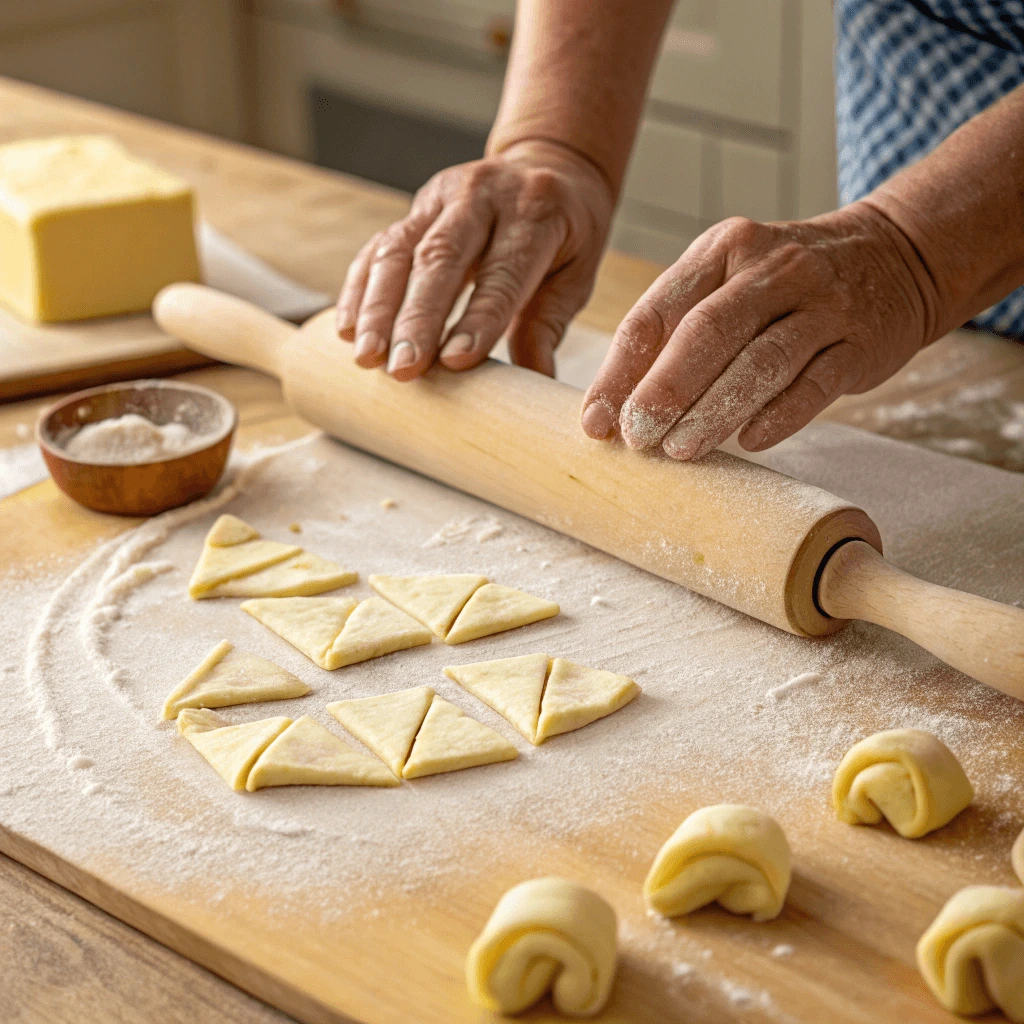
Once the dough is thawed, carefully unroll it on a clean, flat surface. Most store-bought croissant dough comes in a sheet format, so you’ll need to handle it gently to avoid tearing. Use a rolling pin to smooth out any creases and create a flat, even surface. This step helps ensure that the croissants bake evenly and results in that signature flaky texture.
Tip: Lightly dust your work surface with flour to prevent the dough from sticking, but be careful not to add too much flour, as it can affect the final texture of the croissants.
Cutting the Dough into Triangles
To shape your mini croissants, you’ll need to cut the dough into triangles. Start by slicing the dough into even strips, and then cut each strip into triangle-shaped pieces. You can adjust the size of the triangles depending on how small or large you want your mini croissants to be. The key is to make the cuts even so each croissant bakes at the same rate.
Tip: For even-sized croissants, use a sharp knife or pizza cutter to cut the dough. If you’re looking to create an even more uniform shape, use a ruler to measure out your strips.
Adding Butter for Extra Flakiness
While store-bought dough often contains a fair amount of butter, adding a little extra butter to each triangle before rolling it up will enhance the flakiness and richness. Spread a thin layer of softened butter on each piece of dough before you begin rolling. This extra layer of butter helps create the perfect puff when baking.
Tip: You can even experiment with different types of butter, like salted or unsalted, depending on your taste preferences.
Rolling the Croissants
The process of rolling the dough is essential for achieving that trademark croissant shape and texture. Start from the wide edge of the triangle and roll it tightly toward the pointed end. Be sure not to over-roll or stretch the dough as this can cause the croissant to lose its shape during baking. Place each rolled croissant on a baking sheet lined with parchment paper, leaving space between each one for expansion.
Tip: If you want an extra decorative touch, gently curve the ends of the rolled dough inward to form a crescent shape.
Filling Options for Sweet or Savory Croissants
One of the best things about making mini croissants from store-bought dough is the endless variety of filling options you can try. Whether you’re in the mood for something sweet or savory, the filling is where you can get creative. Here are some delicious and easy filling ideas for your croissants:
Sweet Fillings
Sweet mini croissants are perfect for breakfast, brunch, or as a treat to enjoy with coffee or tea. You can use a variety of ingredients to create mouthwatering flavors. Here are some of the most popular sweet filling options:
Chocolate Hazelnut Spread
One of the simplest and most popular fillings for sweet croissants is chocolate hazelnut spread (like Nutella). This rich, creamy spread works perfectly with croissant dough. Simply spread a thin layer of chocolate hazelnut spread on the dough before rolling it up. You can even sprinkle some crushed hazelnuts on top for an extra crunch.
Tip: For an even more indulgent treat, add a few small pieces of dark chocolate along with the spread for an extra layer of richness.
Cinnamon Sugar
For a comforting, cinnamon-sugar croissant, sprinkle a mixture of cinnamon and sugar over the dough before rolling it up. The warm, spicy flavor of cinnamon combined with the sweetness of sugar will create an irresistible croissant with a perfect balance of flavor.
Tip: You can also add a little butter before sprinkling the cinnamon-sugar mixture to help it adhere to the dough and create a slightly gooey center.
Fruit Fillings
For a fruity variation, you can use jam, preserves, or fresh fruit. Raspberry, strawberry, or apricot jams work wonderfully in mini croissants. Spread the jam in the center of the dough before rolling it, ensuring it doesn’t spill out while baking. You can also use fresh berries or thin slices of apple for a natural sweetness.
Tip: If using fresh fruit, make sure to drain excess juice to avoid soggy croissants. A layer of sugar will help release the natural juices without making the filling too watery.
Savory Fillings
Savory mini croissants are perfect for a light lunch, snack, or appetizer. Whether you’re entertaining guests or just looking for a savory treat, these fillings will not disappoint. Here are a few ideas:
Cheese and Spinach
A classic savory combination, cheese, and spinach are perfect for making mini croissants. Spread a little cream cheese, ricotta, or even grated mozzarella onto the dough, then top with a layer of cooked spinach. Roll it up as usual and bake for a delicious, melty, and flavorful treat.
Tip: You can also add a pinch of nutmeg to the spinach mixture to enhance its flavor. If you want a bit more texture, try using a mixture of different cheeses like cheddar and parmesan.
Pesto and Sun-Dried Tomatoes
For a Mediterranean-inspired mini croissant, spread some pesto on the dough and add sun-dried tomatoes for a burst of flavor. The rich, herby pesto pairs perfectly with the tangy sweetness of sun-dried tomatoes, giving the croissants a vibrant, aromatic taste.
Tip: For extra flavor, you can also add a small spoonful of cream cheese or ricotta to the filling for a creamy texture.
Customizing Your Fillings
The best part about making mini croissants is how customizable they are. You can mix and match sweet and savory fillings to suit your preferences. You can even get creative by adding herbs, nuts, or spices to enhance the flavor. Here are a few additional ideas to consider:
- Nuts: Add chopped walnuts, almonds, or pistachios to your filling for extra crunch.
- Spices: Cinnamon, cardamom, or nutmeg work well in sweet croissants, while garlic powder and fresh herbs are great for savory options.
- Vegan Alternatives: For vegan options, swap cheese with vegan cheese, and use non-dairy butter or oil for rolling the dough. You can also experiment with plant-based meats, like vegan sausage or seitan.
Experiment and Get Creative!
Don’t be afraid to try new combinations or even create your own unique filling. You can even stuff your croissants with ingredients like caramelized onions, mushrooms, or even a dash of balsamic glaze for a more sophisticated flavor profile.
Rolling and Shaping the Croissants
Rolling and shaping mini croissants is where the magic happens. By mastering these techniques, you can achieve perfectly shaped croissants that are flaky, golden, and irresistible. The process might sound complicated, but it’s surprisingly simple once you understand the steps. Here’s a guide to rolling and shaping your mini croissants with store-bought dough.
1. Preparing the Dough for Rolling
Before you start rolling, it’s important to make sure your dough is properly prepared. Begin by unrolling the store-bought dough onto a clean, flat surface. If your dough comes in a pre-rolled sheet, you’re already halfway there! However, if it’s a block, use a rolling pin to gently flatten it into a rectangle. Aim for a thickness of about 1/8 inch—thinner dough helps create that flaky texture we all love.
Tip: If your dough is cold from the fridge, allow it to sit at room temperature for a few minutes to make it easier to handle. Cold dough can be tough to roll and may break apart.
2. Cutting the Dough Into Triangles
The next step is to cut the dough into triangles. These will form the classic croissant shape. For mini croissants, you’ll want to cut the dough into small, isosceles triangles (triangles with two equal sides). To do this, first cut the dough into strips about 3 inches wide. Then, slice each strip into triangles. Each triangle should be roughly 4 inches tall, depending on the size of your mini croissants.
Tip: For more consistent shapes, you can use a pizza cutter or a sharp knife to ensure even cuts. If you don’t want to make mini croissants, you can simply adjust the size of the triangles to create larger croissants.
3. Rolling the Croissants
Now comes the fun part—rolling the croissants! To achieve that signature crescent shape, start at the wide end of each triangle and roll it up towards the tip. Keep the rolls tight but not too tight, as you want to leave room for the dough to expand as it bakes. Gently curve the rolled croissants into a crescent shape, making sure the pointed end is tucked under to prevent the croissant from unrolling while baking.
Tip: For a slightly puffier result, you can loosely coil the croissant and let it rest for a few minutes before baking.
4. Shaping Mini Croissants
When shaping mini croissants, the technique is similar to that of regular-sized croissants, but you’ll need to adjust the size to fit the mini format. After rolling each triangle, gently curve them into small crescents. You can also create a more “spiral” shape if you prefer a different aesthetic. The key is to make sure the dough doesn’t overlap or pinch at the ends.
Tip: If you want to shape the croissants more tightly, you can slightly elongate the triangles before rolling. This will give you smaller, tighter croissants with more layers.
5. Ensuring Uniformity
For a polished final look, it’s important that all the croissants are the same size and shape. This helps with even baking and gives your croissants a more professional appearance. After rolling and shaping all your mini croissants, arrange them on a baking sheet, making sure there’s space between each one. This allows the dough to expand without touching during baking, which helps them bake evenly.
Tip: If you’re using store-bought dough, you may notice slight variations in the thickness of the dough. You can lightly press down the thicker spots to ensure a more uniform thickness before cutting and rolling.
6. Optional: Adding a Twist to the Shape
While traditional mini croissants are rolled into a simple crescent shape, feel free to get creative with how you shape them. For example, you can twist the dough before rolling it to create spiral croissants. This adds a fun texture and visual appeal to your baked goods. Alternatively, try making “s-shaped” croissants by curving the dough into a tight S shape.
Tip: If you’re feeling adventurous, try rolling up your croissants with two layers of dough for extra flakiness, or add a filling at the center before rolling them up.
7. Letting the Croissants Rest
Once you have shaped all your mini croissants, it’s important to let them rest for about 10–15 minutes before baking. This resting period allows the dough to relax and prevents it from shrinking during baking. It also gives the yeast time to work a little longer, resulting in fluffier croissants.
Tip: If you’re short on time, you can skip this step, but letting the croissants rest will help them puff up more during baking, giving them a lighter texture.
Sweet Fillings for Mini Croissants

Chocolate Croissants
Chocolate croissants are a delightful twist on the classic croissant, offering a rich, sweet filling inside buttery, flaky pastry. These croissants are perfect for breakfast, dessert, or any time you crave something indulgent. With a few simple steps, you can transform your mini croissants into irresistible chocolate-filled treats. Here’s how to make chocolate croissants that will impress everyone.
1. Choosing the Right Chocolate
The key to a great chocolate croissant is the quality of the chocolate you use. You’ll want a chocolate that melts well and offers a deep, rich flavor. Dark chocolate, semi-sweet chocolate, or even milk chocolate work well, depending on your taste preferences. For a more refined flavor, you can also experiment with high-quality chocolate bars rather than chocolate chips, which tend to melt unevenly.
Tip: If you want to go all out, try adding a hint of chocolate hazelnut spread (like Nutella) for an extra creamy filling.
2. Preparing the Chocolate Filling
Once you’ve selected your chocolate, it’s time to prepare the filling. For mini croissants, you only need small pieces of chocolate. Break your chocolate bar into small chunks or use chocolate chips. If you’re using a spread, simply scoop a tablespoon of the spread and set it aside.
Tip: To create a smoother, meltier filling, you can melt the chocolate and then allow it to cool slightly before using it. This method will ensure the filling doesn’t ooze out when baking and will give you a more uniform, gooey center.
3. Filling the Croissants
Now that your dough is prepared and your chocolate is ready, it’s time to assemble your chocolate croissants. Take a piece of dough and place a small amount of chocolate (chunks or chips) on the wide end of the triangle. Don’t overstuff the croissant; a little chocolate goes a long way, and you want the dough to roll up tightly around the filling.
Tip: Leave a small border along the edges of the dough to prevent the chocolate from spilling out while baking.
Carefully roll up the dough, starting at the wide end and working your way to the tip, just like you would with regular croissants. Make sure to tuck the pointed end underneath to keep the croissant from unrolling while baking.
4. Optional: Adding a Special Touch
For an extra touch of luxury, you can add a small dollop of chocolate hazelnut spread or a sprinkle of chocolate shavings on top before baking. This adds a layer of texture and flavor that will make your chocolate croissants even more indulgent. Alternatively, you can brush the top of the croissants with an egg wash and sprinkle some coarse sugar on top for a golden, crunchy finish.
Tip: If you’re a fan of different chocolate varieties, you can combine milk and dark chocolate together for a balanced flavor profile that’s not too sweet.
5. Baking the Chocolate Croissants
Once your chocolate croissants are filled and shaped, place them on a baking sheet lined with parchment paper. Make sure to leave enough space between each croissant to allow them to puff up and expand as they bake. Preheat your oven according to the store-bought dough instructions and bake your croissants until they turn golden brown and puff up.
Tip: To prevent the chocolate from burning, you may want to bake your croissants at a slightly lower temperature than the instructions suggest, especially if you’re using a lot of chocolate.
6. Letting the Croissants Cool
After your chocolate croissants come out of the oven, let them cool for a few minutes before serving. This allows the chocolate to firm up slightly, so it doesn’t ooze out too much when you bite into them. Once they have cooled enough to handle, serve them warm for the best melt-in-your-mouth experience.
Tip: For the ultimate chocolate indulgence, drizzle melted chocolate on top of the croissants after they’ve cooled. This will add even more chocolatey goodness to the finished product.
7. Enjoying Your Chocolate Croissants
The best way to enjoy chocolate croissants is fresh from the oven, still warm with gooey chocolate in the center. Pair them with a cup of coffee or hot chocolate for a decadent treat, or enjoy them as an afternoon snack. You can also freeze your chocolate croissants before baking and bake them straight from the freezer when you’re ready for a sweet treat.
Tip: If you have leftover croissants, store them in an airtight container for up to two days, or freeze them for longer storage.
Fruit and Jam Croissants
Fruit and jam croissants are a sweet and fruity twist on the classic croissant, providing a burst of flavor with every bite. These croissants are perfect for a breakfast treat, a snack, or even as a light dessert. By combining the buttery flakiness of croissant dough with the sweet, tart notes of fresh fruit or jam, you create a decadent yet simple pastry that everyone will enjoy. Let’s dive into how to make these fruit-filled delights!
1. Choosing Your Filling
The beauty of fruit and jam croissants lies in their versatility. You can fill them with a variety of fruits or jams, depending on your preferences. Fresh fruit works wonderfully, but fruit preserves or jams offer a more concentrated flavor and a smoother consistency. Some classic options include:
- Fresh berries: Blueberries, raspberries, and strawberries offer a juicy, fresh taste that pairs beautifully with buttery croissants.
- Stone fruits: Peaches, apricots, and plums bring a sweet and slightly tart flavor.
- Fruit jams or preserves: Strawberry, raspberry, or apricot jam can be used for a more uniform filling that adds sweetness without the need for fresh fruit.
Tip: If using fresh fruit, be sure to chop it into small pieces to prevent it from spilling out of the croissants while baking.
2. Preparing the Filling
Once you’ve chosen your fruit or jam, it’s time to prepare your filling. If using fresh fruit, chop it into small pieces so it fits neatly inside the croissant. For jams or preserves, you can use them directly from the jar, but if you want a thicker consistency, gently heat the jam in a saucepan for a few minutes to reduce it slightly.
If you want to add some extra flavor or texture, you can mix the jam or fruit with a bit of cream cheese, mascarpone, or even a sprinkle of sugar and cinnamon. This adds creaminess and enhances the overall taste.
Tip: For an added layer of richness, try incorporating a few drops of vanilla extract into your fruit filling.
3. Filling the Croissants
Now that your filling is ready, it’s time to fill the dough. Begin by unrolling your store-bought croissant dough onto a flat surface. Cut the dough into triangles as you would for regular croissants. At the wide end of each triangle, place a small spoonful of your prepared fruit or jam mixture. Be careful not to overstuff, as the filling can leak out while baking if there is too much.
Tip: Leave a small border of dough around the edges to help seal the croissants and prevent the filling from spilling.
Gently roll the dough up, starting at the wide end and working towards the tip, just as you would for regular croissants. Make sure to tuck the pointed end underneath to prevent the croissant from unrolling while baking.
4. Shaping the Croissants
After rolling up the dough and filling, it’s important to shape the croissants correctly. Gently curve each rolled croissant into a crescent shape. You can adjust the tightness of the curl depending on your preference—some like their croissants with a looser, puffier shape, while others prefer a tighter, more compact form.
Tip: If the dough is slightly too stiff to shape easily, let it rest for a few minutes at room temperature to make it more pliable.
5. Optional: Adding a Glaze
For an extra touch of sweetness and shine, you can glaze the croissants before baking. To make a simple glaze, whisk together an egg with a tablespoon of water or milk to create an egg wash. Brush the wash over the top of each croissant, which will give them a golden, glossy finish once baked. For an added layer of sweetness, you can dust the croissants with powdered sugar after baking.
Tip: For a citrusy twist, add a teaspoon of orange or lemon zest to the egg wash for a fragrant finish.
6. Baking the Croissants
Preheat your oven according to the instructions on the store-bought dough packaging. Arrange the filled and shaped croissants on a baking sheet lined with parchment paper, leaving some space between each one so they can expand as they bake. Bake them until they are golden brown and puffed up.
Tip: Keep an eye on the croissants while baking to ensure the jam or fruit filling doesn’t spill out and burn. If you notice the filling bubbling over, lower the oven temperature slightly to prevent it from overcooking.
7. Letting the Croissants Cool
Once your fruit and jam croissants are baked to perfection, remove them from the oven and let them cool for a few minutes before serving. This allows the filling to set slightly, preventing it from oozing out when you bite into them. While they are still warm, you can drizzle a little more jam or honey on top for an extra burst of flavor.
Tip: If you like your croissants extra crispy, you can briefly place them under the broiler for a minute or two after baking to achieve a beautifully golden top.
8. Serving the Croissants
Fruit and jam croissants are best served fresh from the oven, but they can also be enjoyed at room temperature. These croissants pair wonderfully with a cup of coffee, tea, or even a glass of fresh juice. Serve them as part of a brunch spread or as a delicious afternoon snack.
Tip: To make them feel more decadent, serve the croissants with a dollop of whipped cream, clotted cream, or a scoop of vanilla ice cream.
Cinnamon Sugar Mini Croissants
Cinnamon sugar mini croissants are a delightful treat that combines the buttery, flaky layers of croissant dough with the warm, sweet aroma of cinnamon and sugar. These croissants are perfect for a cozy breakfast, an afternoon snack, or even as a light dessert. With a few simple ingredients, you can create a sweet, comforting pastry that will fill your kitchen with an irresistible scent. Let’s break down how to make these tasty bites of joy!
1. The Base: Preparing the Croissant Dough
To create cinnamon sugar mini croissants, start with the croissant dough. You can use store-bought dough to save time and effort, ensuring you get that flaky texture without all the work. Unroll the dough and place it on a flat surface. Once unrolled, slice the dough into small triangles, making sure they are uniform in size for even baking.
Tip: If you prefer, you can use homemade croissant dough, but store-bought dough is a convenient and reliable option that works perfectly for mini croissants.
2. Making the Cinnamon Sugar Mixture
The star of the show for these mini croissants is the cinnamon sugar filling. To create the cinnamon sugar mixture, combine ground cinnamon and granulated sugar in a small bowl. The typical ratio is around 2 parts sugar to 1 part cinnamon, but you can adjust the amounts to suit your personal taste. For an extra touch, add a pinch of salt or even a few drops of vanilla extract to the mixture for enhanced flavor.
Tip: For a richer flavor, you can use brown sugar instead of white sugar. Brown sugar adds moisture and a subtle caramel flavor that pairs wonderfully with the cinnamon.
3. Filling the Croissants
Now that you have your dough and cinnamon sugar mixture ready, it’s time to fill the croissants. Take each triangle of dough and sprinkle a generous amount of the cinnamon sugar mixture over the surface. Be sure to cover the dough evenly but don’t overstuff it. You want just enough cinnamon sugar to give each bite a burst of flavor without spilling out during baking.
Tip: You can lightly press the cinnamon sugar into the dough to help it adhere better. This will also ensure the sugar doesn’t just sit on top of the dough and fall off when you roll it up.
4. Rolling the Dough
After sprinkling the cinnamon sugar, roll up each triangle of dough from the wide end to the tip, just like you would with regular croissants. Be sure to roll them tightly so they bake into a neat, compact shape. Once you have rolled up all the croissants, tuck the tip of the dough under each one to secure it in place.
Tip: For a more pronounced swirl in the croissants, gently stretch the dough slightly as you roll it. This will help the cinnamon sugar mixture spiral throughout the croissant as it bakes.
5. Adding the Sugar Coating
For an extra layer of sweetness and crunch, you can coat the outside of the croissants with more cinnamon sugar. After shaping each mini croissant, lightly brush the tops with melted butter. Then, sprinkle the cinnamon sugar mixture over the buttered croissants, ensuring an even coating.
Tip: To achieve a nice, golden finish, you can also brush the croissants with an egg wash before baking. This will help them develop a glossy, golden appearance as they bake.
6. Baking the Mini Croissants
Place your prepared cinnamon sugar mini croissants on a baking sheet lined with parchment paper. Make sure there is enough space between each croissant to allow for proper puffing. Preheat your oven according to the dough’s package instructions and bake the croissants until they are golden brown and crispy, which usually takes around 12-15 minutes.
Tip: Keep an eye on the croissants while baking. If they are browning too quickly, lower the oven temperature by a few degrees to ensure the insides bake through without overcooking the outside.
7. Cooling and Serving
Once your cinnamon sugar mini croissants are perfectly baked, remove them from the oven and allow them to cool for a few minutes. As they cool, the cinnamon sugar will set, creating a sweet, crunchy coating on the outside of the croissants. Serve them warm for the best texture and flavor, or store them in an airtight container for later enjoyment.
Tip: To enhance the flavor, drizzle the cooled croissants with a simple glaze made of powdered sugar and milk. This will add a touch of sweetness and a beautiful finish.
8. Enjoying Your Cinnamon Sugar Mini Croissants
Cinnamon sugar mini croissants are best enjoyed fresh out of the oven, but they can also be served at room temperature. They pair perfectly with a hot cup of coffee, tea, or even a glass of milk. For extra indulgence, you can serve them with a side of whipped cream or a scoop of vanilla ice cream.
Tip: For a more decadent experience, warm the croissants in the microwave for a few seconds before serving, making them even more comforting and gooey.
Savory Fillings
Vegan Cheese and Spinach Croissants
Vegan cheese and spinach croissants combine savory flavors with a flaky, buttery texture, making them a delicious option for those following a plant-based diet. These croissants are simple to prepare, and with store-bought dough, you can save time without compromising on taste. The vegan cheese melts beautifully inside the croissant, while the spinach adds a fresh, earthy flavor. Let’s break down how to make these tasty vegan delights!
1. Choosing the Right Vegan Cheese
The key to a great vegan cheese and spinach croissant is the choice of cheese. Not all vegan cheeses are created equal, so selecting one that melts well is important. Look for a vegan cheese made from cashews, almonds, or coconut that has a creamy, meltable texture. Some popular options include vegan mozzarella or cheddar-style cheese.
Tip: If you prefer a more distinct flavor, you can use a vegan parmesan or even a vegan cream cheese spread for a rich, creamy filling.
2. Preparing the Spinach Filling
To make the spinach filling, start by sautéing fresh spinach in a bit of olive oil or vegan butter. Cook the spinach until it wilts, then remove it from the heat. You can also add garlic, onions, or herbs like oregano or basil for extra flavor. Once the spinach has cooled slightly, squeeze out any excess moisture using a paper towel to prevent soggy croissants.
Tip: If fresh spinach is not available, you can use frozen spinach. Just make sure to thaw and drain it thoroughly before using it in the filling.
3. Assembling the Vegan Cheese and Spinach Croissants
Once the vegan cheese and spinach filling is ready, it’s time to assemble the croissants. Unroll your store-bought croissant dough onto a clean surface and cut it into smaller triangles, depending on how big you want your croissants.
Take a spoonful of the spinach mixture and place it at the base of each triangle. Top the spinach with a few pieces of vegan cheese. Then, roll the dough tightly from the wide end toward the tip, ensuring the filling stays inside. Pinch the edges to seal them.
Tip: For extra flavor, sprinkle some nutritional yeast on the spinach mixture before rolling it up. This will give the filling a cheesy flavor without using additional cheese.
4. Baking the Croissants
Place the assembled croissants on a baking sheet lined with parchment paper. Brush the tops of the croissants with a bit of olive oil or melted vegan butter for a golden, crispy finish. Preheat the oven to the temperature specified on the croissant dough package and bake the croissants until they are golden brown and the vegan cheese has melted.
Tip: Check the croissants in the final few minutes of baking to ensure the vegan cheese melts and the dough doesn’t over-brown. If you like an extra crispy crust, you can broil them for a minute or two at the end.
5. Serving and Enjoying Your Vegan Cheese and Spinach Croissants
Once your vegan cheese and spinach croissants are baked to perfection, remove them from the oven and let them cool for a few minutes. These croissants are best enjoyed warm when the vegan cheese is gooey, and the spinach has softened to perfection.
Serve them on their own for a snack, as part of a light lunch, or alongside a refreshing salad for a more substantial meal. You can even serve these croissants with a dipping sauce, like marinara, for an extra burst of flavor.
Tip: For an even richer flavor, you can sprinkle some vegan cheese on top of the croissants before baking, allowing it to melt and create a cheesy crust.
6. Customizing Your Vegan Cheese and Spinach Croissants
Feel free to get creative with the filling! You can add sun-dried tomatoes, olives, or even roasted red peppers to the spinach mixture for more texture and flavor. If you’re craving a bit of heat, try adding crushed red pepper flakes or chili powder to the filling.
Tip: Experimenting with different vegan cheeses and other plant-based ingredients will allow you to create a variety of delicious variations on the basic recipe.
Mushroom and Herb Croissants
Mushroom and herb croissants offer a savory alternative to the traditional butter-filled variety. The rich, earthy flavors of sautéed mushrooms combined with aromatic herbs make these croissants a delicious, comforting choice for any meal. Whether served as an appetizer, snack, or part of a light dinner, these croissants are sure to impress with their flaky, golden crust and flavorful filling. Let’s break down how to prepare them step by step.
1. Selecting the Right Mushrooms
The type of mushroom you choose will have a big impact on the overall flavor of your croissants. Opt for a variety that will give you a deep, savory taste. Cremini, button, or shiitake mushrooms are excellent choices for this recipe, but feel free to experiment with other varieties like portobello for a more robust flavor.
Tip: If you like a mix of flavors, you can combine different types of mushrooms for added complexity in the filling. For example, a blend of cremini and shiitake can give you a richer, woodsy flavor.
2. Sautéing the Mushrooms
To make the mushroom filling, start by finely chopping your mushrooms. Heat a tablespoon of olive oil or vegan butter in a skillet over medium heat. Add the mushrooms and sauté them until they become soft and release their moisture. Continue to cook until the mushrooms are golden brown and most of the moisture has evaporated.
For extra flavor, toss in a couple of cloves of minced garlic and a pinch of salt and pepper while sautéing. You can also add a splash of white wine or vegetable broth to deglaze the pan and add richness to the filling.
Tip: Avoid overcrowding the pan while sautéing the mushrooms. If necessary, sauté the mushrooms in batches to ensure they cook evenly and develop a nice caramelized texture.
3. Adding Fresh Herbs
Fresh herbs are essential to bring out the flavors of the mushrooms in this filling. Thyme, rosemary, and parsley are ideal choices, but you can use other herbs that suit your personal taste, such as tarragon or sage.
Add the chopped herbs to the mushrooms near the end of the cooking process. This will help preserve their bright, fresh flavor while allowing them to infuse into the mushrooms. Stir to combine and let the mixture cook for another minute or two.
Tip: Fresh herbs work best in this recipe, as they add vibrant flavors. However, you can use dried herbs in a pinch. Just be sure to reduce the quantity, as dried herbs are more concentrated in flavor.
4. Assembling the Croissants
Once the mushroom and herb mixture is ready, it’s time to assemble the croissants. Roll out your store-bought croissant dough on a clean, flat surface. Cut the dough into triangles, keeping in mind the size you’d like your croissants to be.
Place a spoonful of the mushroom mixture at the base of each triangle, then roll the dough up tightly from the wide end to the point. Make sure to press the edges together so that the filling doesn’t spill out during baking.
Tip: For extra flavor, you can also sprinkle some vegan cheese (like mozzarella or parmesan-style) on top of the mushroom filling before rolling the croissant. The cheese will melt inside, giving the croissants a rich, gooey texture.
5. Baking the Mushroom and Herb Croissants
Preheat your oven according to the instructions on your croissant dough package, usually around 375°F (190°C). Arrange the assembled croissants on a baking sheet lined with parchment paper. Brush the tops of the croissants with a little olive oil or melted vegan butter to help them turn golden and crispy as they bake.
Bake the croissants for 12–15 minutes or until they are golden brown and puffed up. The mushroom filling should be warm and fully cooked by the time the croissants are done.
Tip: Check the croissants during the last few minutes of baking. If you want an extra golden crust, you can broil them for 1–2 minutes, but be careful not to burn them.
6. Serving and Enjoying Your Mushroom and Herb Croissants
Once your mushroom and herb croissants are out of the oven, let them cool for a few minutes before serving. The flaky, buttery crust will contrast beautifully with the rich, savory filling. These croissants are best served warm, as the mushroom mixture will remain soft and flavorful.
Serve them as a delicious snack or appetizer, or pair them with a light salad for a complete meal. They also make a great addition to a brunch spread or a holiday dinner.
Tip: For an extra burst of flavor, serve these croissants with a side of vegan aioli or a balsamic glaze. The tangy, creamy dipping sauce will complement the earthy mushrooms and add another layer of flavor.
7. Customizing Your Mushroom and Herb Croissants
Feel free to experiment with different flavors by adding other ingredients to the filling. For example, you can mix in sautéed onions, sun-dried tomatoes, or even a bit of vegan cream cheese for extra creaminess. You can also swap out the herbs based on what you have available or your personal preferences.
Tip: If you prefer a more savory option, consider adding some nutritional yeast to the filling. It will give the croissants a cheesy flavor without using any dairy.
Cheese and Tomato Croissants
Cheese and tomato croissants are a classic combination that never fails to impress. The juicy sweetness of ripe tomatoes paired with the rich, creamy cheese creates a savory filling that enhances the flaky layers of the croissant. These croissants are perfect for breakfast, brunch, or as a savory snack. They’re simple to make, yet packed with flavor, and offer a delightful contrast of textures. Here’s how you can prepare these delicious croissants with ease.
1. Choosing the Right Cheese
The cheese you select will greatly affect the overall flavor and texture of the croissant. For a melt-in-your-mouth experience, choose cheeses that melt easily and offer a creamy texture. Mozzarella is an excellent choice due to its smooth, stretchy quality. Cheddar or Gruyère can also add a sharper flavor, while cream cheese can lend a tangy richness to the filling.
Tip: Consider combining different types of cheese for a layered flavor profile. Mozzarella and cheddar work particularly well together in these croissants, providing both meltiness and a rich taste.
2. Preparing the Tomatoes
The tomatoes are the star of this savory filling, so it’s important to choose ripe, juicy varieties. Roma tomatoes or vine-ripened tomatoes are great options because they are meaty, flavorful, and have less water content, which prevents the croissants from becoming soggy.
Start by slicing the tomatoes thinly and removing the seeds if desired. This helps reduce the moisture in the filling and prevents it from soaking into the dough. You can also season the tomato slices with a pinch of salt, pepper, and a dash of olive oil to enhance their flavor before adding them to the croissants.
Tip: To intensify the flavor, roast the tomato slices at a low temperature for 10–15 minutes before using them as a filling. This caramelizes the sugars and intensifies the sweetness of the tomatoes.
3. Combining the Cheese and Tomato Filling
Now that you have prepared your cheese and tomatoes, it’s time to assemble the filling. Mix the cheese and tomatoes together in a bowl. Add a handful of fresh basil or oregano to introduce an herbaceous note that complements the cheese and tomato perfectly. If you like a bit of spice, a pinch of red pepper flakes can add just the right amount of heat.
Tip: Don’t overload the croissants with too much filling, as this can cause them to burst open during baking. A small spoonful of the cheese and tomato mixture is usually enough for each croissant.
4. Assembling the Croissants
Roll out your store-bought croissant dough on a clean surface and cut it into triangles. Place a spoonful of the cheese and tomato mixture at the base of each triangle. Carefully roll the dough from the wider end to the point, making sure the filling stays inside. Pinch the edges together to seal the croissant and ensure the filling doesn’t leak during baking.
Tip: If you want to add a bit of crunch to your croissants, sprinkle some breadcrumbs on top of the filling before rolling them up. The breadcrumbs will absorb some of the tomato juice, keeping the croissant dough crispy.
5. Baking the Cheese and Tomato Croissants
Preheat your oven according to the instructions on the croissant dough package, typically around 375°F (190°C). Place the assembled croissants on a parchment-lined baking sheet and brush the tops with a little olive oil or melted butter to help them turn golden brown and crispy.
Bake the croissants for 12-15 minutes or until they are puffed up and golden brown. The cheese should be melted, and the tomato filling should be warm and gooey.
Tip: For a golden, glossy finish, brush the croissants with an egg wash (a mixture of beaten egg and water) before baking. This will give them a beautiful shine and an extra crisp texture.
6. Serving and Enjoying Cheese and Tomato Croissants
Once the croissants are out of the oven, let them cool for a few minutes before serving. The flaky crust, warm melted cheese, and juicy tomato filling will create the perfect bite. These croissants are best enjoyed fresh, straight from the oven, but they can also be stored in an airtight container for a day or two.
Serve these croissants as part of a light lunch, a brunch spread, or even as an appetizer. They pair well with a crisp green salad or a side of roasted vegetables.
Tip: For extra flavor, drizzle a little balsamic glaze or olive tapenade on top of the croissants before serving. These additions will enhance the savory nature of the cheese and tomato filling.
7. Customizing Cheese and Tomato Croissants
While mozzarella and tomato are a classic pairing, feel free to experiment with different types of cheese or other savory ingredients. For example, adding caramelized onions or spinach to the filling will create a more complex flavor profile. You could also sprinkle some Parmesan on top of the croissants before baking for a crispy, cheesy crust.
Tip: To make the croissants even more indulgent, consider adding a layer of pesto or sun-dried tomatoes to the filling. These ingredients will add extra richness and an herbaceous flavor that complements the cheese and tomato perfectly.
Tips for Perfectly Baked Mini Croissants
The Importance of Preheating the Oven
Preheating your oven is a simple yet essential step in ensuring perfectly baked mini croissants. Here’s why it matters:
1. Even Baking
When you place your mini croissants in a preheated oven, they bake more evenly. Without preheating, the croissants may not rise correctly, resulting in uneven baking. A hot oven ensures consistent results, with a crisp outer layer and a fluffy center.
2. Proper Puffing
Croissants rely on immediate heat to puff up. Preheating the oven activates the dough’s leavening agents and helps it rise quickly. If the oven is not preheated, the dough will bake too slowly, affecting the texture and rise.
3. Crispness and Browning
Preheating helps achieve that perfect golden-brown, crispy crust. Without this step, the croissants may not crisp up properly, leaving them soft and undercooked on the outside.
4. Consistent Results
Regularly preheating your oven leads to consistent results each time you bake. This ensures your croissants bake evenly and reach the perfect texture, whether you’re making one batch or several.
Achieving a Golden and Shiny Crust
Achieving that perfect golden and shiny croissant crust is key to making your mini croissants look as good as they taste. Here’s how you can easily achieve this irresistible finish:
1. The Power of Egg Wash
The egg wash is your best friend when it comes to getting a golden, shiny finish on your mini croissants. To prepare an egg wash, beat an egg with a little water or milk. The egg wash creates a beautiful, glossy coating and promotes browning when baked. Use a pastry brush to lightly coat the surface of your croissants right before baking.
2. Butter for Extra Shine
In addition to an egg wash, brushing your mini croissants with melted butter after baking will add an extra layer of shine and flavor. This is an optional step, but it makes a noticeable difference in the finish of your croissants. The butter enhances the golden hue and provides a lovely sheen that makes the croissants look even more appetizing.
3. Baking Temperature Matters
The oven temperature plays a significant role in achieving a golden crust. Ensure that your oven is preheated to the right temperature—typically around 375°F to 400°F (190°C to 200°C). Baking at a higher temperature allows the croissants to crisp up quickly, developing a golden-brown crust. If the temperature is too low, the croissants will not bake properly, leading to a pale and soggy crust.
4. Monitor During Baking
It’s essential to keep an eye on the croissants as they bake. Even a few extra minutes in the oven can make the difference between a light golden color and a darker, overbaked finish. Once they reach that golden, shiny appearance, remove them from the oven right away to avoid overbaking.
5. Don’t Skip the Rest Period
Let your mini croissants rest for a few minutes after baking. During this time, they continue to firm up and develop a more defined golden crust. Allowing them to cool on a wire rack helps maintain their crispness, ensuring that the texture stays just right.
Baking Time and Temperature
Baking mini croissants to perfection is all about getting the right balance between time and temperature. A well-preheated oven and careful monitoring during baking will ensure your mini croissants turn out golden, flaky, and crisp.
1. Preheat Your Oven
Before even thinking about putting your mini croissants in the oven, make sure your oven is preheated. Preheating ensures that the croissants bake evenly from the moment you place them inside. Set the oven to 375°F (190°C) for a classic croissant bake or 400°F (200°C) if you want them to bake a little faster for a more immediate rise. Allow the oven to heat for at least 10 minutes before placing your croissants inside.
2. Ideal Temperature for Flaky Layers
The right oven temperature is crucial for getting the characteristic flaky layers of croissants. Too low, and the dough won’t rise properly, resulting in dense, soggy croissants. Too high, and the outside will burn before the inside has had time to cook. At 375°F (190°C), the dough will bake at an ideal rate, allowing the butter inside the dough to puff it up, creating those beautiful, flaky layers. If you’re using a fan-assisted oven, you may need to lower the temperature slightly to account for more efficient heat distribution.
3. Watch the Clock
Mini croissants typically bake for 12-15 minutes, but keep a close eye on them as they bake. The exact time can vary depending on your oven, the size of your croissants, and how golden you want your crust. The croissants should puff up and turn a beautiful golden-brown color. If they are overbaked, they could dry out and lose that delicate texture, so it’s better to check them a few minutes before the expected time to be sure they don’t overbake.
4. Rotate for Even Baking
In some cases, your oven may have hot spots, meaning that certain areas of the oven may heat more than others. If you notice that some croissants are browning more quickly than others, rotate the baking tray halfway through the baking time. This simple trick ensures that the heat is distributed evenly, and all your croissants get that perfect golden finish.
5. Cooling After Baking
Once your mini croissants are golden and baked to perfection, remove them from the oven. But don’t rush into cutting or serving them right away. Allow them to cool for a few minutes on a wire rack to ensure the flaky layers set and the croissants stay crispy. This brief rest helps to prevent sogginess and keeps the texture just right.
Conclusion
Making mini croissants with store-bought dough is an incredibly easy and versatile way to enjoy fresh, flaky pastries without spending hours in the kitchen. Whether you’re in the mood for sweet or savory, the possibilities are endless when it comes to fillings and flavors. With just a few simple steps, you can create delicious croissants that are sure to impress.
Don’t hesitate to get creative and experiment with different fillings and techniques. From fruit jams and chocolate to vegan options and savory ingredients like spinach and cheese, the world of mini croissants is yours to explore.
We’d love to hear about your own mini croissant adventures! Share your experiences and any unique filling ideas you’ve tried in the comments below. Happy baking!