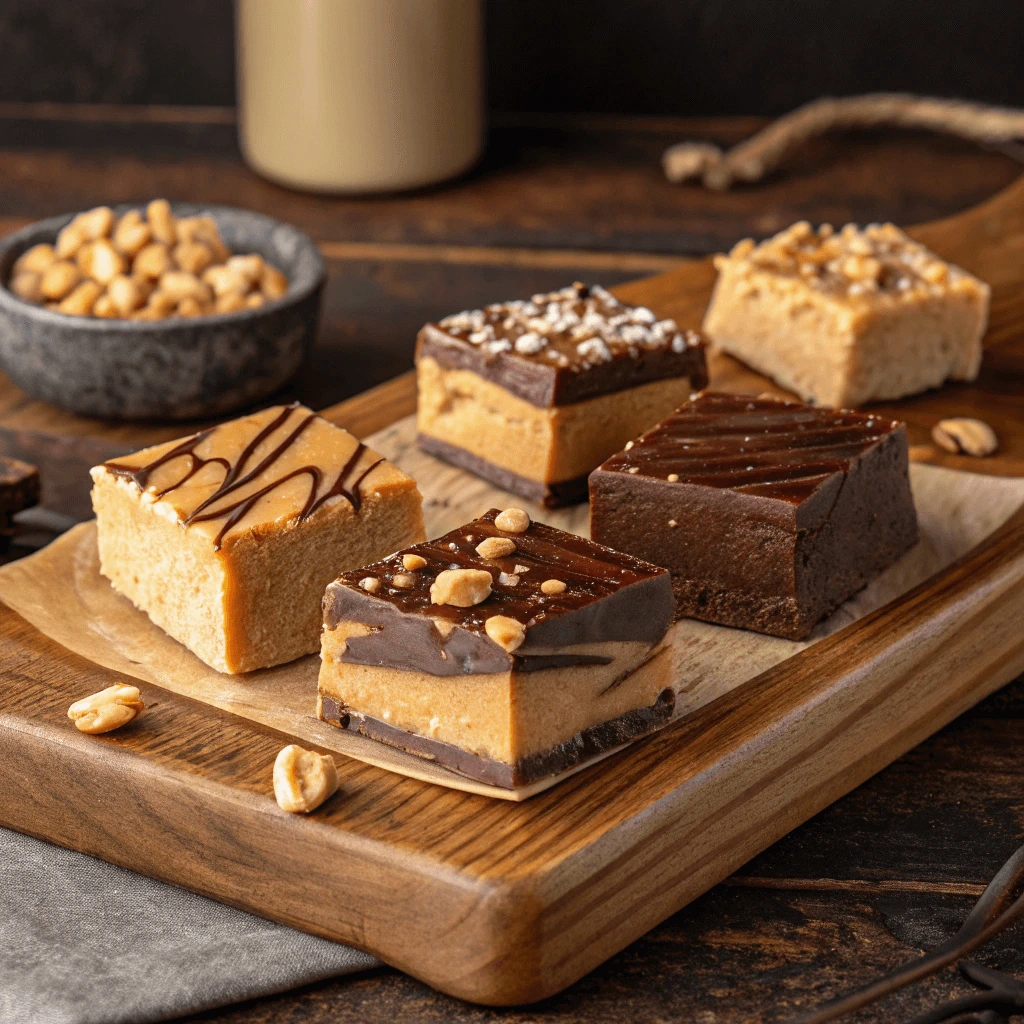
Need a quick, no-bake dessert? This 3-ingredient peanut butter fudge recipe is creamy, rich, and easy to make. You only need peanut butter, sweetened condensed milk, and white chocolate chips to create a smooth, melt-in-your-mouth treat.
This recipe is perfect for beginners or anyone short on time. You can make it in minutes without an oven. It’s great for holidays, gifts, or satisfying a peanut butter craving.
Follow this step-by-step guide to whip up a delicious batch. Plus, learn tips for storage, flavor variations, and serving ideas. Let’s get started!
Why This Peanut Butter Fudge is a Must-Try
Quick and Easy to Make
Creating this 3-ingredient peanut butter fudge is refreshingly simple. You don’t need special tools or baking skills—just a stovetop or microwave, a mixing bowl, and a spatula. Because the steps are few and straightforward, it’s perfect for busy days or last-minute dessert needs.
No Baking Required
One of the biggest time-savers is that this recipe is entirely no-bake. Instead of preheating an oven or watching baking times, you simply melt, mix, and chill. This makes it ideal for summer days or when you want a quick dessert without heating up your kitchen.
Quick Prep, Fast Chill
Start by melting the peanut butter and butter together until smooth. Next, mix in the powdered sugar until it forms a thick, creamy batter. Finally, press the mixture into a pan and refrigerate. In just about 30 minutes, the fudge sets beautifully and is ready to enjoy.
Minimal Effort, Maximum Reward
With minimal prep time and hardly any cleanup, this fudge is a go-to treat for all occasions. Whether you’re hosting friends or just craving something sweet, this fast, no-fail recipe fits the moment perfectly. Best of all, you’ll spend more time enjoying your fudge than making it.
Perfect Texture and Classic Flavor
A good fudge is all about the right balance of smoothness and taste—and this 3-ingredient peanut butter fudge delivers just that. It’s creamy, rich, and melts in your mouth, all without being overly sweet or dense. Thanks to the combination of creamy peanut butter, butter, and powdered sugar, you get both nostalgic flavor and a luxurious texture.
Smooth and Creamy Every Time
The secret to the perfect texture lies in how you combine the ingredients. When you melt the peanut butter and butter together until fully blended, you create a base that’s smooth and velvety. Once you stir in the powdered sugar, the mixture thickens into a rich, fudge-like consistency that’s easy to press into a pan.
Flavor That Never Goes Out of Style
Classic peanut butter flavor has stood the test of time. It’s familiar, comforting, and pairs perfectly with the soft texture of fudge. Every bite brings a balance of nutty richness and just the right amount of sweetness—a timeless treat for all ages. If you’ve grown up with peanut butter desserts, this fudge will bring back fond memories.
Easy to Customize Without Losing Quality
While the original recipe is fantastic as-is, you can add your own twist without sacrificing the perfect texture. Consider mixing in a handful of chopped peanuts for a crunchy contrast or swirling in dark chocolate for added depth. Even with small changes, the core flavor and consistency remain wonderfully satisfying.
Ideal for Holidays, Gifting, or Snacks
This 3-ingredient peanut butter fudge is perfect for a variety of occasions. Whether you’re celebrating holidays, looking for a thoughtful gift, or simply craving a quick snack, this fudge fits the bill. Its simplicity and delicious taste make it a crowd-pleaser every time.
Perfect Holiday Treat
During the holiday season, everyone loves a homemade treat. This fudge requires just minutes to prepare, making it an easy addition to your festive dessert table. Plus, its classic peanut butter flavor complements seasonal flavors like peppermint or cinnamon when you choose to add them.
Thoughtful and Easy Gifts
If you want to surprise friends or family, homemade fudge wrapped in decorative paper or placed in a cute jar makes a heartfelt gift. Because the recipe uses minimal ingredients, it’s budget-friendly too. Personalize your gift with a handwritten note to make it even more special.
Anytime Snack Fix
Beyond special occasions, this fudge works well as an everyday snack. Keep it handy in the fridge for a quick, satisfying bite that provides a good balance of sweetness and protein. Its creamy texture and rich flavor help curb cravings without the need for complicated recipes.
The Only 3 Ingredients You Need
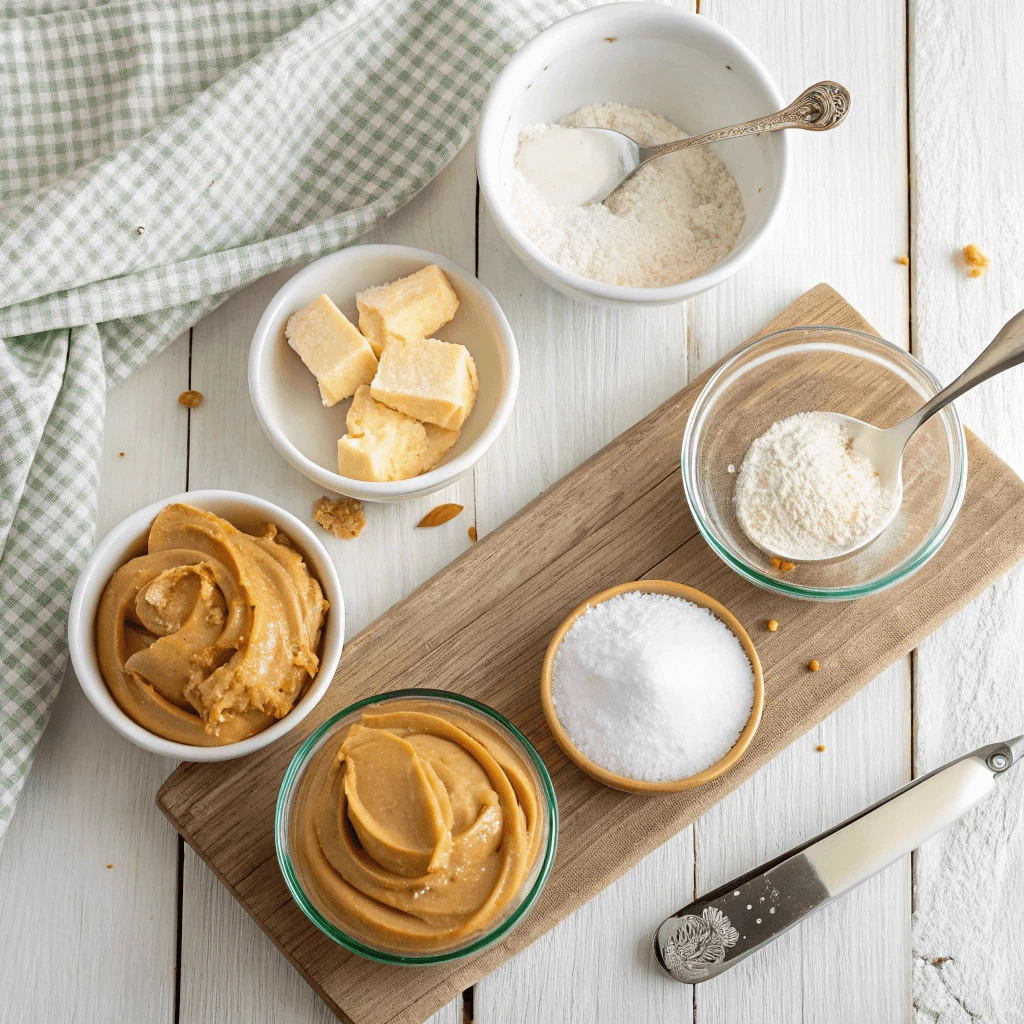
Creamy Peanut Butter
Creamy peanut butter plays a crucial role in creating the perfect texture and flavor for this 3-ingredient peanut butter fudge. Its smooth consistency helps the fudge set properly while delivering that rich, nutty taste everyone loves.
Why Choose Creamy Peanut Butter?
Using creamy peanut butter ensures the fudge blends evenly. Unlike chunky peanut butter, it melts smoothly when combined with butter, preventing any lumps. This results in a silky fudge texture that feels luxurious on your palate.
Enhancing Flavor and Texture
The creamy peanut butter offers a natural richness that balances the sweetness of powdered sugar. It gives the fudge its characteristic nutty flavor while contributing to its soft, melt-in-your-mouth consistency. This combination creates a treat that’s both indulgent and satisfying.
Tips for Best Results
For the best fudge, pick a peanut butter brand that uses minimal ingredients—just peanuts and maybe a pinch of salt. Avoid brands with added oils or sugars, as these can affect the texture and flavor. Stir your peanut butter well before measuring to ensure it mixes evenly into your fudge.
Butter or Dairy-Free Substitute
Butter plays an important role in traditional peanut butter fudge recipes by adding richness and helping the fudge set with the right texture. However, you don’t have to rely solely on dairy butter. You can easily use dairy-free substitutes to make this fudge suitable for vegan or lactose-intolerant diets without sacrificing flavor or creaminess.
Why Use Butter?
Butter adds a smooth, creamy texture and a rich flavor that complements the peanut butter perfectly. It melts quickly, blending seamlessly with the peanut butter to form a luscious base. Butter also helps the fudge firm up nicely when chilled, creating that perfect bite.
Dairy-Free Alternatives
If you prefer a dairy-free option, coconut oil makes an excellent substitute. It provides a similar creamy texture and solidifies well when cooled, ensuring your fudge holds together. Moreover, coconut oil adds a subtle, tropical hint that pairs wonderfully with peanut butter.
Other plant-based fats, like vegan margarine or specialty dairy-free spreads, can also work. Just ensure they have a neutral flavor to avoid overpowering the peanut butter.
Tips for Substituting
When swapping butter with a dairy-free alternative, use the same amount as the recipe calls for. Melt the substitute gently to avoid overheating and combine it well with the peanut butter. If using coconut oil, remember it solidifies at cooler temperatures, so store your fudge accordingly.
Powdered Sugar
Powdered sugar, also known as confectioners’ sugar, is a key ingredient that gives 3-ingredient peanut butter fudge its signature sweetness and smooth texture. It dissolves quickly and blends seamlessly with peanut butter and butter, helping to create the perfect consistency for fudge.
Why Use Powdered Sugar?
Powdered sugar has a very fine texture that allows it to mix evenly without any gritty feeling. This ingredient sweetens the fudge while helping it firm up once chilled. Unlike granulated sugar, powdered sugar won’t leave a grainy texture in the final product, ensuring each bite is silky smooth.
Alternatives to Powdered Sugar
If you want to reduce refined sugar or try a healthier option, you can substitute powdered sugar with alternatives like monk fruit powdered sweetener or erythritol-based powdered sugar. These alternatives dissolve well and offer sweetness without the extra calories or blood sugar spikes.
Keep in mind, when using sugar substitutes, the texture may vary slightly, so adjust the amount to taste and check the fudge consistency as you mix.
Tips for Best Results
Sift your powdered sugar before adding it to your mixture to remove any lumps. This step helps ensure a smooth and even blend. Mix it thoroughly with the melted butter and peanut butter to achieve a creamy batter that sets perfectly.
How to Make 3-Ingredient Peanut Butter Fudge in Minutes
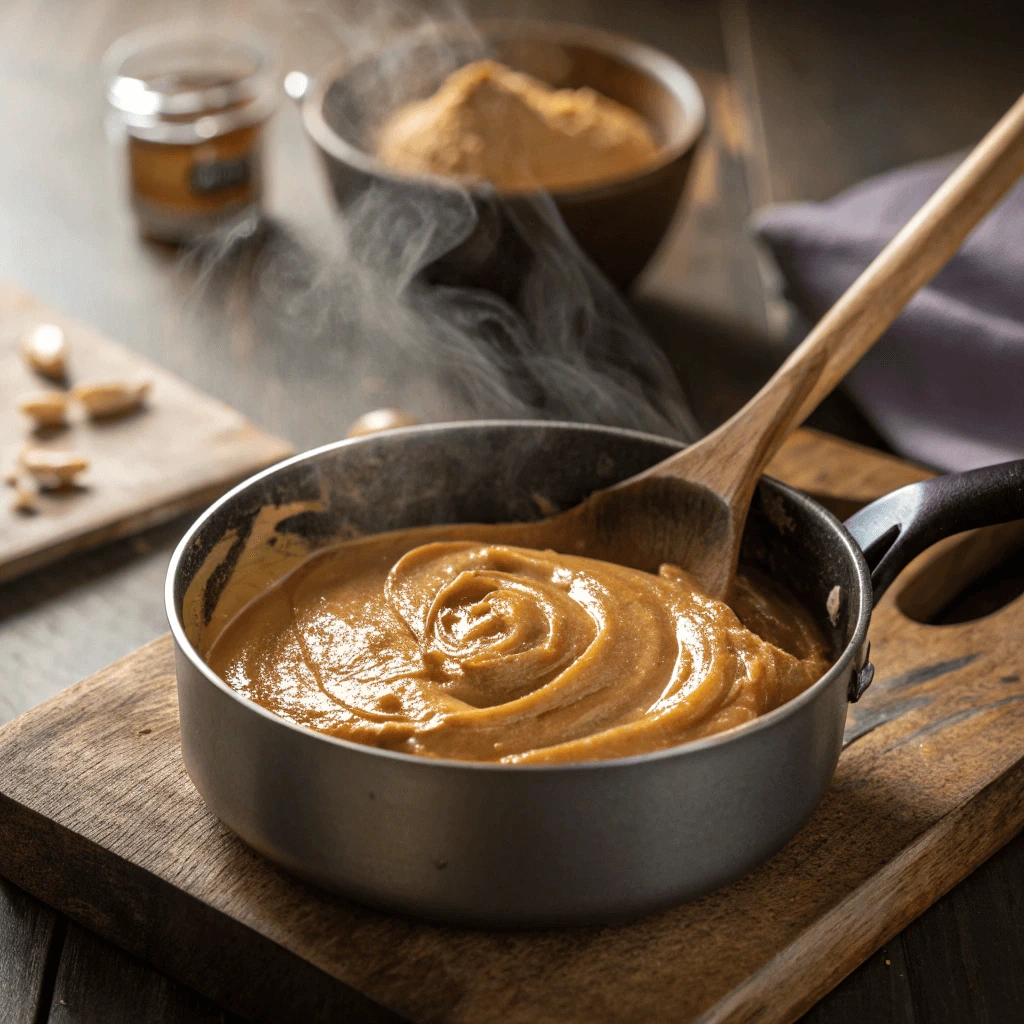
Melt the Butter and Peanut Butter
Melting the butter and peanut butter together is a crucial step for creating the smooth base of your 3-ingredient peanut butter fudge. This process allows the fats to blend, ensuring a creamy texture in the final product.
Choosing the Right Butter
Start with unsalted butter to control the salt level in your fudge. Using salted butter can affect the balance of flavors, making your fudge either too salty or uneven in taste. Cut the butter into small pieces to help it melt evenly and quickly.
How to Melt
Use a double boiler or a heatproof bowl over simmering water to gently melt the butter and peanut butter. This method prevents overheating and burning. Stir frequently with a spatula or wooden spoon to combine the ingredients thoroughly.
If you prefer a quicker method, microwave the butter and peanut butter in short bursts of 20 seconds. Stir after each interval until completely melted and well blended. Avoid overheating, as this can cause the mixture to separate or scorch.
Achieving a Smooth Mixture
Keep stirring until the butter and peanut butter form a smooth, homogeneous liquid. The mixture should be glossy and free of lumps. This smooth base ensures the powdered sugar will mix in evenly, resulting in creamy fudge without any gritty texture.
Common Mistakes to Avoid
Avoid boiling the mixture. High heat can break down the fats, affecting texture and flavor. Also, don’t rush the stirring process—take your time to fully blend the ingredients for the best results.
Mix in the Powdered Sugar
Adding powdered sugar to the melted butter and peanut butter mixture is the key step that transforms the base into rich, creamy fudge. Properly incorporating the powdered sugar ensures a smooth texture and balanced sweetness.
Gradually Add Powdered Sugar
Start by sifting the powdered sugar to remove lumps. Then, gradually add it to the melted mixture. Adding it slowly helps you control the texture and prevents clumping. Use a large mixing bowl to give yourself enough room to combine the ingredients thoroughly.
Stir Thoroughly for a Smooth Texture
Use a sturdy spoon or spatula to stir the powdered sugar into the butter and peanut butter. Stir continuously and vigorously to break down any lumps. The mixture should become thick and smooth, with no gritty texture. Keep stirring until the powdered sugar fully dissolves and blends evenly with the buttery base.
Adjust Consistency as Needed
If the fudge mixture feels too thick, add a small amount of warm milk or cream to loosen it slightly. This helps achieve the perfect fudge consistency—firm enough to hold shape but soft enough to melt in your mouth.
Alternatives to Powdered Sugar
If you prefer a healthier option, try mixing in natural powdered sweeteners like powdered monk fruit or erythritol. These alternatives blend well and maintain the fudge’s sweetness without the added calories or blood sugar spikes.
Avoid Common Mistakes
Don’t dump all the powdered sugar at once, as this can cause lumps and uneven texture. Also, avoid over-mixing, which can make the fudge too stiff. Mix just until the sugar is fully incorporated for the best creamy results.
Press into a Pan and Chill
Once you’ve mixed the peanut butter fudge batter thoroughly, the next crucial step is transferring it into a pan and chilling it properly. This process helps the fudge set into the perfect creamy texture that’s easy to slice and enjoy.
Prepare Your Pan
Start by lining a square or rectangular baking pan with parchment paper or lightly greasing it. Lining the pan with parchment paper makes it easy to lift the fudge out once it’s set, preventing it from sticking and breaking apart. Ensure the paper covers the entire base and sides for easy removal.
Transfer the Mixture
Pour the smooth peanut butter fudge mixture evenly into the prepared pan. Use a spatula to spread and press the mixture down firmly and evenly. Pressing down helps eliminate air pockets and creates a dense, compact fudge block with a smooth surface.
Achieve an Even Thickness
Make sure the fudge layer is spread to an even thickness throughout the pan. This step guarantees consistent texture and firmness when you cut the fudge later. Uneven thickness can lead to some pieces being too soft or too hard.
Chill Until Firm
Place the pan in the refrigerator and chill for at least 2 hours or until the fudge feels firm to the touch. Chilling solidifies the butter and peanut butter blend, helping the fudge hold its shape. Avoid rushing this step by freezing immediately, as slow chilling in the fridge gives better texture.
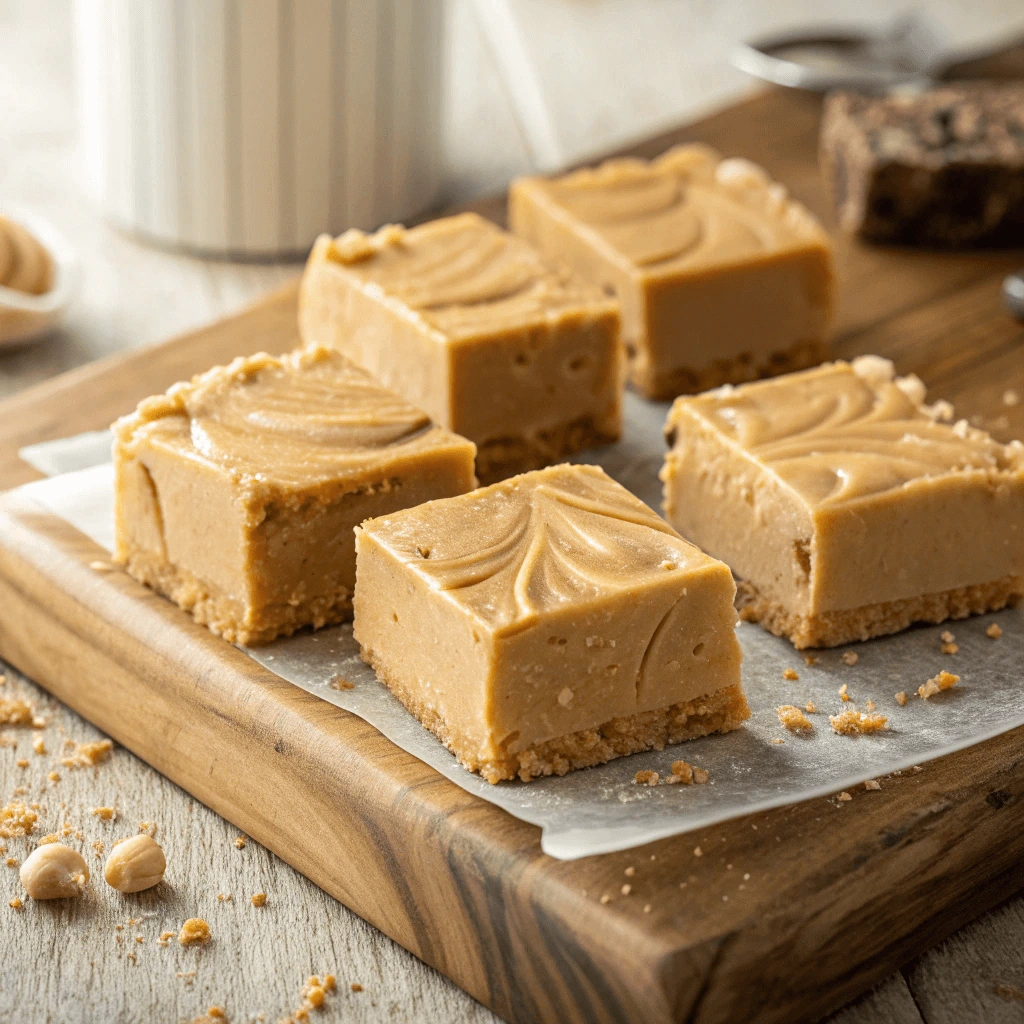
Remove and Slice
Once chilled, carefully lift the fudge block out using the parchment paper edges. Place it on a cutting board and slice into small squares or rectangles with a sharp knife. For clean cuts, warm the knife by running it under hot water, then dry it before slicing.
Tips for Best Results
- Avoid disturbing the fudge while chilling to prevent cracks.
- Store leftovers in an airtight container in the refrigerator to maintain freshness.
- Let fudge sit at room temperature a few minutes before serving for the creamiest bite.
Tips to Perfect Your Peanut Butter Fudge Every Time
Use Fresh Ingredients for Better Peanut Butter Fudge
Using fresh, high-quality ingredients makes a huge difference in the taste and texture of your 3-ingredient peanut butter fudge. When you choose the freshest components, you enhance the flavor and create a more enjoyable treat.
Select Fresh Peanut Butter
Start by picking natural, fresh peanut butter without additives or preservatives. Fresh peanut butter contains just roasted peanuts and maybe a pinch of salt, allowing the pure nutty flavor to shine. Avoid peanut butter with hydrogenated oils or excess sugar, as they can affect the fudge’s texture and healthiness.
Choose Fresh Butter or Alternatives
Whether you use butter or a dairy-free substitute, ensure it’s fresh and stored properly. Fresh butter melts smoothly and blends well with peanut butter, giving the fudge a creamy consistency. Old or rancid butter may introduce off-flavors that ruin the overall taste.
Opt for Fresh Powdered Sugar or Sweetener
Use fresh powdered sugar or your chosen sweetener for the best results. Fresh powdered sugar blends more evenly into the mixture, preventing clumps and gritty textures. If you use alternatives like monk fruit or erythritol-based powdered sweeteners, check that they are fresh and finely ground for a smooth finish.
Benefits of Fresh Ingredients
Fresh ingredients deliver vibrant flavor, better texture, and a cleaner finish. Using stale or expired items can introduce unpleasant tastes and impact how well the fudge sets. Furthermore, fresh ingredients maintain the natural aromas that make homemade fudge so inviting.
Storage Tips for Freshness
To keep ingredients fresh, store peanut butter in a cool, dark place and refrigerate after opening if recommended. Keep butter refrigerated and sealed tightly. Store powdered sugar or sweeteners in airtight containers to prevent moisture absorption.
Line Your Pan for Easy Peanut Butter Fudge Removal
Lining your pan with parchment paper is a simple but essential step when making peanut butter fudge. It helps prevent sticking, makes removal easier, and ensures clean, smooth edges for your fudge squares.
Why Use Parchment Paper?
Parchment paper creates a non-stick surface between the fudge and the pan. Without it, the sticky fudge can adhere to the pan, making it difficult to remove and cutting into neat squares a challenge. By lining the pan, you avoid scraping and potential damage to your fudge’s texture.
How to Properly Line Your Pan
Start by cutting a piece of parchment paper slightly larger than your pan’s base. Place it inside the pan, letting the edges hang over the sides. This overhang acts like handles, so you can lift the entire fudge block out easily once it sets.
Tips for Best Results
Smooth out any wrinkles or air bubbles to keep the fudge surface even. You can lightly grease the parchment paper with a small amount of butter or oil to provide extra non-stick protection, though this usually isn’t necessary.
Benefits of Parchment Paper
Using parchment paper reduces cleanup time and frustration. Instead of scraping sticky residue from your pan, you simply lift the fudge block out by the parchment “handles.” This technique also helps maintain the fudge’s appearance, making your treats look professional and appetizing.
Alternative Options
If you don’t have parchment paper, you can use aluminum foil as a substitute, but make sure to grease it lightly to avoid sticking. However, parchment paper remains the best choice for easy release and clean edges.
Slice Peanut Butter Fudge with a Hot Knife for Clean Cuts
After your fudge has chilled and set, it’s time to slice it into neat, presentable squares. Using a hot knife is a simple trick that makes a big difference in how clean and professional your cuts look.
Why a Hot Knife Works Best
When you use a hot knife, the blade glides smoothly through the fudge, preventing it from crumbling or sticking. Room-temperature knives often drag through the dense texture, leaving uneven edges or messy pieces. By warming the blade, you melt slightly as you cut, which keeps each square crisp and tidy.
How to Heat Your Knife
To heat your knife, run the blade under hot water for a few seconds. Then, dry it completely with a towel before cutting. You can also dip the knife into a cup of hot water between slices to maintain a consistent temperature. Avoid cutting with a wet blade—moisture can cause the fudge to become sticky or streaky.
Tips for Smooth, Even Cuts
- Measure before slicing: Lightly score the top of the fudge with a knife or ruler to mark equal portions.
- Use a straight-edge knife: Avoid serrated knives, which may create jagged edges.
- Clean between cuts: Wipe the knife clean and reheat it after each slice for the best results.
Presentation Matters
Neat squares not only look better but also package more easily—whether you’re storing the fudge or giving it as a gift. This simple step helps turn your homemade fudge into something that looks professionally made.
Healthy Swaps for Guilt-Free Peanut Butter Fudge
Natural Peanut Butter Instead of Processed
If you’re looking to make your peanut butter fudge a little healthier without sacrificing taste, switching from processed to natural peanut butter is a great place to start. Natural peanut butter contains only peanuts (and sometimes a bit of salt), which means you avoid unnecessary additives like hydrogenated oils, extra sugar, and artificial preservatives.
Why Natural Peanut Butter Works Better
Natural peanut butter delivers a rich, true peanut flavor. Because it isn’t sweetened or stabilized with extra oils, it gives your fudge a more authentic taste and cleaner texture. The natural oils blend smoothly into melted butter and sweetener, creating a creamy, satisfying consistency.
Health Benefits and Taste
Choosing natural peanut butter also reduces added sugars in your dessert. That’s especially helpful if you’re watching your sugar intake or trying to make smarter ingredient swaps. Plus, the roasted peanut flavor shines through more strongly, making each bite of fudge more enjoyable.
How to Choose the Right Natural Peanut Butter
When shopping, look for brands with short ingredient lists—just peanuts and salt. Before using, give the jar a good stir, as natural peanut butter separates over time. Store it in the fridge to maintain freshness and texture.
Coconut Oil Instead of Butter
For those who want to keep their fudge dairy-free or add a tropical twist, coconut oil makes an excellent substitute for butter. It not only serves the same purpose in helping your fudge set, but also brings added health perks and a unique flavor profile.
Why Choose Coconut Oil?
Coconut oil solidifies at room temperature, making it an ideal binding agent for no-bake treats like peanut butter fudge. It blends easily with peanut butter and sweeteners, creating a smooth, creamy texture. If you’re vegan or lactose intolerant, this substitution keeps your dessert completely plant-based without compromising on richness.
Flavor and Texture Benefits
Refined coconut oil has a neutral taste, which works well if you don’t want any coconut flavor in your fudge. On the other hand, unrefined (virgin) coconut oil adds a subtle coconut note that can elevate the flavor of your treat. In terms of texture, coconut oil creates a silky finish and a firm structure that holds up well after chilling.
How to Substitute and Store
To use coconut oil in place of butter, swap it at a 1:1 ratio. Melt the coconut oil gently over low heat before combining it with peanut butter and powdered sweetener. Once your fudge is prepared, let it set in the fridge for at least an hour. Because coconut oil melts easily in warm temperatures, it’s best to store the fudge in the refrigerator to maintain its shape and texture.
Monk Fruit or Erythritol in Low-Carb Peanut Butter Fudge
If you’re looking to reduce the sugar content in your fudge without sacrificing sweetness, monk fruit and erythritol-based powdered sweeteners are smart alternatives. These sugar-free options help you create a healthier dessert that’s still indulgent and satisfying.
Why Choose Sugar-Free Sweeteners?
Monk fruit and erythritol don’t spike blood sugar levels, making them ideal for people following low-carb, keto, or diabetic-friendly diets. Unlike regular powdered sugar, these sweeteners allow you to enjoy your favorite treats without the crash or guilt. They provide a similar sweetness level, so you won’t feel like you’re missing out.
How to Use Them in Fudge
To substitute traditional powdered sugar, use a 1:1 ratio with a powdered version of your chosen sweetener. Make sure it’s finely ground, just like confectioners’ sugar, to avoid a gritty texture. If your sweetener isn’t already powdered, you can pulse it in a blender or food processor until it reaches the right consistency.
After melting your peanut butter and butter (or coconut oil), stir in the powdered monk fruit or erythritol until fully incorporated. These sweeteners dissolve well and help create a smooth, creamy texture that sets just like classic fudge.
Flavor Tips and Considerations
Some sugar-free sweeteners have a slight cooling sensation or aftertaste. To minimize this, choose a blend that includes both monk fruit and erythritol or experiment with small batches to find your preferred taste. Vanilla extract or a pinch of sea salt can also help balance any lingering flavors.
Conclusion
This 3-ingredient peanut butter fudge proves that delicious desserts don’t have to be complicated. With just a few pantry staples and a few minutes of your time, you can whip up a rich, creamy treat that’s perfect for holidays, quick cravings, or thoughtful gifts. Whether you stick with the classic version or try some of the healthy ingredient swaps, this fudge is sure to become a favorite.
Give it a try and see just how easy it is! Don’t forget to share your results or tips in the comments—we’d love to hear how your batch turned out!