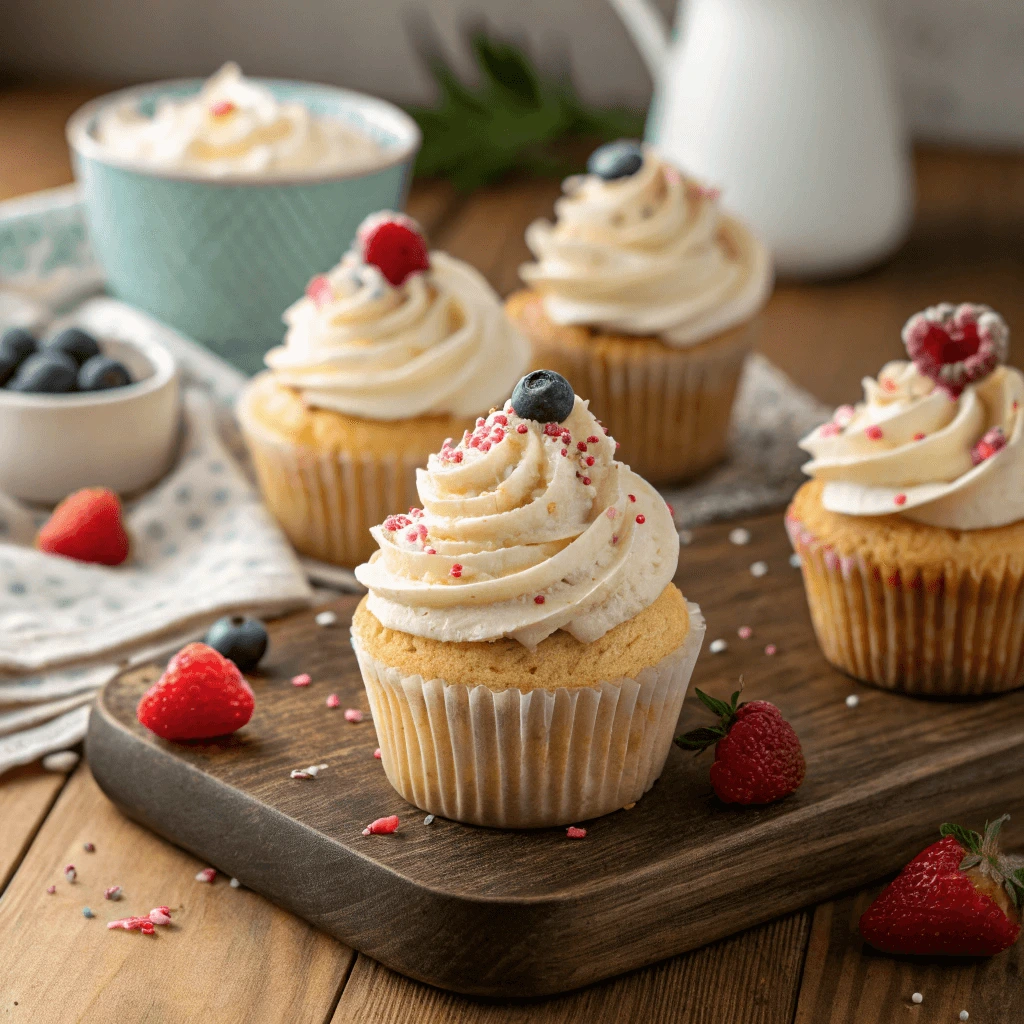
Baking gluten-free cupcakes can be a rewarding experience, but it does come with its challenges. Whether you’re new to gluten-free baking or looking to take your cupcake game to the next level, mastering the art of baking gluten-free treats is within reach. In this ultimate guide, we’ll walk you through everything you need to know to bake light, fluffy, and delicious cupcakes without gluten. From selecting the right ingredients to perfecting texture, flavor, and frosting, you’ll gain the expertise you need to create professional-quality cupcakes in your own kitchen. Get ready to discover foolproof tips, creative flavor ideas, and expert techniques that will elevate your gluten-free cupcake game and impress friends and family alike. Let’s dive in and start baking like a pro!
Essential Ingredients for Perfect Gluten-Free Cupcakes
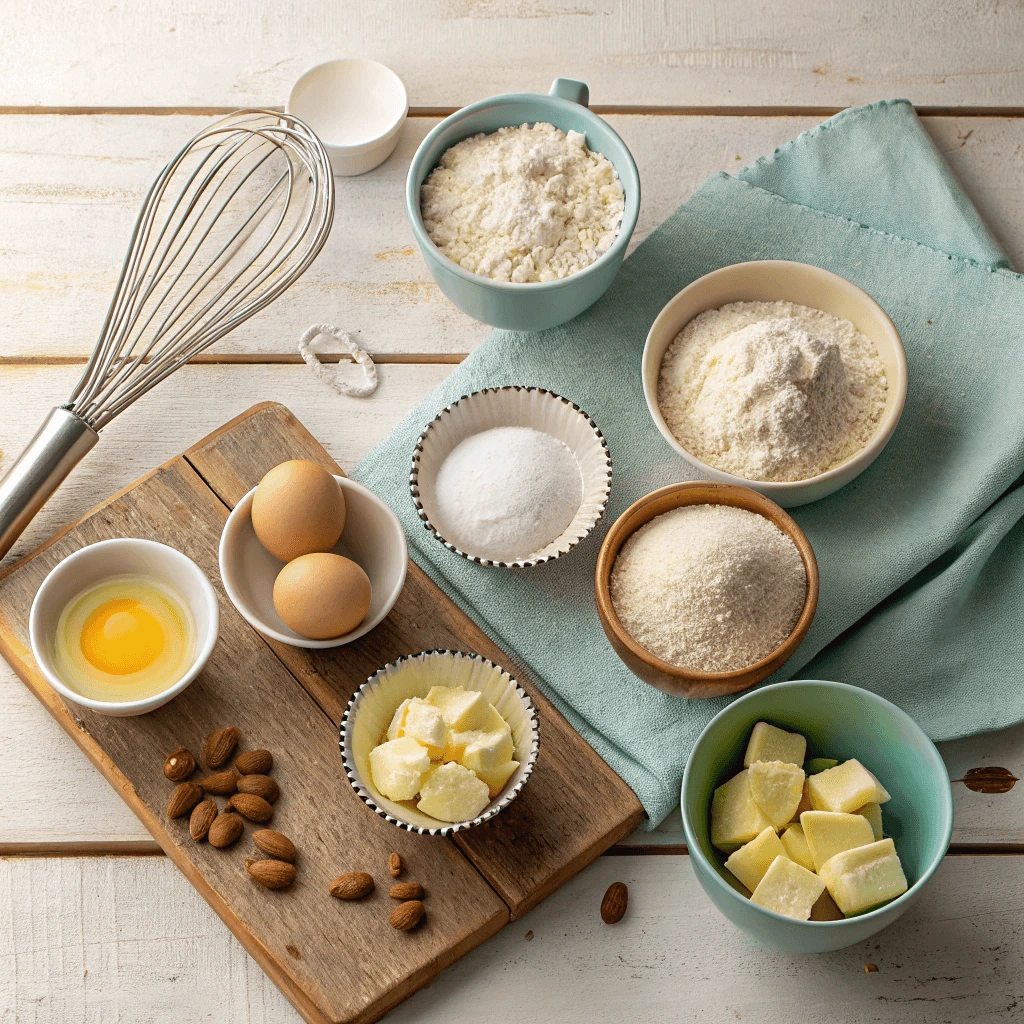
Choosing the Right Gluten-Free Flour
When baking gluten-free cupcakes, the flour you choose plays a crucial role in the overall texture, taste, and structure of the finished product. Unlike traditional wheat flour, gluten-free flours lack the binding protein called gluten, which gives baked goods their chewy texture. To replicate this, you’ll need to combine different gluten-free flours to achieve the best results.
Popular Gluten-Free Flour Options
1. Almond Flour
Almond flour is a popular choice for gluten-free baking because it provides a moist texture and rich, nutty flavor. Made from finely ground almonds, it’s perfect for creating cupcakes with a slightly denser, yet tender crumb. Almond flour works particularly well in cupcakes that pair well with chocolate, vanilla, and citrus flavors. However, since it lacks structure, you may need to combine it with other flours, such as rice flour, for better results.
2. Rice Flour
Rice flour is a staple in gluten-free baking, often used as a base for many flour blends. It’s mild in flavor and provides a delicate texture to cupcakes. However, rice flour alone can sometimes result in a grainy texture, so it’s best used in combination with other gluten-free flours to achieve the ideal cupcake consistency.
3. Tapioca Flour
Tapioca flour is derived from the cassava root and is commonly used as a thickening agent in gluten-free baking. It helps provide moisture and chewiness to cupcakes. Tapioca flour also helps prevent the graininess that rice flour can sometimes cause, making it a key player in your gluten-free flour blend.
4. Sorghum Flour
Sorghum flour has a mild, slightly sweet flavor that adds complexity to gluten-free cupcakes. It’s rich in protein and fiber, helping to give structure and improve texture. Sorghum flour works well when paired with other flours like rice flour and tapioca flour, balancing out the flavors and providing a light yet sturdy cupcake.
How to Mix Your Gluten-Free Flours
For the best texture, try experimenting with gluten-free flour blends. A combination of almond flour, rice flour, tapioca flour, and sorghum flour can give you the perfect balance of flavor, moisture, and structure. It’s often a good idea to use a gluten-free all-purpose flour blend as a starting point. These blends typically contain a mix of rice flour, potato starch, and tapioca flour, designed to mimic the properties of wheat flour. However, depending on the recipe, you may need to adjust the ratios or add extra binding agents to create a light and fluffy cupcake.
Why the Right Blend Matters
Each gluten-free flour brings something unique to the table, but a single flour rarely works well on its own. Using the right combination of gluten-free flours ensures the perfect texture and flavor for your cupcakes. If you choose the wrong flour, you may end up with dry, crumbly cupcakes that lack structure. Conversely, a well-balanced blend creates soft, moist cupcakes with a pleasant crumb. Always make sure to use fresh gluten-free flours as older ones can lose their effectiveness in the recipe.
Binding Agents to Use in Gluten-Free Baking
When you bake gluten-free cupcakes, you’ll quickly discover that gluten is what holds everything together in traditional baking. Since gluten-free baking lacks this natural binder, it’s important to use specific binding agents to replicate that structure and texture. These agents help give gluten-free cupcakes their form, chewiness, and structure.
Why Binding Agents Matter
Binding agents play a critical role in ensuring that your gluten-free cupcakes hold together without crumbling apart. Without them, you risk ending up with a dry, crumbly mess instead of a light, airy cupcake. The right binding agent also enhances moisture retention, improves texture, and ensures even baking. There are several great options available, and the key is to find the one that works best for your specific recipe.
Top Binding Agents for Gluten-Free Cupcakes
1. Xanthan Gum
Xanthan gum is one of the most commonly used binding agents in gluten-free baking. It helps provide structure to gluten-free batters and doughs by holding moisture and improving elasticity. Typically used in small amounts (around 1 teaspoon per cup of flour), xanthan gum adds a bit of chewiness to cupcakes, making them more like their gluten counterparts. It’s particularly helpful in recipes that require a firmer crumb, like chocolate or spice cupcakes.
2. Guar Gum
Guar gum is another popular gluten-free binder derived from the seeds of the guar plant. Like xanthan gum, it helps improve texture and moisture retention. Guar gum is often used in recipes where you want a lighter, more airy crumb. It works especially well in cakes and cupcakes where the goal is to create a soft, fluffy texture. If you find xanthan gum too heavy for your cupcakes, you can swap it out with guar gum for a lighter result.
3. Psyllium Husk
Psyllium husk is an increasingly popular gluten-free binding agent known for its ability to hold moisture and improve the texture of gluten-free baked goods. It’s a great choice for cupcakes that need extra fluffiness and volume. When combined with liquid, psyllium husk forms a gel-like substance that mimics the texture that gluten provides. It’s especially useful in recipes that need more elasticity, such as in making vegan or egg-free cupcakes.
4. Chia Seeds or Flaxseeds
Both chia seeds and flaxseeds are excellent natural binding agents. They are packed with fiber and omega-3 fatty acids. When ground and mixed with water, they form a gel-like consistency that helps hold together the cupcake batter. Chia or flax eggs (1 tablespoon of ground chia or flaxseed mixed with 2.5 tablespoons of water) are popular in vegan baking and can replace the need for both eggs and other binding agents. These seeds add a subtle flavor and extra moisture to your cupcakes.
How to Use Binding Agents
The key to using binding agents effectively is to experiment with small amounts. Start with the recommended quantities and then adjust as needed. Most recipes require only a teaspoon or two of binding agents per cup of flour. Too much binding agent can make your cupcakes dense or gummy, while too little can result in crumbling. When experimenting, keep track of what works best for your desired cupcake texture.
Here are some tips for using these binding agents:
- Incorporate evenly: When adding binding agents, ensure that they are evenly mixed with the dry ingredients before combining with the wet ingredients. This prevents clumping.
- Combine with liquid: Binding agents often need to be activated by liquid. For example, mix psyllium husk or chia seeds with water and let them sit for a few minutes before adding them to the batter.
- Experiment: There’s no one-size-fits-all solution in gluten-free baking. If one binding agent doesn’t produce the results you want, try another, or experiment with combinations.
Non-Dairy Substitutes for Moist Cupcakes
When baking gluten-free cupcakes, achieving a moist texture can be challenging without using dairy ingredients. However, there are several non-dairy substitutes that can help you achieve the perfect soft, tender crumb. Whether you’re avoiding dairy due to dietary restrictions or simply prefer plant-based alternatives, these substitutes can provide the moisture and flavor needed for your cupcakes to stand out.
Why Non-Dairy Substitutes Matter
Dairy ingredients, such as milk and butter, are often used to add moisture and richness to cupcake recipes. Without them, it’s easy for gluten-free cupcakes to turn out dry and dense. By choosing the right non-dairy ingredients, you can maintain moisture and texture while still producing delicious results. Non-dairy substitutes can even enhance the flavor, offering a twist that complements various cupcake flavors.
Top Non-Dairy Substitutes for Moisture
Coconut Milk
Coconut milk is a rich and creamy alternative to dairy milk, making it an ideal option for maintaining moisture in your cupcakes. With its subtle coconut flavor, coconut milk adds both richness and softness to the batter. For the best results, use full-fat coconut milk, which is thicker and provides more moisture. If you’d like to minimize the coconut flavor, opt for coconut milk from a carton rather than the canned version.
How to Use It: Substitute coconut milk in equal quantities for regular milk. If you prefer a less pronounced coconut flavor, balance it with other flavorings like vanilla extract.
Almond Milk
Almond milk is another great choice, offering a mild, nutty flavor that complements many cupcake recipes. It has a lighter consistency compared to coconut milk, which makes it a good fit for cupcakes that don’t require too much heaviness. Almond milk helps keep cupcakes moist and soft, without altering the flavor profile too much.
How to Use It: Replace dairy milk with almond milk on a 1:1 ratio. If you want to add more flavor, consider pairing it with almond extract in recipes that highlight nutty or fruity flavors.
Oat Milk
Oat milk has a naturally creamy texture and a light sweetness that pairs well with a variety of cupcake flavors. It helps retain moisture in cupcakes without making the batter too dense, which is important for light, fluffy cupcakes. Oat milk is particularly well-suited for vanilla or fruit-based cupcakes, as its subtle sweetness complements the ingredients without overpowering them.
How to Use It: Replace dairy milk with oat milk in a 1:1 ratio. Oat milk is especially ideal for cupcakes with spices or fruit fillings, as its gentle sweetness enhances those flavors.
Non-Dairy Butter (Vegan Butter)
Non-dairy butter is essential when you need to replace butter in your cupcake recipe. Many brands use oils like coconut, avocado, or olive oil as the base, providing a creamy consistency that mimics traditional butter. Vegan butter helps make your cupcakes rich and moist, achieving that tender crumb without using any animal products.
How to Use It: Replace regular butter with vegan butter in a 1:1 ratio. Make sure to select a solid, high-quality vegan butter, which is key to ensuring a proper texture and consistency in your cupcakes.
Applesauce
Applesauce is an excellent substitute for fats like butter or oil, adding moisture and a hint of natural sweetness to your cupcakes. It helps bind ingredients together while providing a soft, moist texture. Unsweetened applesauce works best if you don’t want to add extra sugar to your cupcakes.
How to Use It: Use applesauce to replace half of the fat in your recipe. Typically, 1/2 cup of butter can be swapped with 1/2 cup of applesauce. It’s perfect for fruit-based cupcakes, such as banana or apple cinnamon cupcakes.
Avocado
For a unique twist, try using avocado as a butter substitute in your cupcake recipe. Avocado provides healthy fats, moisture, and a smooth texture, all while keeping the cupcakes tender. Its mild flavor works well with chocolate or spice cupcakes, where its creamy texture helps balance the richness.
How to Use It: Replace the butter or oil in your recipe with mashed avocado at a 1:1 ratio. Be sure to mash it thoroughly to avoid any lumps in your batter.
Tips for Extra Moisture
In addition to the non-dairy substitutes mentioned above, you can use a few tricks to boost moisture further.
- Add a Splash of Vinegar: A small amount of vinegar (like apple cider vinegar) can help improve the leavening reaction and moisture retention in your cupcakes.
- Incorporate Fruit Purees: Purees such as pumpkin, banana, or pear can add both moisture and natural sweetness to your cupcakes, making them more flavorful and moist.
- Gelatin or Agar-Agar: If you need extra structure, gelatin or agar-agar can help hold the cupcakes together while keeping them moist and tender.
How to Get the Perfect Texture in Gluten-Free Cupcakes
Tips for Making Fluffy Gluten-Free Cupcakes
Achieving fluffy gluten-free cupcakes can be a challenge, especially since gluten plays a crucial role in providing structure and lift. However, with the right techniques and ingredients, you can create light, airy cupcakes that rival their gluten-filled counterparts. Here are some essential tips to ensure your gluten-free cupcakes turn out perfectly fluffy every time.
1. Use the Right Flour Blend
Flour is the base of any cupcake, and choosing the right gluten-free flour blend can make or break your recipe. Single gluten-free flours like rice flour or coconut flour tend to make dense cupcakes, while blends that combine various flours provide the right structure and texture. A good gluten-free flour blend usually contains a combination of rice flour, potato starch, and tapioca flour. These ingredients help mimic the structure that gluten would provide in traditional cupcakes.
Tip: For best results, look for flour blends that contain xanthan gum or guar gum, which help provide structure and prevent your cupcakes from being crumbly.
2. Don’t Overmix the Batter
Overmixing gluten-free cupcake batter is a common mistake that can lead to dense, heavy cupcakes. When you mix the batter too much, you cause the gluten-free flours to absorb excess moisture, making it harder for the cupcakes to rise properly. To prevent this, mix the ingredients until just combined. Lumps in the batter are okay — you don’t need to worry about them too much, as overworking the batter will affect the texture more than a few lumps will.
Tip: Use a gentle folding motion with a spatula to combine dry and wet ingredients, rather than using an electric mixer on high speed.
3. Add Baking Soda and Baking Powder in Proper Proportions
The right balance of leavening agents is crucial when baking gluten-free cupcakes. Both baking soda and baking powder are responsible for helping your cupcakes rise and become fluffy. If you use too much of either, the cupcakes could rise too quickly and then fall, resulting in a dense, sunken appearance.
- Baking soda: It works best when there’s an acid in the batter, such as vinegar or lemon juice. It produces carbon dioxide gas, helping your cupcakes rise.
- Baking powder: A combination of baking soda, an acid, and a starch, it’s typically used when there’s no acidic ingredient in the recipe.
Tip: If you’re using both baking powder and baking soda in your recipe, make sure you measure carefully. A good starting point is 1 teaspoon of baking powder and 1/2 teaspoon of baking soda for every cup of gluten-free flour.
4. Use Room Temperature Ingredients
Using ingredients at room temperature, especially eggs, butter, and milk (or their non-dairy substitutes), helps to incorporate air into the batter more easily. Cold ingredients can cause the batter to become too thick, resulting in dense cupcakes. Room temperature ingredients mix together more smoothly, allowing the batter to rise more effectively during baking.
Tip: Take out your eggs, butter, and any other dairy or dairy-free substitutes about 30 minutes before you plan to bake.
5. Separate Wet and Dry Ingredients
One of the keys to making fluffy cupcakes is ensuring that your wet and dry ingredients are well mixed before combining them. This prevents clumps of dry flour from interfering with the batter’s consistency and helps achieve a smooth texture. Once both the wet and dry ingredients are combined, it’s crucial to mix only until the batter is smooth, avoiding overmixing.
Tip: Sift your dry ingredients before adding them to the wet ingredients to avoid any lumps or air pockets. This step ensures that all the ingredients are evenly distributed, giving you a smooth batter.
6. Don’t Overfill the Cupcake Liners
Overfilling cupcake liners can lead to dense, flat cupcakes. When the batter rises, it needs room to expand. If the liners are too full, the batter will overflow and spill over the edges, resulting in cupcakes that don’t rise evenly. The ideal amount of batter for each liner is about 2/3 full. This gives the cupcakes enough room to rise and become fluffy while maintaining their structure.
Tip: Use an ice cream scoop to portion the batter evenly into the cupcake liners for consistent results.
7. Bake at the Right Temperature
Baking at the correct temperature is essential for fluffy cupcakes. If the oven is too hot, the cupcakes may rise too quickly and then collapse. If the temperature is too low, they may not rise enough to become light and fluffy. A consistent baking temperature is crucial for achieving the desired texture.
Tip: Preheat your oven to 350°F (175°C) before placing your cupcakes inside. You may also want to invest in an oven thermometer to ensure your oven is accurate, as temperatures can vary.
8. Let Your Cupcakes Cool Properly
After baking, allow your cupcakes to cool in the pan for 5-10 minutes before transferring them to a wire rack. This prevents them from becoming too soggy. Cooling on a wire rack allows air to circulate around the cupcakes, helping them set properly while maintaining their fluffy texture.
Tip: Avoid covering your cupcakes with plastic wrap while they are cooling, as this can trap moisture and make them soggy.
The Role of Leavening Agents: Baking Soda vs. Baking Powder
Leavening agents are essential when baking gluten-free cupcakes, as they help create light and fluffy textures. Two common leavening agents used in gluten-free baking are baking soda and baking powder. While they may appear similar, they perform different roles in the baking process, and understanding how they work can make a big difference in the texture and rise of your cupcakes.
1. What is Baking Soda?
Baking soda, also known as sodium bicarbonate, is a basic compound that requires an acid to activate its leavening properties. When mixed with an acidic ingredient like lemon juice, vinegar, or buttermilk, baking soda produces carbon dioxide bubbles. These bubbles help the batter rise, creating air pockets that make cupcakes light and fluffy.
How Baking Soda Works:
When baking soda reacts with an acid, it produces carbon dioxide gas. This gas creates bubbles in the batter, which expand when heated, causing the batter to rise. This reaction takes place immediately upon mixing, which is why recipes that include baking soda often need to be baked right away.
Best Uses:
Baking soda works best in recipes that already contain acidic ingredients. Common acidic ingredients include buttermilk, yogurt, or vinegar. For instance, if your gluten-free cupcake recipe calls for an acidic liquid, like lemon juice, you’ll want to include baking soda to help your cupcakes rise.
Tip: Always make sure to use the right amount of baking soda. Too much can lead to a soapy taste, while too little can result in flat cupcakes.
2. What is Baking Powder?
Baking powder is a combination of baking soda, an acid (usually cream of tartar), and starch. Unlike baking soda, baking powder doesn’t require an additional acidic ingredient to work. There are two types of baking powder: single-acting and double-acting.
How Baking Powder Works:
Baking powder contains both an acid and a base, which allows it to create gas bubbles in two stages. In double-acting baking powder, the first reaction happens when it’s mixed with wet ingredients, and the second occurs when it’s exposed to heat during baking. This results in a more consistent rise.
Best Uses:
Baking powder is used in recipes that don’t contain acidic ingredients. It’s perfect for gluten-free cupcakes that don’t call for buttermilk or lemon juice but still need lift. It provides a steady, reliable rise that helps maintain the texture of your cupcakes.
Tip: If a recipe calls for baking powder, be sure to use the correct type. Double-acting baking powder is the most common, but some older recipes may call for single-acting. Double-acting powder is preferred for most baking.
3. Key Differences Between Baking Soda and Baking Powder
Although both baking soda and baking powder help cupcakes rise, they differ in how they achieve this goal. Here are some key differences:
- Activation: Baking soda needs an acid to activate, whereas baking powder has both an acid and a base, making it self-activating.
- Baking Time: Baking soda produces gas immediately when combined with acid, so it’s important to bake right away. On the other hand, baking powder releases gas in two stages, giving you more time to work with the batter.
- Flavor: Baking soda can sometimes leave a bitter taste if too much is used, while baking powder typically has a neutral taste when used in the right amounts.
Tip: When substituting one for the other, you need to be cautious. Baking soda is more powerful than baking powder, so if you substitute baking powder for baking soda, you may need to adjust the quantity and account for the extra acid in the recipe.
4. How to Use Both in Gluten-Free Cupcakes
Many gluten-free cupcake recipes call for both baking soda and baking powder to achieve the ideal rise and texture. Using both leavening agents gives you the best of both worlds: baking soda reacts with acids to provide an immediate rise, while baking powder ensures that the cupcakes continue to rise steadily in the oven.
Tip: If you’re using both, be sure to follow the recipe measurements carefully. Too much of either can lead to over-risen cupcakes, while too little can result in a flat, dense outcome.
Avoiding Common Gluten-Free Baking Mistakes
Baking gluten-free cupcakes can be a challenge, especially when you’re new to gluten-free baking. There are several common mistakes that bakers often make, but knowing how to avoid them will ensure that your cupcakes turn out perfectly every time. Let’s break down some of the most frequent pitfalls and how to overcome them.
1. Using the Wrong Flour Blend
One of the most common mistakes in gluten-free baking is using the wrong flour blend. Gluten-free flours behave differently than wheat flour and often require specific combinations to replicate the texture and structure that gluten provides.
Solution:
Always use a reliable gluten-free flour blend designed for baking. These blends usually contain a combination of flours (like rice flour, almond flour, or tapioca flour) and starches (like cornstarch or potato starch) to help mimic the elasticity of gluten. For the best results, stick to blends labeled specifically for baking cupcakes, cookies, or cakes.
If you prefer to make your own flour blend, ensure that it includes a variety of flours and starches to balance texture, taste, and rise. Additionally, experiment with binding agents (such as xanthan gum or guar gum) that help provide structure and prevent your cupcakes from being crumbly.
2. Not Using Enough Binding Agents
In gluten-free baking, binding agents play an essential role in holding everything together. Without them, your cupcakes can turn out dry, crumbly, or lacking in structure.
Solution:
Use enough binding agents to ensure your gluten-free cupcakes hold their shape and texture. Xanthan gum and guar gum are the most common, but some recipes may also call for other options like psyllium husk powder or flax seeds. These ingredients help improve elasticity and moisture retention, preventing your cupcakes from falling apart.
However, be careful not to overuse these binding agents. Too much can result in gummy or overly dense cupcakes. Follow your recipe’s instructions for the proper amounts.
3. Skipping the Sifting Step
Gluten-free flours can often have clumps, which can lead to uneven textures in your cupcakes. Failing to sift the flour can result in a lumpy batter and uneven rising, leading to dense cupcakes that lack a light and airy texture.
Solution:
Always sift your gluten-free flours before mixing them with other dry ingredients. This helps to break up any clumps and ensures that your leavening agents are evenly distributed throughout the batter. If you’re using a homemade flour blend, sifting is particularly important, as it will ensure that all the ingredients mix thoroughly and uniformly.
4. Overmixing the Batter
Overmixing the batter can cause gluten-free cupcakes to become dense and tough. While traditional cupcake recipes might encourage a quick, thorough mixing, gluten-free batters require a gentler approach.
Solution:
Mix your gluten-free cupcake batter just until the ingredients are combined. Overmixing can result in a chewy texture that you don’t want in a light, fluffy cupcake. Once all the ingredients are incorporated, stop mixing, and allow the batter to rest for a few minutes before transferring it to the cupcake tins. This resting time helps the flours hydrate and improves the texture of the cupcakes.
5. Not Measuring Ingredients Correctly
Measuring ingredients incorrectly is a common mistake that can lead to gluten-free baking disasters. Since gluten-free flours vary widely in texture, weight, and absorption, measuring them properly is crucial.
Solution:
For the best results, use a kitchen scale to weigh your dry ingredients, especially flour. Measuring by volume (such as using a cup measure) can result in inconsistencies, as different flours can have varying densities. If you must use cups, be sure to spoon the flour into the measuring cup and level it off with a knife.
Additionally, make sure you measure all your ingredients—wet and dry—precisely. Too much of one ingredient can ruin the balance and affect the texture, rise, and flavor of your cupcakes.
6. Not Letting the Cupcakes Cool Properly
The cooling process is often overlooked, but it’s just as important as the baking process. If you remove your gluten-free cupcakes from the oven and allow them to cool in the pan, they may become soggy or lose their structure.
Solution:
After baking, allow your cupcakes to cool in the tin for about 5 to 10 minutes. Then, transfer them to a wire rack to cool completely. Cooling on a rack ensures that the air can circulate around the cupcakes, helping them retain their structure and texture.
7. Forgetting to Adjust for High Altitudes or Humidity
If you live in an area with high altitude or high humidity, you may need to adjust your recipe. At higher altitudes, the air pressure is lower, which can affect the rise and texture of your cupcakes. Similarly, in humid climates, gluten-free flours can absorb more moisture, altering the consistency of the batter.
Solution:
At high altitudes, you may need to increase the oven temperature slightly or reduce the amount of liquid in the batter. If you’re baking in a humid climate, you might want to decrease the liquid and increase the flour in your recipe. Experimenting with small adjustments will help you achieve the perfect texture.
Delicious Gluten-Free Cupcake Flavor Ideas
Classic Vanilla and Chocolate Gluten-Free Cupcakes
When it comes to gluten-free cupcakes, the classics like vanilla and chocolate are always a crowd favorite. These versatile flavors can be enjoyed by everyone, whether or not they have dietary restrictions. By using the right ingredients and techniques, you can create fluffy, moist, and delicious gluten-free cupcakes that rival their gluten-filled counterparts. Let’s dive into the key elements of making both vanilla and chocolate gluten-free cupcakes.
1. Key Ingredients for Classic Vanilla Gluten-Free Cupcakes
Vanilla cupcakes are a staple at any celebration, and they’re surprisingly easy to make gluten-free without sacrificing flavor or texture. The key to getting a soft, light texture in gluten-free vanilla cupcakes lies in the right flour blend and other essential ingredients.
Gluten-Free Flour Blend:
Use a high-quality gluten-free flour blend specifically formulated for baking. A combination of rice flour, potato starch, and tapioca flour is often ideal, as it creates a balanced texture. If you prefer to make your own blend, try mixing one part rice flour, one part potato starch, and one part tapioca flour, and add xanthan gum to help bind the ingredients together.
Sweeteners:
In gluten-free baking, the choice of sweetener can impact both the texture and taste. Granulated sugar works well for vanilla cupcakes, but you can also use a mix of honey or maple syrup for a natural sweetness. Just be sure to adjust the liquid content of the recipe when using liquid sweeteners.
Eggs:
Eggs help provide structure, moisture, and binding properties. They also help to give the cupcakes a light, airy texture. If you need to make the recipe egg-free, consider using flax eggs (1 tablespoon of ground flaxseed mixed with 3 tablespoons of water) as a binding alternative.
2. Tips for Achieving Fluffy Gluten-Free Vanilla Cupcakes
Getting a fluffy texture in your gluten-free vanilla cupcakes can be tricky. Here are some tips to help you get the perfect rise and texture every time.
Sift Your Dry Ingredients:
Sifting the flour and other dry ingredients, such as baking powder or baking soda, helps to eliminate clumps and ensures even distribution. This also improves the texture and consistency of the batter, leading to fluffier cupcakes.
Don’t Overmix the Batter:
Once you add the wet ingredients to the dry ingredients, mix just until combined. Overmixing the batter can result in dense cupcakes, so gently fold the ingredients together. Let the batter rest for 5-10 minutes before baking to allow the gluten-free flours to fully absorb the moisture.
Use Room Temperature Ingredients:
For the best results, make sure all your ingredients are at room temperature. Cold butter or eggs can cause the batter to seize up and result in uneven mixing. Room temperature ingredients blend together more smoothly and evenly, contributing to a lighter, fluffier texture.
3. Classic Chocolate Gluten-Free Cupcakes
Chocolate cupcakes are another crowd favorite, and it’s just as easy to make them gluten-free with the right approach. The key to achieving the rich, moist texture that chocolate cupcakes are known for lies in the right combination of cocoa powder, gluten-free flour, and other ingredients.
Cocoa Powder:
Use high-quality unsweetened cocoa powder to give your chocolate cupcakes that deep, rich flavor. If possible, choose Dutch-processed cocoa powder, which has a smoother, milder taste. Be sure to sift the cocoa powder before adding it to the dry ingredients to avoid clumps and ensure an even distribution throughout the batter.
Flour Blend:
Just like with vanilla cupcakes, a reliable gluten-free flour blend is crucial for chocolate cupcakes. You can use a store-bought blend or create your own mix of rice flour, potato starch, and tapioca flour. The key is to ensure that your blend has a good balance of flours and starches for structure and moisture retention.
Eggs and Dairy-Free Options:
Eggs provide moisture and lift in chocolate cupcakes. For dairy-free options, use plant-based milk such as almond or coconut milk, and replace butter with dairy-free margarine or coconut oil. The flavor of chocolate will shine through even with these substitutions.
4. Tips for Making Moist and Rich Gluten-Free Chocolate Cupcakes
Making chocolate cupcakes gluten-free requires a few additional steps to ensure that they stay moist and have a rich flavor.
Use a Mix of Wet Ingredients:
In addition to eggs and dairy, consider adding a bit of oil (like vegetable oil or coconut oil) to your batter. Oil adds moisture to the cupcakes, making them soft and tender. You can also add yogurt or sour cream for an extra moist texture.
Incorporate Boiling Water or Coffee:
Adding a small amount of hot water or brewed coffee to the chocolate batter helps to enhance the flavor and create a smoother texture. Coffee, in particular, intensifies the chocolate taste without overpowering it.
Don’t Overbake:
One of the most common issues with gluten-free chocolate cupcakes is overbaking. Gluten-free cupcakes can dry out quickly, so always check for doneness 2-3 minutes before the suggested baking time is up. The cupcakes are done when a toothpick inserted into the center comes out clean.
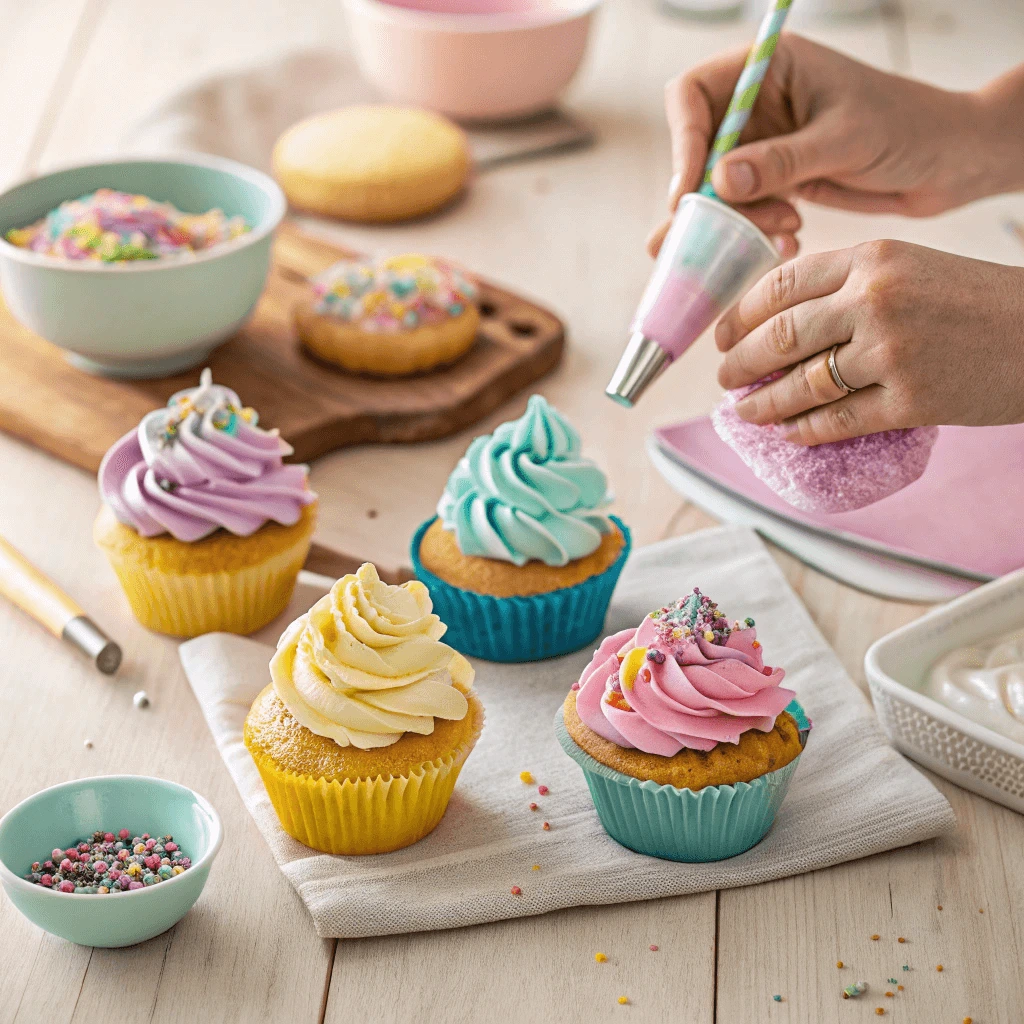
5. Decorating Your Classic Vanilla and Chocolate Gluten-Free Cupcakes
Once your cupcakes are baked to perfection, it’s time to get creative with your decorations! Whether you prefer simple frosting or more elaborate designs, decorating gluten-free cupcakes is just as fun as decorating regular cupcakes.
Frosting:
For both vanilla and chocolate cupcakes, a classic buttercream frosting works beautifully. You can also try whipped cream cheese frosting or a dairy-free version made with coconut cream. Add natural food coloring or top with sprinkles to bring extra flair to your cupcakes.
Add Fresh Fruits or Nuts:
Top your cupcakes with fresh berries, such as raspberries or strawberries, for a burst of color and a fresh taste. Chopped nuts like walnuts, almonds, or pecans also make great toppings, adding a bit of crunch to the otherwise soft texture.
Creative Garnishes:
For a more elegant touch, try decorating your cupcakes with edible flowers, chocolate shavings, or a dusting of powdered sugar. These simple garnishes elevate your cupcakes and make them look as good as they taste.
Fruity Flavors Like Lemon Poppy Seed and Strawberry
Fruity flavors bring a refreshing twist to gluten-free cupcakes, making them both vibrant and delicious. Two popular fruity options that stand out are Lemon Poppy Seed and Strawberry cupcakes. These flavors are perfect for any occasion, offering a light, citrusy zing or a sweet, fresh taste. Let’s explore the best techniques to create these flavorful cupcakes and tips for enhancing their textures and tastes.
1. Lemon Poppy Seed Cupcakes: A Zesty Delight
Lemon and poppy seed are a classic combination that adds both flavor and texture to gluten-free cupcakes. The fresh citrus flavor of lemon provides a vibrant and zesty profile, while the poppy seeds offer a delightful crunch.
Key Ingredients for Lemon Poppy Seed Cupcakes
To achieve the perfect lemony flavor, it’s essential to use both lemon zest and lemon juice. The zest, which comes from the outer layer of the lemon peel, contains oils that are rich in flavor. Combine it with fresh lemon juice to get the full tangy citrus profile.
Adding Poppy Seeds
Poppy seeds are small but mighty in texture. They give the cupcakes a slight crunch and a beautiful visual appeal. You only need a tablespoon or two mixed into the batter to add the perfect pop.
Choosing the Right Gluten-Free Flour
When making lemon poppy seed cupcakes gluten-free, the key is selecting the right flour blend. Choose a blend that includes rice flour, potato starch, and tapioca flour to create a light texture that balances the dense nature of gluten-free flours. This combination ensures your cupcakes rise nicely without becoming too heavy.
2. Enhancing the Flavor of Lemon Poppy Seed Cupcakes
To take your lemon poppy seed cupcakes to the next level, consider these additional flavor-enhancing options.
Lemon Glaze or Frosting
For an added burst of lemon flavor, top your cupcakes with a simple lemon glaze made from powdered sugar and lemon juice. Alternatively, you can make a lemon buttercream frosting for a more indulgent option. The sweetness of the frosting contrasts beautifully with the tangy lemon in the cupcakes.
Incorporating Greek Yogurt or Sour Cream
Adding Greek yogurt or sour cream to the batter will make the cupcakes extra moist and tender. These ingredients help maintain a soft crumb, which complements the zesty lemon flavor.
Lemon Extract
If fresh lemon juice and zest aren’t enough for you, a few drops of lemon extract can boost the citrus flavor. Just be cautious not to overdo it, as extracts are potent and can easily overpower the taste of the other ingredients.
3. Strawberry Cupcakes: Sweet and Refreshing
Strawberry cupcakes are a fantastic way to enjoy the natural sweetness of fresh fruit in a gluten-free form. They’re perfect for spring and summer but can be enjoyed year-round with the right technique.
Using Fresh Strawberries for Natural Sweetness
Start by using fresh, ripe strawberries for the best flavor. Puree the strawberries before adding them to the batter to ensure they distribute evenly. Fresh strawberries contribute a natural sweetness and moisture, making them an excellent choice for gluten-free baking.
Strawberry Puree vs. Strawberry Extract
While fresh strawberry puree offers the most natural flavor, strawberry extract can also be used as an option. Extracts are more concentrated, so only a few drops are needed. If you’re short on fresh strawberries or want to intensify the flavor, strawberry extract is a good alternative.
Gluten-Free Flour Blend for Moisture
For strawberry cupcakes, a gluten-free flour blend that includes xanthan gum or guar gum is ideal, as it helps with texture and binding. You want to avoid a dry, crumbly texture, so make sure the flour blend also includes ingredients that retain moisture, like cornstarch or potato flour.
4. Tips for Making Moist and Tender Strawberry Cupcakes
Maintaining moisture and tenderness in strawberry cupcakes can be challenging due to the natural tendency of gluten-free cakes to dry out. Here are some tips to ensure your cupcakes stay soft and delicious:
Add Extra Moisture with Yogurt or Coconut Oil
Greek yogurt or sour cream can be mixed into the batter for moisture. Alternatively, try adding coconut oil to the batter, as it helps keep the cupcakes soft while enhancing the flavor.
Don’t Overmix the Batter
Mix the wet and dry ingredients until just combined. Overmixing can lead to dense, heavy cupcakes. A few gentle stirs should be enough to incorporate the ingredients.
Bake with a Toothpick Test
Always test for doneness by inserting a toothpick into the center of the cupcakes. If it comes out clean or with just a few crumbs, they’re ready to be removed from the oven. Overbaking strawberry cupcakes will dry them out, so keep a close eye on them as they bake.
5. Decorating Fruity Flavored Cupcakes
Once your Lemon Poppy Seed or Strawberry cupcakes are baked and cooled, it’s time to decorate them. Here are some fun and beautiful ways to add a finishing touch:
Lemon Poppy Seed Cupcake Toppings
For lemon poppy seed cupcakes, top them with a zesty lemon glaze or a swirl of lemon buttercream frosting. Garnish with extra poppy seeds or thin slices of lemon for added visual appeal. A few mint leaves can also add a refreshing touch.
Strawberry Cupcake Toppings
For strawberry cupcakes, fresh sliced strawberries are the perfect topping. You can also add a dollop of whipped cream or cream cheese frosting. If you’re feeling adventurous, try making strawberry buttercream frosting by blending fresh strawberries into the buttercream.
Creative Garnishes
Whether you’re making lemon poppy seed or strawberry cupcakes, you can get creative with garnishes like edible flowers, a dusting of powdered sugar, or even chocolate drizzle to complement the fruity flavors.
Fun and Unique Cupcake Flavors
When it comes to baking gluten-free cupcakes, experimenting with unique and fun flavors is a great way to elevate your creations. While classic flavors like vanilla and chocolate are always a hit, adding a twist with unexpected ingredients and combinations can make your cupcakes stand out. Whether you’re baking for a special occasion or just trying something new, these fun and unique cupcake flavors will spark your creativity and impress your guests.
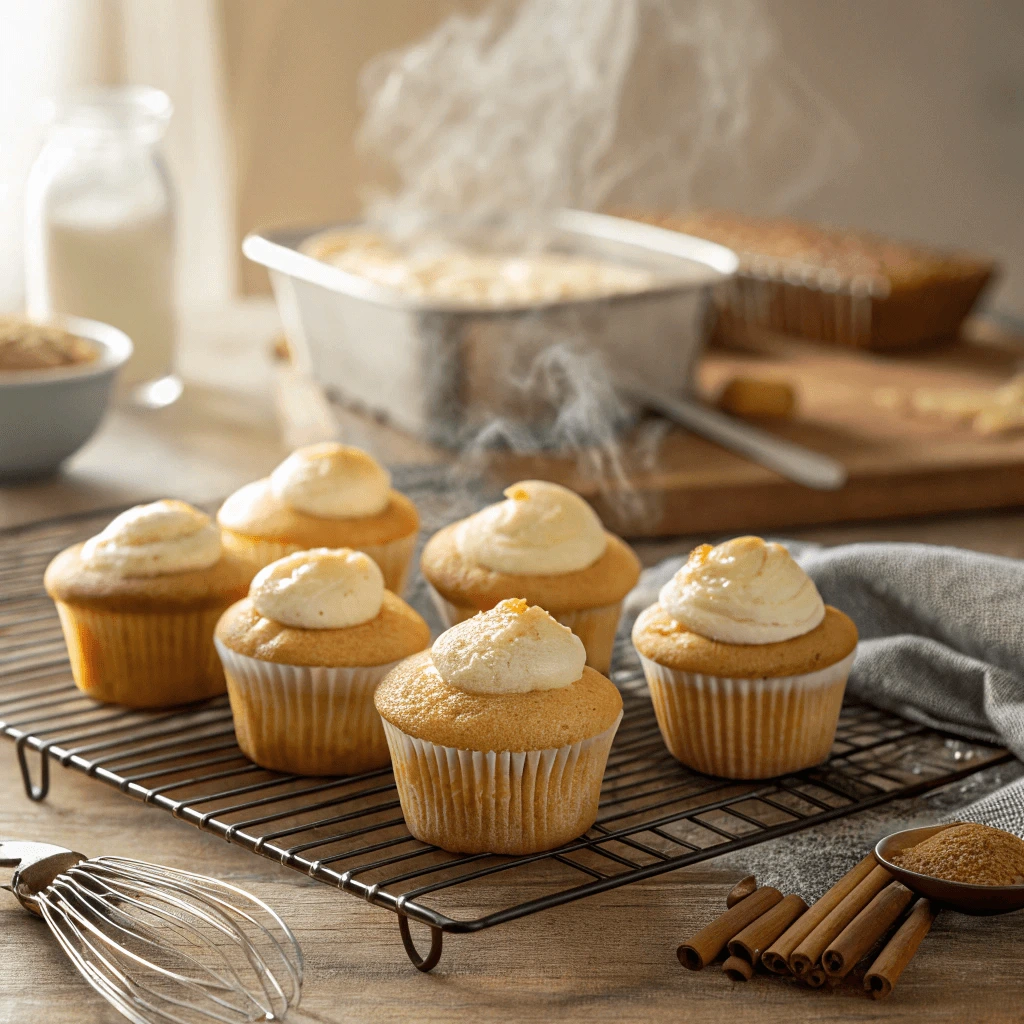
1. Chai Spice Cupcakes: A Warm, Spiced Delight
Chai spices bring warmth and depth to gluten-free cupcakes, offering a cozy and aromatic flavor profile. The combination of cinnamon, cardamom, cloves, and ginger creates a fragrant and slightly spicy cupcake that’s perfect for fall or winter.
Why Choose Chai Spice?
Chai spice cupcakes are perfect for those who love aromatic spices and want a more complex flavor. The warm spices make them comforting, while the slight heat from the ginger gives them a unique edge. This combination pairs well with both simple buttercream frosting or a tangy cream cheese frosting to balance out the spiciness.
Perfect Pairings
Top your chai spice cupcakes with a drizzle of honey or maple syrup to enhance the natural sweetness. A sprinkle of cinnamon on top of the frosting can also provide an extra punch of flavor and a visually appealing finish.
2. Matcha Green Tea Cupcakes: An Earthy Twist
Matcha, the powdered green tea, offers a beautiful vibrant color and a subtly earthy flavor that works wonderfully in gluten-free cupcakes. This trendy flavor has become increasingly popular, not only for its health benefits but also for its distinct taste.
Health Benefits of Matcha
Matcha is rich in antioxidants and offers a calming, steady energy boost, making it a popular choice for health-conscious bakers. When added to cupcakes, it provides a slightly grassy flavor that pairs well with sweet frosting or even a white chocolate glaze.
Matcha Cupcake Variations
If you want to make your matcha cupcakes even more interesting, consider incorporating white chocolate chips into the batter for a sweet contrast. Alternatively, a light lemon or honey frosting complements the flavor of matcha, offering balance to its earthiness.
3. Lavender Honey Cupcakes: A Floral and Sweet Sensation
Lavender is a delicate and fragrant flower that pairs wonderfully with honey in gluten-free cupcakes. The subtle floral notes of lavender, combined with the natural sweetness of honey, create an elegant and refined cupcake flavor.
Balancing Floral and Sweet Flavors
When using lavender in baking, it’s important not to overdo it. A little bit goes a long way, and too much lavender can overwhelm the other flavors. Honey adds a rich sweetness that complements the floral notes of lavender, while a light frosting or glaze adds the perfect finishing touch.
Decoration Ideas
To elevate the visual appeal of lavender honey cupcakes, consider decorating them with edible flowers, like fresh lavender sprigs or small violet petals. A drizzle of honey on top also enhances the flavor and adds a glossy finish.
4. Salted Caramel Pretzel Cupcakes: A Sweet-Salty Dream
Salted caramel and pretzels are a match made in heaven, and they make a deliciously unexpected flavor combination in gluten-free cupcakes. The salty pretzels provide a satisfying crunch, while the caramel brings a deep, rich sweetness.
Crafting the Perfect Cupcake
For these cupcakes, use gluten-free pretzels that are crumbled into the batter. This adds a nice texture and a touch of saltiness that contrasts beautifully with the caramel flavor. Top your cupcakes with a swirl of salted caramel frosting and a few more pretzel crumbs for the perfect balance of salty and sweet.
Flavor Variations
You can also incorporate a bit of chocolate into the batter or frosting for an added layer of richness. Dark chocolate pairs exceptionally well with the caramel and salt, taking these cupcakes to a decadent level.
5. Coconut Lime Cupcakes: Tropical Bliss in Every Bite
Coconut and lime are a classic tropical combination that works wonderfully in gluten-free cupcakes. The tropical flavor of coconut combines with the bright acidity of lime for a refreshing treat that feels like a mini vacation in every bite.
Making Coconut Lime Cupcakes
To get the best coconut flavor, use shredded unsweetened coconut in the batter. A hint of lime zest and lime juice will add the necessary acidity and brightness. For frosting, coconut cream paired with lime zest creates a velvety, tropical topping that completes the cupcake.
Tropical Garnishes
Top your coconut lime cupcakes with toasted coconut flakes or a few slices of lime for an extra burst of flavor and visual appeal. These cupcakes are perfect for summer parties or any occasion where you want to bring a bit of sunshine to the table.
Creative Toppings and Frosting Ideas for Gluten-Free Cupcakes
Classic Buttercream Frosting
Classic buttercream frosting is a staple in cupcake decoration and provides a smooth, creamy, and sweet topping that pairs perfectly with many types of cakes and cupcakes. Known for its versatility and rich texture, buttercream can be flavored and colored in countless ways to match any occasion. Whether you’re decorating gluten-free cupcakes for a birthday or a special celebration, classic buttercream frosting is an easy and delicious choice.
1. What Makes Buttercream Frosting So Special?
Buttercream frosting is loved for its smooth, velvety texture and its perfect balance of sweetness and richness. The key to its success lies in its simple ingredients: butter, powdered sugar, vanilla extract, and a small amount of milk or cream. These ingredients come together to create a fluffy and easy-to-pipe frosting that holds its shape beautifully.
Why Use Buttercream?
Buttercream frosting stands out because of its ease of preparation and the variety of ways it can be customized. Its rich flavor, paired with a delicate sweetness, complements almost any cupcake flavor. Additionally, its ability to take on different textures—from soft and creamy to stiff and firm—makes it the go-to frosting for decorators and casual bakers alike.
2. How to Make Classic Buttercream Frosting
Making buttercream frosting from scratch is simple, and it requires just a few ingredients. Here’s the basic method:
Ingredients:
- 1 cup (2 sticks) unsalted butter, softened
- 4 cups powdered sugar
- 2 teaspoons vanilla extract
- 2-4 tablespoons heavy cream or milk (for desired consistency)
Instructions:
- Begin by beating the softened butter on medium speed until it becomes light and fluffy. This can take about 3-5 minutes, depending on your mixer.
- Gradually add the powdered sugar, one cup at a time, ensuring that it incorporates fully into the butter.
- Once all of the powdered sugar is mixed in, add the vanilla extract and 2 tablespoons of heavy cream or milk. Continue to beat the frosting, adding more milk if needed until you reach a smooth and spreadable consistency.
- Beat the frosting for another 3-5 minutes on high speed to make it fluffy and light.
- Taste the frosting to see if it needs additional vanilla or a pinch of salt to balance out the sweetness.
Tips for the Perfect Texture:
- If you prefer a stiffer frosting for piping, reduce the amount of milk or cream. For a softer, spreadable frosting, add more milk to achieve the desired consistency.
- Always make sure your butter is softened to room temperature before beginning. Cold butter will create lumps and make it difficult to achieve a smooth consistency.
3. Flavor Variations for Buttercream Frosting
While classic buttercream frosting is delicious on its own, you can experiment with various flavors to complement your gluten-free cupcakes. Here are a few ideas to get you started:
Chocolate Buttercream:
To turn your classic buttercream into a chocolate version, simply add unsweetened cocoa powder or melted chocolate. For a chocolate buttercream, sift ½ cup of cocoa powder into the powdered sugar and follow the same instructions. If you want a richer chocolate flavor, add 4 ounces of melted chocolate to the frosting for an indulgent treat.
Fruit Flavored Buttercream:
Adding fruit purees to buttercream frosting can create a refreshing, fruity flavor. Puree fresh fruits like strawberries, raspberries, or lemon zest, and mix them into the frosting for a natural, vibrant taste. Keep in mind that adding fruit can slightly change the consistency, so you may need to adjust the amount of powdered sugar or milk.
Citrus Buttercream:
To make a citrus-infused buttercream, simply add a bit of lemon or orange zest to the mixture. You can also incorporate a little citrus juice for an added tang. This variation is particularly refreshing when paired with fruit-flavored cupcakes, like lemon poppy seed or strawberry.
4. How to Pipe and Decorate with Buttercream Frosting
One of the best things about buttercream is its ability to be piped into intricate designs on your gluten-free cupcakes. Whether you’re creating rosettes, swirls, or simple decorative borders, buttercream’s consistency makes it easy to achieve beautiful, professional-looking results.
Piping Tips:
- For intricate piping designs, use a piping bag with a large star tip or a small round tip to create fine details.
- For a smooth finish, spread the frosting on the cupcake with a spatula, and then use a bench scraper to smooth it out.
- If you want to create rose swirls, start at the center of the cupcake and work your way out in a circular motion.
Decorating Ideas:
- Sprinkles and Edible Glitter: Add sprinkles or edible glitter to the buttercream for a festive look.
- Fresh Fruit: Top cupcakes with fresh fruit like berries or citrus slices for a natural, elegant decoration.
- Chocolate Shavings or Crumbs: Shave chocolate on top for an extra layer of indulgence, or crumble gluten-free cookies for added texture and crunch.
5. Storing Buttercream Frosting
If you’re not using your buttercream immediately, it’s important to store it properly to maintain its texture and freshness. You can store it in an airtight container in the refrigerator for up to a week. Before using, let it come to room temperature and beat it again to restore its smooth consistency.
For longer storage, you can freeze buttercream frosting for up to three months. Thaw it in the fridge overnight and beat it to bring it back to life before using.
Vegan Frosting for Dairy-Free Options
For those following a vegan or dairy-free diet, traditional buttercream frosting made with butter and cream just won’t do. Thankfully, vegan frosting options are just as delicious, creamy, and versatile. By using plant-based substitutes for dairy ingredients, you can create frosting that is rich, smooth, and ideal for decorating your gluten-free cupcakes.
1. Key Ingredients for Vegan Frosting
The key to making vegan frosting is swapping out the dairy elements like butter and cream for plant-based alternatives. These alternatives still provide the same creamy texture and rich flavor without compromising the frosting’s structure. Below are some common ingredients you’ll need to create a luscious vegan frosting:
Vegan Butter:
Vegan butter is a plant-based substitute for dairy butter, and it provides the same smooth, rich texture. It’s typically made from oils such as coconut, olive, or sunflower oil. Look for a vegan butter that has a similar consistency to regular butter for the best results.
Coconut Cream:
For a dairy-free alternative to heavy cream, coconut cream is an excellent choice. It’s rich and thick, offering the perfect texture for frosting. Coconut cream also adds a slight coconut flavor, which works wonderfully with tropical cupcake flavors, but you can also use other non-dairy milks like almond or oat milk for a more neutral flavor.
Powdered Sugar:
As with traditional buttercream frosting, powdered sugar is used in vegan frosting for sweetness and structure. Powdered sugar dissolves easily, helping to create a smooth, velvety frosting that holds up well for decorating cupcakes.
Vanilla Extract:
Vanilla extract remains a constant in both traditional and vegan frostings. It enhances the flavor and brings out the sweetness, making the frosting more balanced and aromatic.
2. How to Make Vegan Frosting
Making vegan frosting from scratch is simple and requires just a few key ingredients. Here’s a basic recipe to get you started:
Ingredients:
- 1 cup vegan butter, softened
- 4 cups powdered sugar
- 2-3 tablespoons coconut cream (or other non-dairy milk)
- 1 teaspoon vanilla extract
- A pinch of salt (optional, but helps balance the sweetness)
Instructions:
- Cream the Vegan Butter: Begin by beating the softened vegan butter with an electric mixer on medium speed until it’s smooth and creamy. This will usually take about 3-4 minutes.
- Add Powdered Sugar: Gradually add in the powdered sugar, one cup at a time, ensuring that it’s well-incorporated into the butter. This prevents the sugar from dusting your kitchen and ensures a smooth texture.
- Incorporate Coconut Cream and Vanilla: Add the coconut cream (or another plant-based milk) along with the vanilla extract. Continue to mix until the frosting becomes smooth and fluffy. If you find the frosting is too thick, you can add more coconut cream or non-dairy milk to reach the desired consistency.
- Adjust Consistency and Taste: Taste your frosting and adjust the sweetness or vanilla flavor if needed. If the frosting is too runny, add more powdered sugar until it reaches the right thickness. For a stiffer consistency for piping, reduce the amount of coconut cream used.
3. Variations of Vegan Frosting
Just because you’re making a vegan frosting doesn’t mean it has to be plain. You can get creative with different flavors, colors, and even textures to suit your cupcakes and make them extra special. Here are a few fun variations:
Chocolate Vegan Frosting:
To turn your vegan frosting into a chocolate version, simply add unsweetened cocoa powder to the mix. About ½ cup of cocoa powder will do the trick, but feel free to adjust depending on how rich you want the chocolate flavor to be. You can also melt dark vegan chocolate and incorporate it into the frosting for an extra indulgent touch.
Fruit-Flavored Vegan Frosting:
If you prefer fruity flavors in your frosting, you can add pureed fruits like strawberries, raspberries, or mango. For a tangy twist, try adding lemon or lime zest to the frosting base. Fruit purees can affect the consistency, so if it becomes too runny, just add a little more powdered sugar or vegan butter to thicken it up.
Mint or Matcha Vegan Frosting:
For a refreshing mint-flavored frosting, add a few drops of mint extract. Alternatively, for a unique flavor and a burst of green color, you can mix in some matcha powder. Just be sure to use a good-quality culinary-grade matcha powder to avoid a bitter taste.
Spices and Nuts:
Incorporating spices like cinnamon or nutmeg into your frosting can complement the flavors of autumn or spice-themed cupcakes. You can also add finely chopped nuts like pecans or walnuts for a bit of crunch and flavor, especially when paired with carrot cake or pumpkin cupcakes.
4. Piping and Decorating with Vegan Frosting
Vegan frosting is just as versatile as traditional buttercream, and it can be piped into various shapes, swirls, and patterns. Whether you want to create elegant rosettes or simple swirls, vegan frosting holds up well for all types of cupcake decorations.
Piping Tips:
- For softer, creamier frosting, use a medium or large round piping tip.
- For more decorative and intricate designs, opt for a star-shaped piping tip. Vegan frosting holds its shape well, so you can create beautiful rosettes, shells, or flowers.
- If you want a smooth and professional-looking finish, use an offset spatula to spread the frosting over the cupcake and then smooth it with a bench scraper.
Decorating Ideas:
- Edible Flowers: Vegan frosting works beautifully with edible flowers like pansies, violets, or marigolds. These flowers add a natural and colorful touch to your cupcakes.
- Sprinkles: Top your vegan cupcakes with colorful sprinkles, sugar crystals, or edible glitter for a fun and festive look.
- Fresh Fruit or Jam: Fresh berries or a dollop of fruit preserves or jam can be used to decorate your cupcakes and enhance the fruit flavors of the frosting.
5. Storing and Using Vegan Frosting
Like traditional frosting, vegan frosting can be stored for later use. Keep it in an airtight container and refrigerate it for up to 5-7 days. Before using it, let it come to room temperature and give it a quick stir to restore its creamy texture.
Freezing Vegan Frosting:
If you have leftover vegan frosting, you can freeze it for later use. Store the frosting in a freezer-safe container, and it will last for up to three months. Thaw it in the fridge overnight and beat it again before using it to restore its fluffy consistency.
Fun Cupcake Decorations
Decorating your gluten-free cupcakes is a fun way to enhance their appeal. Whether you’re aiming for a vibrant, themed look or an elegant finish, these decoration ideas will help bring your cupcakes to life.
1. Edible Glitter and Sprinkles
Sprinkles and edible glitter add instant fun and color. Opt for glitter sprinkles in various colors for a sparkling finish or use nonpareils for a textured look. Sugar crystals give a crunchy, shimmery touch, perfect for any occasion.
2. Fresh Fruits and Berries
Fresh fruits not only enhance flavor but also bring vibrant color. Berries like strawberries and blueberries are classic choices, while citrus slices (lemons or oranges) offer a zesty twist. For something exotic, try tropical fruits like mango or pineapple.
3. Fondant Decorations
Fondant is perfect for creating intricate designs. You can make flowers or simple cut-out shapes like hearts and stars. Fondant is also great for creating textured patterns for a refined look.
4. Themed Cupcake Toppers
Cupcake toppers instantly personalize your cupcakes. Choose from birthday-themed toppers or holiday-specific designs like pumpkins for Halloween or hearts for Valentine’s Day. Custom printed designs are another fun option to match any occasion.
5. Piping Techniques
Piping allows for detailed decoration. Use a star tip to create elegant swirls, or a petal tip for beautiful rose designs. Shells and borders add a polished, textured edge to your cupcakes.
6. Chocolate Shavings and Drizzles
Chocolate always adds richness to cupcakes. Use a vegetable peeler to create chocolate curls or drizzle melted chocolate over the frosting. These simple touches can make your cupcakes look decadent and delicious.
Expert Tips for Baking Gluten-Free Cupcakes Like a Pro
Baking Tools You’ll Need
Having the right tools makes baking gluten-free cupcakes easier and more enjoyable. These essential tools will help you get the best results.
1. Mixing Bowls
Choose a set of mixing bowls in various sizes. Stainless steel or glass bowls work best for mixing your ingredients thoroughly.
2. Electric Mixer or Stand Mixer
An electric hand mixer or stand mixer will ensure smooth batter consistency. These are especially helpful when working with gluten-free flours.
3. Cupcake Pans and Liners
Opt for non-stick cupcake pans for even baking. Use paper or silicone liners to prevent sticking and make cleanup easier.
4. Measuring Cups and Spoons
Accurate measurements are key to gluten-free baking. Use separate cups for dry and wet ingredients and always measure carefully.
5. Sifting Tools
A fine-mesh sifter helps prevent clumps in your gluten-free flour, ensuring an even batter texture.
6. Spatulas and Whisks
Silicone spatulas help scrape down bowls, while whisks incorporate air into your batter, helping create light cupcakes.
7. Oven Thermometer
An oven thermometer ensures your oven is at the correct temperature, helping prevent overbaking or underbaking.
8. Cooling Rack
After baking, let your cupcakes cool on a cooling rack to avoid sogginess and maintain their texture.
9. Piping Bags and Tips
For professional-looking cupcakes, use piping bags and decorating tips to create beautiful frosting designs.
How to Store and Keep Your Cupcakes Fresh
Proper storage is key to keeping your gluten-free cupcakes fresh, moist, and delicious for as long as possible. If you plan to bake your cupcakes in advance or have leftovers, following these tips will ensure they stay in top condition.
1. Cool Your Cupcakes Completely Before Storing
After baking, allow your cupcakes to cool completely on a wire rack. This prevents condensation from forming inside your storage container, which can make the cupcakes soggy. It’s essential to let them cool at room temperature, as placing warm cupcakes in storage too soon can cause them to lose their texture.
2. Store Cupcakes at Room Temperature
For cupcakes that will be consumed within a few days, store them at room temperature. Place them in an airtight container to keep moisture locked in, ensuring that the cupcakes remain soft and fresh. Be sure to keep them in a dry area, away from direct sunlight or heat, as this can cause them to dry out.
3. Refrigerate Cupcakes for Extended Freshness
If you need to store cupcakes for more than a few days, refrigeration is the best option. However, make sure to cover the cupcakes with plastic wrap or place them in an airtight container to prevent them from absorbing odors from other foods. Refrigeration can cause cupcakes to dry out slightly, so it’s recommended to let them sit at room temperature for a few minutes before serving.
4. Freezing Cupcakes for Long-Term Storage
Freezing is a great way to preserve cupcakes for weeks or even months. First, allow your cupcakes to cool completely. Then, wrap each cupcake individually in plastic wrap, followed by a layer of aluminum foil. Place the wrapped cupcakes in a freezer-safe bag or airtight container, and store them in the freezer. To thaw, simply leave them at room temperature for about an hour or heat them in the microwave for a few seconds to restore their softness.
5. Avoid Storing Cupcakes with Frosting in the Fridge for Too Long
While refrigeration is essential for some cupcake types, frosting can be delicate. Storing cupcakes with frosting for an extended period can cause the frosting to harden or lose its texture. If you plan to frost your cupcakes in advance, it’s best to store the unfrosted cupcakes at room temperature and add the frosting just before serving.
6. Use Cake Domes or Cupcake Boxes for Special Occasions
If you’re taking your cupcakes to a party or special event, protect them with cake domes or cupcake boxes. These storage solutions not only preserve the freshness but also make it easy to transport your cupcakes without damaging them. The airtight design ensures your cupcakes stay intact and fresh during the journey.
7. How to Handle Overbaked Cupcakes
If your cupcakes are slightly overbaked or have dried out a bit, there’s still hope! You can bring back moisture by lightly covering them with a damp paper towel and microwaving them for a few seconds. Alternatively, serving them with a side of fresh fruit or custard can enhance their flavor and moisture.
Troubleshooting Common Gluten-Free Cupcake Problems
Baking gluten-free cupcakes can be tricky, but don’t worry – most issues are easy to fix. Here are some common problems and how to solve them:
1. Cupcakes Are Too Dense
- Check your flour blend: Make sure you’re using a flour blend with the right balance of starches.
- Avoid overmixing: Mix the batter just until combined.
- Adjust liquids: Gluten-free flours absorb more liquid, so add a bit more moisture if needed.
2. Cupcakes Won’t Rise
- Fresh leavening agents: Ensure your baking powder or soda is fresh.
- Correct oven temperature: Use an oven thermometer to avoid under or overbaking.
- Don’t overfill liners: Leave room for the cupcakes to expand.
3. Cupcakes Are Too Dry
- Use enough wet ingredients: Add moisture with oils, applesauce, or dairy-free milk.
- Shorten baking time: Overbaking dries them out, so check a few minutes before the recommended time.
- Use binding agents: Add xanthan gum or guar gum to help retain moisture.
4. Cupcakes Stick to Liners
- Increase fat content: Use enough butter or oil to prevent sticking.
- Let them cool: Allow cupcakes to cool for 10 minutes before removing from liners.
5. Cupcakes Have a Gritty Texture
- Adjust your flour blend: Try a finer flour blend or sift the dry ingredients.
- Add extra flavor: Vanilla, citrus, or spices can mask any off tastes.
By addressing these common baking problems, you can troubleshoot your gluten-free cupcakes and enjoy the perfect batch every time!
Conclusion
Baking gluten-free cupcakes doesn’t have to be intimidating. By understanding the key components like choosing the right flour, using binding agents, and experimenting with flavors, you can create delicious, light, and moist cupcakes every time. Remember, practice makes perfect, so don’t be afraid to experiment with different ingredients and try new flavors!
Now it’s time for you to get baking! Try out the recipes and tips shared in this guide, and make these cupcakes your own. Whether you’re a seasoned baker or just starting out, there’s always room for creativity in the kitchen.
We’d love to hear from you! Share your favorite gluten-free cupcake recipe in the comments below or let us know any baking tips you’ve learned along the way. Happy baking!