If you’re a fan of fresh, flavorful sushi-grade salmon, you’re in for a treat! In this post, we’ll explore the top 5 recipes using sushi-grade salmon that will elevate your cooking and impress your guests. Whether you’re looking for a simple yet elegant dish like salmon nigiri or a creative twist with a salmon poke bowl, these recipes are perfect for making the most of this premium ingredient. Let’s dive into these mouthwatering options that highlight the delicate flavors and textures of sushi-grade salmon.
What Is Sushi Grade Salmon and Why It’s Essential for Top Recipes?
Understanding Sushi Grade Salmon
Sushi-grade salmon refers to the highest quality fish safe for raw consumption. The term often causes confusion, as it’s not an official classification but rather a standard for ensuring the fish is safe and fresh.
What Makes Salmon Sushi Grade?
The key factor in sushi-grade salmon is its freshness and the safety measures used to handle it. To prevent parasites, salmon must be frozen at -4°F (-20°C) for at least seven days. Freezing at these temperatures kills harmful parasites, ensuring that the fish is safe for raw consumption.
The Freezing Process and Quality
Freezing plays a vital role in both safety and texture. While some argue freezing affects the texture, properly frozen salmon remains tender and perfect for dishes like sushi and sashimi. Freezing helps preserve the fish’s delicate texture, making it ideal for raw preparations.
Freshness Matters
Freshness is essential for sushi-grade salmon. The fish should have bright, vibrant color, firm flesh, and a clean ocean-like scent. If it smells fishy or sour, it’s a sign the salmon isn’t fresh and likely isn’t sushi-grade.
Where to Buy Sushi-Grade Salmon
Look for trusted suppliers who handle fish with care. Whether you shop at fish markets, grocery stores, or online, ensure the salmon is stored and frozen properly. Always ask about the fish’s handling and freezing processes to make sure it’s truly sushi-grade.
How to Choose the Best Sushi Grade Salmon
When selecting sushi-grade salmon, you should focus on freshness, texture, and sourcing. Here are key tips to ensure you’re getting the best quality fish.
1. Look for Freshness
Sushi-grade salmon should have a bright, vibrant color—typically a rich pink or red. The flesh should feel firm and bounce back when pressed. Avoid fish that appears dull or mushy.
2. Check the Smell
Fresh salmon has a clean, ocean-like scent. A strong fishy or sour odor means the salmon is not fresh and should be avoided for sushi.
3. Choose a Reputable Source
Ensure that your salmon is labeled as sushi-grade by a trusted supplier. If in doubt, ask about the fish’s origin and how it was frozen to meet safety standards.
4. Consider the Type of Salmon
Different salmon types, like king or sockeye, offer varying textures and flavors. King salmon has a rich, buttery texture, while sockeye is leaner and firmer. Choose based on your taste preference.
Variations and Toppings for Poke Bowls
Poke bowls are a customizable dish, with endless combinations of ingredients that cater to every taste. Here are some popular variations and toppings for a delicious poke bowl.
1. Base Ingredients
The base of your poke bowl sets the tone:
- White Rice: The traditional choice for a mild, sticky foundation.
- Brown Rice: Offers a nutty flavor and extra fiber.
- Mixed Greens: A light, low-carb option.
- Zucchini Noodles: For a gluten-free or keto-friendly base.
2. Protein Options
While sushi-grade salmon is a top choice, consider these alternatives:
- Tuna: Leaner with a firmer texture.
- Tofu: Great for a vegetarian or vegan bowl.
- Shrimp: Adds a light, savory flavor.
3. Toppings
The toppings make your poke bowl shine. Popular choices include:
- Avocado: Creamy texture to balance other ingredients.
- Edamame: Protein-packed and slightly nutty.
- Seaweed Salad: Adds a refreshing umami flavor.
- Fried Onions: For extra crunch.
4. Sauces
Choose the perfect sauce to enhance the flavor:
- Soy Sauce: A classic, salty option.
- Spicy Mayo: Creamy with a hint of spice.
- Ponzu: A citrusy, refreshing sauce.
- Sriracha: For those who love heat.
5. Garnishes
Finish your bowl with these garnishes for extra flavor:
Chili Flakes: A spicy kick for heat lovers.
Green Onions: A fresh, sharp bite.
Sesame Seeds: For a nutty finish.
Recipe #1: Classic Salmon Nigiri
Ingredients for Salmon Nigiri
Salmon Nigiri is a simple yet delicious sushi dish that showcases the rich flavor of sushi-grade salmon. The ingredients for making this classic sushi are minimal but essential for achieving the best taste and texture. Here’s a breakdown of what you’ll need:
1. Sushi-Grade Salmon
The star of Salmon Nigiri is the sushi-grade salmon, which is known for its freshness and safe consumption raw. It should be sliced thinly across the grain for the best texture. Look for vibrant, deep red or orange color and firm, smooth flesh. Always ensure the salmon is from a trusted source, as it should meet specific quality standards for raw consumption.
2. Sushi Rice
Sushi rice, or shari, is sticky and slightly sweet, acting as the perfect base for your fish. To make it:
- Cook short-grain Japanese rice.
- Season it with a mixture of rice vinegar, sugar, and salt while it’s still warm.
The rice should be slightly warm, not hot, when you form the nigiri to ensure the salmon stays fresh.
3. Wasabi
Wasabi adds a spicy kick and is traditionally placed under the slice of salmon. If you prefer a milder flavor, you can skip it or use less. Fresh wasabi is ideal, but store-bought versions will work just fine.
4. Soy Sauce
A small dish of soy sauce is used for dipping the nigiri, providing a salty contrast to the rich flavors of the salmon. Opt for high-quality, low-sodium soy sauce to enhance the delicate taste of the fish without overwhelming it.
5. Pickled Ginger
Pickled ginger, or gari, is traditionally served on the side to cleanse the palate between bites of different sushi. Its slightly sweet and tangy flavor helps balance the richness of the salmon.
6. Optional Garnishes
While not mandatory, certain garnishes can add extra flavor and aesthetic appeal:
Shiso Leaves: An aromatic leaf that adds a refreshing, minty flavor when used as a garnish.
Sesame Seeds: Toasted sesame seeds can add a bit of crunch and nuttiness.
Chopped Green Onions: A hint of sharpness can complement the richness of the salmon.
How to Prepare Salmon Nigiri
Salmon nigiri is a simple and delicious sushi dish made with fresh, sushi-grade salmon and vinegared rice. Follow these steps to prepare perfect salmon nigiri:
1. Prepare the Sushi Rice
Start by making sushi rice. Rinse 1 cup of short-grain rice until the water runs clear. Cook the rice in a rice cooker or on the stovetop, then let it cool slightly. Once cooled, gently stir in 2 tablespoons of rice vinegar, 1 tablespoon of sugar, and 1 teaspoon of salt. Let the rice rest at room temperature.
2. Slice the Salmon
Use fresh, sushi-grade salmon. Slice it into thin pieces, about 1/4 inch thick, across the grain. The slices should be long enough to cover the rice but not too wide. Make sure the salmon is at the proper temperature for serving—slightly chilled but not too cold.
3. Shape the Rice
Wet your hands with water to prevent the rice from sticking. Take a small amount of rice (about 2 tablespoons) and shape it into a compact oval. Be gentle to avoid crushing the rice. The rice should feel firm but not too tight.
4. Assemble the Nigiri
Place a slice of salmon on top of each rice ball. Press down gently to ensure the fish adheres to the rice without squishing the rice itself.
5. Garnish (Optional)
For extra flavor, you can lightly drizzle soy sauce or add a small dab of wasabi between the salmon and rice. You can also garnish with thinly sliced scallions, sesame seeds, or a touch of lemon zest for a unique twist.
6. Serve Immediately
Nigiri is best served fresh. Arrange the pieces on a plate and serve with soy sauce, pickled ginger, and wasabi. Enjoy your salmon nigiri as part of a sushi meal or on its own!
Tips for Perfecting Your Nigiri
Mastering salmon nigiri requires the right technique and ingredients. Here are some key tips to help you get it just right:
1. Use Sushi-Grade Salmon
For the best flavor and texture, always choose fresh, sushi-grade salmon. It ensures safety and enhances the taste of your nigiri.
2. Perfect Your Sushi Rice
Make sure your sushi rice has the right sticky texture. Rinse it well before cooking and fold in vinegar, sugar, and salt once it’s cooled to room temperature.
3. Shape the Rice Gently
Form small, oval-shaped rice balls by pressing gently. Don’t compact the rice too much to keep it light and airy.
4. Slice the Fish Thinly
Use a sharp knife to slice the salmon into thin, even pieces (about 1/4 inch thick). This makes the fish tender and enhances its flavor.
5. Control the Wasabi
Apply just a tiny bit of wasabi between the rice and the salmon to avoid overpowering the delicate taste of the fish.
6. Serve Immediately
Sushi is best when served fresh. Assemble your nigiri right before serving to keep the ingredients at their peak.
7. Experiment with Presentation
Arranging your nigiri neatly and adding garnishes like sesame seeds or thinly sliced scallions can elevate both the flavor and appearance.
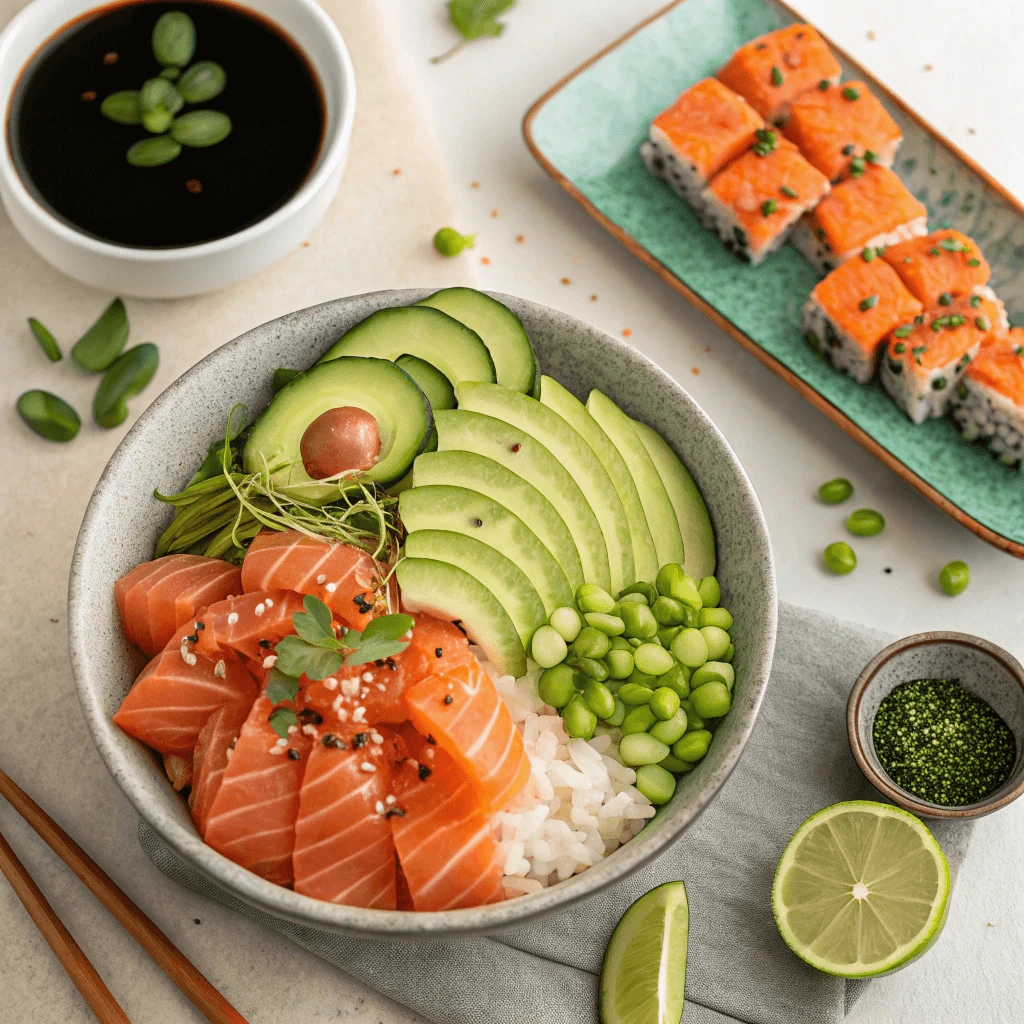
Recipe #2: Fresh Salmon Poke Bowl
Poke Bowl Ingredients
Poke bowls are customizable and versatile, making them a great dish for any occasion. The key is to balance flavors and textures, from fresh fish to the base and toppings. Here’s a breakdown of the essential ingredients that make up a delicious poke bowl.
1. Fresh Fish
The core of any poke bowl is high-quality, sushi-grade fish. Salmon is a popular choice for its buttery texture, while ahi tuna offers a firmer bite. Always make sure the fish is fresh and sourced from a reputable supplier.
2. Base: Rice or Greens
Choose your base depending on preference or dietary needs. Sushi rice, seasoned with vinegar, sugar, and salt, adds a tangy flavor. Alternatively, opt for greens like spinach or mixed lettuce for a low-carb, nutrient-packed option.
3. Vegetables
Add a mix of vegetables for crunch and flavor. Common choices include cucumbers, avocado, shredded carrots, and edamame. Pickled vegetables, like ginger or radishes, can add a tangy twist.
4. Toppings
Toppings bring your poke bowl to life. Sesame seeds, nori strips, green onions, and fried garlic chips offer crunch and flavor. For heat, you can add chili flakes or fresh chilies.
5. Sauces
Sauces tie everything together. Soy sauce is a classic choice, but ponzu, spicy mayo, and eel sauce offer variety. A drizzle of sesame oil adds an extra layer of richness.
With the right combination of fresh fish, vegetables, and flavorful sauces, you can create a poke bowl that’s both satisfying and packed with flavor.
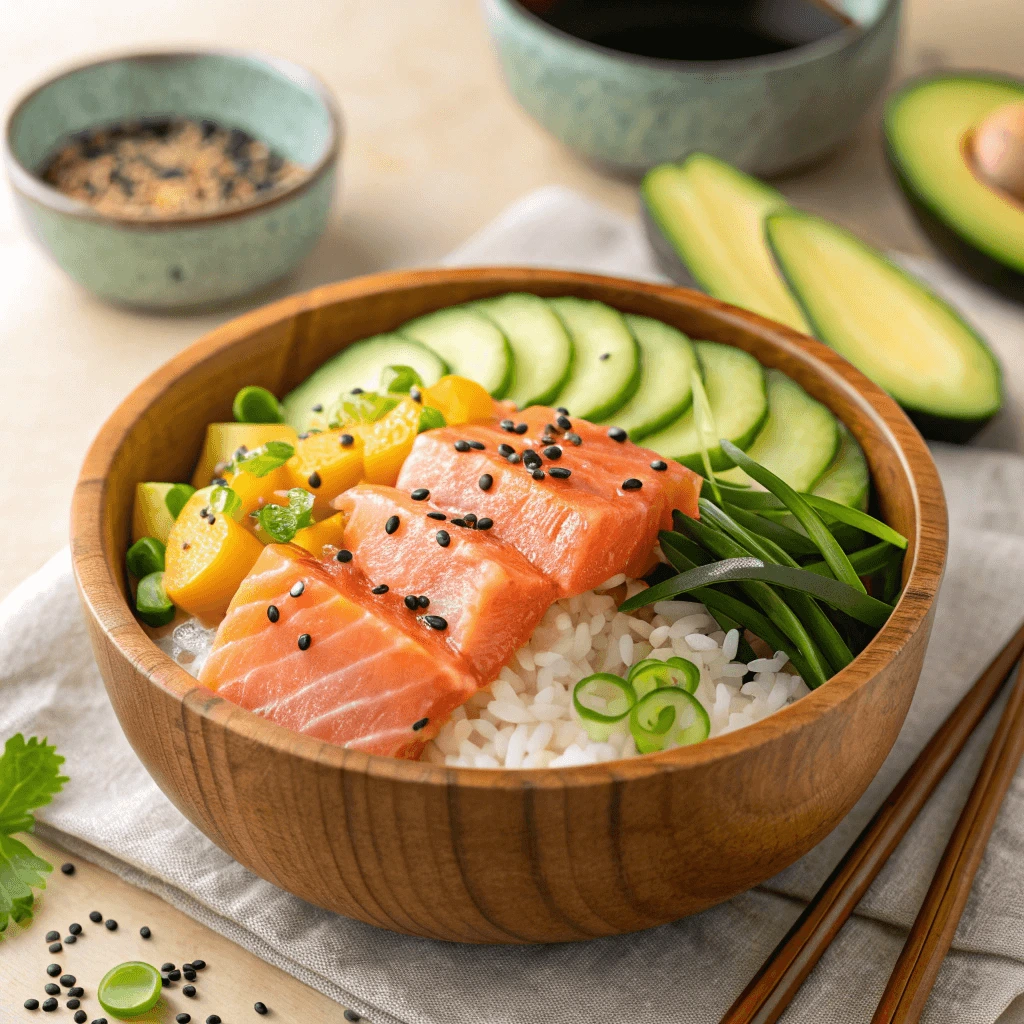
How to Make a Salmon Poke Bowl
A salmon poke bowl is a healthy, colorful, and flavorful dish that you can easily make at home. With sushi-grade salmon as the star ingredient, it’s important to balance freshness with creativity. Let’s walk through each step of making a perfect salmon poke bowl.
Select and Prepare the Salmon
Start by choosing sushi-grade salmon from a trusted source. This ensures the fish is safe to eat raw and has the best taste and texture. Cut the salmon into small, uniform cubes. For extra flavor, marinate it in a mix of soy sauce, sesame oil, a splash of rice vinegar, and a pinch of sugar. Let it sit for 10–15 minutes while you prepare the other ingredients.
Choose Your Base
Traditionally, poke bowls are built on a bed of rice—usually short-grain sushi rice. Cook the rice, then season it with a bit of rice vinegar, sugar, and salt for an authentic flavor. If you’re going for a lighter option, you can use brown rice, cauliflower rice, or even mixed greens as your base.
Add Color with Veggies and Fruits
Layer in vibrant, crunchy vegetables like sliced cucumbers, shredded carrots, edamame, avocado, and radish. For sweetness, add some mango chunks or pineapple. These ingredients add texture and contrast to the rich salmon.
Top It Off with Crunch and Spice
Now, add toppings for flavor and texture. Sprinkle on sesame seeds, chopped green onions, seaweed salad, or crispy shallots. You can drizzle with spicy mayo, ponzu sauce, or a light soy-sesame dressing to tie everything together.
Assemble and Serve
Build your bowl by placing your rice or greens on the bottom. Neatly arrange the marinated salmon and vegetables on top, then finish with sauces and toppings. Serve immediately to enjoy the freshness.
Variations and Toppings for Poke Bowls
Poke bowls offer endless room for creativity, and that’s what makes them so appealing. Whether you’re aiming for a protein-packed meal or a light, veggie-rich bowl, you can customize every component to suit your preferences. From unique proteins to bold sauces and crunchy toppings, here’s how to elevate your poke bowl.
Explore Protein Options
While sushi-grade salmon is a classic base, you don’t have to stop there. You can add or swap in other proteins like:
- Tuna – Ahi or yellowfin tuna is a popular alternative to salmon, offering a slightly firmer texture.
- Tofu – For a vegetarian twist, marinate cubed firm tofu in soy sauce, sesame oil, and lime juice.
- Cooked Shrimp or Crab – If you’re not a fan of raw fish, opt for fully cooked seafood options.
These alternatives allow you to experiment while keeping the dish fresh and flavorful.
Add a Variety of Veggies and Fruits
Mixing textures and colors can take your poke bowl from basic to brilliant. Consider adding:
- Crunchy options like shredded carrots, radish, jicama, or snow peas.
- Creamy additions such as avocado or edamame.
- Sweet contrast with mango cubes, pineapple chunks, or pickled ginger.
These elements balance the richness of the fish and add nutritional variety.
Choose Sauces and Seasonings Wisely
The sauce brings everything together. You can either drizzle it over the bowl or toss it with the fish beforehand. Try:
- Spicy mayo – A blend of mayonnaise and sriracha for a creamy kick.
- Ponzu – A light, citrus-based soy sauce that brightens the bowl.
- Yuzu or wasabi dressing – For an extra zing.
Garnish your bowl with sesame seeds, nori strips, scallions, or crispy garlic for texture and flavor.
Recipe #3: Salmon Tartare with Avocado
What You’ll Need for Salmon Tartare
Making salmon tartare at home is simpler than it looks, but it does require the right ingredients and tools. Each element plays a role in achieving a dish that’s fresh, flavorful, and perfectly balanced.
1. Choose High-Quality Sushi-Grade Salmon
Start with the most crucial ingredient—sushi-grade salmon. Make sure the fish is:
- Fresh or flash-frozen to kill parasites.
- Bright orange or deep pink, not dull or gray.
- Firm to the touch, without a fishy smell.
Purchase your salmon from a trusted fishmonger or reputable grocery store with clear sourcing practices. Always ask if it’s safe for raw consumption.
2. Gather Flavor-Enhancing Ingredients
To give your tartare layers of taste and texture, gather the following:
- Fresh herbs: Chives, dill, or cilantro add brightness.
- Aromatic vegetables: Finely chopped shallots or red onions bring a mild kick.
- Acidity: Use lemon juice or rice vinegar to balance the richness of the salmon.
- Heat: Add a touch of minced chili, sriracha, or wasabi for gentle spice.
- Oil: A drizzle of high-quality sesame oil or extra virgin olive oil adds richness.
Optional ingredients like capers, soy sauce, or Dijon mustard can also bring a briny or tangy dimension to your tartare.
3. Tools for Precision and Presentation
You’ll need just a few simple tools to prepare tartare efficiently:
- Sharp chef’s knife: Helps you cube the salmon cleanly without tearing the flesh.
- Mixing bowl: Use a non-metallic bowl to preserve the flavor of your ingredients.
- Ring mold (optional): For plating your tartare in a neat, professional-looking shape.
Make sure your utensils and cutting board are sanitized and used exclusively for raw preparations to avoid cross-contamination.
How to Prepare Salmon Tartare
Crafting salmon tartare at home is easier than you might think. With careful preparation and quality ingredients, you can create a dish that looks elegant and tastes fresh, light, and satisfying.
Step 1: Chill and Sanitize
Begin by chilling your workspace and tools. Cold salmon is easier to cut cleanly, and keeping everything cold maintains the fish’s freshness. Place your mixing bowl, knife, and cutting board in the fridge for about 10–15 minutes before starting.
Meanwhile, sanitize your cutting board and knife thoroughly. Raw fish requires strict hygiene to prevent contamination.
Step 2: Dice the Salmon
Use a sharp chef’s knife to slice the sushi-grade salmon into thin strips, then cut those strips into small cubes—about 1/4-inch or smaller for a fine tartare texture. Avoid mincing or mashing the salmon. The clean cuts preserve the fish’s delicate texture.
Transfer the diced salmon into the chilled mixing bowl immediately.
Step 3: Add the Aromatics and Seasonings
Next, gently fold in the flavoring ingredients. Try this basic combination:
- Finely chopped shallots or red onion
- A squeeze of fresh lemon or lime juice
- A few drops of sesame oil or olive oil
- Chopped chives or herbs
- Optional: A dash of soy sauce, capers, or chili for depth or heat
Mix everything gently with a spoon—don’t overmix. You want to coat the salmon with flavor while preserving its structure.
Step 4: Taste and Adjust
Before plating, taste the mixture and adjust the flavors if needed. Add more citrus juice for brightness or a bit more oil for richness. Every palate is different, so fine-tuning is key to achieving the perfect balance.
Step 5: Plate and Serve
You can plate salmon tartare in several creative ways. Use a round mold to shape it into a tidy circle, or serve it over avocado slices, cucumber rounds, or crackers for a light appetizer. Garnish with microgreens, sesame seeds, or a drizzle of additional dressing.
Serve immediately to enjoy the dish at its freshest.
Tips for Serving Tartare
Serving salmon tartare with finesse can make a simple dish feel gourmet. To bring out the best in this delicate preparation, focus on temperature control, presentation, pairing, and portioning. Here are some essential tips.
Maintain Proper Temperature
Always serve salmon tartare cold and fresh. Chill the tartare in the refrigerator until you’re ready to plate it. You can also chill serving plates in advance to help keep the fish cool while eating. If you’re hosting outdoors or during warmer months, nest the plate in a bowl of crushed ice for added freshness and safety.
Focus on Visual Presentation
A beautiful presentation enhances the dining experience. Use a round mold or food ring to shape your tartare neatly. If you don’t have one, form a mound using a spoon and gently pat it into shape. You can also serve it inside an avocado half or atop thin cucumber slices for a visually appealing and practical approach. A drizzle of sesame oil, a sprinkle of chopped chives, or a small garnish of microgreens can add elegance and color contrast.
Offer Texture Contrasts
Texture is key to balancing tartare. Serve it alongside crispy elements like toasted baguette slices, wonton crisps, or rice crackers. These add crunch and complement the creamy, tender texture of the raw salmon. You can also add texture directly into the tartare by folding in finely diced cucumber, radish, or toasted sesame seeds.
Choose Light and Balanced Accompaniments
Simple sides and sauces enhance the tartare without overpowering it. Offer small dishes of soy sauce, ponzu, or a citrus-based vinaigrette on the side. Lightly pickled vegetables, such as julienned carrots or daikon, can add brightness. For something creamy, a thin swipe of avocado purée or crème fraîche works beautifully.
Portion and Serve Immediately
When entertaining, consider serving tartare in individual portions—such as in small ramekins, glasses, or appetizer spoons. This not only looks stylish but also helps maintain freshness and hygiene. Always prepare and serve the tartare shortly before eating to preserve the quality and flavor of the raw fish.
Recipe #4: Salmon Maki Rolls (Sushi Rolls)
Maki Roll Ingredients
Creating delicious salmon maki rolls starts with choosing high-quality, fresh ingredients. Each component plays a key role in the taste, texture, and overall success of your sushi roll.
Sushi Grade Salmon
The star of your maki roll is the salmon. Always use sushi-grade salmon to ensure safety and optimal flavor. Sushi-grade salmon has been flash-frozen to kill parasites, preserving its quality and texture for raw consumption. Look for a bright, vibrant color and a clean, fresh smell.
Sushi Rice
Short-grain or medium-grain Japanese rice works best for maki rolls. Once cooked, season it with rice vinegar, sugar, and salt to give it the signature tangy flavor and sticky texture that holds the roll together. Let the rice cool to room temperature before assembling your rolls.
Nori (Seaweed Sheets)
Nori sheets form the outer layer of the maki roll. Choose high-quality, dark green nori with a crisp texture. Before using, briefly toast the sheets (if not pre-toasted) to enhance their flavor and texture.
Fillings and Add-Ins
While salmon is the main protein, you can add vegetables for crunch and contrast. Popular options include thin strips of cucumber, avocado slices, or julienned carrots. Cream cheese or spicy mayo can provide extra creaminess and depth.
Optional Seasonings and Toppings
You can sprinkle sesame seeds on the rice for added texture or drizzle spicy mayo or eel sauce over the top for flavor. Pickled ginger, wasabi, and soy sauce serve as classic accompaniments for dipping and palate cleansing.
How to Roll Maki Sushi
Rolling maki sushi may seem intimidating at first, but with a little practice and the right technique, you’ll be creating beautifully wrapped rolls in no time. Follow these steps to master the art of rolling sushi like a pro.
Prepare Your Workstation
Start by laying a bamboo sushi mat on a clean, flat surface. Cover it with a piece of plastic wrap to prevent sticking and make cleanup easier. Place a bowl of water nearby so you can wet your fingers—this keeps the rice from clinging to your hands.
Spread the Rice Evenly
Place a sheet of nori, shiny side down, on the bamboo mat. Moisten your fingers and scoop about ¾ cup of seasoned sushi rice onto the nori. Gently spread the rice across the surface, leaving about one inch of space at the top edge to seal the roll later.
If you’re making an uramaki (inside-out roll), flip the nori over so the rice is facing down before adding fillings.
Add Fillings
Line your chosen ingredients—sushi-grade salmon, avocado, cucumber, or cream cheese—horizontally across the middle of the rice. Avoid overfilling, which can make rolling messy or cause the roll to fall apart.
Roll with Confidence
Lift the edge of the bamboo mat closest to you and begin rolling it over the fillings, using your fingers to tuck them in tightly. Continue rolling forward while applying gentle pressure to shape and compact the roll. Once you reach the edge, use the exposed strip of nori to seal the roll by pressing gently.
Slice and Serve
Use a sharp knife dipped in water to slice the roll into even pieces—typically 6 to 8 per roll. Clean the knife between cuts to maintain clean edges. Serve your maki with soy sauce, pickled ginger, and wasabi for the full sushi experience.
Sushi Rolling Tips and Tricks
Rolling sushi is an art form, but with the right techniques, even beginners can achieve clean, tight, and delicious rolls. These tips and tricks will help you improve your rolling skills and elevate your homemade sushi.
Use Fresh, Sticky Sushi Rice
The key to a successful roll starts with perfectly cooked sushi rice. Make sure the rice is properly seasoned with rice vinegar, sugar, and salt. Use short-grain Japanese rice, as it holds together better than long-grain varieties. Always let the rice cool slightly before handling—it should be warm, not hot.
Keep Your Hands Wet
Sushi rice is sticky by design. To prevent it from clinging to your fingers, keep a small bowl of water nearby. Wet your fingers before spreading the rice on the nori sheet. This small step makes a big difference in keeping the rice manageable and evenly distributed.
Don’t Overfill the Roll
It’s tempting to pile on your favorite fillings, but too much can cause the roll to burst or become uneven. Stick to two or three main ingredients for a balanced, tight roll. Place the fillings horizontally in the center of the rice to help the roll keep its shape.
Apply Gentle, Even Pressure
When you start rolling, use both hands to guide the bamboo mat forward. Apply gentle but consistent pressure to compact the roll without crushing the ingredients. Lift the mat slightly as you continue rolling to avoid rolling it into the sushi.
Cut with a Wet, Sharp Knife
A dull knife can mash your sushi and ruin the presentation. Use a sharp chef’s knife and dip it in water before slicing. Clean the blade between cuts to ensure neat, clean pieces every time.
Practice Makes Perfect
Don’t worry if your first few rolls aren’t perfect. Practice improves consistency and helps you get a feel for how much pressure to apply. Experiment with different fillings and techniques, and you’ll see steady improvement with each attempt.
Recipe #5: Salmon Sashimi – Simple and Elegant
Ingredients for Salmon Sashimi
Sashimi is a beloved Japanese dish that showcases the purity and freshness of raw fish. While salmon is one of the most popular choices for sashimi, selecting the right ingredients is essential to ensure a safe, delicious, and authentic experience. Here’s what you’ll need to make perfect salmon sashimi.
Fresh, Sushi-Grade Salmon
The most crucial ingredient for salmon sashimi is the fish itself. Always choose sushi-grade salmon, which has been frozen to specific temperatures to eliminate parasites and ensure its safety for raw consumption. Look for vibrant, firm, and fatty pieces with a rich orange hue. Avoid any salmon that looks dull or has an off-putting odor, as these can indicate poor quality.
Soy Sauce for Dipping
Soy sauce is a classic accompaniment to salmon sashimi. It adds a salty, umami-rich depth of flavor that perfectly complements the delicate taste of the fish. Choose a high-quality, naturally brewed soy sauce for the best experience. You can also experiment with low-sodium soy sauce if you’re looking for a lighter version.
Wasabi for Heat
Wasabi, a spicy green paste, adds a sharp, pungent heat to the dish. In Japan, wasabi is traditionally placed atop each slice of sashimi, but you can also mix it into your soy sauce for a more intense flavor. Fresh wasabi root provides the most authentic flavor, but most home cooks use prepared wasabi paste or powder.
Pickled Ginger for Cleansing the Palate
Pickled ginger, known as gari, is often served alongside sashimi. Its tangy sweetness helps cleanse the palate between bites, ensuring you can fully appreciate the subtle flavors of each slice of salmon. Ginger also provides a refreshing contrast to the richness of the fish.
Fresh Garnishes for Presentation
Presentation plays a big role in sushi and sashimi. For an elegant touch, garnish your plate with finely shredded daikon radish, shiso leaves, or edible flowers. These not only enhance the dish’s aesthetic appeal but also add a light, crunchy texture to balance the smoothness of the salmon.
How to Slice Salmon for Sashimi
Properly slicing salmon is key to creating delicious and visually appealing sashimi. Here’s a simple guide to help you slice your salmon perfectly.
1. Use a Sharp Knife
A sharp knife, ideally a sushi knife (yanagiba), is essential for clean, smooth cuts. A sharp blade reduces pressure and prevents squashing the fish.
2. Thaw Salmon Correctly
If using frozen salmon, thaw it in the fridge for 8-12 hours. Never thaw at room temperature, as it can compromise the fish’s quality.
3. Remove the Skin (Optional)
If you prefer skinless salmon, make a small incision between the skin and flesh, then gently slide the knife to remove the skin.
4. Slice Against the Grain
Cut against the grain of the fish to ensure tenderness. This will allow for a smoother, more delicate texture.
5. Cut at an Angle
Slice the salmon at a 45-degree angle to create larger, more attractive pieces. This also improves the texture for a better eating experience.
6. Maintain Uniform Thickness
Aim for slices that are about 1/4 to 1/2 inch thick. This size ensures the perfect balance of flavor and texture.
7. Serve Fresh
Sashimi is best enjoyed immediately after slicing. Serve it fresh on a chilled plate with traditional accompaniments like wasabi and pickled ginger.
How to Serve Sashimi
Serving sashimi involves more than just placing slices of fish on a plate. It’s an art that highlights freshness, flavor, and texture. Here are essential steps for serving sashimi that will elevate your dining experience.
1. Use a Chilled Plate
Always serve sashimi on a chilled plate. Cold plates help maintain the freshness and texture of the fish, ensuring it doesn’t warm up too quickly. You can chill the plate by placing it in the refrigerator or freezer for a few minutes before serving.
2. Present the Fish Neatly
Arrange the sashimi slices in a fan-like pattern or a straight line. Avoid overcrowding the plate. A neat, visually appealing arrangement enhances the overall presentation. The fish should not be overlapping, as this could negatively impact the texture and flavor.
3. Include Garnishes
Traditionally, sashimi is served with garnishes that complement the fish without overpowering it. Common garnishes include:
- Shredded Daikon Radish: This adds crunch and freshness, acting as a palate cleanser.
- Shiso Leaves: These provide a refreshing, aromatic flavor that pairs well with salmon and other fish.
- Edible Flowers: For a decorative touch, you can add colorful edible flowers.
- Citrus Slices: A small wedge of lemon or lime can enhance the freshness of the fish.
4. Accompaniments for Sashimi
The right sides enhance the sashimi without stealing the spotlight from the fish itself. Typical accompaniments include:
- Soy Sauce: A small dish of soy sauce is a must for dipping. For added complexity, consider offering low-sodium soy sauce or tamari.
- Wasabi: This fiery condiment pairs perfectly with sashimi. You can serve it either as a small mound on the plate or allow diners to mix it into their soy sauce for a personalized spice level.
- Pickled Ginger: Serve pickled ginger on the side. It helps cleanse the palate between different fish varieties, allowing each flavor to shine.
5. Serve Immediately
Sashimi is best enjoyed immediately after preparation. Its delicate texture can degrade if left out for too long. Serve it promptly, especially if it’s fresh fish, to enjoy its full flavor profile.
6. Optional Pairings
While traditional sashimi is enjoyed on its own, you can offer a variety of drinks to accompany the dish:
- Sake: Serve chilled or at room temperature for a true Japanese dining experience.
- Green Tea: A warm cup of green tea can act as a gentle palate cleanser.
- Cold Beer: A crisp, light lager or pale ale pairs well with sashimi, offering a refreshing contrast to the rich flavors of the fish.
Conclusion
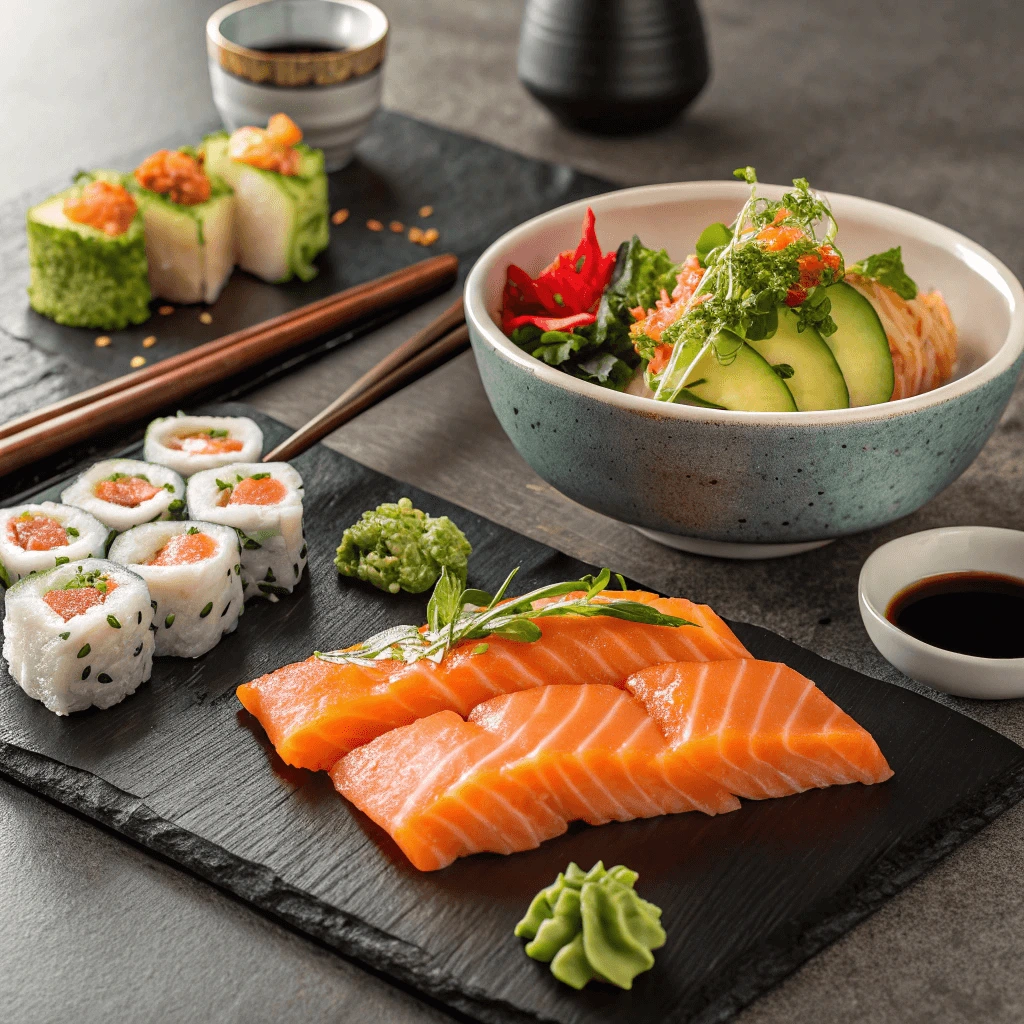
In this post, we’ve covered five delicious recipes you can make with sushi-grade salmon: Salmon Sashimi, Maki Rolls, Poke Bowls, Salmon Nigiri, and Salmon Tartare. These dishes cater to a variety of tastes, whether you’re looking for something simple like sashimi or something a bit more complex like a poke bowl.
Each recipe offers a great way to enjoy fresh, sushi-grade salmon in a unique style. Don’t hesitate to experiment with these recipes to find your personal favorite!
Feel free to share your go-to sushi-grade salmon recipe or ask any questions about preparing sushi at home in the comments!