Looking for the best gluten free snacks recipes? You’re in the right place. Whether you have celiac disease, gluten sensitivity, or simply want healthier snack options, this guide will help you find easy and delicious ideas.
We’ve gathered a variety of sweet and savory gluten-free snacks that are simple to make at home. These recipes use wholesome ingredients like almond flour, oat flour, and chia seeds. They’re perfect for kids, adults, and anyone craving something tasty without the gluten.
You’ll also get tips on how to store, pack, and shop for gluten-free snacks. No more guesswork—just straightforward, satisfying recipes to keep your snack game strong.
What Makes a Great Gluten Free Snack?
The Basics of Gluten-Free Eating
If you’re new to gluten-free living, you’re not alone. Many people choose a gluten-free diet to manage celiac disease, reduce inflammation, or simply feel better overall. But before diving into recipes, it helps to understand what gluten is and where it hides.
What Is Gluten?
Gluten is a protein found in wheat, barley, and rye. It gives dough its structure and chewy texture. While it works great in baked goods, it can cause problems for people with celiac disease or gluten sensitivity. For those with celiac disease, even a small amount can trigger a harmful immune response. People with gluten sensitivity may experience fatigue, bloating, or headaches after eating it.
Hidden Sources of Gluten
Gluten doesn’t only live in bread and pasta. It sneaks into unexpected places like soy sauce, soups, salad dressings, and even candy. Always check food labels. Watch for ingredients like wheat, barley, malt, and modified food starch. Look for certified gluten-free products when shopping. These items are tested and confirmed to meet safety standards for gluten-free eating.
Safe Ingredients to Use
There are plenty of naturally gluten-free ingredients that make snack time simple and delicious. Almond flour and coconut flour are great for baking. Certified gluten-free oats are perfect for granola, muffins, and energy bites. Chickpeas and beans add crunch and protein to savory snacks. Rice, corn, chia seeds, and flaxseeds also offer fiber and nutrients without any gluten.
Why a Gluten-Free Diet Needs Balance
Just because something is gluten-free doesn’t mean it’s healthy. Many store-bought gluten-free snacks are highly processed and low in fiber. When you make snacks at home, you can focus on whole foods, natural sweeteners, and plant-based proteins. This ensures your gluten-free diet stays balanced and full of flavor.
Key Ingredients to Look For
Choosing the right ingredients is key to making gluten-free snacks that are both tasty and nutritious. Many alternatives to wheat and barley exist, and they work beautifully in sweet and savory recipes. Below are some of the most popular and reliable options.
Gluten-Free Flours
Gluten-free flours provide the base for most snacks. Each type has its own texture and flavor, so using a blend often gives the best results.
- Almond flour offers a nutty taste and works well in cookies, muffins, and energy bites. It’s also packed with protein and healthy fats.
- Coconut flour absorbs a lot of moisture, making it ideal for soft baked goods. Use it with eggs or extra liquid to avoid dryness.
- Oat flour (certified gluten-free) brings a mild, familiar taste to bars, pancakes, and snack cakes. It also adds fiber and whole grain benefits.
Naturally Gluten-Free Grains and Seeds
Whole grains and seeds can add crunch, texture, and nutrition to your gluten-free snacks.
- Quinoa cooks quickly and contains all nine essential amino acids. Use it in snack bars or crispy bites.
- Chia seeds swell up in liquid and create a gel-like texture, perfect for puddings or binding energy bites.
- Flaxseeds provide fiber and healthy fats. When ground and mixed with water, they act as a great egg replacer in vegan snacks.
Protein and Crunchy Add-Ins
To make snacks satisfying and energy-boosting, include protein-rich or crunchy add-ins.
- Nut butters like peanut or almond butter give creamy texture and help bind ingredients.
- Chickpeas roast into a crunchy snack packed with fiber and protein.
- Pumpkin seeds and sunflower seeds add crunch and nutrients, especially zinc and magnesium.
Natural Sweeteners and Binders
Skip processed sugar and use natural alternatives when possible. These options add sweetness without overloading your snack with empty calories.
- Honey and maple syrup blend easily into batters and bind ingredients in bars and bites.
- Mashed bananas or applesauce can replace part of the fat or sugar in many recipes.
- Dates work well in no-bake recipes, offering sweetness and sticky texture for easy rolling.
Using these ingredients helps you make snacks that are naturally gluten-free, full of flavor, and better for your body. Keep these staples in your pantry, and you’ll always be ready to whip up something delicious.
Why Homemade Is Often Better
When it comes to gluten-free snacks, homemade options usually come out on top. While store-bought snacks can be convenient, making your own at home gives you more control, better nutrition, and tastier results.
Full Control Over Ingredients
When you prepare snacks at home, you get to choose exactly what goes into them. You can avoid preservatives, artificial flavors, and hidden gluten sources that sometimes sneak into packaged products. Want to cut down on sugar or add more fiber? You can adjust every recipe to match your needs.
Homemade snacks also let you choose better-quality ingredients. You can use organic produce, natural sweeteners, and high-protein flours like almond or oat. This flexibility is especially helpful for people with multiple food sensitivities or dietary goals.
Fresher, Better Flavor
Homemade snacks often taste better because they’re fresh. When you bake a batch of gluten-free granola bars or energy bites, the flavors are richer and more vibrant than what you find in a box. You can also experiment with different herbs, spices, fruits, and add-ins to match your personal preferences.
You’re not stuck with just one or two flavor choices like you are with store-bought options. Want lemon-blueberry protein balls or spicy roasted chickpeas? You can make exactly what you’re craving.
Cost-Effective and Eco-Friendly
Making your own snacks at home can save money in the long run. Store-bought gluten-free products tend to be expensive. When you buy ingredients in bulk and make larger batches, you reduce the cost per serving.
You’ll also cut down on packaging waste. Most packaged snacks come in single-use wrappers or plastic containers. Homemade snacks can go in reusable containers, making your snacking habits more eco-friendly.
Safer for Gluten-Free Lifestyles
Cross-contamination is a big concern for people who need to avoid gluten completely. Even “gluten-free” labeled products can sometimes be made in shared facilities. When you prepare snacks at home, you eliminate the risk of gluten exposure from shared equipment or accidental contact.
You can also teach your kids or family members to understand gluten-free cooking, making your whole household more aware and supportive of your needs.
Sweet Gluten Free Snacks Recipes to Satisfy Your Cravings
No-Bake Peanut Butter Energy Bites
These no-bake peanut butter energy bites are a favorite among gluten-free snack lovers. They’re quick to prepare, easy to store, and packed with flavor and nutrition. Whether you need a mid-afternoon pick-me-up or a pre-workout boost, these bites deliver energy without the crash.
Simple Ingredients with Big Benefits
You don’t need a long list of ingredients to make these energy bites. Most of the ingredients are probably already in your pantry.
- Peanut butter gives a creamy texture and adds plant-based protein and healthy fats.
- Gluten-free oats provide fiber and slow-digesting carbs to keep you full longer.
- Honey or maple syrup adds natural sweetness and helps bind the ingredients together.
- Chia seeds or flaxseeds boost the fiber content and offer omega-3 fatty acids.
- Add-ins like mini chocolate chips, shredded coconut, or dried fruit add variety and flavor.
These ingredients come together quickly in one bowl—no oven, no mess, and no hassle.
Quick and Easy to Make
Start by mixing the peanut butter and sweetener until smooth. Then stir in the oats, seeds, and any extras. Chill the mixture for about 20 minutes to make it easier to roll. Once firm, scoop and roll the mixture into bite-sized balls. Store them in an airtight container in the fridge for up to a week—or freeze them for longer storage.
Kids can help roll the bites, making this recipe family-friendly and fun. You can also double the batch to prep snacks ahead for the whole week.
Why They’re Perfect for Gluten-Free Diets
These energy bites check all the right boxes. They’re gluten-free, high in protein, naturally sweetened, and easy to customize. You avoid processed ingredients and hidden gluten, and you get a snack that’s both satisfying and energizing.
Plus, they’re portable! Pack a few in your lunchbox, gym bag, or desk drawer for a healthy option anytime hunger strikes.
Coconut Flour Chocolate Chip Cookies
Coconut flour chocolate chip cookies offer a delicious and gluten-free twist on the classic treat. They’re soft, chewy, and packed with the irresistible flavor of chocolate chips. Plus, coconut flour brings an extra layer of fiber and moisture, making these cookies perfect for a gluten-free snack.
Why Coconut Flour Works
Coconut flour is a fantastic gluten-free alternative to traditional wheat flour. It’s made from dried coconut meat and absorbs liquid more efficiently than other flours. This unique property makes it ideal for gluten-free baking. Coconut flour gives these cookies a slightly sweet, coconutty flavor that pairs wonderfully with chocolate chips. Plus, it’s rich in fiber, which helps keep you fuller for longer.
Simple Ingredients for Big Flavor
Making coconut flour chocolate chip cookies is easy and requires just a handful of ingredients. Here’s what you’ll need:
- Coconut flour: The main ingredient that gives these cookies their texture and flavor.
- Eggs: Help bind the dough together and give the cookies structure.
- Butter or coconut oil: Adds richness and a smooth texture. You can use coconut oil for a dairy-free version.
- Maple syrup or honey: These natural sweeteners offer sweetness without refined sugar.
- Baking soda: Ensures the cookies rise and spread properly.
- Chocolate chips: Choose dairy-free or dark chocolate chips for a healthier option.
With these simple ingredients, you can create a batch of warm, gooey cookies in no time!
Easy Steps to Make Coconut Flour Chocolate Chip Cookies
- Mix the Wet Ingredients: In a bowl, combine the melted butter (or coconut oil) with eggs, maple syrup, and vanilla extract. Stir until smooth.
- Add the Dry Ingredients: Slowly add the coconut flour, baking soda, and a pinch of salt. Mix until fully combined. Coconut flour will absorb a lot of moisture, so the dough may be thicker than traditional cookie dough.
- Fold in the Chocolate Chips: Gently fold the chocolate chips into the dough, ensuring they’re evenly distributed.
- Chill the Dough: Refrigerate the dough for about 30 minutes. This helps the cookies hold their shape while baking.
- Bake and Enjoy: Scoop the dough into tablespoon-sized balls and place them on a baking sheet. Bake at 350°F for about 10-12 minutes or until the edges are golden brown. Let the cookies cool on the sheet before transferring them to a wire rack.
Why These Cookies Are a Great Gluten-Free Option
These coconut flour chocolate chip cookies are naturally gluten-free, grain-free, and refined sugar-free. They provide a healthier alternative to traditional cookies without sacrificing taste. Coconut flour adds a unique texture and helps keep the cookies moist, while the chocolate chips satisfy your sweet tooth.
Since they’re made without gluten, these cookies are perfect for those with celiac disease or gluten sensitivity. They also provide a good amount of fiber and healthy fats, making them a more filling and nutritious snack.
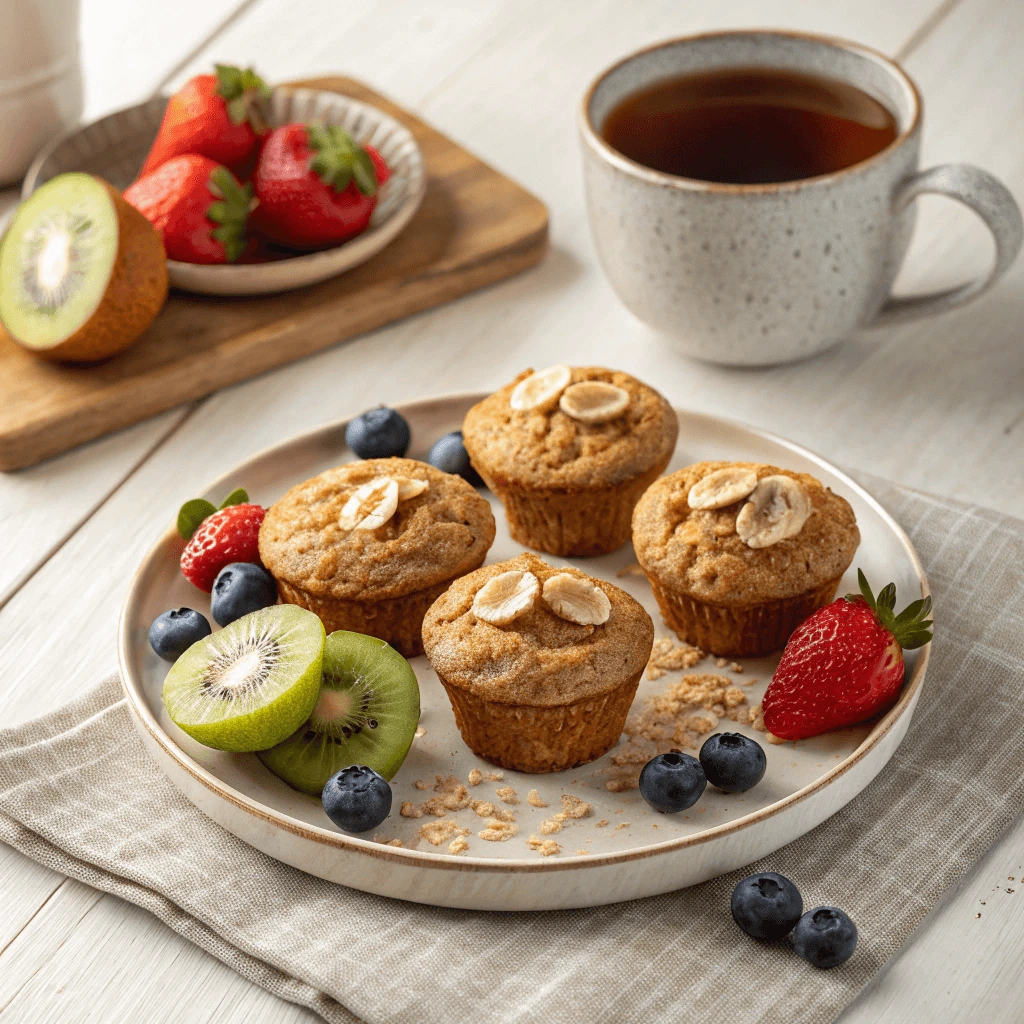
Banana Oat Muffins
Banana oat muffins are a perfect gluten-free snack that combines natural sweetness with hearty oats. They’re moist, flavorful, and packed with nutrition. These muffins are ideal for breakfast on the go or as a mid-day snack. They also freeze well, making them a great option for meal prep.
Why Banana and Oats Make a Perfect Pair
Bananas and oats are a natural pairing in baking. Bananas not only add natural sweetness but also provide moisture to the muffins, so you can reduce the need for added sugars. Oats, on the other hand, are a great source of fiber and protein, giving these muffins a hearty texture. Together, they create a well-balanced snack that will keep you full and energized throughout the day.
Simple Ingredients for Easy Muffins
Making banana oat muffins is easy and requires a few simple ingredients that you probably already have in your pantry:
- Ripe bananas: The key to sweetness and moisture. Make sure your bananas are ripe for the best flavor.
- Gluten-free oats: These serve as the base for the muffins, adding texture and nutrition.
- Eggs: Provide structure and binding, helping the muffins rise.
- Baking powder and baking soda: These leavening agents ensure the muffins rise and become fluffy.
- Honey or maple syrup: Adds natural sweetness without refined sugars.
- Cinnamon: Adds warmth and enhances the banana flavor.
- Vanilla extract: A small touch that boosts the overall flavor of the muffins.
- Dairy-free milk: Use almond milk, coconut milk, or your preferred non-dairy option to keep the muffins moist.
These ingredients come together in a matter of minutes to create a batch of muffins that’s both gluten-free and delicious.
Step-by-Step Guide to Making Banana Oat Muffins
- Prepare the Wet Ingredients: In a large bowl, mash the ripe bananas with a fork or potato masher until smooth. Add the eggs, honey (or maple syrup), and vanilla extract. Stir everything together until fully combined.
- Add the Dry Ingredients: In a separate bowl, whisk together the gluten-free oats, baking powder, baking soda, cinnamon, and salt. Gradually add the dry ingredients to the wet mixture, stirring until combined. If the batter feels too thick, add a splash of dairy-free milk to reach the desired consistency.
- Fill the Muffin Tin: Grease a muffin tin or line it with paper liners. Spoon the batter into the muffin cups, filling them about 2/3 of the way full.
- Bake and Enjoy: Bake the muffins at 350°F for 18–20 minutes or until a toothpick comes out clean when inserted into the center. Let the muffins cool in the tin for 5 minutes before transferring them to a wire rack to cool completely.
Why These Muffins Are Ideal for Gluten-Free Diets
These banana oat muffins are naturally gluten-free, provided you use certified gluten-free oats. They’re also free from refined sugar and dairy, making them suitable for various dietary needs. The bananas provide potassium and fiber, while the oats contribute protein and fiber to keep you full. Whether you have a busy morning ahead or need an afternoon snack, these muffins are a nutritious and satisfying option.
Since they’re made with wholesome, natural ingredients, these muffins offer a healthier way to indulge your sweet tooth. They’re also a great option for meal prep, as they keep well in the fridge or freezer for later enjoyment.
Savory and Crunchy Gluten Free Snack Ideas
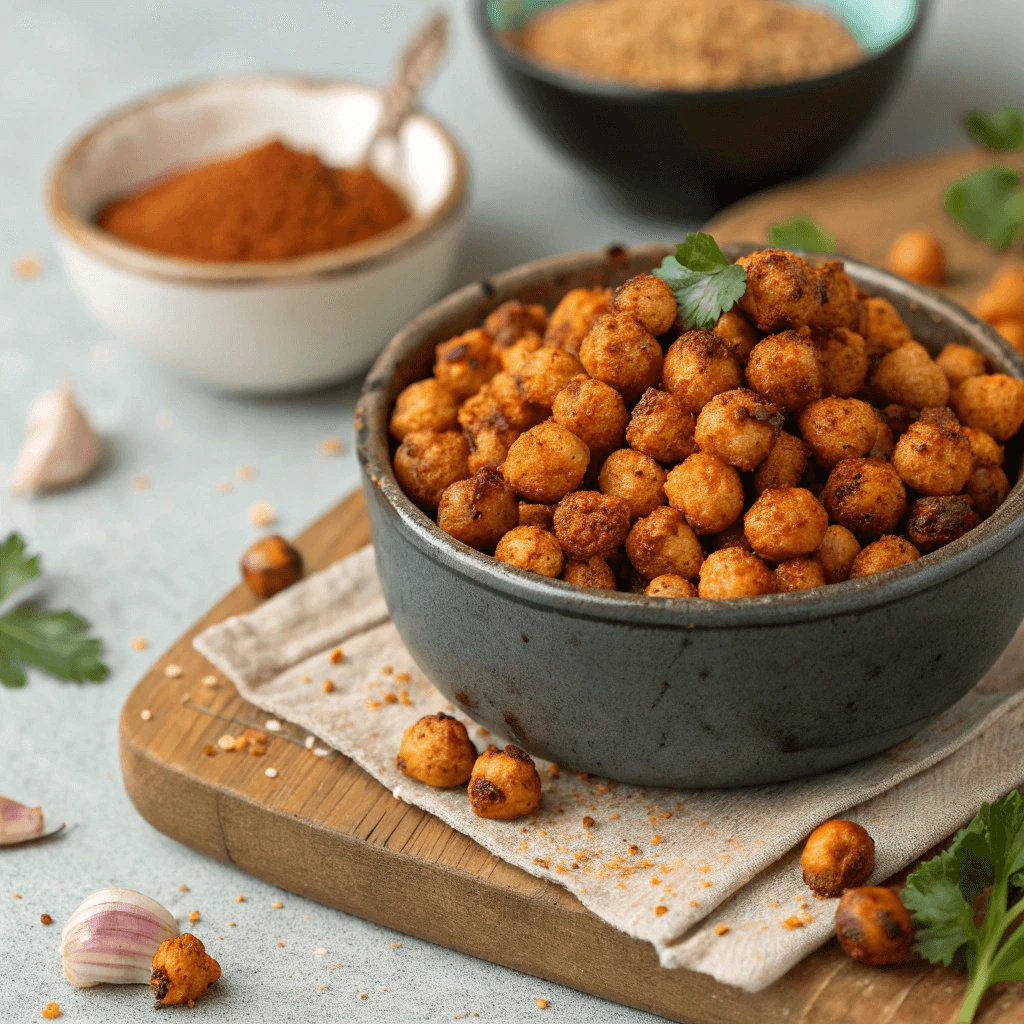
Roasted Chickpeas with Spices
Roasted chickpeas with spices are a flavorful, crunchy, and nutritious gluten-free snack that you can easily prepare at home. Packed with protein, fiber, and a variety of spices, these roasted chickpeas make a satisfying snack for any time of the day. You can customize the spices to suit your taste, making this recipe versatile and exciting.
Why Chickpeas Are a Great Snack Choice
Chickpeas are not only delicious but also highly nutritious. They are rich in protein, fiber, and essential minerals like iron and magnesium. These nutrients make chickpeas a great snack choice, as they help keep you full for longer, support digestion, and provide a slow and steady energy boost. They are also naturally gluten-free, making them an ideal option for those following a gluten-free diet.
Simple Ingredients for Flavorful Roasted Chickpeas
This recipe for roasted chickpeas is incredibly simple and requires only a few ingredients:
- Chickpeas: You can use canned chickpeas or dry chickpeas that you cook yourself. If using canned chickpeas, be sure to rinse and drain them well.
- Olive oil: Helps the spices adhere to the chickpeas while also adding richness and flavor.
- Spices: The spice mix is where you can get creative! Common spices include cumin, paprika, garlic powder, onion powder, chili powder, and turmeric. You can also add salt and pepper to taste.
- Optional add-ins: For a touch of sweetness, consider adding a pinch of cinnamon or a drizzle of honey after roasting.
With just a few pantry staples, you can easily whip up this snack in no time.
How to Make Roasted Chickpeas with Spices
- Prepare the Chickpeas: If using canned chickpeas, rinse them well to remove any excess sodium. Pat them dry with a clean towel to ensure they roast properly and get crispy. If using dried chickpeas, cook them first according to package instructions.
- Season the Chickpeas: In a large bowl, toss the chickpeas with olive oil and your choice of spices. Ensure the chickpeas are evenly coated with the oil and spices for maximum flavor.
- Roast the Chickpeas: Preheat your oven to 400°F (200°C). Spread the seasoned chickpeas in a single layer on a baking sheet. Roast them for 25–30 minutes, tossing halfway through, until they are golden and crispy. Keep an eye on them toward the end to prevent burning.
- Cool and Serve: Let the chickpeas cool for a few minutes to crisp up further. Once they’ve reached the perfect crunch, serve them immediately, or store them in an airtight container for later.
Why Roasted Chickpeas Are the Perfect Gluten-Free Snack
Roasted chickpeas are not only gluten-free but also packed with health benefits. They’re high in protein and fiber, which help you stay full longer and support your digestive health. The spices used in this recipe add a burst of flavor, making these roasted chickpeas an exciting alternative to chips and other processed snacks.
Another benefit of this snack is its versatility. You can adjust the spice levels to your liking—whether you prefer a mild flavor or a spicy kick. If you want to make them even more filling, you can add a handful of nuts or seeds after roasting.
Since roasted chickpeas are so easy to make, they’re a fantastic option for meal prep. You can roast a large batch and keep them on hand for a quick snack, salad topping, or addition to grain bowls.
Homemade Gluten-Free Cheese Crackers
Homemade gluten-free cheese crackers are a crunchy, cheesy, and satisfying snack that everyone can enjoy. These crackers are made with simple, gluten-free ingredients, making them a great choice for those who follow a gluten-free diet or simply want a homemade snack without the added preservatives. They are perfect for snacking on their own or pairing with dips and spreads.
Why Choose Homemade Over Store-Bought Cheese Crackers?
While store-bought gluten-free cheese crackers may seem like a convenient option, homemade versions often have the edge when it comes to flavor and quality. When you make cheese crackers from scratch, you can control the ingredients, ensuring they are made with fresh, high-quality items. Plus, you can avoid any unnecessary additives or preservatives commonly found in packaged snacks.
Making them at home also allows you to experiment with different flavors and textures. For example, you can adjust the amount of cheese, add your favorite herbs, or even use a blend of cheeses to create unique flavor profiles. Homemade cheese crackers offer a level of customization that store-bought snacks simply can’t match.
Simple Ingredients for Homemade Cheese Crackers
To make these homemade gluten-free cheese crackers, you’ll need the following ingredients:
- Gluten-free all-purpose flour: This serves as the base for the crackers. Choose a high-quality blend of gluten-free flours to ensure a crispy texture.
- Sharp cheddar cheese: The key ingredient for that irresistible cheese flavor. You can also use a mix of cheeses like Parmesan, Gouda, or even pepper jack for a twist.
- Butter: Adds richness and helps bind the dough together.
- Egg: Works as a binder to hold the dough together and helps the crackers crisp up during baking.
- Salt: Enhances the overall flavor of the crackers.
- Herbs and spices: This is where you can get creative! You can add dried herbs such as thyme, rosemary, or oregano for an herbal twist, or spices like paprika or garlic powder to bring in extra flavor.
These simple ingredients combine to create crackers that are both delicious and satisfying.
How to Make Homemade Gluten-Free Cheese Crackers
- Prepare the Dough: Start by grating the cheese. In a large mixing bowl, combine the gluten-free flour, grated cheese, and salt. Add the butter and work it into the dry ingredients until the mixture resembles coarse crumbs. Stir in the egg and any herbs or spices you’re using. Mix everything together until a dough forms. If the dough feels too dry, add a splash of water until it comes together.
- Roll Out the Dough: Place the dough between two sheets of parchment paper and roll it out until it’s about 1/8-inch thick. The thinner you roll the dough, the crispier your crackers will be.
- Cut and Bake: Use a sharp knife, pizza cutter, or cookie cutter to cut the dough into squares or your desired shape. Place the crackers on a baking sheet lined with parchment paper and bake them in a preheated oven at 350°F (175°C) for 10–12 minutes, or until they are golden brown and crispy.
- Cool and Serve: Allow the crackers to cool completely on the baking sheet before serving. Once cooled, store them in an airtight container to keep them fresh.
Why Homemade Gluten-Free Cheese Crackers Are the Best Choice
Homemade gluten-free cheese crackers are not only delicious, but they also offer several advantages over their store-bought counterparts. For one, they are customizable. You can adjust the flavor by adding different spices or herbs to suit your tastes. You can also experiment with the type of cheese you use, offering a wide range of flavors from sharp and tangy to smooth and creamy.
Making these crackers at home also ensures that you’re using only the freshest ingredients. You can choose high-quality, organic cheese and flour blends, giving you peace of mind about what you’re eating. Plus, the process of making the crackers is easy and fun—perfect for a weekend baking project or a quick snack fix.
These crackers also have the added benefit of being free from the preservatives and artificial flavors commonly found in store-bought gluten-free snacks. With their homemade, natural ingredients, these cheese crackers are a wholesome snack you can feel good about enjoying.
Stuffed Mini Bell Peppers
Stuffed mini bell peppers are a perfect gluten-free snack or appetizer. They are nutritious, colorful, and versatile, offering a sweet and savory flavor combination that works well for various fillings.
Why Mini Bell Peppers Are Great for Snacking
Mini bell peppers are rich in vitamin C, antioxidants, and fiber. Their small size makes them ideal for stuffing, and they offer a mild sweetness that complements savory fillings. Low in calories, they’re a healthy option for anyone looking for a light snack.
Creative Fillings for Stuffed Mini Bell Peppers
Stuffed mini bell peppers can be filled with a range of gluten-free options. Some ideas include:
- Cheese and Herbs: Cream cheese, goat cheese, or cheddar with fresh herbs.
- Quinoa and Black Beans: A vegetarian filling with protein and flavor.
- Ground Turkey or Chicken: Lean meat with spices like cumin and paprika.
- Rice and Veggies: A veggie-based filling with rice or cauliflower rice.
How to Make Stuffed Mini Bell Peppers
- Prep the Peppers: Wash and cut the tops off the peppers, removing the seeds.
- Prepare the Filling: Choose your filling, cook if needed, and mix the ingredients.
- Stuff the Peppers: Spoon the filling into the peppers, packing it in tightly.
- Bake: Bake at 375°F (190°C) for 15–20 minutes or until tender and heated through.
Why These Make the Perfect Gluten-Free Snack
These stuffed mini bell peppers are naturally gluten-free, nutrient-rich, and customizable. They can be made in advance, served at gatherings, or enjoyed as a quick snack. With their vibrant colors and variety of fillings, they’re a fun and healthy choice for any occasion.
Quick and Healthy Gluten Free Snacks for On-the-Go
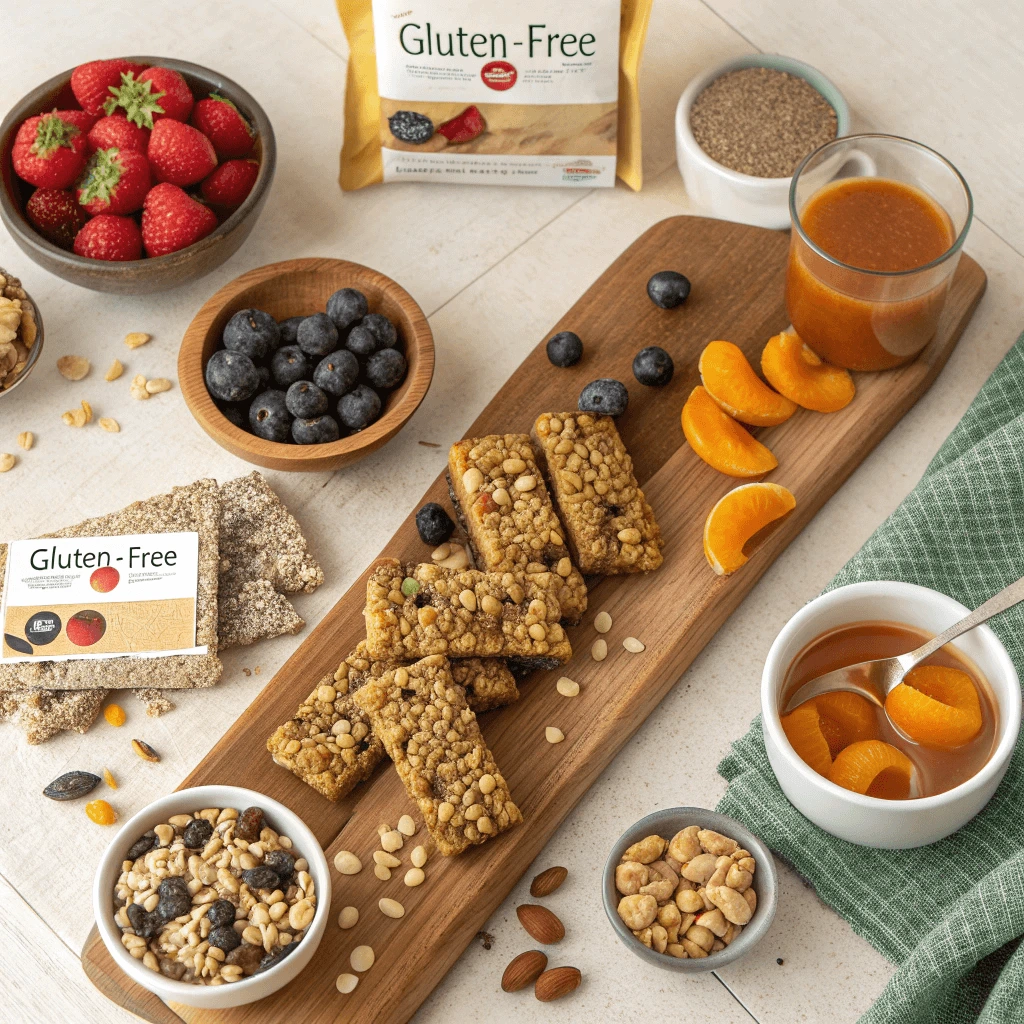
Gluten-Free Granola Bars
Homemade gluten-free granola bars are a nutritious and convenient snack. They’re easy to make, customizable, and perfect for a quick breakfast or on-the-go energy boost. Making your own bars ensures you control the ingredients and avoid unwanted additives found in store-bought versions.
Benefits of Homemade Granola Bars
Making granola bars at home is cost-effective and allows you to use wholesome ingredients. You can avoid preservatives and gluten, making them safe for those with sensitivities. Plus, homemade bars are easily customizable to suit your taste and dietary preferences.
Key Ingredients for Granola Bars
- Gluten-Free Oats: The base of the bars, naturally gluten-free (choose certified gluten-free oats to avoid cross-contamination).
- Nuts and Seeds: Almonds, walnuts, chia seeds, or sunflower seeds for crunch and healthy fats.
- Sweeteners: Honey, maple syrup, or agave nectar for natural sweetness and binding.
- Nut Butters: Peanut or almond butter for a creamy texture and binding agent.
Simple Recipe for Granola Bars
Ingredients:
- 2 cups gluten-free oats
- 1/2 cup nuts and seeds
- 1/4 cup dried fruit
- 1/4 cup honey or maple syrup
- 1/4 cup nut butter
- 1/2 tsp vanilla extract
Instructions:
- Preheat oven to 350°F (175°C). Line an 8×8-inch pan with parchment paper.
- Combine dry ingredients in a bowl.
- Mix wet ingredients and heat slightly to blend.
- Stir wet ingredients into the dry mixture until combined.
- Press into the pan and bake for 15-20 minutes.
- Cool before slicing into bars.
Customization Ideas
You can add protein powder, coconut flakes, or spices like cinnamon to change the flavor. Vegan options are easy to achieve by using plant-based nut butters and sweeteners like maple syrup.
Rice Cakes with Nut Butter & Fruit
Rice cakes with nut butter and fruit are a quick, nutritious snack that’s perfect for any time of the day. This simple snack offers a balanced combination of carbs, protein, and healthy fats, and it’s completely gluten-free. Whether you’re craving a light breakfast, post-workout energy boost, or an afternoon treat, rice cakes with nut butter and fruit can be customized to fit your taste.
Why Rice Cakes Are a Great Snack Base
Rice cakes are a gluten-free, low-calorie base that provides a light and crunchy texture. They’re versatile, making them perfect for both savory and sweet toppings. Their simplicity allows for endless customization, whether you’re in the mood for something fruity and sweet or savory and satisfying.
The Role of Nut Butter
Nut butters like peanut, almond, or cashew butter are perfect for adding healthy fats and protein. Nut butters help keep you full longer and offer essential nutrients such as vitamin E, magnesium, and healthy monounsaturated fats. Pairing nut butter with rice cakes creates a filling, nutritious base for your snack.
Adding Fruit for Sweetness and Nutrients
Fresh fruit not only enhances the flavor but also adds natural sweetness, fiber, and antioxidants. Fruits like bananas, strawberries, and blueberries are perfect choices. They provide vitamins and antioxidants that boost your overall health while balancing the richness of the nut butter.
Simple Recipe
Ingredients:
- Rice cakes (plain or lightly salted)
- Nut butter (peanut, almond, or cashew butter)
- Fresh fruit (banana slices, berries, or apple slices)
Instructions:
- Spread a generous layer of nut butter on each rice cake.
- Top with fresh fruit slices of your choice.
- Optional: Add a drizzle of honey, chia seeds, or a sprinkle of cinnamon.
- Enjoy immediately or pack for a snack on-the-go.
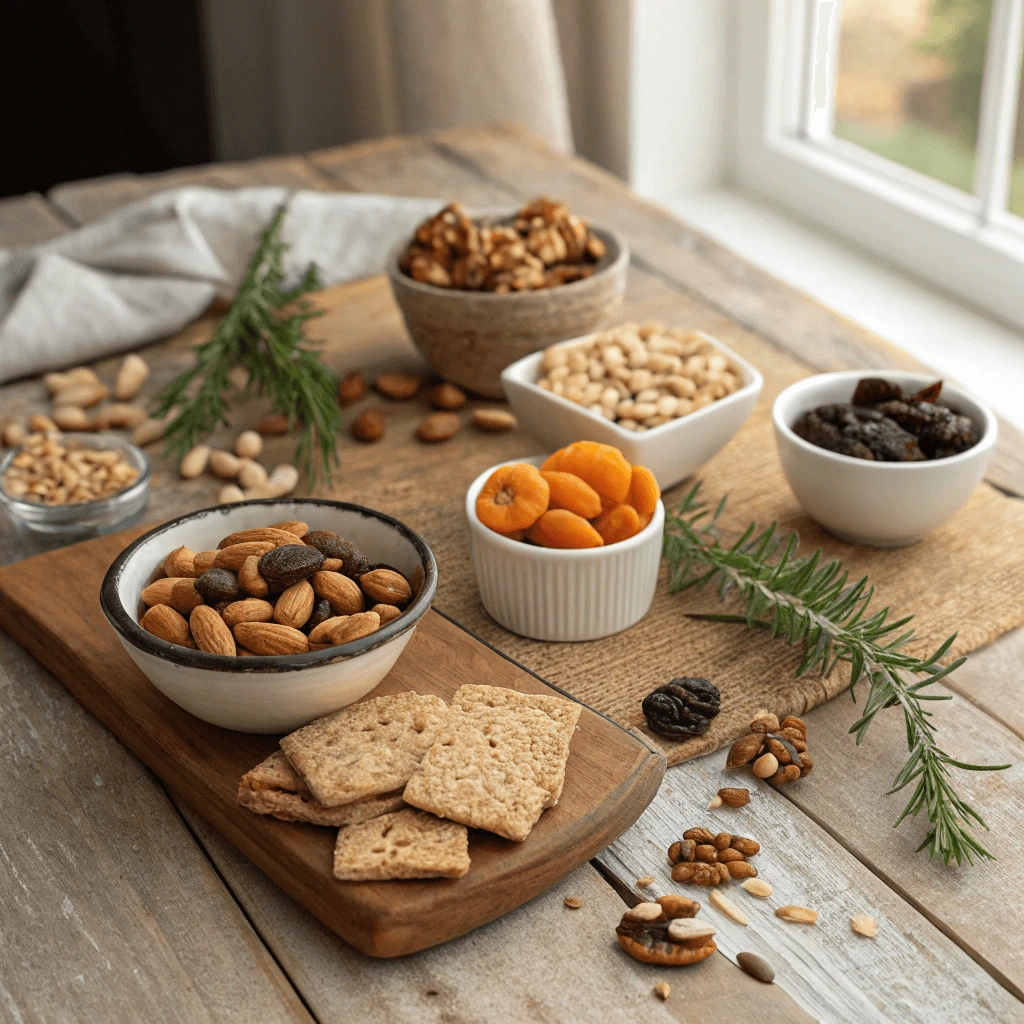
Trail Mix with Dried Fruit and Seeds
Trail mix with dried fruit and seeds is a perfect snack for anyone looking for a healthy, gluten-free option that provides long-lasting energy. This combination of nuts, seeds, and dried fruit is packed with nutrients, making it a great choice for hiking, a midday snack, or an on-the-go treat. It’s customizable, satisfying, and full of healthy fats, fiber, and protein to keep you full longer.
Why Trail Mix Makes a Great Snack
Trail mix is a classic snack known for its convenience and ability to fuel your body. By combining a variety of ingredients like nuts, seeds, and dried fruit, it offers a satisfying mix of crunchy, chewy, sweet, and savory flavors. It’s an easy-to-make snack that you can keep in your pantry or pack for a quick energy boost when you’re on the move.
Nutritional Benefits of Dried Fruit and Seeds
Dried fruit adds natural sweetness and provides essential vitamins, minerals, and fiber. Fruits like raisins, apricots, cranberries, and mangoes are packed with antioxidants and contribute to a healthy digestive system. The seeds—such as pumpkin, sunflower, and chia seeds—are excellent sources of healthy fats, protein, and essential minerals like magnesium and zinc. These nutrients help support muscle function, promote healthy skin, and boost your immune system.
Customizing Your Trail Mix
One of the best things about trail mix is how customizable it is. You can adjust the ingredients based on your taste preferences or dietary restrictions. Want a sweeter mix? Add dark chocolate chips or dried coconut. Looking for more protein? Add roasted chickpeas or almonds. You can even add a bit of sea salt or spices like cinnamon for a savory twist.
Simple Trail Mix Recipe
Ingredients:
- 1 cup of mixed nuts (almonds, walnuts, cashews)
- 1/2 cup of seeds (sunflower, pumpkin, chia)
- 1/2 cup of dried fruit (raisins, cranberries, apricots)
- Optional: Dark chocolate chips, coconut flakes, or spices like cinnamon
Instructions:
- In a large bowl, combine your nuts, seeds, and dried fruit.
- Add any optional ingredients such as chocolate chips or coconut flakes.
- Mix everything together and store it in an airtight container or individual snack bags.
- Enjoy whenever you need a quick and energizing snack.
Tips for Storing, Packing, and Buying Gluten Free Snacks
How to Store Homemade Snacks for Freshness
Proper storage is key to keeping homemade gluten-free snacks fresh and flavorful for as long as possible. By following a few simple tips, you can enjoy your snacks at their best, whether you’re storing them for a few days or a few weeks.
Why Proper Storage Matters
Improper storage can cause snacks to lose their flavor, texture, or even spoil faster. By storing them properly, you can maintain their quality and avoid wasting food.
Best Storage Containers
Airtight containers are essential for keeping snacks fresh. Glass jars, plastic containers with tight lids, or resealable bags all work well. Vacuum-sealed bags are great for longer storage, as they protect the snacks from air and moisture.
Room Temperature vs. Refrigeration
- Room Temperature: Snacks like cookies and energy bites can be stored at room temperature in an airtight container for several days.
- Refrigeration: Snacks with fresh ingredients, such as homemade cheese crackers, should be kept in the fridge to maintain freshness.
- Freezing: For long-term storage, freeze snacks like muffins and granola bars. Wrap them tightly in plastic or foil and store in a freezer bag.
Freshness Tips
- Cool Before Storing: Allow snacks to cool completely before sealing to avoid moisture buildup.
- Individual Portions: Store snacks in small portions to prevent frequent exposure to air.
- Moisture Control: Use desiccant packets in humid climates to keep snacks crisp.
Checking for Freshness
If your snacks lose their flavor, develop an odd smell, or change texture, they may no longer be safe to eat. Always check before consuming.
Packing Gluten-Free Snacks for School, Work, or Travel
Packing gluten-free snacks for school, work, or travel is simple with the right plan and preparation. By choosing convenient, portable options, you can ensure that you always have a healthy snack when you need it.
Plan Ahead
Preparing snacks in advance is key. Whether it’s batch-making granola bars or energy bites, having snacks ready to go helps prevent reaching for non-gluten-free options in a pinch. Portioning snacks into small containers or bags makes it easier to grab and go.
Best Containers
Choose airtight containers or resealable bags to keep your snacks fresh. For moist snacks like cut fruit or veggies, opt for small containers with secure lids. For cold items, use insulated lunch bags with ice packs to maintain freshness.
Snack Ideas
- Energy Bites: A quick, portable option packed with protein and nutrients.
- Trail Mix: A combination of gluten-free nuts, seeds, and dried fruits for a satisfying snack.
- Rice Cakes with Nut Butter: A balanced snack with healthy fats and carbs.
- Granola Bars: Homemade bars that are easy to pack and customize.
- Cut Veggies and Hummus: A crunchy, nutritious snack perfect for a midday boost.
Packing for Different Settings
- For School: Pack fun and healthy options like mini muffins, fruit cups, and homemade crackers.
- For Work: Choose snacks that keep you energized, like trail mix, energy bites, or granola bars.
- For Travel: Opt for shelf-stable snacks like trail mix, energy bars, and nuts for easy portability.
Keep Snacks Fresh
To maintain freshness, use ice packs or insulated bags for perishable items. For dry snacks, airtight containers help prevent them from getting crushed or stale.
How to Read Labels for Gluten-Free Certification
Understanding how to read labels for gluten-free certification is essential for anyone following a gluten-free diet. It helps you ensure the food is safe and meets necessary standards.
Look for Certified Symbols
The easiest way to identify gluten-free products is by looking for certification logos, like the Gluten-Free Certification Organization (GFCO). These logos guarantee the product contains fewer than 20 parts per million (ppm) of gluten, the accepted standard.
Check the Ingredients List
Always read the ingredients list. Even if a product is labeled gluten-free, recipes can change. Watch out for gluten-containing ingredients like wheat, barley, or rye. If you’re unsure about an ingredient, research it to confirm it’s gluten-free.
Cross-Contamination Warnings
Some labels may include warnings about potential cross-contamination, such as “may contain traces of gluten.” If you’re highly sensitive to gluten, it’s best to avoid these products. If you can tolerate trace amounts, these warnings might not be a concern.
Understand Regulations
In many countries, including the U.S. and EU, gluten-free products must contain less than 20 ppm of gluten. While this is generally safe, those with severe gluten sensitivities should look for additional certifications like Celiac Disease Foundation for extra assurance.
Avoid Misleading Labels
Be cautious of labels that say “wheat-free” but don’t specify “gluten-free.” A product may still contain barley or rye, which are not safe for gluten-free diets. Always look for “gluten-free” specifically and check for certification symbols.
Conclusion
Finding delicious, gluten-free snacks doesn’t have to be a challenge. With the right ingredients, a little creativity, and the knowledge of which foods to look for, you can enjoy a wide variety of tasty snacks that fit your gluten-free lifestyle. Whether you’re making homemade snacks like Coconut Flour Chocolate Chip Cookies, Banana Oat Muffins, or grabbing easy options like Trail Mix with Dried Fruit and Seeds, there’s a snack for every craving.
By understanding the basics of gluten-free eating, recognizing essential ingredients, and knowing how to read labels carefully, you can make informed choices that keep you both satisfied and safe. And remember, homemade snacks not only offer better control over the ingredients but also provide a fresher, healthier option.
With the recipes and tips provided in this guide, you can confidently prepare snacks that cater to your dietary needs without compromising on flavor. So go ahead and start exploring the endless possibilities of gluten-free snacking today – your taste buds will thank you!
Good https://rb.gy/4gq2o4
thank you
Good https://is.gd/N1ikS2
thank you